The PDF Conjurer Pro is an advanced upgrade to the free PDF Conjurer plugin, built for users who require greater customization and professional-level control when generating PDF documents. While the free version supports essential functions such as creating tables, adding text and images, and managing columns, the Pro version significantly expands these capabilities. It introduces enhanced flexibility, more powerful actions, and deeper control over how each PDF element is created and displayed.
Among its upgrades, PDF Conjurer Pro adds new actions like generating a right-side Table of Contents for seamless navigation, inserting QR codes and watermarks for branding and security, and creating pre-signed URLs for secure, temporary access to AWS-hosted files. Existing features are strengthened with options for password protection, printing controls, and file compression. Additional enhancements include preserving leading spaces in text, marking text as ToC entries, saving and accessing PDFs directly through AWS, and supporting uploads of files exceeding 50MB—all designed to streamline workflows and produce more polished, reliable PDFs.
💡
All actions receive the previous action result (except the “Initialize PDF Document” action), it will be always the first parameter you need to insert into the action! Please don’t forget! Each action will be shown below!
Step-by-Step Video Tutorial
How to setup
Step 1 – Install the Plugin
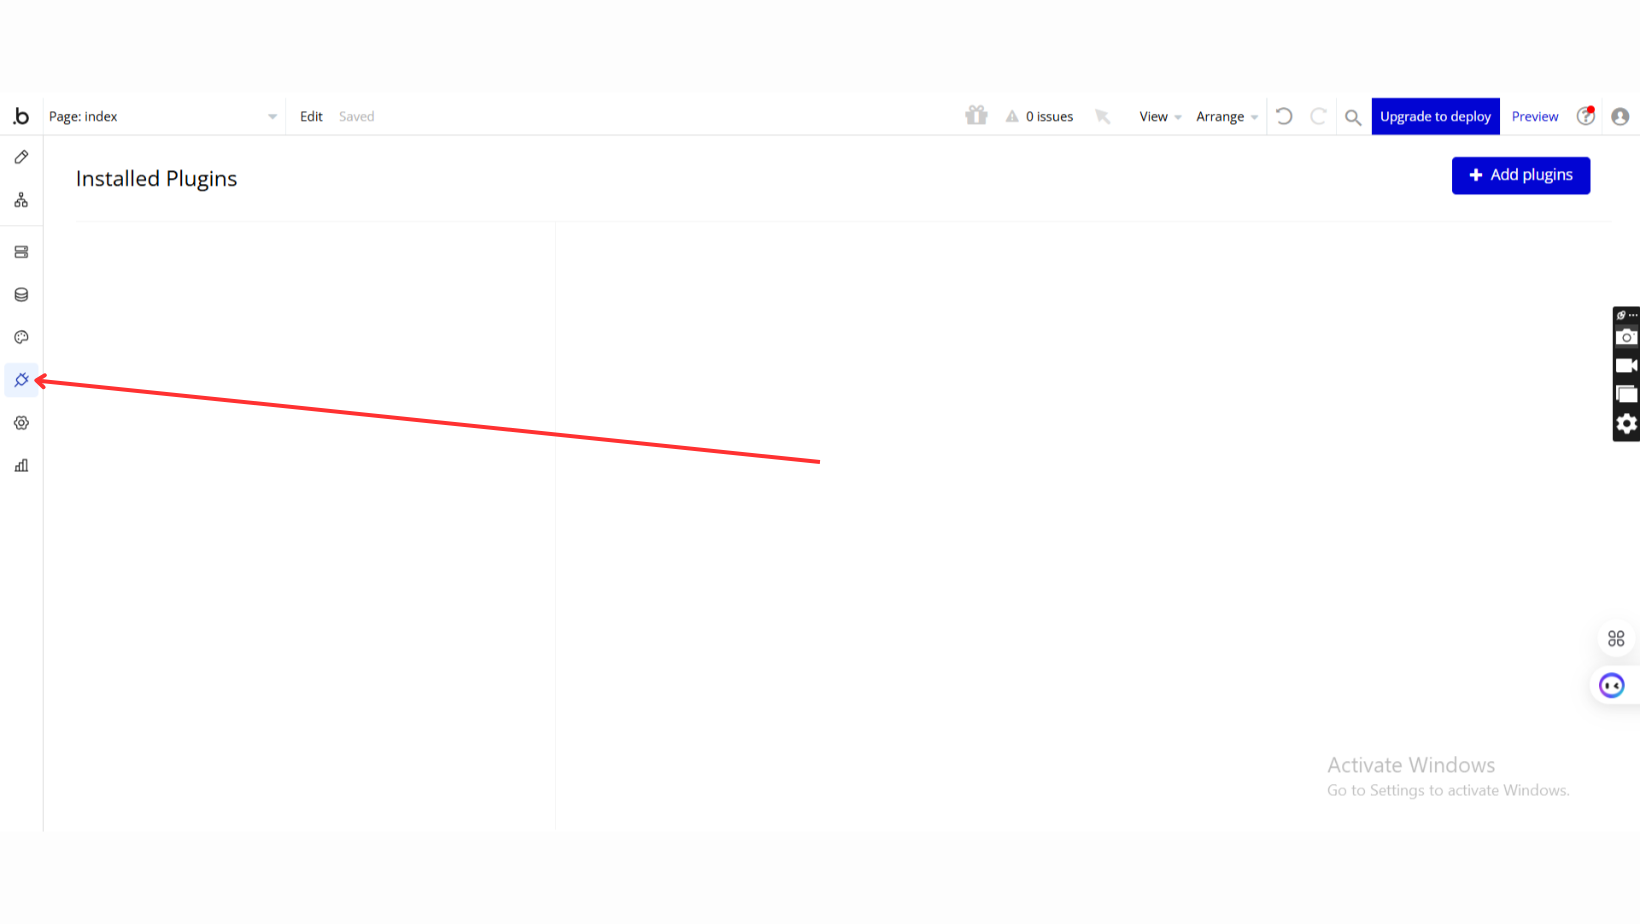
Go to the Plugin Tab
Open your Bubble Editor.
Navigate to the Plugins tab on the left panel.
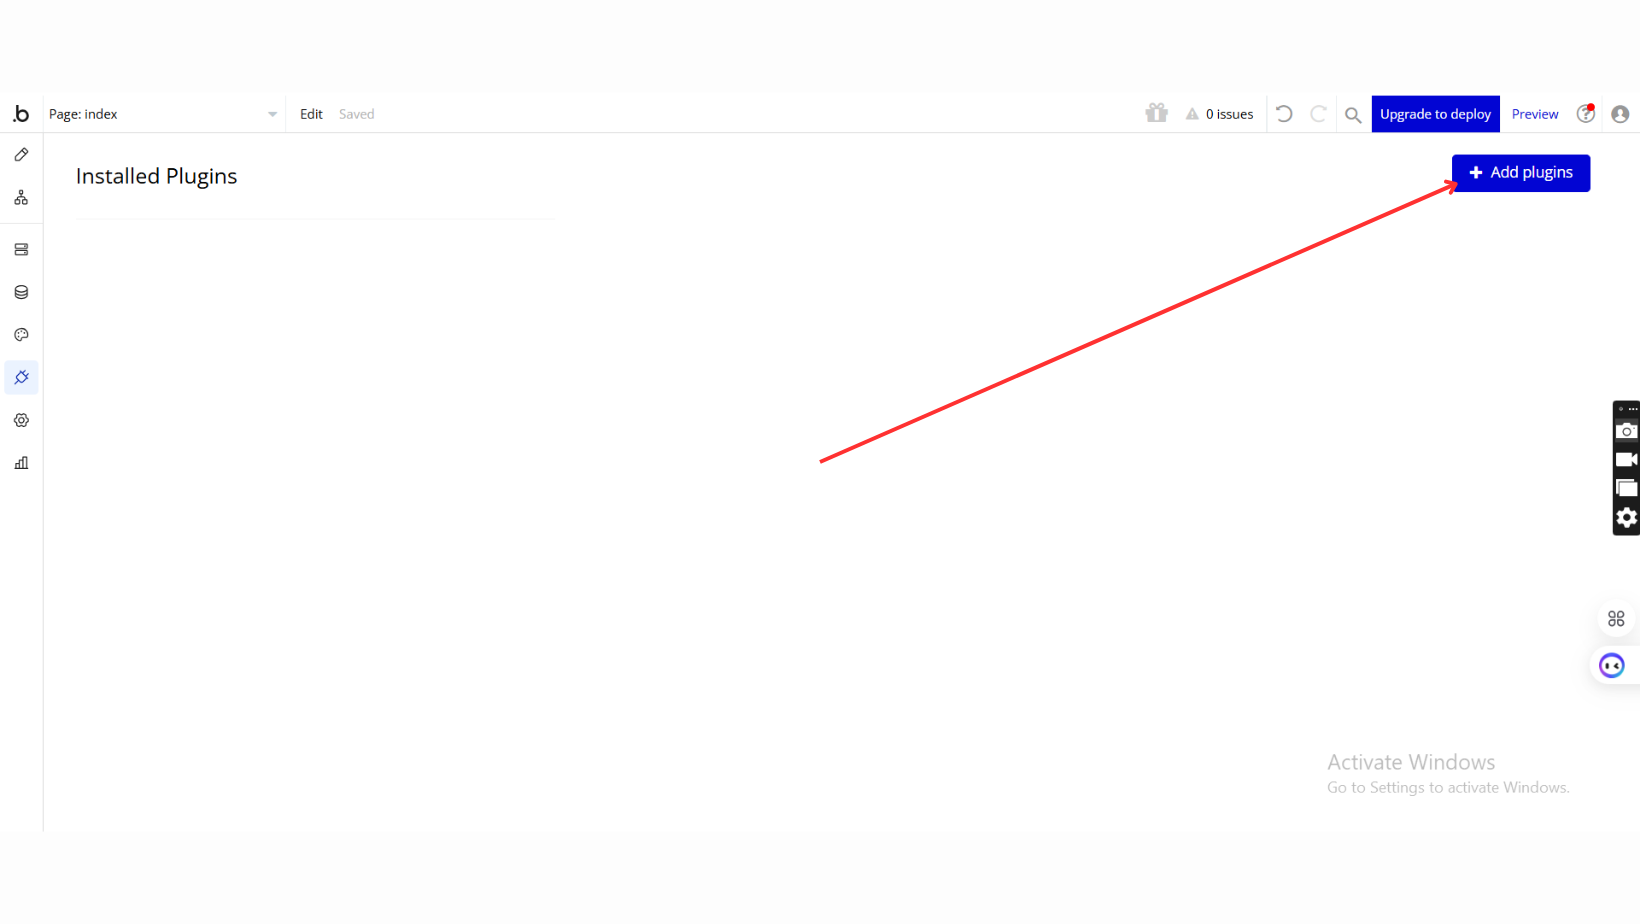
Add Plugins
Once in the Plugins tab, click the Add Plugins button.
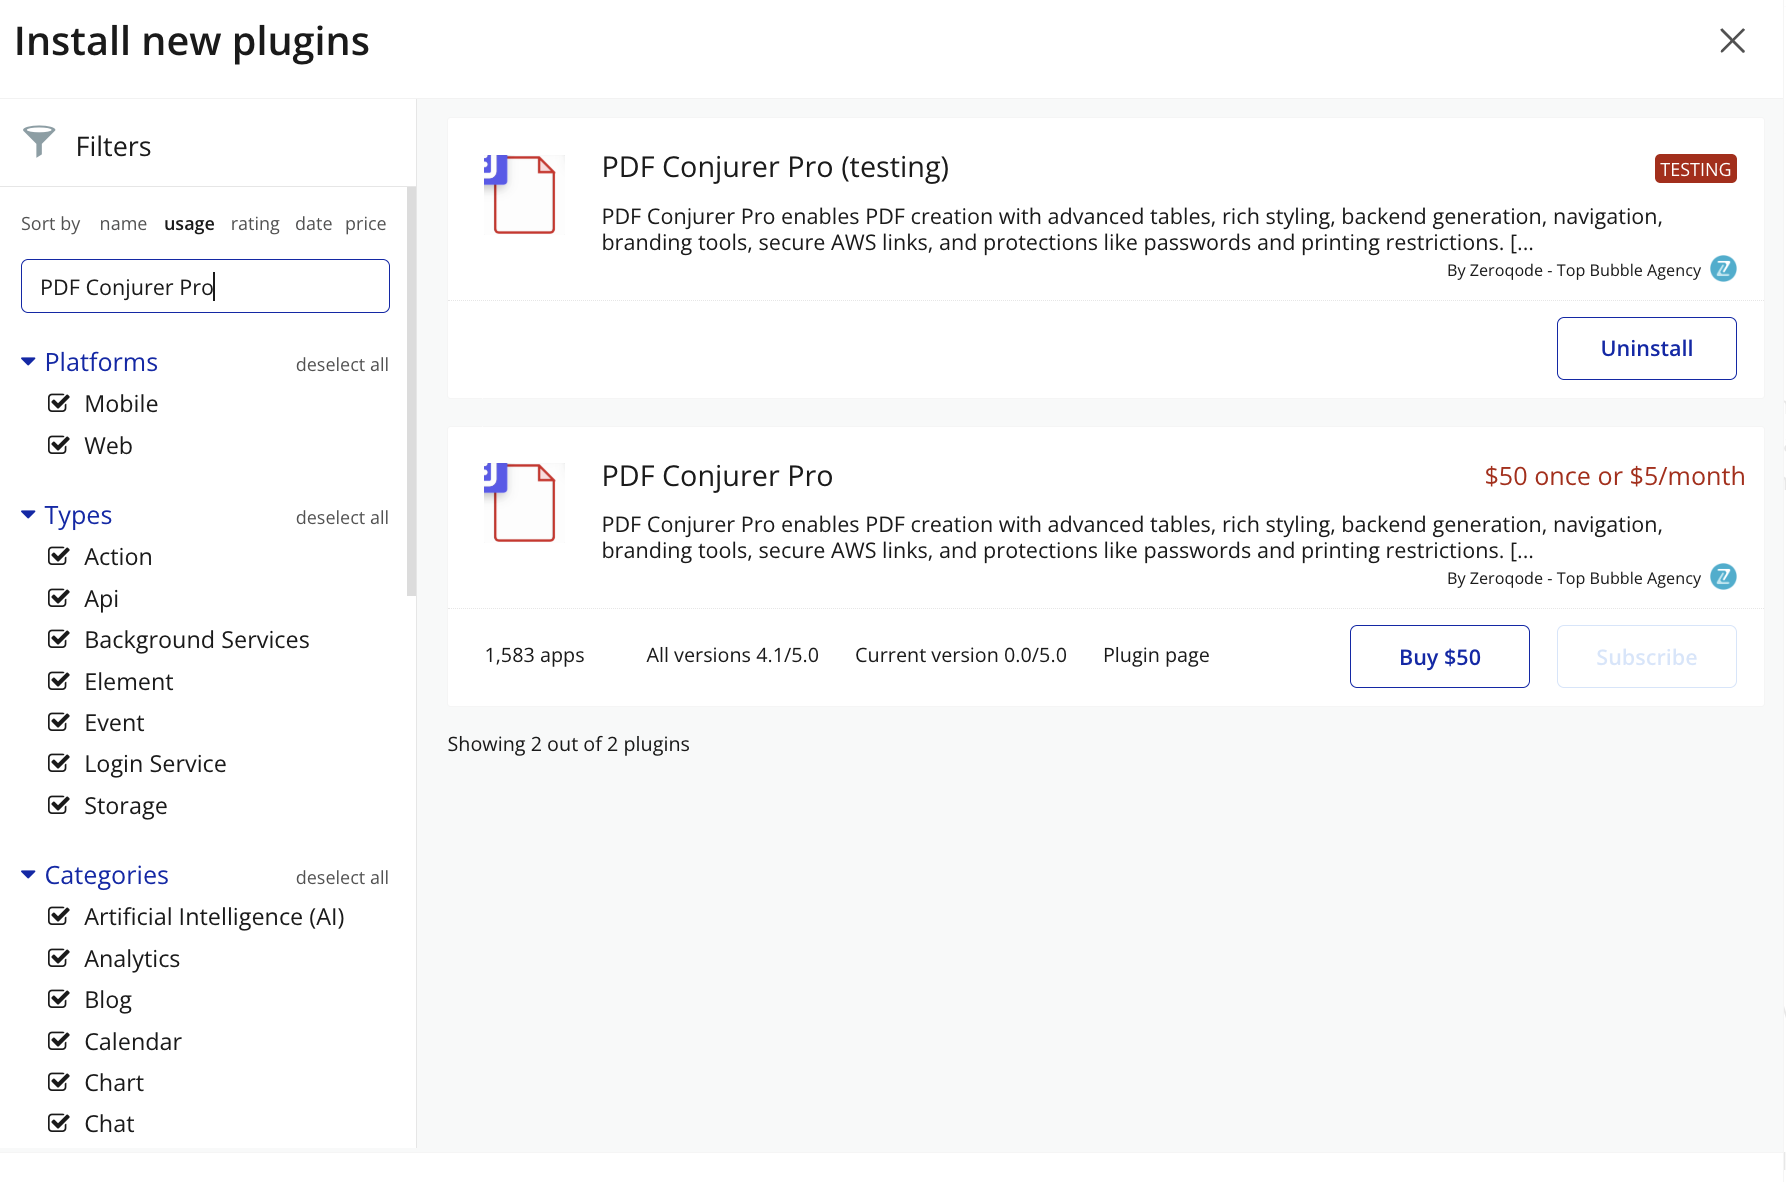
Search for the Plugin
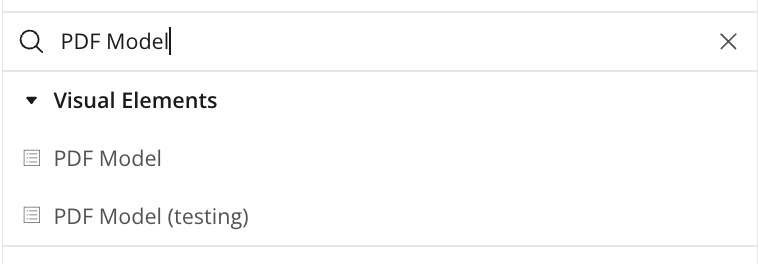
Use the search bar to type PDF Conjurer Pro.
Locate the plugin in the search results.
Install/Buy
Click Buy and follow the purchase instructions.
Payment Information
Fill in your payment details and make payment
Charges will be added to your Bubble billing account.
Remember, if you unsubscribe from the plugin shortly after installation, charges will be prorated based on the days used.
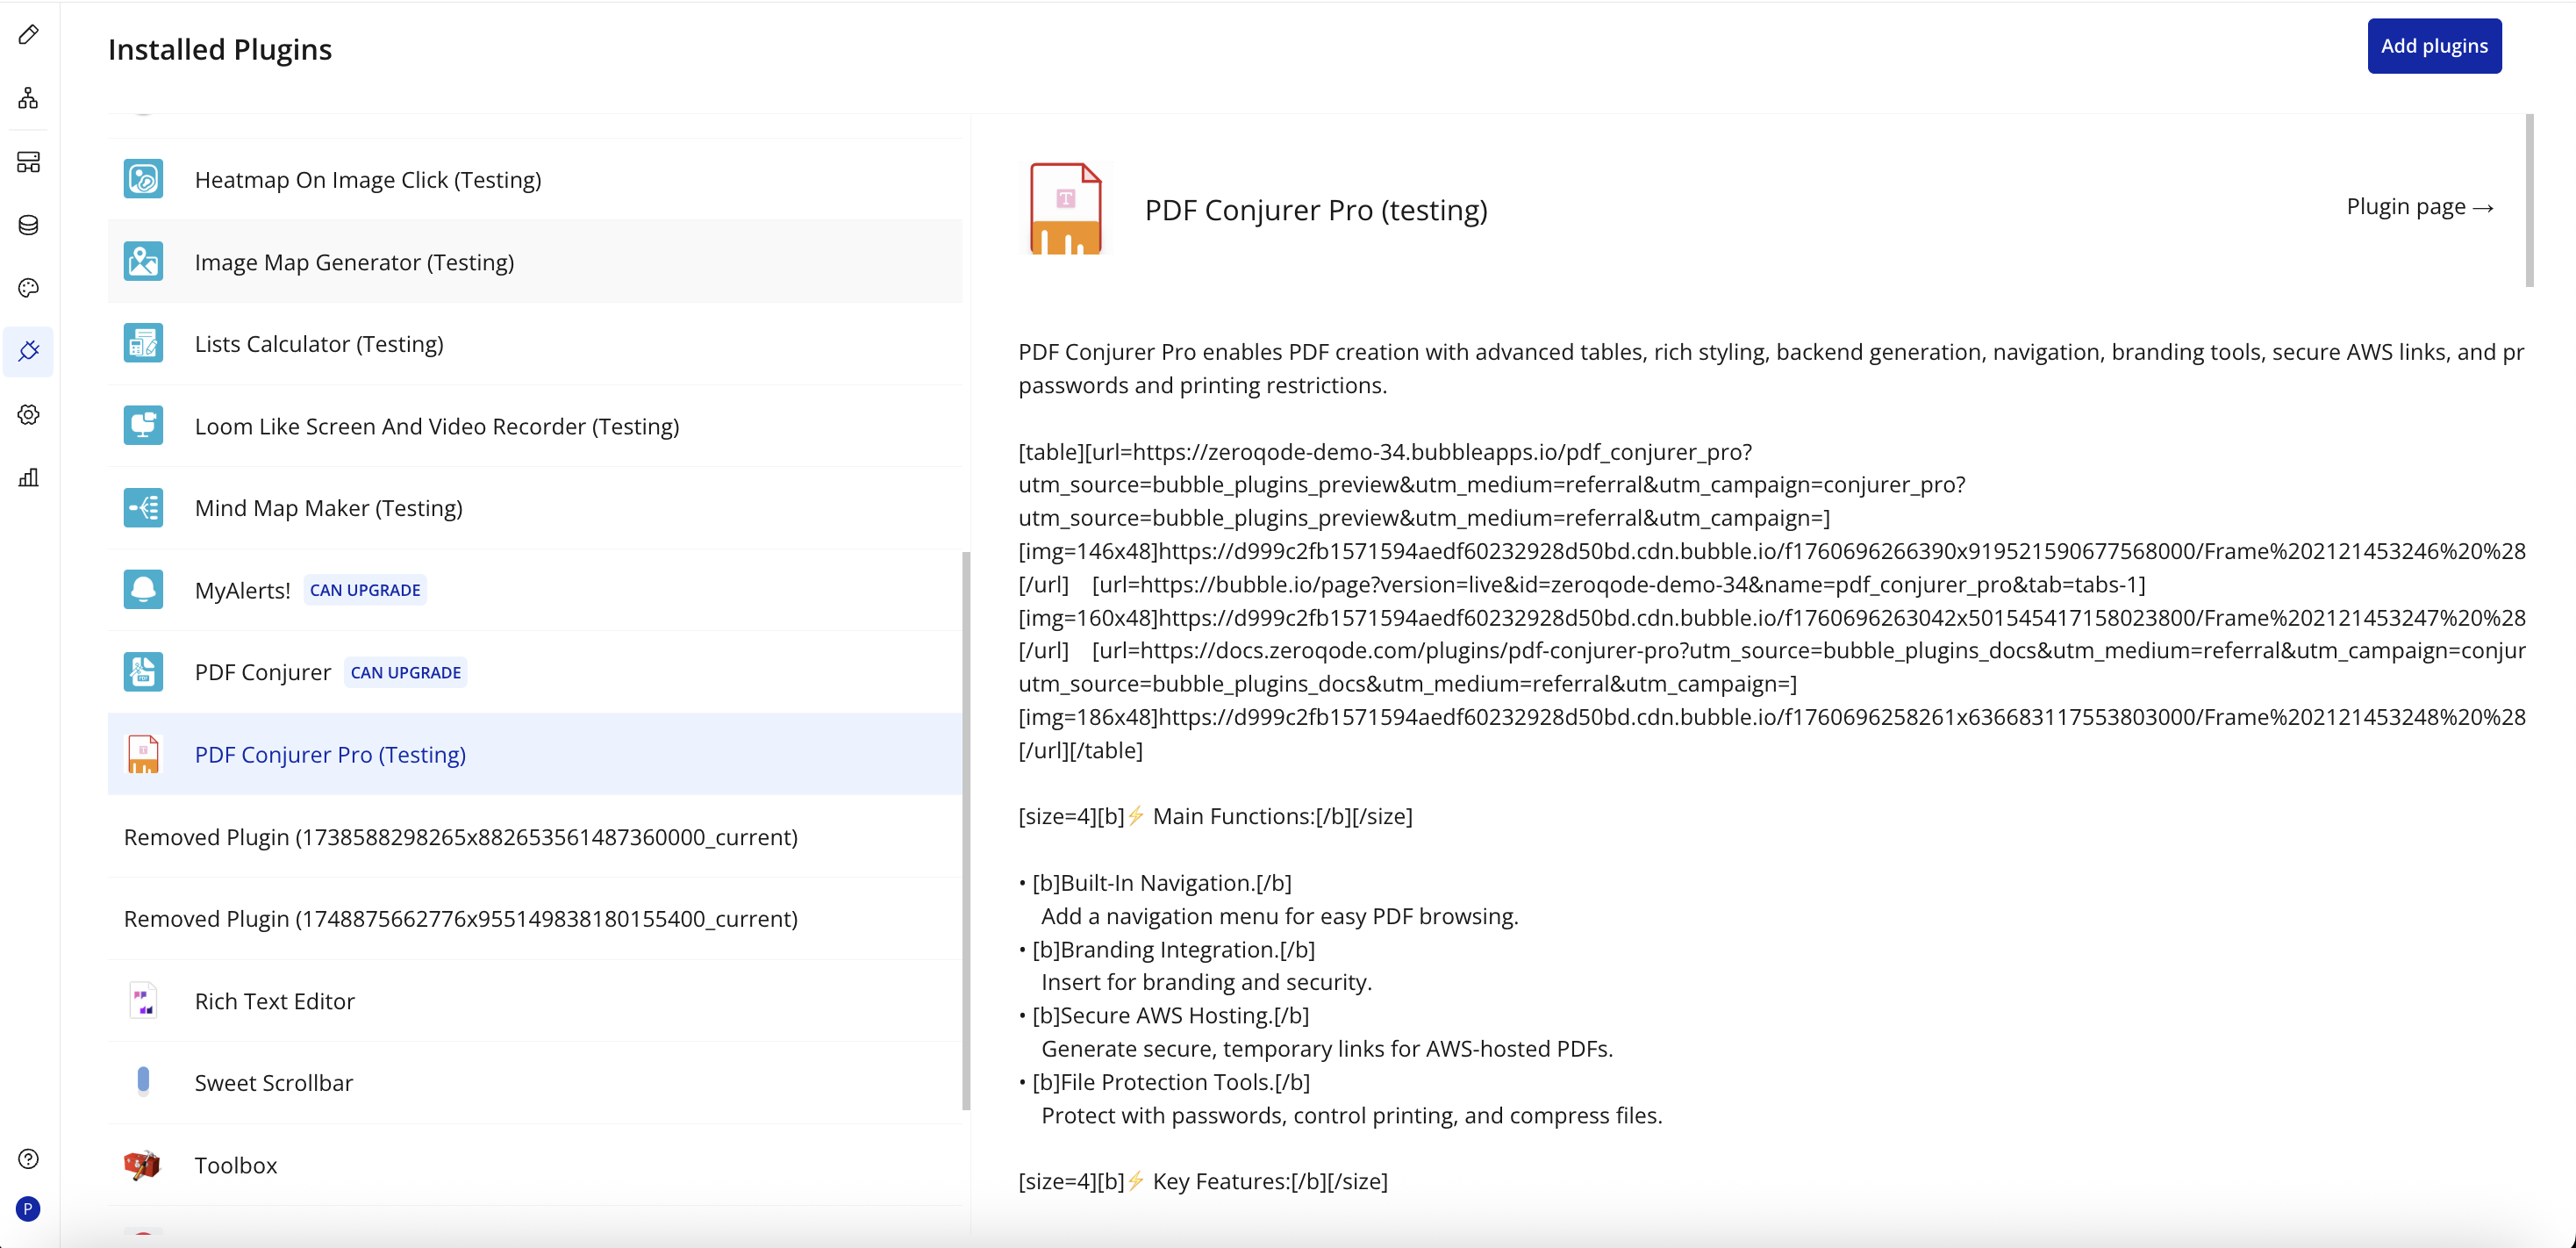
Plugin Installed
Once installed, the plugin will appear under the Installed Plugins list in your Bubble Editor.
Step 2 – Add the Plugin Element to Your Page
Open the Design tab in your Bubble editor.
Search for the PDF Model element in the Elements panel.
Drag and drop the element onto your page.
Step 3 – Configure Properties
Select the element and configure workflows to start creating PDFs using the InitializePDF & ConjurePDF actions like the example below:
✅ Step 1: Start PDF Generation
Use Start PDF to initialize a named document.
✅ Step 2: Add Text
Action:Create text on PDF
Provide content and reference the custom style by name.
Optionally enable Preserve Leading Spaces, Parse BBCode, and text margins.
✅ Step 3: Conjure the PDF
Finalize by using Conjure PDF action.
Set file name, choose whether to save in File Manager or AWS, and configure download options.
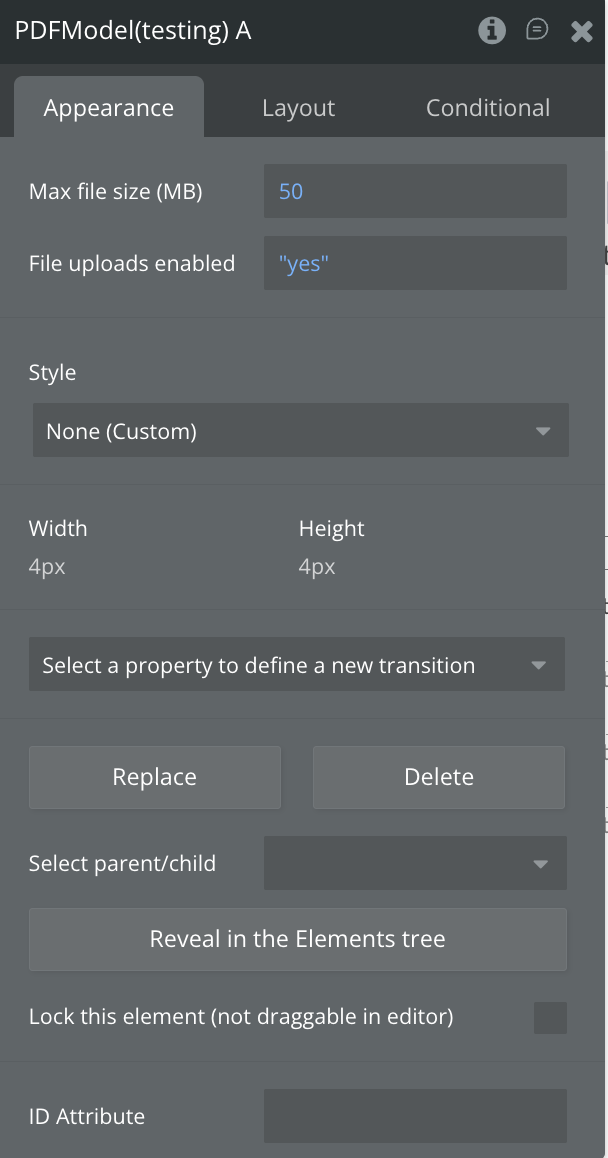
Plugin Element - PDF Model
PDF Conjurer Pro is a logic-only plugin element that provides advanced customization and professional control for generating secure, feature-rich PDFs.
Fields
Name
Description
Type
Max File Size (MB)
Maximum allowed size of MB of the uploaded file
File
File uploads enabled
Allows file uploads within the application
Yes/No, Required
Exposed States
Name
Description
Type
Saved PDF
The PDF that you generated will be here, save this file's link into your database after you run the Conjure PDF action.
File
Debug Log Content
The contend response for debugging
Text
Element Events
Name
Description
Finished Uploading and is available in element state
This is triggered when the PDF finishes being uploaded and becomes available in the element state.
Debug Log Available
This is triggered when the debug log is available
Plugin Actions
This section covers both element and plugin actions, which share the same underlying logic. Where differences exist, they are clearly labeled as client-side or server-side.
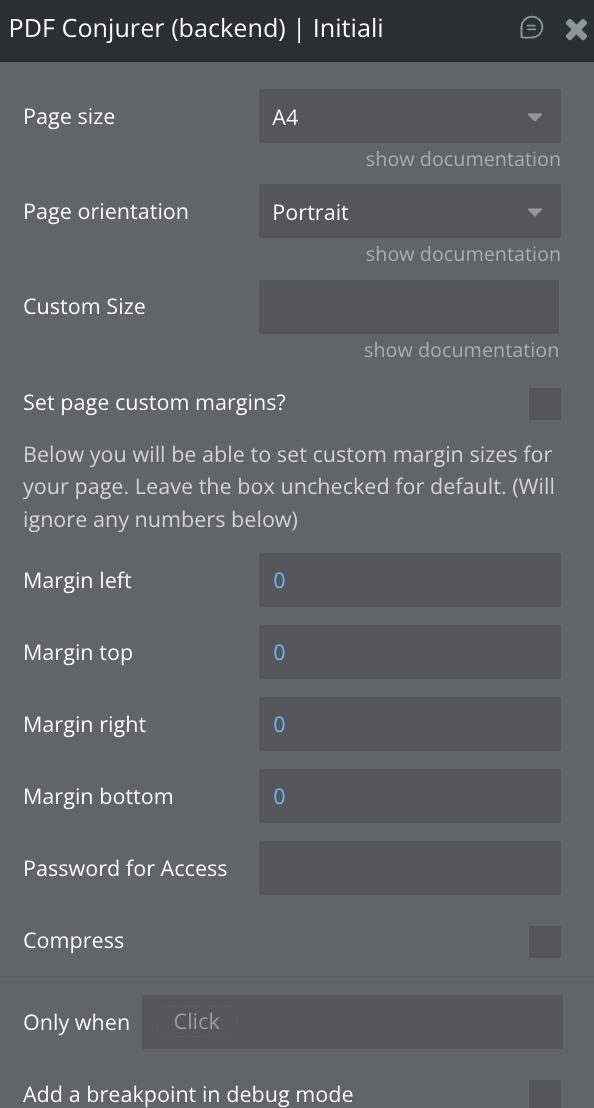
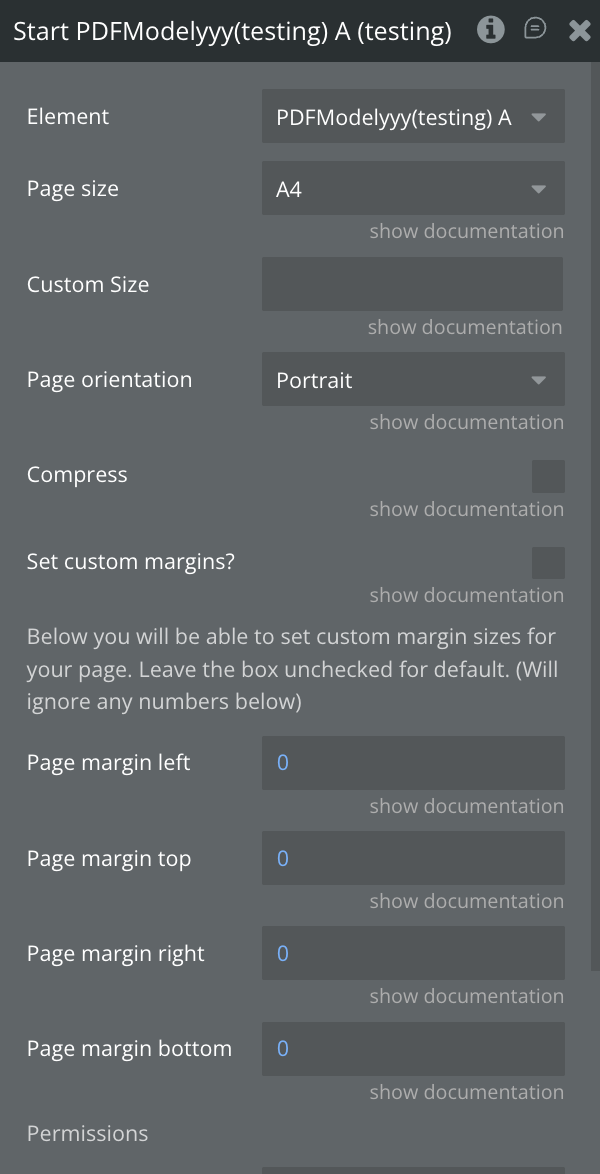
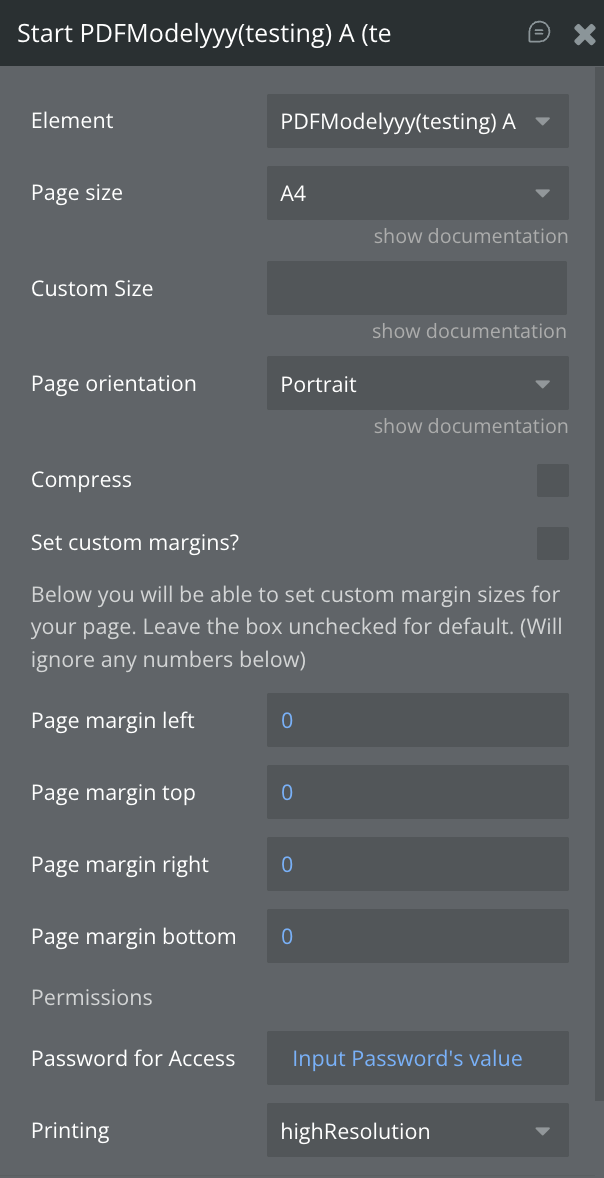
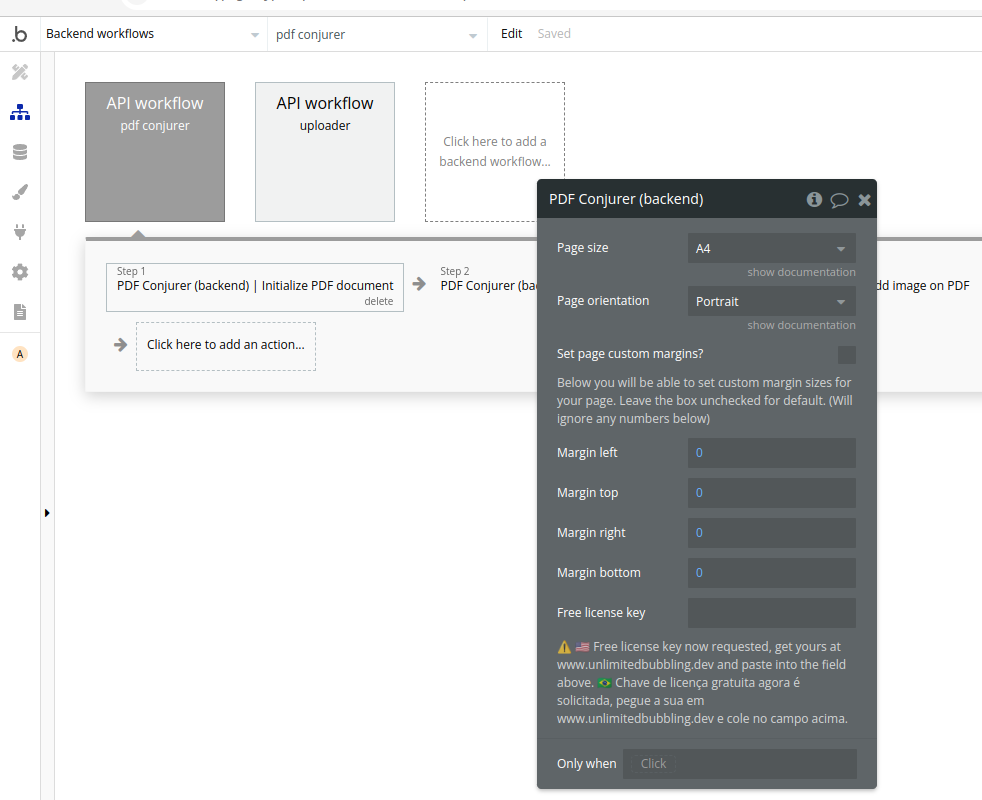
1. Initialize PDF document
Initialize your PDF document and set initial configurations.
The first action you should use to start a document, it sets the initial configurations of your PDF Document:
Title
Description
Type
Page size
Sets the page size, according to the standard paper sizes accepted by PDFMake.
Dropdown
Page orientation
Sets the page orientation, which can be horizontal (Landscape) or vertical (Portrait).
Dropdown
Custom Size
Width, Height
Text
Set page custom margins
Allows the use of custom document margins. If not checked, the margins used will be the ones that PDFMake uses by default.
Yes/No
Margin left, top, right, and bottom
Sets the value of the page margins in points (pt). If the option Set page custom margins is not checked, the values will be ignored.
Number
Password for Access
Password to access the pdf
Text, Optional
Compress
Compresses the size of the PDF
Yes/No
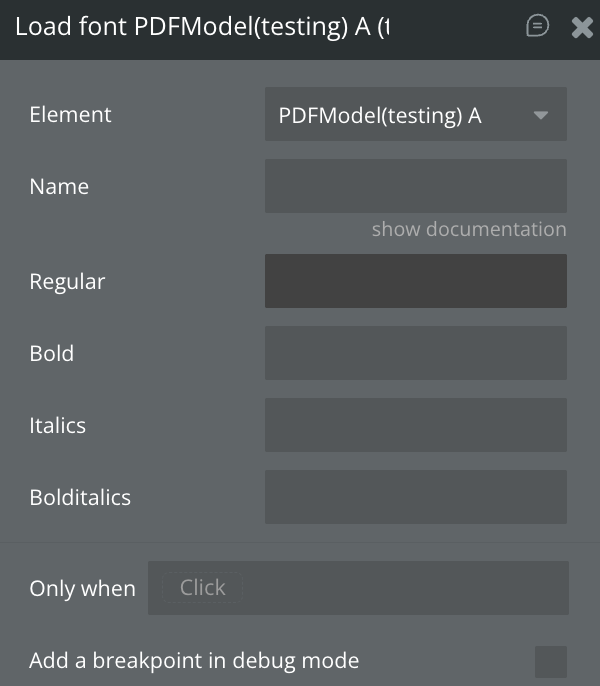
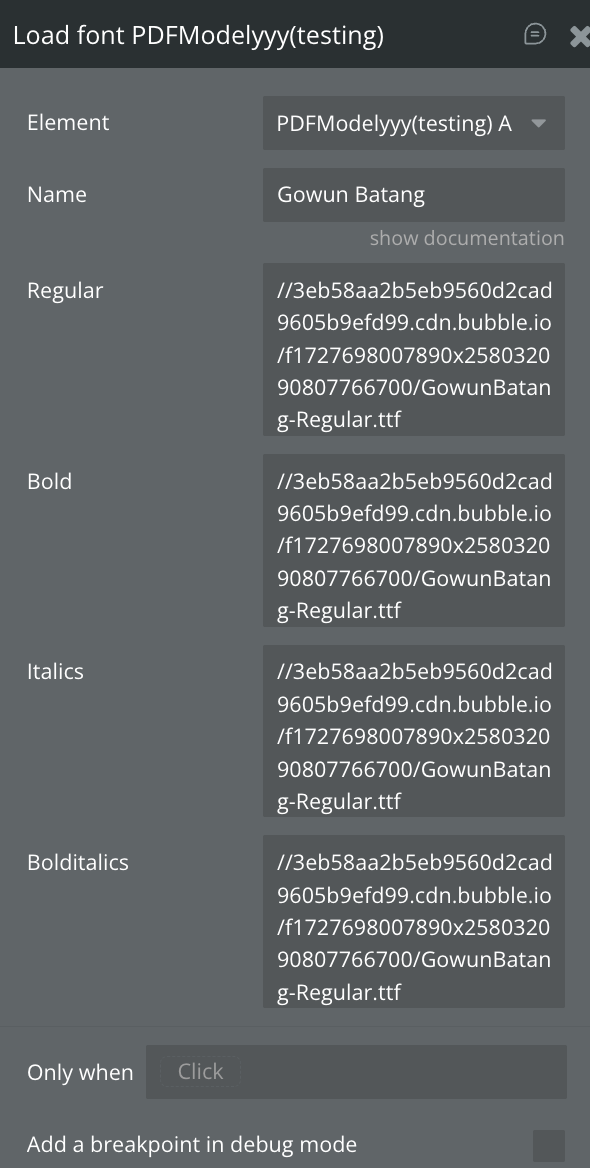
2. Load font
Upload font files, if you want to use other fonts that are not available by default
Title
Description
Type
Font name
The font name that you will use in other actions; please avoid using special characters
Text setting
Font files
Regular, Bold, Italics, and BoldItalics. You can upload the font files or copy the file links
File input group
💡
We recommend the use of TrueType font file extension (.ttf)
Default fonts that you don’t need to upload:
Roboto, Times New Roman, Courier New, and Helvetica
Not all fonts can be read. If you have a text in Arabic, Chinese, etc., please experiment with the top fonts for these languages and see which one suits you best.
For ex: For example, for a PDF in Arabic, you can use Amiri.
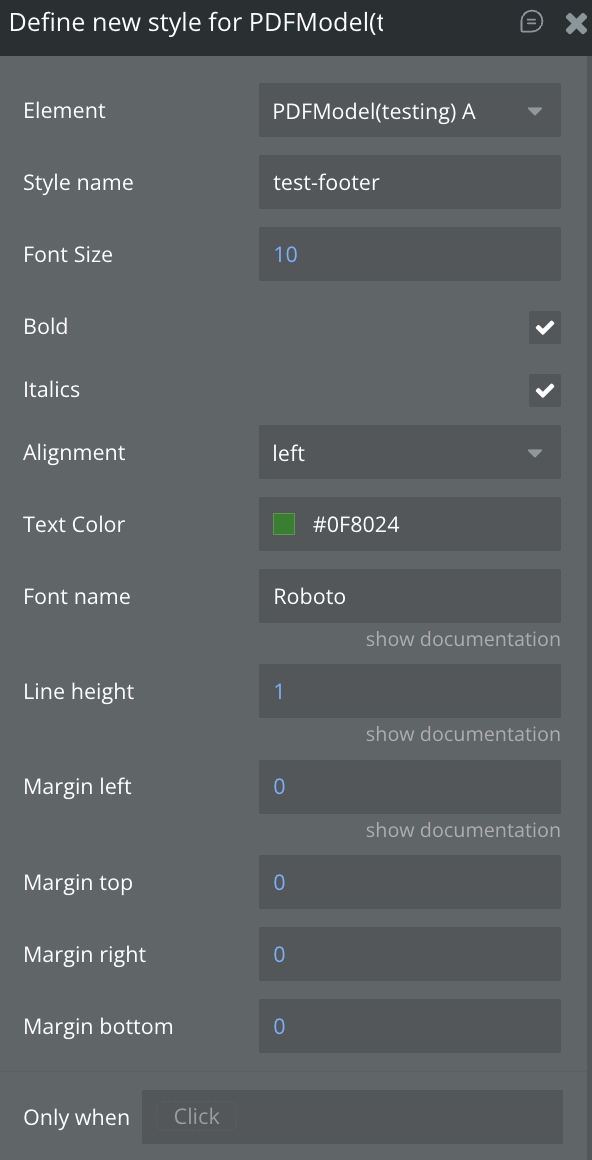
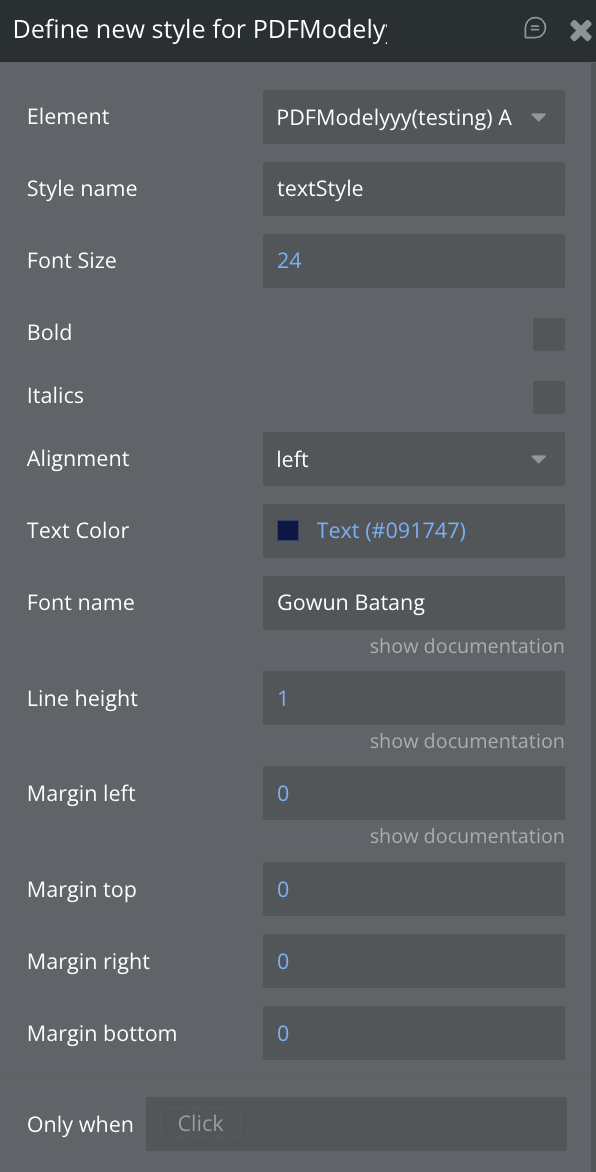
3. Define new style
Set a custom style that you can use in texts present in the document or tables
Title
Description
Type
Style name
The style name that you will use in other actions; please avoid using special characters
Text
Font size
Sets the font size in points (pt)
Number
Bold
Check if you want the text in bold
Boolean option
Italics
Check if you want the text in italic or oblique
Boolean option
Alignment
Select the text alignment (left, center, right, or justify)
Selection option
Text color
Open the color selector and choose the text color
Color picker
Font name
The font name you want to use
Text
Line Height
The line height px of text
Number
Margin left, top, right, and bottom
Sets the value of the page margins in points (pt). If the option Set page custom margins is not checked, the values will be ignored.
Number
💡
Remember to use the same font name that you set in the “Load font to PDF” action, or use a preloaded font: Roboto, Times New Roman, Courier New, and Helvetica
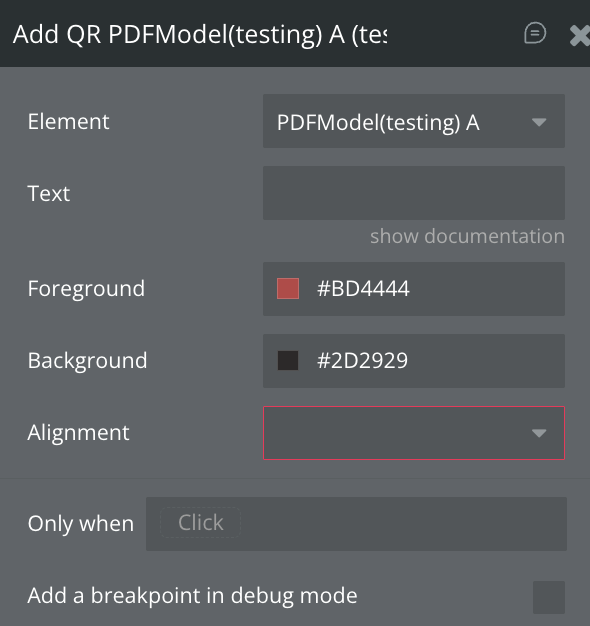
4. Add QR(client-side)
The add QR action in pdfmarket.js allows you to insert a QR code into a PDF document. This action generates a QR code based on a provided string or URL and places it at a specified location within the PDF.
Title
Description
Type
Text
The content or string that will be displayed or styled
Text input
Foreground
The color applied to the text itself (text color)
Color setting
Background
The color behind the text, used to highlight or emphasize content
Color setting
Alignment
Determines how the text is positioned horizontally (left, center, right, or justified)
Dropdown
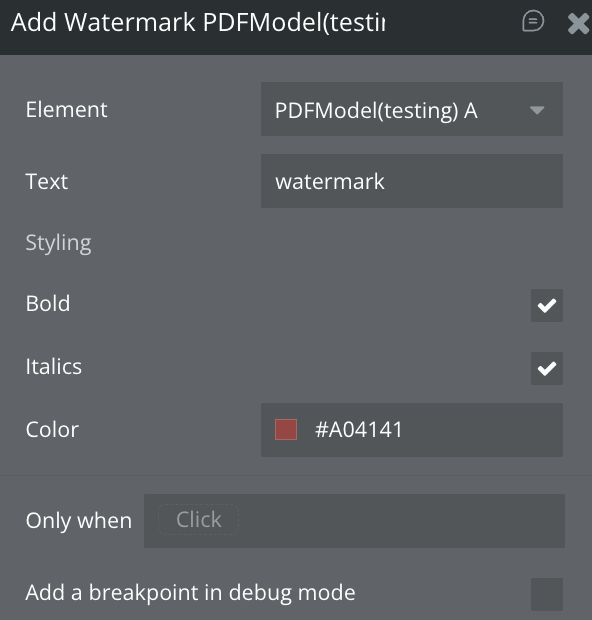
5. Add Watermark (client-side)
The Watermark function in pdfmarket.js allows you to apply a watermark (text or image) to a PDF document. This watermark can be positioned on each page of the PDF, either as a visible overlay or background, depending on the configuration.
Title
Description
Type
Text
The content or string that will be displayed or styled
Text
Bold
Makes the watermark text bold
Checkbox
Italic
Makes the watermark text italic
Checkbox
Color
The color of the text
Color
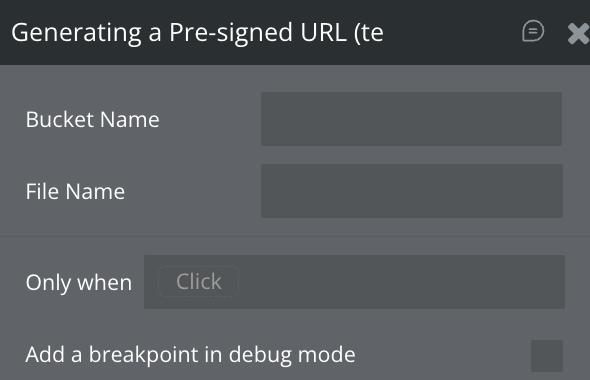
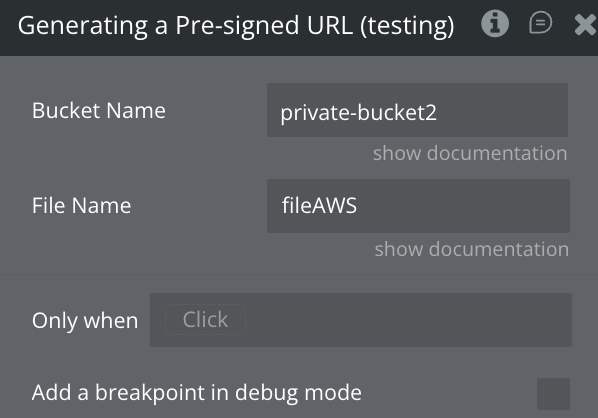
6. Generate SignURL
Generates a Signed Url
Title
Description
Type
Bucket Name
The name of the bucket
Text
File Name
The name of the file
Text
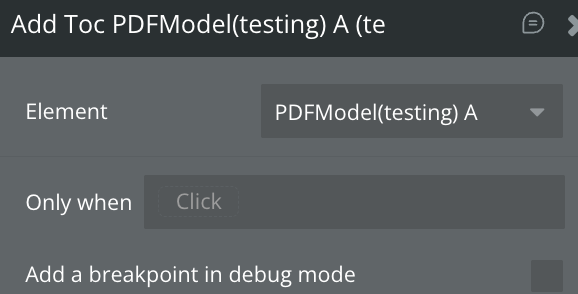
7. Add TOC (client-side)
The TOC function in pdfmarket.js generates a Table of Contents that lists the sections of the PDF document. It facilitates quick navigation through the document by providing users with a clear structure of the content.
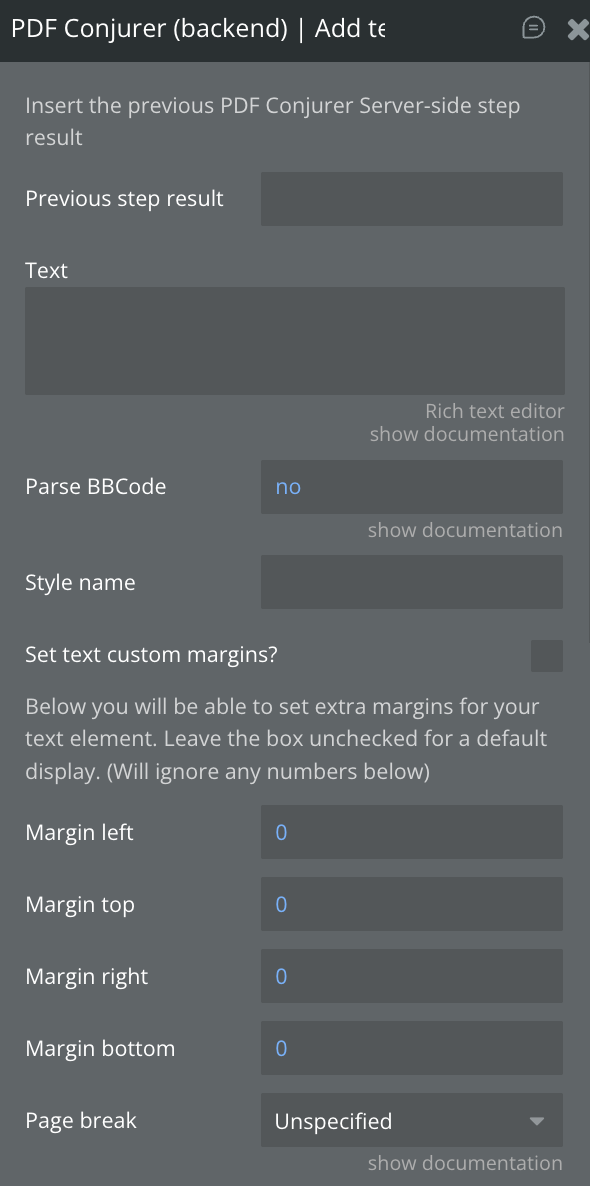
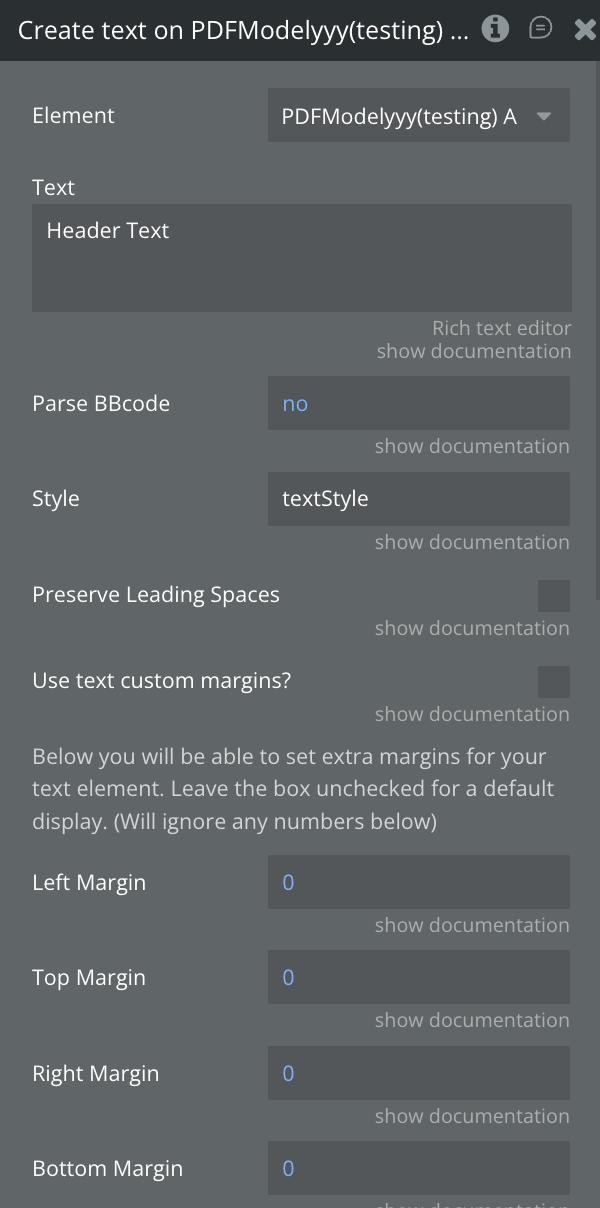
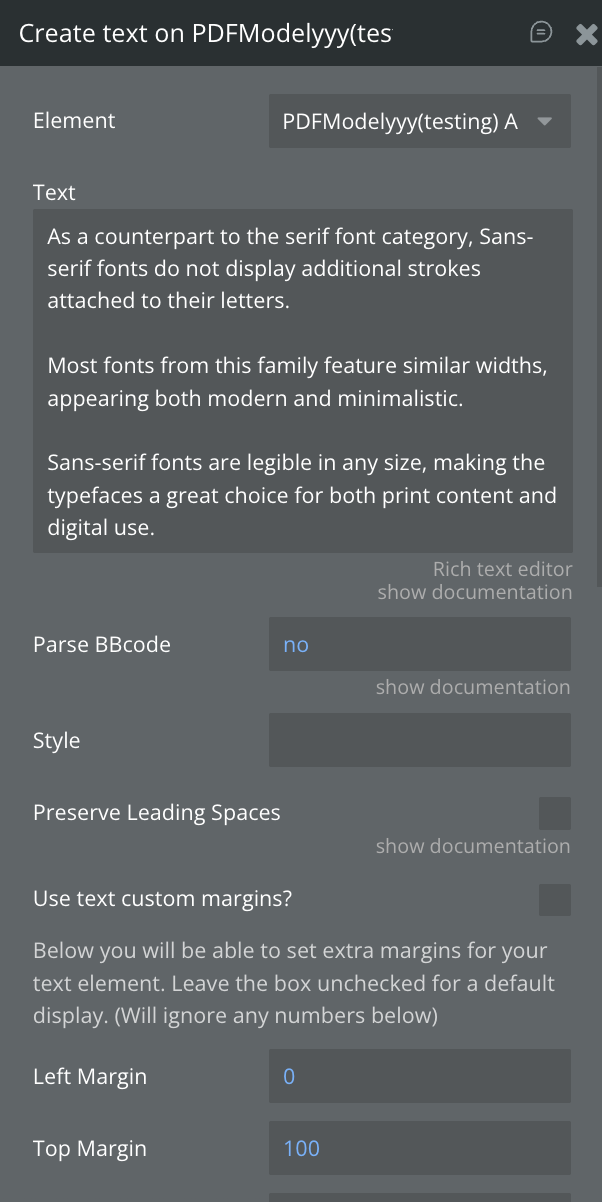
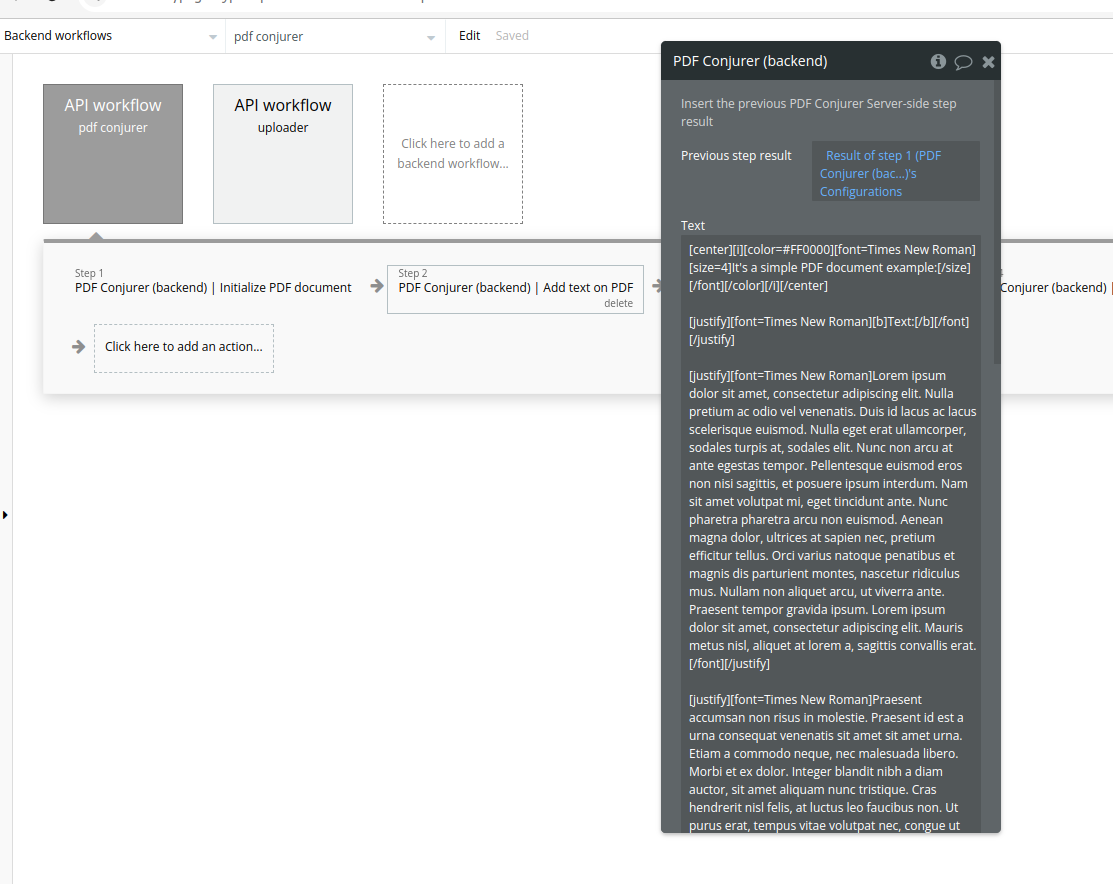
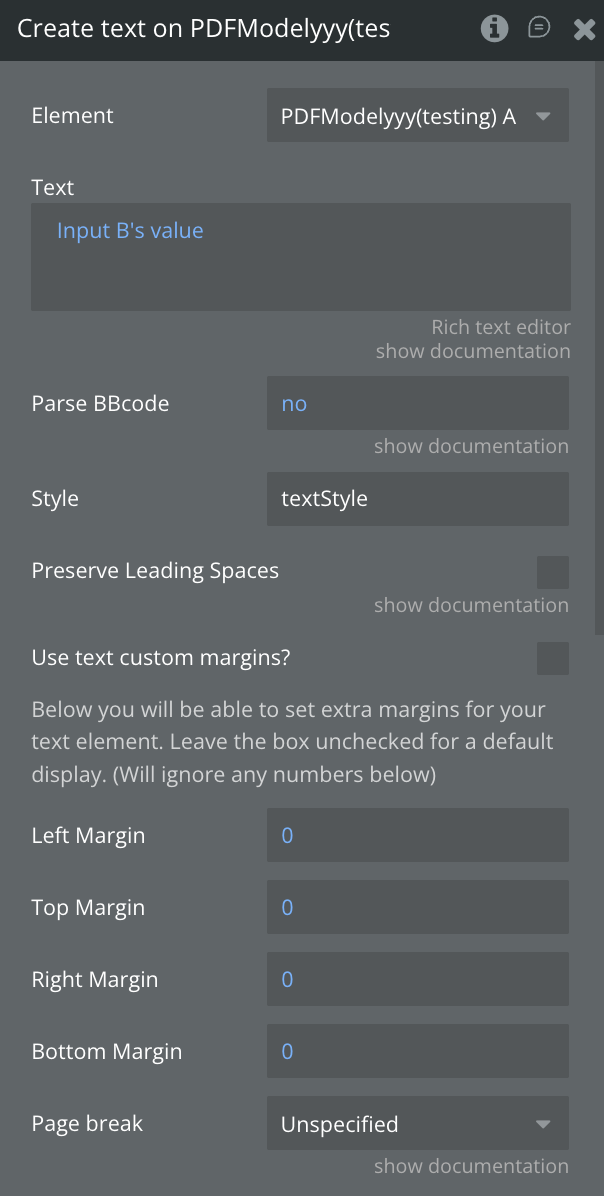
8. Add text
Draw text into the PDF using some styles options
Title
Description
Type
Previous step result
Required to load the options from previous actions of this plugin in back-end workflows
Workflow input
Text
The text you want to draw into your document; you can use the Bubble Rich Text Editor for more style options
Text input
Parse BBCode
Set to “yes” to interpret the Bubble Rich Text Editor BBCode in the Text field; see the BBCode Parser manual for details
Boolean option
Style name
The style name defined in the “Define new style to PDF” action; must match exactly. If Parse BBCode is enabled, BBCode-defined styles take priority
Text setting
Set text custom margins
Check if you want to use extra margins for your text element
Boolean option
Margins left, top, right, and bottom
Sets margin values in points (pt). Ignored if Set text custom margins is unchecked
Numeric settings
Page Break
Choose whether to add a new page before or after this element
Selection option
Put into a Multi column
Check if you want to place the text into a multi-column structure; each text element occupies one column. Requires Start multi column on PDF to be run first
Boolean option
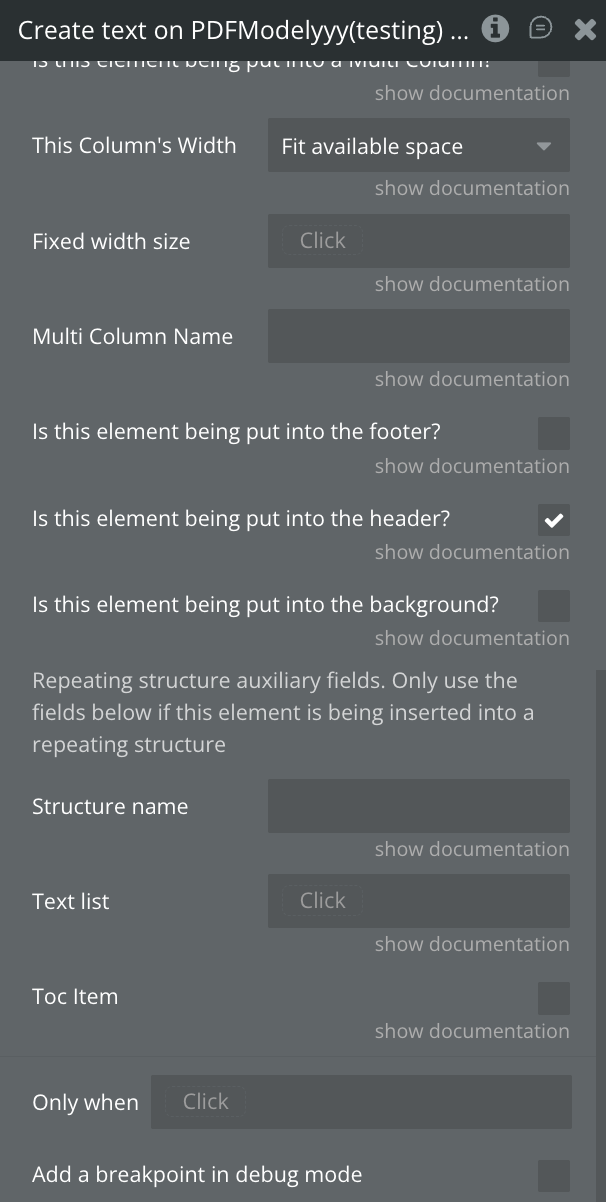
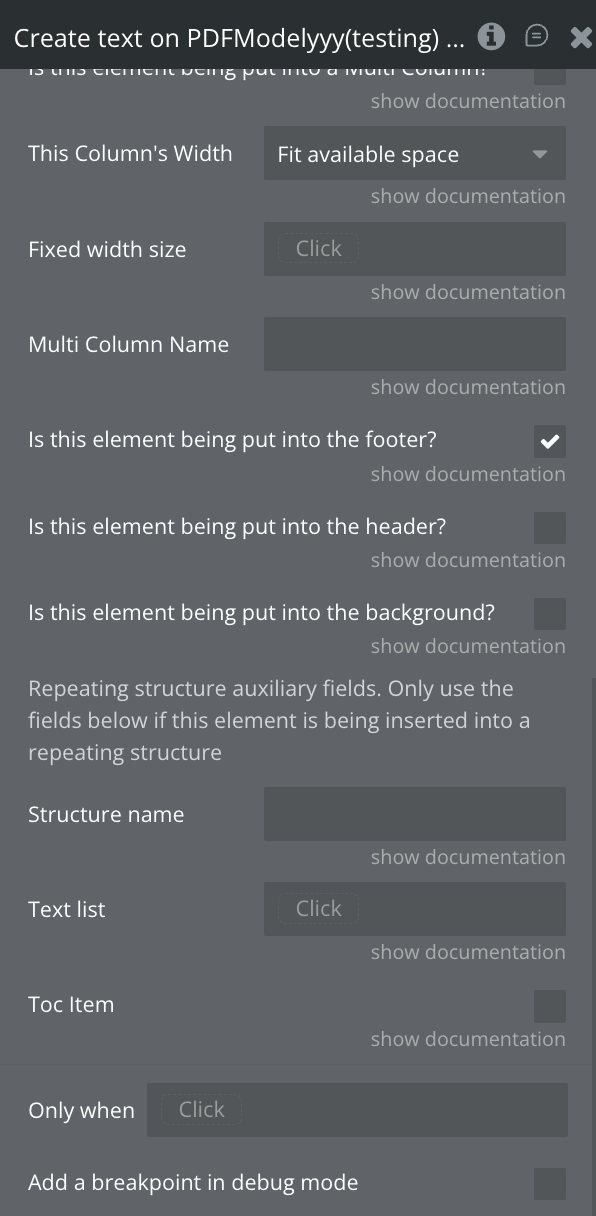
This Column’s Width
Choose whether the column should fit its content or occupy the available space
Selection option
Multi column name
The name of the multi-column structure defined in the “Start multi column on PDF” action; must match exactly
Text setting
Is this element being put into the header?
Check if the text should be rendered in the page header. Requires activating the header with Activate header on PDF
Boolean option
Is this element being put into the footer?
Check if the text should be rendered in the page footer. Requires activating the footer with Activate footer on PDF
Boolean option
Is this element being put into the background?
Check if the text should be placed behind other page elements
Boolean option
Structure name
The repeating structure name defined in the “Start repeating structure on PDF” action; must match exactly. Used to insert this element inside a repeating structure
Text setting
Text list
A list of texts to insert into a repeating structure. Each item becomes one repeated element; if empty, the value of Text will be used for each repetition
List input
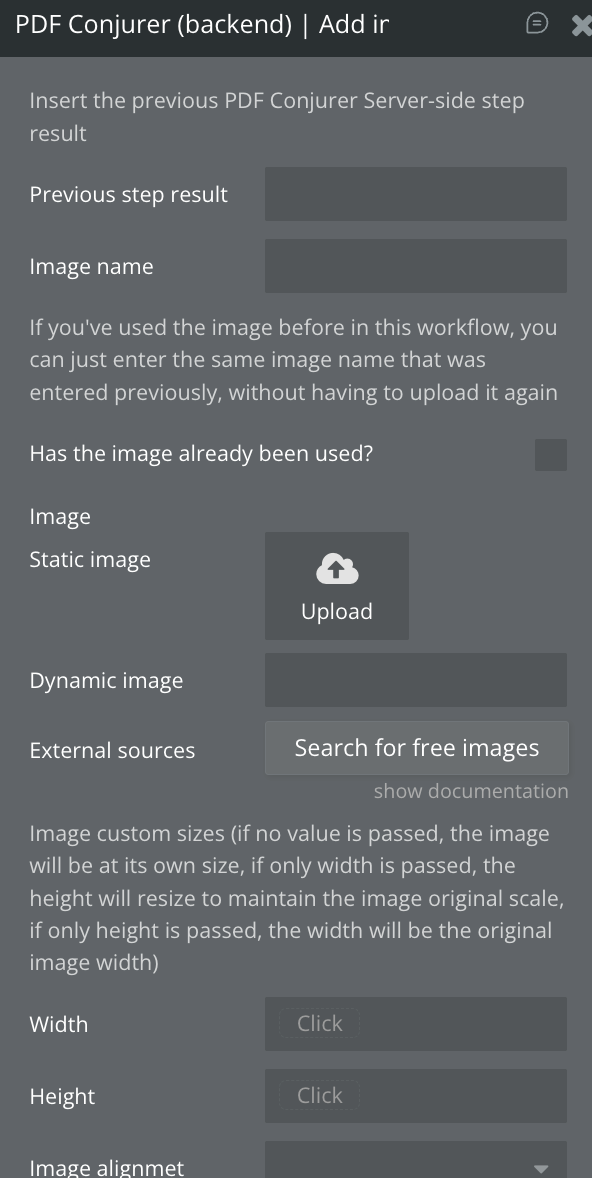
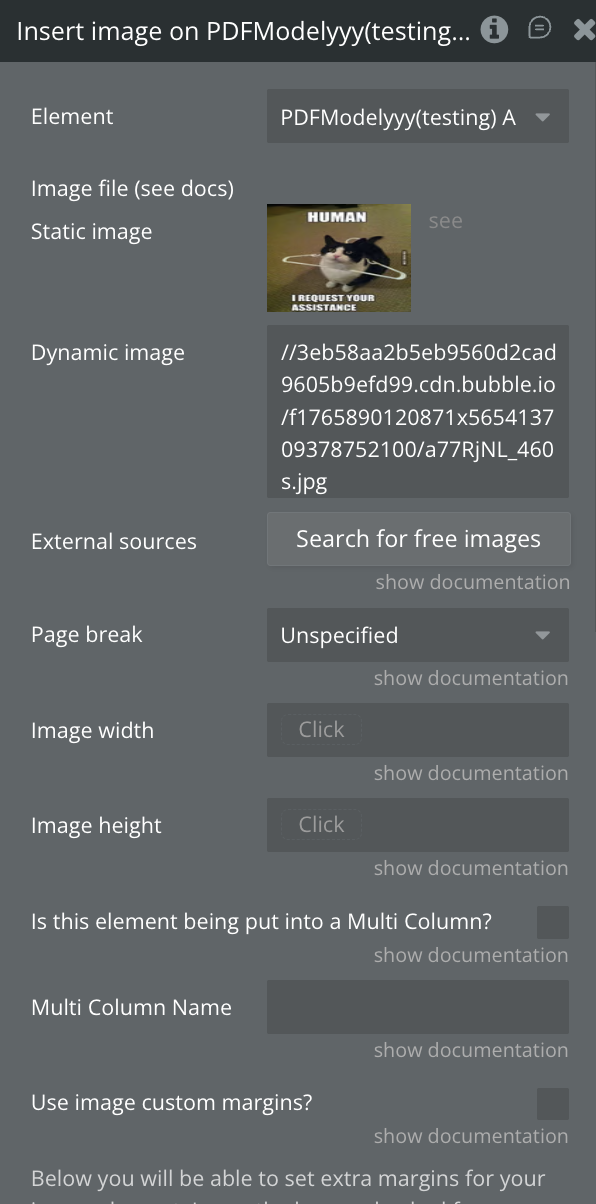
9. Add image
Draw images into the PDF document
Title
Description
Type
Previous step result
Required to load the options from previous actions of this plugin in back-end workflows
Text
Image name
The name used to reference the image if you want to reuse it later in the workflow
Text
Has the image already been used?
Check if this image has already been used previously in the same workflow; allows reuse without re-uploading by referencing the same name
Yes/No
Image
Upload the image or provide its URL. Required if the image has not been used before. External free-image sources can also be used
File
Width
Sets the image width
Number
Height
Sets the image height
Number
Image alignment
Choose the image alignment (left, center, or right)
Dropdown
Use custom margins
Check if you want to apply extra margins to the image
Yes/No
Margins left, top, right, and bottom
Sets margin values in points (pt). Ignored if Use custom margins is unchecked
Number
Page Break
Choose whether to insert a new page before or after the element
Dropdown
Is this element being put into a Multi Column?
Check if the image should be placed into a multi-column structure. Each image occupies one column. Requires Start multi column on PDF
Yes/No
Multi column name
The multi-column name defined in the “Start multi column on PDF” action. Must match exactly
Text
Column Width
Choose whether the column fits its content or occupies the available space
Dropdown
Is this element being put into the header?
Check if the image should be rendered in the page header. Requires activating the header with Activate header on PDF
Yes/No
Is this element being put into the footer?
Check if the image should be rendered in the page footer. Requires activating the footer with Activate footer on PDF
Yes/No
Is this element being put into the background?
Check if the image should appear behind other page elements
Yes/No
Structure name
The repeating structure name defined in the “Start repeating structure on PDF” action; must match exactly. Used when placing the image inside a repeating structure
Text
Image list
A list of image URLs to insert into a repeating structure. Each image becomes one repeated element. If left empty, the previously selected image is used for all repetitions
Text List
💡
If the height and width values are not set, the image will be kept at its original size.
If only the width value has been set, the height will be adjusted to maintain the original image scale.
If only the height is defined, the width will be kept the original of the image.
If the image size is larger than the size it can occupy, the image may be cut off or not appear (especially in columns or in the header/footer), so adjust its size until it appears correctly.
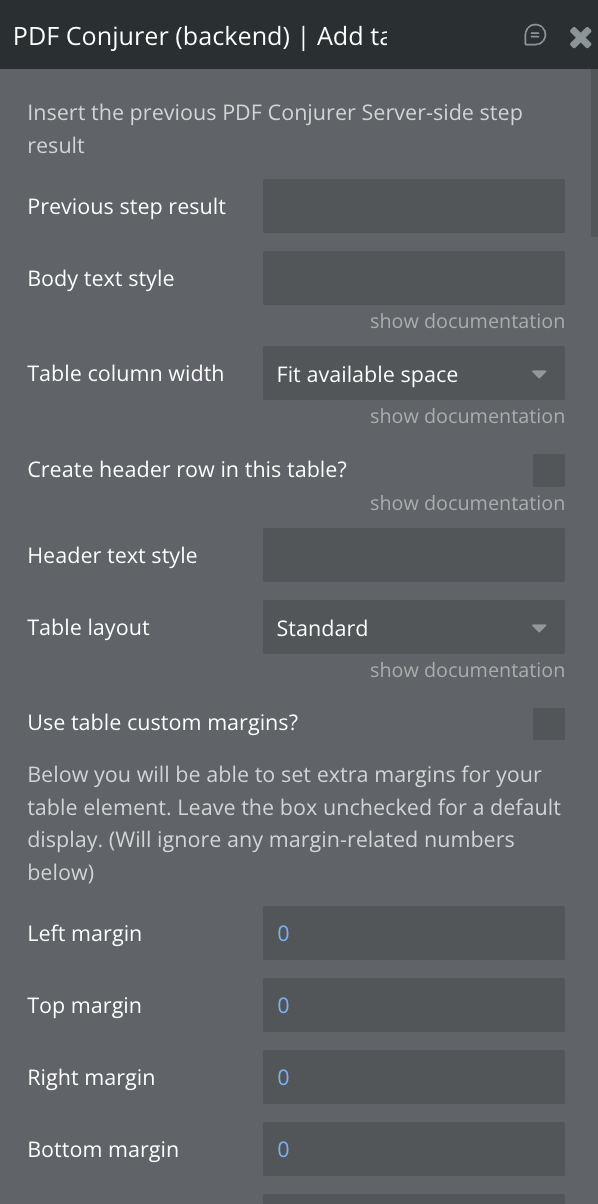
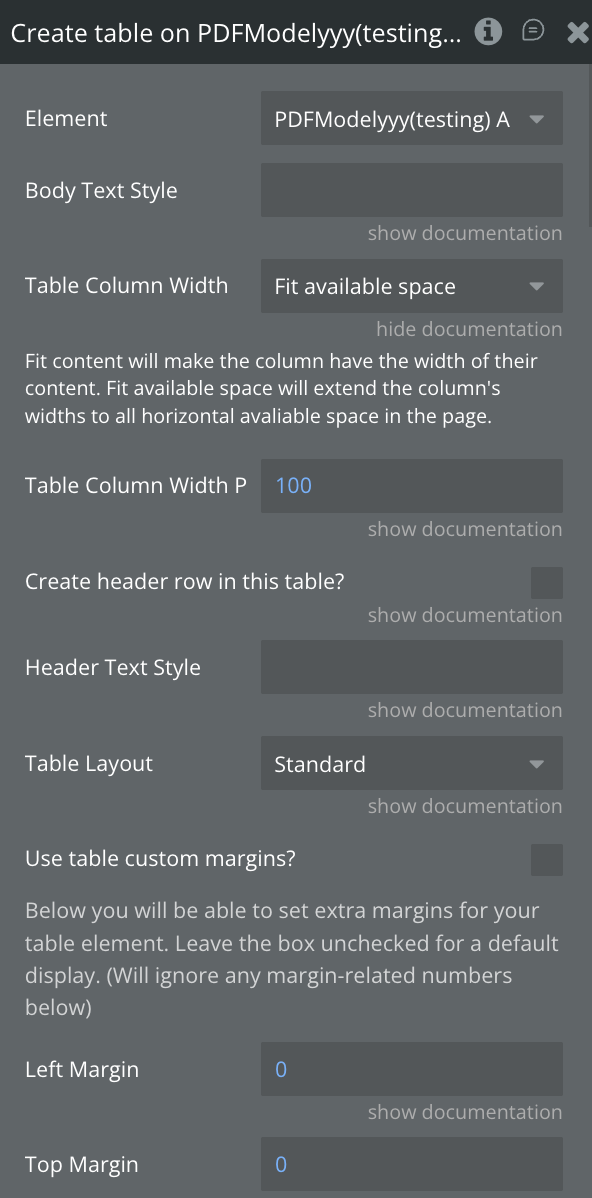
10. Add table
Draw tables from a list of things
Title
Description
Type
Previous step result
Required to load the options from previous actions of this plugin in back-end workflows
Text
Body text style
The style name defined in the “Define new style to PDF” action; must match exactly. This style will be applied to the body of all table columns
Text
Table column width
Choose whether all table columns will fit the content or occupy the available space
Dropdown
Create header row in this table?
Check if you want the first row to be a header. If the table spans multiple pages, the header repeats on all pages
Yes/No
Header text style
The style name defined in the “Define new style to PDF” action; must match exactly. This style will be applied to all header cells
Text
Table layout
Choose the table design/layout you prefer (options displayed below in the interface)
Dropdown
Use table custom margins
Check if you want to apply extra margins to the table element
Yes/No
Margins left, top, right, and bottom
Margin values in points (pt). Ignored if Use table custom margins is unchecked
Number
Page Break
Choose whether to insert a new page before or after the table element
Dropdown
Column’s header (1 to 20)
Header label for the respective column. Ignored if Create header row in this table? is not checked. If blank while header row is enabled, the header cell will be blank
Text
Column’s body (1 to 20)
A list of texts that fill each table column; each text becomes one table row
List
Use column (2 to 20)
Check if you want to include the respective column; if unchecked, the column will be ignored
Yes/No
Is this element put into a Multi column?
Check if the table should be placed into a multi-column structure. Each table element occupies one column. Must run Start multi column on PDF beforehand
Yes/No
This Column’s Width
Width for the multi-column structure’s column (not the table’s column width). Choose fit-content or full available space
Dropdown
Multi column name
Name of the multi-column structure as defined in the “Start multi column on PDF” action; must match exactly
Text
Is this element being put into the header?
Check if the table should appear in the page header. Requires activating the header via Activate header on PDF
Yes/No
Is this element being put into the footer?
Check if the table should appear in the page footer. Requires activating the footer via Activate footer on PDF
Yes/No
Is this element being put into the background?
Check if the table should appear behind the main page content
Yes/No
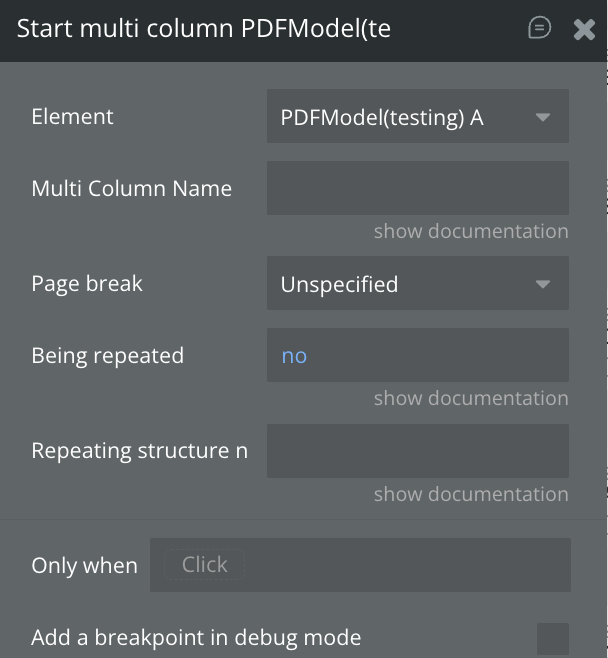
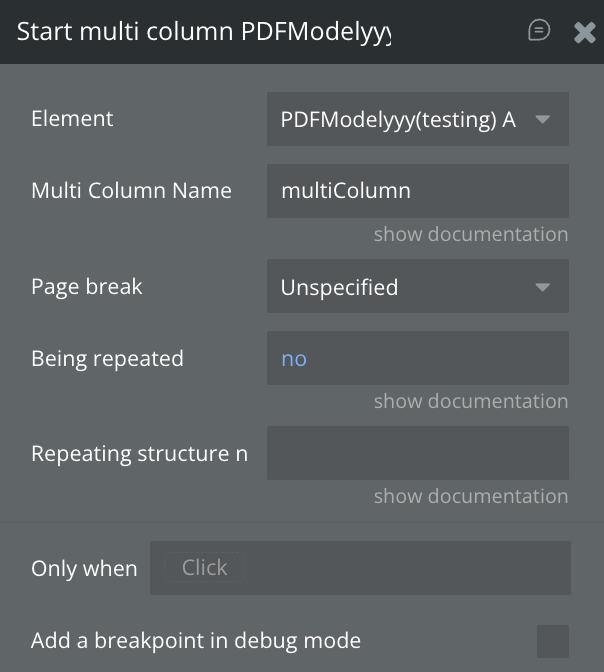
11. Start Multi-column
Use to create a multi-column structure in your document, you can add columns to it through the actions: add texts, images, and tables! Each element will be a new column, so if you want, for example, a text with two columns you need to use de action “Add text on PDF” twice
Title
Description
Type
Multi column name
The multi-column name that will be used in other actions; avoid using special characters
Text
Page break
Choose whether to add a new page before or after the multi-column structure
Dropdown
Being repeated
Set to “yes” if this multi-column structure will be inserted into a repeating structure
Yes/No
Repeating structure name
The name of the repeating structure where the multi-column should be placed
Text
💡
If you want to place the multi-column into a repeating structure, the plugin will create a different multi-column for each structure inside the repeating structure, ideal for use with a list of things in actions like add text, and images, because each element in the list will be inserted into a different multi-column! To do that just combine the options to use multi-columns and repeating structures in these actions (add text, and add image)
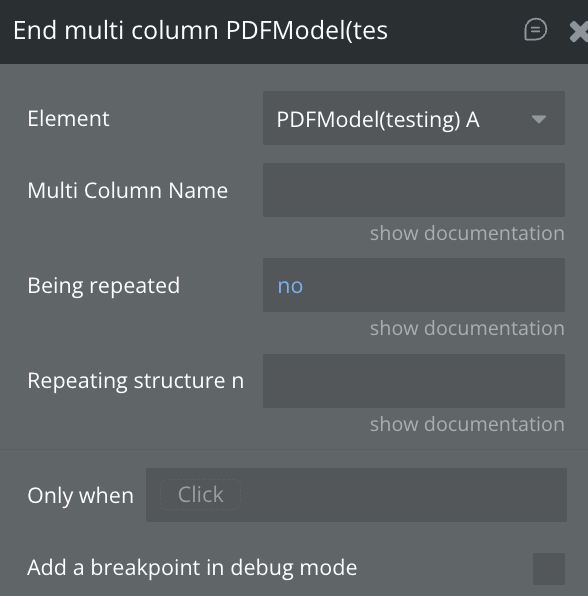
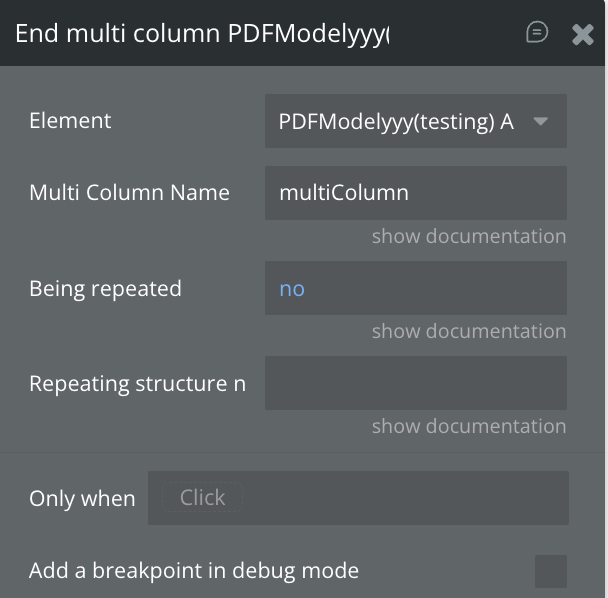
12. End Multi-column
Use to end a multi-column structure in your document, and insert it into the document or into a repeating structure
Title
Description
Type
Multi column name
The multi-column name defined in the “Start multi column on PDF” action; must match exactly
Text
Being repeated
Set “yes” if the multi-column will be inserted into a repeating structure; must match the choice used in the “Start multi column on PDF” action
Yes/No
Repeating structure name
The name of the repeating structure where the multi-column should be placed; must match the value used in the “Start multi column on PDF” action
Text
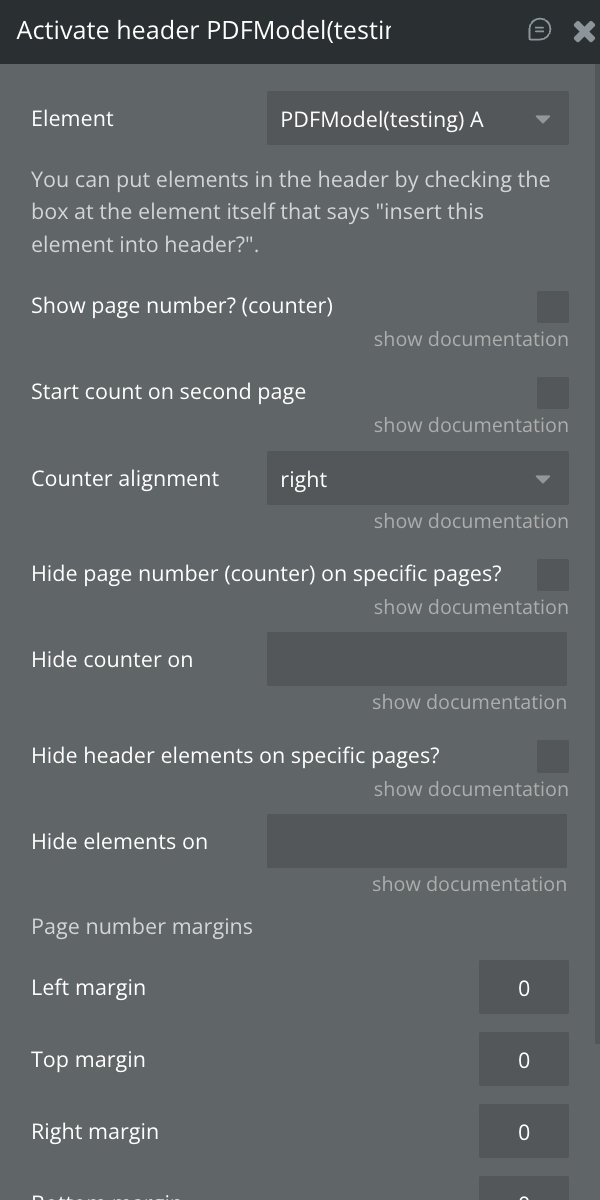
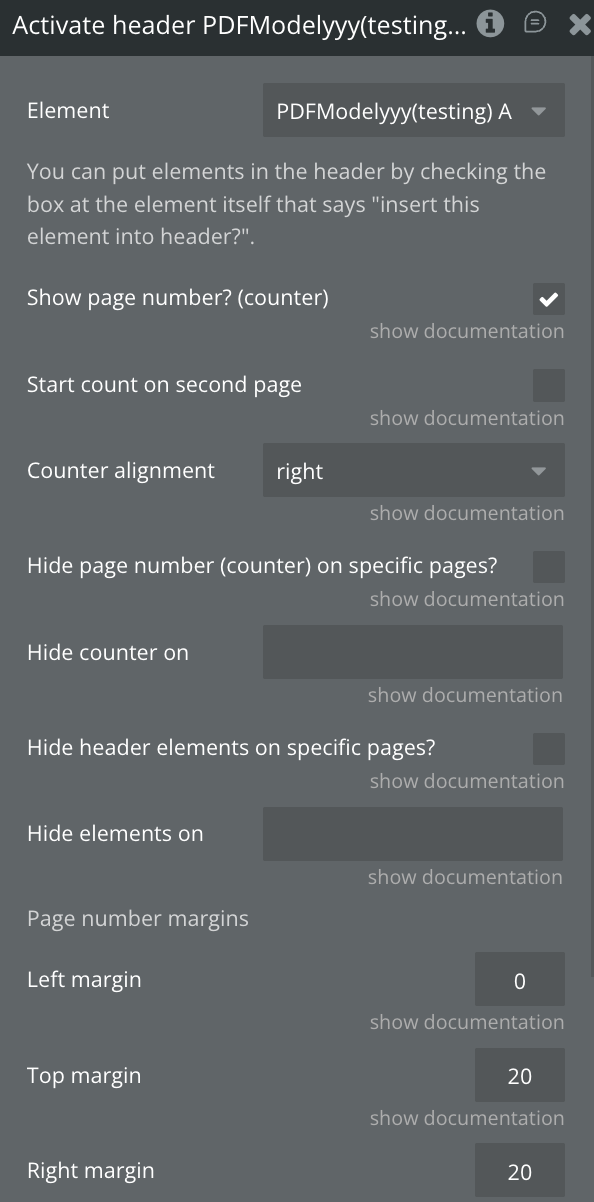
13. Active header
Use to enable the header in your document
Title
Description
Type
Previous step result
Required to load the options from previous actions of this plugin in back-end workflows
Workflow
Show page number? (counter)
Check if you want to display the page number in the header
Yes/No
Start count on second page
Check if you want the counter to begin on the second page; the first page will hide the number and the second page becomes number 1
Yes/No
Even and Odd pages counter alignment
Choose where the counter will appear on even and odd pages (left, center, or right)
Dropdown
Hide page numbers (counter) on specific pages?
Check if you want to hide the counter on specific pages; the counting will continue normally
Yes/No
Hide counter on
The numbers of the pages where the counter should be hidden, separated by commas
Text
Hide header elements on specific pages?
Check if you want to hide header elements on one or more pages
Yes/No
Hide elements on
The page numbers where header elements should be hidden, separated by commas
Text
Left, top, right, and bottom page number margins
The margin values (in points) for the page number element
Number
💡
Remember that if you have chosen to start counting on the second page, the number of pages will be counted from that. Please consider this when choosing the pages where the elements or the counter will not appear, because the first page will be number 0.
💡
Header space is limited, so if any elements don't appear then resize them to fit
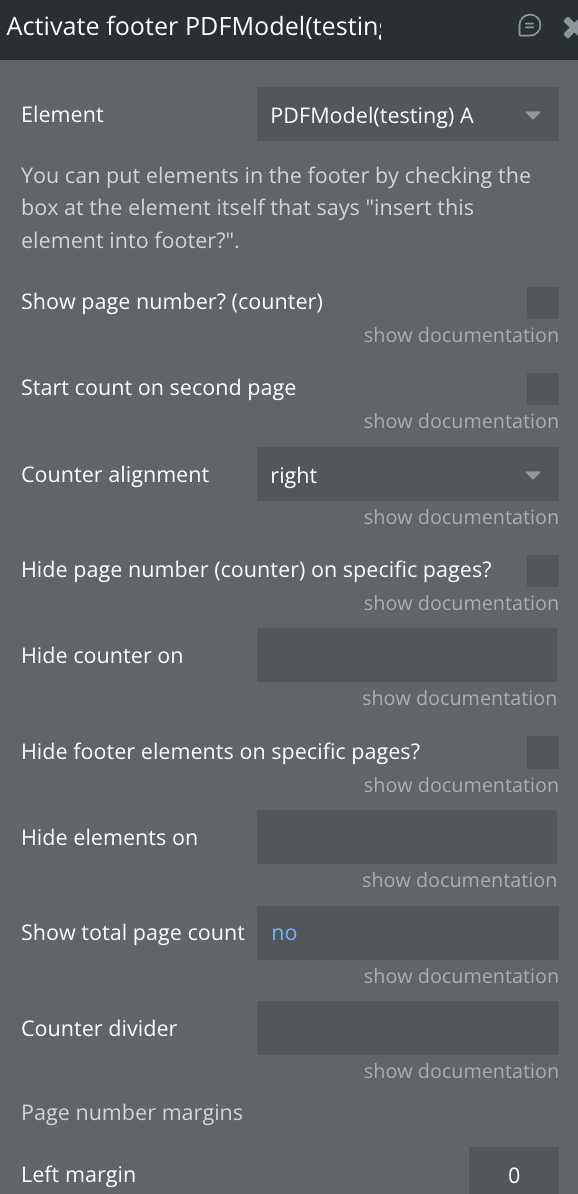
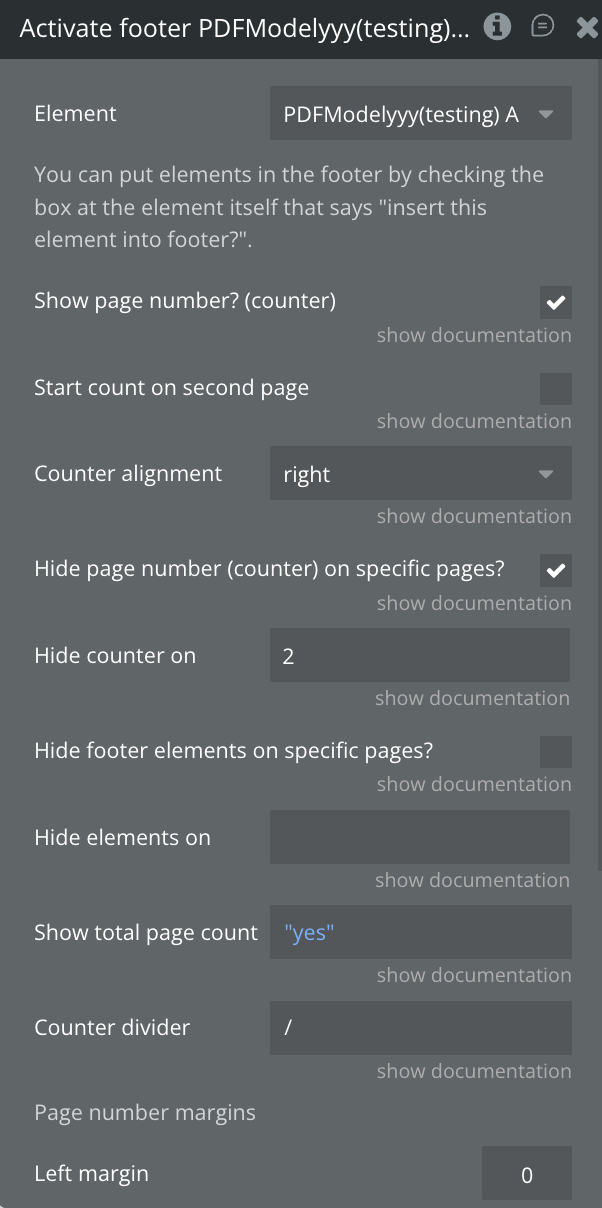
14. Active footer
Make it possible to insert content into the document footer
Title
Description
Type
Previous step result
Required to load the options from previous actions of this plugin in back-end workflows
Workflow
Show page number? (counter)
Check if you want to display the page number in the footer
Yes/No
Start count on second page
Check if you want the counter to begin on the second page; the first page hides the number and the second page becomes number 1
Yes/No
Even and Odd pages counter alignment
Choose where the counter will appear on even and odd pages (left, center, or right)
Dropdown
Hide page numbers (counter) on specific pages?
Check if you want to hide the page counter on specific pages; the count continues normally
Yes/No
Hide counter on
Page numbers where the counter should be hidden, separated by commas
Text
Hide footer elements on specific pages?
Check if you want to hide footer elements on one or more pages
Yes/No
Hide elements on
The page numbers where footer elements should be hidden, separated by commas
Text
Left, top, right, and bottom page number margins
Margin values (in points) for the page number element
Number
💡
Remember that if you have chosen to start counting on the second page, the number of pages will be counted from that. Please consider this when choosing the pages where the elements or the counter will not appear, because the first page will be number 0.
💡
Footer space is limited, so if any elements don't appear then resize them to fit
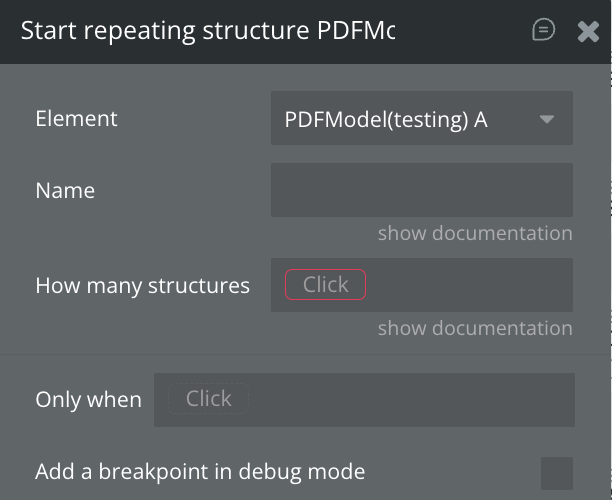
15. Start repeating structures
Initialize a repeated structure into the document ideal for some label that repeats yourself or a list of things that have the same structure
In this action, the plugin creates many structures that you want inside the repeating structure!
In other words, these structures, that the plugin creates, are simple lists, that you can insert things on, like texts, images, columns, and tables
You can put the same element in all these lists or when you pass a list of things, each element goes into a different list inside the repeating structure
Title
Description
Type
Name
The repeating structure name that will be used in other actions; avoid using special characters
Text
How many structures
The number of structures (or lists) that you want to place inside this repeating structure
Number
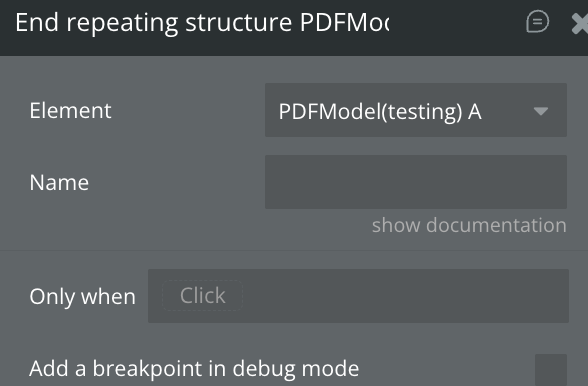
16. End repeat structure
Insert the repeated structure into the document.
Title
Description
Type
Name
The repeating structure name used in “Start repeating structure on PDF”; must match exactly
Text
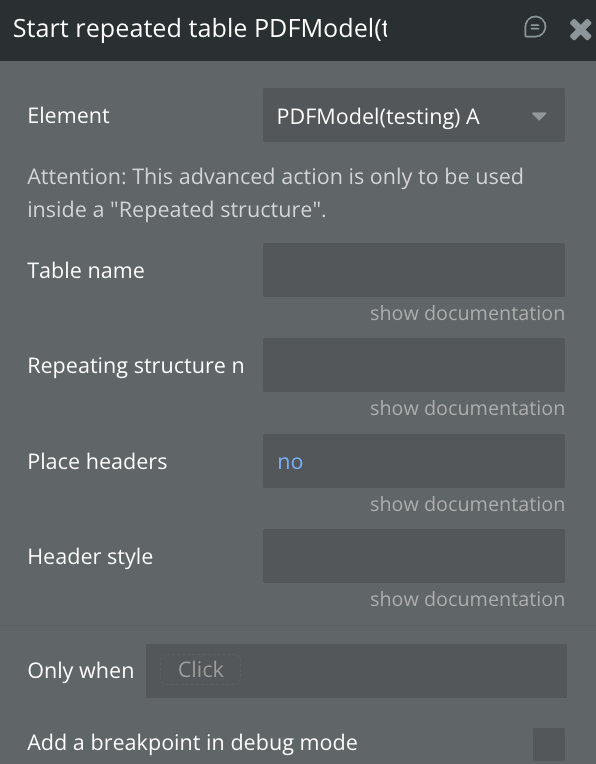
17. Start repeated table
Start a repeated table structure in your document, ideal for some lists of data that have the same structure, for example, a list of couples: each couple has a list of the names, ages... of each person, so each couple will be a table, and the properties (name or age) will be the tables' columns.
Title
Description
Type
Table name
The repeated table structure name that will be used in other actions; avoid using special characters
Text
Repeating structure name
The repeating structure this table is being repeated into.
Text
Place headers
If "yes", will create a header row. Good for column titles.
Yes/No
Header style
The name of the text style you want to be applied to the header's text.
Text
💡
You need to start a repeated structure before initializing a repeated table
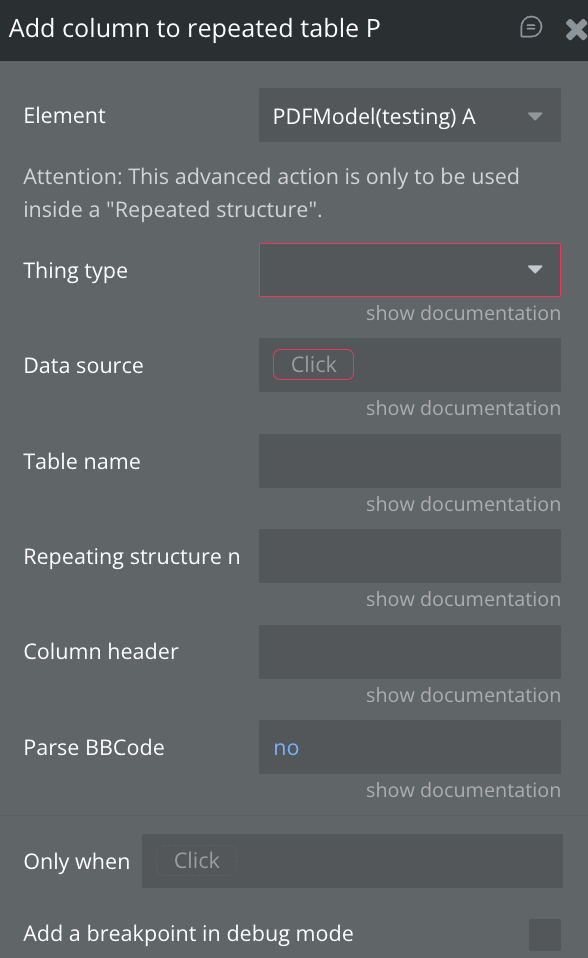
18. Add column to a repeated table
Use to add a column into a repeated table structure, each column will be a list of that main list, you can put a header cell and customize the column text
Title
Description
Type
Table name
The repeated table structure name used in the “Start repeated table on PDF” action; must match exactly
Text
Thing type
The data type of the items you want to use to assemble the tables
Text
Field of things
The data property that contains a list
Text
Data source
The main list containing the items and nested lists to be used in the repeated table
List
Column style
The style (from “Define new style to PDF”) that will be applied to the text inside this column
Text
Column header
The label for the column header; repeated automatically on each page if the table spans multiple pages
Text
Header style
The style (from “Define new style to PDF”) that will be applied to the text in this column header
Text
Column width
Choose whether the column fits its content or occupies the available space
Dropdown
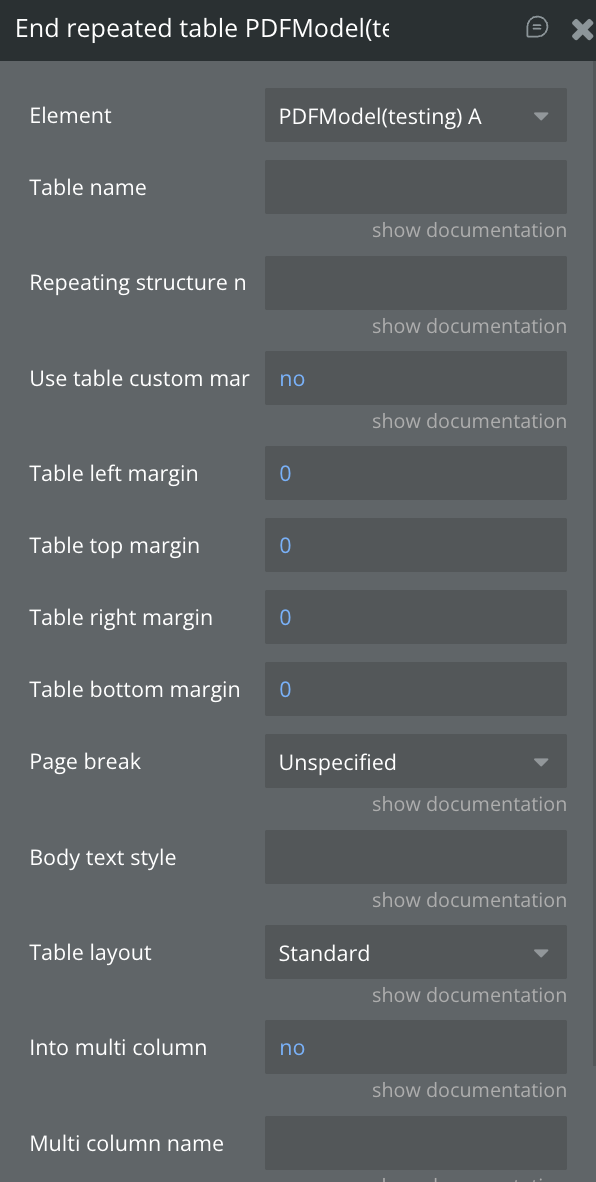
19. End repeated table
Use to end a repeated table structure, and insert the tables into the document or in a multi-columns inside a repeated structure
Title
Description
Type
Table name
The repeated table structure name used in the “Start repeated table on PDF” action; must match exactly
Text
Use table custom margins
Set to “yes” if you want to use custom margins for each table
Yes/No
Table margins left, top, right, and bottom
Margin values in points (pt) for each table. Ignored if Use table custom margins is set to “no”
Number
Page break
Choose whether to insert a new page before or after each table element
Dropdown
Table layout
Choose the table design/layout you prefer (options are displayed in the interface)
Dropdown
Into multi column
Set “yes” if the tables should be inserted into a multi-column structure; note that the multi-column must also be inside the repeating structure
Yes/No
Multi column name
The multi-column name defined in the “Start multi column on PDF” action; must match exactly
Text
Multi column width
Choose whether the multi-column structure’s column (not the table column) fits its content or occupies the available space
Dropdown
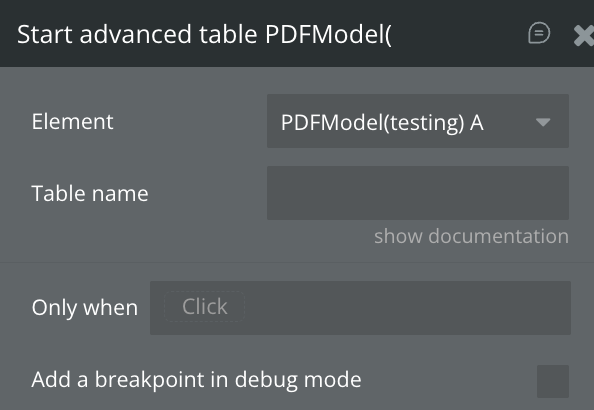
20. Start advanced table
Use to create an advanced table structure, it is similar to a regular table, but you can add as many columns as will fit in your document and style them individually
Title
Description
Type
Table name
The advanced table structure name that will be used in other actions; avoid using special characters
Text
21. Add column into advanced table
Use to add a column into an advanced table structure
Title
Description
Type
Table name
The advanced table structure name used in the “Start advanced table on PDF” action; must match exactly
Text
List of items
The list of items that will populate the column
List
Text body style
The style (from “Define new style to PDF”) that will be applied to the column body text
Text
Column width
Choose whether the column fits the content, occupies available space, or uses a fixed width
Dropdown
Fixed width size
If a fixed width was chosen, set its measurement in points (pt)
Number
Column header
The text label of the column header
Text
Header style
The style (from “Define new style to PDF”) that will be applied to the column header text
Text
Using images
Set “yes” if the list in List of items contains image URLs
Yes/No
Image width and height
The image dimensions to use for each item; see “Add image on PDF” action for details
Number
Use custom margins?
Set “yes” if all elements in the column (texts or images) should have custom margins
Yes/No
Left, top, right and bottom margins
Margin values (in points) applied to all elements; ignored if Use custom margins? is set to “no”
Number
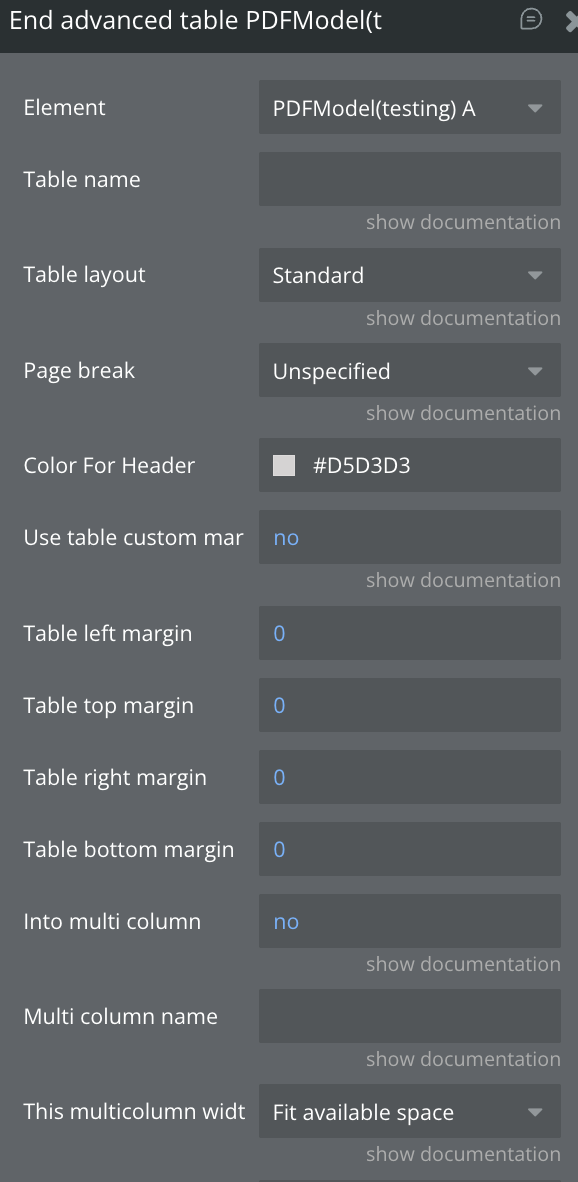
22. End advanced table
Use to end an advanced table structure, and insert it into the document, or a multi-column structure, into the header/footer or into the background
Title
Description
Type
Table name
The advanced table structure name used in the “Start advanced table on PDF” action; must match exactly
Text
Table layout
Choose the table design you prefer
Dropdown
Page break
Choose whether to insert a new page before or after the table element
Dropdown
Color for Header
Header Color
Color
Use custom margins?
Set “yes” if you want to apply custom margins to the table
Yes/No
Left, top, right and bottom margins
Margin values (in points) for the table; ignored if Use custom margins? is set to “no”
Number
Into multi column
Set “yes” if the table should be inserted into a multi-column structure
Yes/No
Multi column name
The multi-column name defined in the “Start multi column on PDF” action; must match exactly
Text
This multi column width
Choose whether the multi-column structure’s column (not the table’s columns) fits content or occupies available space
Dropdown
Into header
Set “yes” to place the table in the page header; requires the header to be activated via “Activate header on PDF”
Yes/No
Into footer
Set “yes” to place the table in the page footer; requires the footer to be activated via “Activate footer on PDF”
Yes/No
Into background
Set “yes” to place the table behind the main page content
Yes/No
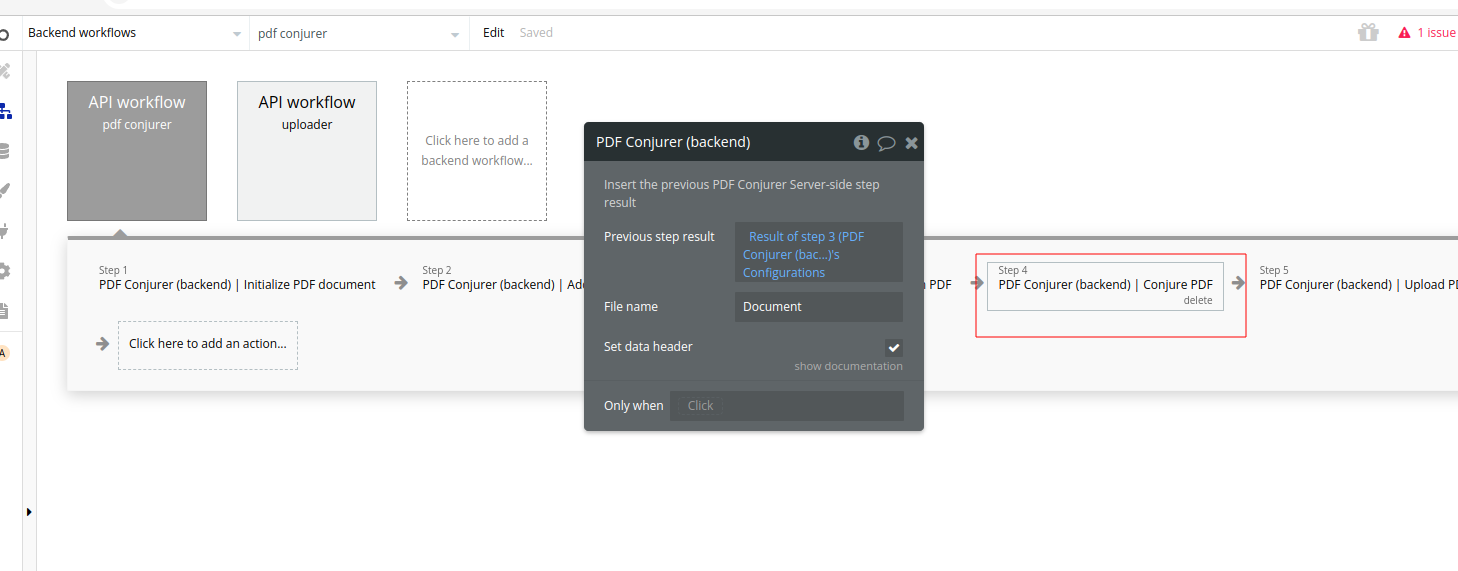
23. Conjure PDF (server-side)
Use this action to generate the resulting PDF document, it will return the document on a base 64 string format as the content, and the file name with the PDF file extension (.pdf)
Title
Description
Type
Previous step result
Required to load the options from previous actions of this plugin in back-end workflows
Workflow
File name
The PDF file name; it will also be added to the document metadata as the title
Text
Set data header
Check if you want to add the data header to the Base64 string (useful for opening the PDF directly in a browser)
Yes/No
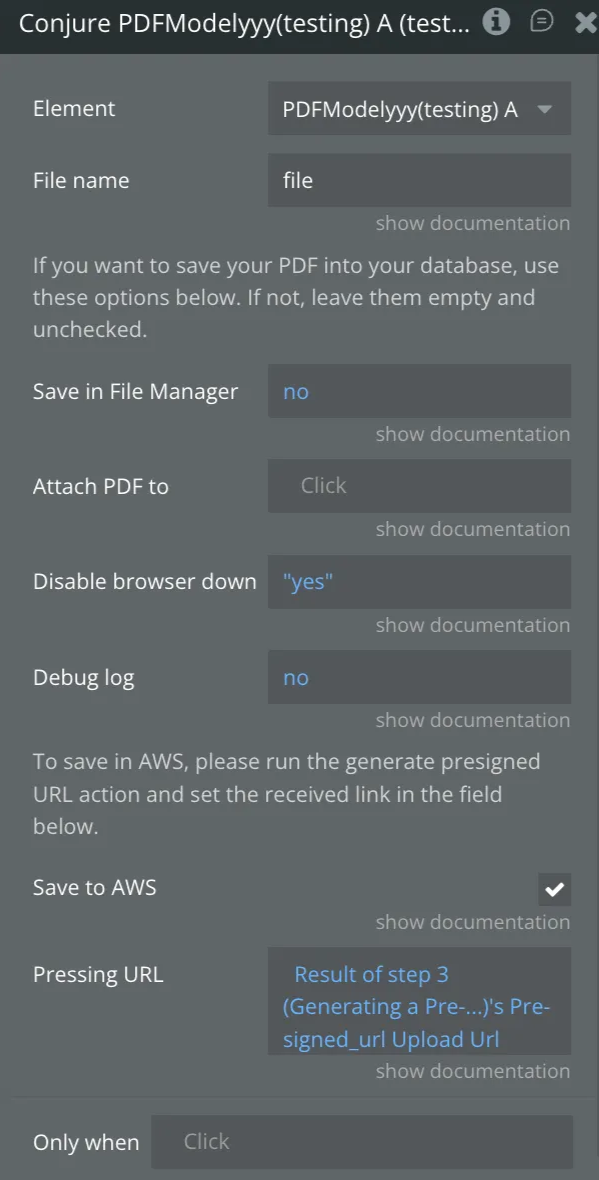
24. Conjure PDF (client-side)
Use this action to generate the resulting PDF document, it will return the document on a base 64 string format as the content, and the file name with the PDF file extension (.pdf)
Title
Description
Type
File name
The name of the PDF file that will be generated
Text
Save in File Manager
Set “yes” if you want the generated PDF to be saved in your application's File Manager
Yes/No
Attach PDF to
Defines where the generated PDF should be attached (e.g., a User, Order, Report, or other database entry)
Dropdown
Disable browser download
Set “yes” to prevent the PDF from automatically downloading in the browser
Yes/No
Save to AWS
Set “yes” to upload and store the generated PDF in your AWS storage
Yes/No
Pressing URL
A URL that triggers the PDF generation when visited or used programmatically
Text
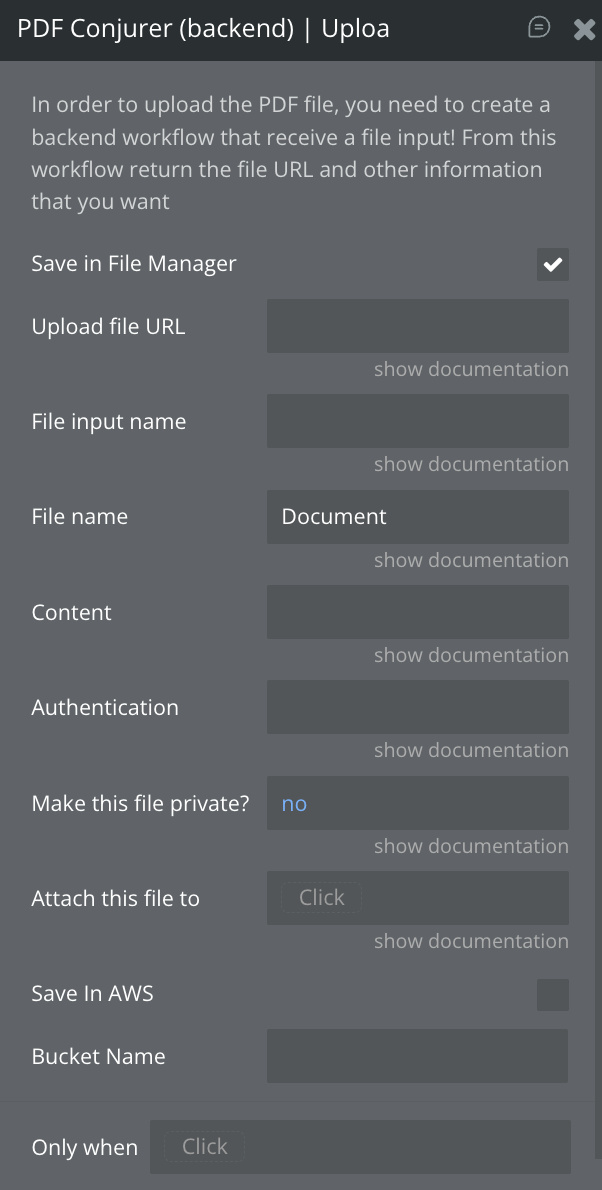
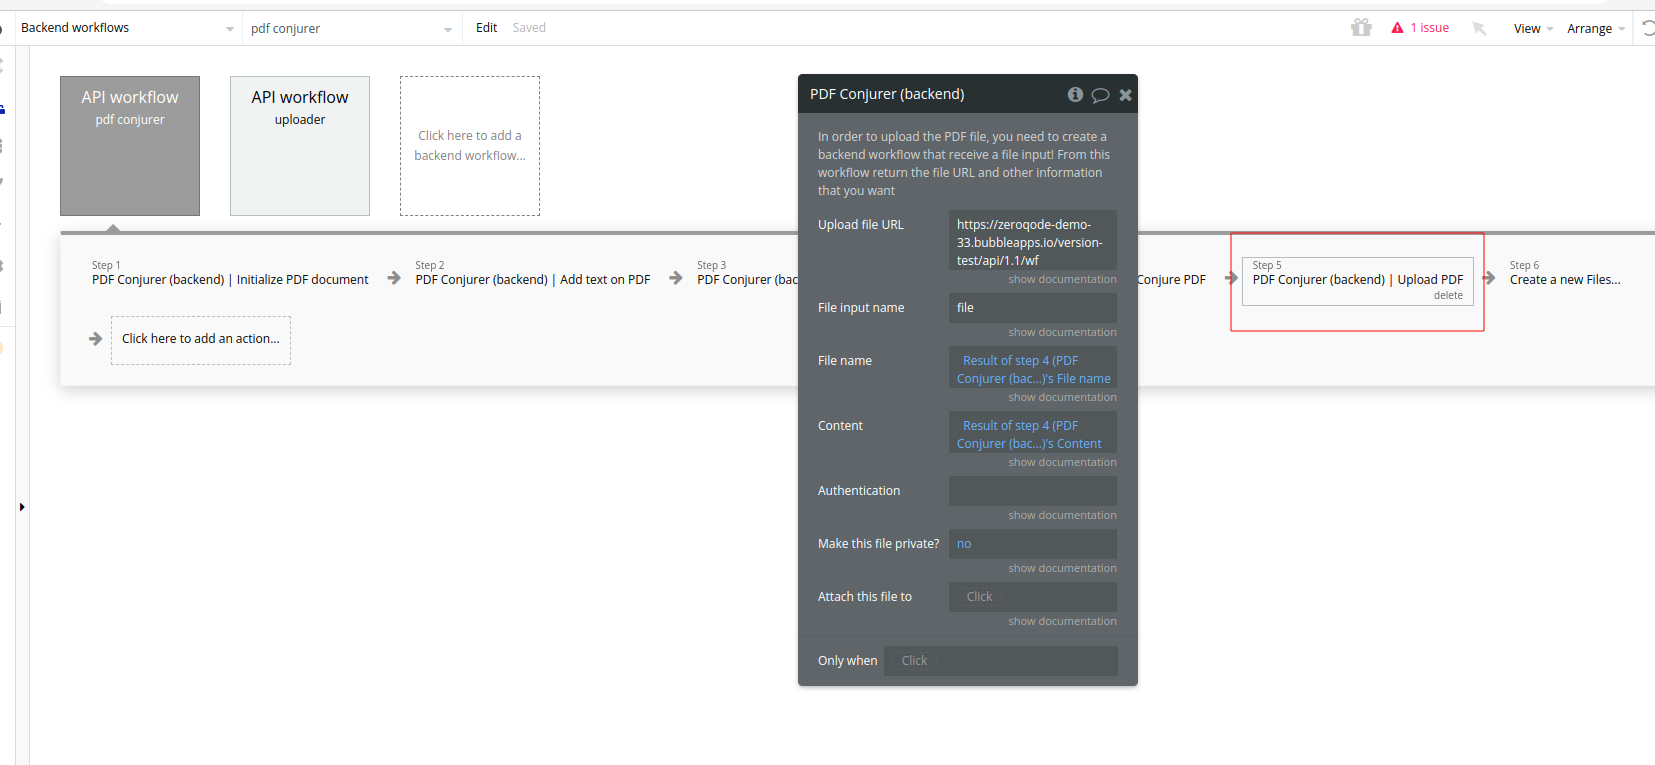
25. Upload PDF
Use this action to upload the resulting PDF via a back-end workflow, but you need a API Workflow that receives a file type field. This action returns the uploaded file URL
Title
Description
Type
Save in File Manager
Saves the file in file bubble manager
Checkbox
Upload file URL
The URL of the API Workflow that uploads the file to the Bubble server
Text
File input name
The input name in your API Workflow that receives the uploaded file (file-type input)
Text
File name
The file name returned by the “Conjure PDF” action
Text
Content
The Base64 content returned by the “Conjure PDF” action
Text
Authentication
Set “yes” if the API Workflow requires an authorization token (API key or a token from an authentication Workflow)
Yes/No
Save in AWS
Set “yes” if the file should also be uploaded to AWS (S3)
Yes/No
Bucket name
The AWS S3 bucket where the file will be stored; bucket names must be globally unique
Text
Workflow examples
PDF with Text
✅ Step 1: Start PDF Generation
Use Start PDF to initialize a named document.
✅ Step 2: Add Text
Action:Create text on PDF
Provide content and reference the custom style by name.
Optionally enable Preserve Leading Spaces, Parse BBCode, and text margins.
✅ Step 3: Conjure the PDF
Finalize by using Conjure PDF action.
Set file name, choose whether to save in File Manager or AWS, and configure download options.
The Table name or Multi Column name must be identical across start/end blocks.
Use text blocks freely inside multi-column containers — each Create text is treated as a segment.
Font names and style names must match exactly across steps.
PDF with Advanced Table in a PDF
✅ Step 1: Start PDF Generation
Use Start PDF to initialize a named document.
✅ Step 2: Add Text - This step is Optional
Action:Create text on PDF
Provide content and reference the custom style by name.
Optionally enable Preserve Leading Spaces, Parse BBCode, and text margins.
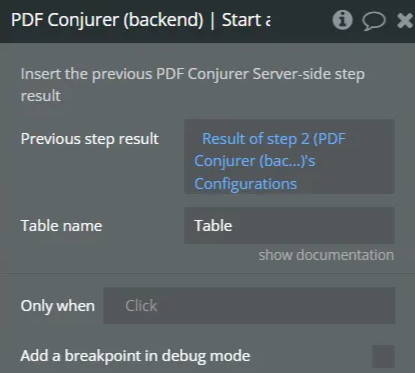
✅ Step 3: Start Advanced Table
Action:Start advanced table on PDF
Previous step result: Output from Step 2 (or Step 1 if no text is added, This field is not available on the frontend).
Table name:Table (must be consistent across steps).
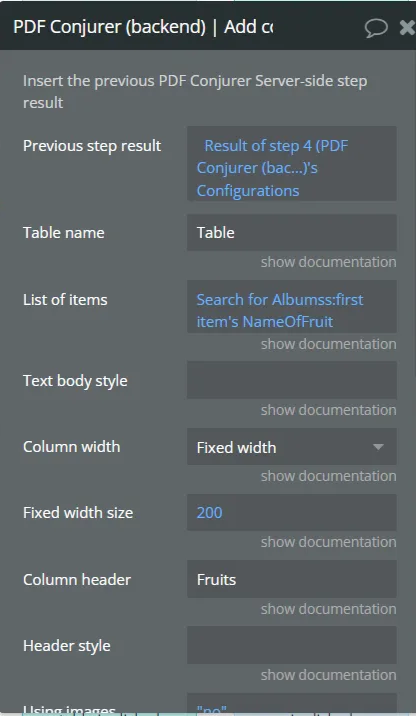
✅ Step 4: Add Columns to the Table
Repeat this step for each column you want to add.
Action:Add column into advanced table on PDF
Previous step result: Output from previous step (Start advanced table or another column step).
Table name:Table
List of items: The dynamic list to populate the column (e.g., image list).
Column header: The title of the column (e.g., it is image).
Column width: Fixed width (e.g., 200)
Image height: e.g., 100
Use custom margins:no
Parse BBCode?:no
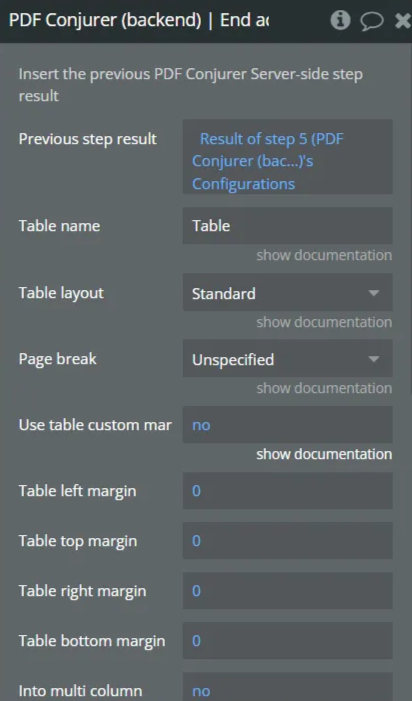
✅ Step 5: End Advanced Table
Action:End advanced table on PDF
Previous step result: Last "Add column" step.(This field is not available on the frontend)
Table name:Table.
Table layout: Standard (or custom);
Page break: Optional (Unspecified or as needed);
Margins, column merge options: Set to no or default unless needed;
Header color: Optional (e.g., #E2D6D6);
✅ Step 6: Conjure the PDF
Action:Conjure PDF
This compiles the configurations and generates the PDF file.
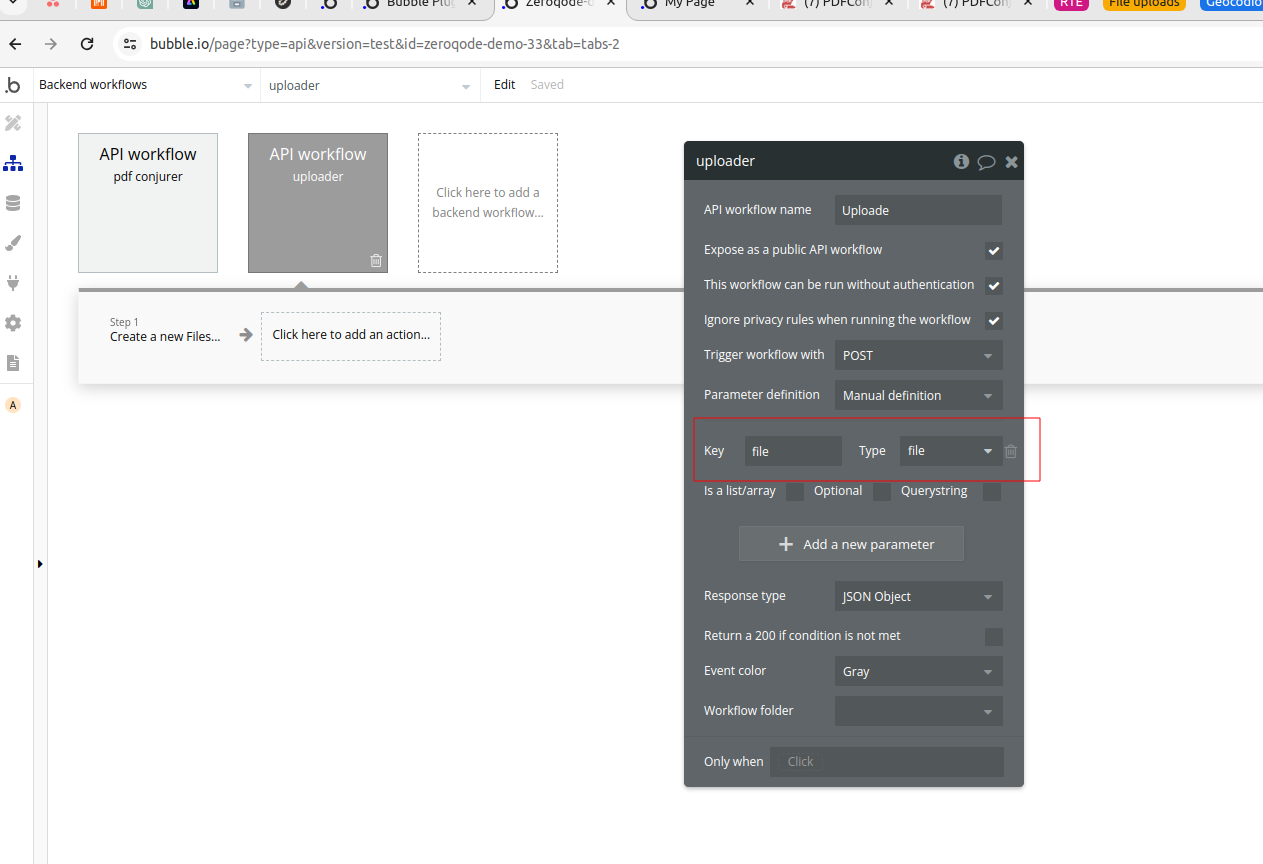
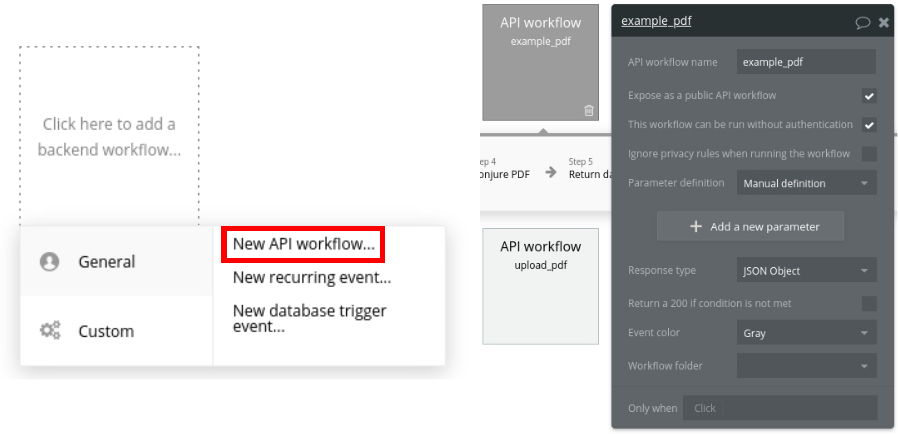
Upload API workflow
To configure an upload API workflow is very simple:
Create an API Workflow and give it a name
Add a new parameter with the Type file! Remember the key name to insert into the “Upload PDF” action field “File input name”
Return the file’s URL, using the action “Return data from API” at the “Data (Things)” session
Optional: You can also use “Create a new thing...” to save the file’s data that you want in your database, or use it into another workflow
Troubleshooting & Tips
Initializing PDF Conjurer configurations
Create a new App into your account and add the PDF Conjurer plugin
The server side actions only works into the Backend workflows, so just go to the Top Menu and open the
Backend workflows
In the Backend workflows you can create a workflow like you want (if you have a paid plan), here we create a new API Workflow as example, so give it a name, and make the configurations that you need
2. Use the action Initialize PDF Document to set the initial
configurations of your PDF document
After the Initialize PDF Document action, insert the action that you want to add a content, you can use it in any order that you want
Remember to load the previous step result Configurations into the first field of each action
To use special structures like multi-columns and repeating structures:
After the Initialize PDF Document (Not necessarily right after) action, insert the action that initialize the structure
The content must be between the start action and the end action of the corresponding structure, you can use these fields to specify where the content will be inserted, if none of these fields were used, the content will be inserted into the document
Remember to insert the end action, in order to insert the structure into the document, before the “Conjure PDF” action
Repeated tables must be inserted inside a repeating structure
You can also combine multi-columns with repeating structures, using both fields in the actions!
You can insert repeated tables into multi-colunms when this multi-column are into a repeating structure
To activate the header and footer:
Remember to use the activate header/footer on PDF action, you can use only one or both into your document:
The background doesn’t need to be activated
Insert content into these structures:
You can use the fields in an action to put the element into these structures
💡
The elements into the header or footer are placed into a multi-column, so you can use the columns width property to adjust the content size
💡
If the content is larger than the available space, it will be not displayed correctly
After insert all the content you need:
Use the action Conjure PDF
Set the last action into the first field
Set the PDF Document name
Choose if you want to insert the data header at the result base 64 string
The action returns the base 64 string with the document content, and its name with the pdf extension
Both the file name and the base 64 string can be:
Returned from your API Workflow
Saved into the database
Uploaded it into the Bubble server through the action “Upload PDF” and an upload API Workflow (see next page)
Uploading the PDF document
Configure an upload API Workflow (see page 34) and get your Workflow API root URL at your App Settings panel > API
After the action Conjure PDF:
Use the action Upload PDF in your workflow
Into field “Upload file URL” insert your Workflow API root URL plus “/your_upload_workflow_name”
Insert the key name that receive a file into your upload workflow into the field “File input name”
The “File name” field receives the “Conjure PDF” action File name result
The “Content” field receives the “Conjure PDF” action Content result
If you chose not that the workflow run without authentication, you need to insert the API token or a valid token provided by an authentication API Workflow into the “Authentication” field
The action returns the file's URL if it managed to locate it, in other words if you configured your upload workflow correctly:
You can find the file into the App Data panel > File manager
You can also save the file’s URL in the database, with the other information, like the name and his base64 string!
For example, to generate a list of files (periodic reports), or use it to send in an email, a message, show on a page and the user can click and open the file
Creating text or Inserting Image on a PDF Model threw the following error: TypeError: Cannot read properties of null (reading 'replace')
Actions like Create text or Insert image cannot be left as empty, if you use dynamic data expressions you need to make sure that Bubble doesn’t see them as empty, or else the plugin will throw errors because it doesn’t see what content to display.
You could check how Bubble sees your dynamic expression by launching your page in Step-by-Step mode and paying close attention to the Create Text/ Insert Images actions their dynamic data values shouldn’t be empty!
We suggest considering adding to all actions that rely on dynamic data to add content to your PDF final, to have a condition that will make it so that the plugin skips an action if it has empty data. You can find the screens attached in our previous reply
Example based on a Create text on PDFModel action:
You need to copy the expression and set a condition that will trigger only when the expression is not empty.
By setting it the following way the plugin will skip this action in case it has empty data, and will get to the next one without throwing errors.
Changelogs
Update 28.05.26 - Version 1.27.0
Bubble Plugin Page Update (Tutorials).
Update 27.03.26 - Version 1.26.0
fixed header color for the Add Table (backend) and Advanced Table.
Update 13.03.26 - Version 1.25.0
Add column into advanced table” and “Conjure” so they can parse Base64 images.
Update 06.03.26 - Version 1.24.0
Bubble Plugin Page Update (Category).
Update 12.12.25 - Version 1.23.0
New Table Column Width PX.
Update 20.11.25 - Version 1.22.0
Fixed Add column to repeated table action.
Update 18.11.25 - Version 1.21.0
Bubble Plugin Page Update (Description).
Update 18.11.25 - Version 1.20.0
Fixed Create Table action.
Update 18.11.25 - Version 1.19.0
Bubble Plugin Page Update (Description).
Update 18.11.25 - Version 1.18.0
Bubble Plugin Page Update (Description).
Update 29.10.25 - Version 1.17.0
Bubble Plugin Page Update (Description).
Update 29.10.25 - Version 1.15.0
Bubble Plugin Page Update (Recommendations).
Update 29.10.25 - Version 1.14.0
Bubble Plugin Page Update (Description).
Update 27.10.25 - Version 1.13.0
Bubble Plugin Page Update (Logo).
Update 27.08.25 - Version 1.12.0
Improve parsing BBcode.
Update 23.07.25 - Version 1.11.0
Applies user-defined styles to the table header row when a header color is specified..
Update 14.07.25 - Version 1.10.0
Bubble Plugin Page Update (Logo).
Update 19.06.25 - Version 1.9.0
Fix: Error in Create Table when Color header was null.
Update 18.06.25 - Version 1.8.0
Bubble Plugin Page Update (Logo).
Update 12.06.25 - Version 1.7.0
Added support for dynamic proxy server using to avoid CORS issues when downloading files. Replaced hardcoded proxy.
Update 15.04.25 - Version 1.6.0
Fixed problem with page size.
Update 04.03.25 - Version 1.5.0
Added the ability to set a background for the header and custom sizes.