Demo to preview the settings
Introduction
Sign up and log in users with their Github credentials.
Prerequisites
- You must have GitHub account.
How to set up
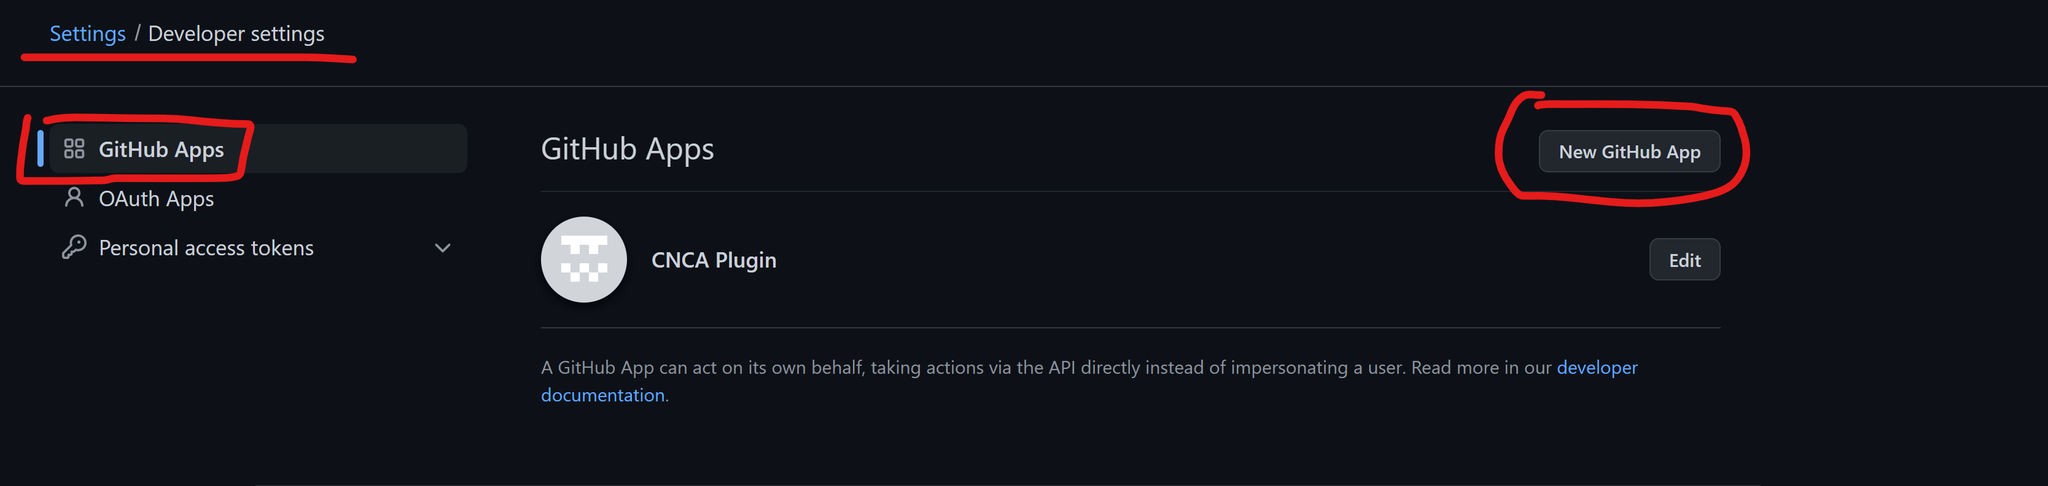
Register your application
Log in to your Github account and navigate to your developer settings to create a new app here: https://github.com/settings/apps
Copy App ID and Secret
Once registered, you'll be given a Client ID and a Client Secret (App Secret), which you will enter into the plugin settings.

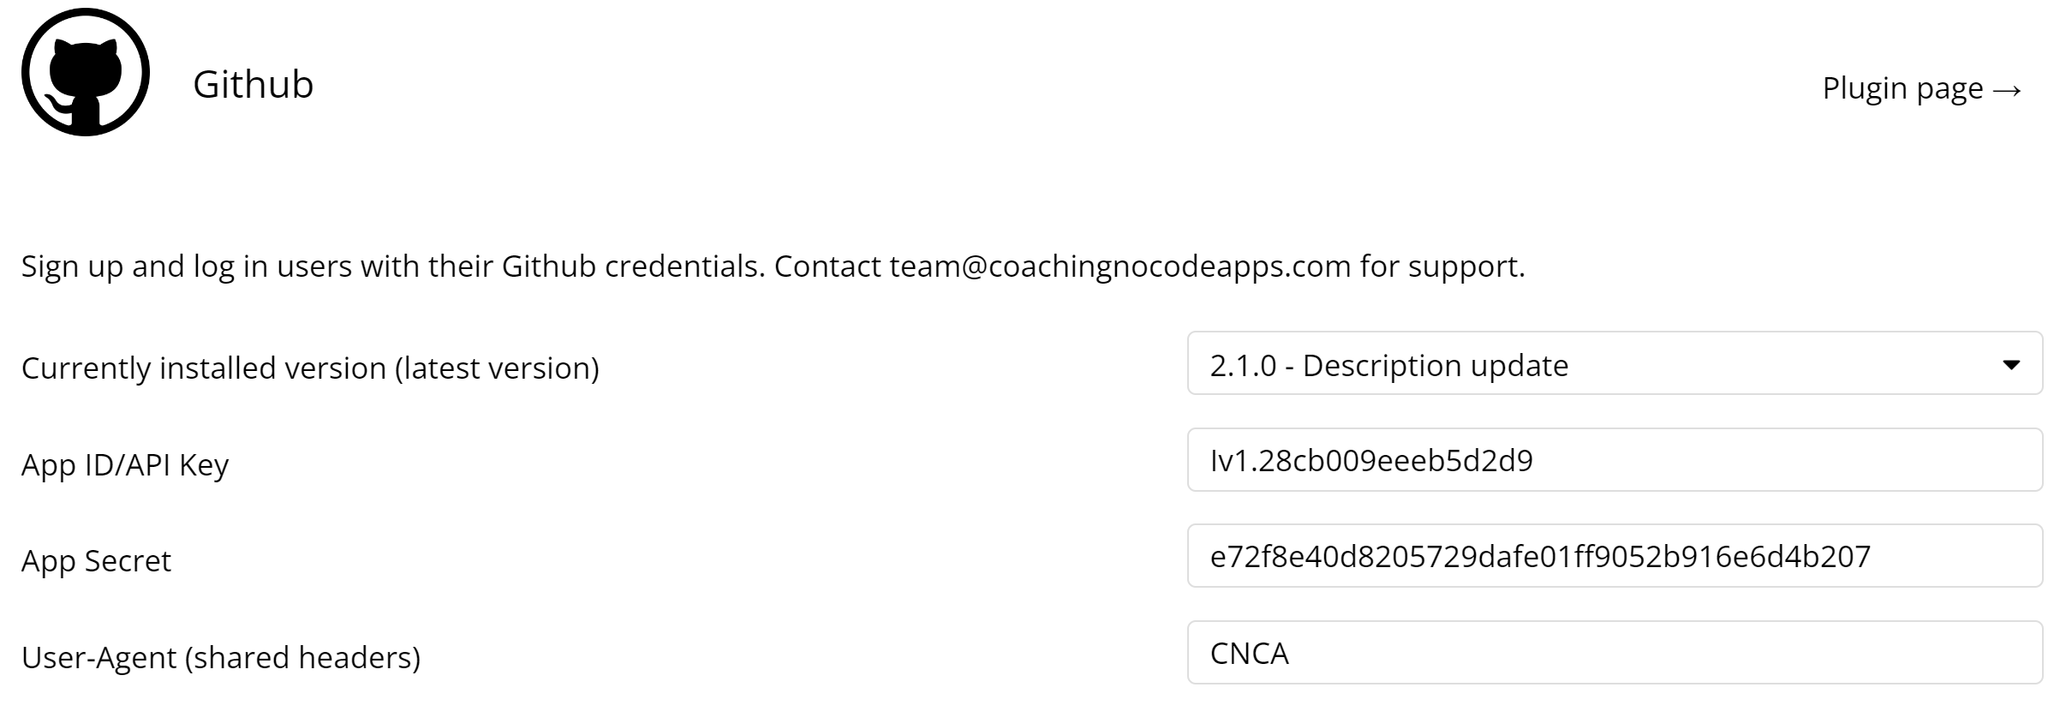
User-Agent (shared headers)
Github doesn't have a specific requirement for this field, but you cannot leave it empty. We recommend typing in your application name. You can read about what this is used for here: https://docs.github.com/en/rest/overview/resources-in-the-rest-api?apiVersion=2022-11-28#user-agent-required
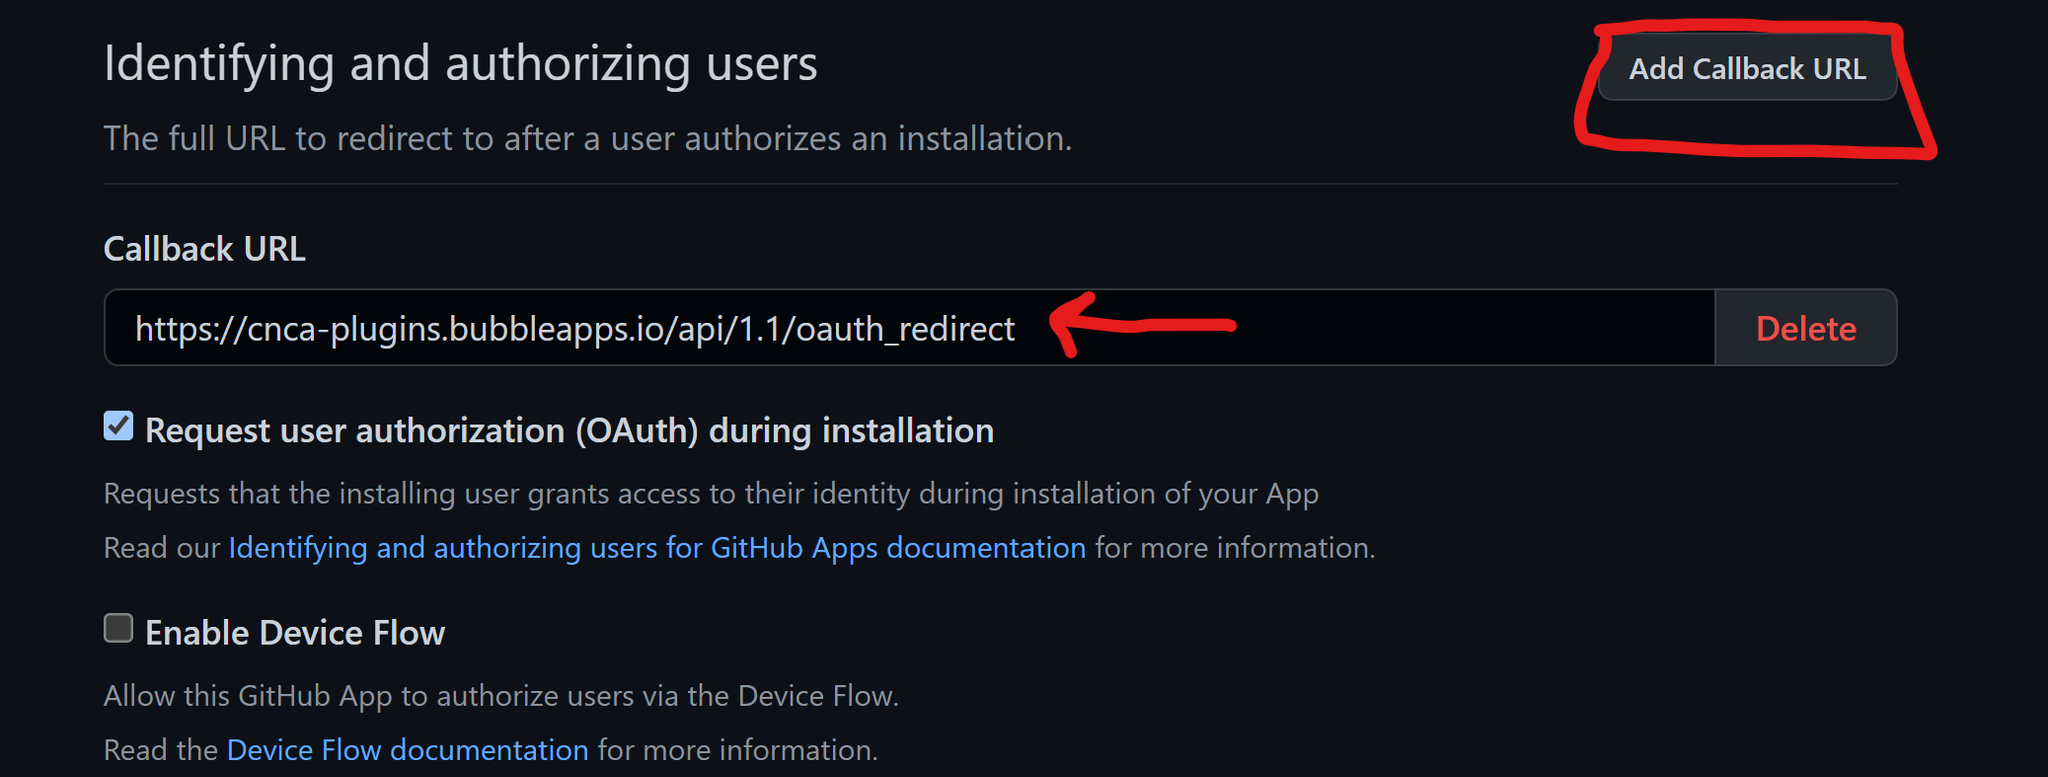
Callback URL
Make sure to add a callback URL in the app details page in Github. This is the exact URL for the page in your app that will trigger the signup/login workflow (be mindful of the debugger and "version-test"). You can add multiple Callback URLs.
Alternatively, you can use your generic redirect, which Bubble shows you in the plugin settings.

Make sure you click on "Save" in your Github app settings. Now, you're ready to use the plugin in your app.
Signup / Login Workflow
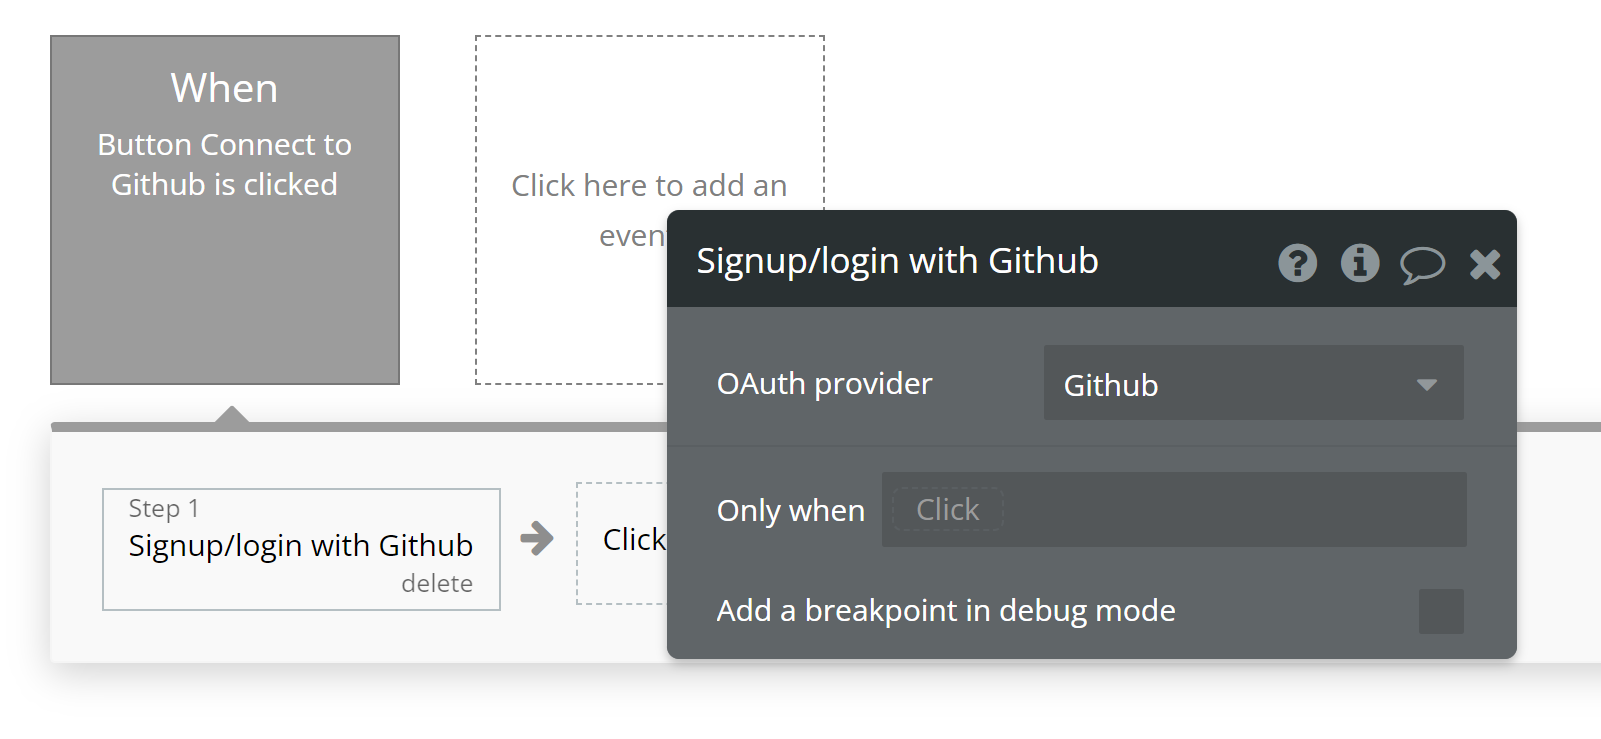
Add a button to your page design to trigger the signup / login with social network action, and select "Github" as the OAuth provider:
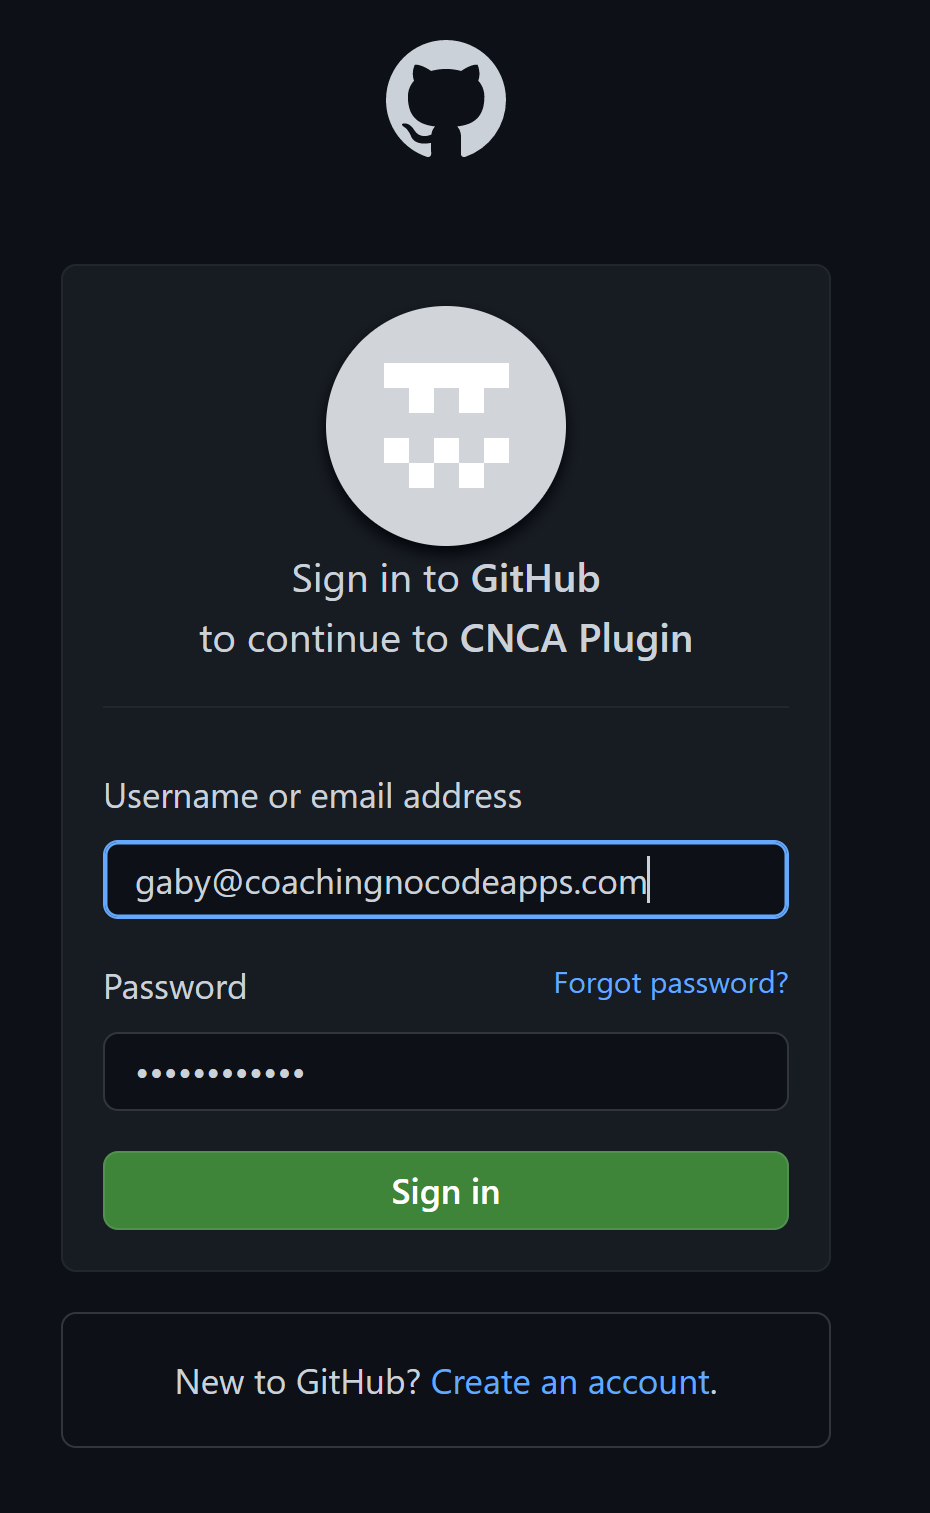
The user will be taken to a login screen to enter their Github credentials and accept this authorization:
Once they're authorized, they'll automatically be redirected back to your Bubble app and be logged in.
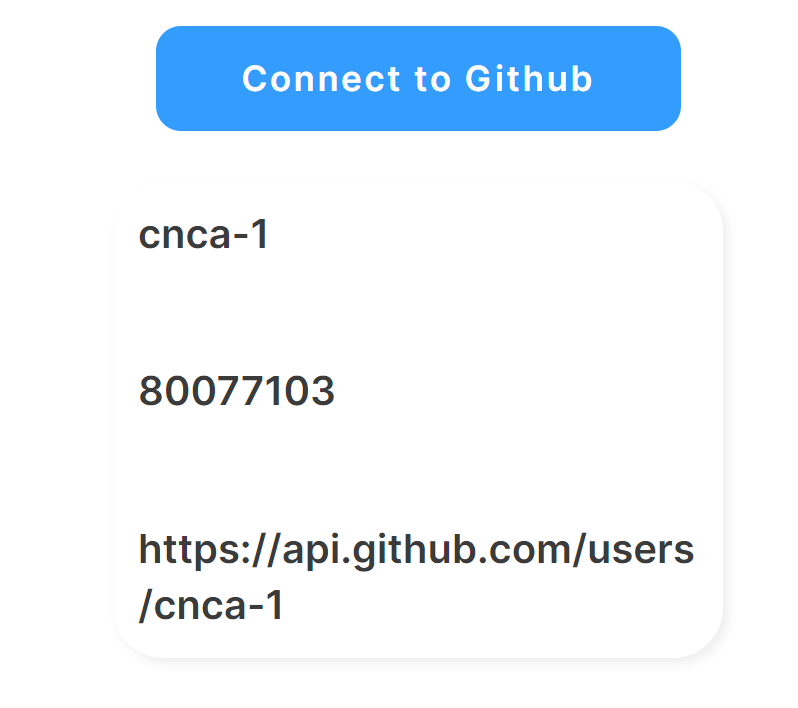
User Information
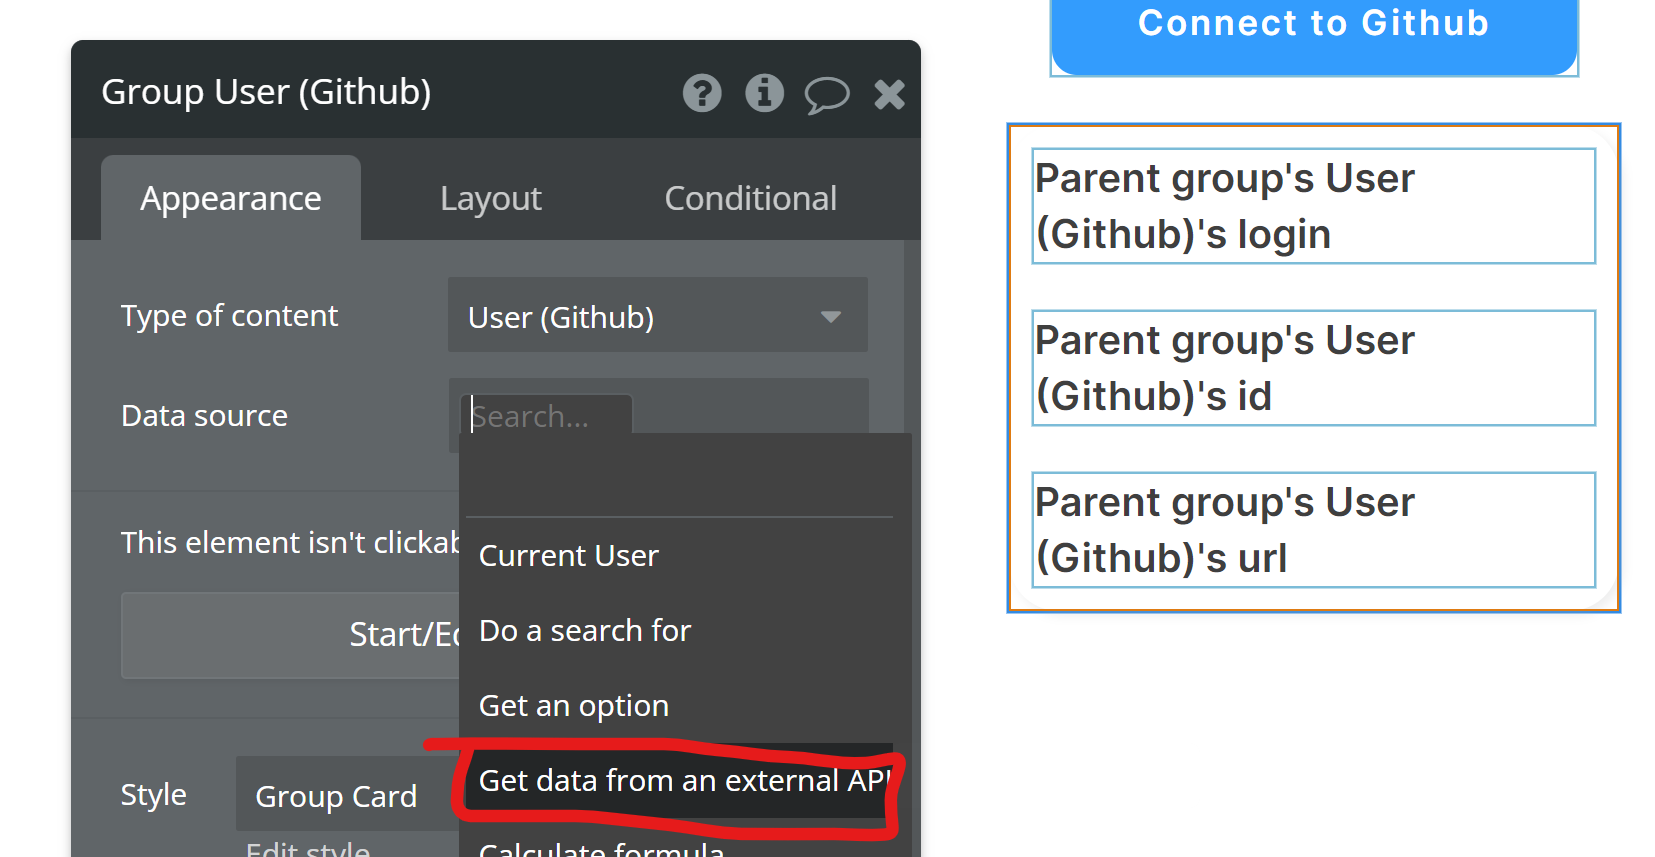
This plugin also comes with a data source to get extra information about the authenticated user.
For example, you can set up a group with this data source to display these details -- just select "Get data from external API", then choose "Github - User"
Make sure the Group's "Type of content" is also "User (Github)"
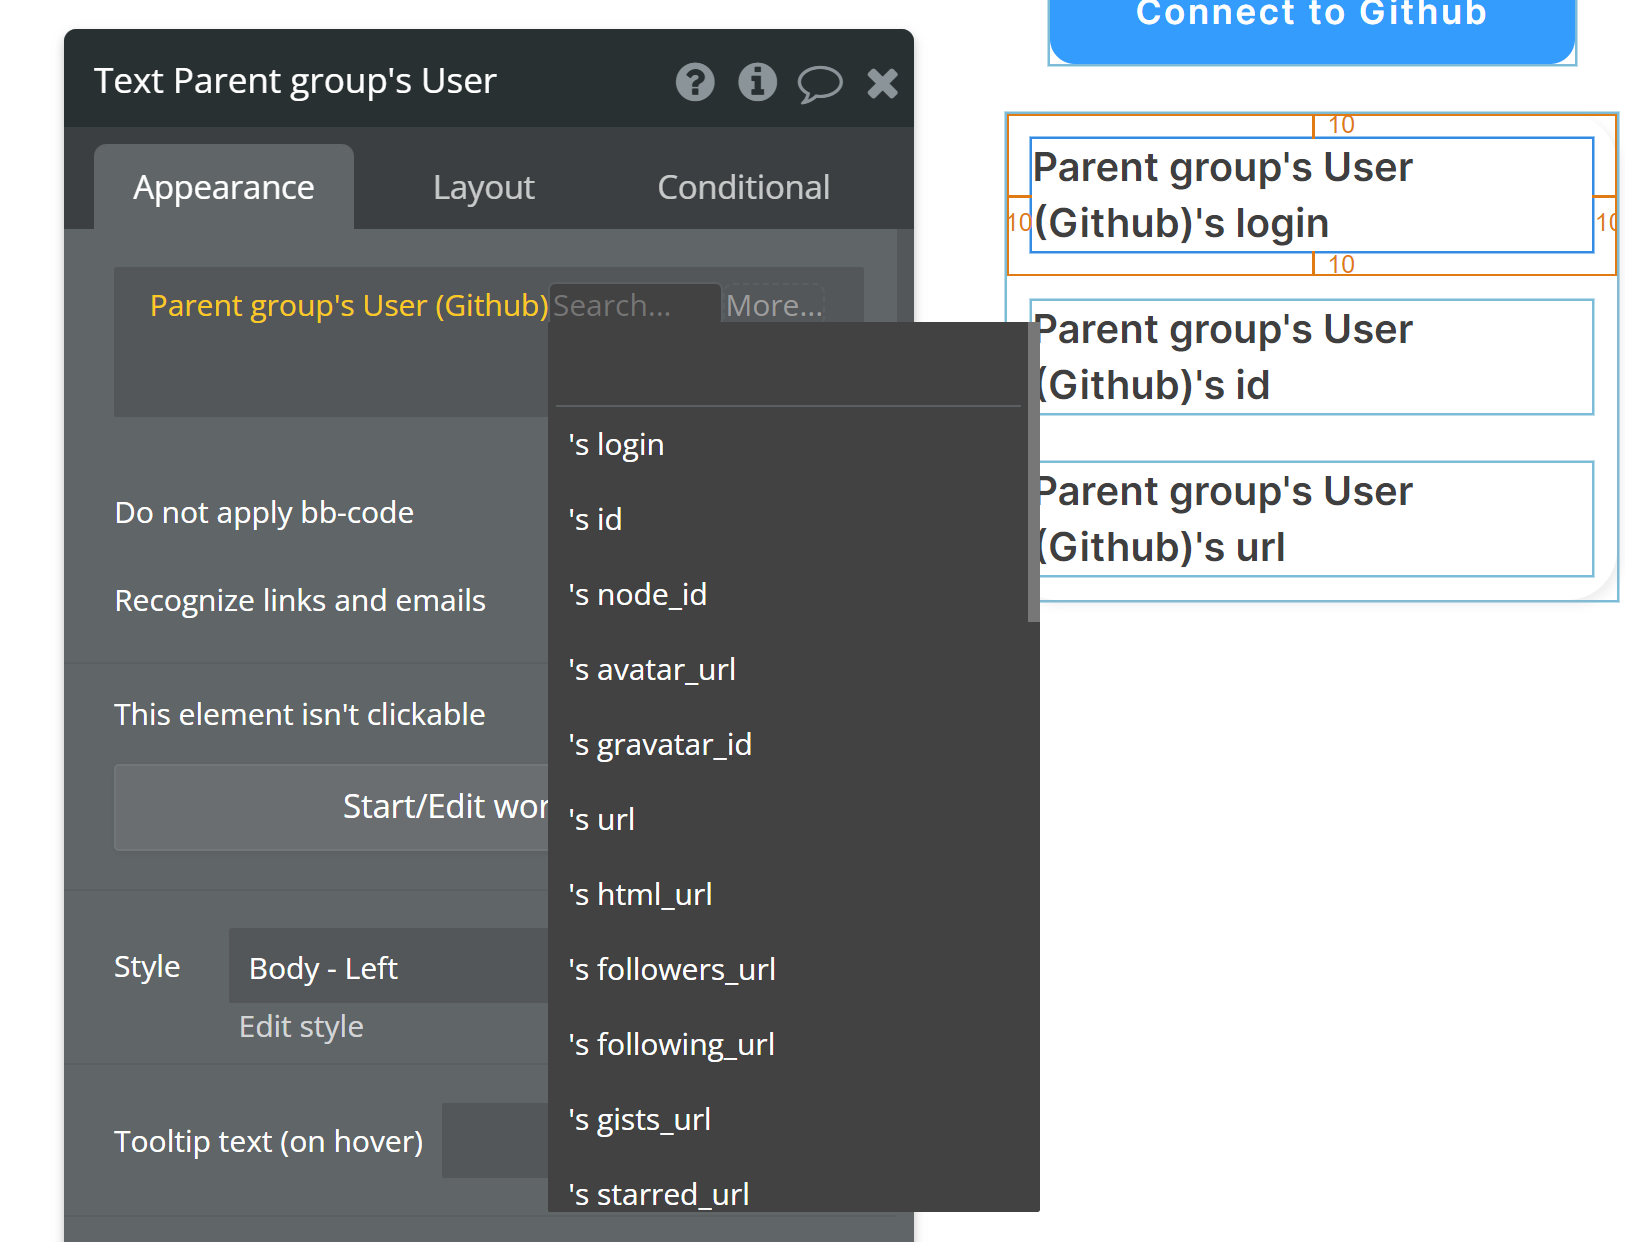
Now, inside the group, you can display that Github user's information:
Now you're ready to authenticate your users with their Github accounts!