
✅
Demo to preview the plugin:
✅
Introduction
The Apple Pay & Google Pay Plugin gives you a single integration for Apple Pay and Google Pay.
Customers see an Apple Pay button or a Google Pay button, depending on what their device and browser combination supports. If no option is available, they don’t see the button.

Prerequisites
- Stripe account
- Your Bubble app should be subscribed to Personal Plan (or upper)
Requirements
Apple Pay
Apple Pay is supported only by the Safari browser
- Safari on Mac running macOS Sierra or later, Mobile Safari on iOS 10.1 or later.
- iPhone (not iPad; Safari doesn’t support them yet) with a card in its Wallet paired to your Mac with Handoff, or a Mac with TouchID
- Make sure you’ve verified your domain with Apple Pay.
- At least one payment method is added to your browser. For example, you can save a card in Chrome, add a card to your Google Pay account or add a card to your Wallet for Safari.
- Serve your application over HTTPS. This is a requirement both in development and in production.
Verify your domain with Apple Pay
To use Apple Pay, you need to register with Apple all of your web domains that will show an Apple Pay button. This includes both top-level domains (for example, stripe.com) and subdomains (for example, shop.stripe.com).
Important note: Apple’s documentation for Apple Pay on the Web describes their process of “merchant validation”, which Stripe handles for you behind the scenes. You don’t need to create an Apple Merchant ID, CSR, and so on, as described in their documentation, and should instead just follow these steps:
1) Get your app domain:
- Open your bubble app
- Open preview
- Copy URL of this page (Example:
https://innerspacenative.bubbleapps.io/version-test/apple_pay?debug_mode=true)
- Remove
https://and remove all paths
- Example of correct domain
innerspacenative.bubbleapps.io
Copy your domain
2) Register the domain in Stripe
- In the Stripe Dashboard go to Settings → Payments → Payment method domains (
https://dashboard.stripe.com/settings/payment_method_domains).
- Click Add a new domain, paste your domain, and click Save and continue.
- Repeat for any additional domains or subdomains you use.
3) Verification
- If your domain is already live and publicly serving over HTTPS, Stripe verifies it automatically — no further action is needed.
- If it isn't verified automatically, open the domain's row on the same page and click Verify.
Reminders:
- The domain you register must match your published Bubble app domain exactly, including the subdomain (e.g.
innerspacenative.bubbleapps.io, or your custom domainwww.yourapp.comif you use one). A mismatch will prevent the Apple Pay button from appearing.
- Register your domains in live mode before going live. Registering in live mode also registers them in sandboxes automatically. When testing the live environment, use your live Stripe Publishable/Secret API keys (test keys won't surface Apple Pay on a live-registered domain).
Google Pay
Google Pay is supported only by Chrome browser
- At least one payment method is added to your browser. For example, you can save a card in Chrome, add a card to your Google Pay account or add a card to your Wallet for Safari.
- Chrome 61 or newer
- An activated Google Pay card or a saved card
When using Google Pay with a test mode key, you might see an “Unrecognized app” warning. This is expected and doesn’t show up in live mode.
Domain registration: Google Pay uses the same Payment method domains registration as Apple Pay. If you've already registered your domain in the Stripe Dashboard (see the Apple Pay section above), no separate step is required — the same domain works for Google Pay automatically.
How to setup
1) Complete plugin fields
- Go to Stripe and copy your Publishable Key

For testing use the test mode key
- Paste this key in the plugins tab

- Now open Stripe and go to
Devepoers->API Keys

- Copy your secret key

Paste your Secret key in the plugins tab

2) Setup backend workflow
Setup for “Apple & Google Pay” element
- Go to your bubble app editor and open
Backend workflows
- Create New API Workflow

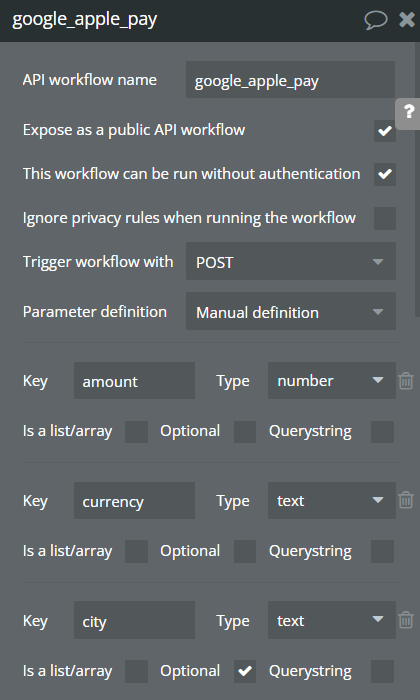
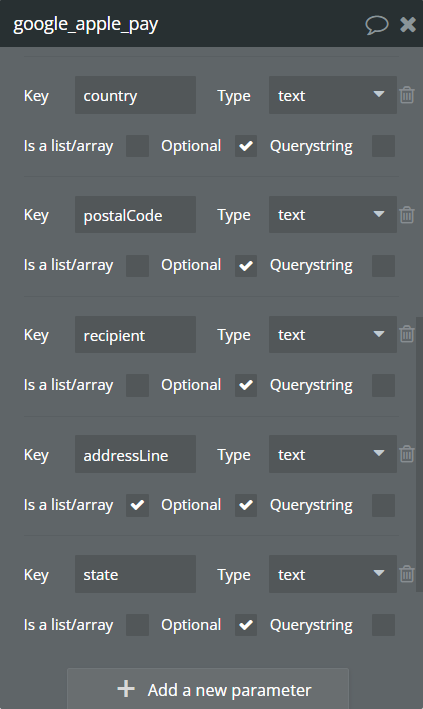
- Allow running without authentication and add the next fields
Title | Type | Checkbox to check |
amount | number | |
currency | text | |
city | text | Optional |
country | text | Optional |
postalCode | text | Optional |
recipient | text | Optional |
addressLine | text | Optional, is a list/array |
state | text | Optional |
- Now go to the Settings tab in your bubble app editor, open API section, and enable API workflow

- Copy your
Workflow API root URLand paste it into the plugin element in the fieldPaymentIntent Endpoint

- Modify this url: add
/your-endpoint-nameat end of url (Example:/google_apple_pay)

✅
PaymentInent Endpoint: Once you are satisfied with your test environment, you can update the URL to make it go live, version-test → version-live
- Return to the Backend and finish the workflow

- Use action
Apple & Google Pay - Create PaymentIntent

- Use endpoint parameters as action fields sources
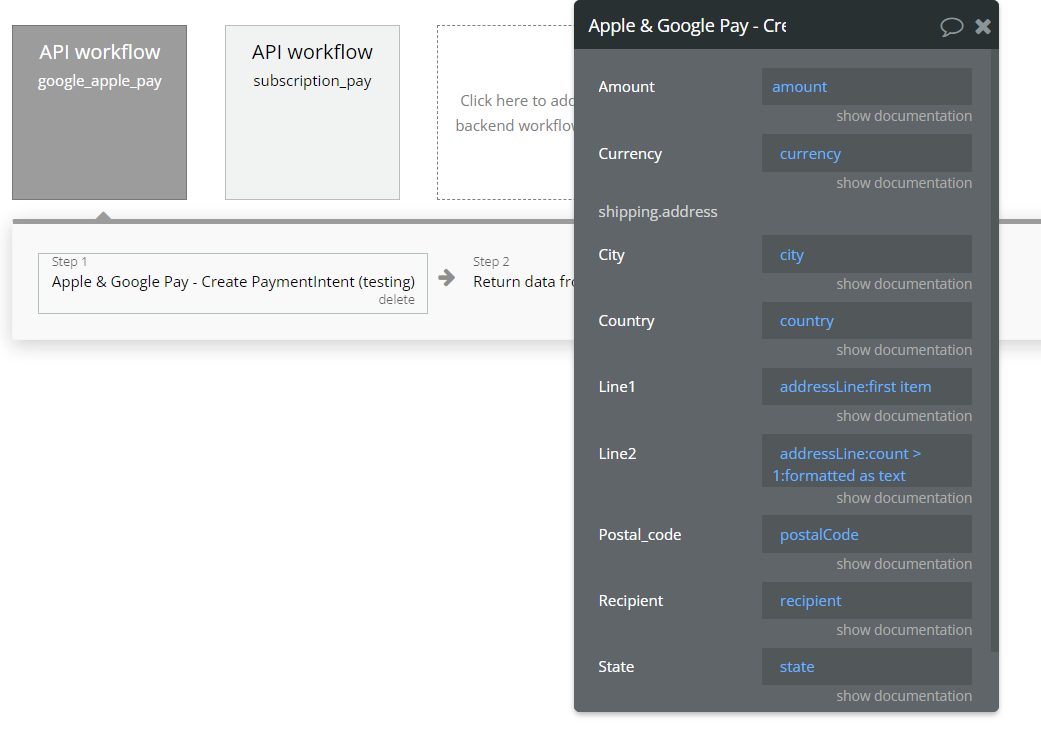
- The next add action
Return data from API

- Add a new parameter to this action and name it
paymentwith typetext


- And return data from the first step

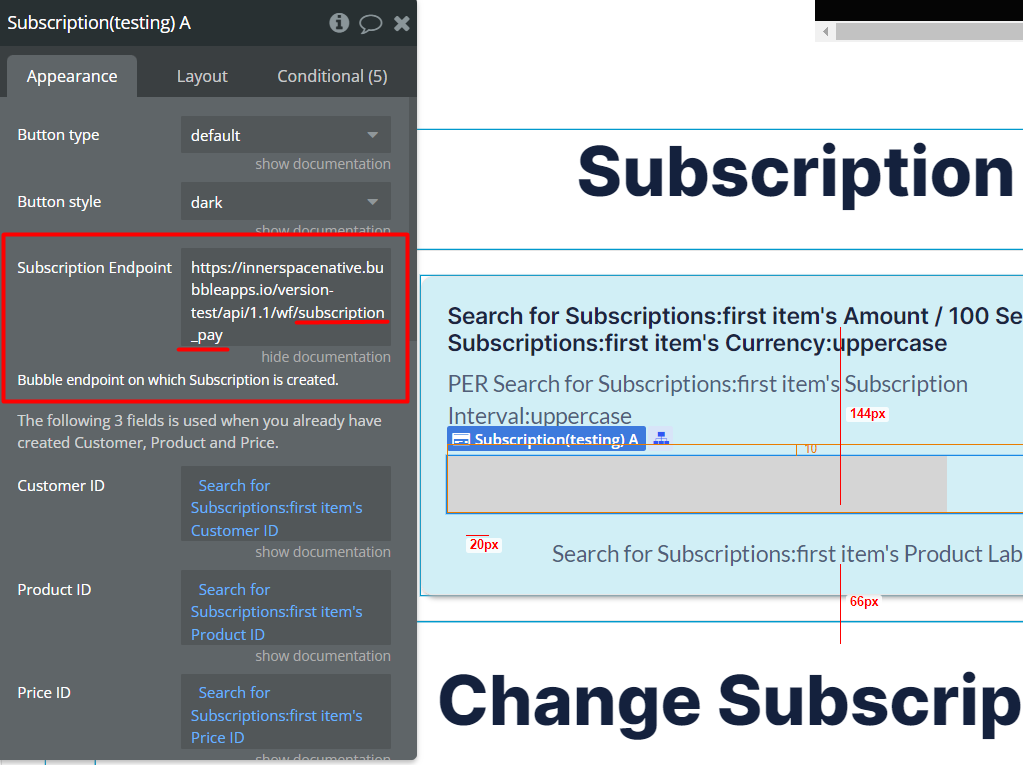
Setup for “Subscription” element
- Go to your bubble app editor and open
Backend workflows
- Create New API Workflow

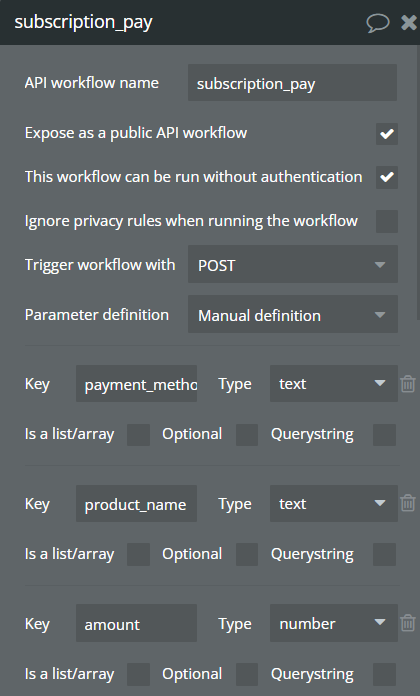
- Allow running without authentication and add the next fields
Title | Type |
payment_method_id | text |
product_name | text |
amount | number |
currency | text |
interval | text |
customer_id | text |
product_id | text |
price_id | text |
- Copy your
Workflow API root URLand paste it into the plugin element in the fieldSubscription Endpoint
- Modify this url: add
/your-endpoint-nameat end of url (Example:/subscription_pay)
✅
Once you are satisfied with your test environment, you can update the URL to make it go live, version-test → version-live
- Return to the Backend and finish the workflow
- Use action
Apple & Google Pay - Create Subscription
- Use endpoint parameters as action fields sources

- The next add action
Return data from API
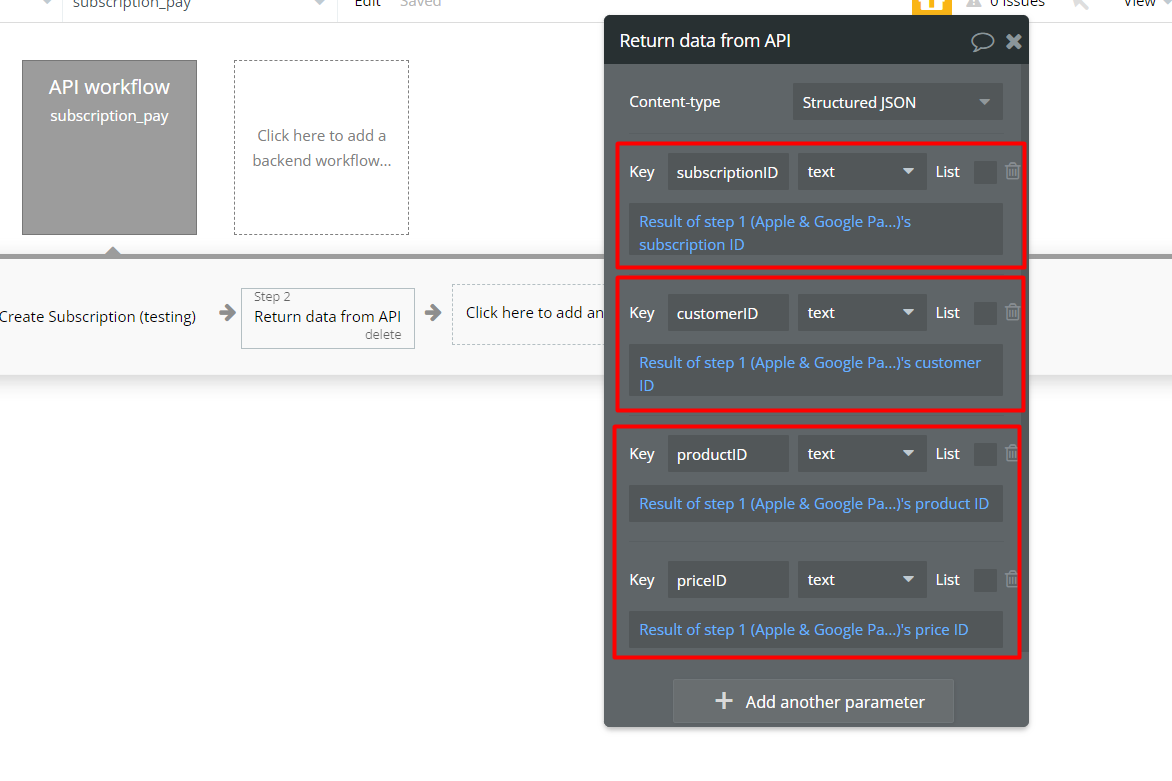
- Add parameters to this action
Title | Type | Value |
subscriptionID | text | Result of step 1 - subscription ID |
customerID | text | Result of step 1 - customer ID |
productID | text | Result of step 1 - product ID |
priceID | text | Result of step 1 - price ID |
- Now you can try to use Apple & Google Pay plugin
Plugin’s Elements
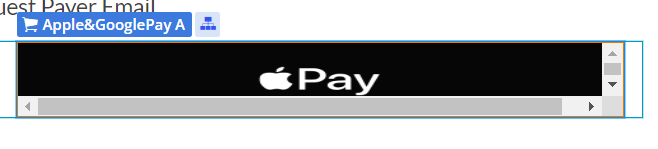
Element “Apple & Google Pay”
This element is the pay button. Element detects the current user browser, checks if payment is possible, and displays Google or Apple Pay button.
It dynamically creates UI elements, handles various payment-related events, and ensures robust error handling to maintain a smooth user experience throughout the payment process.
Fields
Title | Description | Type |
Button type | A type that indicates the button types that you can display to initiate Pay transactions.
By default set to: default. | Dropdown (default,book,buy,donate) |
Button style | A type that indicates the available appearances for an Pay Button.
By default set to: light-outline | Dropdown (dark,light,light-outline) |
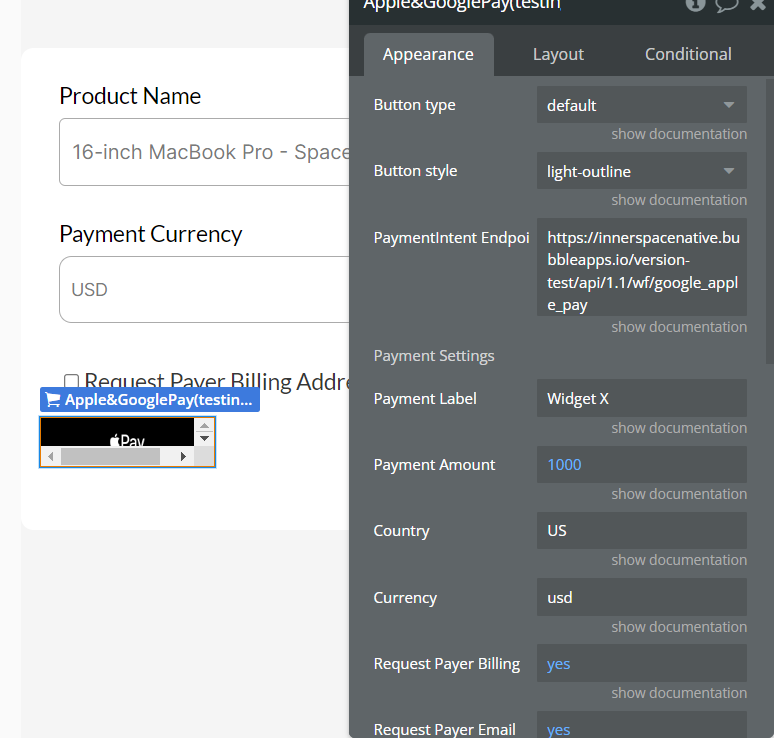
PaymentIntent Endpoint | Bubble endpoint on which PaymentIntent is generated. | Text |
Payment Label | A required value that’s a short, localized description of item.
Refers to a text or description that identifies the purpose or nature of a payment. It's a label or title associated with a specific transaction that helps users understand what they are paying for.
By default: “Payment Button Demo” | Text |
Payment Amount | The unit amount in cents to be charged, represented as a whole integer if possible. Check here: https://stripe.com/docs/currencies
By default: 1000 | Number |
Country | The two-letter country code of your Stripe account (e.g., US).
By default: US | Text |
Currency | Three character currency code (e.g., usd).
By default: usd | Text |
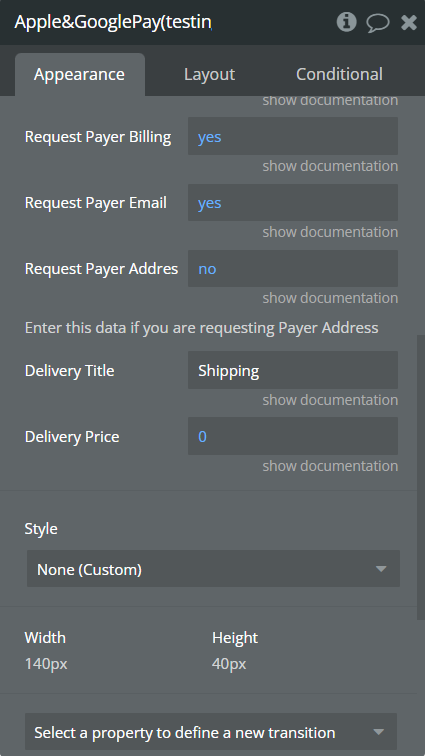
Request Payer Name | Use this parameter to collect the payer’s name for Apple Pay.
By default set to Yes. | Yes/No |
Request Payer Email | Use this parameter to collect the payer’s email address.
By default set to Yes. | Yes/No |
Request Payer Address | Use this parameter to collect the payer’s Shipping Address.
By default set to No. | Yes/No |
Delivery Title | (Optional - Enter this data if you are requesting Payer Address)
A short label for this shipping option. Example: Shipping | Text |
Delivery Price | (Optional - Enter this data if you are requesting Payer Address )
The amount to show for this shipping option. Example: 0
By default: 0 | Number |
Returned Values
Title | Description | Type |
Apple Pay is supported | Represents a value indicating whether Apple Pay is supported for the given payment request. | yes/no |
Google Pay is supported | Represents a value indicating whether Google Pay is supported for the given payment request. | yes/no |
Browser | Returns the browser name ( Safari, Chrome, Others browser) | text |
Payment intent ID | The ID of successfully completed payment. | text |
shipping city | The city for shipping. | text |
shipping country | The postal code for shipping. | text |
shipping postal code | The recipient for shipping. | text |
shipping recipient | The recipient for shipping. | text |
shipping state | The state for shipping. | text |
shipping address line | The address line for shipping. | list of texts |
Payer email | The email of the payer. Is set only when the "Request Payer Email" field is checked. | text |
payer name | The name of the payer. It is set only when the "Request Payer Name" field is checked. | text |
Events
Title | Description |
Payment Failed | An event that is triggered when a payment attempt fails. |
Payment Success | An event that is triggered when a payment attempt is successful. |
Payment Cancelled | An event that is triggered when the user cancels the payment process. |
shipping address is changed | This event is triggered when the Shipping Address is changed in the payment interface. |
Element “Subscription”
This element streamlines the subscription payment process for users by providing a user-friendly interface, supporting various payment methods, and handling payment-related events effectively.
Users can interact with the payment button, select a payment method, and complete the subscription payment with confidence, knowing that appropriate error handling is in place.
Fields
Title | Description | Type |
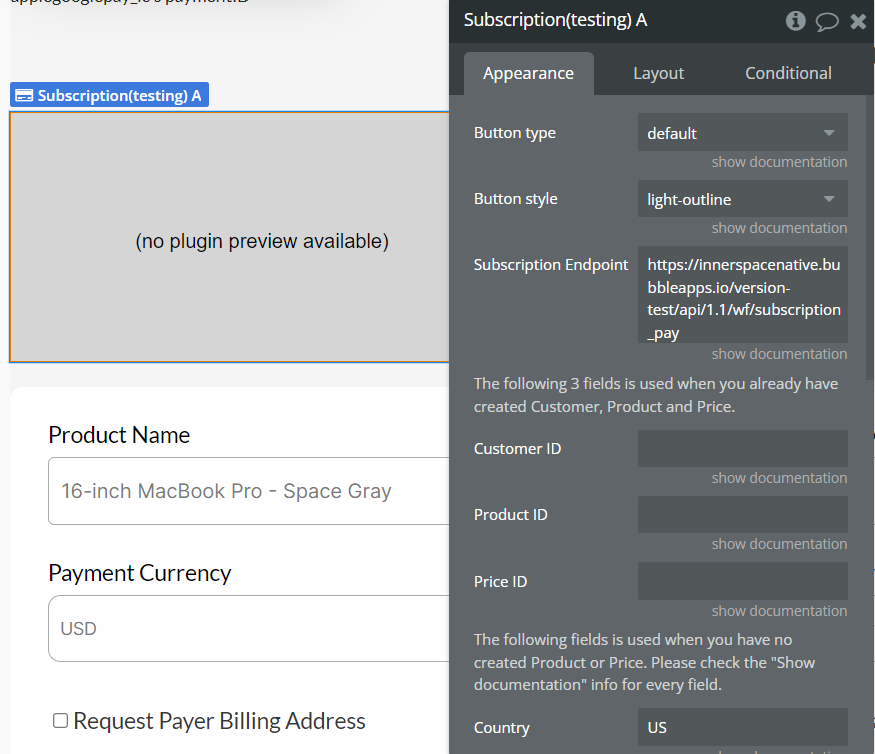
Button type | A type that indicates the button types that you can display to initiate Pay transactions.
By default set to: default. | Dropdown (default,book,buy,donate) |
Button style | A type that indicates the available appearances for an Pay Button.
By default set to: light-outline | Dropdown (dark,light,light-outline) |
Subscription Endpoint | Bubble endpoint on which Subscription is created. | Text |
The following 3 fields is used when you already have created Customer, Product and Price. | ||
Customer ID | (Optional) The Customer ID from Stripe. Use this field when you have one of this. If leaves empty, the new Customer will be created on your Stripe account. | Text |
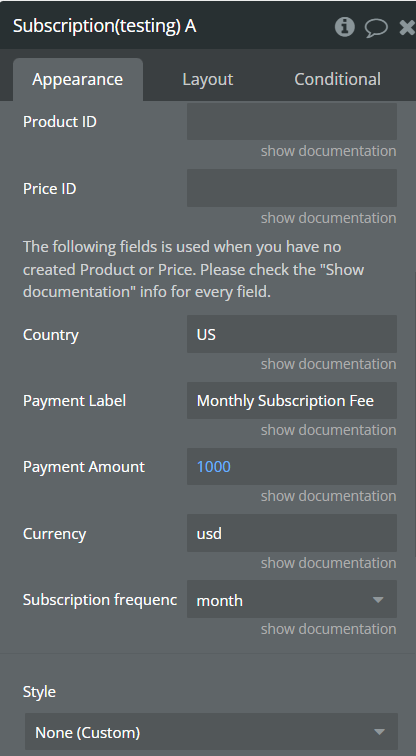
Product ID | (Optional) The Product ID from Stripe. Use this field when you have one of this. If leaves empty, use "Payment Label" to create new Product on your Stripe account. | Text |
Price ID | (Optional) The Price ID from Stripe. Use this field when you have one of this. If leaves empty, use "Payment Amount", "Currency" and "Subscription frequency" to create new Price on your Stripe account. | Text |
The following fields is used when you have no created Product or Price. | ||
Country | The two-letter country code of your Stripe account (e.g., US).
By default: US | Text |
Payment Label | A required value that’s a short, localized description of item. Use this field to create new Product in the Stripe. Leave "Product ID" field empty. | Text |
Payment Amount | The unit amount in cents to be charged, represented as a whole integer if possible. Check here: https://stripe.com/docs/currencies. Use this field to create new Price in the Stripe. Leave "Price ID" field empty. | Number |
Currency | Three character currency code (e.g., usd). Use this field to create new Price in the Stripe. Leave "Price ID" field empty. | Text |
Subscription frequency | Specifies billing frequency. Either day, week, month or year. Use this field to create new Price in the Stripe. Leave "Price ID" field empty.
By default set to: month. | Dropdown( day,week,month,year ) |
Trial Period | Integer representing the number of trial period days before the customer is charged for the first time. | number |
Returned Values
Title | Description | Type |
Subscription ID | The ID of successfully completed subscription payment. | Text |
Browser | Returns the browser name ( Safari, Chrome, Others browser) | Text |
Apple Pay is supported | Indicates whether Apple Pay is supported for the current payment request. | Yes/No |
Google Pay is supported | Indicates whether Google Pay is supported for the current payment request. | Yes/No |
Customer ID | The ID of the successful payment request customer. | Text |
Product ID | The ID of the successful payment request product. | Text |
Price ID | The ID of the successful payment request price. | Text |
Events
Title | Description |
Payment Failed | An event that is triggered when a payment attempt fails. |
Payment Success | An event that is triggered when a payment attempt is successful. |
Payment Cancelled | An event that is triggered when the user cancels the payment process. |
Supported Types
Google Pay

Apple Pay

Supported Styles
Google Pay

Apple Pay

Plugin Actions
Apple & Google Pay - Create PaymentIntent
This action streamlines the payment intent creation process, ensuring robust and secure payment processing within the application.
Payment intent guides users through the payment process, providing clear instructions and feedback at each step to ensure a smooth and transparent payment experience.
Fields
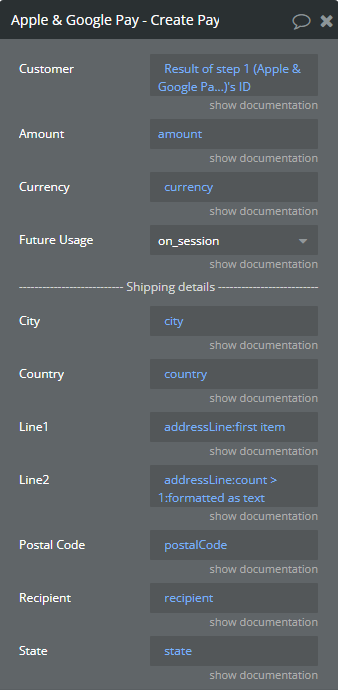
Title | Description | Type |
Customer | ID of the Customer this PaymentIntent belongs to, if one exists. | text (optional) |
Amount | A required value that’s the monetary amount of the item. | Number |
Currency | Three character currency code (e.g., usd).
By default set to: usd | Text |
Future Payment | Indicates that you intend to make future payments with this PaymentIntent’s payment method. Use 'on_session' if you intend to only reuse the payment method when your customer is present in your checkout flow. Otherwise, use 'off_session'. | Dropdown |
City | (Optional) City, district, suburb, town, or village. | Text |
Country | (Optional) Two-letter country code | Text |
Line1 | (Optional) Address line 1 (e.g., street, PO Box, or company name). | Text |
Line2 | (Optional) Address line 2 (e.g., apartment, suite, unit, or building). | Text |
Postal Code | (Optional) ZIP or postal code. | Text |
Recipient | (Optional) Recipient name. | Text |
State | (Optional) State, county, province, or region. | Text |
Returned Values
Title | Description | Type |
Payment | It's a unique token that serves as a client-side authentication mechanism for completing the payment process securely. | Text |
error message | The error message that occurred during the action call. | text |
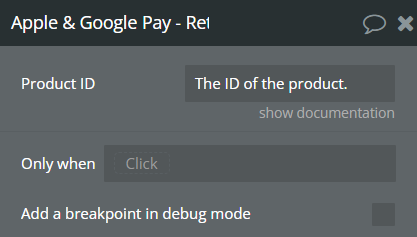
Apple & Google Pay - Retrieve Product
This action retrieves product information from the Stripe using the provided product ID.
It makes sure it's allowed to access this information using a special key provided before. If everything goes well, it gives back the product's name and description. If something goes wrong, it lets you know there's been an error.
Fields
Title | Description | Type |
Product ID | The ID of the product. | Text |
Returned Values
Title | Description | Type |
Name | This corresponds to the name of the product retrieved from Stripe. It's typically a concise title or label identifying the product. | Text |
Description | This represents a brief description or summary of the product. It provides additional context or information about the product beyond its name. | Text |
error message | The error message that occurred during the action call. | text |
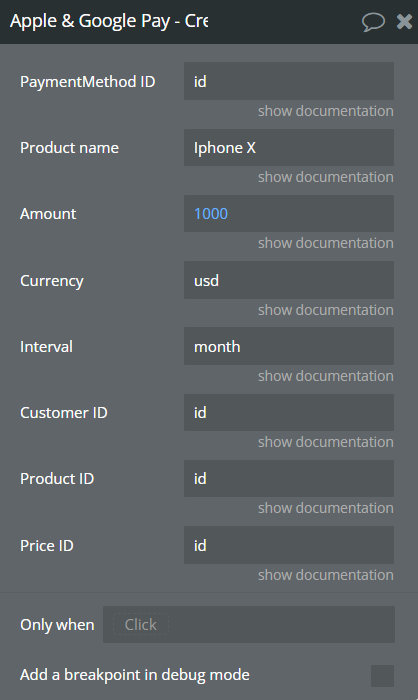
Apple & Google Pay - Create Subscription
This action sets up subscriptions for products in an application using Stripe. It handles everything needed to create a subscription, like managing customer details, product information, and pricing. If everything goes well, it creates the subscription and provides the necessary IDs. If there are any issues along the way, it reports an error to ensure a smooth subscription setup process.
Fields
Title | Description | Type |
PaymentMethod ID | ID of the default payment method for the subscription. It must belong to the customer associated with the subscription.
It identifies a specific payment method used for transactions, such as a credit card, debit card, or bank account. | Text |
Product Name | The product’s name, meant to be displayable to the customer. | Text |
Amount | The unit amount in cents to be charged, represented as a whole integer if possible. Check here: https://stripe.com/docs/currencies. | Number |
Currency | Three-letter ISO currency code, in lowercase. Must be a supported currency. | Text |
Interval | Specifies billing frequency. Either day, week, month or year. | Text |
Trial Period | Integer representing the number of trial period days before the customer is charged for the first time. | number |
Customer ID | The ID of the customer. | Text |
Product ID | The ID of the product. | Text |
Price ID | The ID of the price. | Text |
Returned Values
Title | Description | Type |
Customer ID | This is the unique identifier for the customer associated with the subscription. It helps track which customer has subscribed to the service or product.
Returned only if the subscription was successful. | Text |
Product ID | This identifier represents the specific product for which the subscription was created. It distinguishes one product from another within the Stripe platform.
Returned only if the subscription was successful. | Text |
Price ID | This identifier corresponds to the price assigned to the subscription. It helps identify the pricing details associated with the subscription plan.
Returned only if the subscription was successful. | Text |
Subscription ID | This is the unique identifier for the subscription itself. It uniquely identifies the subscription within the Stripe system, enabling management and tracking of the subscription status and details.
Returned only if the subscription was successful. | Text |
error message | The error message that occurred during the action call. | text |
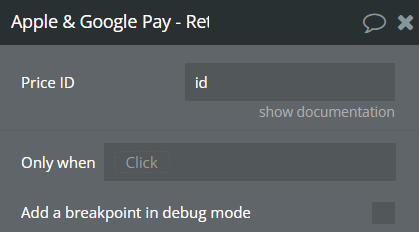
Apple & Google Pay - Retrieve Price
This action retrieves pricing information for a subscription plan from Stripe.
Fields
Title | Description | Type |
Price ID | The ID of the price. | Text |
Returned Values
Title | Description | Type |
Product ID | Represents the ID of the product associated with the price. | Text |
Currency | Indicates the currency in which the price is denominated. | Text |
Interval | Specifies the interval at which the price recurs (e.g., monthly, yearly). | Text |
Amount | Denotes the amount of the price, typically in the smallest currency unit (e.g., cents, pence). | Number |
error message | The error message that occurred during the action call. | text |
Apple & Google Pay - Create Price
This action creates a new price for a product using the Stripe API. It ensures that all required fields, such as product ID, currency, amount, and interval, are provided. After successfully creating the price, it returns the ID of the newly created price.
Fields
Title | Description | Type |
Product ID | The ID of the product. | Text |
Currency | Three-letter ISO currency code, in lowercase. Must be a supported currency. | Text |
Amount | The unit amount in cents to be charged, represented as a whole integer if possible. Check here: https://stripe.com/docs/currencies. | Number |
Interval | Specifies billing frequency. Either day, week, month or year. | Text |

Returned Values
Title | Description | Type |
Price ID | The ID of the newly created price. | Text |
error message | The error message that occurred during the action call. | text |
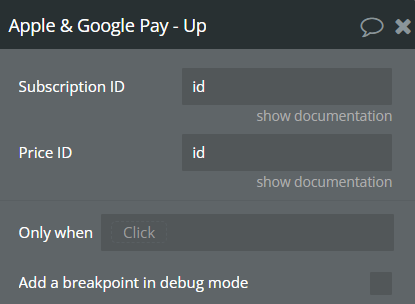
Apple & Google Pay - Update Subscription
This action updates a subscription by replacing its current price with a new one, ensuring both IDs are provided. It retrieves the subscription details, identifies the current price item, creates options to update the subscription with the new price, executes the update, and returns the updated subscription ID if successful.
Fields
Title | Description | Type |
Subscription ID | The ID of the subscription that will be updated. | Text |
Price ID | The ID of the price. | Text |
Returned Values
Title | Description | Type |
Subscription ID | The updated subscription ID if the request was successful. | Text |
error message | The error message that occurred during the action call. | text |
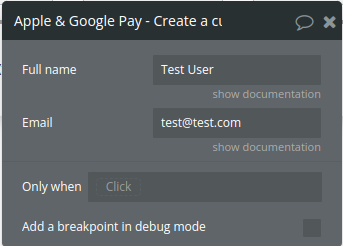
Apple & Google Pay - Create a customer
Fields
Title | Description | Type |
Full Name | The customer’s full name or business name. | Text |
Email | Customer’s email address. It’s displayed alongside the customer in your dashboard and can be useful for searching and tracking. This may be up to 512 characters. | Text |
Returned Values
Title | Description | Type |
ID | The customer ID if the request was successful. | Text |
error | The error message that occurred during the action call. | text |

Changelogs
Update 27.11.25 - Version 1.45.0
- Bubble Plugin Page Update (Description).
Update 27.11.25 - Version 1.44.0
- Bubble Plugin Page Update (Description and Name).
Update 08.07.25 - Version 1.43.0
- Bubble Plugin Page Update (Logo).
Update 11.06.25 - Version 1.42.0
- Marketing update (minor change).
Update 10.06.25 - Version 1.41.0
- Marketing update (minor change).
Update 14.11.24 - Version 1.40.0
- Renamed "Future Usage" field into "Future Payment".
Update 11.11.24 - Version 1.39.0
- Added "Future Usage" field "Create PaymentIntent" action.
Update 07.10.24 - Version 1.38.0
- Create customer action - unnecessary fields removed .
Update 04.10.24 - Version 1.37.0
- New action - Create customer .
Update 16.09.24 - Version 1.36.0
- Added "error message" state for actions.
Update 20.08.24 - Version 1.35.0
- Added "payer name" state for "Apple & Google Pay".
Update 06.08.24 - Version 1.34.0
- Added "Payer email" exposed state.
Update 25.07.24 - Version 1.33.0
- Minor update .
Update 17.07.24 - Version 1.32.0
- Minor update (Marketing update).
Update 11.06.24 - Version 1.31.0
- Updated demo/service links.
Update 06.06.24 - Version 1.30.0
- Minor update.
Update 09.04.24 - Version 1.29.0
- minor update.
Update 03.04.24 - Version 1.28.0
- updated description.
Update 17.03.24 - Version 1.27.0
- Added "shipping address is changed" event..
Update 09.03.24 - Version 1.26.0
- Added Trial Period for Subscription.
Update 07.03.24 - Version 1.25.0
- Fixed fields and descriptions.
Update 24.01.24 - Version 1.24.0
- updated description.
Update 08.01.24 - Version 1.23.0
- Added "Create Price" & "Update Subscription" actions.
Update 23.10.23 - Version 1.22.0
- Fixed "Create PaymentIntent" action.
Update 20.10.23 - Version 1.21.0
- Added "Delivery Title" and "Delivery Price" fields.
Update 18.10.23 - Version 1.20.0
- Updated description.
Update 11.10.23 - Version 1.19.0
- Added "Request Payer Address" field in "Apple & Google Pay" element.
Update 25.09.23 - Version 1.18.0
- Added "Subscription" element, Customer, Product, Price, Subscription creating actions.
Update 15.09.23 - Version 1.17.0
- updated description.
Update 08.09.23 - Version 1.16.0
- minor updates.
Update 06.09.23 - Version 1.15.0
- Obfuscation.
Update 22.08.23 - Version 1.14.0
- added comma recognition as decimal separator.
Update 02.08.23 - Version 1.13.0
- Upgrate to node18.
Update 24.07.23 - Version 1.12.0
- Added "payment intent ID" state for element.
Update 12.07.23 - Version 1.11.0
- updated description.
Update 19.06.23 - Version 1.10.0
- Updated the description .
Update 20.03.23 - Version 1.9.0
- Minor fixes.
Update 17.03.23 - Version 1.8.0
- Added verification when payment is changed.
Update 15.03.23 - Version 1.7.0
- updated the description.
Update 23.02.23 - Version 1.6.0
- deleted the icons.
Update 22.02.23 - Version 1.5.0
- updated the description.
Update 02.02.23 - Version 1.4.0
- Updated description.
Update 20.01.23 - Version 1.3.0
- Updated description.
Update 28.10.22 - Version 1.2.0
- Updated description and changed icon.
Update 22.09.22 - Version 1.1.0
- Added "Browser" exposed state..
Update 01.09.22 - Version 1.0.0
- Initial Release.