Demo to preview the plugin:
Introduction
A must-have no-code plug-in for a Bubble app that allows user authentication with Apple ID and is submitted to App Store for publishing. Once your app is reviewed by the Apple Review Team, they will require Apple Signing to be implemented as one of the sign-in options.
Moreover, Sign in with Apple makes it easy for users to sign in to your apps and websites using their Apple ID. Instead of filling out forms, verifying email addresses, and choosing new passwords, they can use Sign in with Apple to set up an account and start using your app right away.
Prerequisites
You must have a developer account with Apple to interact with the plugin. Create your development account at: https://developer.apple.com/design/human-interface-guidelines/sign-in-with-apple
Note: Apple provides several Sign in with Apple buttons you can use to let people set up an account and sign in.
To see the guidance please go here: https://developer.apple.com/design/human-interface-guidelines/technologies/sign-in-with-apple/buttons/
How to setup
The plugin setup includes two main parts:
1. Apple Developer Account
Required to connect and authenticate with Apple services.
You’ll need an active Apple Developer account to use this plugin.
👉 Create or manage your account in the Apple Developer Console
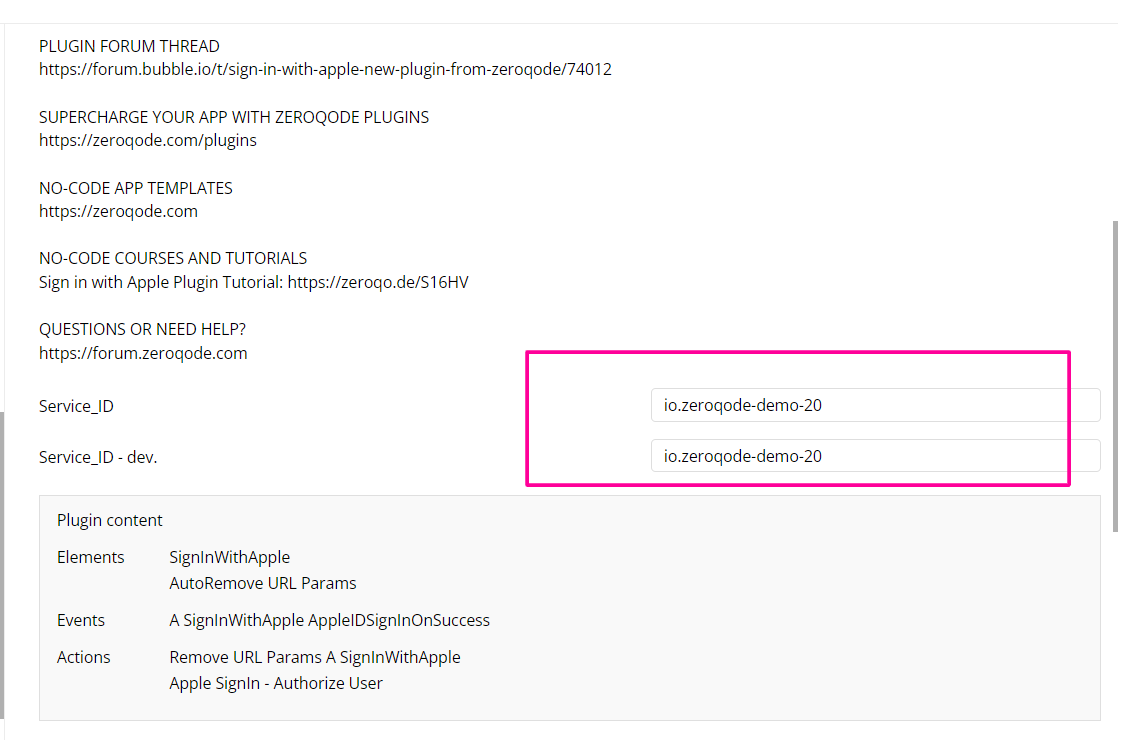
2. Plugin Settings (Plugins Tab)
Used to configure and manage the required API keys inside Bubble.

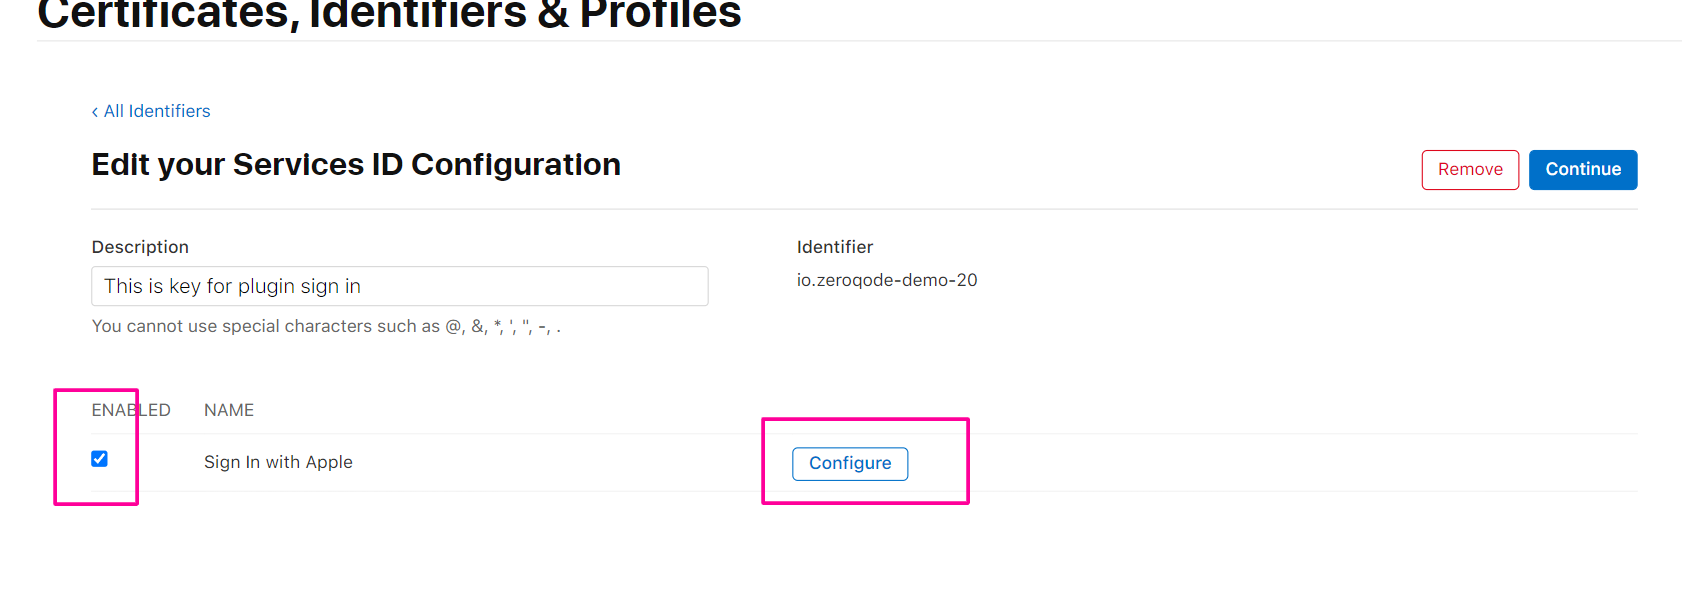
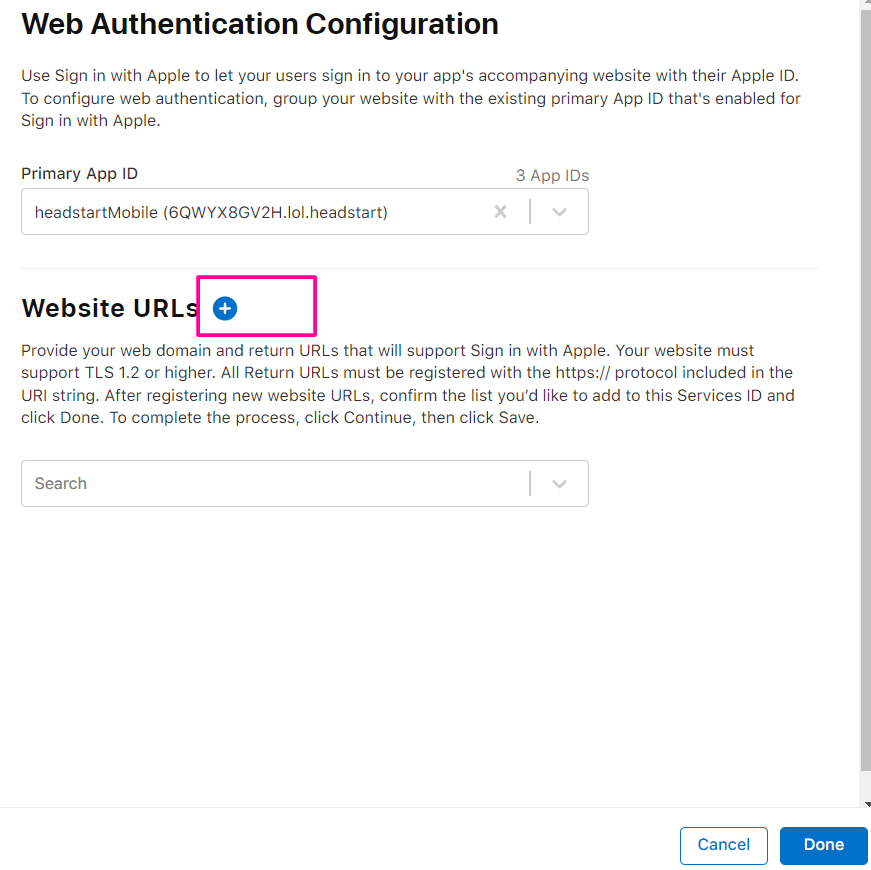
Create an APP ID

1. Choose App IDs in this first step

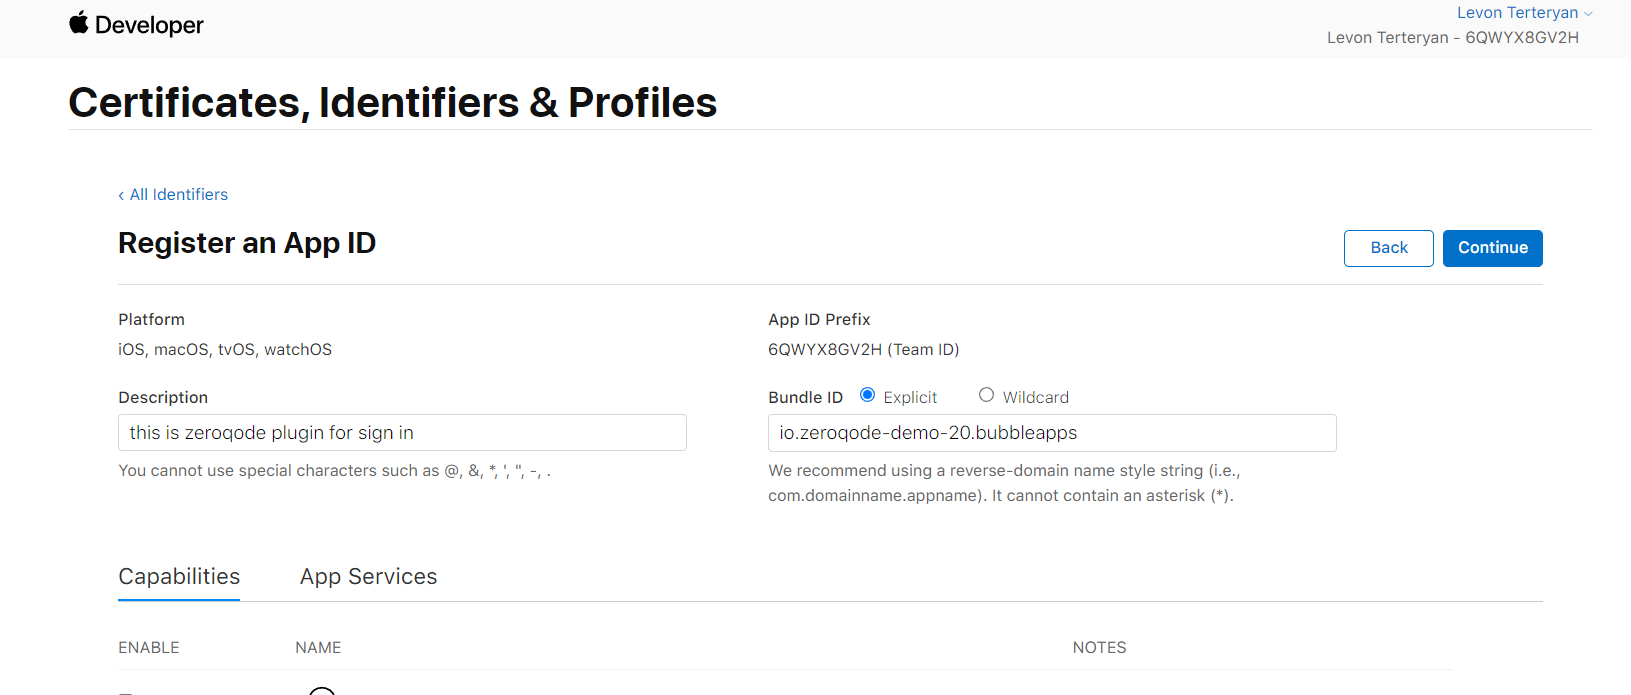

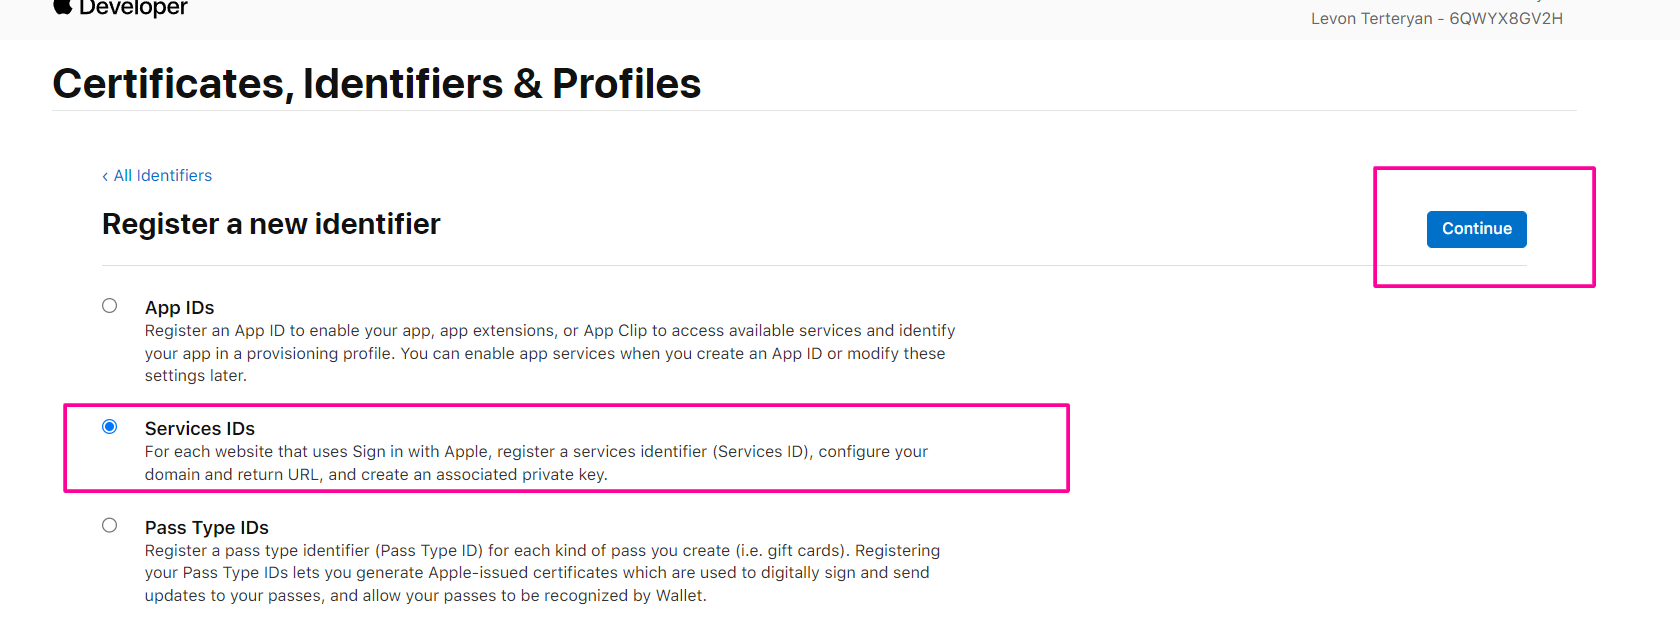
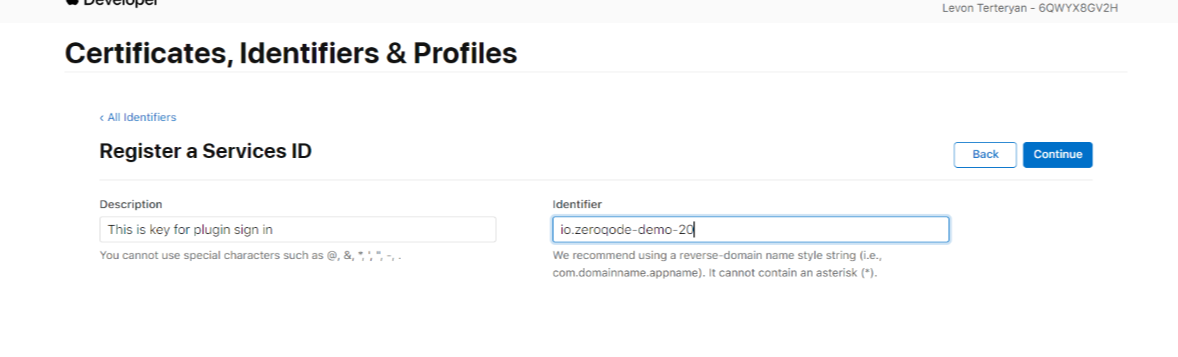
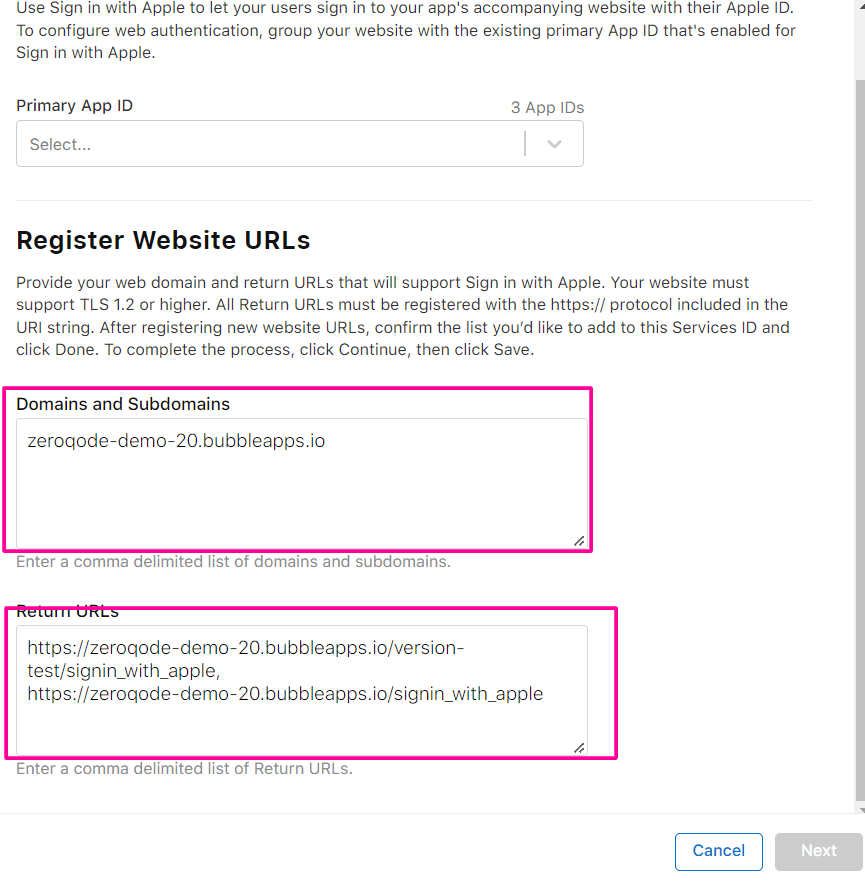
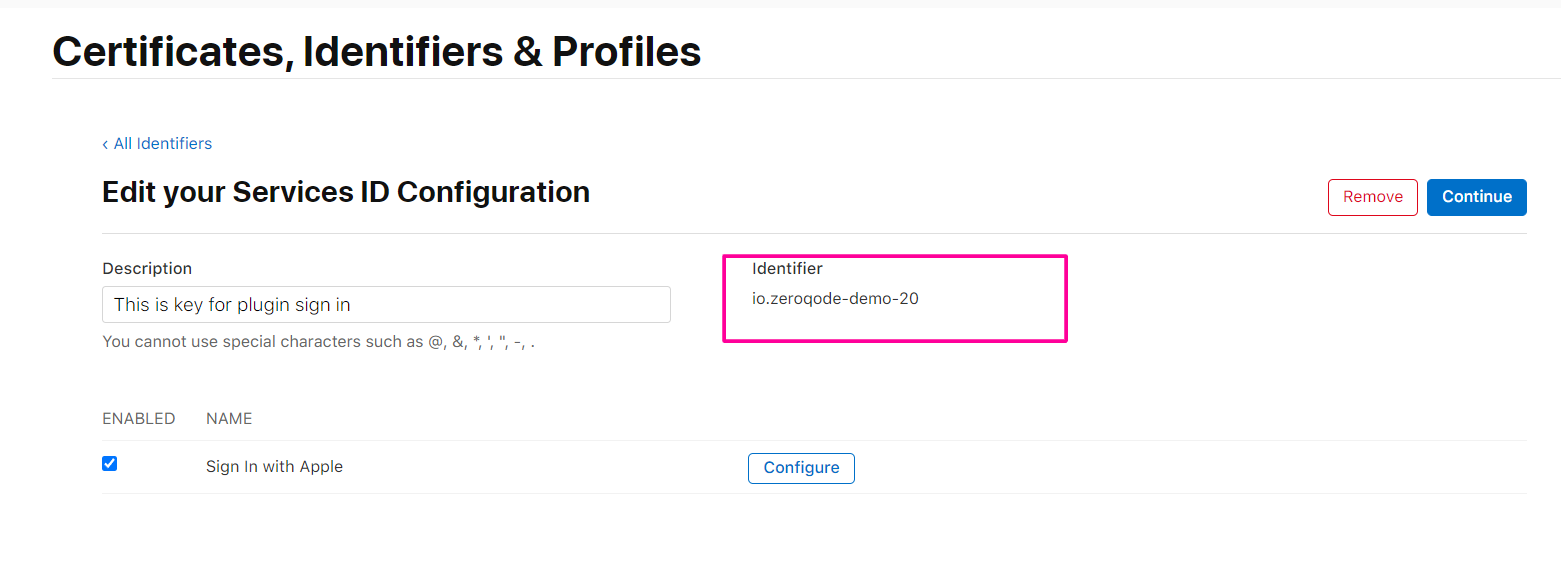
2. Choose Services IDs in this first step and click continue.
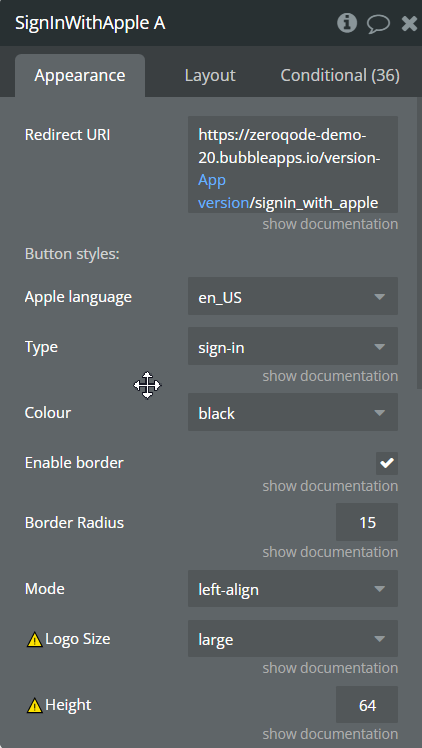
Plugin element - Sign In With Apple
Apple requires that all apps using the Sign in with Apple button strictly follow their official Human Interface Guidelines regarding appearance, size, colors, and branding.
Customization of the button is limited and must not conflict with Apple’s standards.
Non-compliance may result in App Store rejection or issues with Apple’s service approval process.
Always use the official button assets and review Apple’s requirements before releasing your app.
If you implement the Sign in with Apple button on a web page and do not follow Apple’s guidelines, several things can happen:
- Apple may block or disable your app’s Sign in with Apple functionality if they detect non-compliance.
- If your web app is linked to a native iOS/macOS app, your app could be rejected during App Store review.
- Apple may request you to update your implementation to comply, and in some cases, may even restrict access to their authentication API.
Fields
Exposed States
Element Events
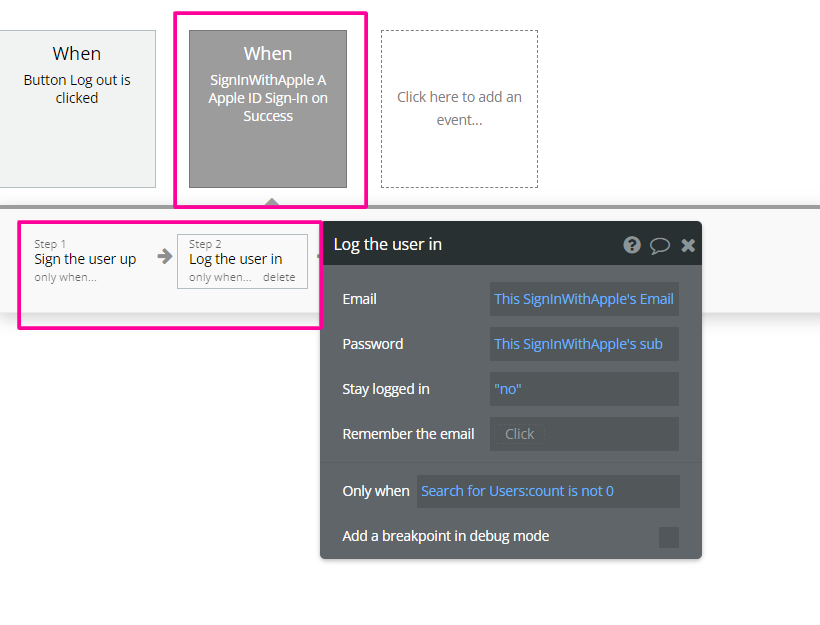
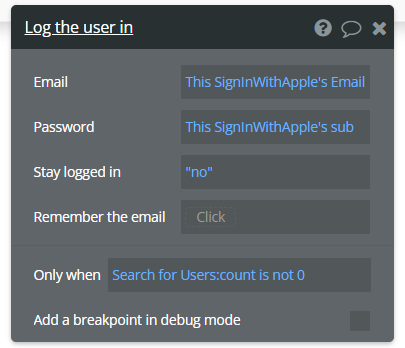
Workflow example
Here are some basic workflow examples to get you started with the Sign in with Apple plugin.
Basic Sign in Setup