Demo to preview settings
Introduction
Give users new ways to interact with your product by building engaging voice and text-based conversational interfaces powered by AI. Connect with users on your website, mobile app, the Google Assistant, Amazon Alexa, Facebook Messenger, and other popular platforms and devices.
Prerequisites
For using the plugin you'll need to get the API credentials as API Key and API Secret.
Create your development account at : https://console.cloud.google.com and enable Dialogflow Agent in the https://dialogflow.cloud.google.com/#/login
How to setup
I. Setup the Google Console Project, create Service Account and Private Key
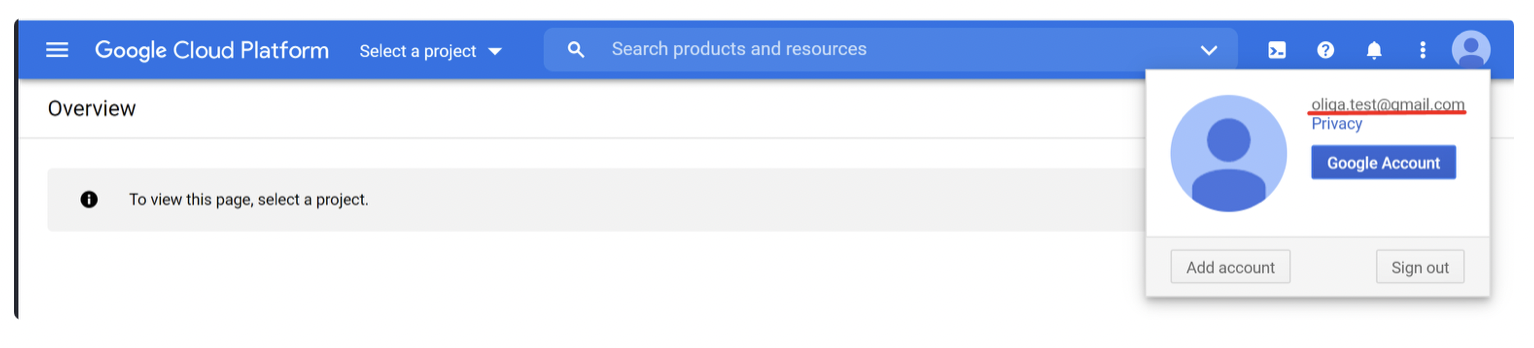
- You need to go to https://console.cloud.google.com page and login with your Google email.
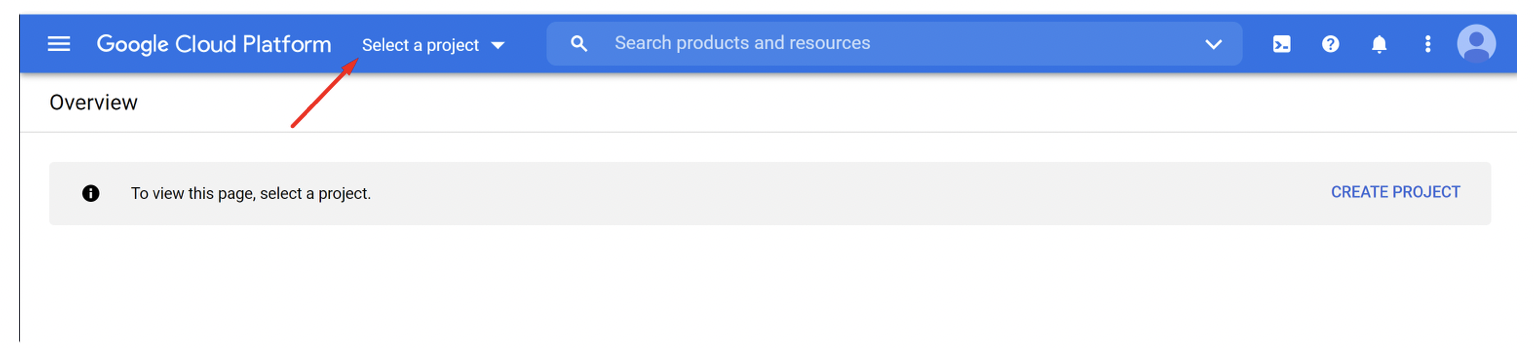
2. Select or create a project in Console
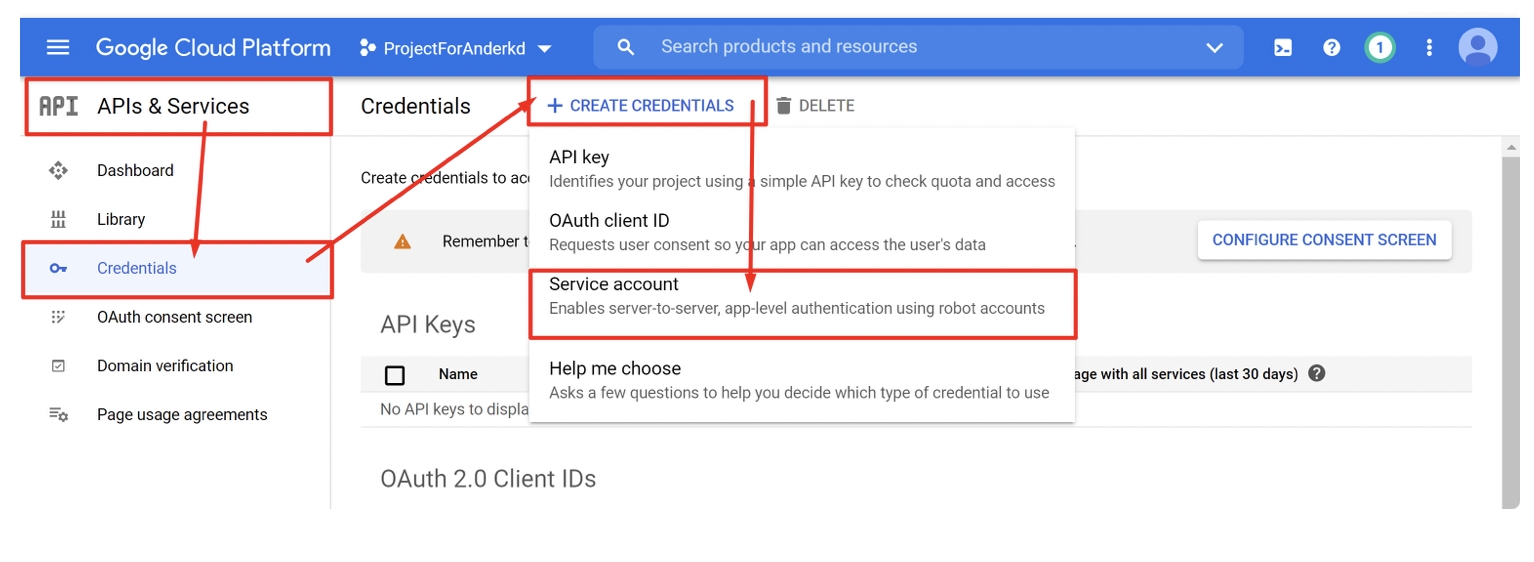
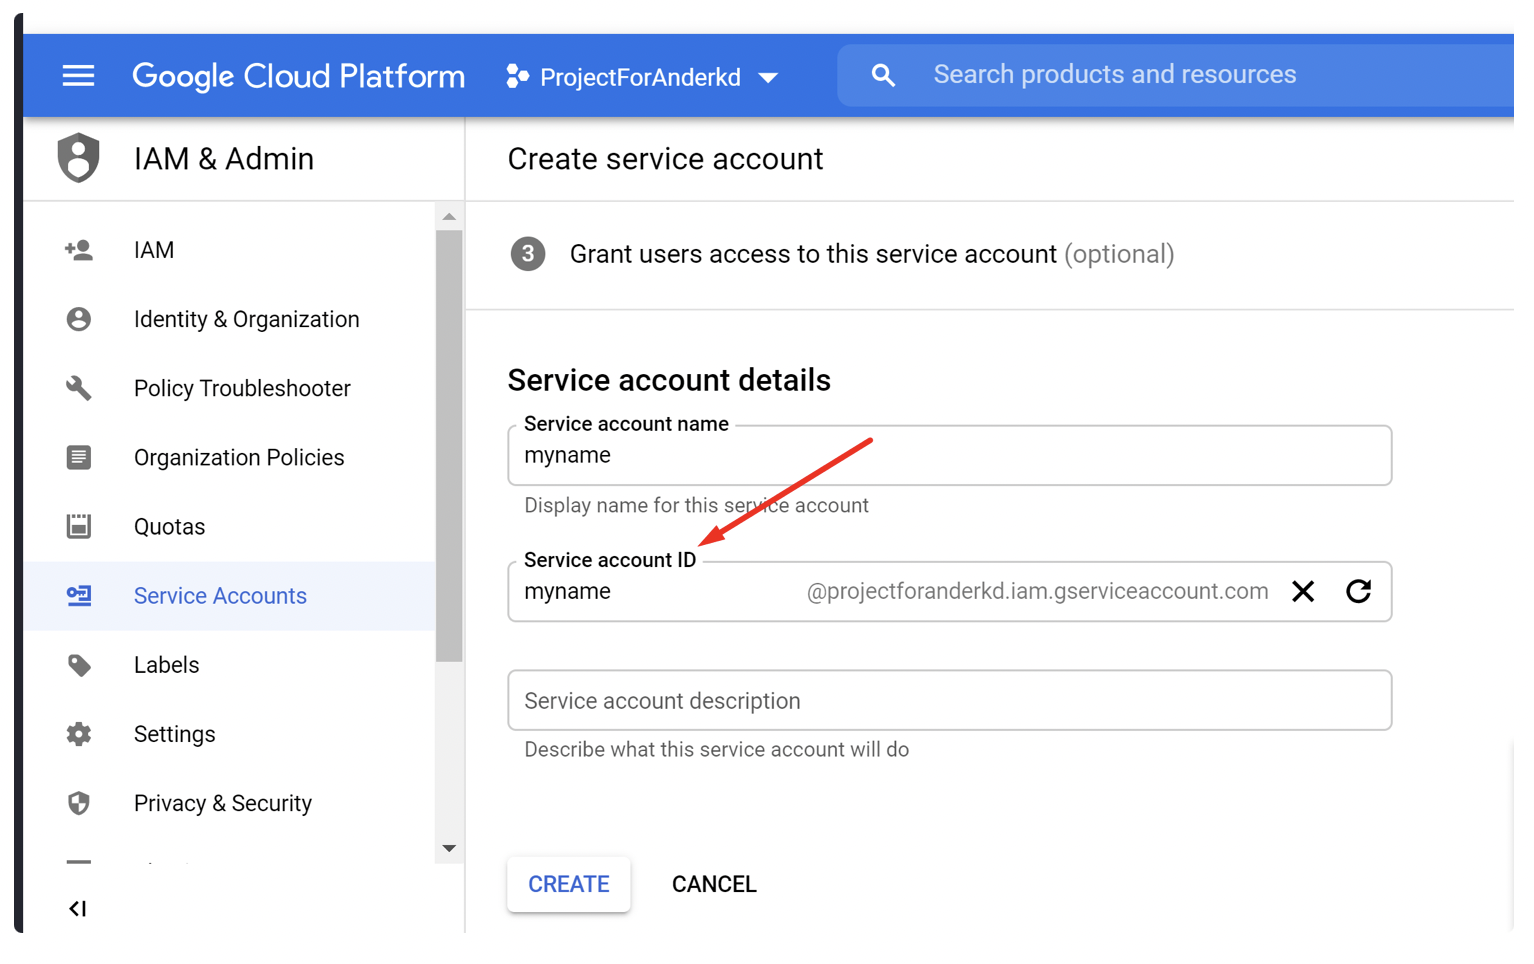
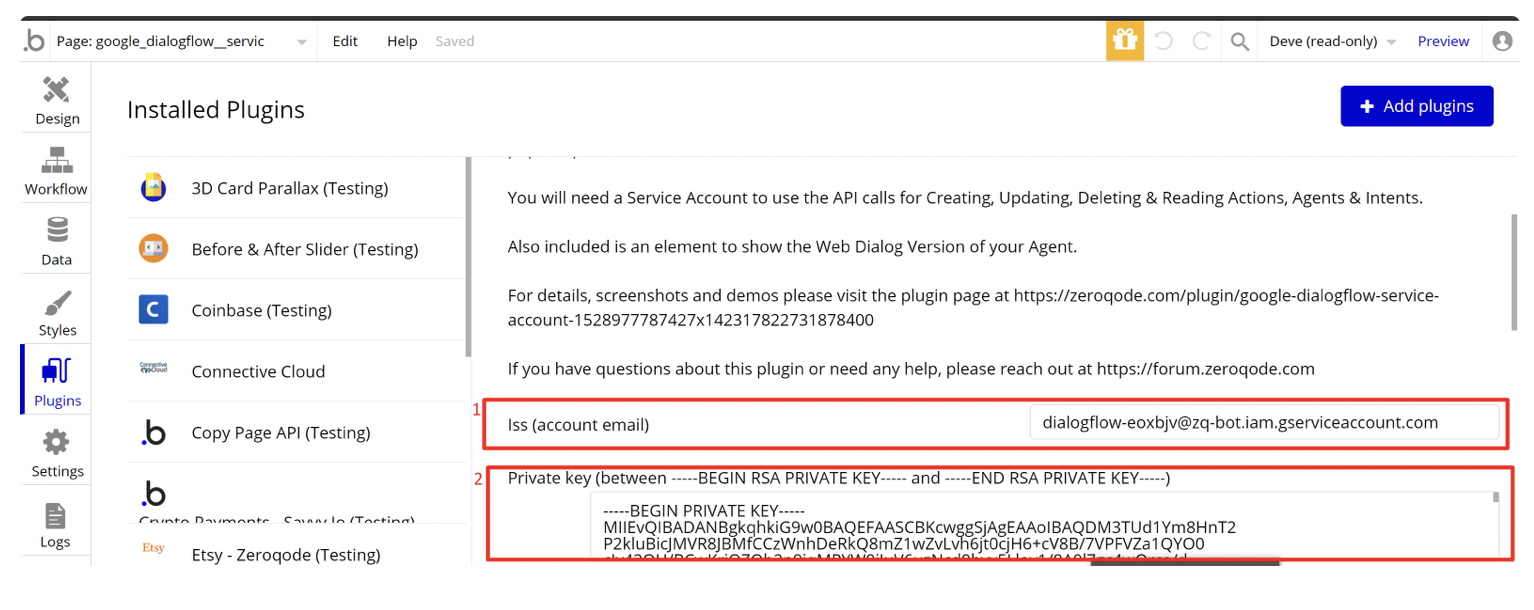
3. Go to Credentials and create a service account. Note: This is Iss (account email) used in Bubble plugin settings
3.1 Enable for this account 2 roles, one of Owner to have full access and one of Service Account Admin.
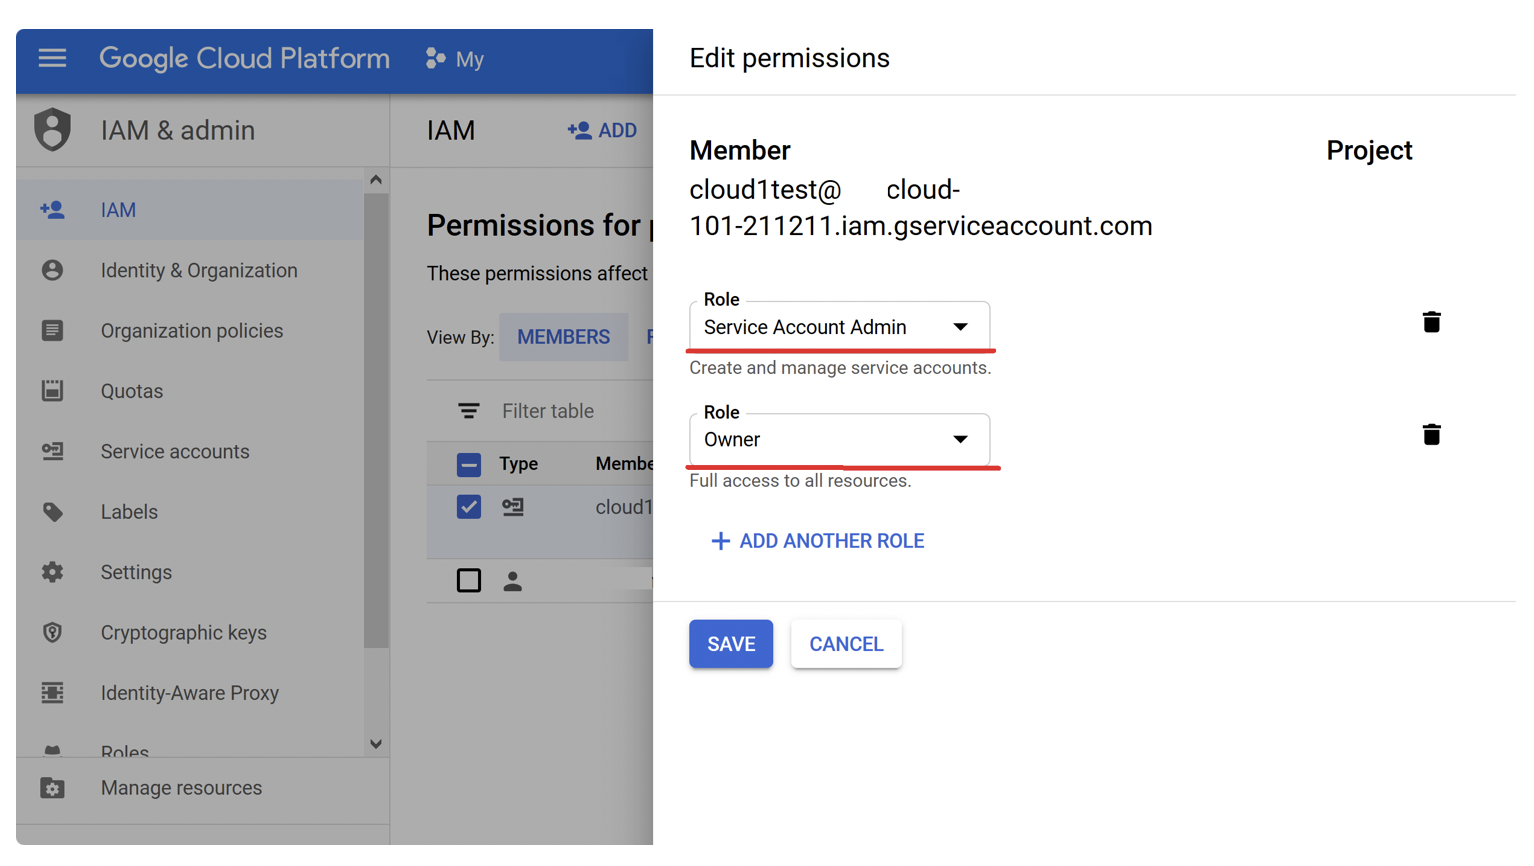
Save the settings and CONTINUE.
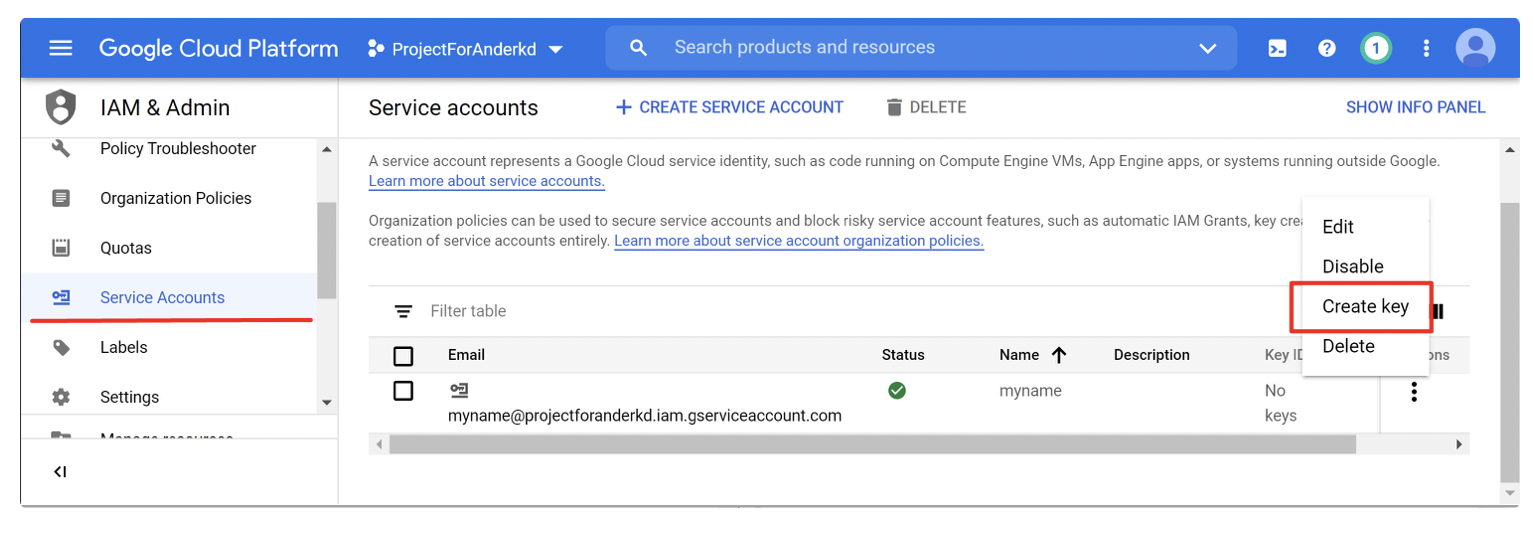
4. After you've created Service Account you will be able to create private key and download it in JSON format to your machine
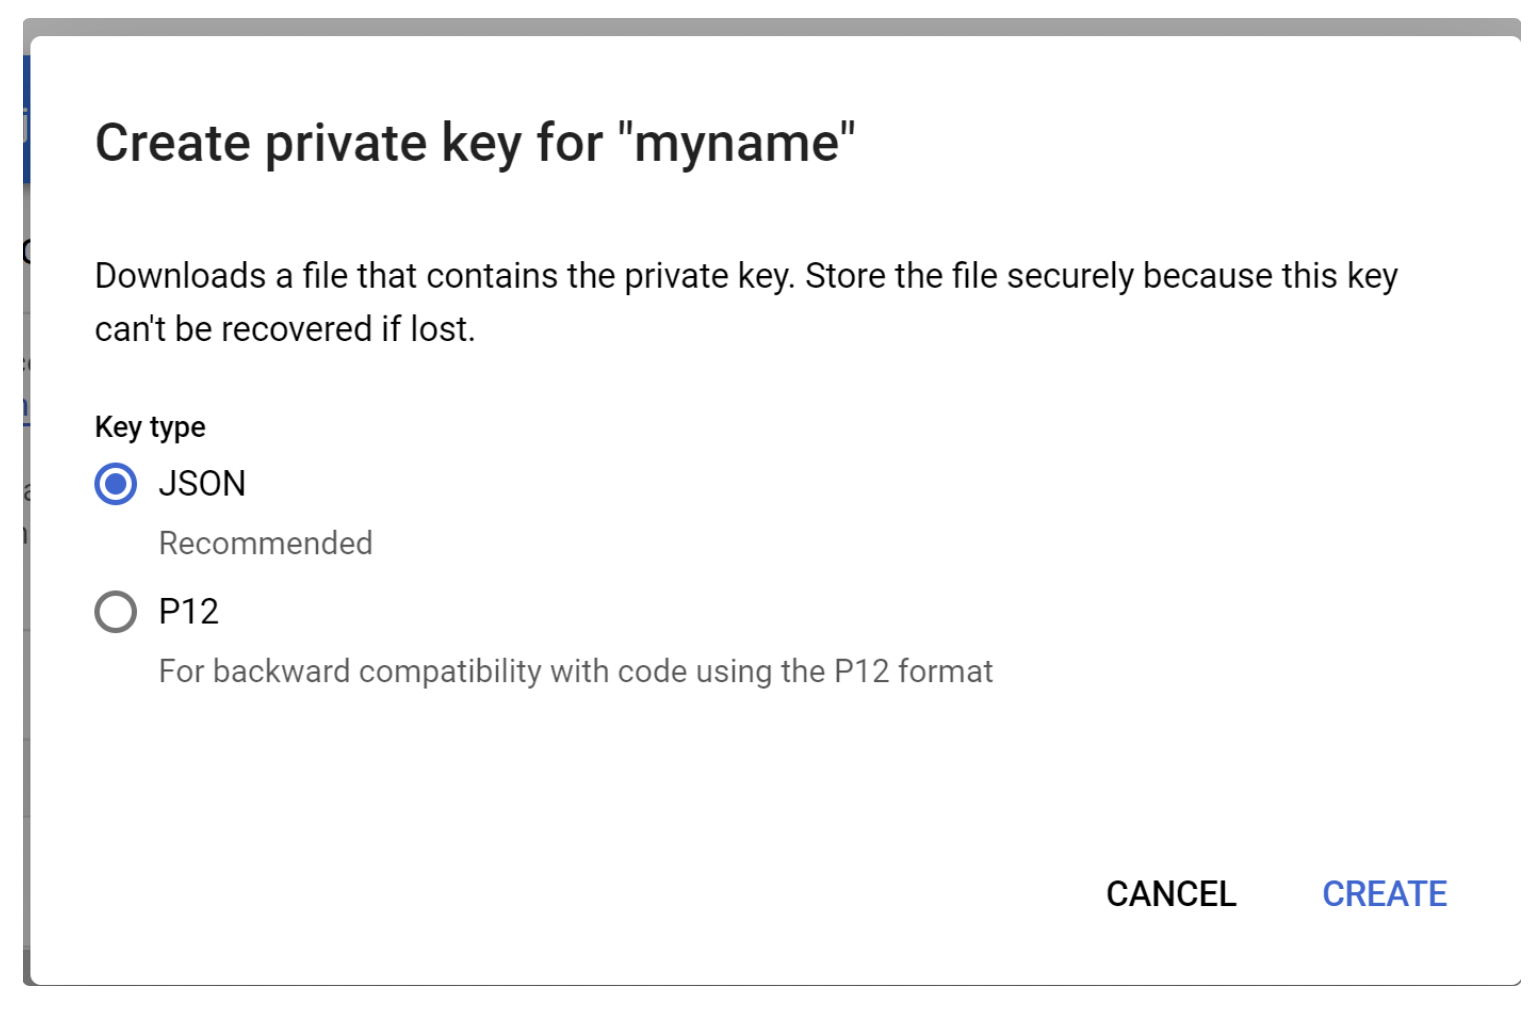
5. Download the private key and edit it before using it in plugin settings
5.1 Edit the key by removing only all the "\n" and "=" characters from it and replace them with <-Enter.
Check the official Google documentation (https://developers.google.com/shopping-content/v2/orders-best-practices)

6. Next, go to Bubble in Plugins tab and insert the appropriate data (service account and edited private key)
II. Setup the DialogFlow agent
Sign in to the app dashboard https://dialogflow.cloud.google.com and click the button "Create new agent"
Insert the agent name and project from Google Cloud
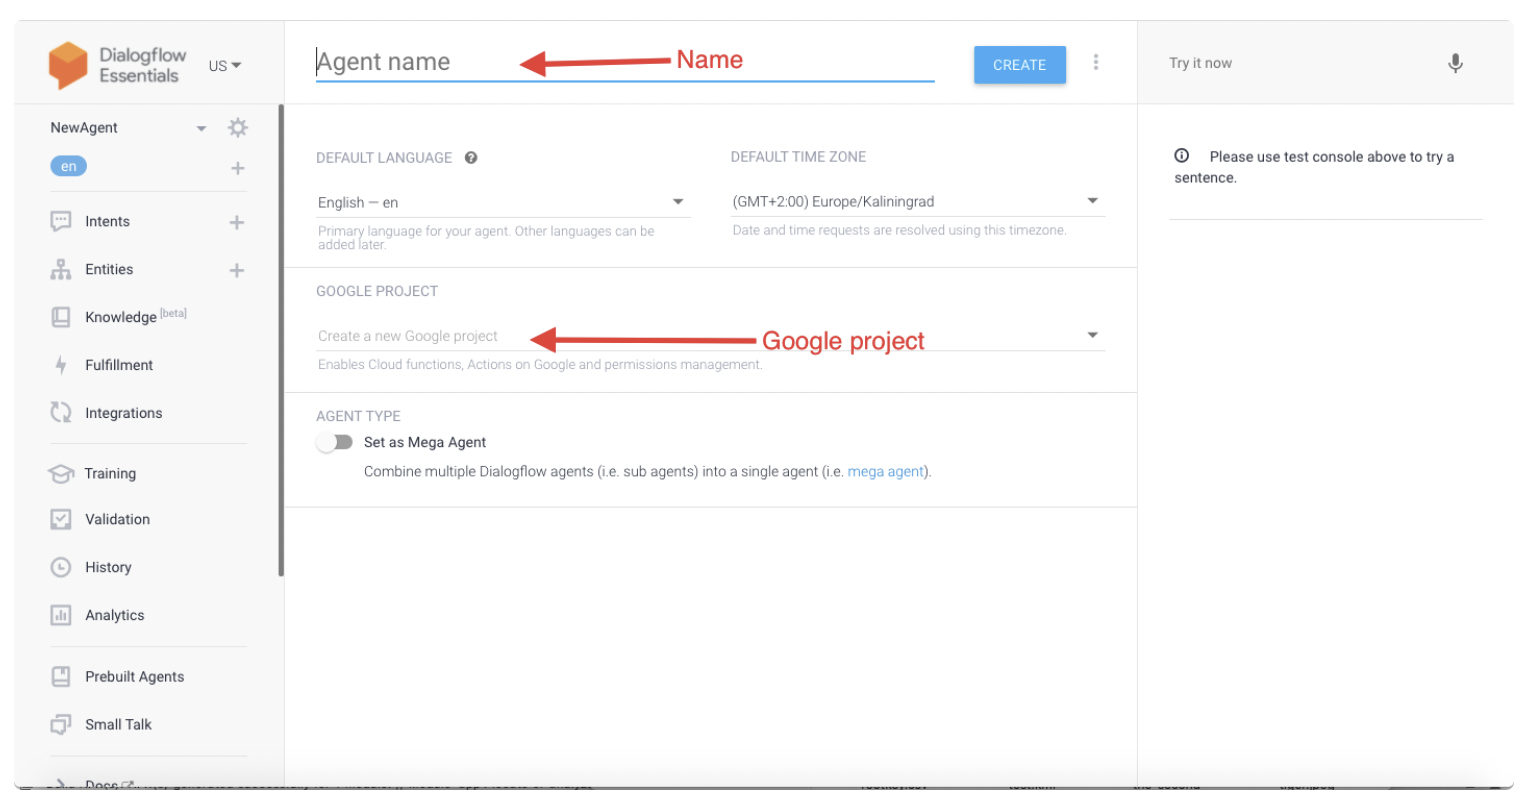
Note: Be sure to select the project that was created for DialogFlow! And don't use MEGA agent for the first time.
After you clicked the Create button, you will be taken to the settings of your agent.
Here you can configure additional settings for your agent
Your Web Bot URL
- Go to the DialogFlow app dashboard and tap the Integrations tab. Find the "web demo" tab and enable it.
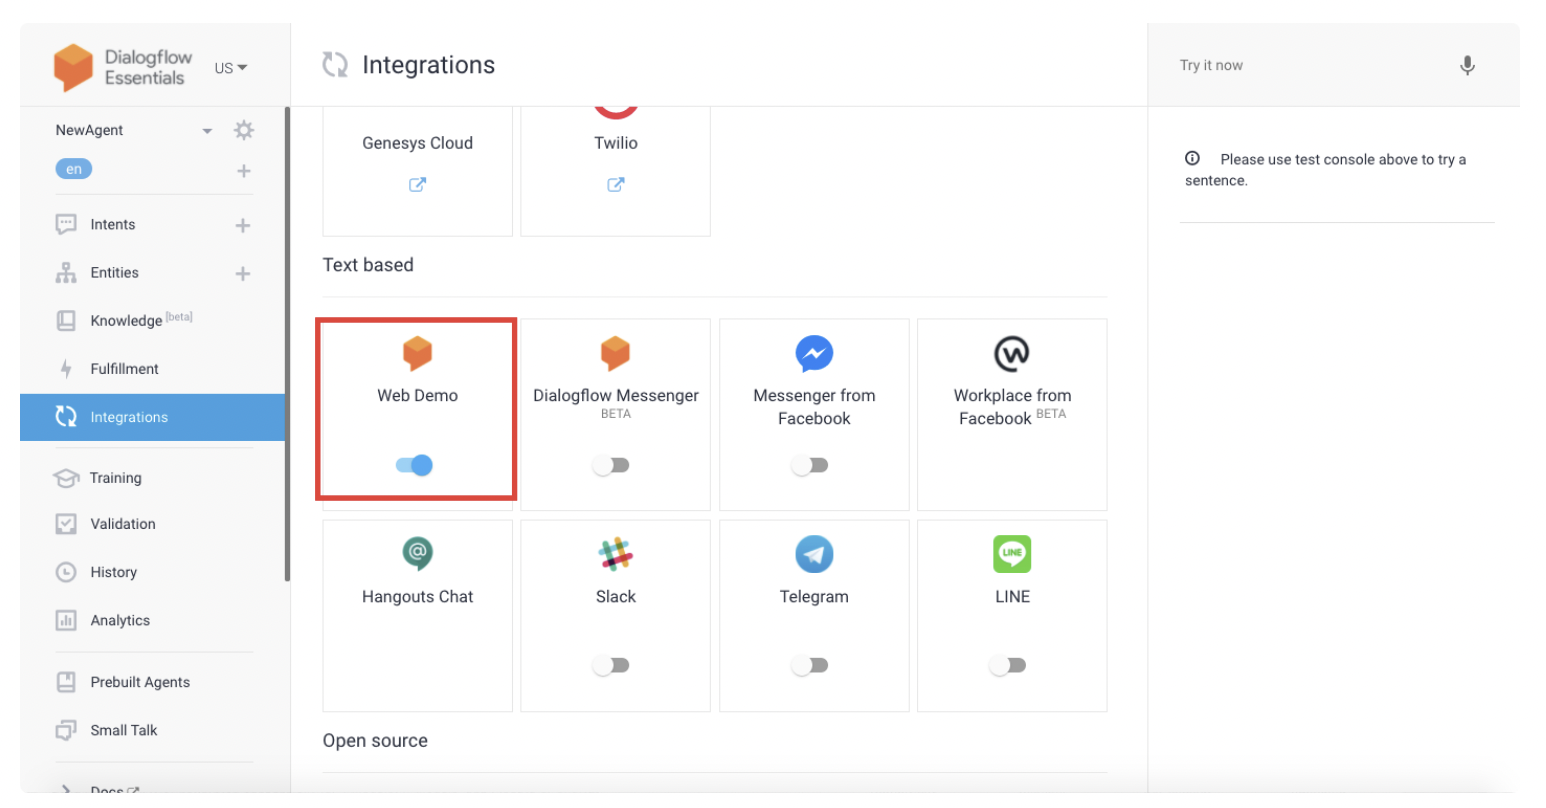
2. Copy the source url from the opened window.
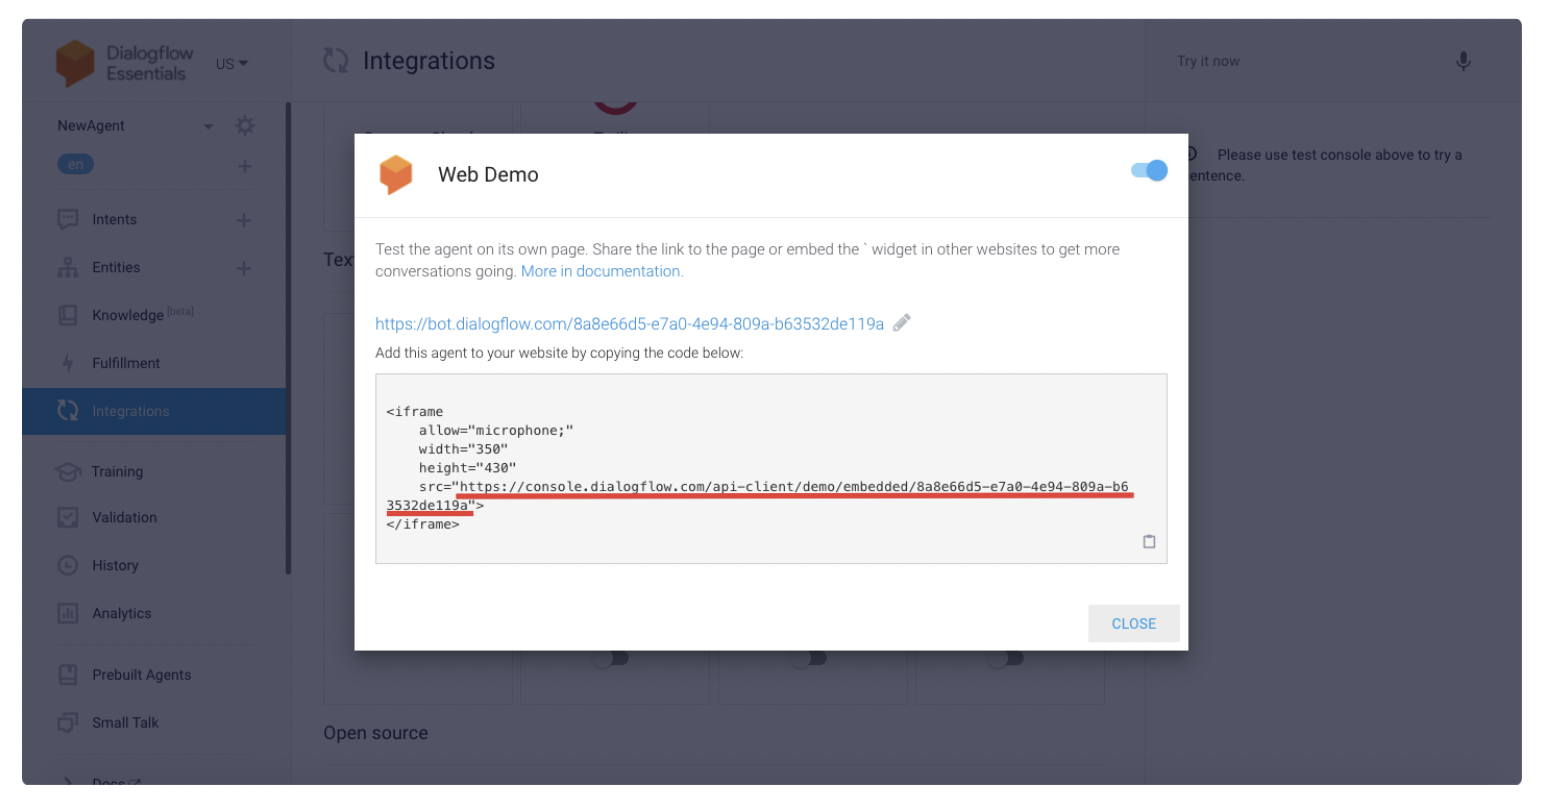
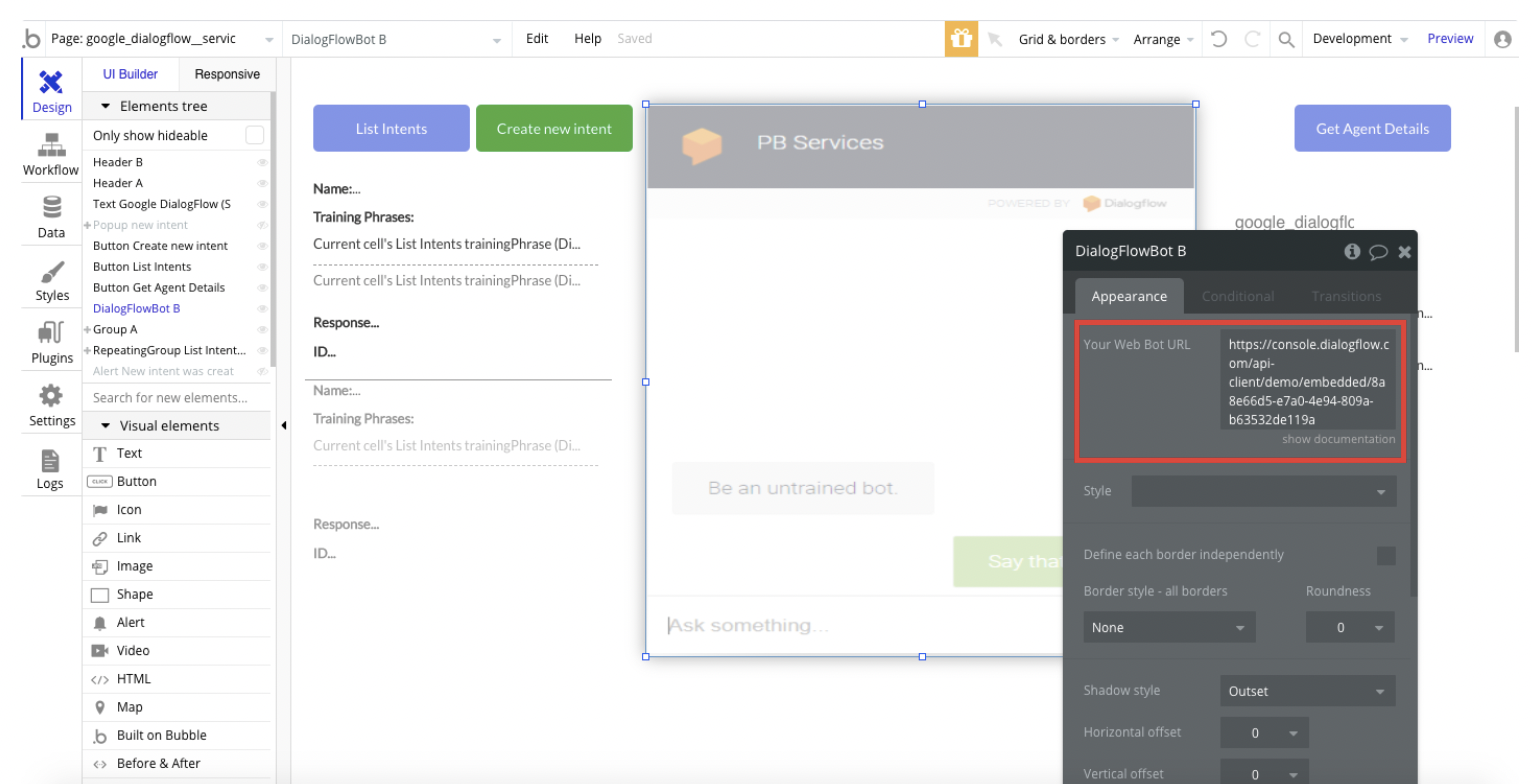
3. Insert this URL in the element's field.
4. Done. Now you can train your agent from the app dashboard or you can use the "Create new intent" Action API Call from the plugin.
Plugin Element Proprieties [Deprecated]
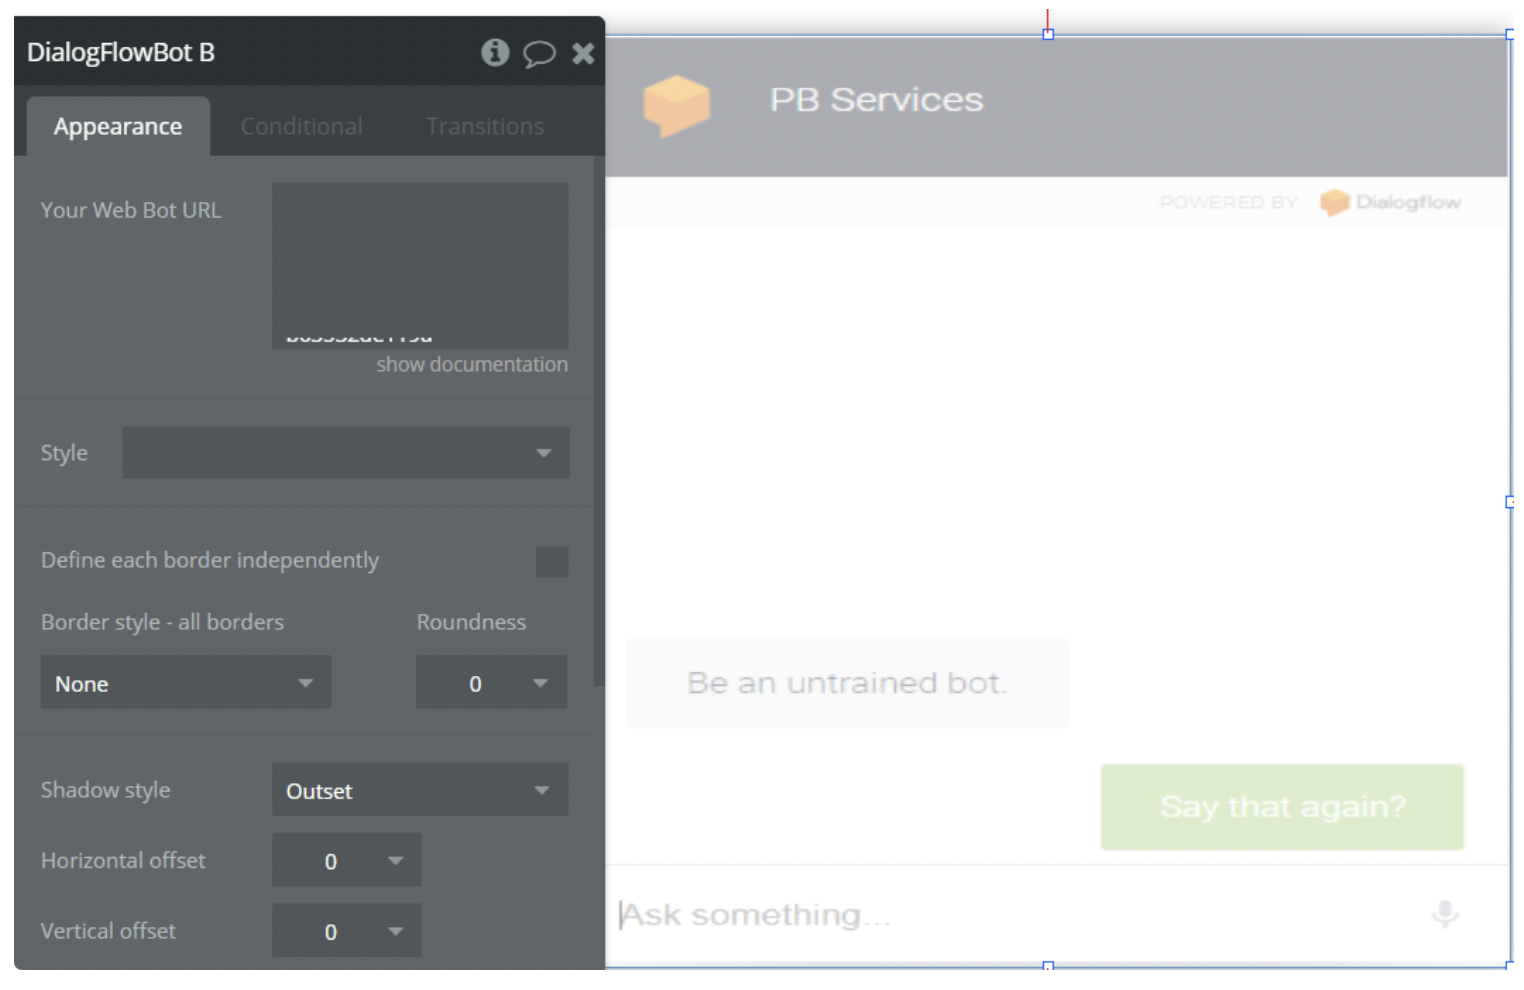
The plugin contains DialogFlowBot visual element which should be used on page.
Proprieties field:
- Your Web Bot URL: the source url of the webbot from Dialogflow console
Plugin Data/Action Calls
Data Calls
DialogFlow - Get Intent: Retrieves the specified intent.
DialogFlow - List Intents: Returns the list of all intents in the specified agent.
DialogFlow - Search Agents: Returns the list of agents. Since there is at most one conversational agent per project, this method is useful primarily for listing all agents across projects the caller has access to.
One can achieve that with a wildcard project collection id "-". Refer to List Sub-Collections.
Action Calls
DialogFlow - Create new Intent (Extended): Creates an intent in the specified agent with extended properties.
DialogFlow - Create new Intent (Simple): Creates an intent in the specified agent. This is a simple intent creation using fields:
- Name of intent
- Training phrase
- Response
DialogFlow - Update Intent (extended): Updates the specified intent with extended properties.
DialogFlow - Update Intent (simple): Update an intent in the specified agent. This is a simple intent update with four properties:
- Phrase ID
- Training phrase
- Response
- Name of intent
DialogFlow - Delete Intent: Deletes the specified intent and its direct or indirect follow-up intents.
DialogFlow - Get Agent: Retrieves the specified agent.
DialogFlow - Export agent: Exports the specified agent to a ZIP file.
DialogFlow - Import agent: Imports the specified agent from a ZIP file. Uploads new intents and entity types without deleting the existing ones. Intents and entity types with the same name are replaced with the new versions from ImportAgentRequest.
After the import, the imported draft agent will be trained automatically (unless disabled in agent settings). However, once the import is done, training may not be completed yet. Please call
agent.train and wait for the operation it returns in order to train explicitly.
Operation <response: google.protobuf.Empty> An operation that tracks when importing is complete. It only tracks when the draft agent is updated not when it is done training.
DialogFlow - Restore agent: Restores the specified agent from a ZIP file. Replaces the current agent version with a new one. All the intents and entity types in the older version are deleted. After the restore, the restored draft agent will be trained automatically (unless disabled in agent settings).
However, once the restore is done, training may not be completed yet. Please call agent.trainand wait for the operation it returns in order to train explicitly. Operation <response: google.protobuf.Empty> An operation that tracks when restoring is complete. It only tracks when the draft agent is updated not when it is done training.
DialogFlow - Train agent: Trains the specified agent.Workflow Example
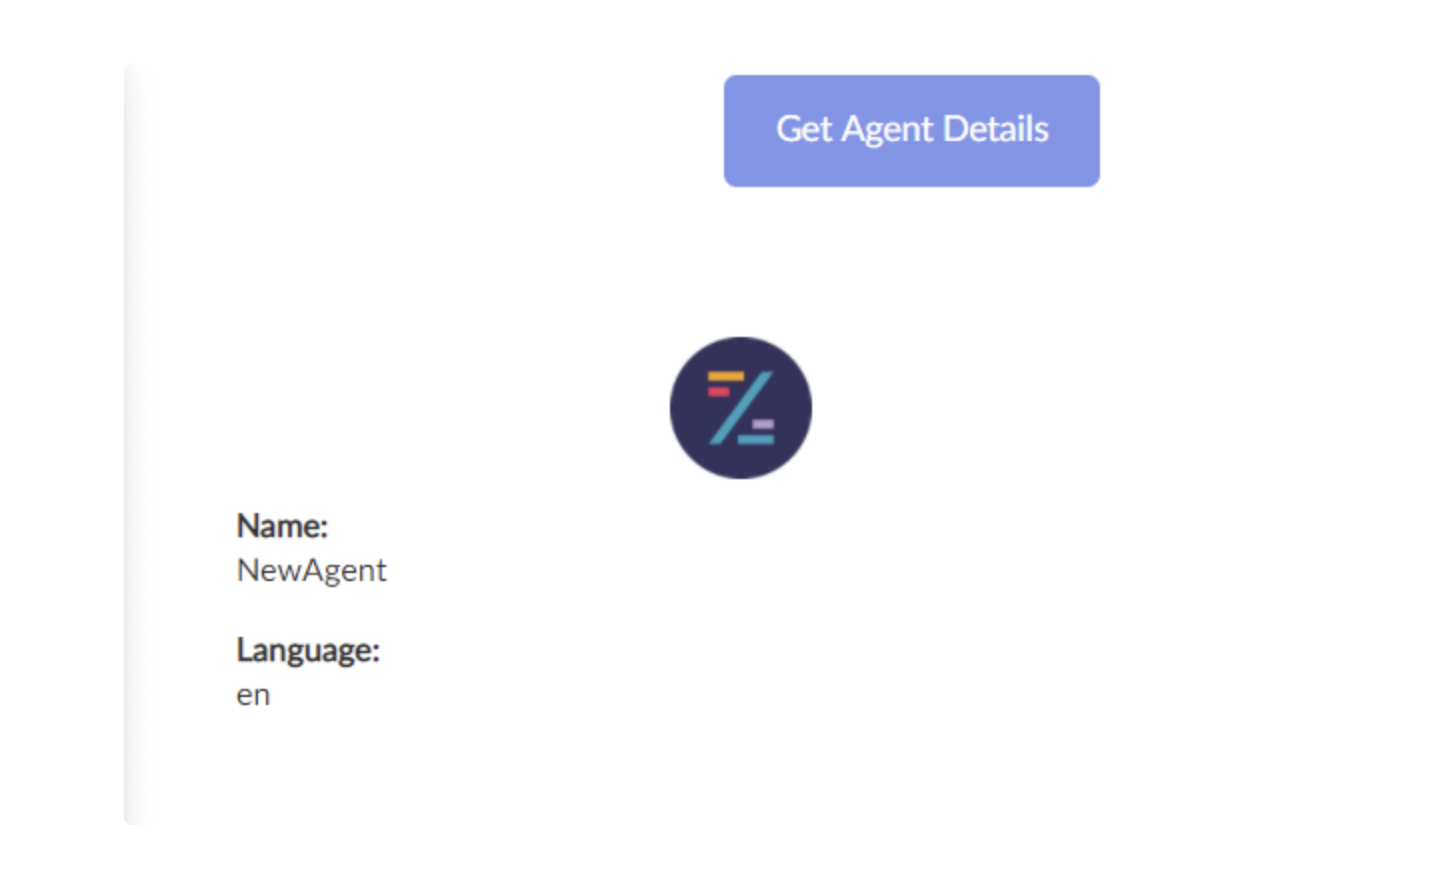
- Create an event on button clicked to get Agent Details
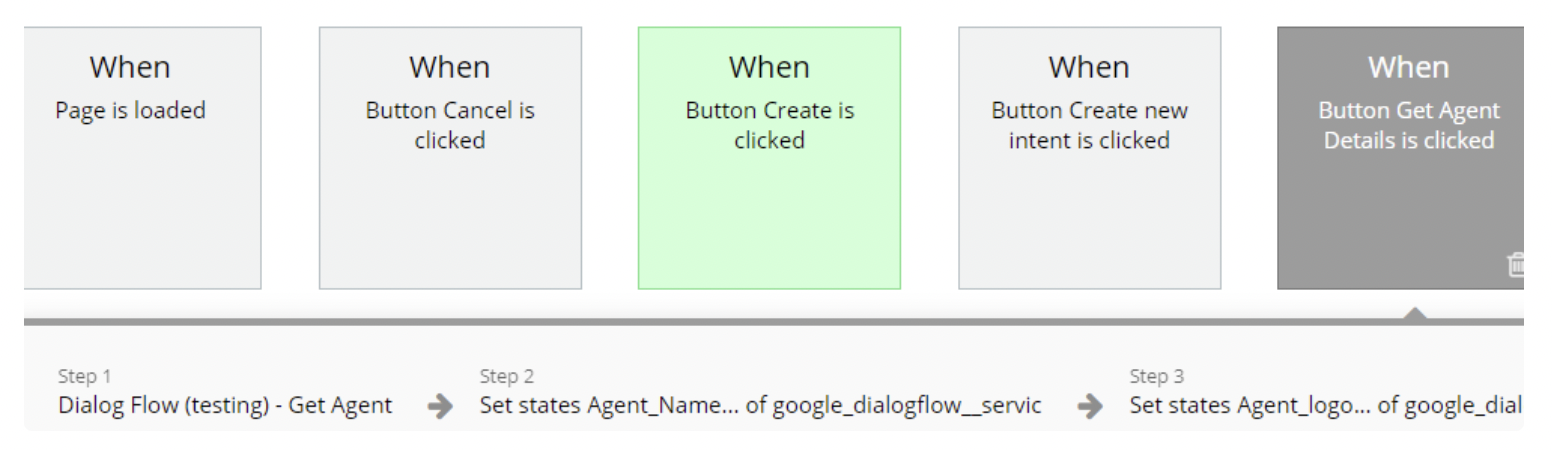
2. Add the Action to get Agent details (provide the projectID parameter)
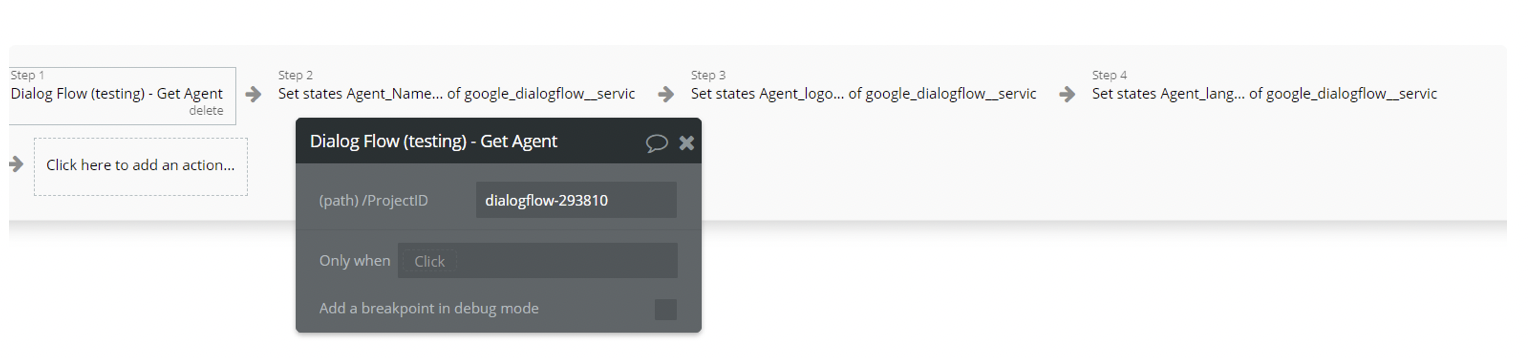
3. Save the values of the agent in states by setting the return value of the previous step (Name, Avatar and Language)
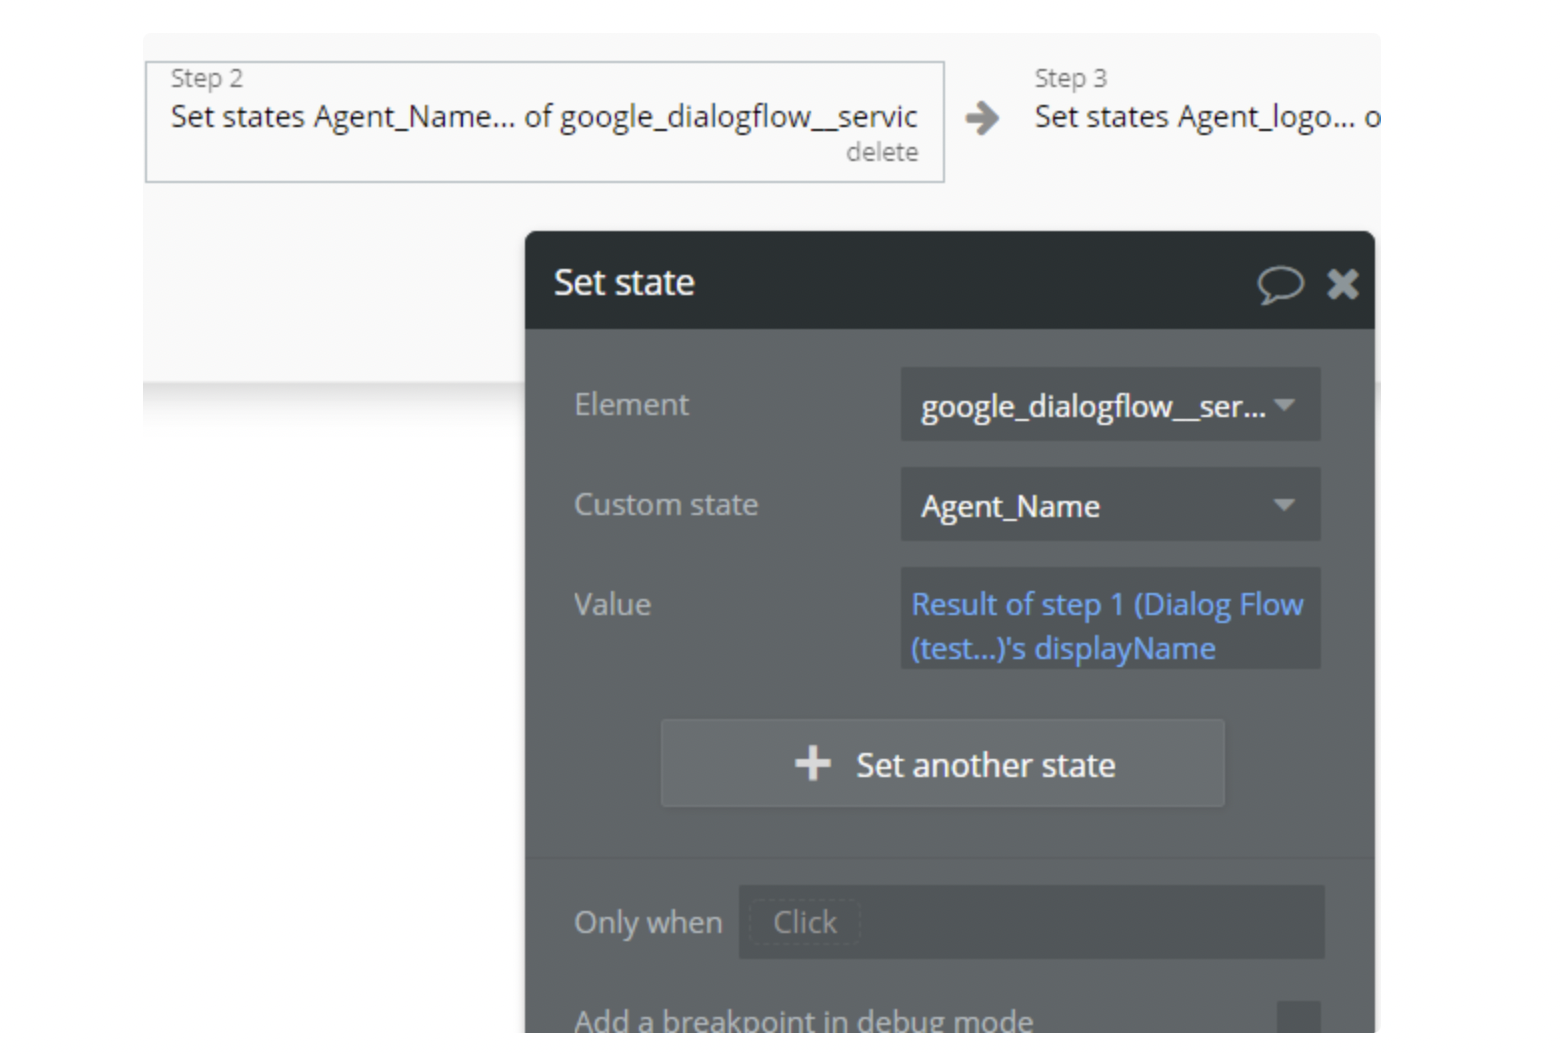
4. Use these values to display them on page