Link to the plugin page: https://zeroqode.com/plugin/1528968981330x469587835559608300
Demo to preview the plugin:
Introduction
OAuth Redirect Repair plugin is designed to assist you in solving issues related to custom URL paths and parameters in the setup URI. It can be used for Google and social networks.
Video Tutorial
How to setup
- Preparing for Redirection
- Create a Workflow in Bubble to initiate the OAuth login process.
- Add the "Prepare Redirect" action to the workflow.
- Set up necessary parameters, such as the redirect URL or user data.
- Redirect the user to the OAuth provider’s authentication URL (Google, Facebook, etc.).
Before sending the user to the OAuth provider, use the Prepare Redirect action to store important information.
Configuration:
- Handling OAuth Return
- Create a Workflow that triggers when the user returns from the OAuth provider.
- Add the "After OAuth Flow" action to the workflow.
- Check the "Confirmed Login?" parameter, which returns "yes" if authentication was successful and "no" otherwise.
- If "Confirmed Login?" is "yes", proceed with post-authentication actions such as storing access tokens or fetching user data.
- If "Confirmed Login?" is "no", implement proper error handling, such as displaying a message to the user or redirecting them to retry authentication.
After the user authorizes the application and returns from the OAuth provider, use the After OAuth Flow action to process the response.
Configuration:
- Preventing Back Navigation
- Add the "Prevent Back Button" action immediately after successful authentication.
- This will prevent users from navigating back, ensuring they stay in the correct flow.
After the user completes authentication, you might want to prevent them from going back to the previous page using the browser's back button. Use the Prevent Back Button action for this.
Configuration:
Plugin Actions
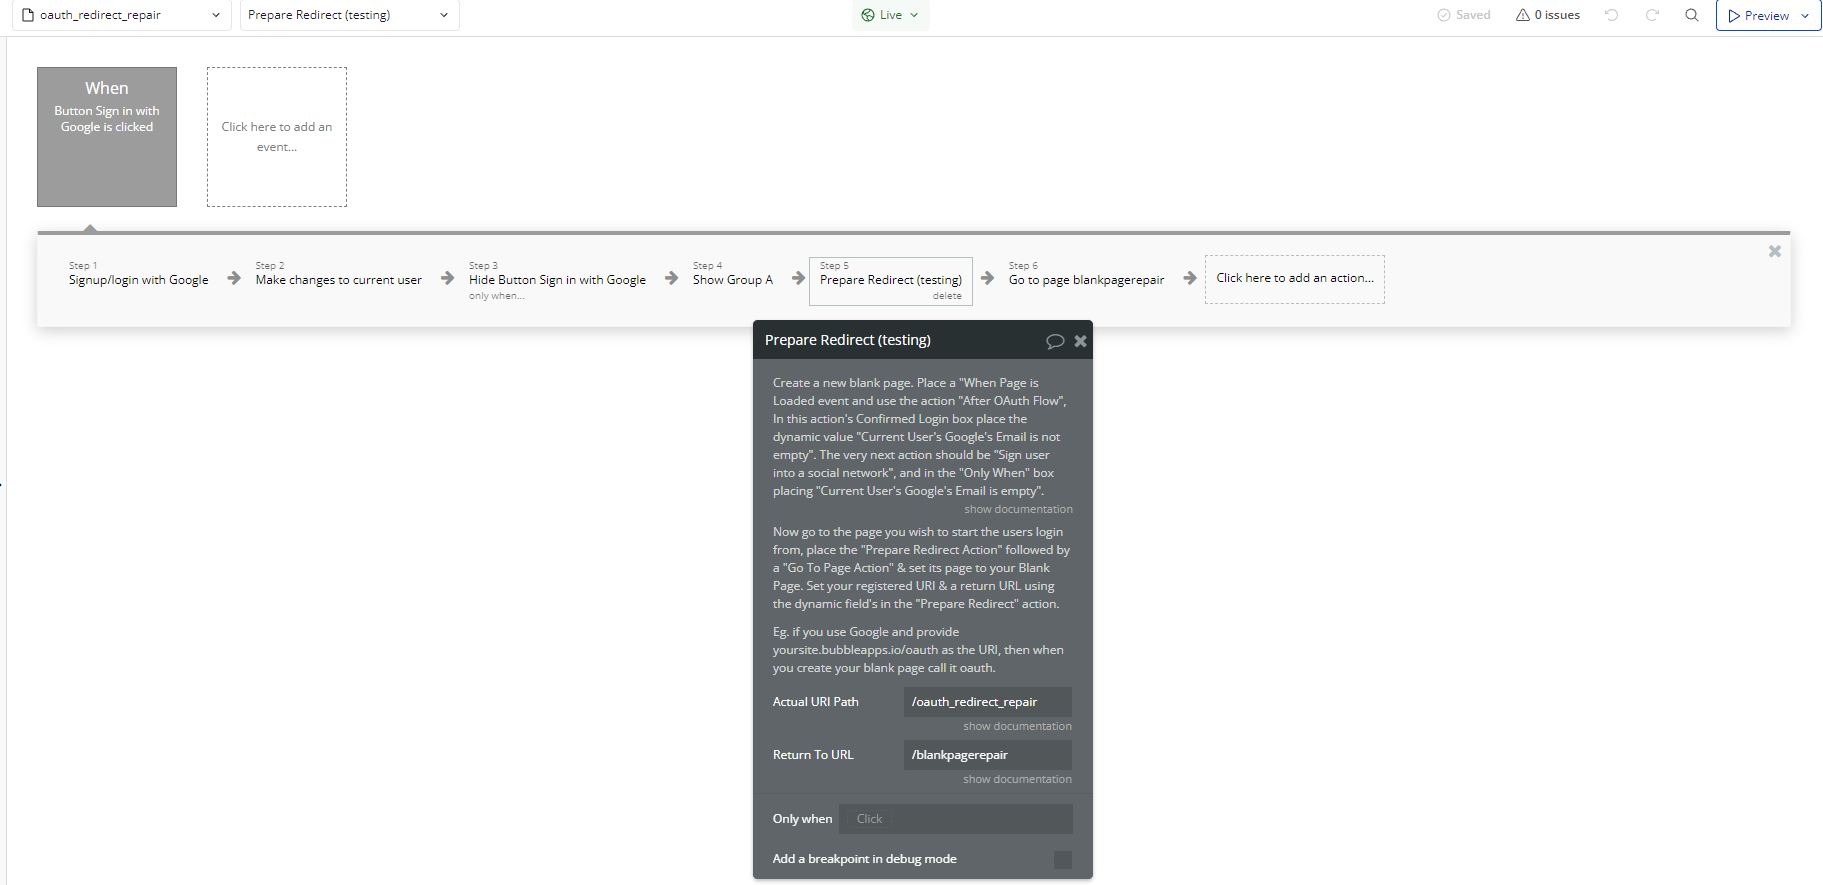
- Prepare Redirect - This action prepares the application for redirection to an external authentication provider. It allows you to store necessary parameters before redirecting users to an OAuth provider, ensuring a smooth authentication process.
Title | Description | Type |
Create a new blank page. Place a “When Page is Loaded event and use the action”After OAuth Flow”, In this action’s Confirmed Login box place the dynamic value “Current User’s Google’s Email is not empty”. The very next action should be “Sign user into a social network”, and in the “Only When” box placing “Current User’s Google’s Email is empty”. | ||
Now go to the page you wish to start the users login from, place the “Prepare Redirect Action” followed by a “Go To Page Action” & set its page to your Blank Page. Set your registered URI & a return URL using the dynamic field’s in the “Prepare Redirect” action. | ||
Eg. if you use Google and provide yoursite.bubbleapps.io/oauth as the URI, then when you create your blank page call it oauth. | ||
Actual URI Path | Actual URI Path | Text |
Return To URL | Return To URL | Text |
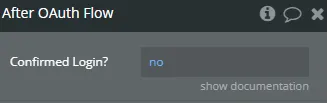
- After OAuth Flow - This action processes the OAuth response once the user is redirected back to your app. It checks whether the authentication was successful and allows you to trigger post-login actions.
Title | Description | Type |
Confirmed Login? | Confirmed Login? | Checkbox (yes/no) |
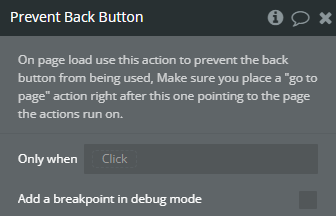
- Prevent Back Button - This action prevents users from navigating back using the browser’s back button. It is useful for securing authentication flows and ensuring users do not accidentally leave the login process.
Title | Description | Type |
On page load use this action to prevent the back button from being used, Make sure you place a “go to page” action right after this one pointing to the page the actions run on. |