Link to plugin page: https://zeroqode.com/plugin/content-preloader-1547522068997x724993284281991200
Demo to preview the settings
Introduction
This plugin allows you to show animated placeholder elements while the user waits for the content to be fully loaded. This significantly improves the user experience and gives the feeling of loading progress. Most of the top apps and websites employ this technique, for example, Facebook, Asana, Slack, and many others.
Tip: How to enable ID Attribute for an element in Bubble - https://forum.zeroqode.com/t/how-to-add-id-attribute-to-html-elements/469

How to Setup
- First of all, install the “Content Preloader” plugin in your app.
- Place the plugin element on the page, alongside the elements to which you wan appy the plugin's effects:
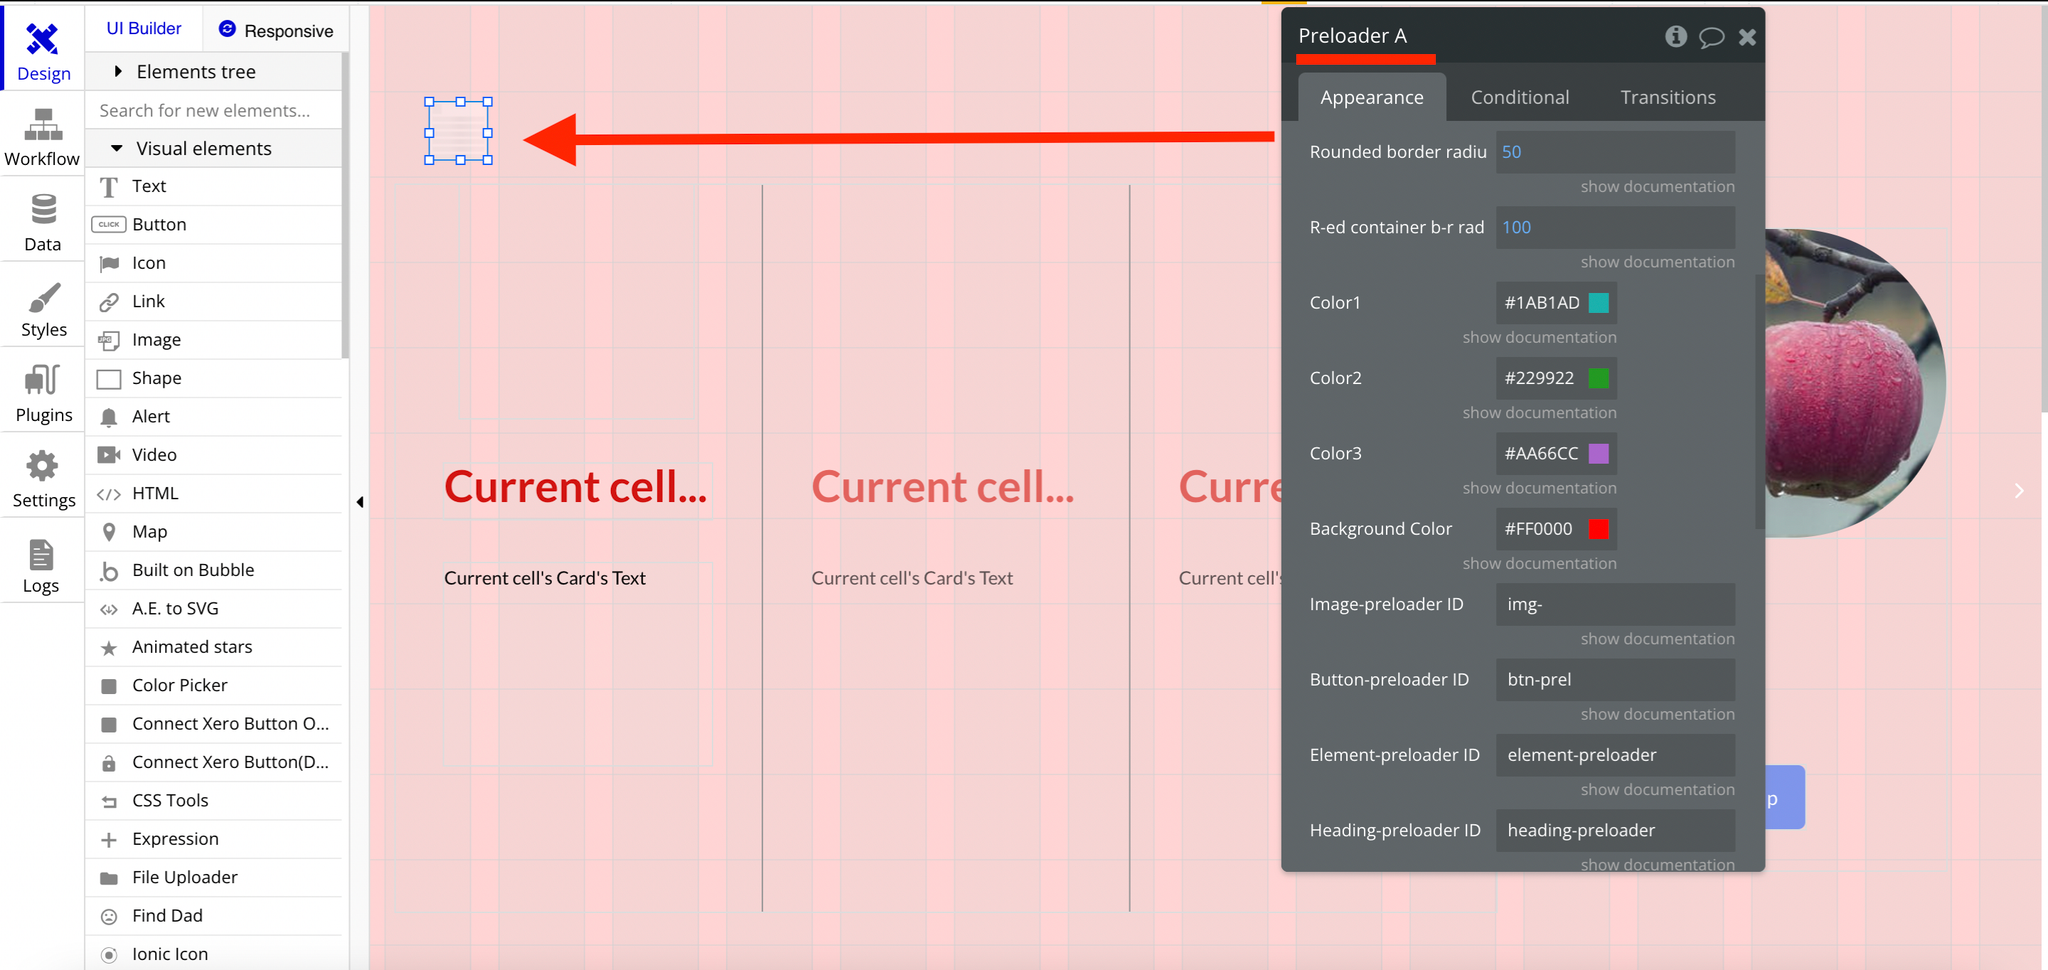
Plugin Element Proprieties
All properties (style, IDs, etc) can be found on the plugin's element:
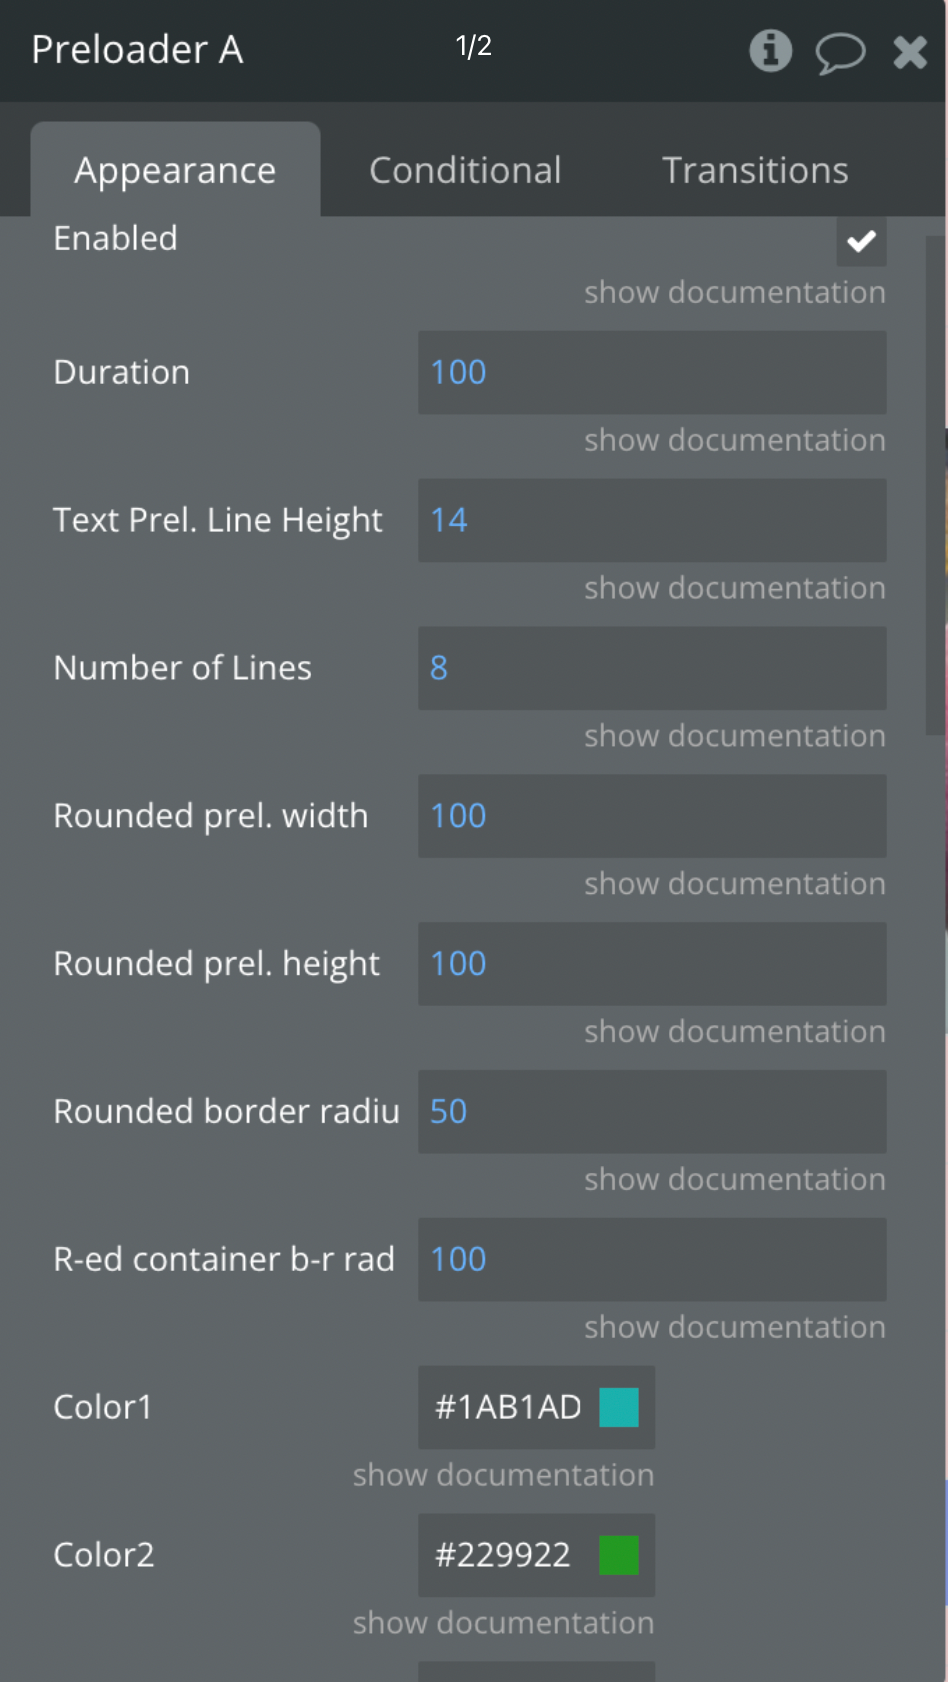
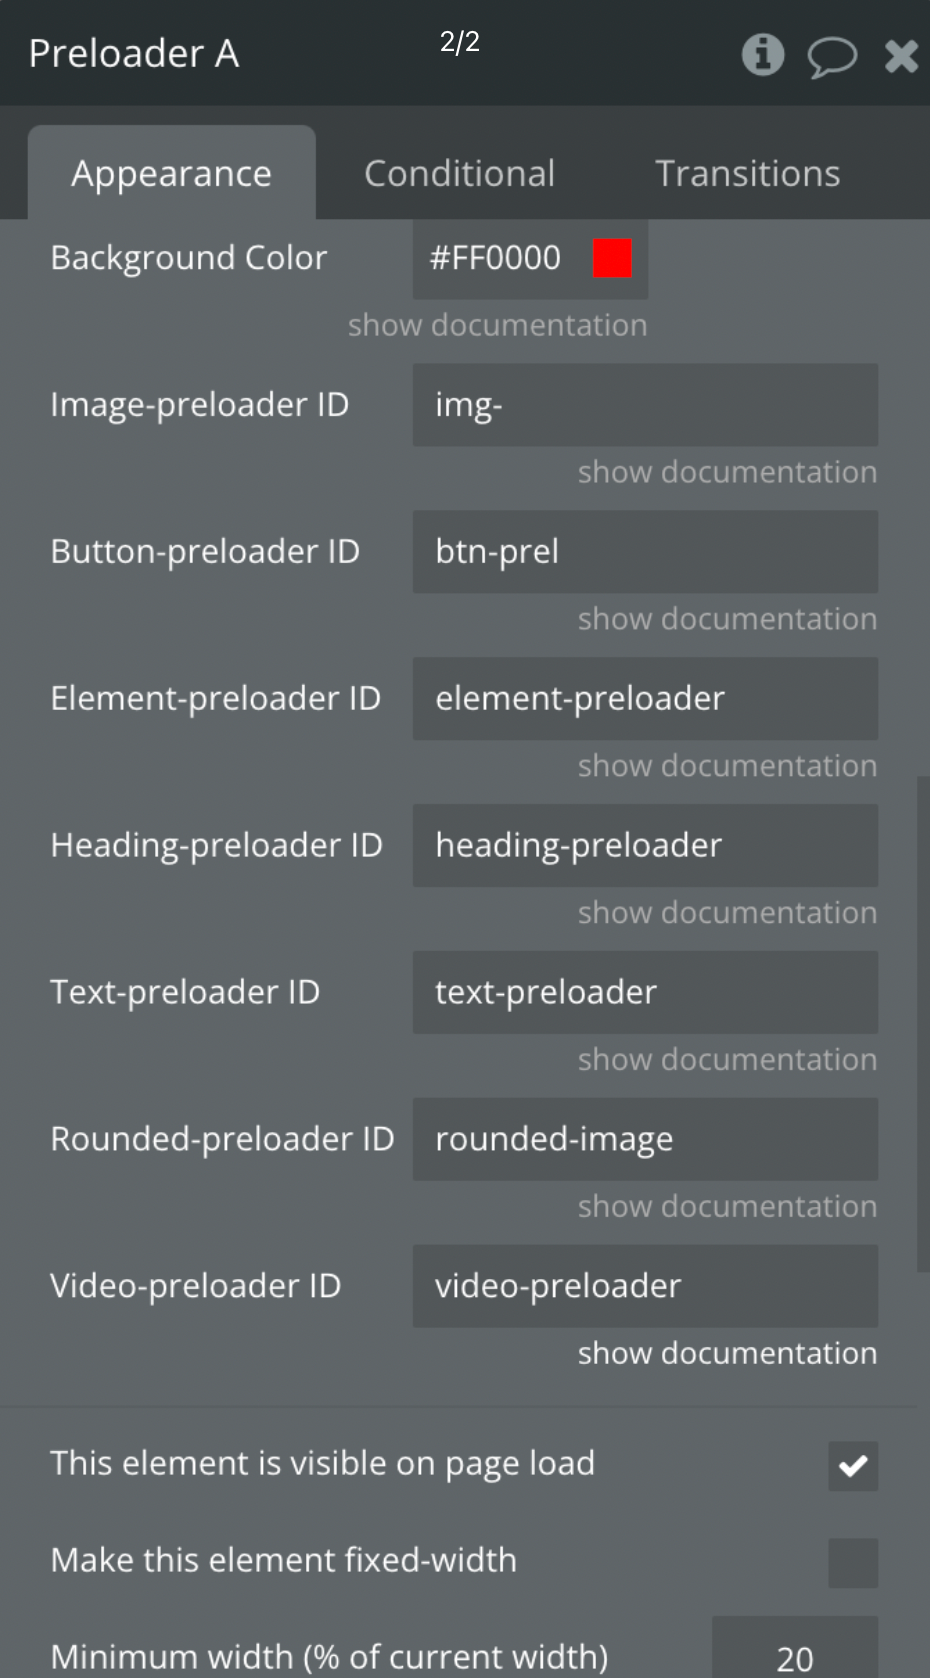
Note: plugin parameters were moved from the Plugin tab to the plugin element on the 1.15.0 version.
Parameters
- Enabled - checkbox, if checked - enables the plugin's effects on the page.
- Duration - Number in seconds.Is responsible for the duration of the preloader effect. You can play with it for a better experience. The plugin will hide all the elements using the preloader class and make them visible after the specified dutaion as soon as the elements are loaded onu the page (sing Bubble.)
- Text Preloader Line Height - Number in pixel.This parameter will be applied to the text preloader. By default text is 14 px height, so if you need a bigger height, you can fill your own value.
- Number of Lines for Text Preloader - Number. You can specify how many lines of text preloader to show on the top of your text. A large number of lines may affect the performance of your application. An optimal choice would be in the range from 1 to 30.
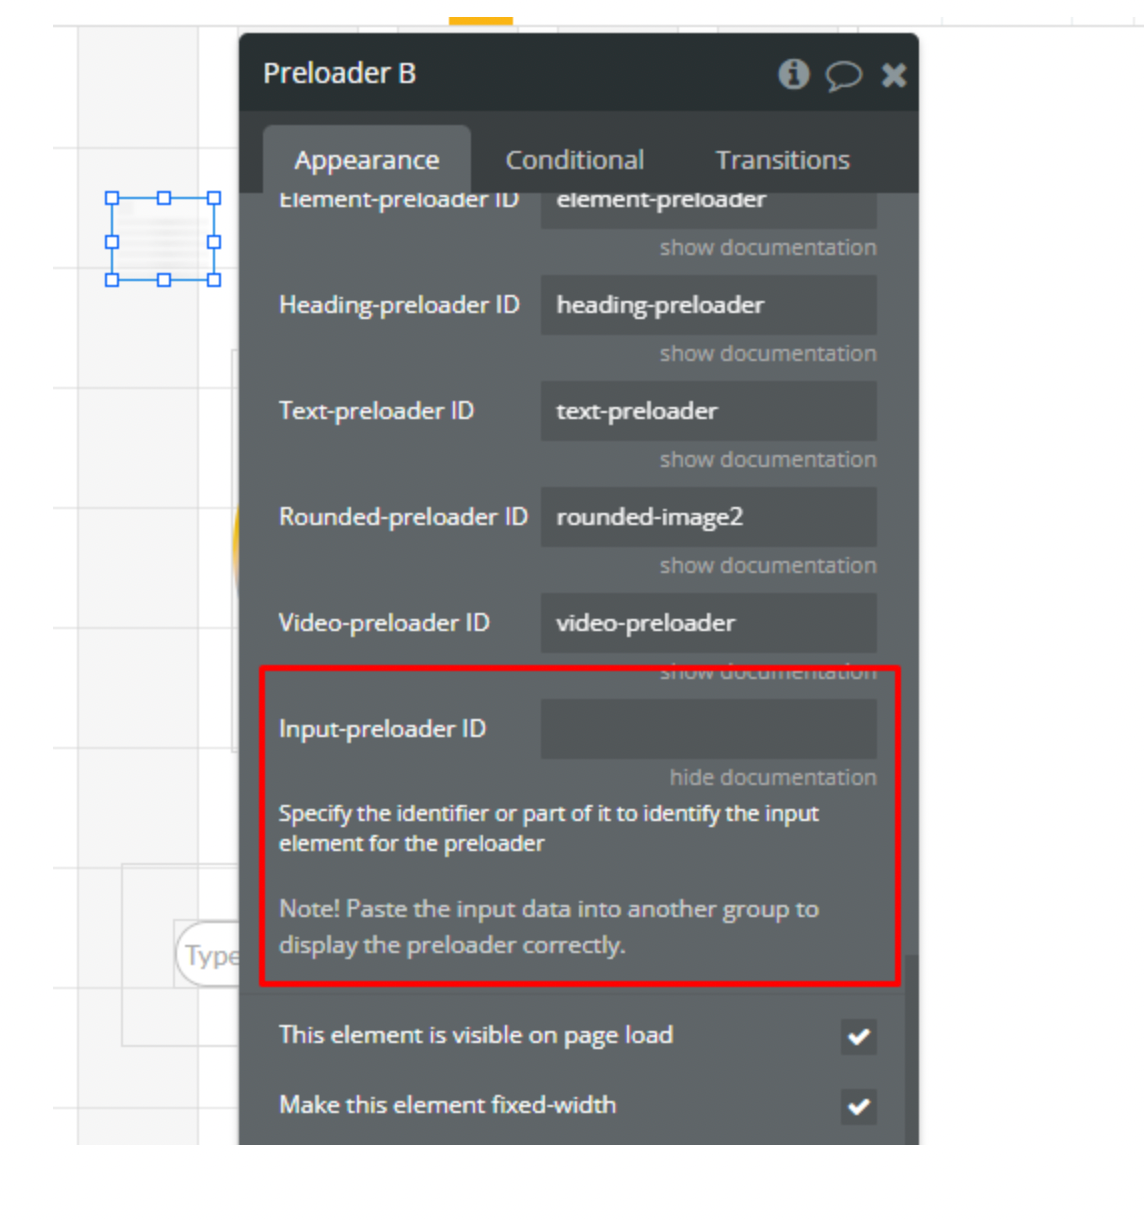
- Rounded prel. width - Number in px. Indicate the width of the rounded preloader in pixels.
- Rounded prel. height - Number in px. Indicate the height of the rounded preloader in pixels.
- Rounded border-radius - Number in px.Indicate the border-radius for the rounded preloader in pixels.
- R-ed container b-r radius - Number in px. Set the border radius for the rounded preloader container in pixels
- Color 1 - Color in HEX. Set the color for the first option (optional).
- Color 2 - Color in HEX. Set color for the second part (optional).
- Color 3 - Color in HEX. Set the color for the last part of preloading (optional).
- Background Color - Color in HEX.Set the color for the background of the preloader container (optional).
- Image-preloader ID - text. Specify the ID to identify the image for the preloader. E.g.-"image-preloader".
- Button-preloader ID -text. Specify the ID to identify the button for the preloader. E.g. - "button-preloader".
- Element-preloader ID - text. Specify the ID to identify the element for the preloader. E.g. - "element-preloader".
- Heading-preloader ID - text. Specify the ID to identify the header-text for the preloader. E.g. - "heading-preloader"g.
- Text-preloader ID - text. Specify the ID to identify the text for the preloader. E.g. - "text-preloader".
- Rounded-preloader ID - text. Specify the ID to identify the rounded element for the rounded preloader. E.g - "rounded-image".
- Video-preloader ID - text. Specify the ID to identify the video element for the preloader. E.g. - "video-preloader".
To apply the preloader effect, just specify preloader ID in the ID Attribute field of required elements (such as images, buttons, etc.).
To expose the ID attribute field you need to navigate to the app Settings -> General tab, and tick the checkbox next to "Expose the option to add an ID attribute to HTML elements".

Preloader ID can be: image-preloader, rounded-image-preloader, heading-preloader, text-preloader, button-preloader.
If you want to apply the preloader effect for a shape, or a group, you can also use the “image-preloader” ID, for example like this:

Element Actions
Start Preloader a Preloader - used to start the preloader in workflow
Stop Preloader a Preloader - used for stopping the preloader animation workflow
