Link to plugin page: https://zeroqode.com/plugin/telegram-1519019646265x950432348785868800
Demo to preview the settings:
Try Telegram Bot: telegram.me/zenifybot
Introduction
This plugin allows you to build Telegram bots by sending messages, photos, music to a chat with the user.
Prerequisites
You must have an account with Telegram to interact with the Telegram API. Create your development account: https://core.telegram.org/

How to setup
After installing the plugin, please insert your API key in all the parameter fields that you see on the plugin tab.
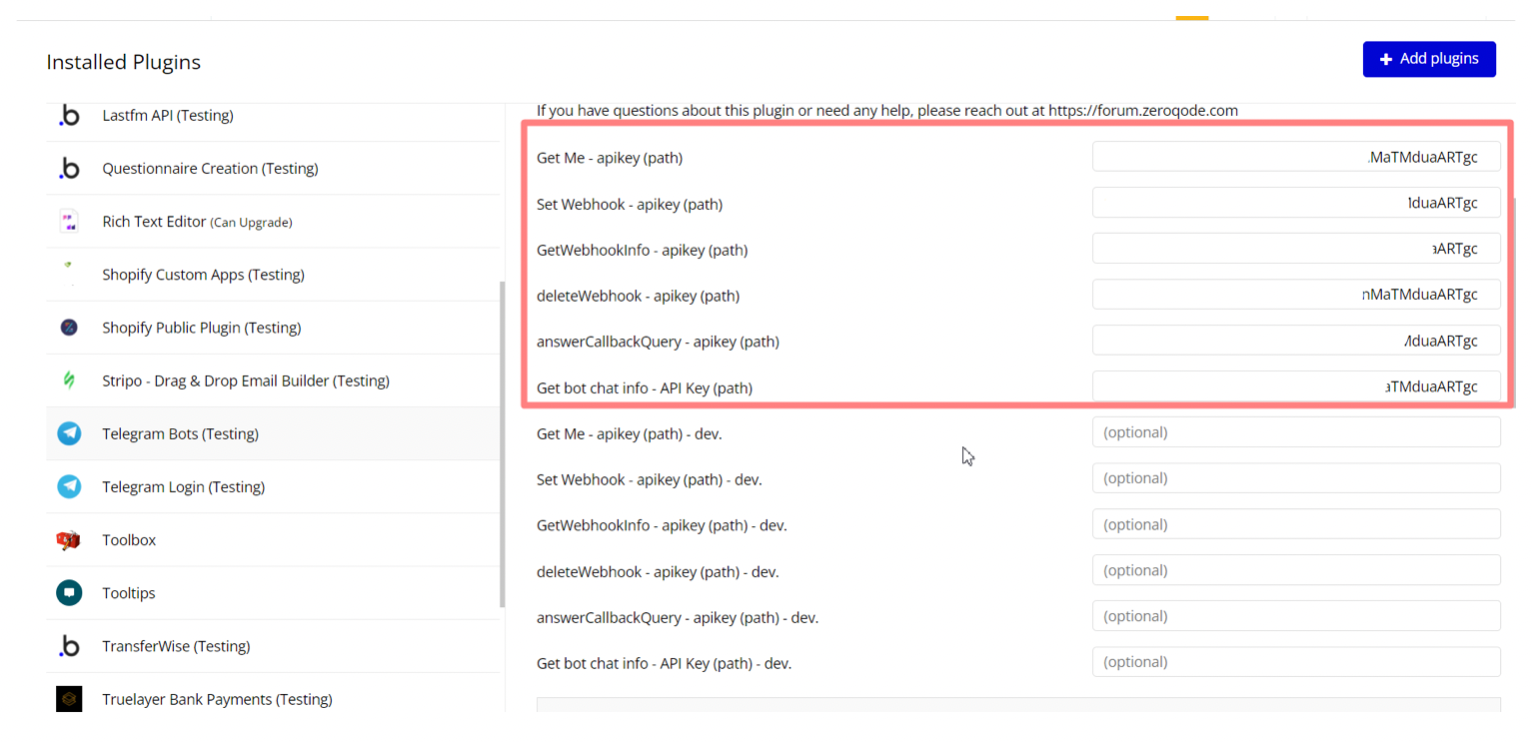
The steps on how to get the Key are presented on the Demo page.
You will not be able to receive updates using getUpdates for as long as an outgoing webhook is set up.
For details please check here: https://core.telegram.org/bots/api#getting-updates
Webhook setup
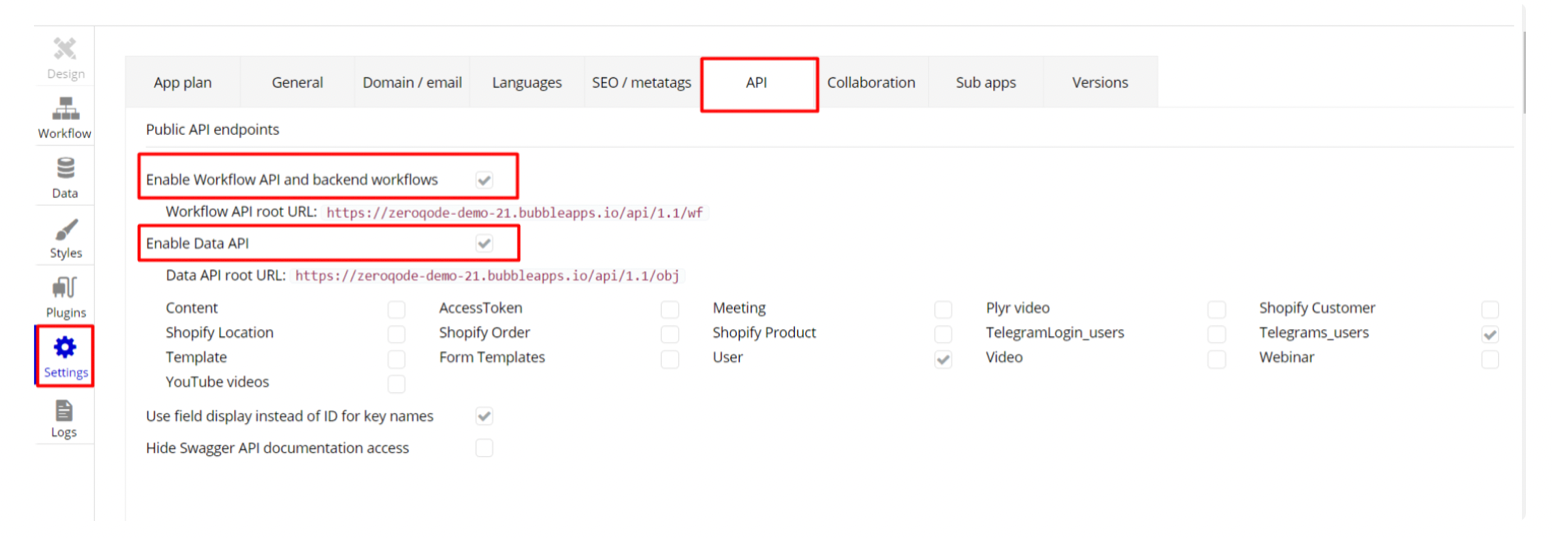
- Go to Tab Settings - > API -> and click on “Enable Workflow API and backends workflows ” and "Enable Data API" to open the application for external connections
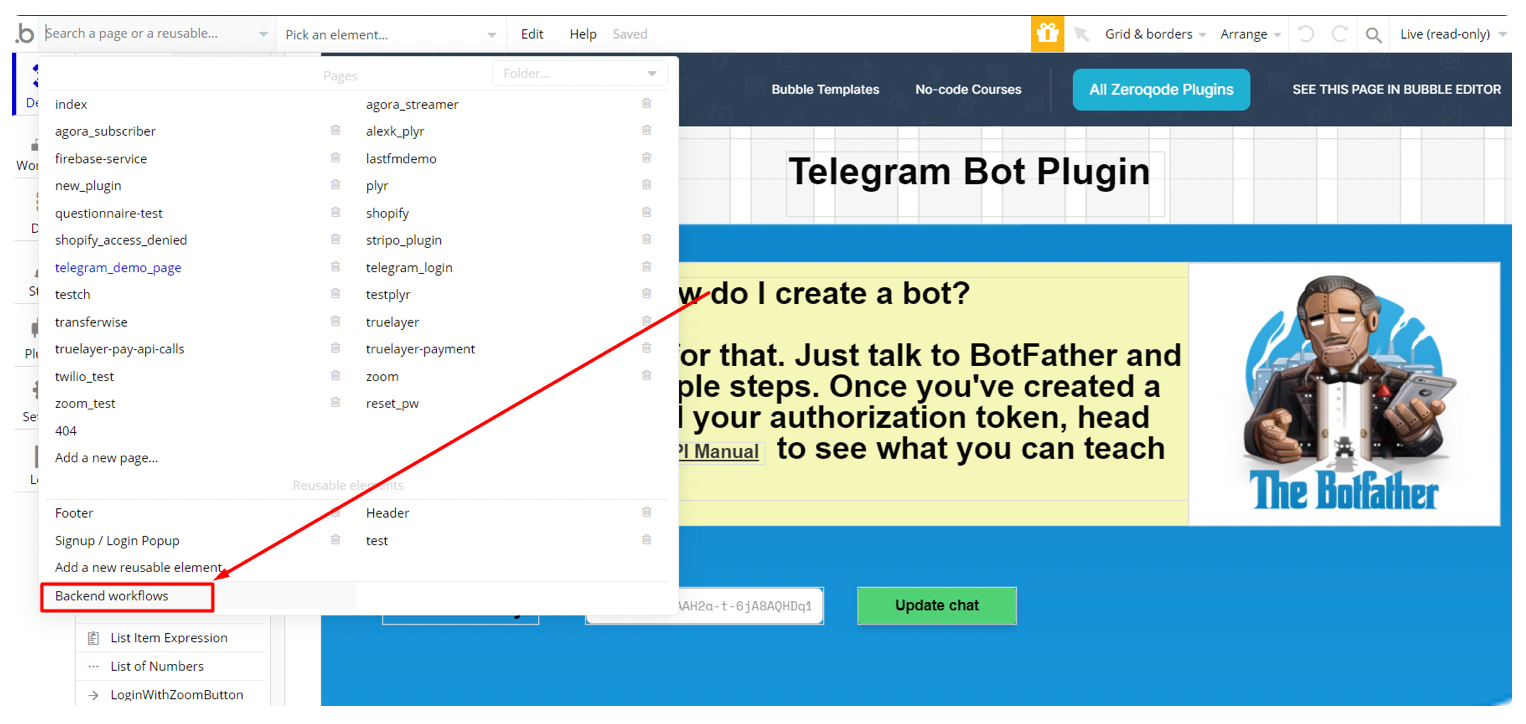
3. Click on the pages menu - “Backend workflow” and go to “API workflow” page
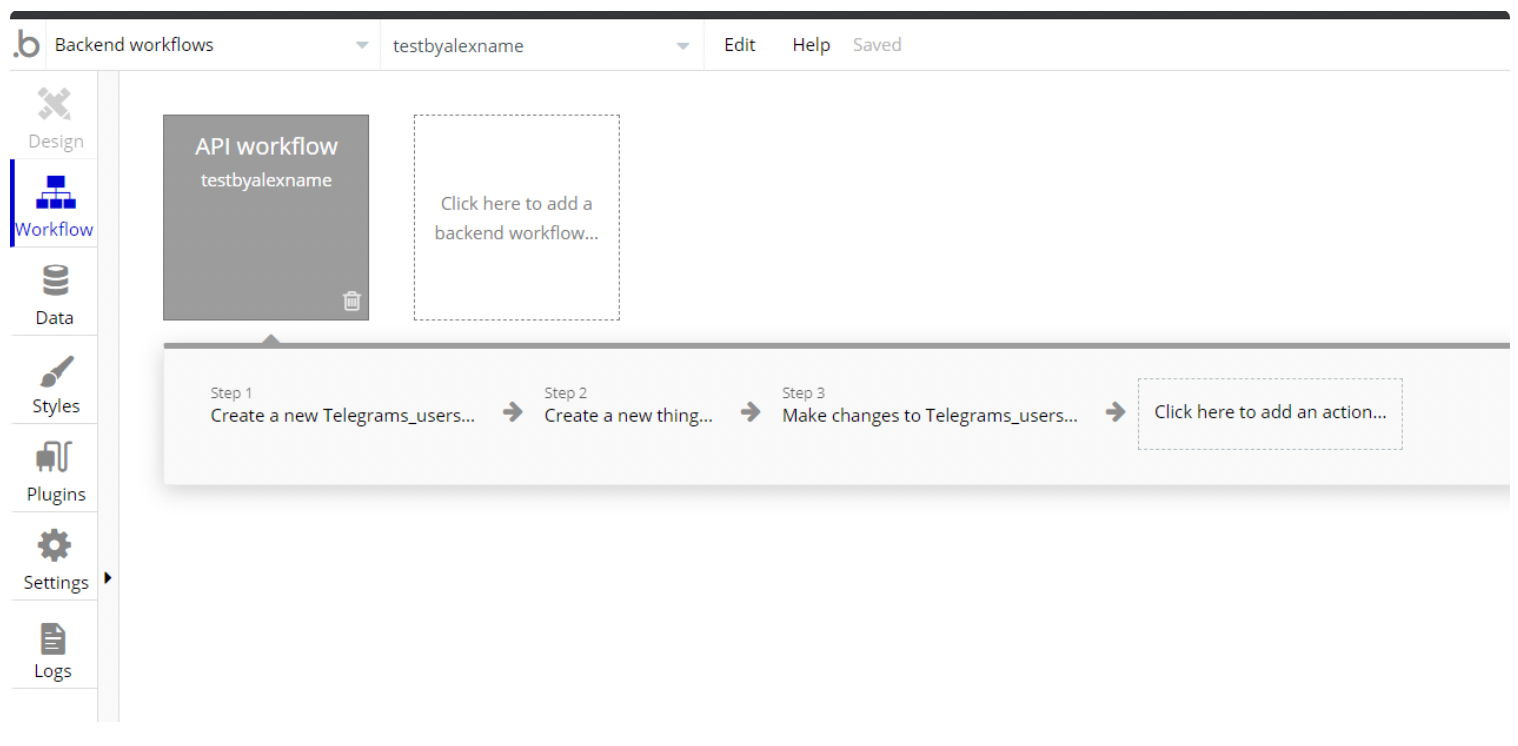
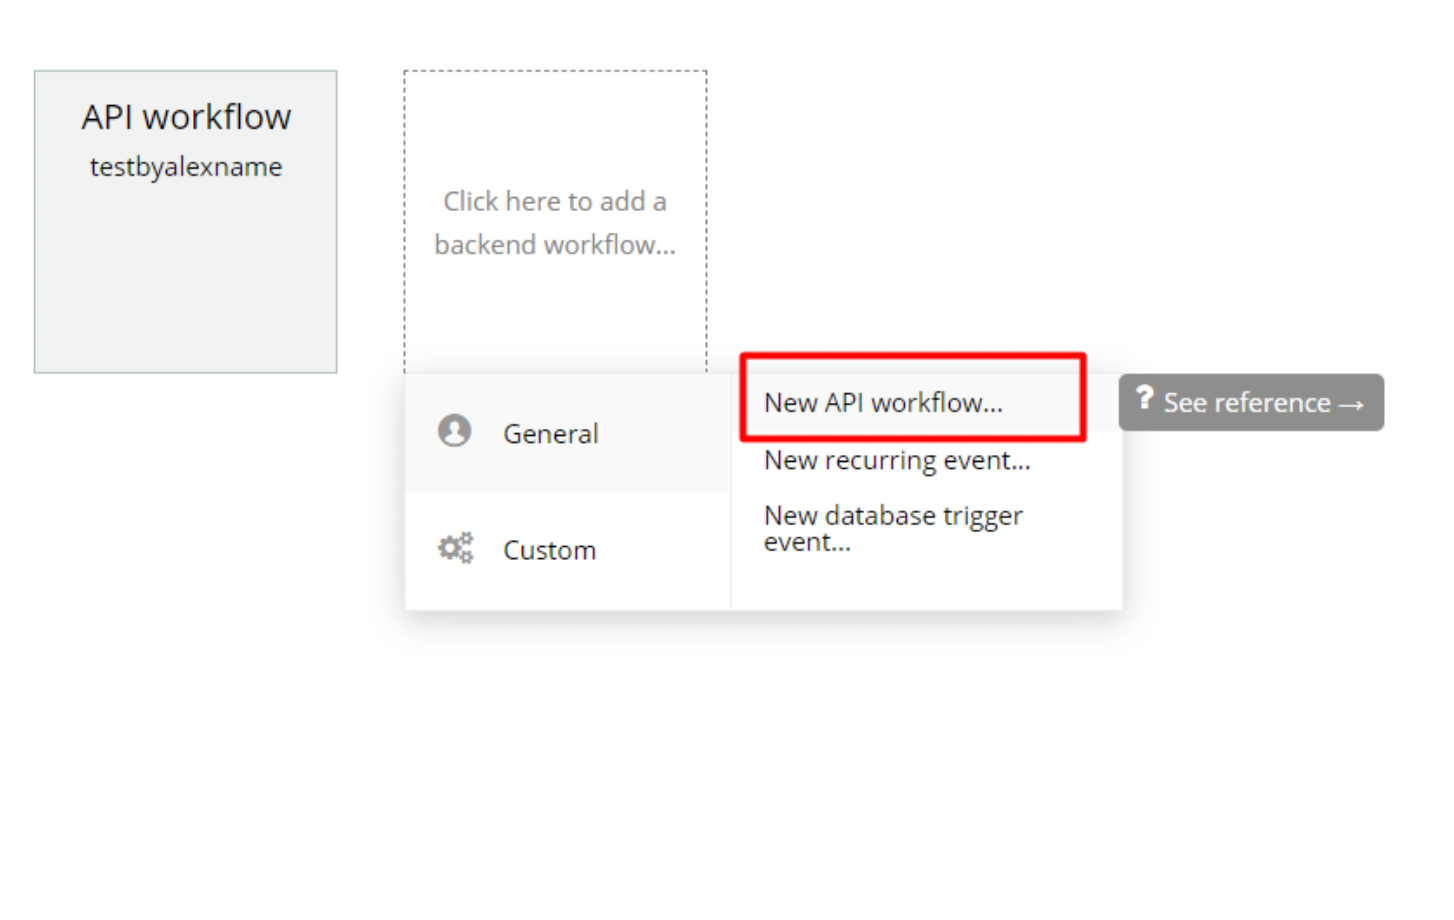
4. Add a new endpoint and type a name for it (this will be the webhook for Telegram to which it'll connect to - https://core.telegram.org/bots/webhooks)
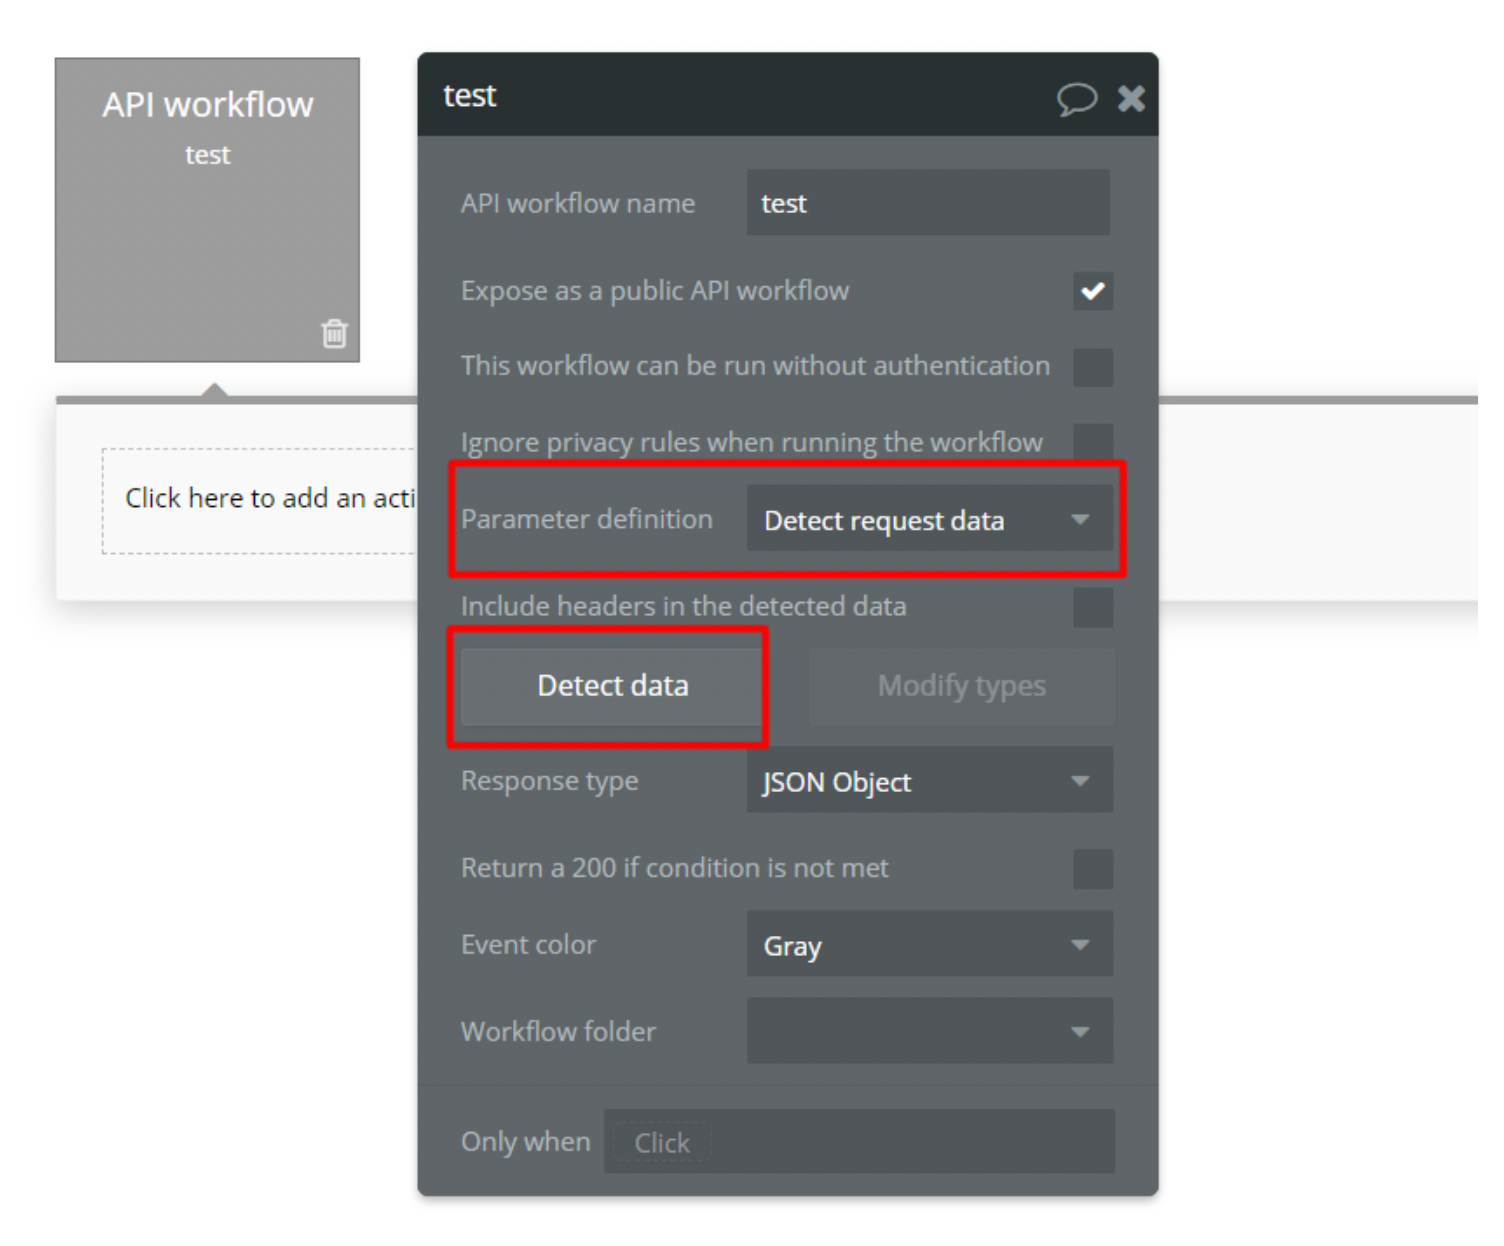
5. Click on the endpoint and then click “detect data”
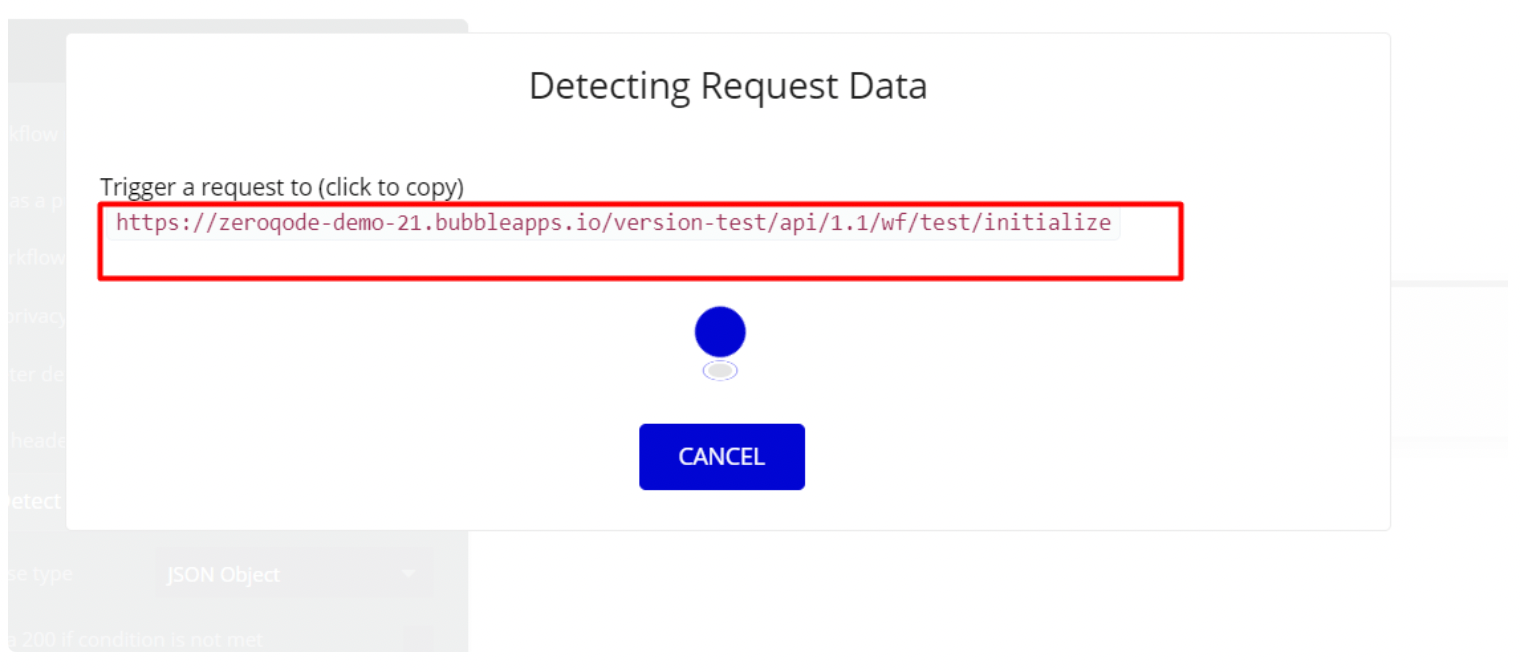
6. Copy the link
7. Install postman on your computer and then import the collection:
javascript{
    "update_id": 1234567,
    "message": {
        "message_id": 751,
        "from": {
            "id": 12122121,
            "is_bot": false,
            "first_name": "Me",
            "last_name": "&",
            "username": "&&&&",
            "language_code": "en"
        },
        "chat": {
            "id": -104235244275,
            "title": "Some group",
            "type": "supergroup"
        },
        "date": 1579999999,
        "text": "Hi!"
    }
}
8. In the call that you see replace the URL with the one you copied from the detect data and initialize the call.
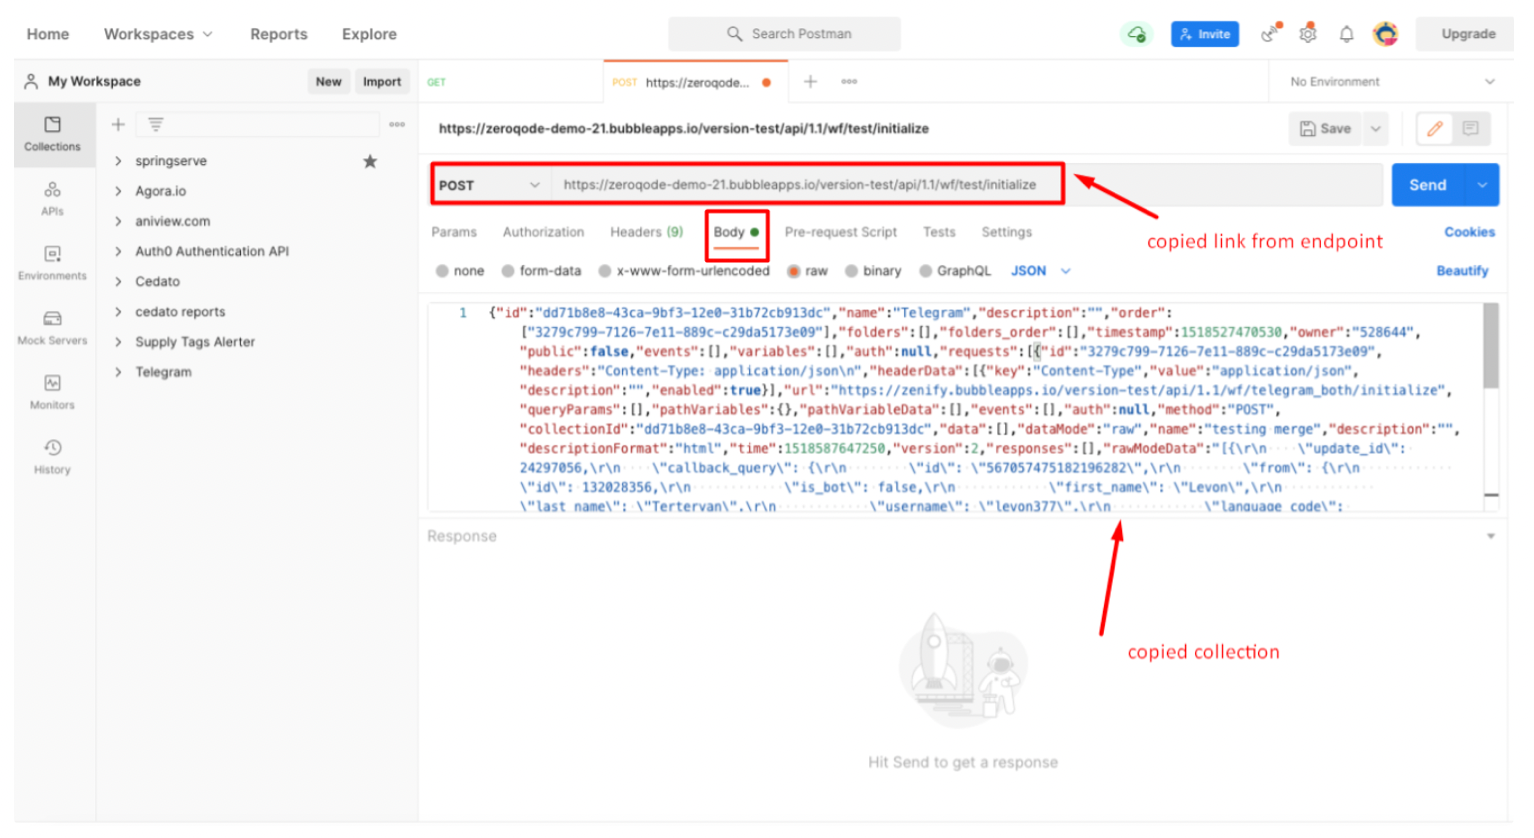
9. You should see a success confirmation in the postman window.
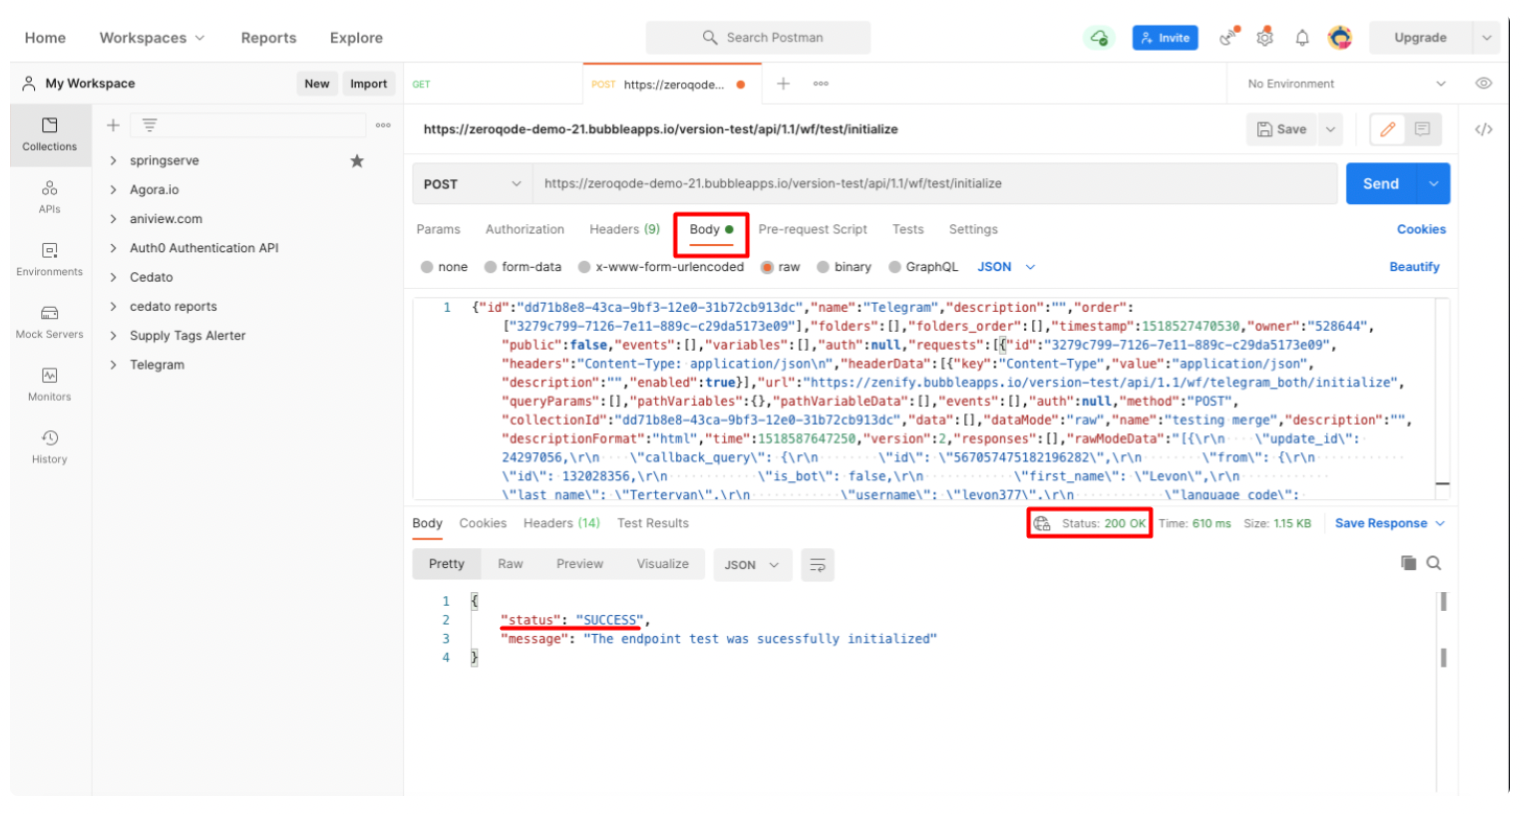
10. On the Telegram side use setwebhook call to tell Telergram which URL should be used for webhooks (Note: it’s the same that you used in postman but without “initialize” at the end on the Telegram side).
More info on how to work with Telegram webhooks (https://core.telegram.org/bots/api#setwebhook and here https://core.telegram.org/bots/webhooks)
When using sendmessage (https://core.telegram.org/bots/api#sendmessage) call you have a few options for the replymarkupfield (which is optional)
Main options are:
1. inline keyboard (shows buttons right next to the message)
here is a sample syntax
{ “inline_keyboard”: [[ { “text”: “I’m ready, let’s get started”, “callback_data”: “readytostart” }] ] }
you can add more buttons in a row and have a few rows of buttons
2. custom keyboard (shows custom keyboard with buttons instead of the regular keyboard)
sample syntax
{ “keyboard”: [[ { “text”: “Done” }] ],“one_time_keyboard”:true }
same here, you can add more buttons in a row and have a few rows of buttons
You're all set to send and receive data from Telegram
To see how the Webhook is set on the Demo page please check backend workflows.
Actions
Send Message - This action formats and sends the message.
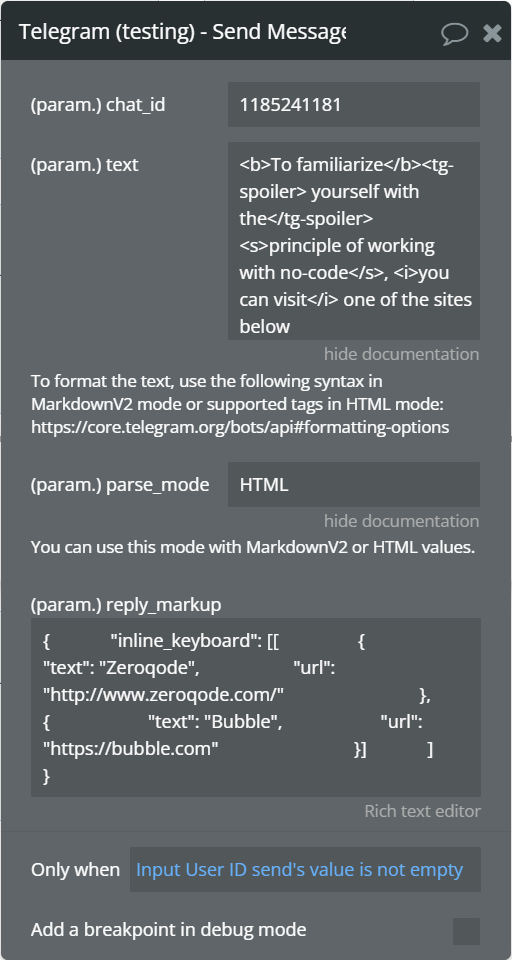
Fields:
Title | Description | Type |
chat_id | Unique identifier for the target chat or username of the target channel (in the format @channelusername) | Integer or String |
text | Text of the message to be sent, 1-4096 characters after entities parsing.
To format the text, use the following syntax in MarkdownV2 mode or supported tags in HTML mode: https://core.telegram.org/bots/api#formatting-options | String |
parse_mode | Mode for parsing entities in the message text. See formatting options
for more details. | String |
reply_markup | Additional interface options. A JSON-serialized object for an inline keyboard, custom reply keyboard, and instructions to remove the reply keyboard or to force a reply from the user. | InlineKeyboardMarkup or ReplyKeyboardMarkup or ReplyKeyboardRemove or ForceReply |
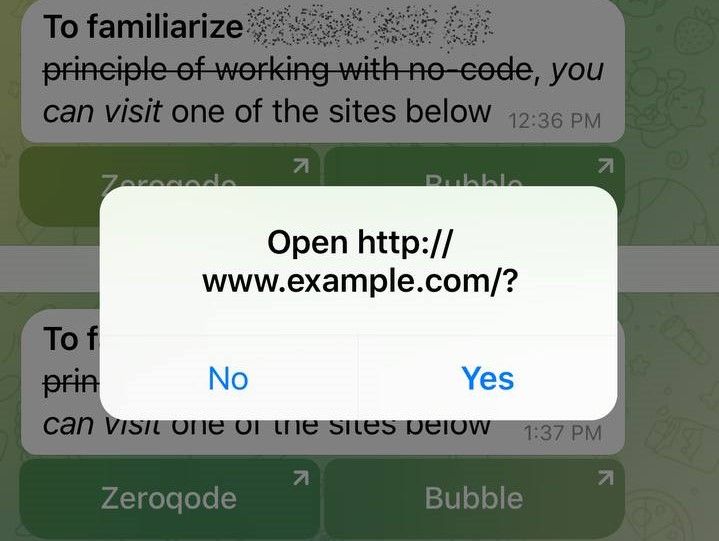
You can use bold, italic, underlined, strikethrough, and spoiler text, as well as inline links and pre-formatted code in your bots' messages. You can specify text entities directly, or use markdown-style or HTML-style formatting.
Note that Telegram clients will display an alert to the user before opening an inline link ('Open this link?' together with the full URL).
MarkdownV2 style
To use this mode, pass MarkdownV2 in the parse_mode field. Use the following syntax in your message:

HTML style
To use this mode, pass HTML in the parse_mode field. The following tags are currently supported:
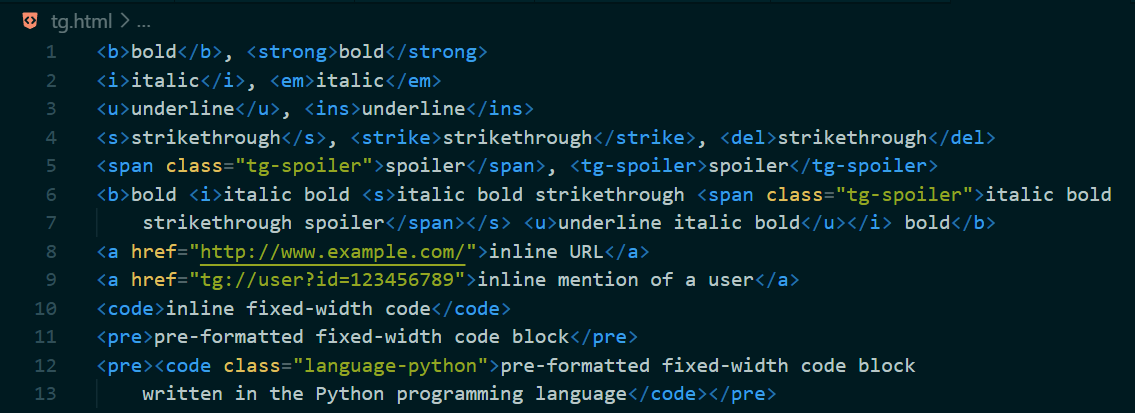
Formatting options in Telegram Documentation: https://core.telegram.org/bots/api#formatting-options

