Link to the plugin page: https://zeroqode.com/plugin/1546872654804x306416515013148700
Demo to preview the plugin:
Introduction
Are you thinking about getting a stylish progress visualization in percents for your Bubble app? Try this no-code Liquid Gauges plugin and use customizable gauge elements for that.
How to setup
- Add the Liquid Gauge element to the page
- Search for the Liquid Gauge element and drag it onto your page.
- Configure the properties
- Value: Set the initial value of the gauge.
- Wave Height, Speed, Color: Customize the appearance of the animation.
- Text Color: Adjust the color of the number displayed inside the gauge.
Adjust the following parameters as needed:
- Update the Gauge Dynamically
- Add a button labeled "Update Gauge" to your page.
- Go to the Workflows tab and create a new event "When the button is clicked".
- Add the Update Gauge A Liquid Gauge action.
- Select the Liquid Gauge element you want to update.
- Set a New Value (e.g.,
Input's valueto use the value from a numeric input).
To change the gauge value in real time, use the Update Gauge A Liquid Gauge action within a workflow.
Example Usage
Plugin Element Properties
Liquid Gauge
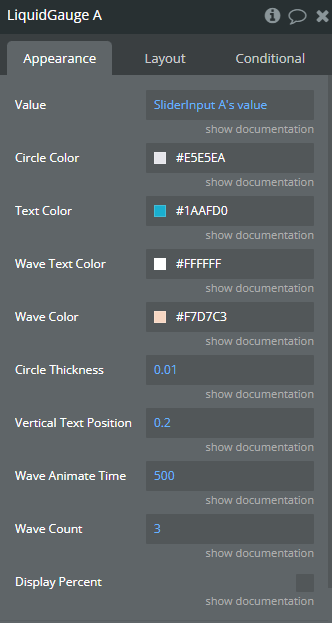
Fields:
Title | Description | Type |
Value | The value to display | Number |
Circle Color | The gauges circle color. | Color |
Text Color | The gauges font color. | Color |
Wave Text Color | The wave text color. | Color |
Wave Color | The wave color. | Color |
Circle Thickness | The circle thickness. | Number |
Vertical Text Position | The vertical text position. | Number |
Wave Animate Time | The wave animation time. | Number |
Wave Count | The number of waves. | Number |
Display Percent | Adds a % symbol to the gauge | Checkbox (yes/no) |
Element Actions
- Update Gauge - Updates the gauge.
Title | Description | Type |
New Value | The new value to display. | Number |