Demo to preview the settings
Introduction
Sign up and log in users with their Spotify credentials. You can also retrieve user details for the authenticated user.
Prerequisites
- You must have the Spotify Developer account.
How to set up
Create your application
Log in to your Spotify account and navigate to this page: https://developer.spotify.com/dashboard
Fill in your app's name, description, website URL, and redirect URI to proceed to the next step.
Make sure your redirect uri is the exact url of the page that triggers the "signup/login with Spotify" action.
Copy Client ID and Client Secret
The first greyed-out box is your Client ID, and the blue link will reveal your Client Secret. Copy these two values:

Then copy these two values into your plugin settings area:

Client ID goes to App ID/API Key.
Client Secret goes to App Secret.
Signup / Login Workflow
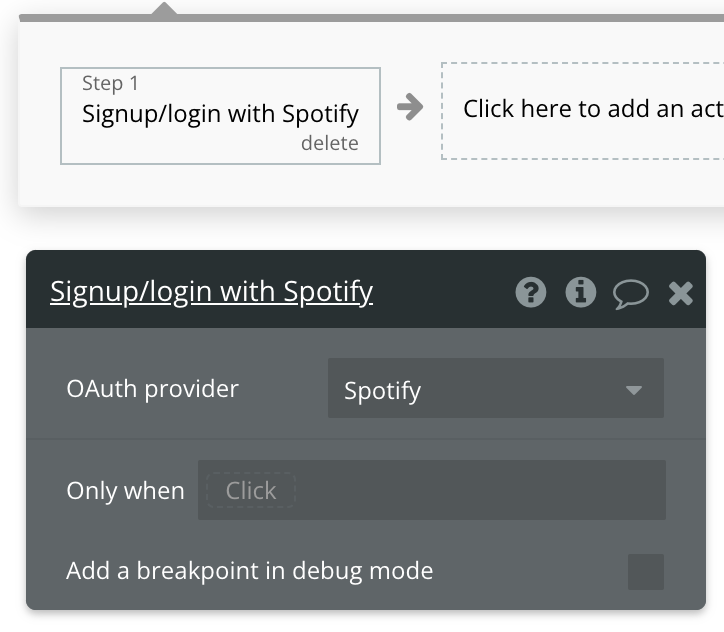
Add a button to your page design to trigger the signup / login with social network action, and select "Spotify" as the OAuth provider:
The user will be taken to a login screen to enter their Spotify credentials and accept this authorization:
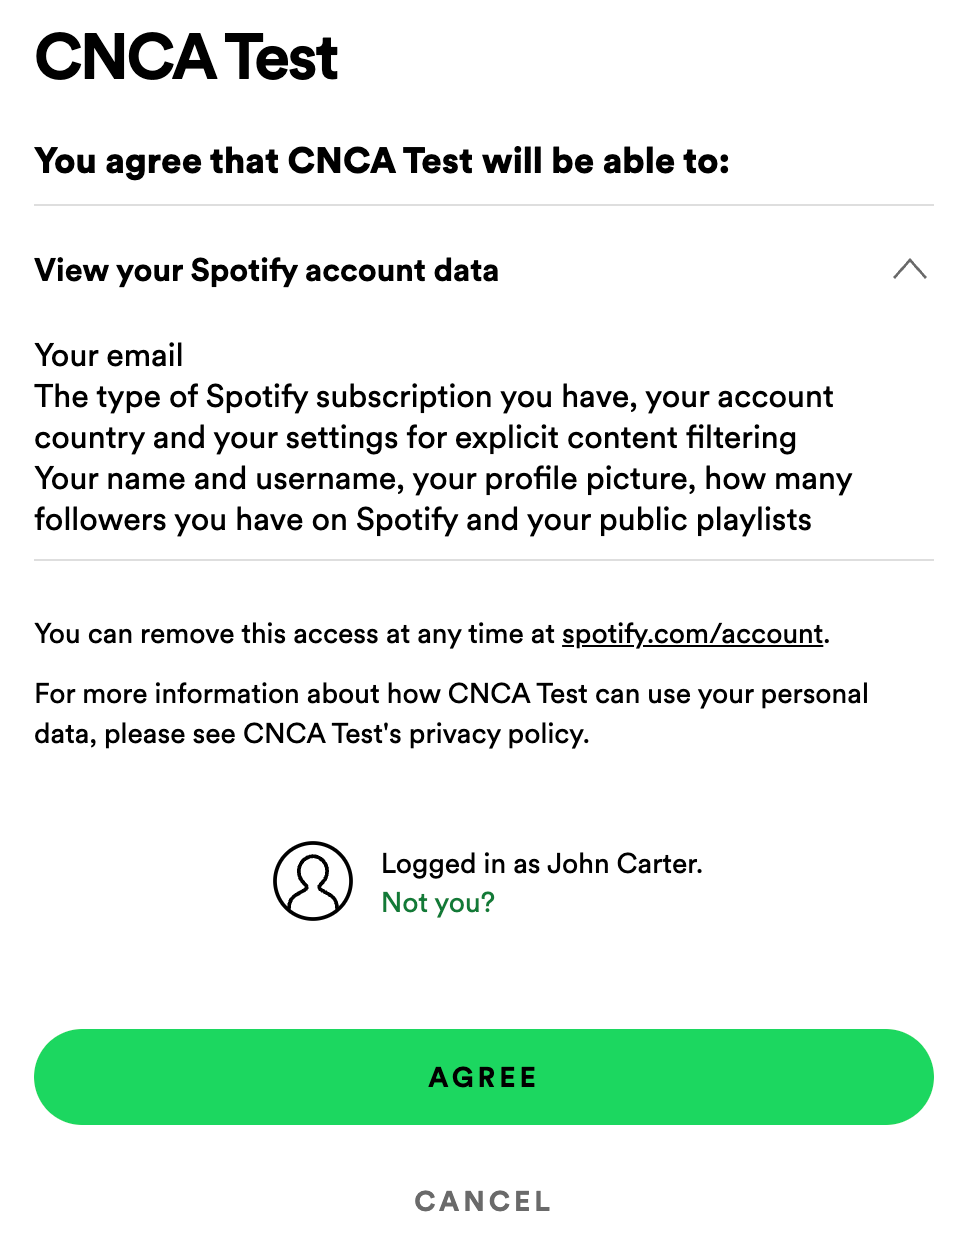
Once they're authorized, they'll automatically be redirected back to your Bubble app and be logged in.
User Information
This plugin also comes with a data source to get extra information about the authenticated user.
For example, you can set up a group with this data source to display these details -- just select "Get data from external API", then choose "Spotify - Profile"
Make sure the Group's "Type of content" is also "Profile (Spotify)"
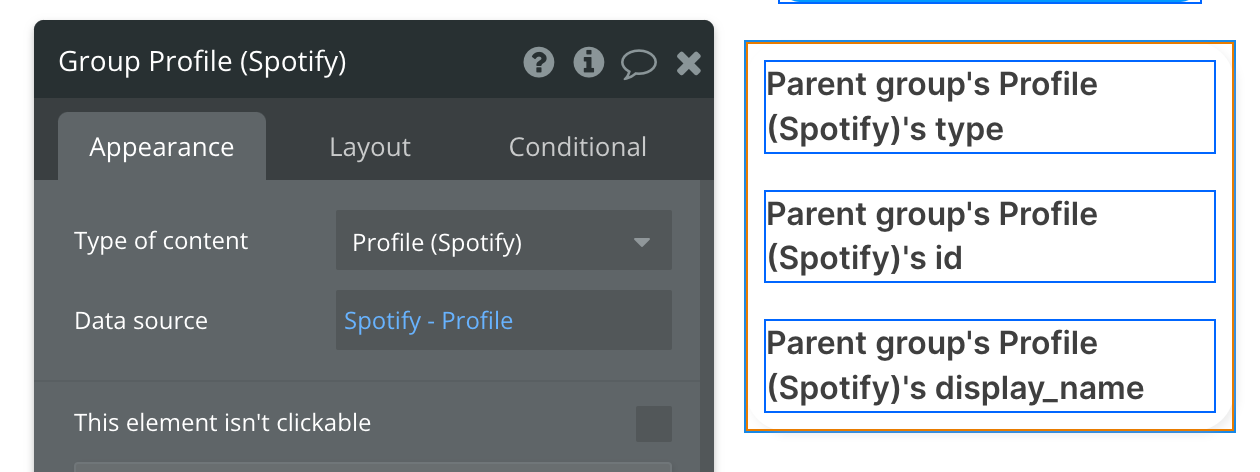
Now, inside the group, you can display that Spotify user's information. Open the dropdown like in the below screenshot to see all of the available fields you can display about the User.
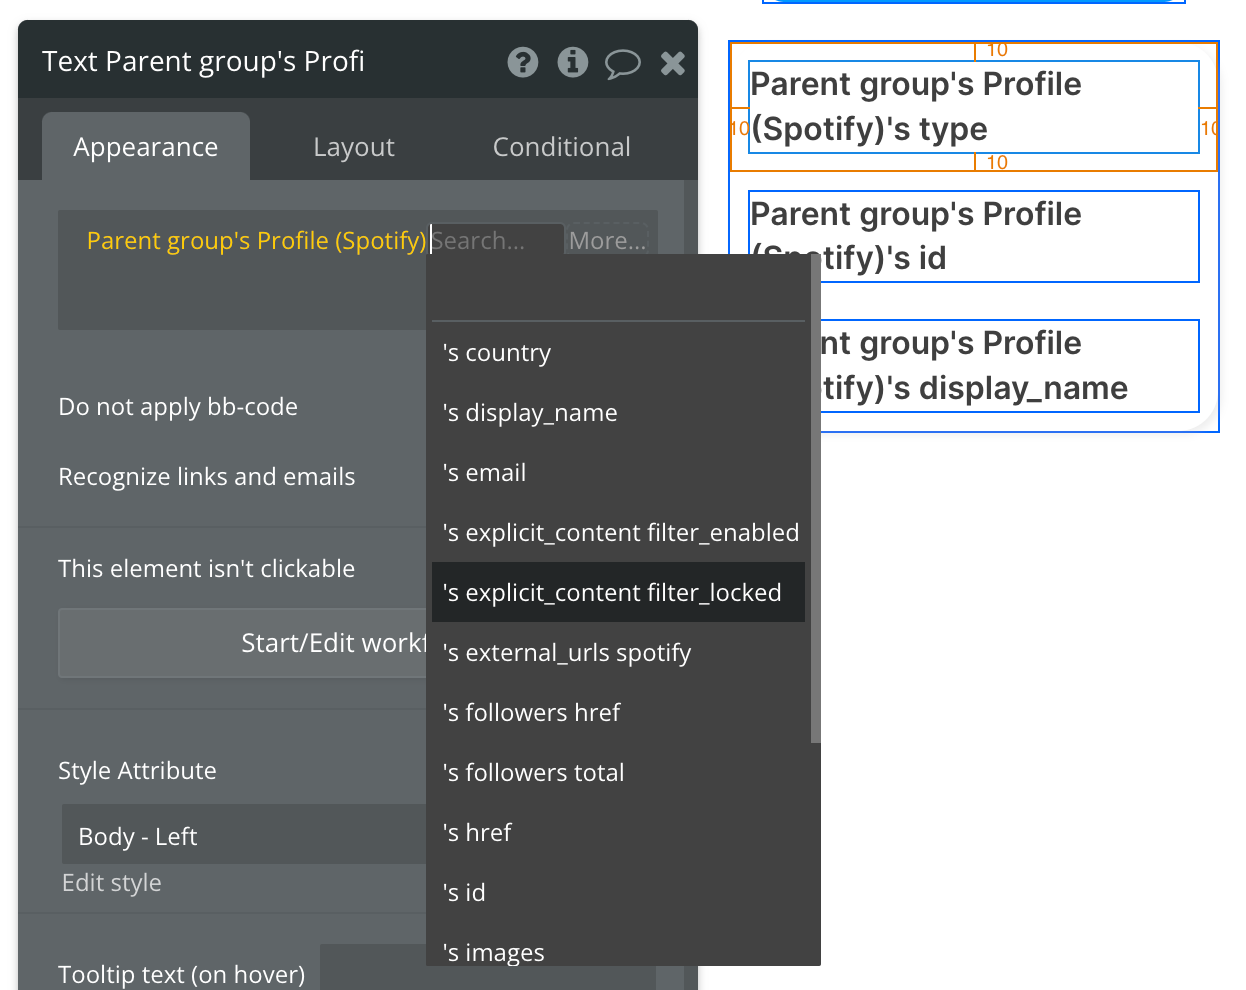
Now you're ready to authenticate your users with their Spotify accounts!
Search
Spotify documentation: https://developer.spotify.com/documentation/web-api/reference/search
Set up the datasource
We're using a repeating group in our example. Make sure whatever element you use has the correct type of content set (Search tracks item (Spotify)):
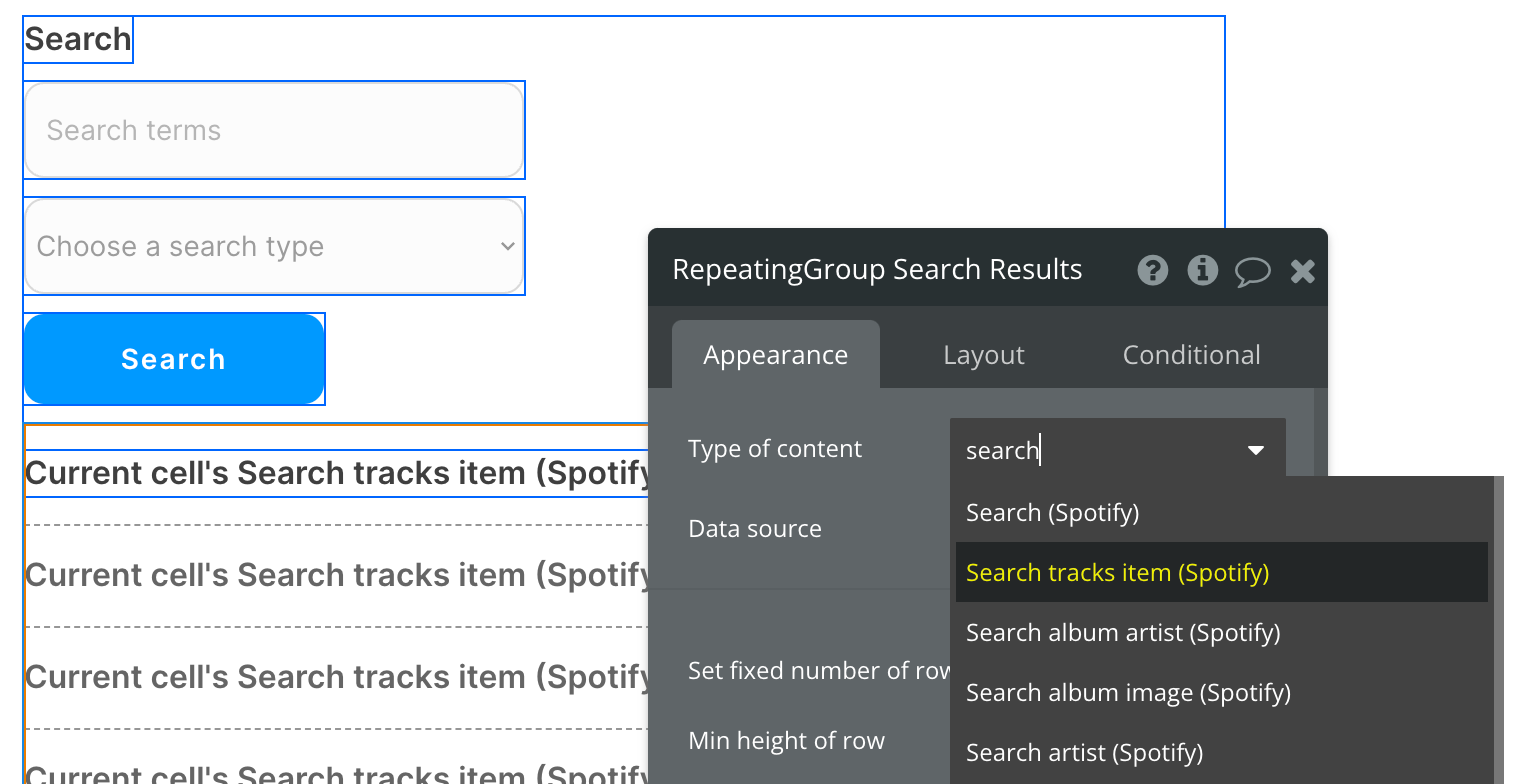
Set up the API call
Using the blue button from the screenshot above, we'll use a Display List action to send the results of this API call to the repeating group we've set up.
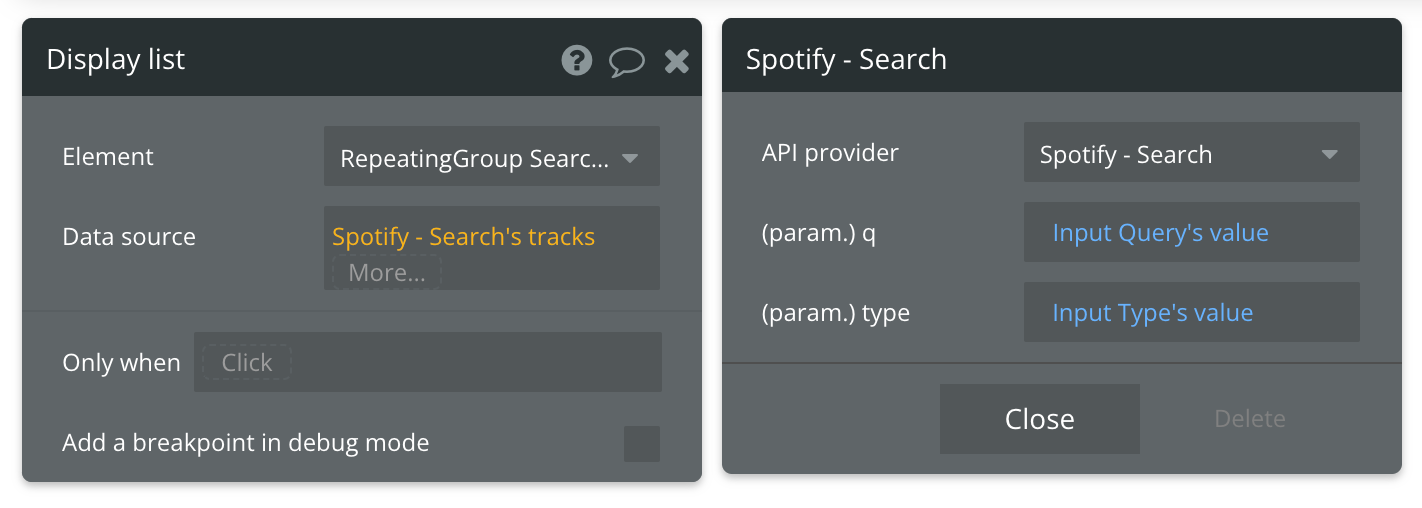
Fill in the necessary parameters. Refer to the documentation link at the top of this page for more information on the requirements for this API call, as well as other options to use in the "type" parameter field.
Available Parameters (* indicates a required value)
q* - The search query.
type* - The type of content you're searching for: album, track, artist, etc. This can take multiple values separated by a comma.
Get Track
Spotify documentation: https://developer.spotify.com/documentation/web-api/reference/get-track
Set up the datasource
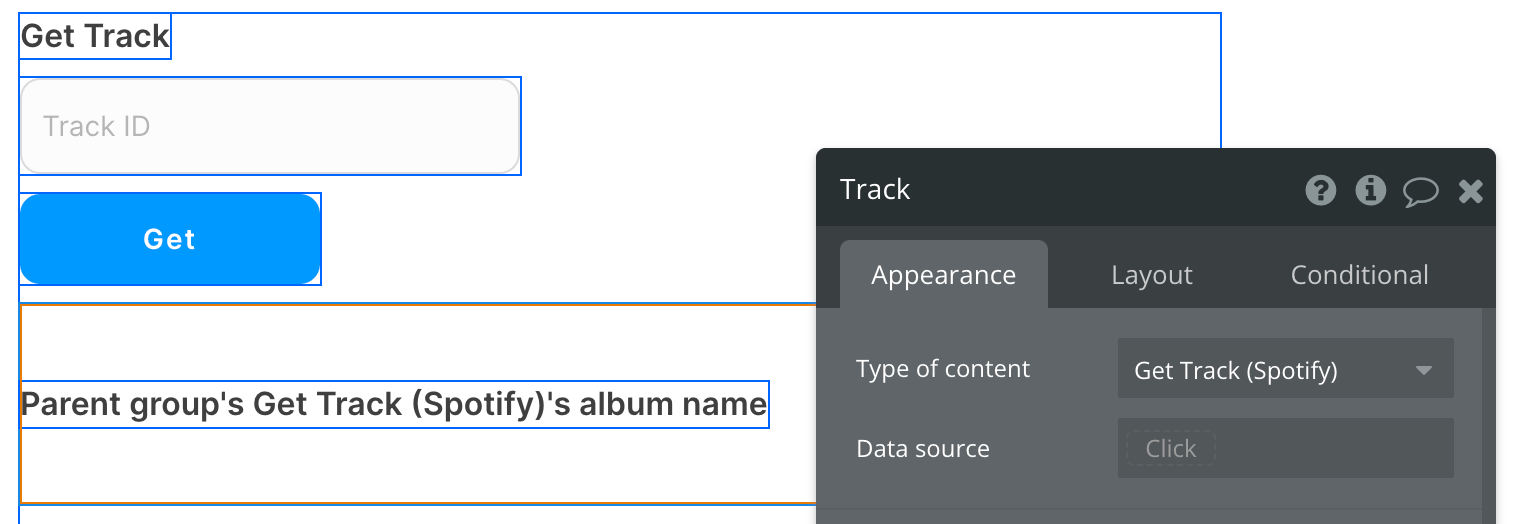
We're using a group in our example. Make sure whatever element you use has the correct type of content set (Get Track (Spotify)):
Set up the API call
Using the blue button from the screenshot above, we'll use a Display data in group action to send the results of this API call to the group we've set up.
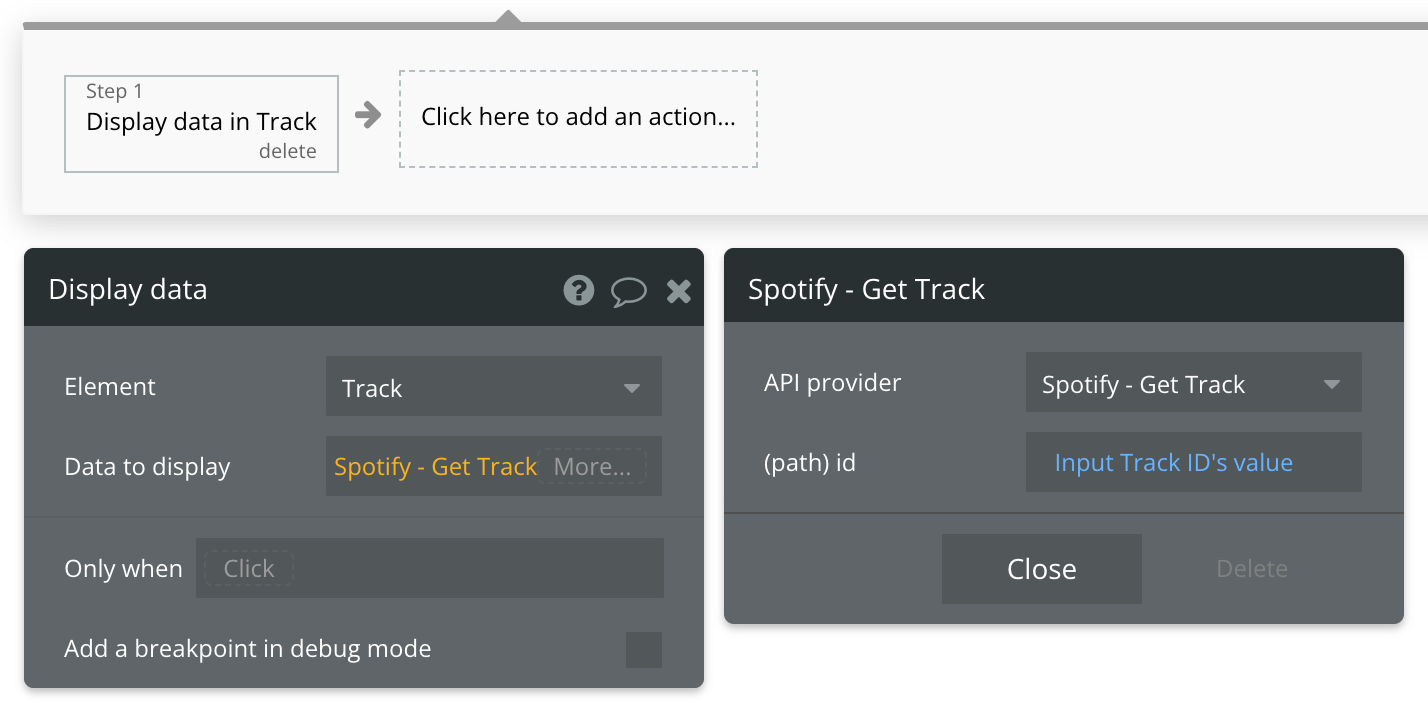
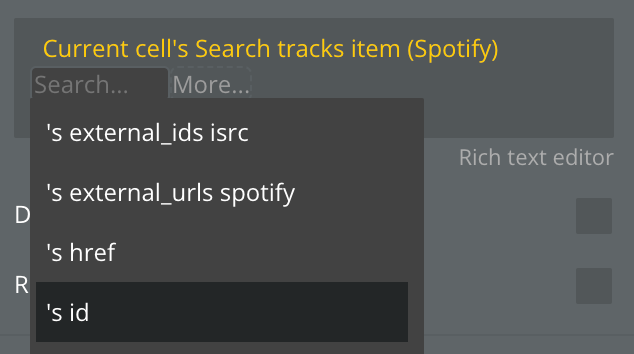
Note that the ID of a track can be found from the previous API call (Search):
Refer to the documentation link at the top of this page for more information on the requirements for this API call.
Available Path (* indicates a required value)
id* - The ID of the track you're looking up.
