Link to plugin page: https://zeroqode.com/plugin/wasabi-cloud-storage-1613750368034x69111169565483
Demo to preview the settings:
Live Demo: https://appkit.bubbleapps.io/wasabi

Introduction
Wasabi Hot Cloud Storage is enterprise-class, tier-free, instantly available storage and allows you to store an infinite amount of data affordably. Upload & manage files with your Wasabi account.
Prerequisites
You must have an account with Wasabi to interact with the API. Create your account at: https://wasabi.com/
How to setup
Visit wasabi.com to sign up for their service, you will get an email with link to your console. In your Wasabi console go to Billing->Payment settings then add your Payment method. While you do receive a month free trial to upload private files, a paid account is required to upload public files.
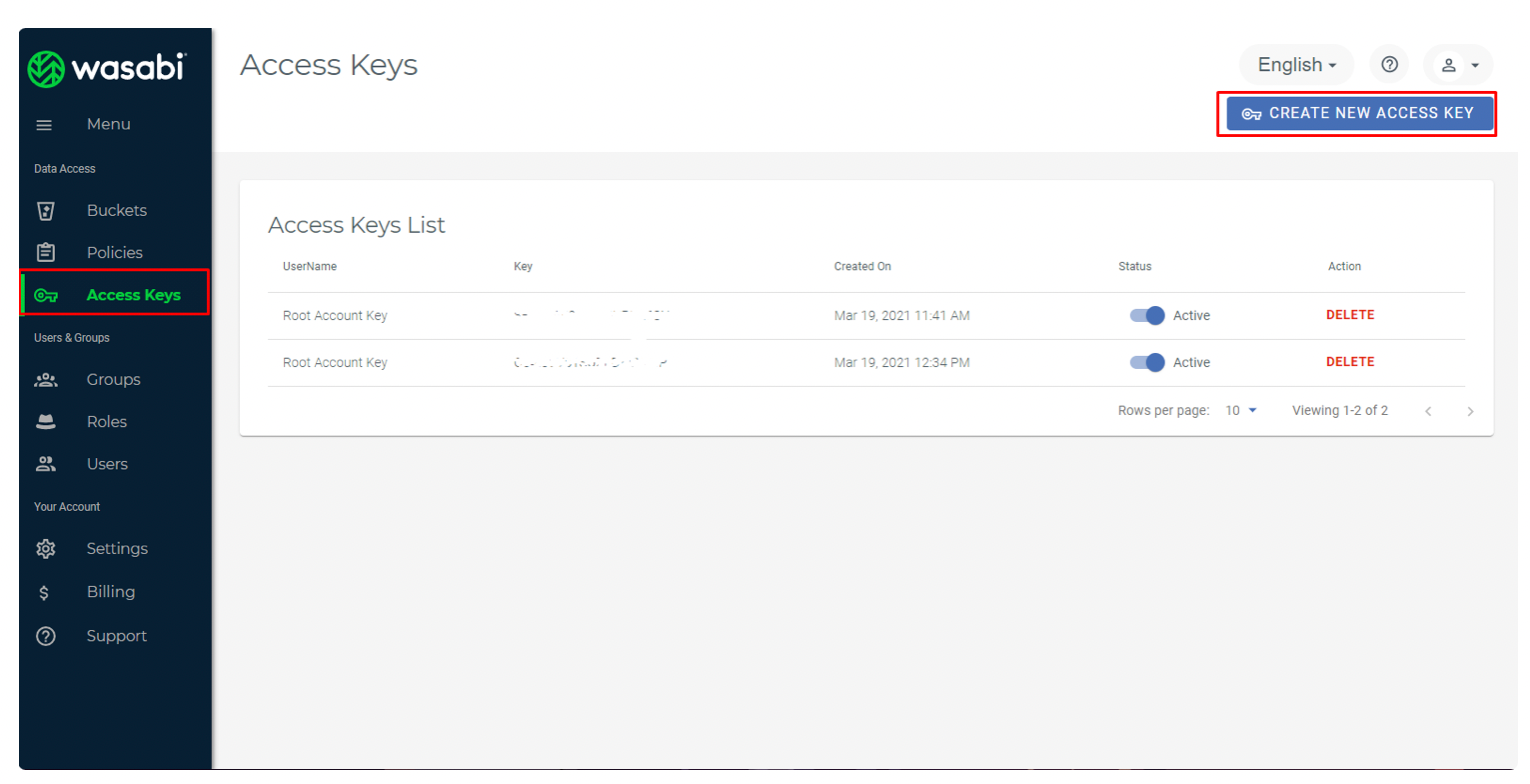
Next, go to the Access Keys page & create a new access key.
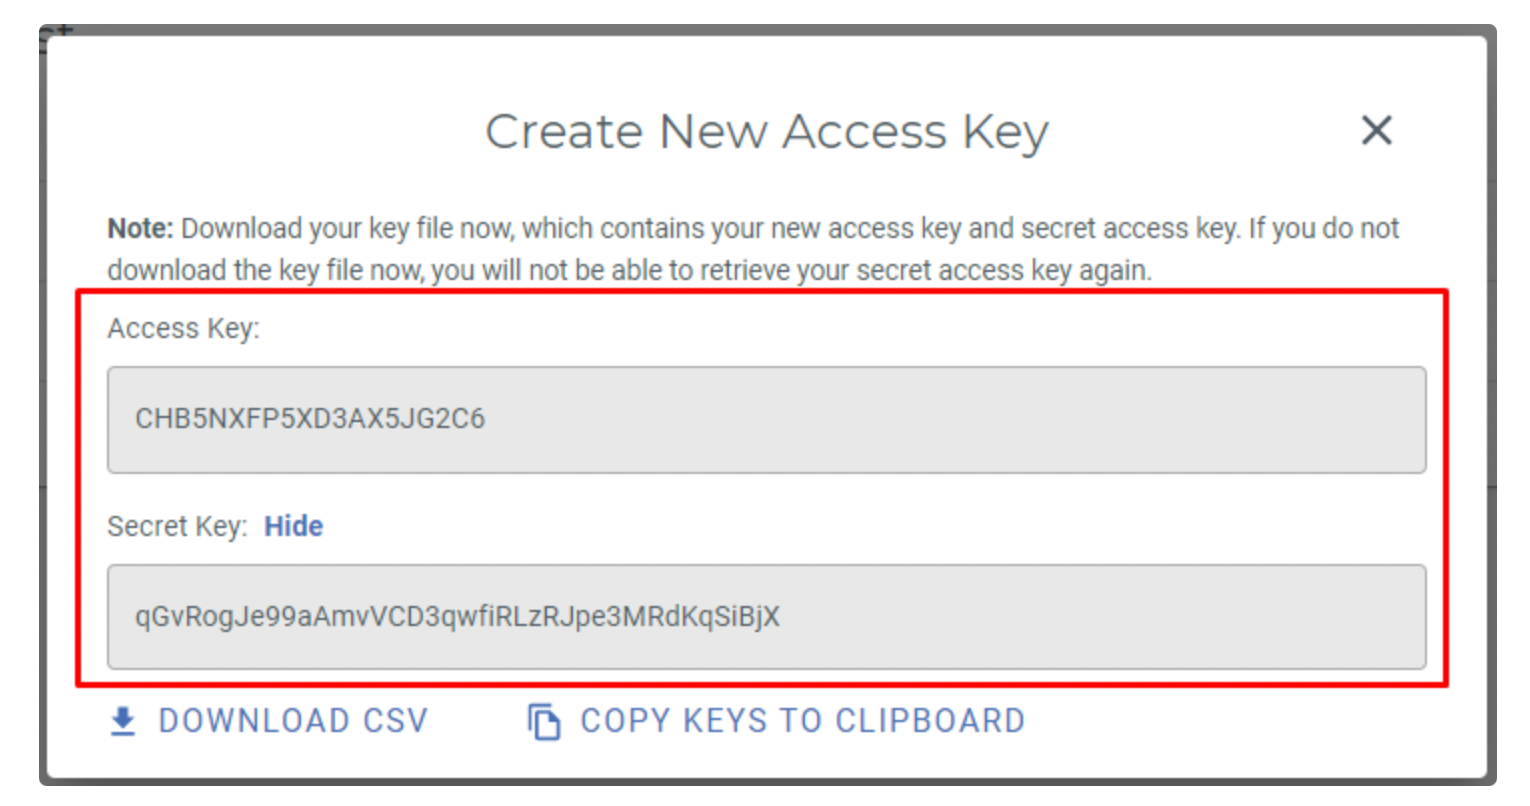
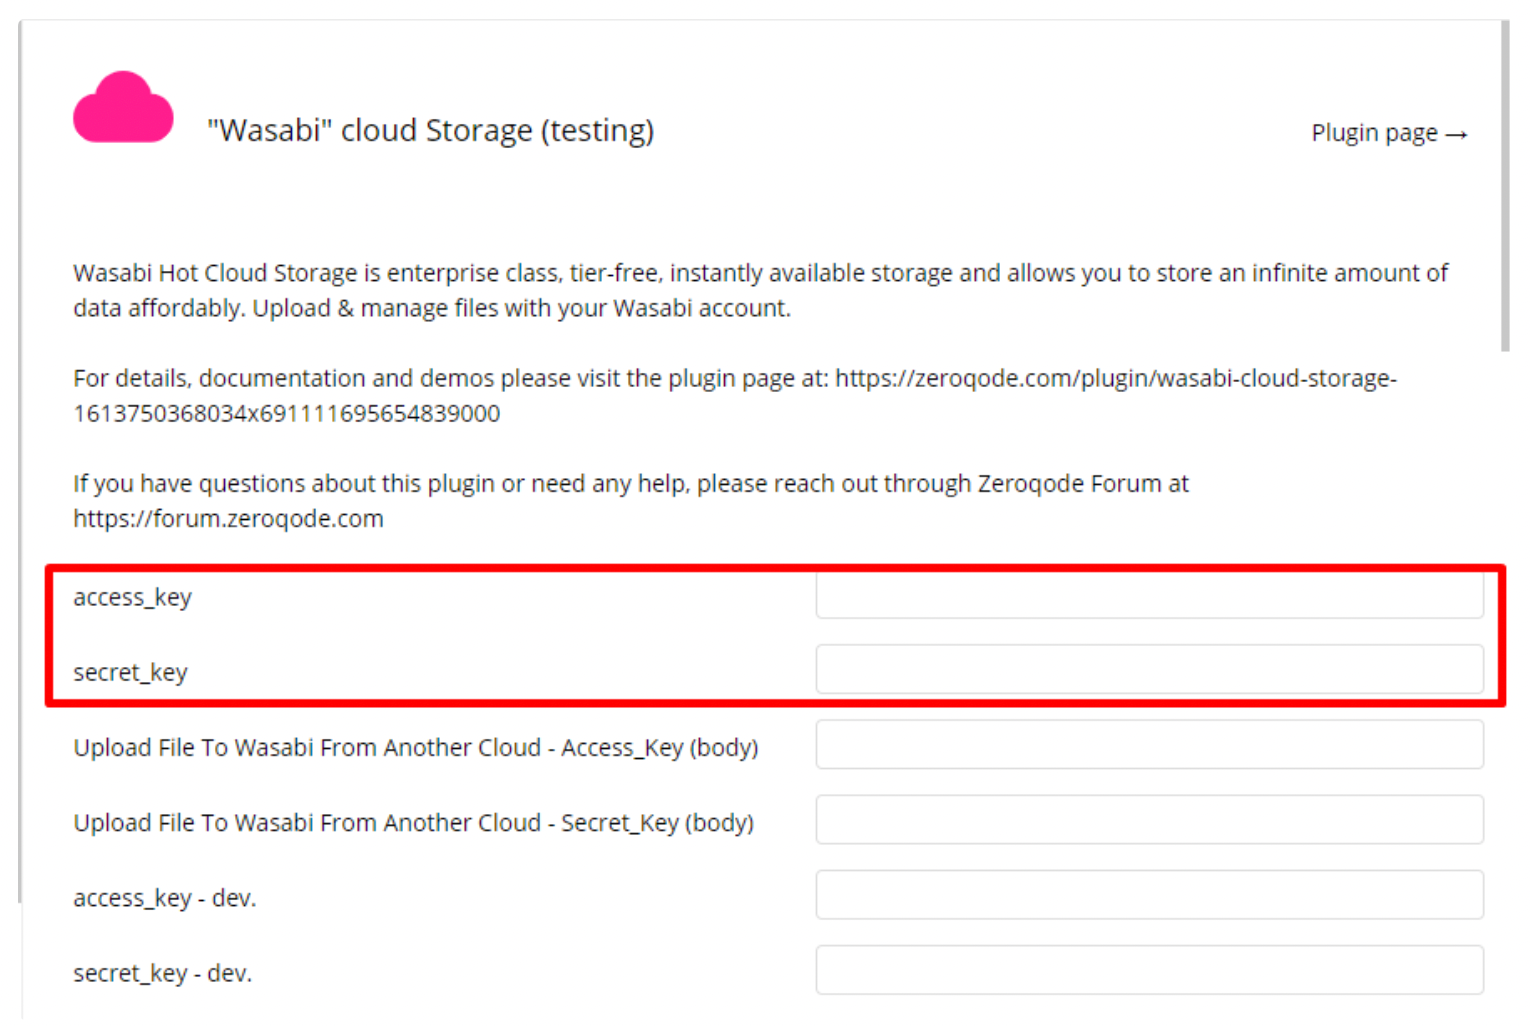
Insert the access key/secret from the plugins tab.
Add the element 'Wasabi S3' on your page and configure any other preferences for uploading.
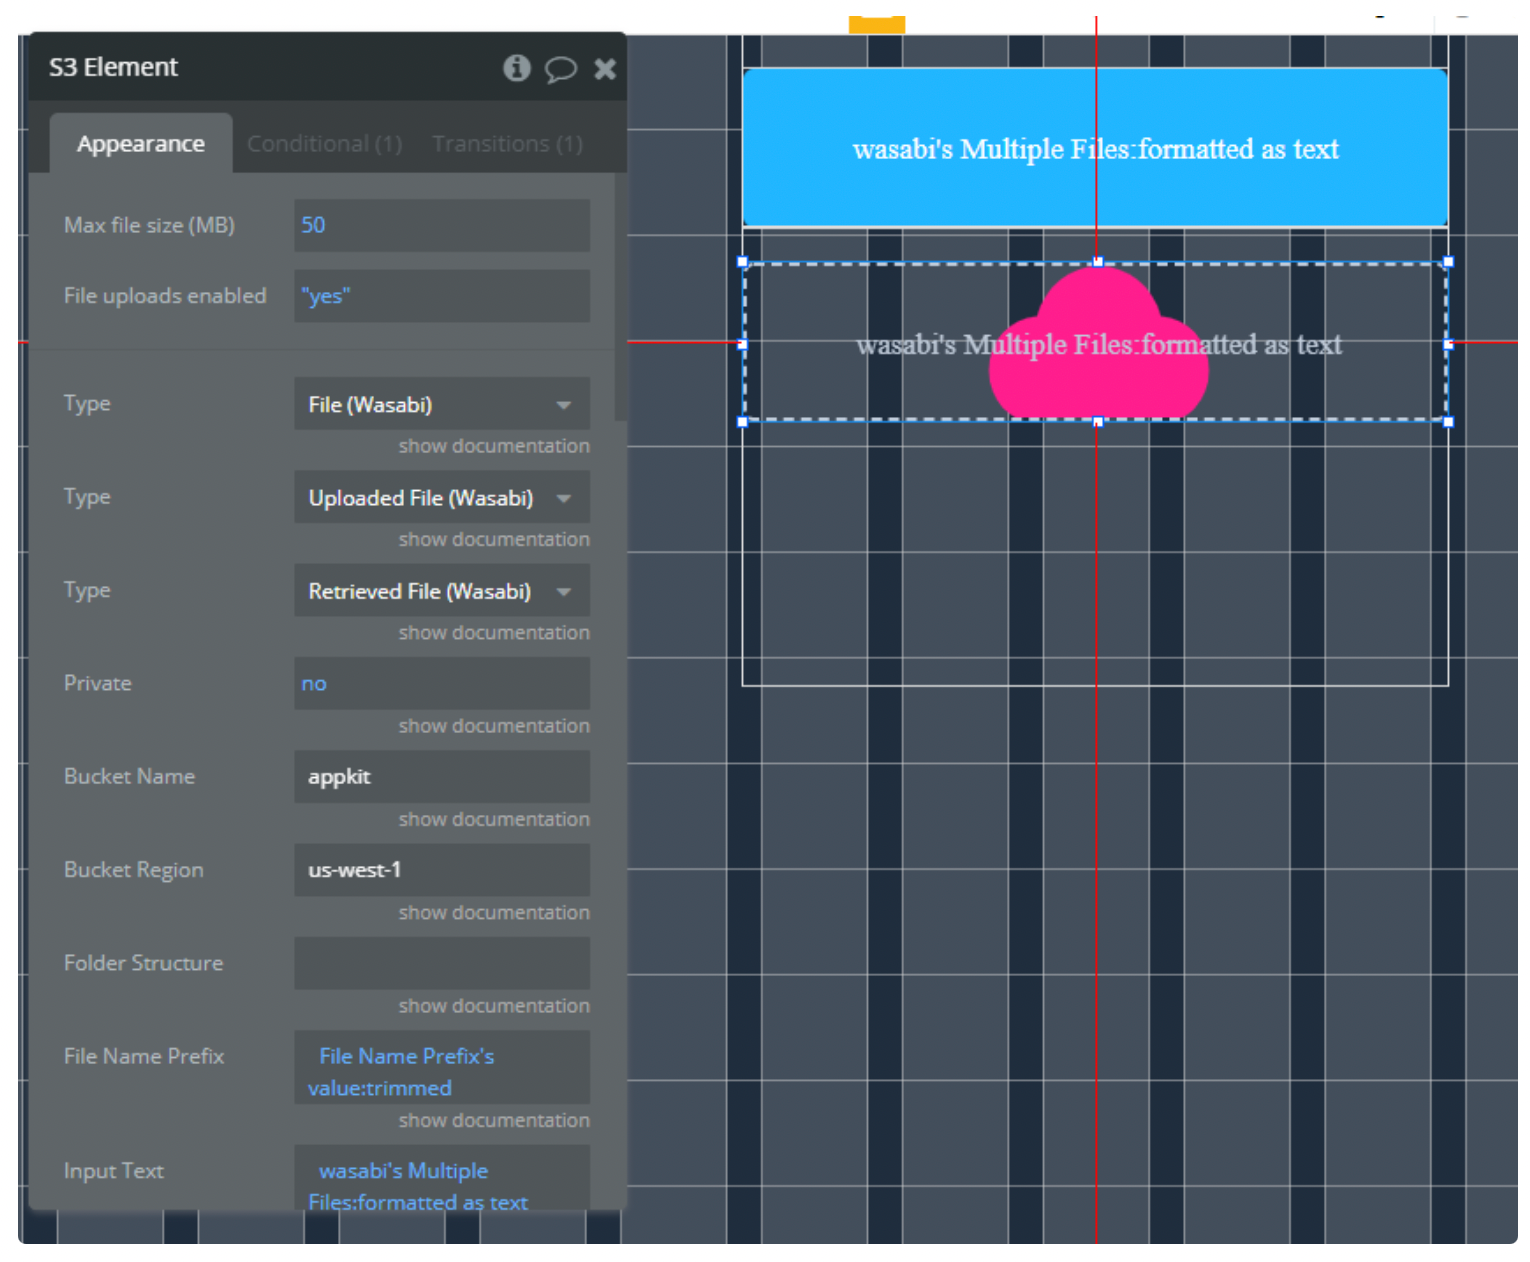
Plugin Fields, Events, Actions, and States
Plugin contains 3 elements, 23 actions, and 2 API Calls.
Progress Bar
Display graphically uploading status.
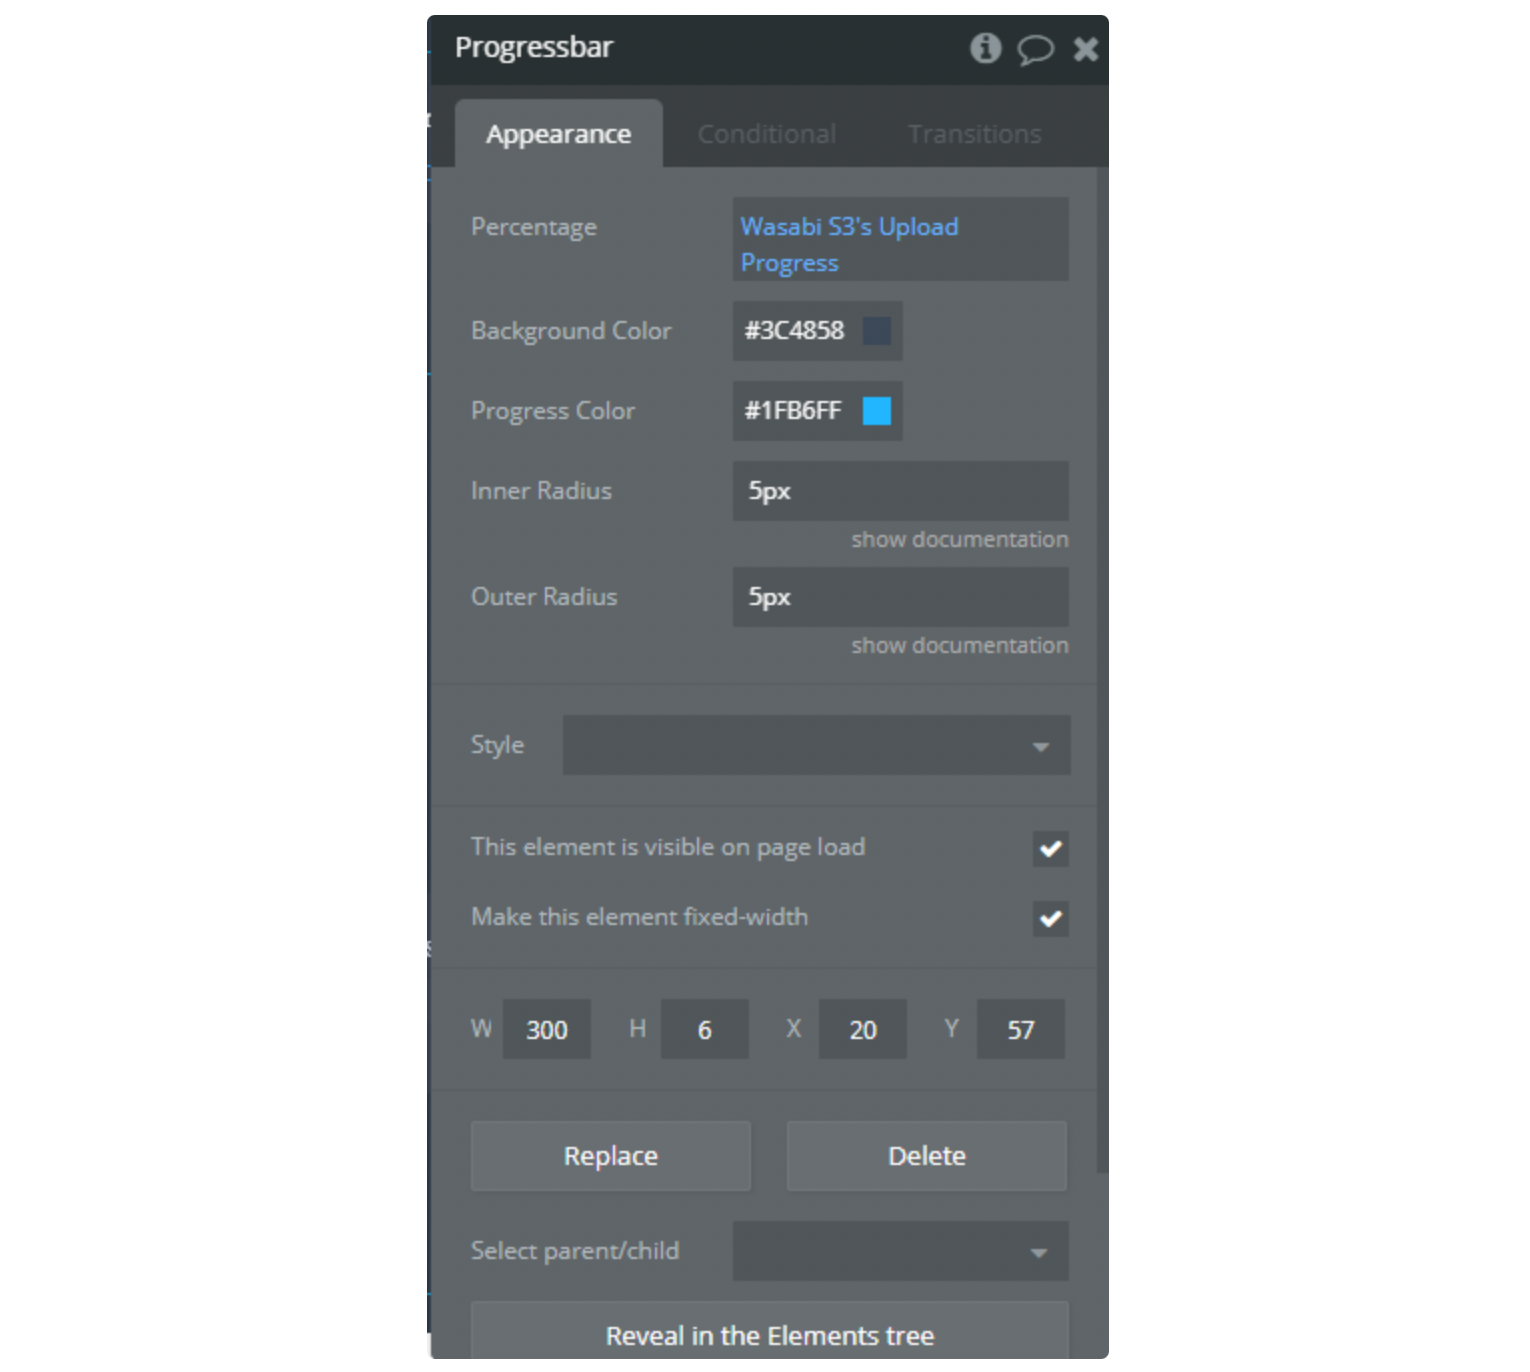
Fields
Title | Description | Type |
Percentage | Current percent of upload. Can be numbers from 0 to 100 | Number |
Background Color | The background color of the bar | Color |
Progress Color | Color of the progress | Color |
Inner Radius | Radius of the background bar | Text |
Outer Radius | Radius of the progress bar | Text |
Data Size
Convert bytes to a more readable value.
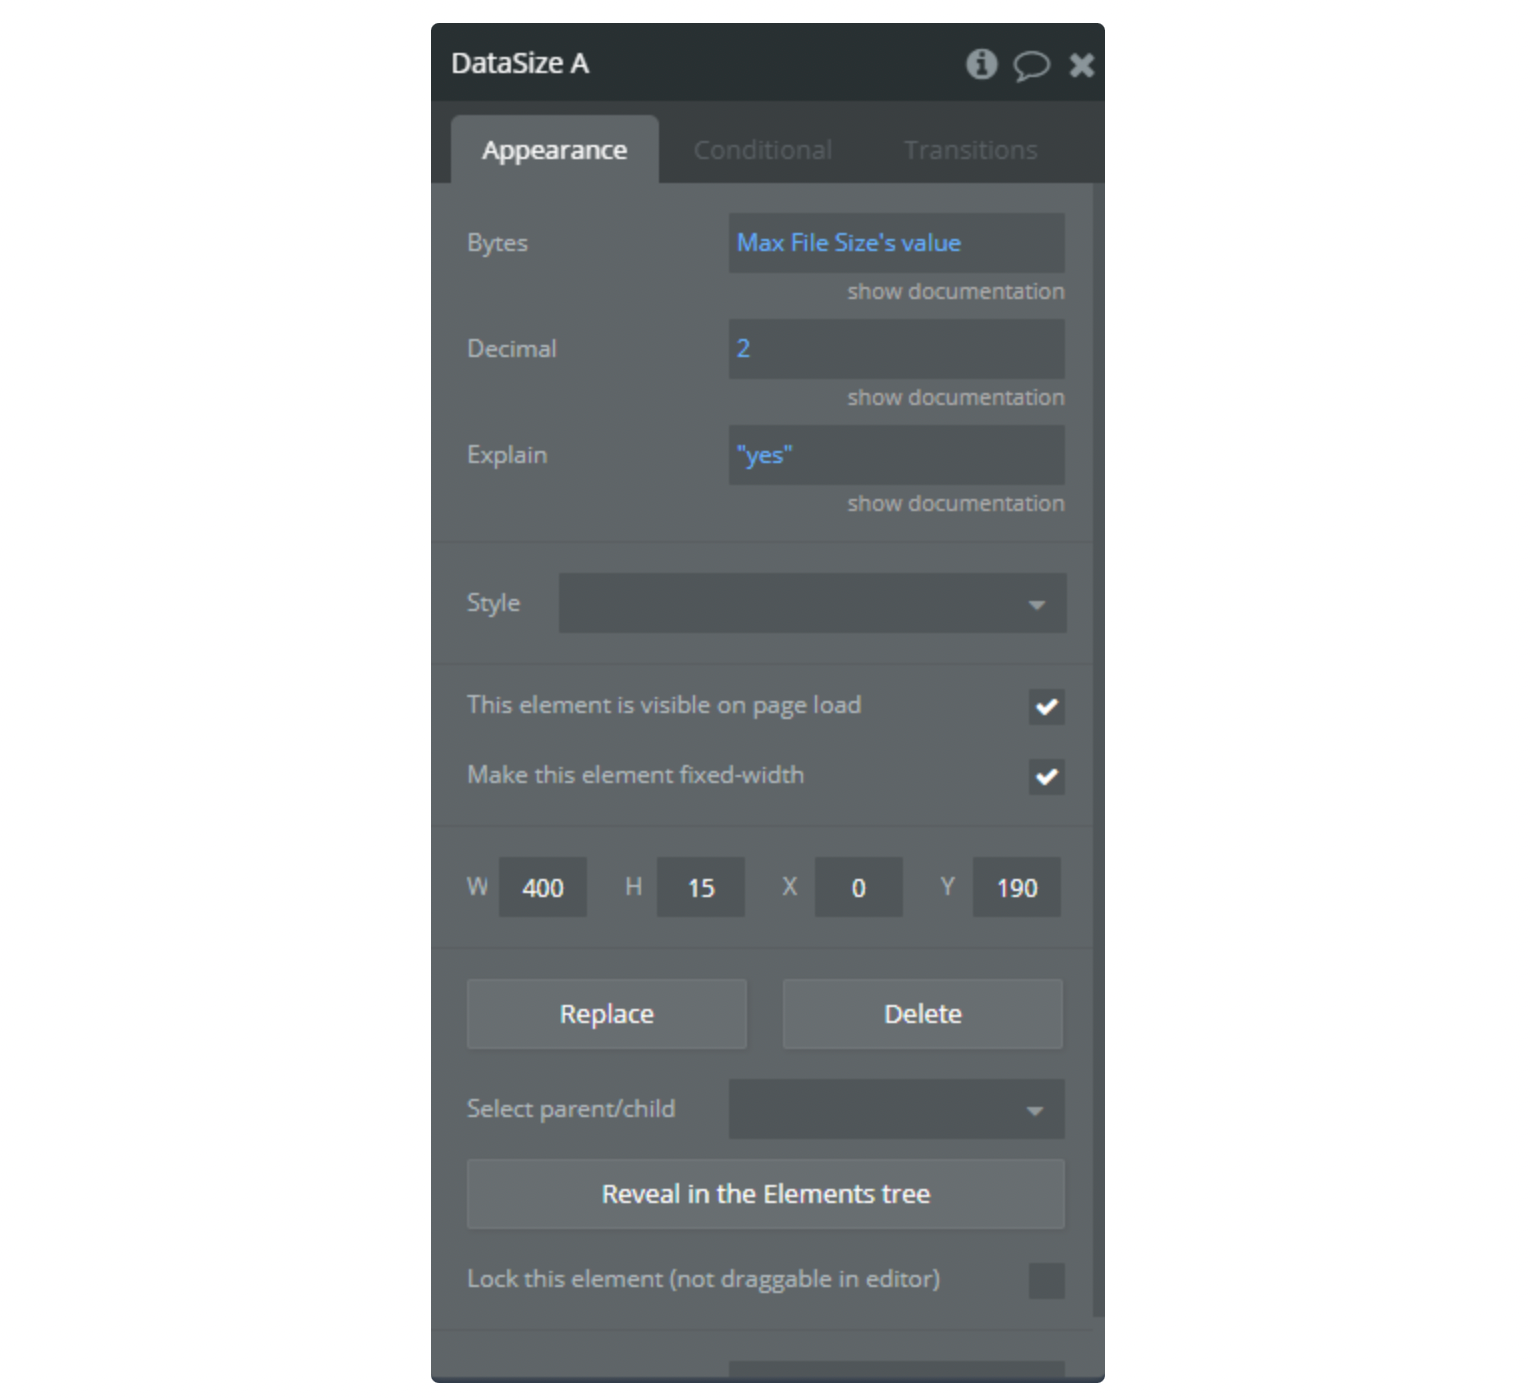
Fields
Title | Description | Type |
Bytes | Insert Bytes to evaluate. | Number |
Decimal | Round to decimal place. | Number |
Explain | Explains the size abbreviation in brackets. | Checkbox (yes/no) (optional) |
Returned states
Title | Description | Type |
Value | The readable value returned | Text |
Wasabi S3
Improved security and support for large file upload
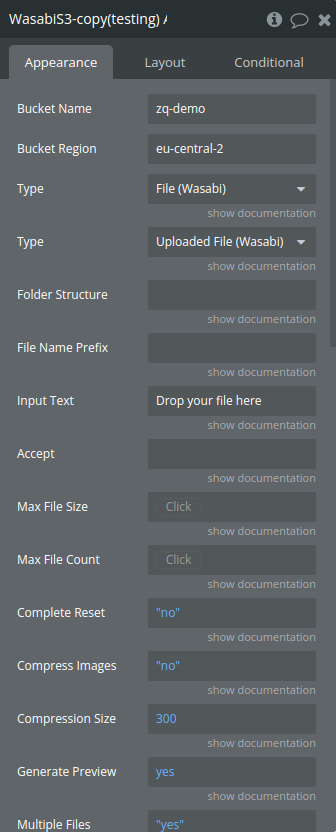
Fields
Title | Description | Type |
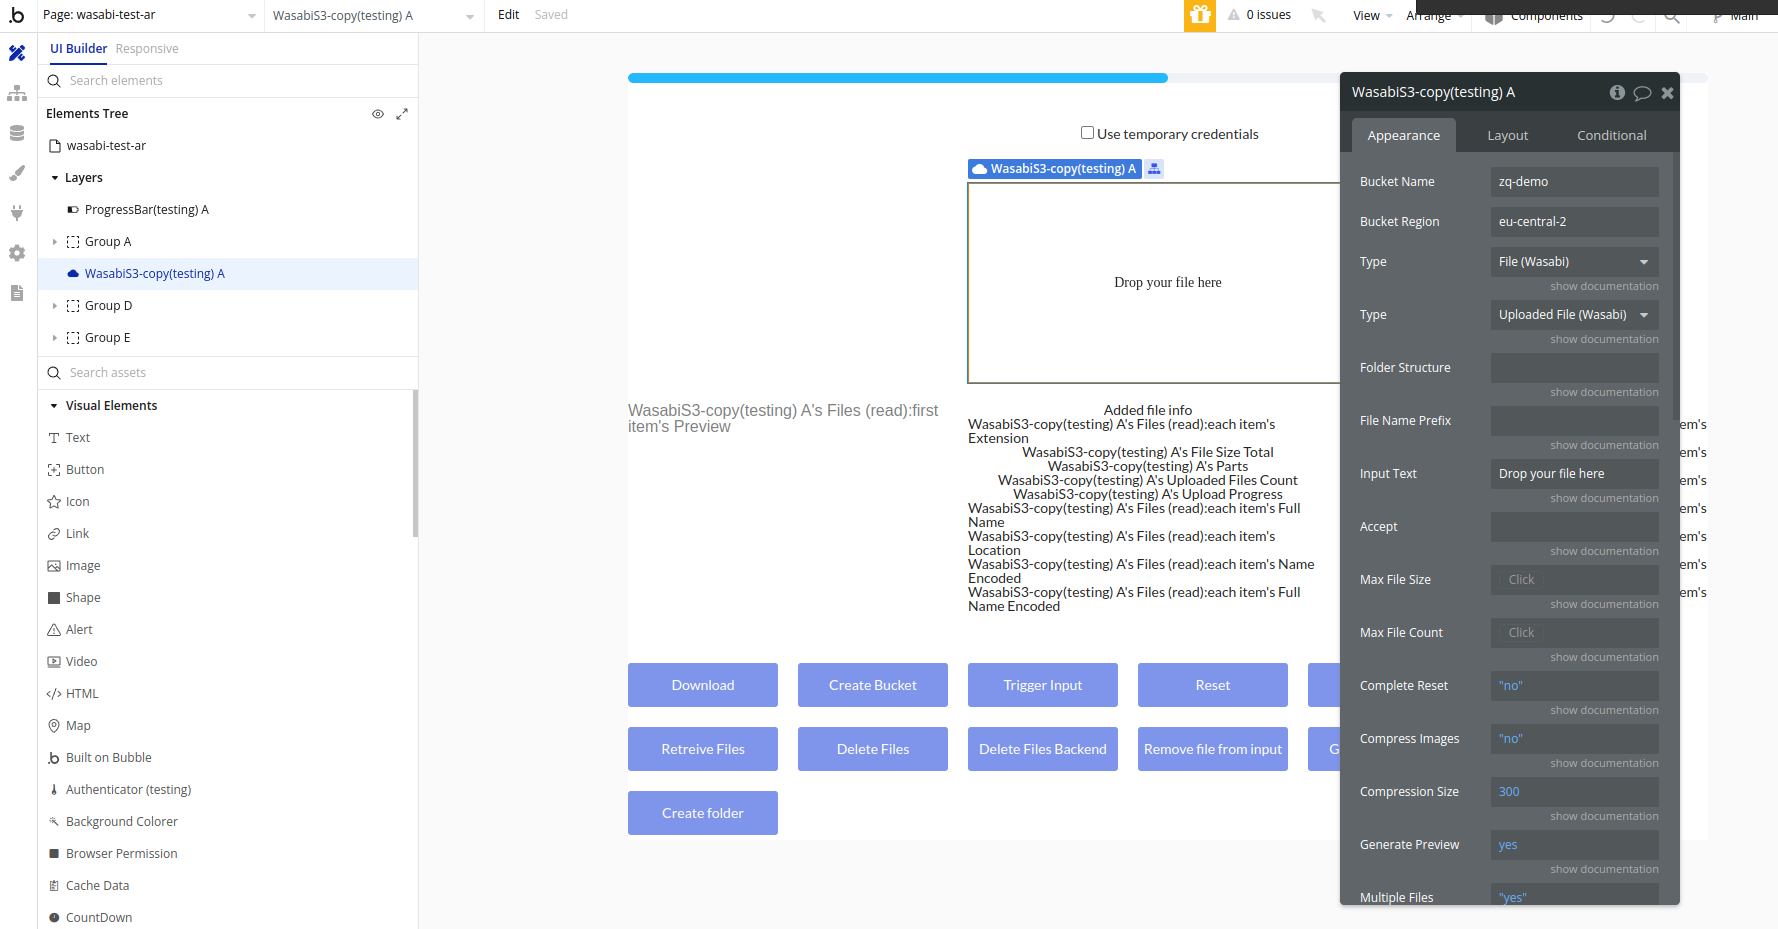
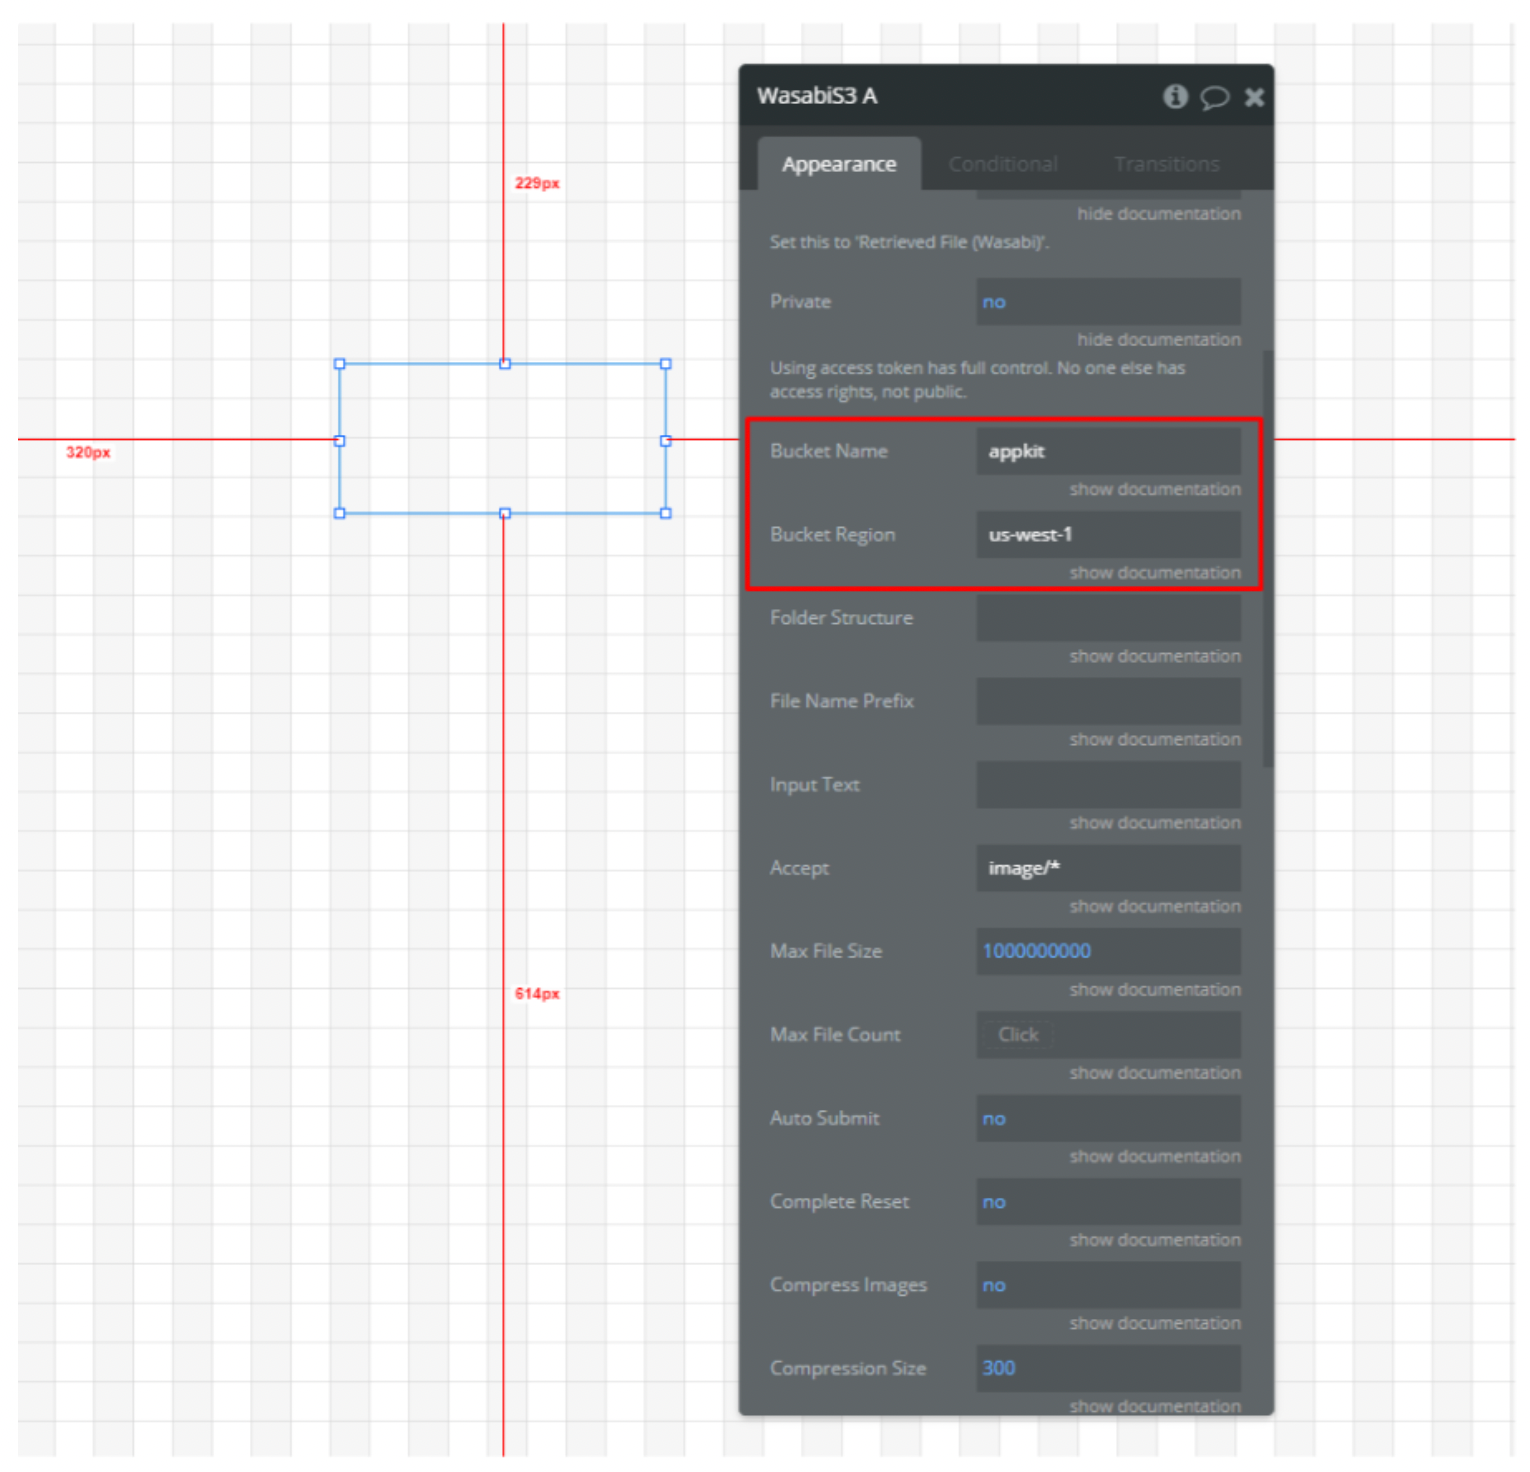
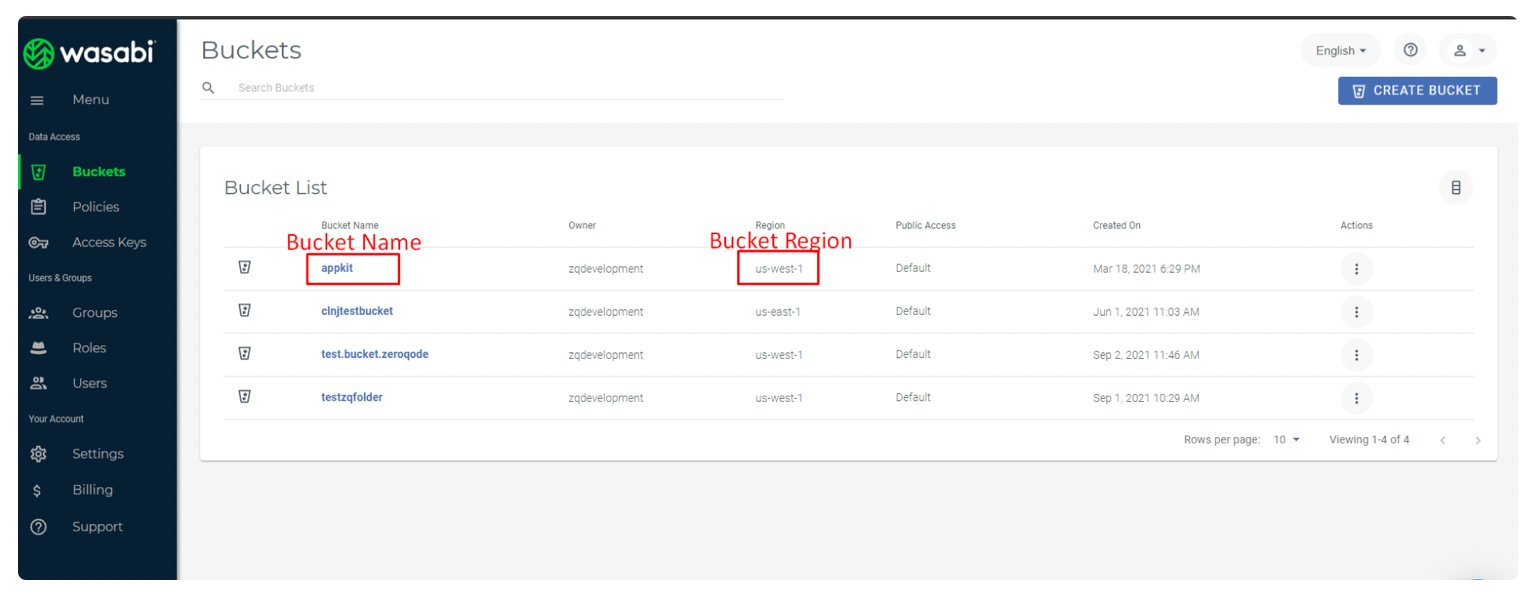
Bucket Name | The name of the Bucket you would like to upload to. Case sensitive. | text |
Bucket Region | The region of where this Bucket is stored. Please check all available regions here | text |
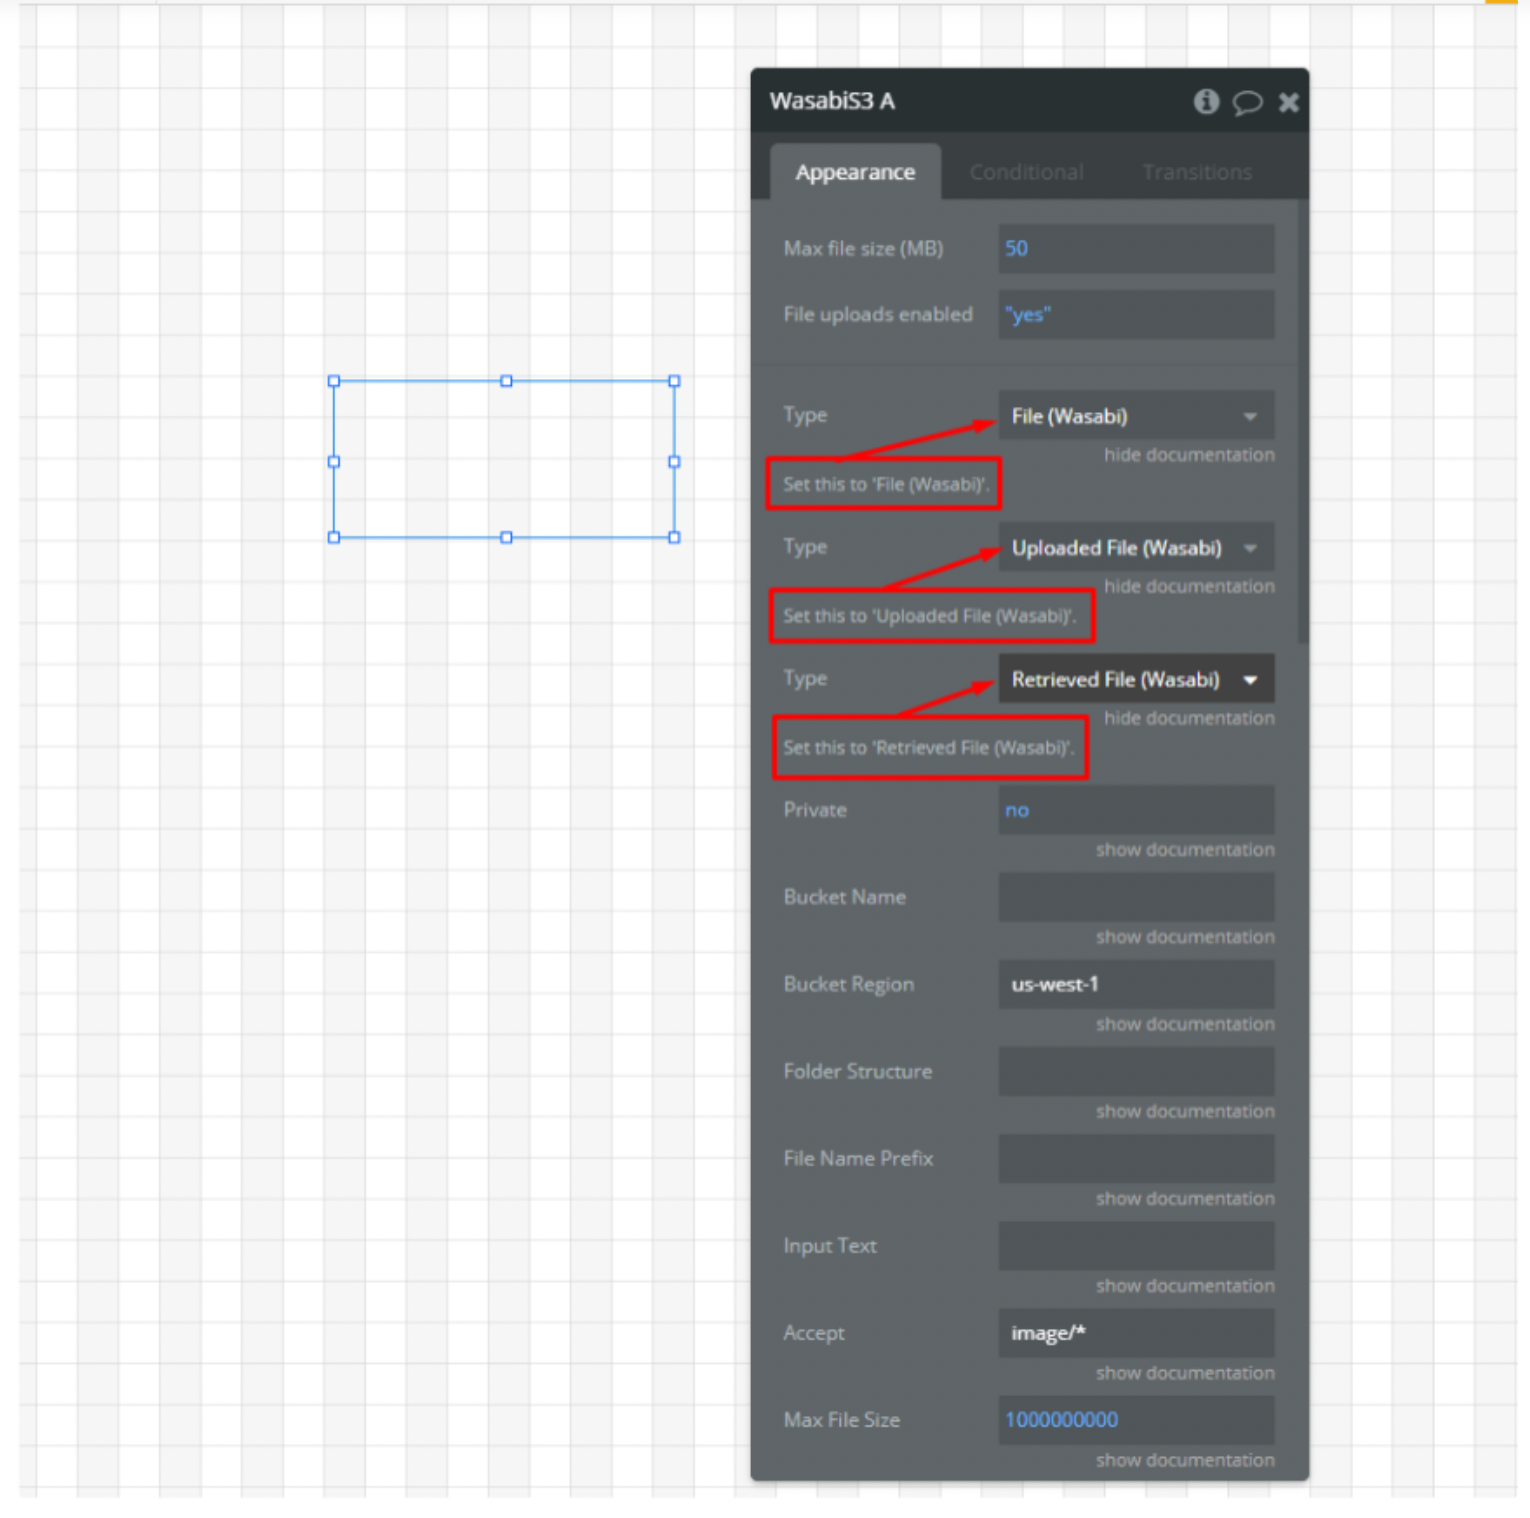
Type | Set this to 'File (Wasabi)' | Dropdown |
Type | Set this to 'Uploaded File (Wasabi) | Dropdown |
Type | Set this to 'Deleted File (Wasabi) | Dropdown |
Folder Structure | The folder structure of where this file should be saved (example: uploads). You can also specify sub-folders (eg: uploads/images). As a suggestion, you could save the folder as the current user/thing's unique id. | text |
File Name Prefix | Prefix for the file name. Some special characters (for example: !$#@), will not upload correctly. | text |
Input Text | Add text to the input, default Bubble typeface styles will apply. If you would like to style your own input in Bubble, make your element hidden on the page & then use the workflow action to trigger input. | text |
Accept | Specify the file extension(s) (e.g.: .gif, .jpg, .png, .doc) the user can pick from or specify a group of file types like audio/, video/ image/*. Defaults to all if empty. In the case of an extension not validating correctly, you can also use the mime type here. | text |
Max File Size | Total value for all files in bytes, 1000000 = 1MB (Megabyte) or 5000000000 is 5GB (Gigabytes). Defaults to any size if empty. | number |
Max File Count | Max number of files the user can upload. Defaults to any amount if empty. | number |
Complete Reset | Reset progress & input when a file or all files have been uploaded successfully. | yes/no |
Compress Images | Select this option to compress the size of image files. | yes/no |
Compression Size | The size for image compression, this value is in KB. | number |
Generate Preview | Output Base64 URLs for image files | yes/no |
Multiple Files | Allow for uploading multiple files at once. | yes/no |
Upload Directory | Allows the user to select 1 folder to upload, all child folders and files will be selected. This option is non-standard, supported by most newer browsers except IE. | yes/no |
Filter File Names | Separate with space & commas between names if not dynamic. Only matched (case-sensitive) names will be uploaded, the matching process happens first before calculating the size file count or reading any other file data. Leave empty to ignore this option. | text |
Rename Files | rename uploaded files or not. | yes/no |
File Names | New names for files. | text |
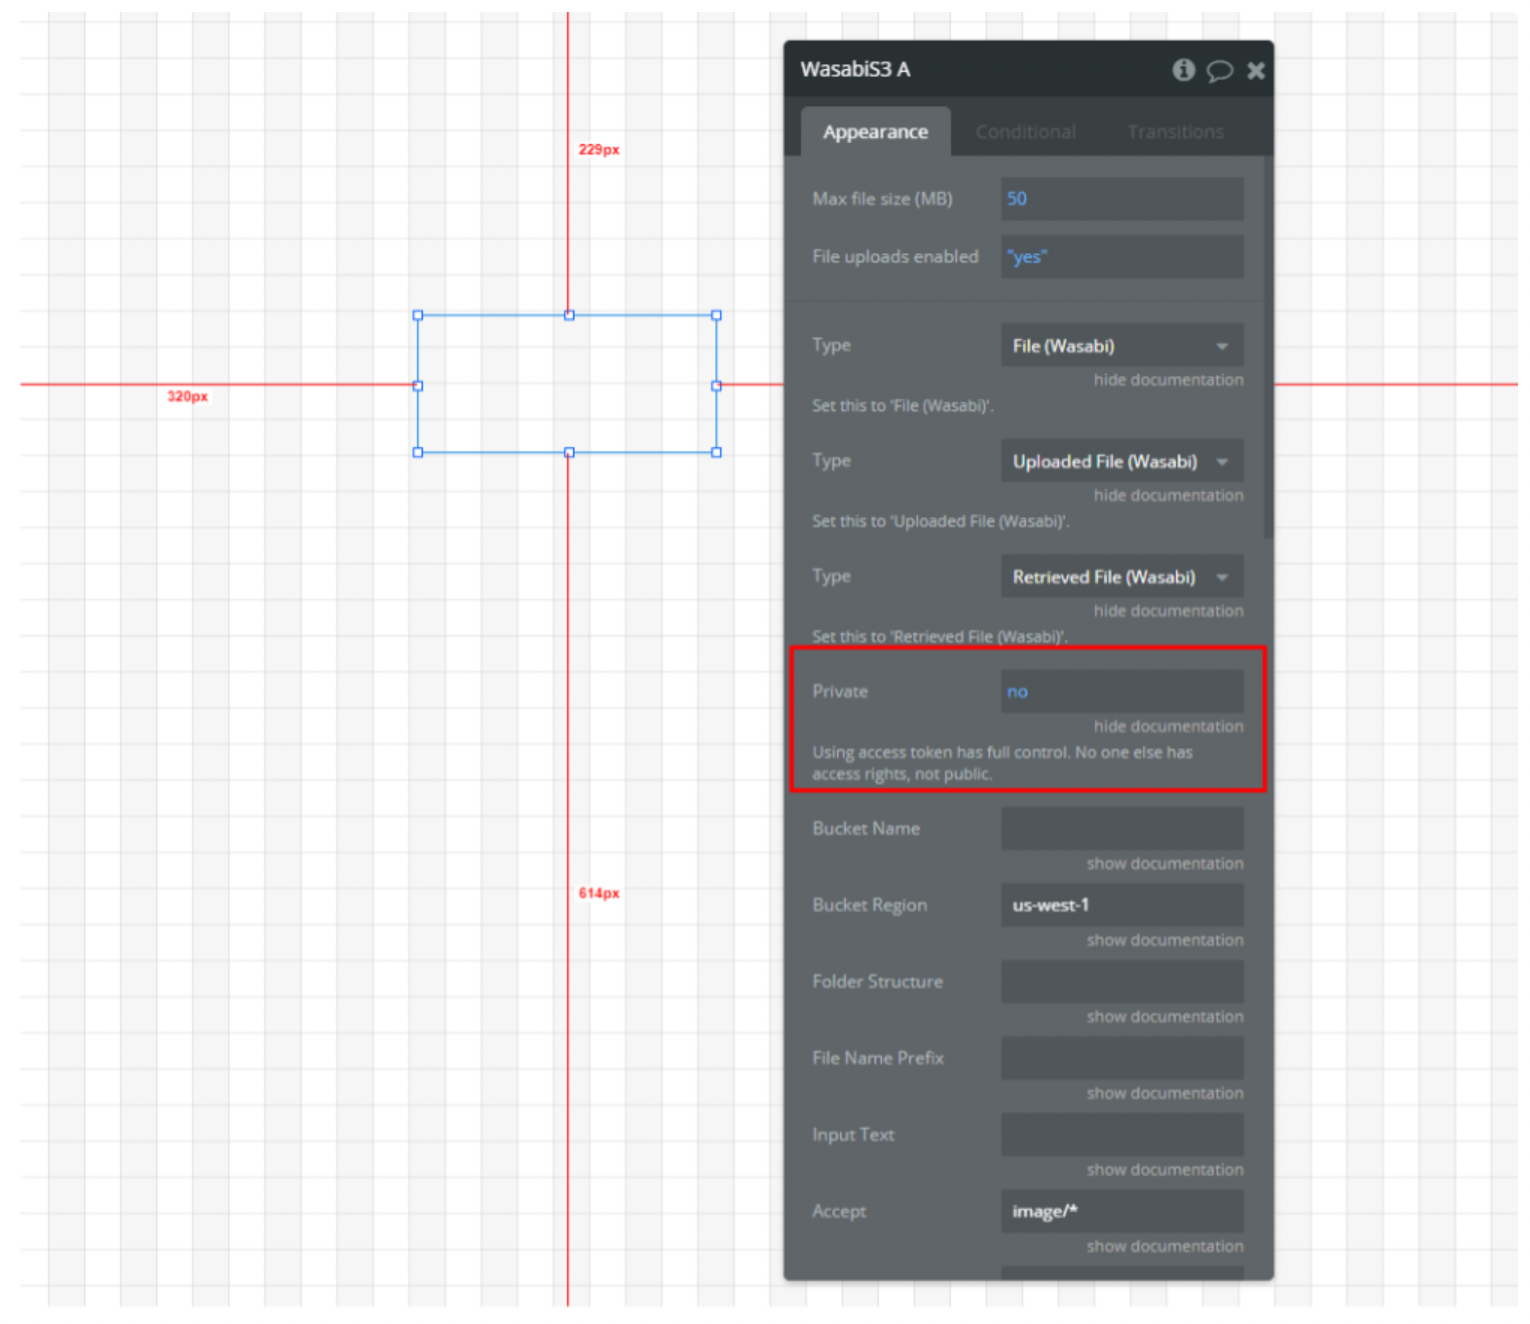
Is Private | Determines the access control list (ACL) setting for the uploaded files on the Wasabi storage.When set to yes, the uploaded files are given a "private" ACL. When no the files are given a "public-read" ACL. Defaults to yes | yes/no |
SSE Cusomer Key | Used for server-side encryption (SSE) with customer-provided keys. If set, it indicates that the user has provided a custom encryption key for securing the uploaded files on the server side. | text(optional) |
SSE Customer key MD5 | The MD5 hash of the customer-provided encryption key. It's used as an integrity check for the encryption key. | text(optional) |
File Selection Mode | Determines how new file selections are handled in the Wasabi S3 uploader. This property offers two modes:
"Reset": In this mode, each new file selection replaces the previously selected files. When users select new files, the existing file list is cleared, and only the newly selected files are added.
"Append": This mode allows users to add new files to the existing selection. Each new file selection is added to the current list of files without removing the previously selected ones. | Dropdown |
Note: If you specify “image/heic” only in the Accept field, the iOS user has to upload an image as File instead of Photo. When uploading as a Photo, IOS converts heic to jpg on the phone side before sending it for upload.
Element states
Title | Description | Type |
Files | Please see the table below for a detailed description | Object(list) |
Files Count | Return a number of uploaded files. | Number |
File Size Total | Return the total size of uploaded files. | Number |
Upload Progress | Upload progress of files. From 0 to 100. | Number |
Last Uploaded Files | List of all uploaded files(file info has the same structure as in Files state) | Object(list) |
Is Ready | Returns true if the element is ready | yes/no |
Is Dragged Over | If a file is being dragged over a valid drop target return true else return false | yes/no |
Is Mobile | Returns true if the user device is mobile, else return false | yes/no |
Is Reading Files | While files are reading return true else return false | yes/no |
Is Uploading | If the element now uploads files to Wasabi return true else return false | yes/no |
Error | Returns the text of the error | Text |
Is Compressing Images | If the element now compresses images return true else return false | yes/no |
Is Deleting Files | If element now deletes files return true else return false | yes/no |
Chosen Files Count | Returns the number of chosen files. | Number |
Logs | Captures and records important events and messages during the file upload process | Text |
Parts | stores information about individual chunks or segments of a file during multipart uploads. It contains an array of objects, each representing a successfully uploaded part with its part number and ETag. This state is crucial for large file uploads, allowing the system to track the progress of multipart uploads and ultimately complete the upload process by assembling these parts on the server side. | Text |
Deleted Files | List of deleted files, file info has the same structure as in Files state | Object(list) |
Failed Deletions | List of files failed to delete | Object(list) |
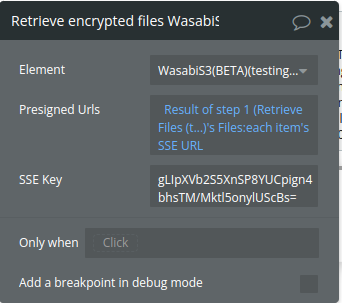
Encrypted Files Urls | Encrypted Files Urls returned from Retrieve encrypted files action | Text(list) |
Files - list of files added to input. Contains info about the file.
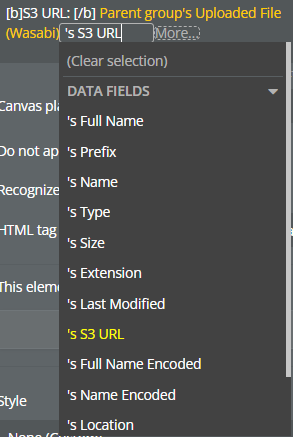
Full name | Name with extension | Text |
Prefix | Prefix for the file name | Text |
Name | Name of file without extension | Text |
Type | Mime type of the file | Text |
Size | Size in bytes | Number |
Extension | Extension of the file | Text |
Last Modified | Time when the file was modified. | Date |
S3 URL | Full path to the file. | Text |
Full Name Encoded | Name with extension with encoded special charts | Text |
Name | Name without extension with encoded special charts | Text |
Location | Path to file is included folder structure and full name. Can be used for action Generate pre-sign URL | Text |
Events
Title | Description |
File Upload Started | Triggered when the file upload process begins. |
File Upload Successful | Triggered when all files have been successfully uploaded. |
File Uploader Reset | Triggered when the file uploader is fully reset. |
Error Uploading File | Triggered when an error occurs during the upload process. |
File/Folder Deleted Successfully | Triggered when at least one file is successfully deleted. |
Error Deleting File/Folder | Triggered in three scenarios:
a) When the presigned_url property is in an invalid format.
b) When one or more files fail to delete.
c) If there's an overall error in the deletion process. |
Error Downloading File | Triggered when there's an error in downloading files. This event is fired in two scenarios:
a) If all file downloads fail.
b) If some, but not all, file downloads fail. In this case, an error state is also published with details about the number of failed downloads. |
Upload Cancelled By User | Triggered when the user cancels an ongoing upload. |
Upload Cancelled Successfully | Triggered after the upload cancellation process is complete. |
Logs | Triggered each time a new log entry is added. |
File added | Triggered when new files are successfully added to the upload queue. This event fires after all selected files have been processed and added to the internal file list. |
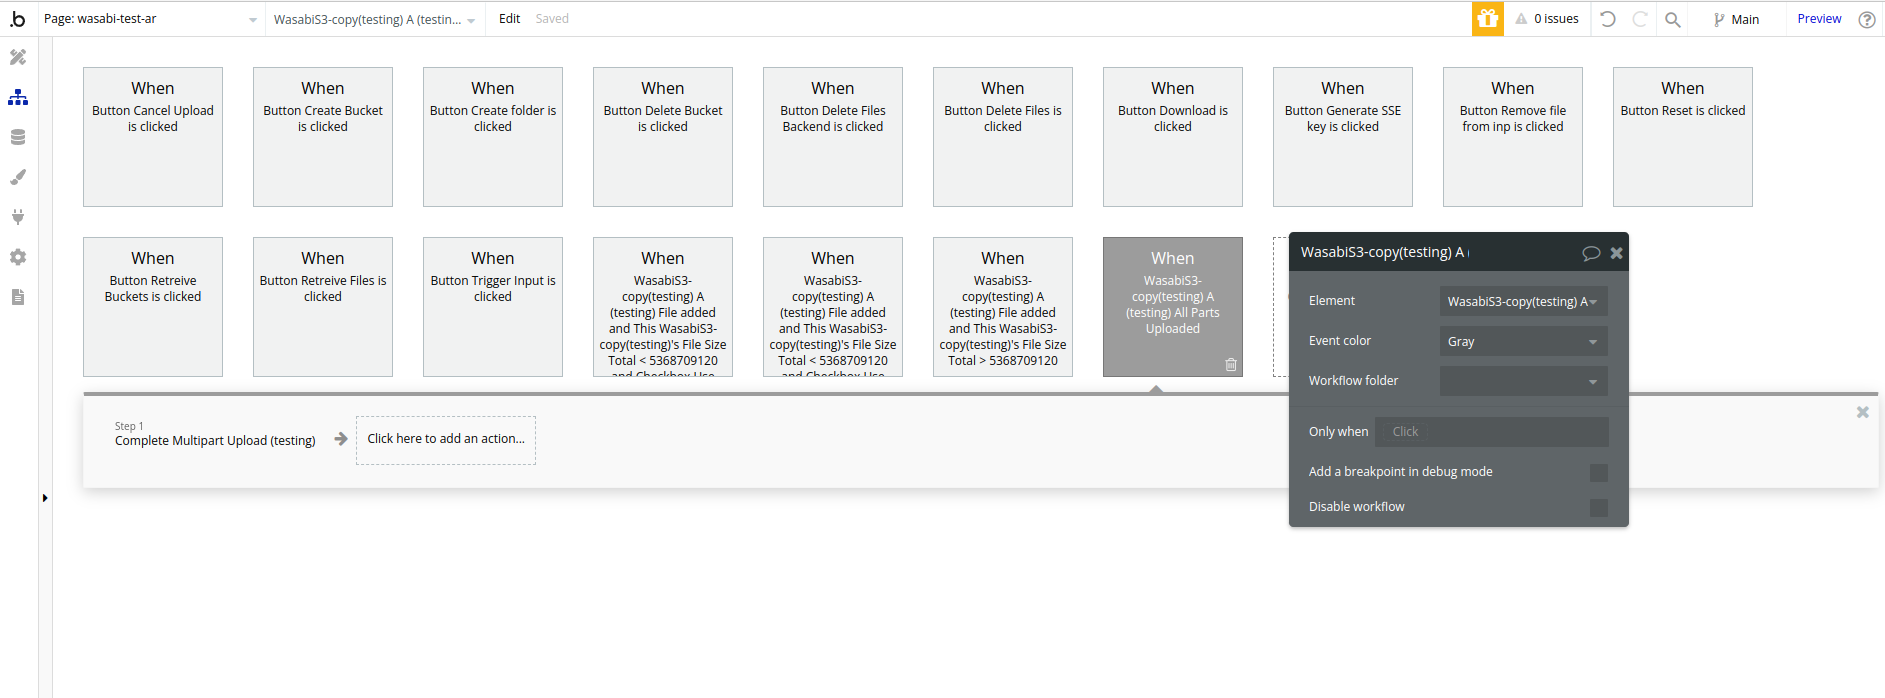
All Parts Uploaded | Triggered when all parts of a multipart upload have been successfully uploaded. |
File Download Successful | Triggered when all files have been successfully downloaded. This event is fired if all the presigned URLs result in successful downloads. |
Actions
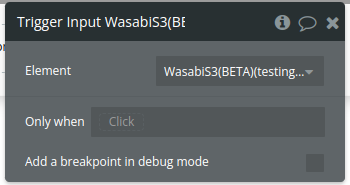
Trigger Input - emulate click on input and show file dialog.
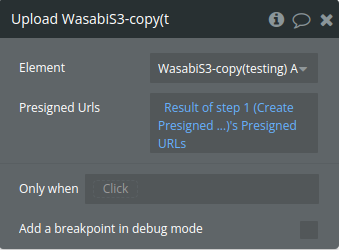
Upload - Start uploading files to Wasabi.
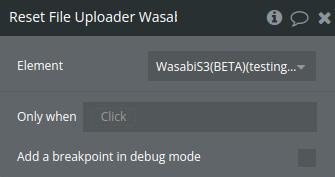
Reset File Uploader - Remove all files from this element. Reset states: Files (to the empty list ), Files Count (to 0), File Size Total (to 0), Upload Progress (to 0), Is Uploading (to false), Is Reading Files (to false).
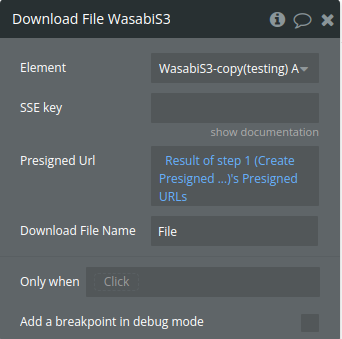
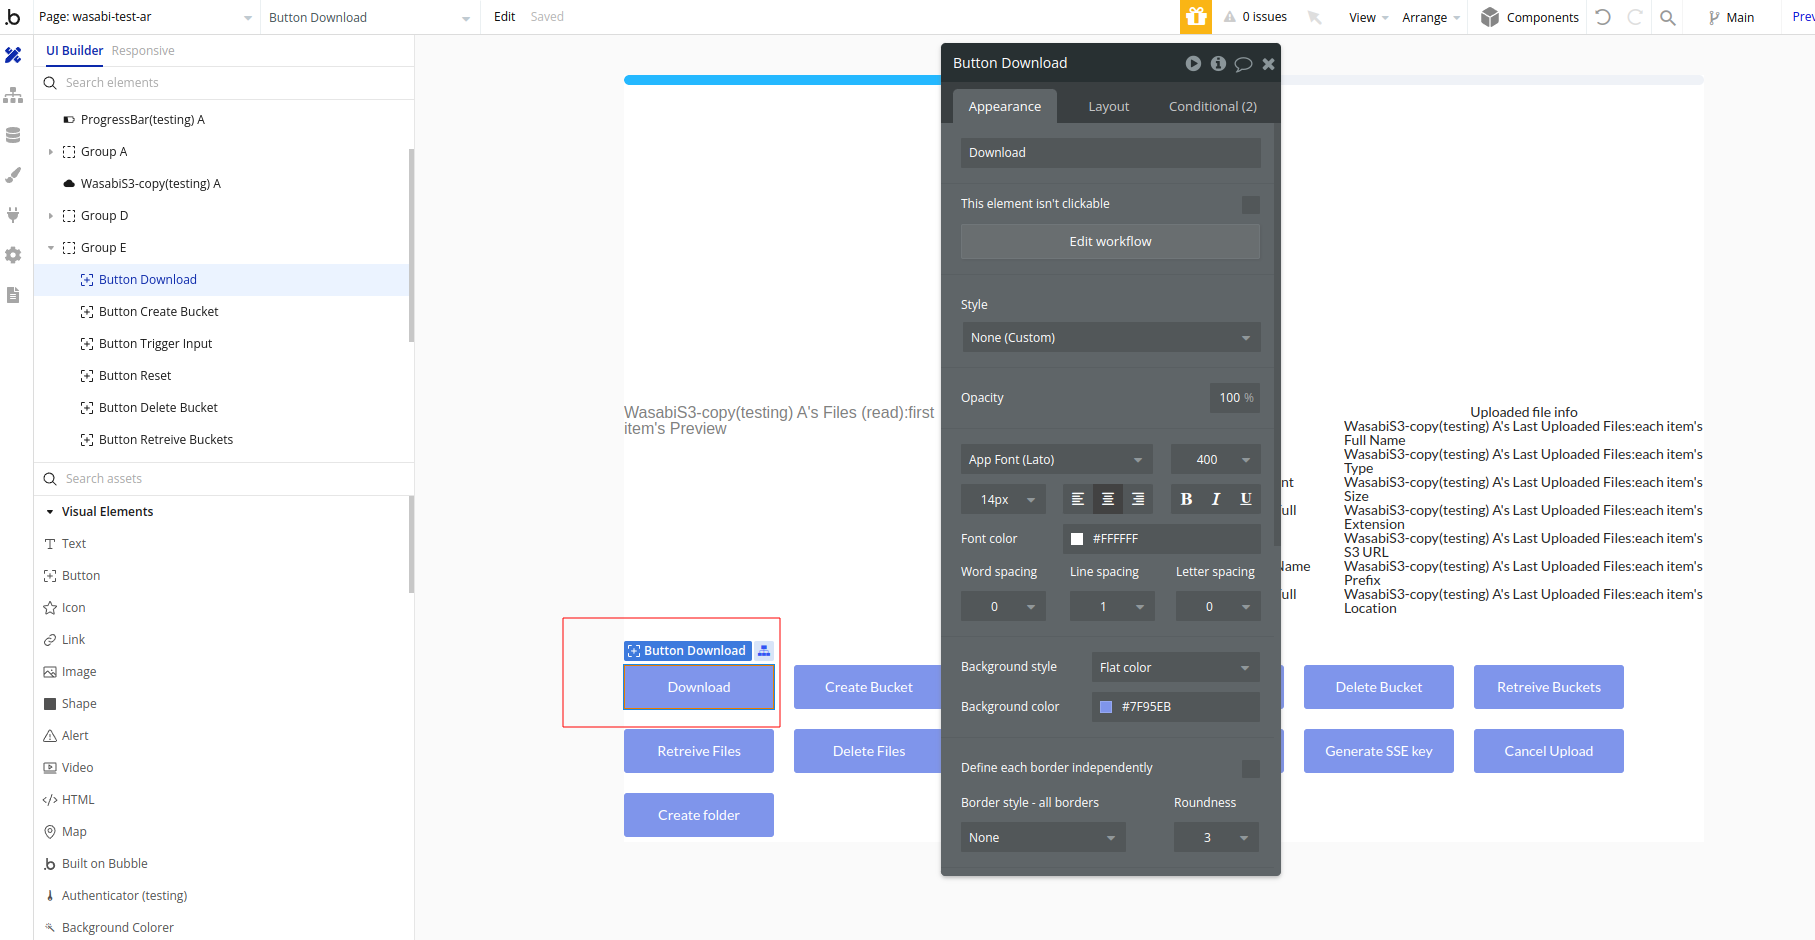
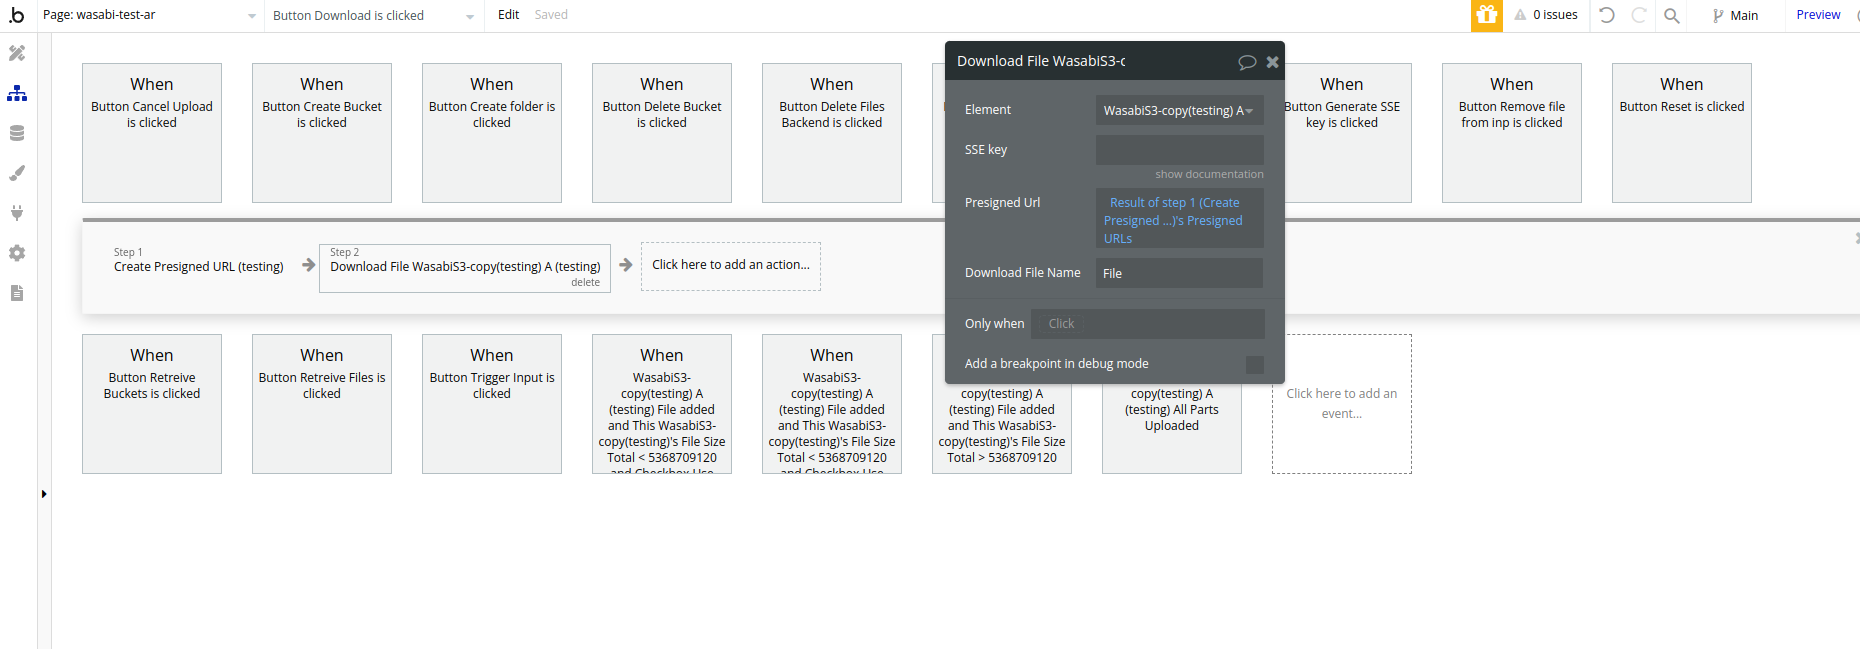
Download File - download a file from Wasabi.
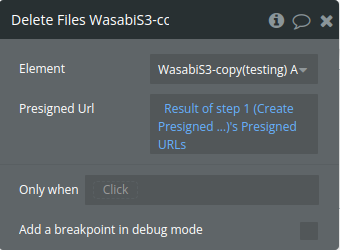
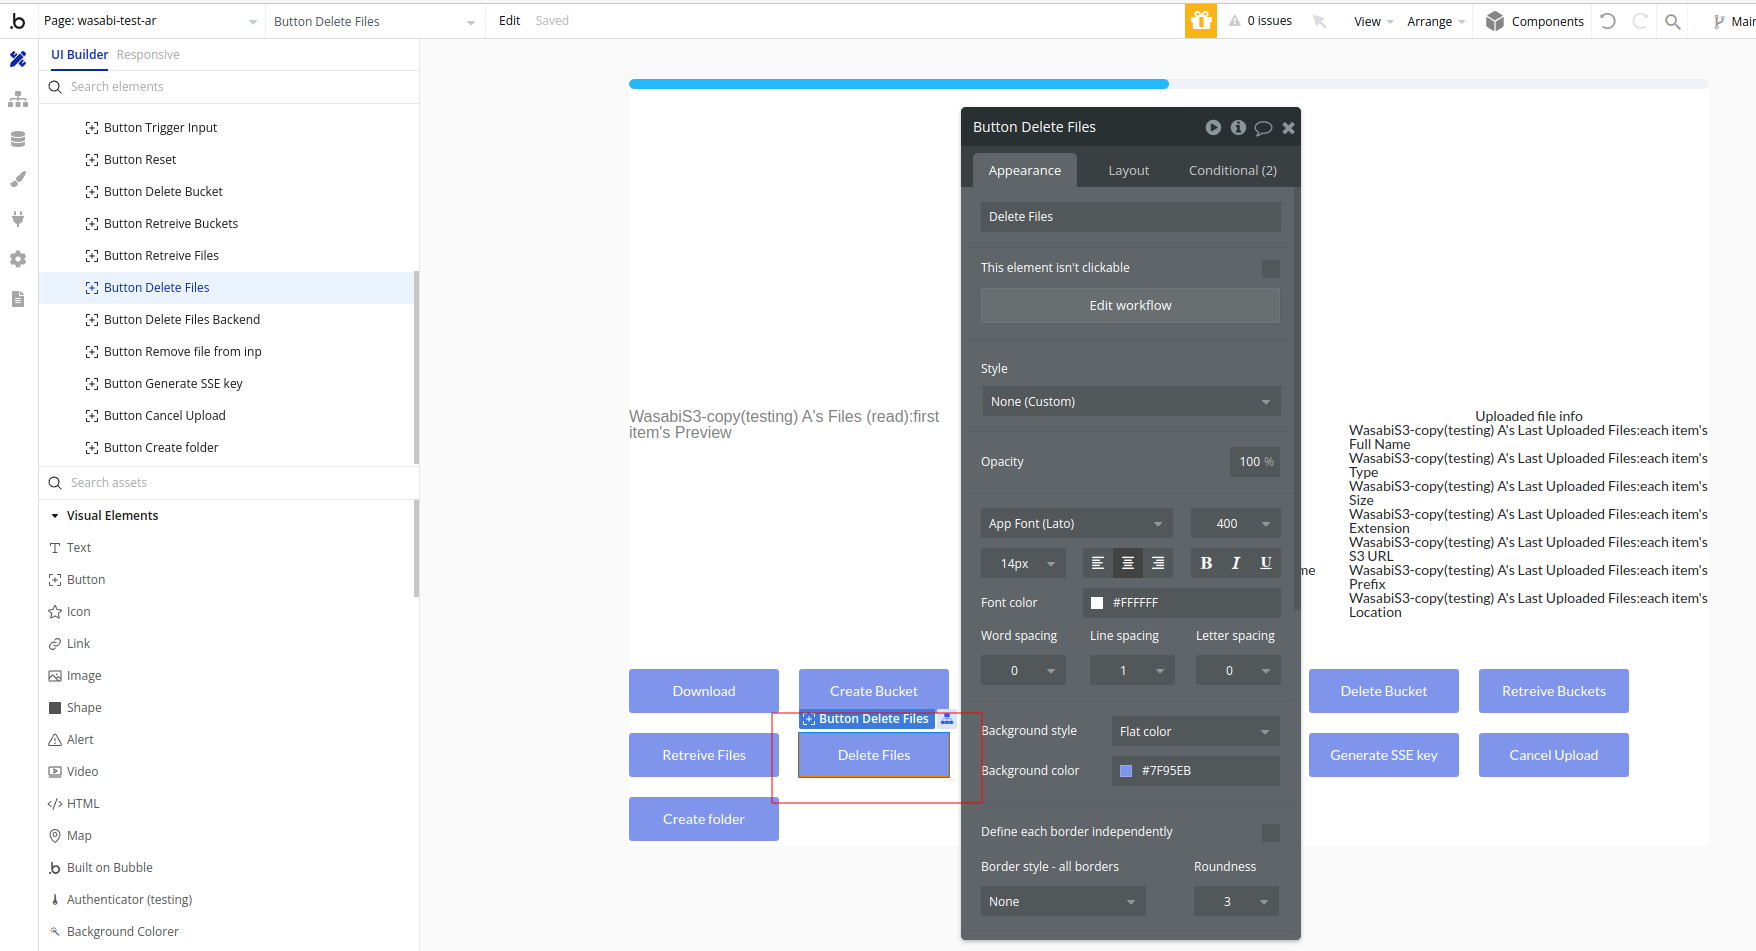
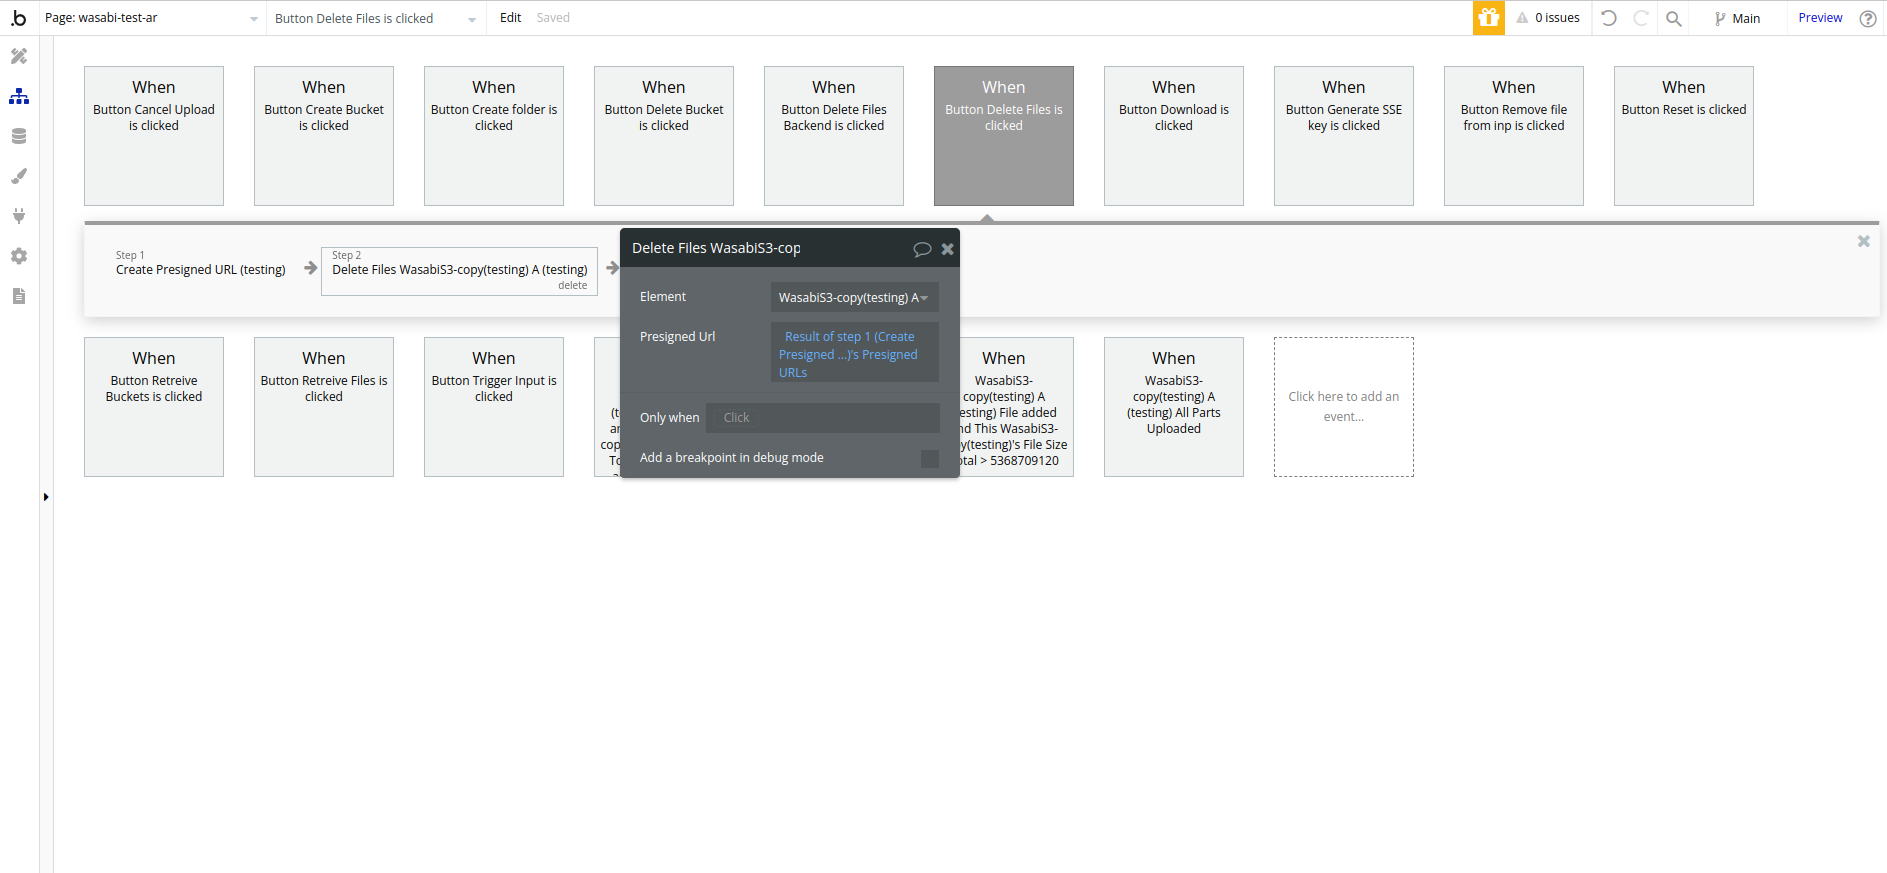
Delete Files/Folders - Delete files and folders from the selected bucket
Remove File From Input - remove the file from the element.
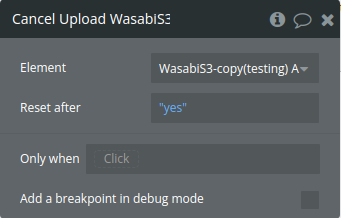
Cancel Upload - cancel current files uploading
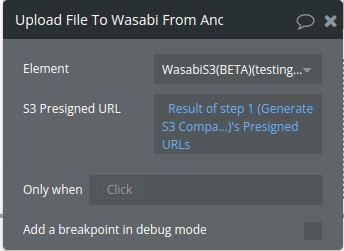
Upload File To Wasabi From Another Cloud element Action
Retrieve encrypted files element Action
Actions
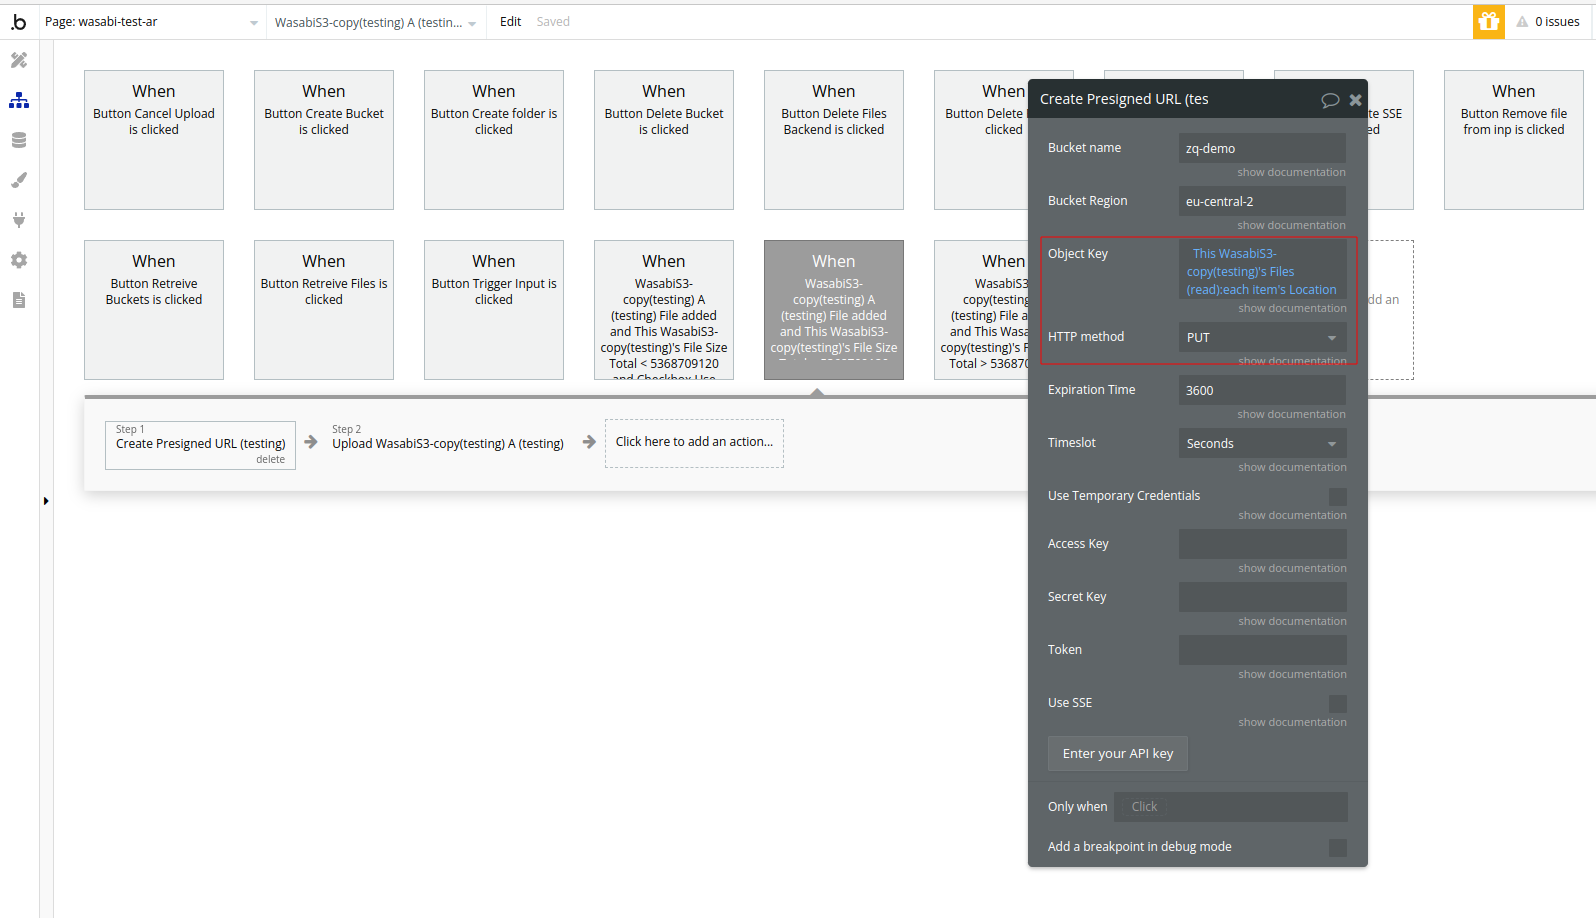
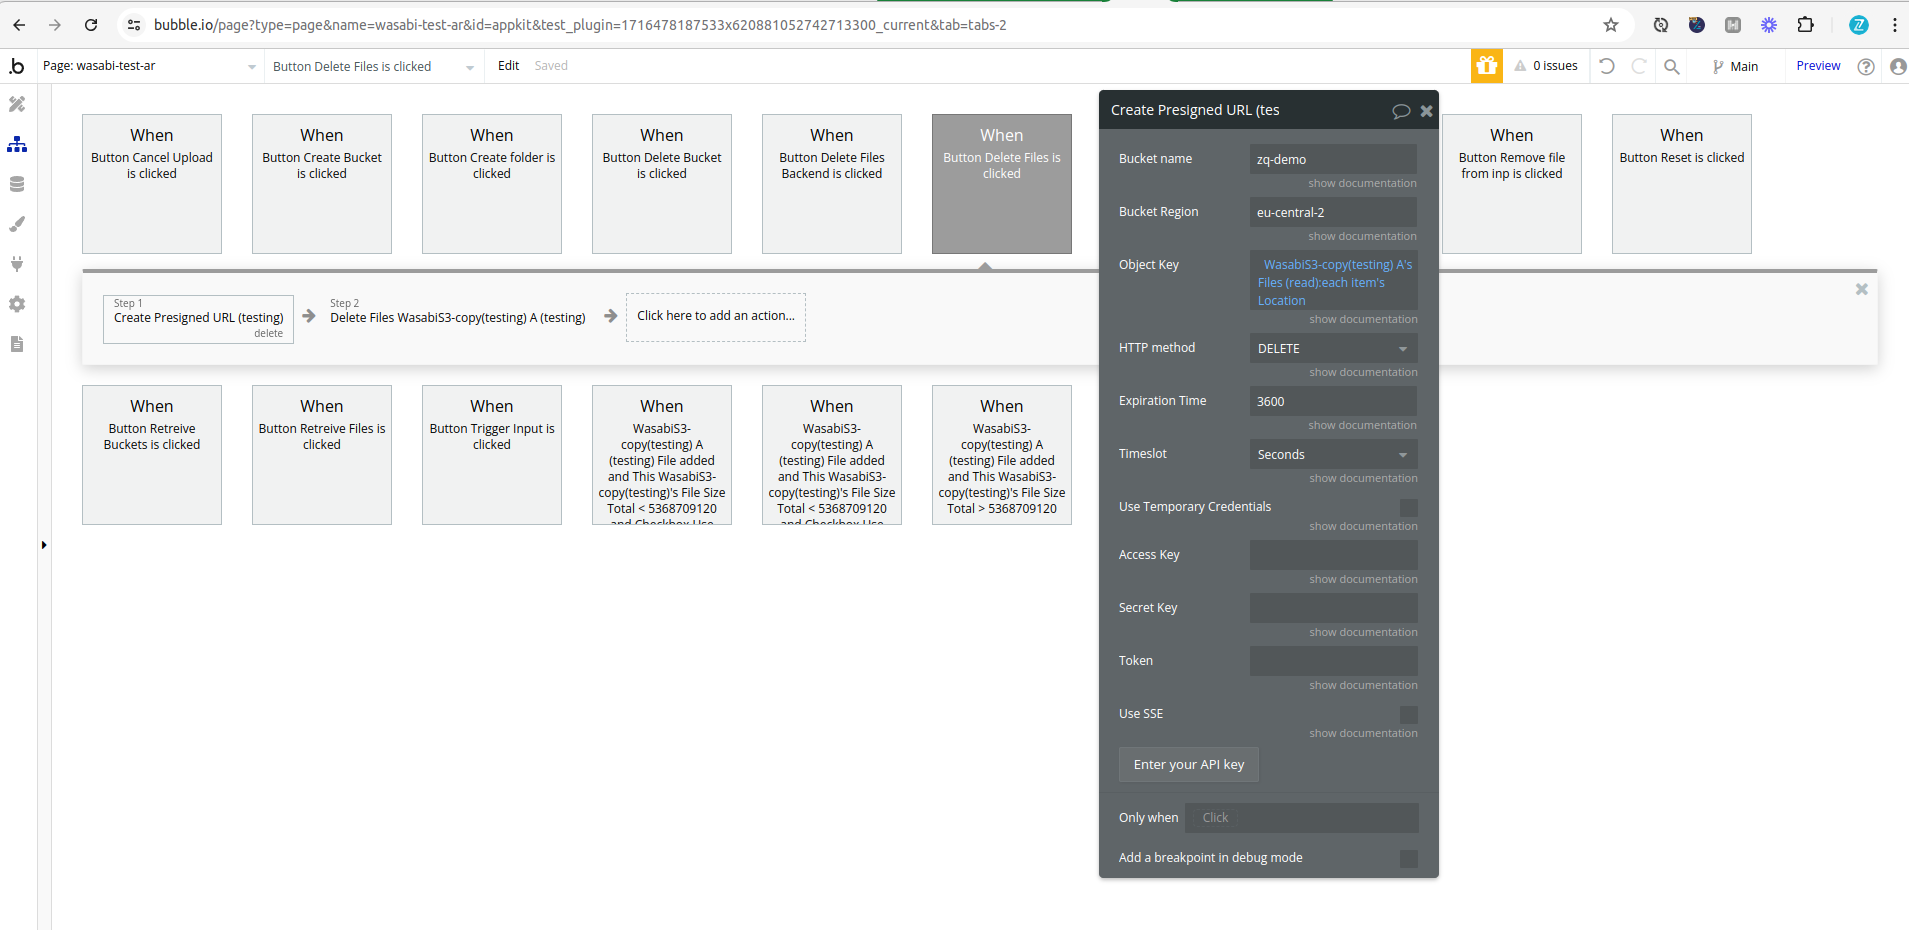
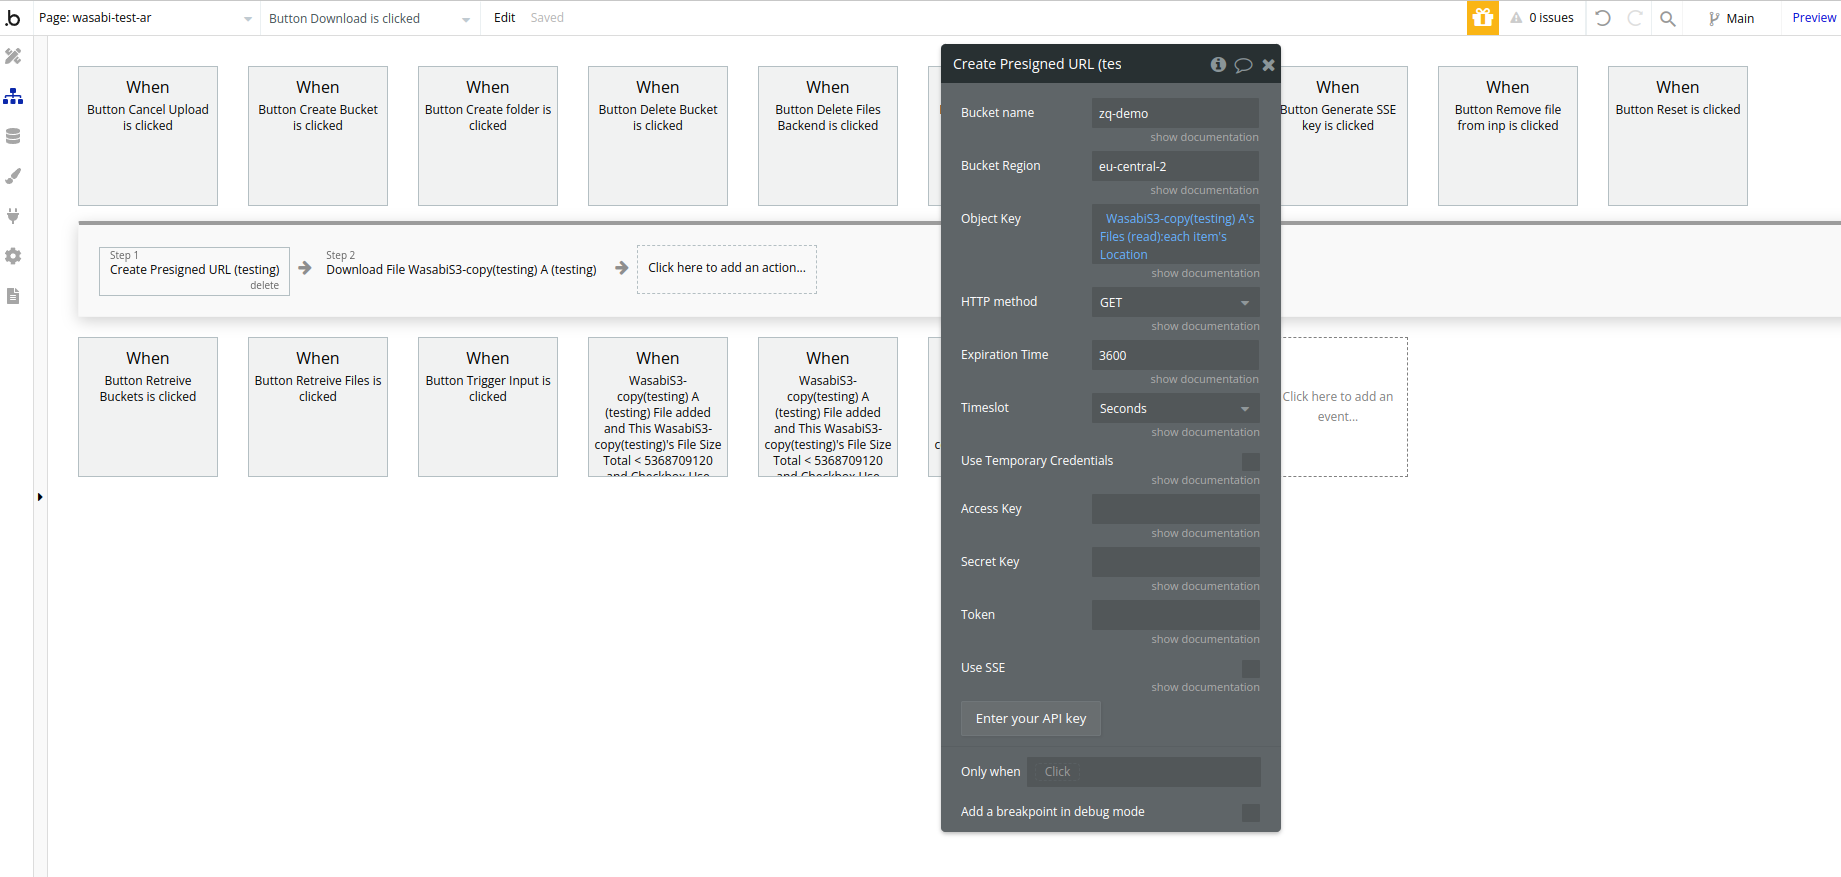
- Create Presigned URL
presignedUrls: An array of strings, where each string is a pre-signed URL for an S3 object.- Allows the specified HTTP method (GET, PUT, or DELETE) on the corresponding S3 object.
- Is valid for the duration specified by the
expirationTimeandtime_varinputs.
This action generates pre-signed URLs for S3-compatible storage operations (Wasabi in this case). It supports GET, PUT, and DELETE operations for single or multiple files. The function can use either permanent or temporary credentials and optionally enables server-side encryption. It allows customization of URL expiration time and handles various input formats. The function returns an array of presigned URLs, each corresponding to a file specified in the input, enabling secure, time-limited access to S3 objects without requiring AWS credentials to be shared with the client.
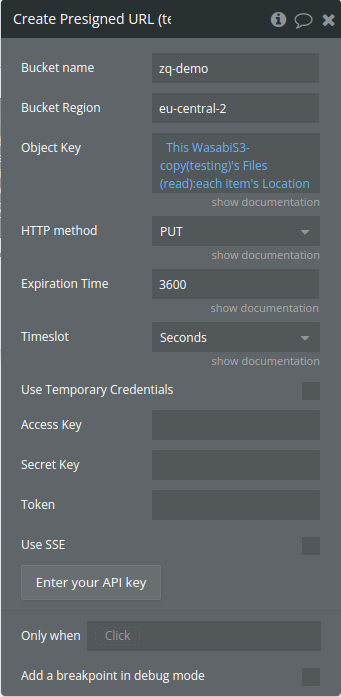
Fields
Title | Description | Type |
Bucket name | The name of the Wasabi bucket where the object(s) are stored. | Text |
Bucket Region | The region where this Bucket is stored. Please check all available regions here | Text |
Object Key | The key (path) of the file(s) in the bucket.
| list of texts |
HTTP method | The HTTP method for which to generate the pre-signed URL (GET, PUT, or DELETE). | Dropdown |
Expiration Time | The duration for which the pre-signed URL will be valid. | Number |
Timeslot | The unit of time for the expiration (Days, Hours, Minutes or Seconds). | Dropdown |
Note: The maximum value of expiration time is 7 days.
The action returns an object with a single property:
The length of the
presignedUrls array corresponds to the number of object keys provided in the objectKey input property. If a single object key is provided, the array will contain one URL. If multiple object keys were provided (comma-separated), the array will contain a URL for each key.Each pre-signed URL in the array:
These URLs can be used to perform the specified operation on the S3 objects without requiring additional authentication, as long as they are used before expiration.
- Create SSE-C Key
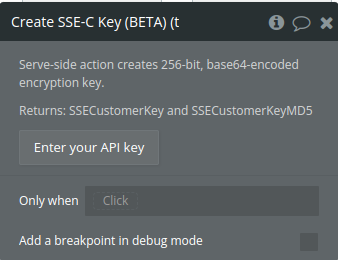
This action generates a random base64-encoded encryption key for Wasabi to use to encrypt or decrypt your data.
Run the action and save the result to a state or to a database to use it later in others actions. You will need only the “SSE Customer Key” state in the plugin's actions.
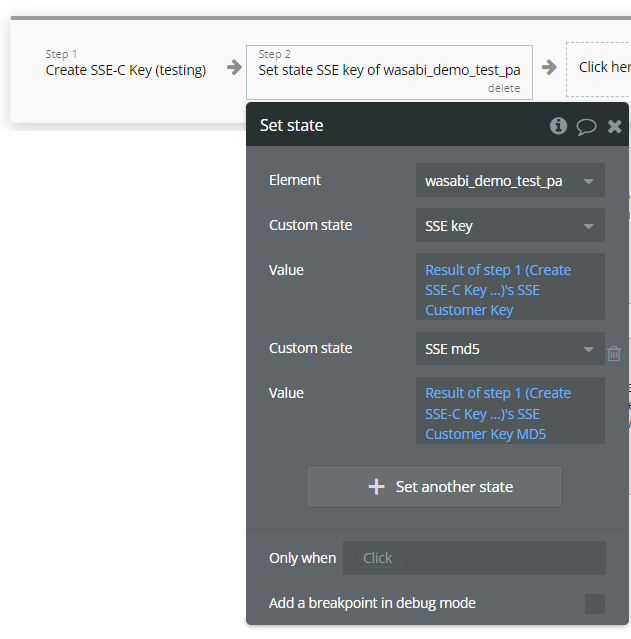
NOTE: Wasabi does not store the encryption key you provide. If you lose the encryption key, any GET request for an object without its encryption key fails, and you lose the object.
- Create Bucket
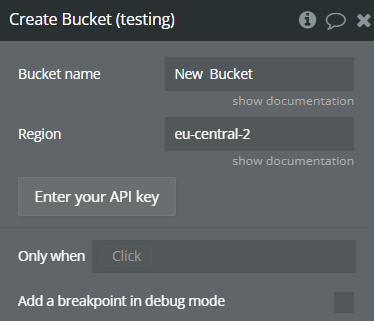
Fields:
Title | Description | Type |
Bucket name | Must be unique, valid DNS name, 63 characters or less. Case sensitive. | Text |
Bucket Region | The region of where this Bucket is stored. Please check all available regions here | Text |
- Retrieve Files
This action lists objects in a specified Wasabi bucket and location, returning detailed information about each object.
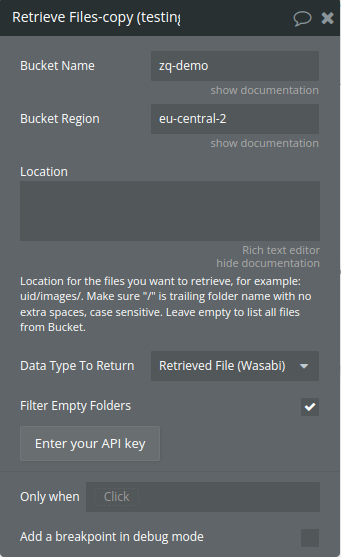
Fields
Title | Description | Type |
Bucket name | The name of the Wasabi bucket where the object(s) are stored. | Text |
Bucket Region | The region where this Bucket is stored. Please check all available regions here | Text |
Location | Location for the files you want to retrieve, for example: uid/images/. Make sure "/" is a trailing folder name with no extra spaces, case sensitive. Leave empty to list all files from Bucket. | Text |
Data Type To Return | Should be Retrieved File (Wasabi) | Text |
Filter Empty Folders | Whether to exclude empty folders from the results. | Checkbox |
Encrypted Files | If checked will return the SSE URL file state | Checkbox |
Returned Value:
The function returns an object with the following properties:
- status (string): Either "success" or "fail", indicating the outcome of the operation.
- files (array of objects): An array containing information about each file in the specified location. Each object in the array has the following properties:
- Location (string): The full path of the object in the bucket.
- Full Name (string): The full name of the file, including extension.
- Name (string): The name of the file without extension.
- Type (string|null): The MIME type of the file, or null if not determined.
- Parameters (string|null): Any query parameters in the object key.
- Size (number): The size of the object in bytes.
- Extension (string|null): The file extension, or null if none.
- Last Modified (string): The last modification date of the object.
- S3 URL (string): The complete URL to access the object in S3.
- SSE URL (string): Pre-signed URL if encrypted files is true
- Storage Class (string): The storage class of the object in S3.
- Full Name Encoded (string): URL-encoded full name of the file.
- Name Encoded (string): URL-encoded name of the file without extension.
- error (string): An error message if the operation failed, empty string otherwise.
- Delete files/folders
This action deletes objects from specified locations in an S3 bucket. It can handle multiple locations and will delete all objects within each specified location.
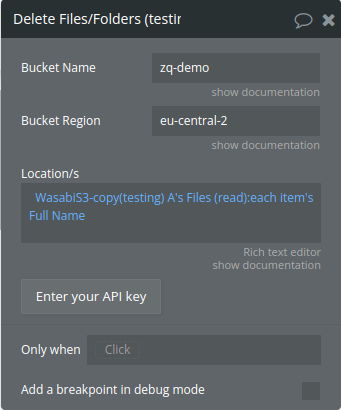
Title | Description | Type |
Bucket name | The name of the Wasabi bucket where the object(s) are stored. | Text |
Bucket Region | The region where this Bucket is stored. Please check all available regions here | Text |
Location | Location of files or folders, if not dynamic list then separated by comma and space (file1.png, uid/images/, uid/images/file2.png). For folders make sure "/" is trailing with no extra spaces, case sensitive. Use the Delete Bucket action to delete all files. | Text |
Returned Value:
The action returns an object with the following properties:
- deleted (array of strings): An array containing the locations from which objects were successfully deleted.
- error (string): An error message if an operation failed, or an empty string if all operations were successful.
7. Delete bucket
deletes a bucket from Wasabi
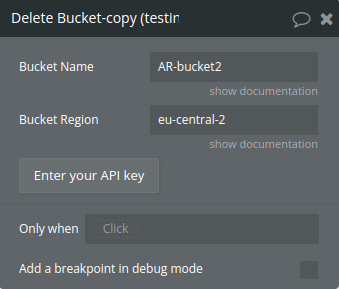
Title | Description | Type |
Bucket name | The name of the Wasabi bucket to be deleted | Text |
Bucket Region | The region of where this Bucket is stored. Please check all available regions here | Text |
Returned object:
The action returns an object with two properties:
status: Either "success" or "fail", indicating the outcome of the operation.
error: An empty string if successful, or the error message if the operation failed.
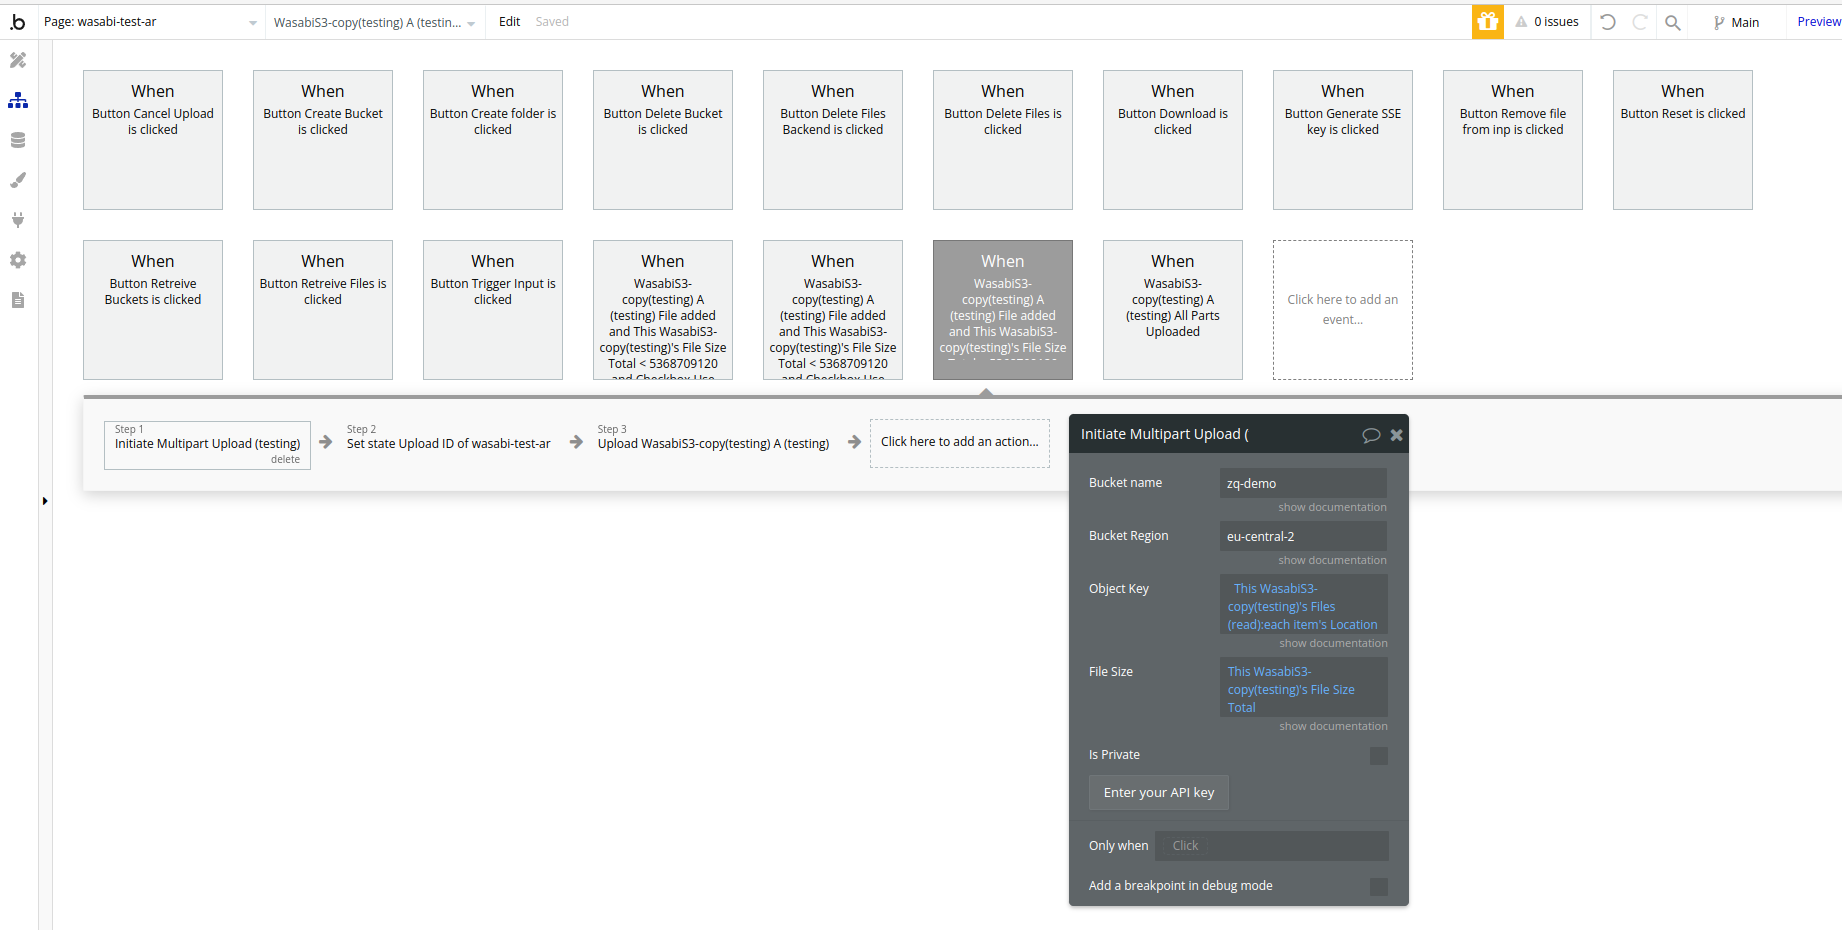
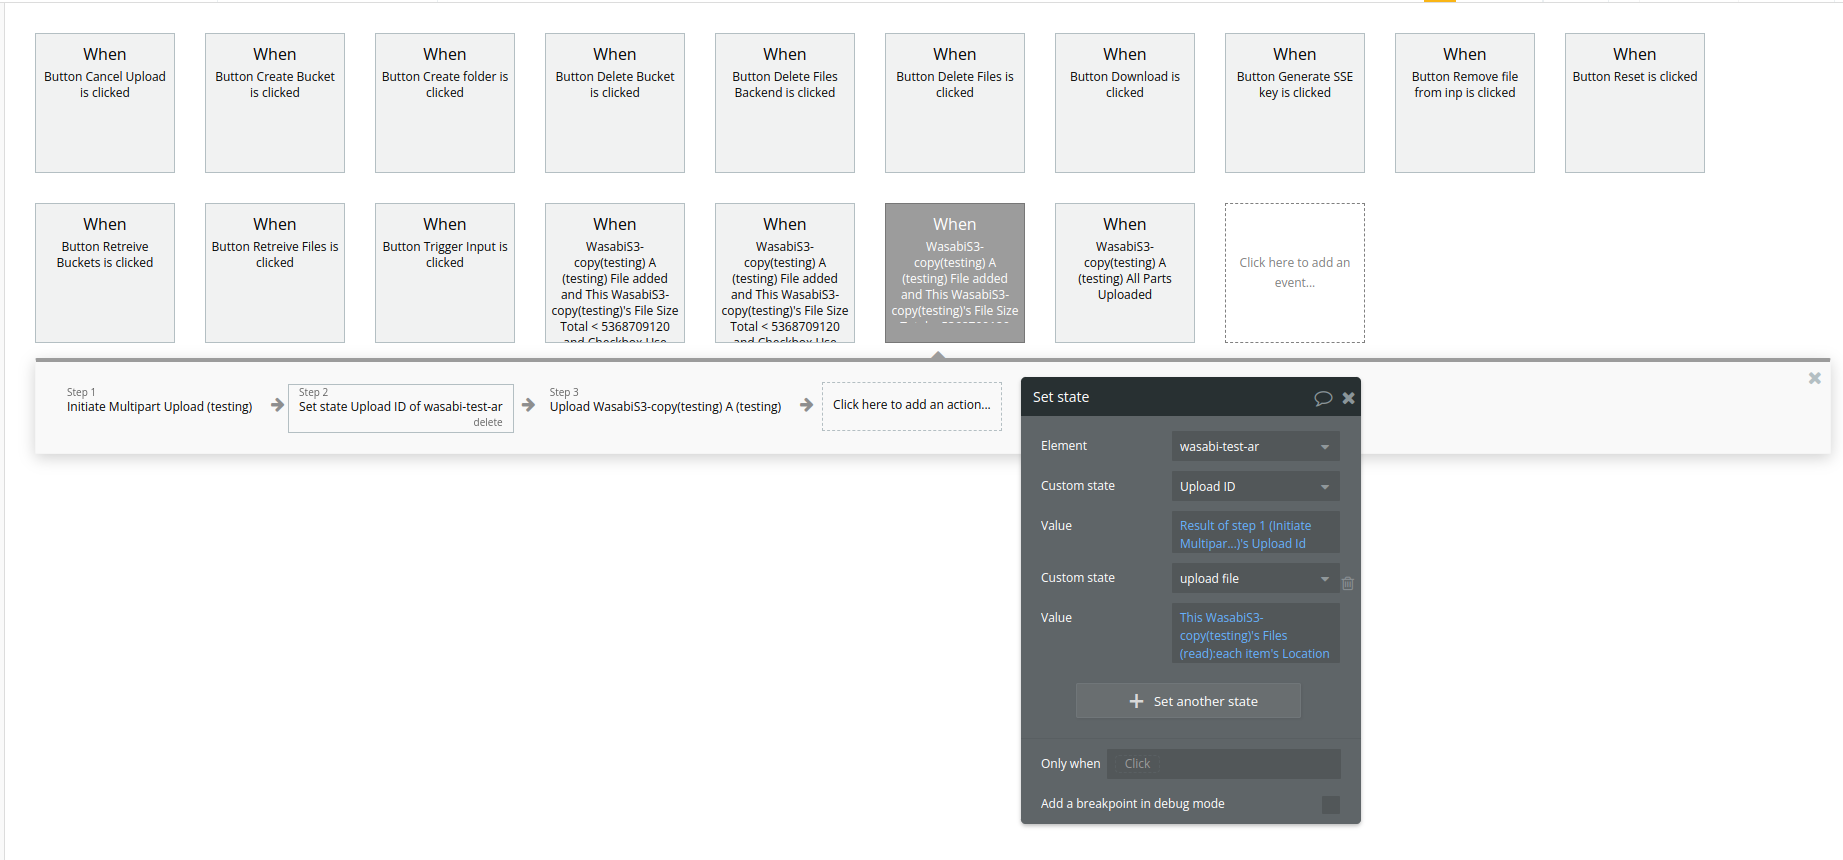
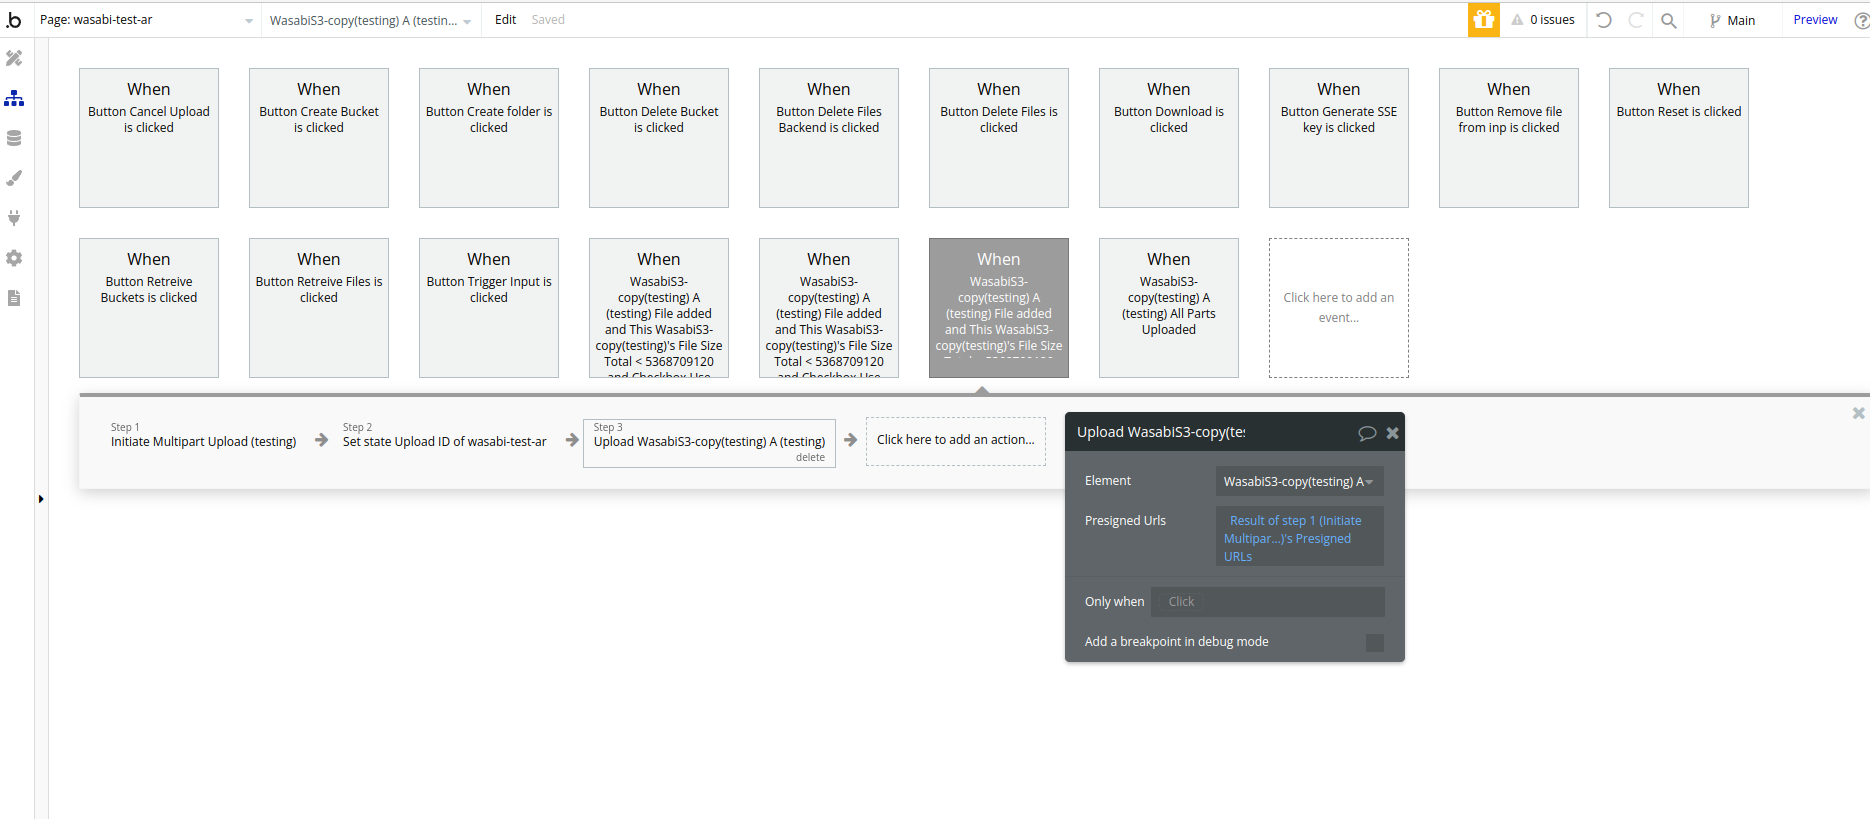
- Initiate Multipart Upload
Initiates large file uploads to Wasabi buckets and gets pre-signed URLs for client-side uploading of individual parts. This approach is particularly useful for large files that need to be uploaded in parts(files bigger than 5Gb).
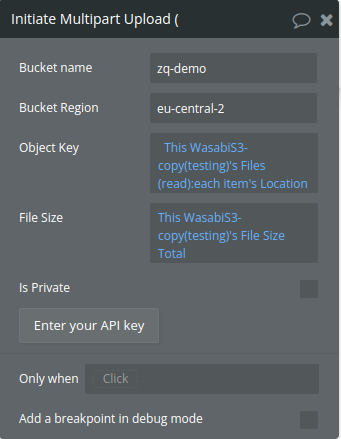
Title | Description | Type |
Bucket name | The name of the Wasabi bucket | Text |
Bucket Region | The region of where this Bucket is stored. Please check all available regions here | Text |
Object Keys | The key (path/filename) for the object to be uploaded. | Text(list) |
File Sizes | The total size of the file to be uploaded. | Number(list) |
Is Pivate | Whether the uploaded object should be private or public. | Checkbox |
Expiration Time | The duration for which the pre-signed URL will be valid. | Number |
Returned object:
The action returns an object with two properties:
UploadIds: The IDs of the initiated multipart upload.
presignedUrls: A list of pre-signed URLs for each part of the multipart upload.
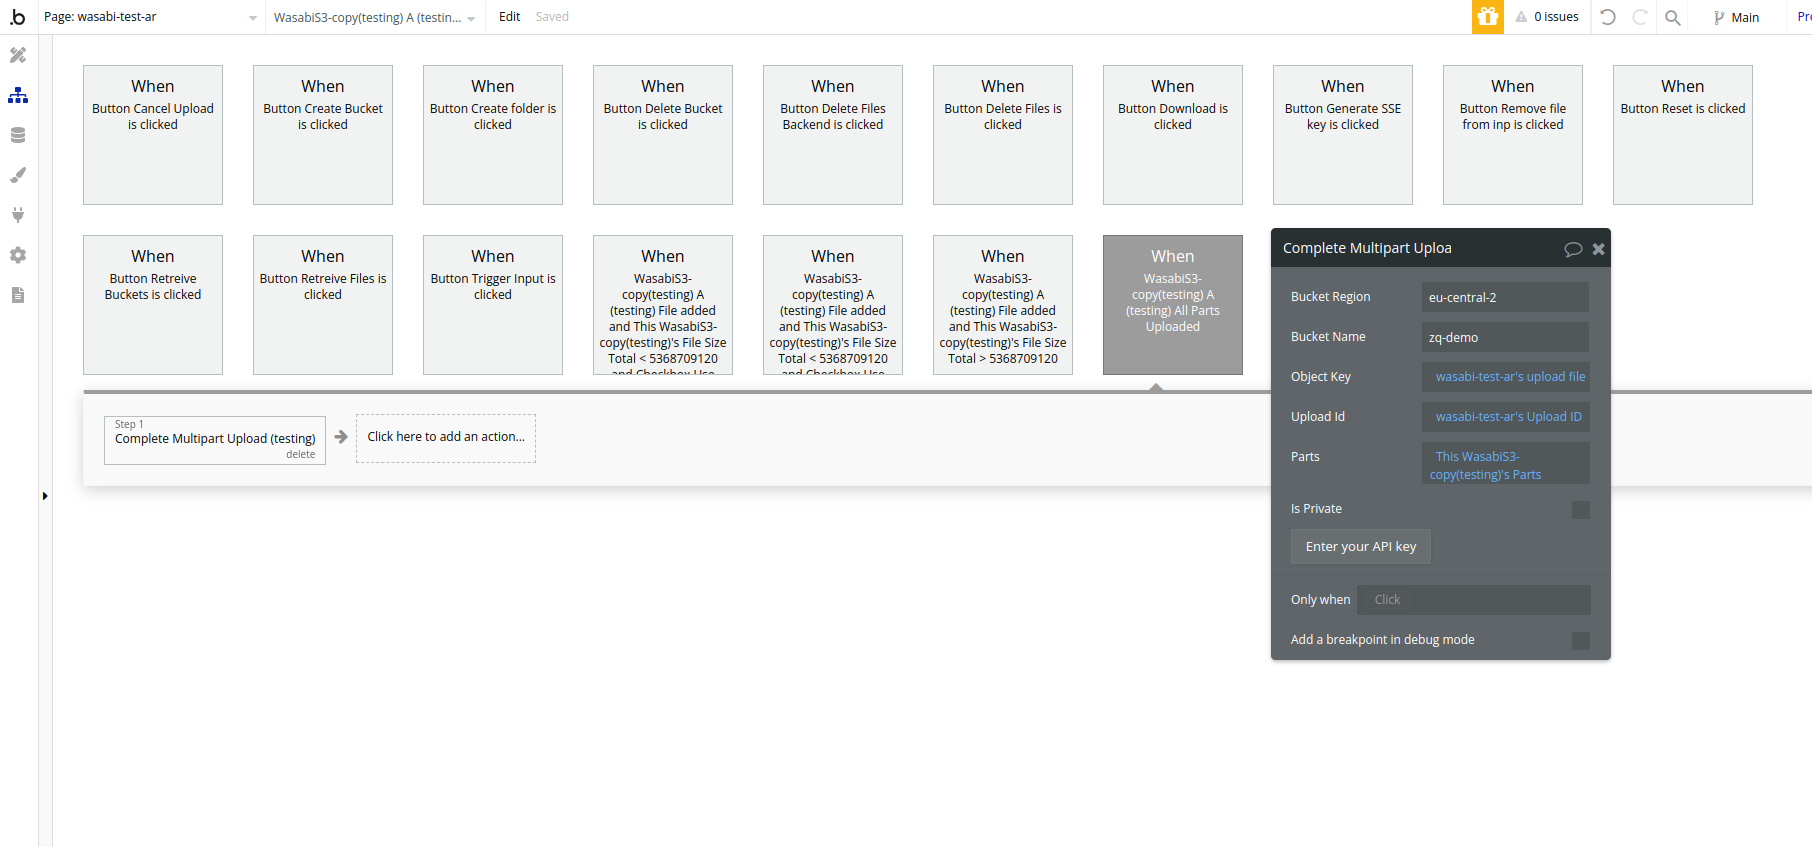
- Complete Multipart Upload
Completes a multipart upload to a Wasabi bucket
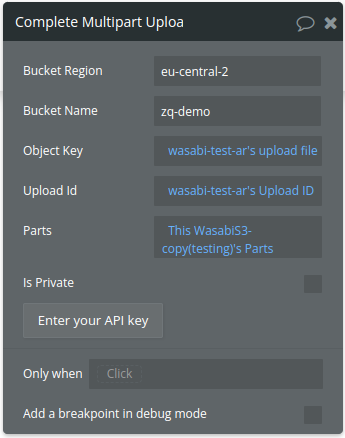
Title | Description | Type |
Bucket name | The name of the Wasabi bucket | Text |
Bucket Region | The region of where this Bucket is stored. Please check all available regions here | Text |
Object Keys | The keys (path/filename) for the objects to be uploaded. | Text |
Upload IDs | The IDs of the multipart upload to be completed. | text |
Parts | A JSON string containing information about the uploaded parts | text |
- Retrieve Buckets
Lists all buckets in a Wasabi account
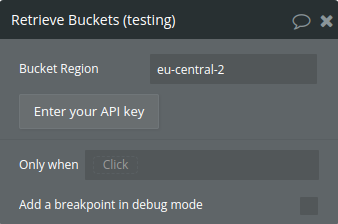
Title | Description | Type |
Bucket Region | The region of where this Bucket is stored. Please check all available regions here | Text |
Returned object:
The action returns an object with three properties:
status: Either "success" or "fail", indicating the outcome of the operation.
buckets: An array of bucket names if successful, or an empty array if failed.
error: An empty string if successful, or the error message if the operation failed.
- Create folder
Creates a folder (technically, a zero-byte object with a key ending in "/") in a Wasabi bucket.
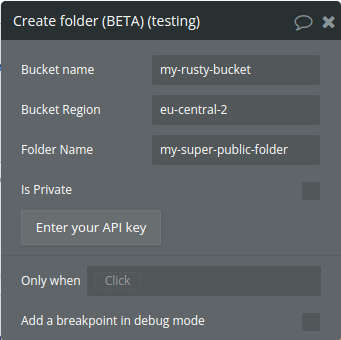
Title | Description | Type |
Bucket name | The name of the Wasabi bucket | Text |
Bucket Region | The region where this Bucket is stored. Please check all available regions here | Text |
Folder Name | The name of the folder to be created. | Text |
Is Private | Marks the folder private or public | yes/no |
Returned object:
The action returns an object with two or three properties:
success: A boolean indicating whether the operation was successful.
message: A string describing the result of the operation.
error: (Only present ifsuccessis false) A string containing the error message.
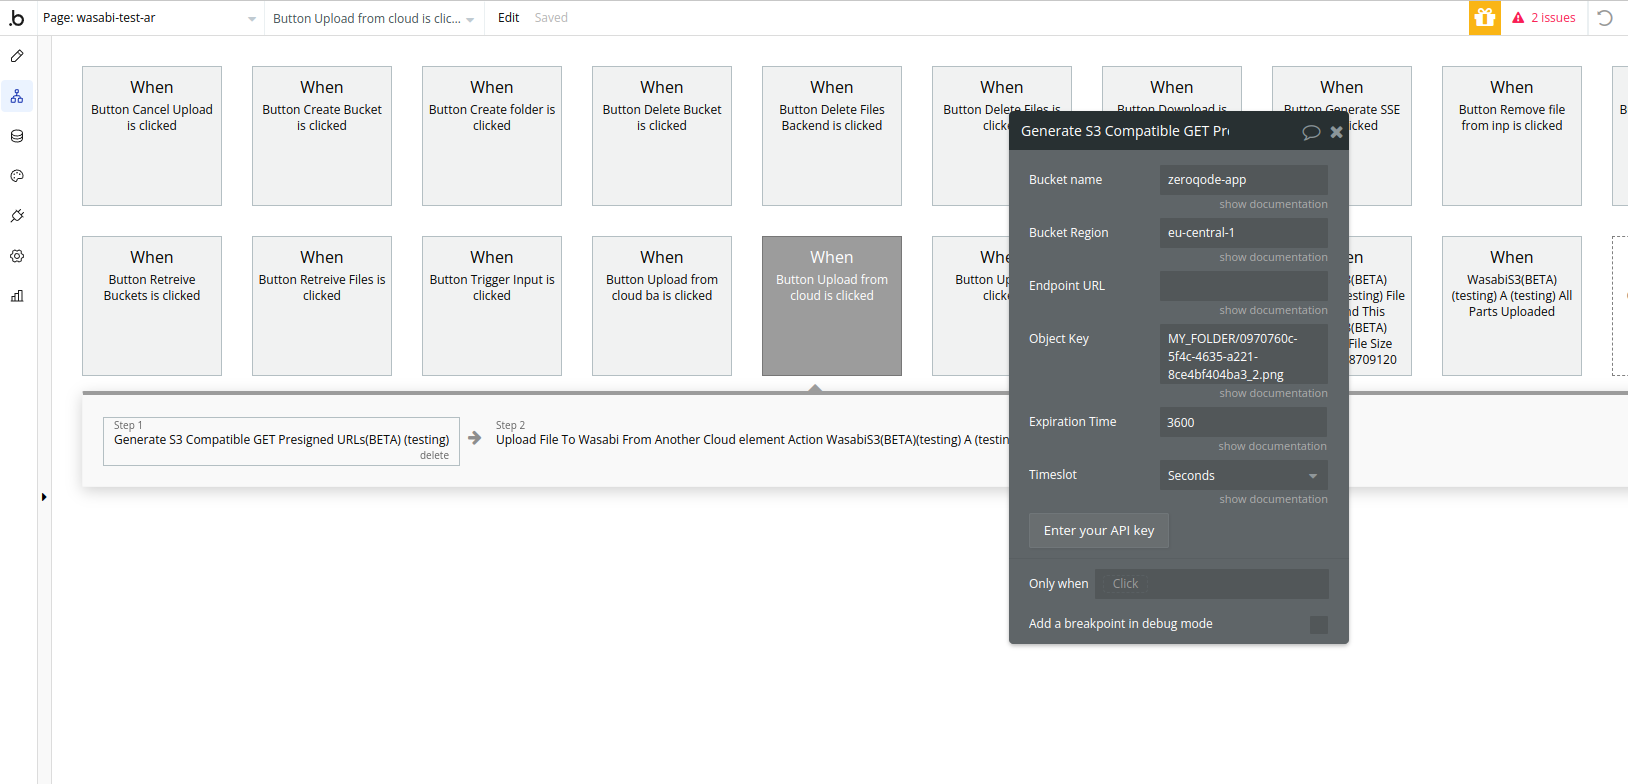
- Generate S3 Compatible GET Presigned URLs - generates an S3 compatible GET presigned url for accessing files from S3 like private buckets
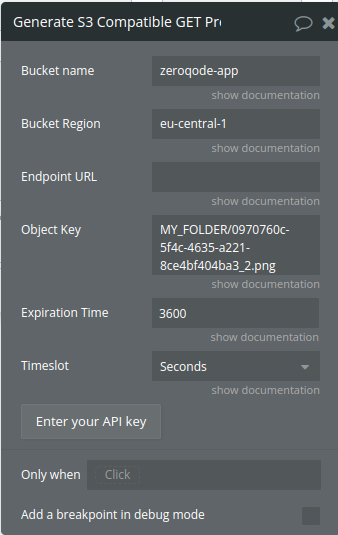
Title | Description | Type |
Bucket name | The name of the S3 compatible bucket where the object(s) are stored. | Text |
Object Key | The file from the S3 compatible service. Ex: folder1/forder2/folderX/filename.ext | Text |
Expiration Time | An expiration time interval, maximum 7 days | Text |
Timeslot | Timeslot to use for expiration time. Available options: Seconds, Minutes, Hours, Days | Dropdown |
Bucket Region | The region where the S3 compatible bucket is located. | Text |
Endpoint URL | Allows you to specify a custom endpoint URL for your S3-compatible storage service. This is particularly useful when working with S3-compatible storage providers other than Amazon S3, such as MinIO, Wasabi, or other object storage systems that implement the S3 API. If provided, this URL will be used as the base endpoint for all S3 operations instead of the default Amazon S3 endpoints. This allows the plugin to connect to your specific S3-compatible storage service. Usage: If you’re using Amazon S3, you can leave this property empty. For other S3-compatible services, provide the full URL to your storage service’s API endpoint. Example Values: “https://play.min.io:9000” (for MinIO) “https://s3.wasabisys.com” (for Wasabi) “https://your-custom-s3-compatible-endpoint.com” | Text (optional) |
Return Values:
Title | Description | Type |
Presigned URLs | S3 compatible GET presigned url | Text |
API Action calls
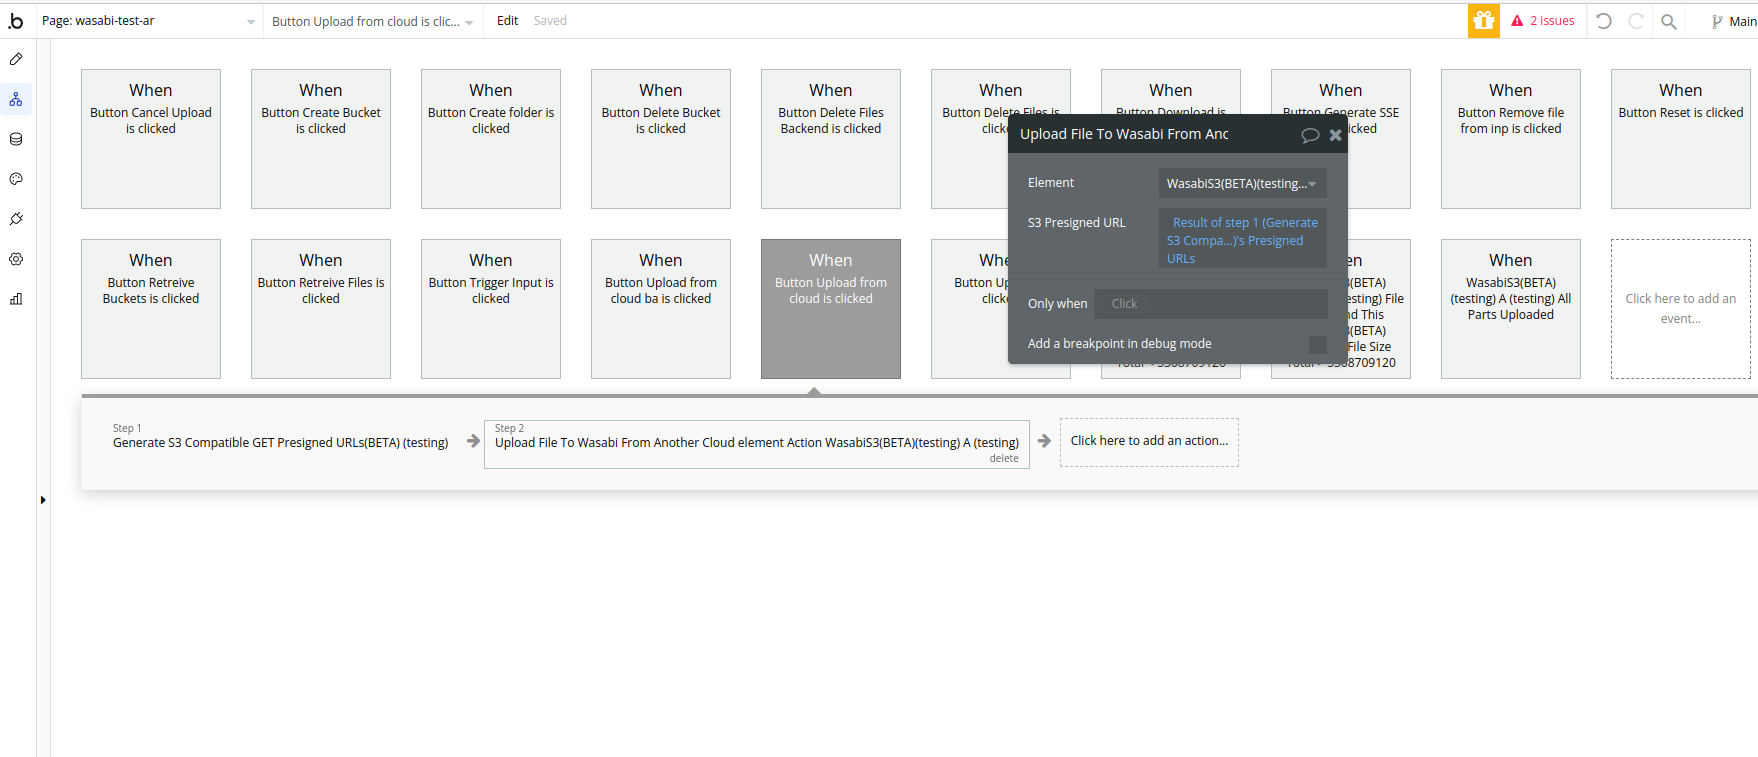
- Upload File To Wasabi From Another Cloud
This API Call allows uploading files to your Wasabi Cloud Storage from another cloud storage (for example all uploaded in base files are saved to AWS S3 and you have a URL of them ).
For an API call to work, you need to enter the Wasabi Access Key and Secret Key.
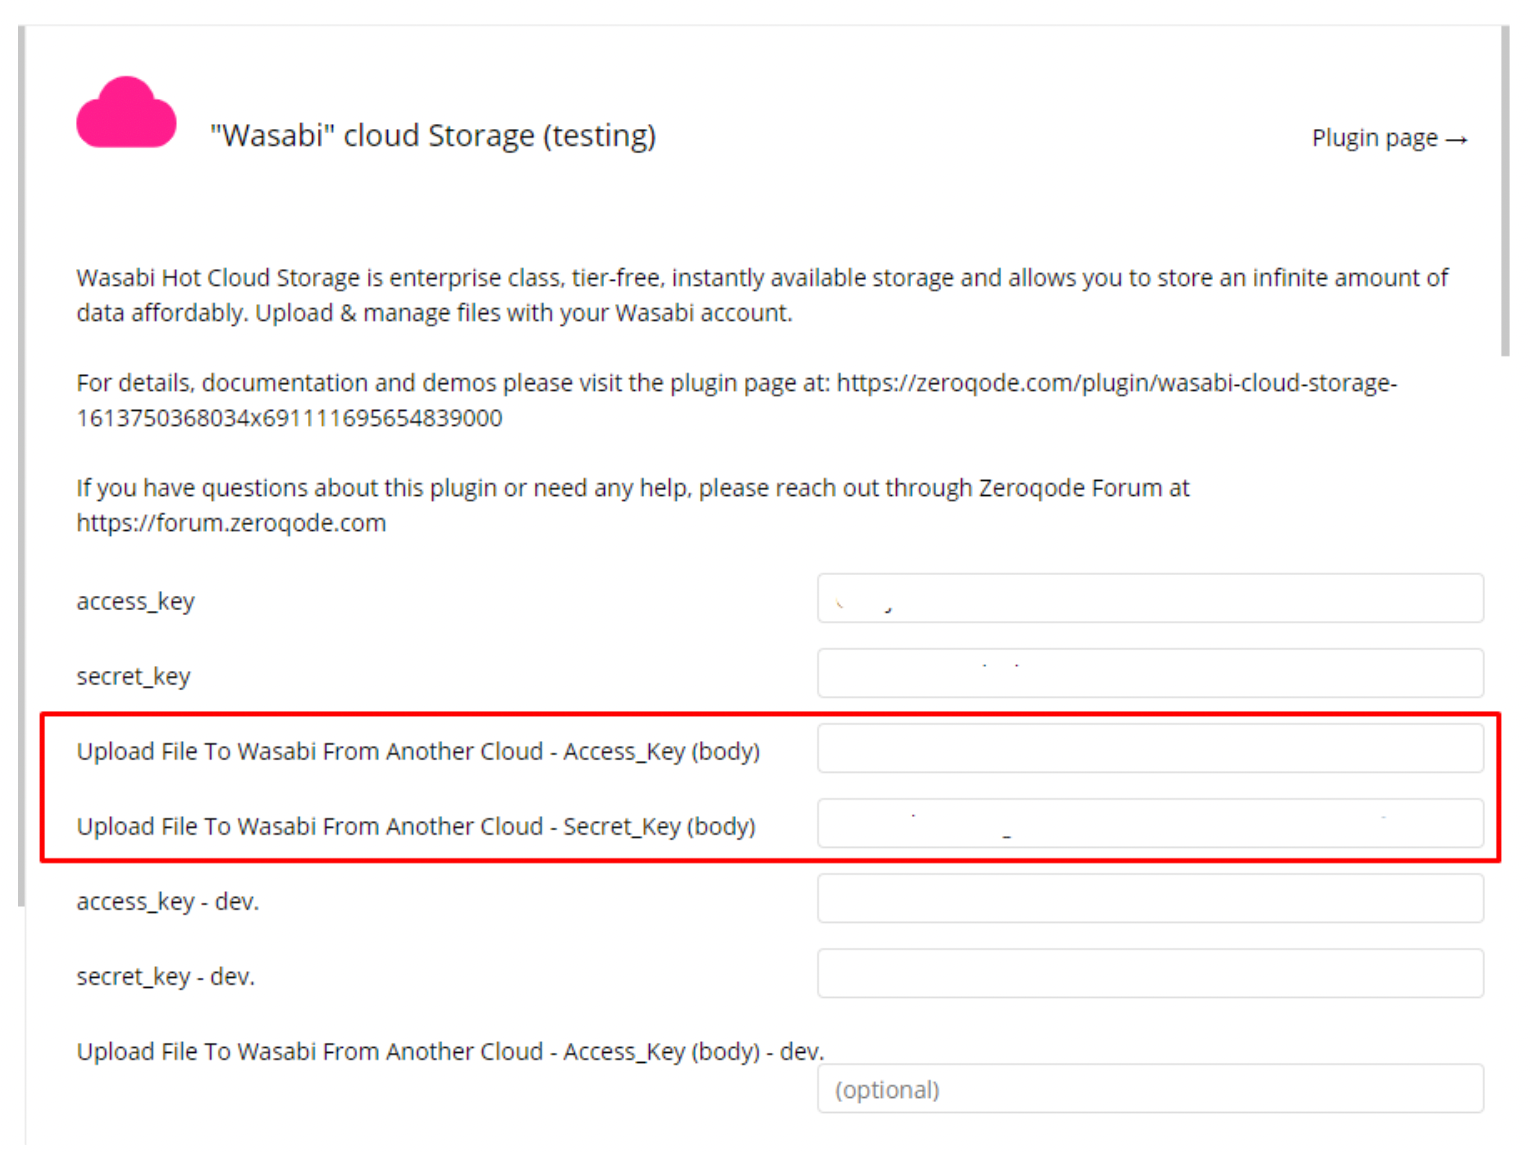
This API Call is in BETA mode. Max upload file size = 300MB. If you try to upload files with a larger size, it may respond with an error text message.
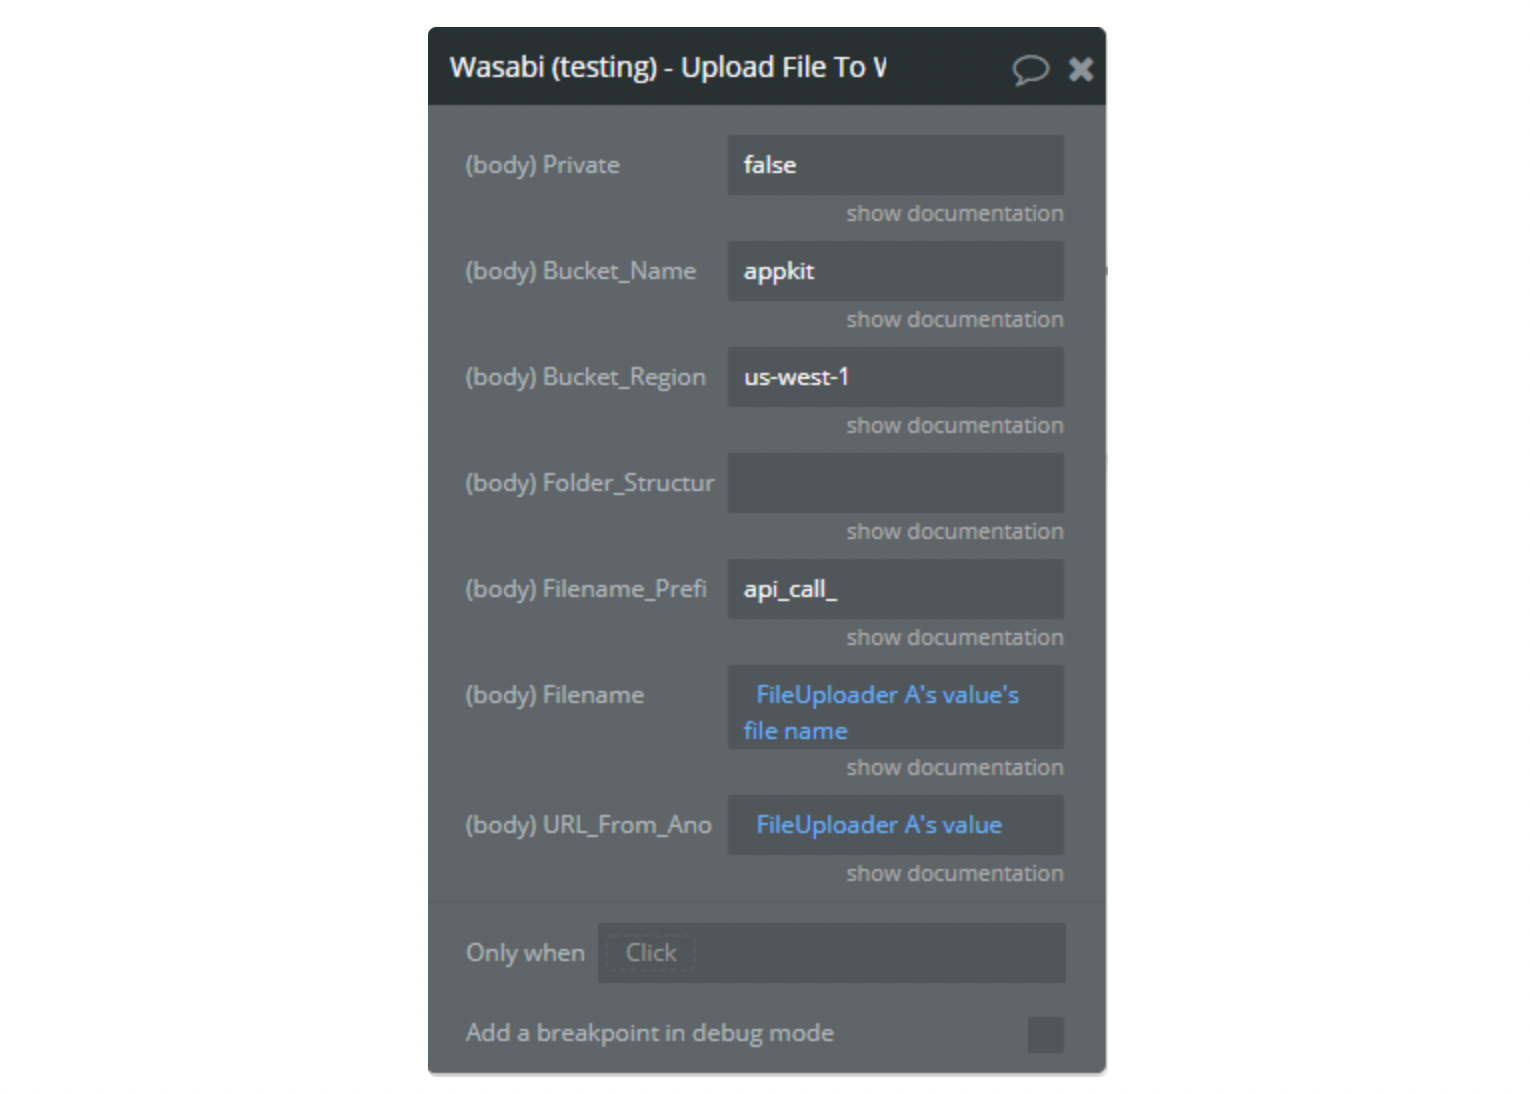
Fields
Name | Description | Type |
Private | Using access token has full control. No one else has access rights, not public. The value word “true” or “false”. | Text |
Bucket_Name | The name of the Bucket you would like to upload to. Case sensitive. | Text |
Bucket_Region | The region of where this Bucket is stored. Enter one of the following: us-west-1, eu-central-1, us-east-1, us-east-2. | Text |
Folder_Structure | The folder structure of where this file should be saved (example: uploads) . You can also specify sub folders (eg: uploads/images). As a suggestion you could save the folder as current user/thing’s unique id. | Text |
Filename_Prefix | Prefix for the file name. Some special characters (for example: !$#@), will not upload correctly. | Text |
Filename | FIle name to save on Wasabi S3 with extension ( .png, .mp3, etc.) ) | Text |
URL_From_Another_Cloud | URL of file | Text |
Access_Key | Wasabi Access Key | Text |
Secret_Key | Wasabi Secret Key | Text |
Return Values:
Return type: JSON
json{
  "Location": "text",
  "Full Name": "text",
  "Name": "text",
  "Type": "text",
  "Size": "number",
  "Extension": "text",
  "S3 URL": "text"
}
- Upload File To Wasabi From Another Cloud with SSE
The same API call as Upload File To Wasabi From Another Cloud but with the field SSE
This API Call allows uploading files to your Wasabi Cloud Storage from another cloud storage with Wasabi Server Side encription.
For an API call to work, you need to enter the Wasabi Access Key, Secret Key, and sse_key.

This API Call is in BETA mode. Max upload file size = 300MB. If you try to upload files with a larger size, it may respond with an error text message.
Fields
Name | Description | Type |
Private | Using access token has full control. No one else has access rights, not public. The value word “true” or “false”. | Text |
Bucket_Name | The name of the Bucket you would like to upload to. Case sensitive. | Text |
Bucket_Region | The region of where this Bucket is stored. Enter one of the following: us-west-1, eu-central-1, us-east-1, us-east-2. | Text |
Folder_Structure | The folder structure of where this file should be saved (example: uploads) . You can also specify sub folders (eg: uploads/images). As a suggestion you could save the folder as current user/thing’s unique id. | Text |
Filename_Prefix | Prefix for the file name. Some special characters (for example: !$#@), will not upload correctly. | Text |
Filename | FIle name to save on Wasabi S3 with extension ( .png, .mp3, etc.) ) | Text |
URL_From_Another_Cloud | URL of file | Text |
Access_Key | Wasabi Access Key | Text |
Secret_Key | Wasabi Secret Key | Text |
Sse_key | In order to use Wasabi server side encryption fill-in this field with 256-bit, base64-encoded encryption key. You can use “Create SSE-C Key” action to create the key. | Text |
Return Values:
Return type: JSON
json{
  "body Location": "text",
  "body Full Name": "text",
  "body Name": "text",
  "body Type": "text",
  "body Size": "number",
  "body Extension": "text",
  "body S3 URL": "text",
  "body message": "text",
  "error status_code": "number",
  "error status_message": "text",
  "error body": "text",
  "returned_an_error": "yes/no"
}
Additional setup
1. Restrict access to the bucket (allows access only to application visitors).
By default, public use of a bucket, folder, or file is allowed only by certain paid (not trial) accounts. If your account does not have access to this feature, contact Wasabi Support at support@wasabi.com for assistance.
Restricting access to a specific HTTP referrer
Suppose that you have a website with a domain name (www.example.com or example.com) with links to photos and videos stored in your Wasabi bucket, YOUR_WEB_SITE_FULL_URL. By default, all the Wasabi resources are private, so only the account that created the resources can access them.
To allow read access to these objects from your website, you can add a bucket policy that allows permission with a condition, that the get request must originate from specific web pages.
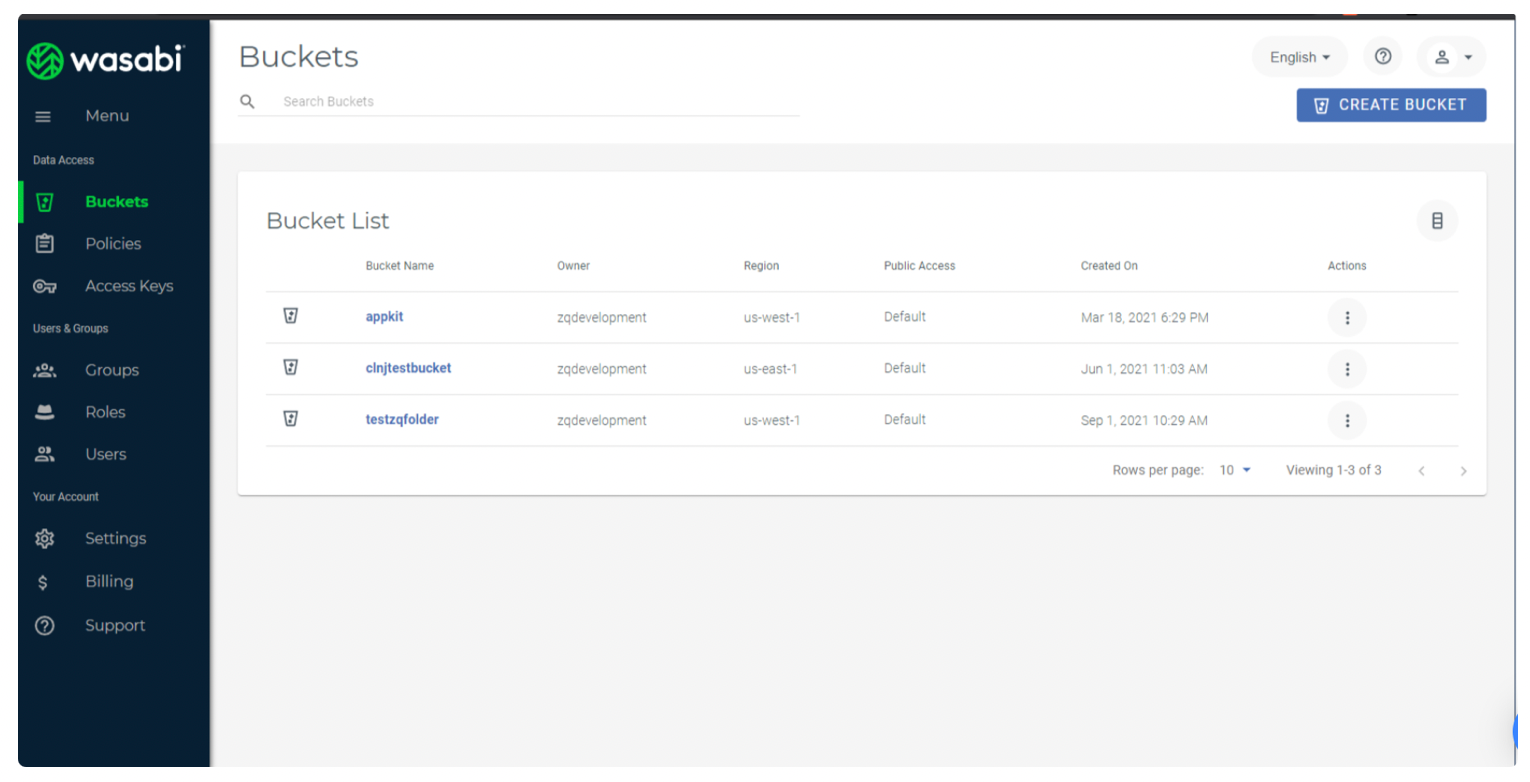
- Go to your Wasabi console
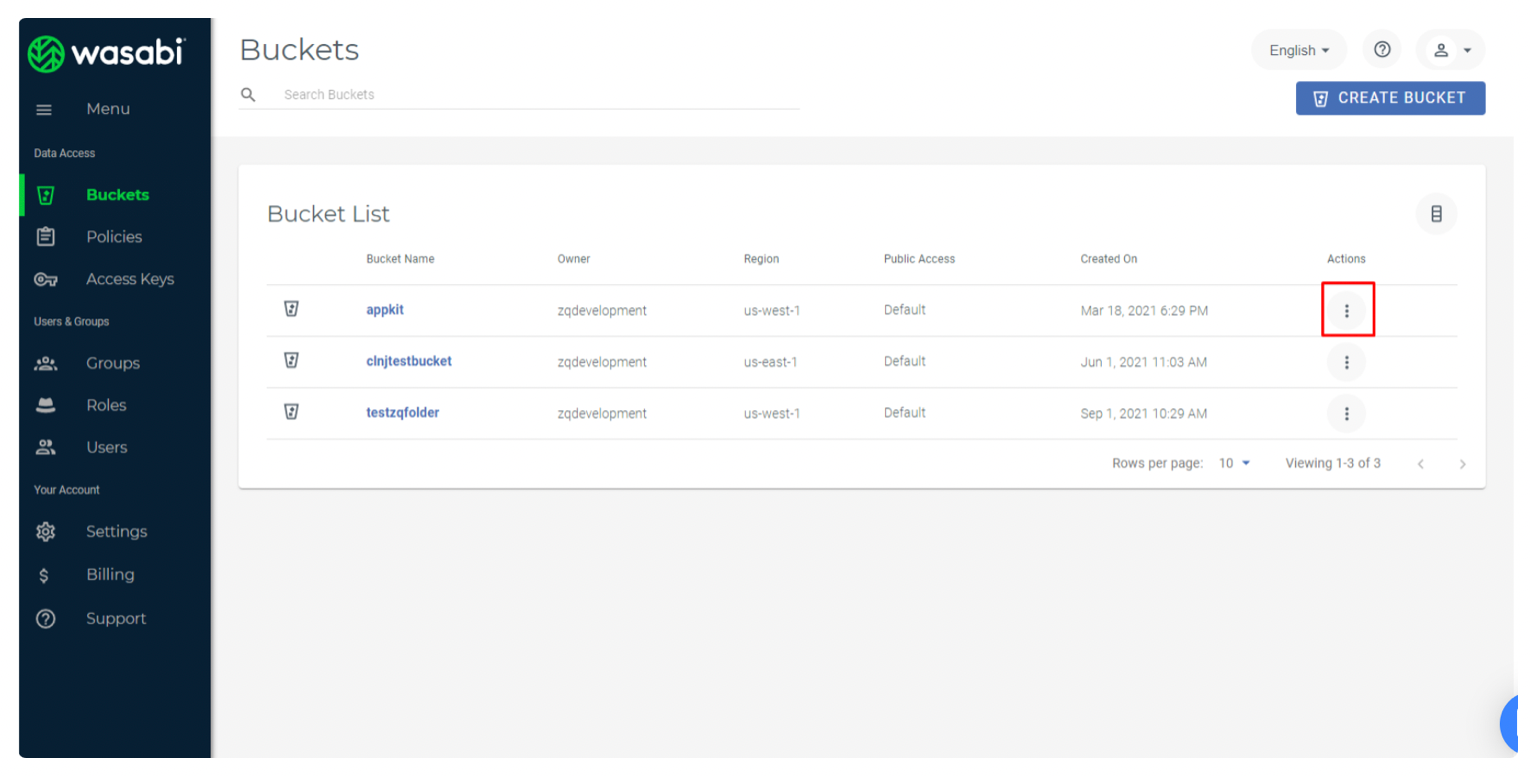
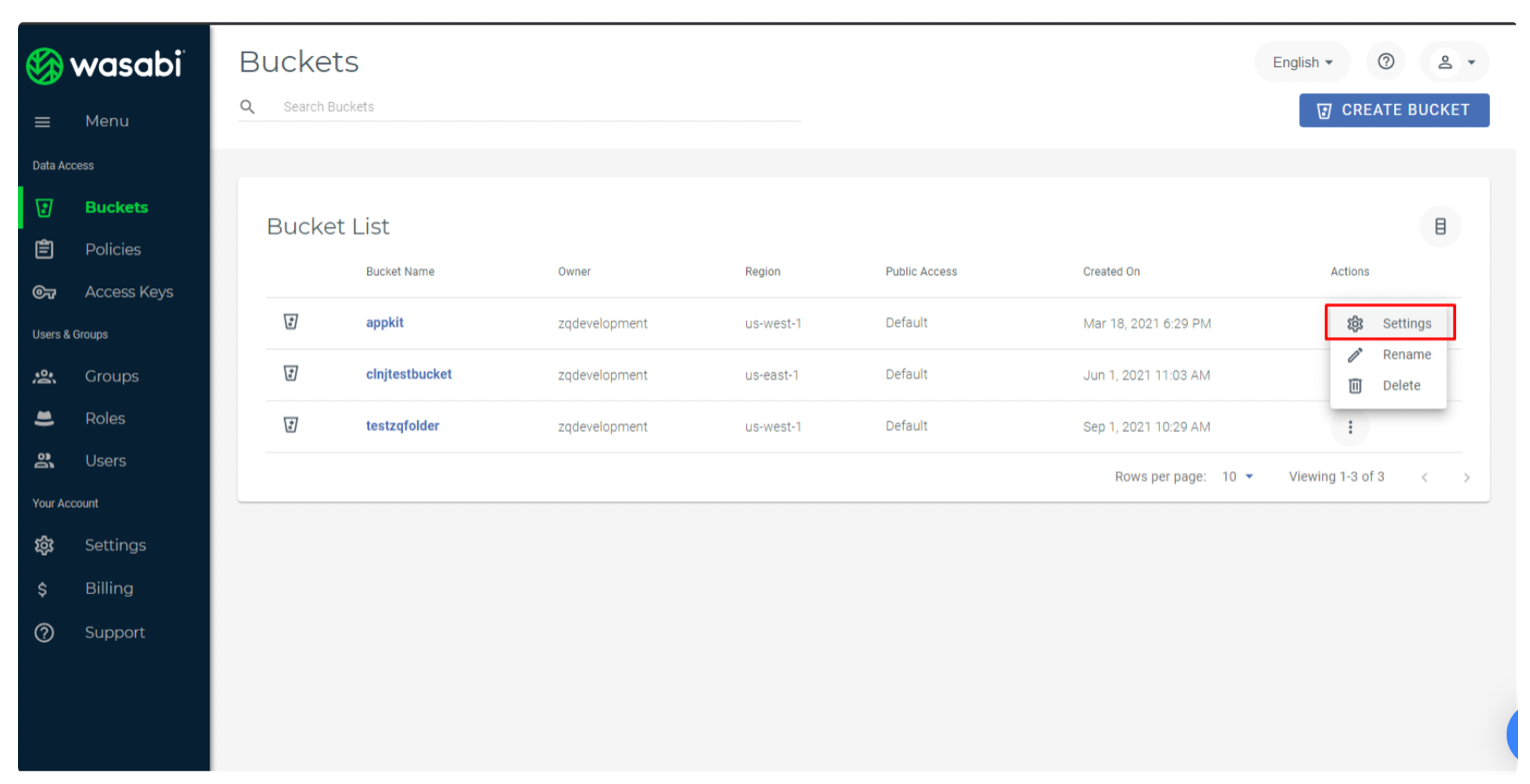
2. Go to bucket settings
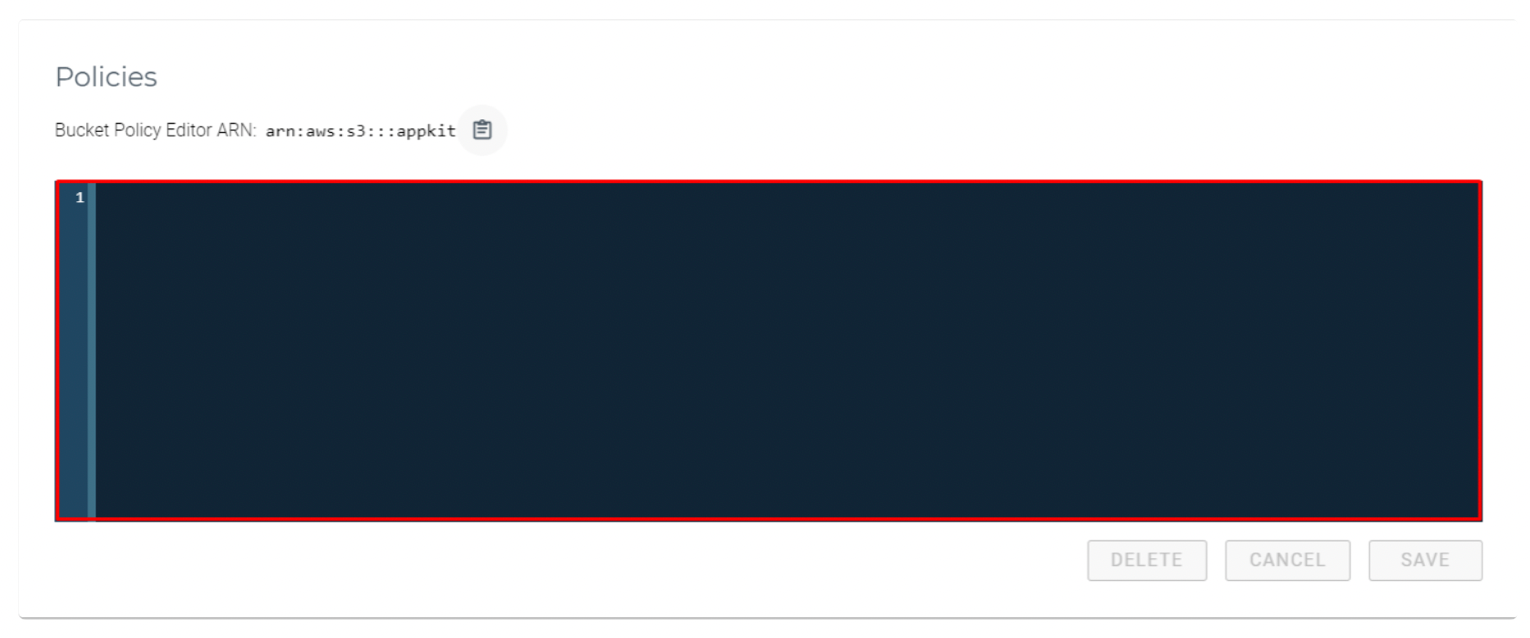
3. Go to tab "POLICIES"
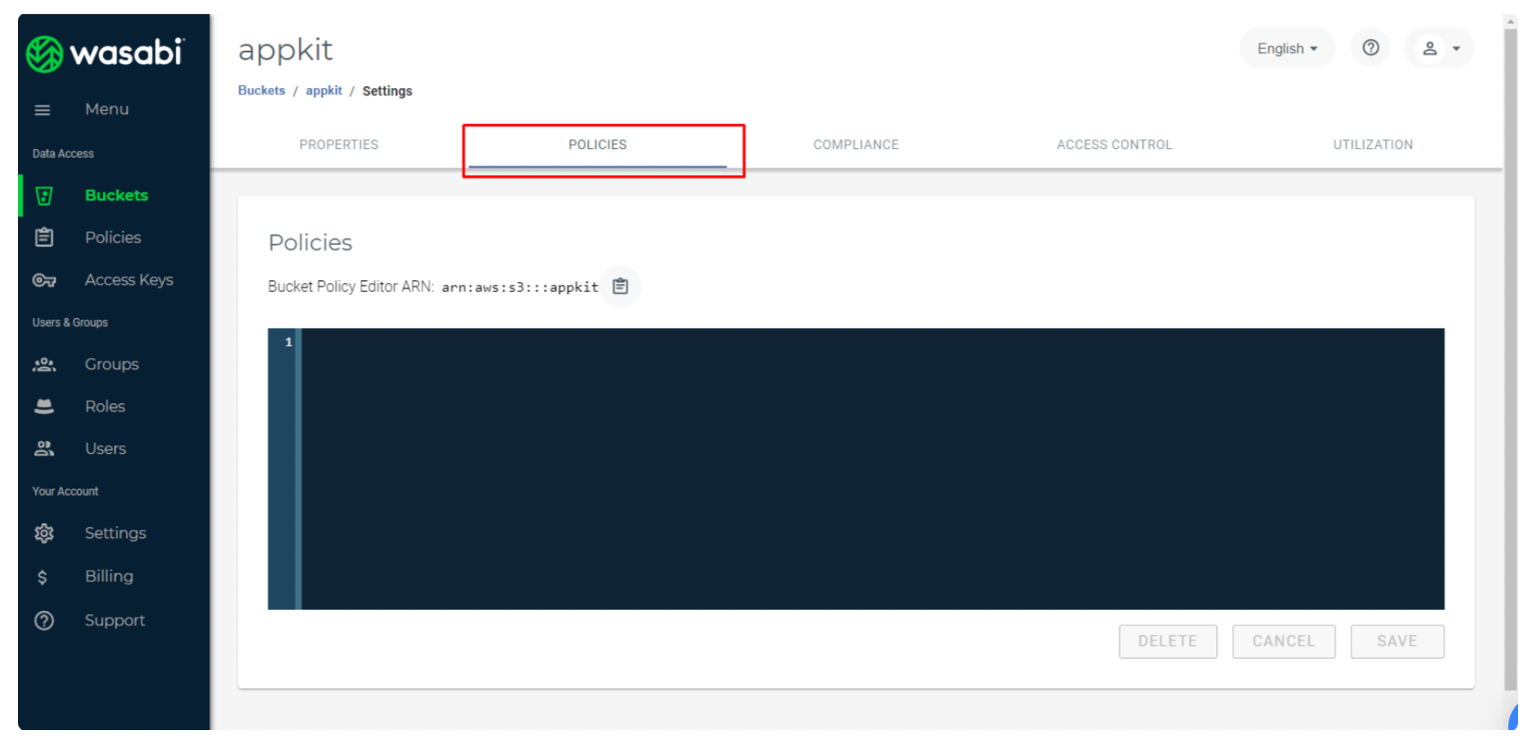
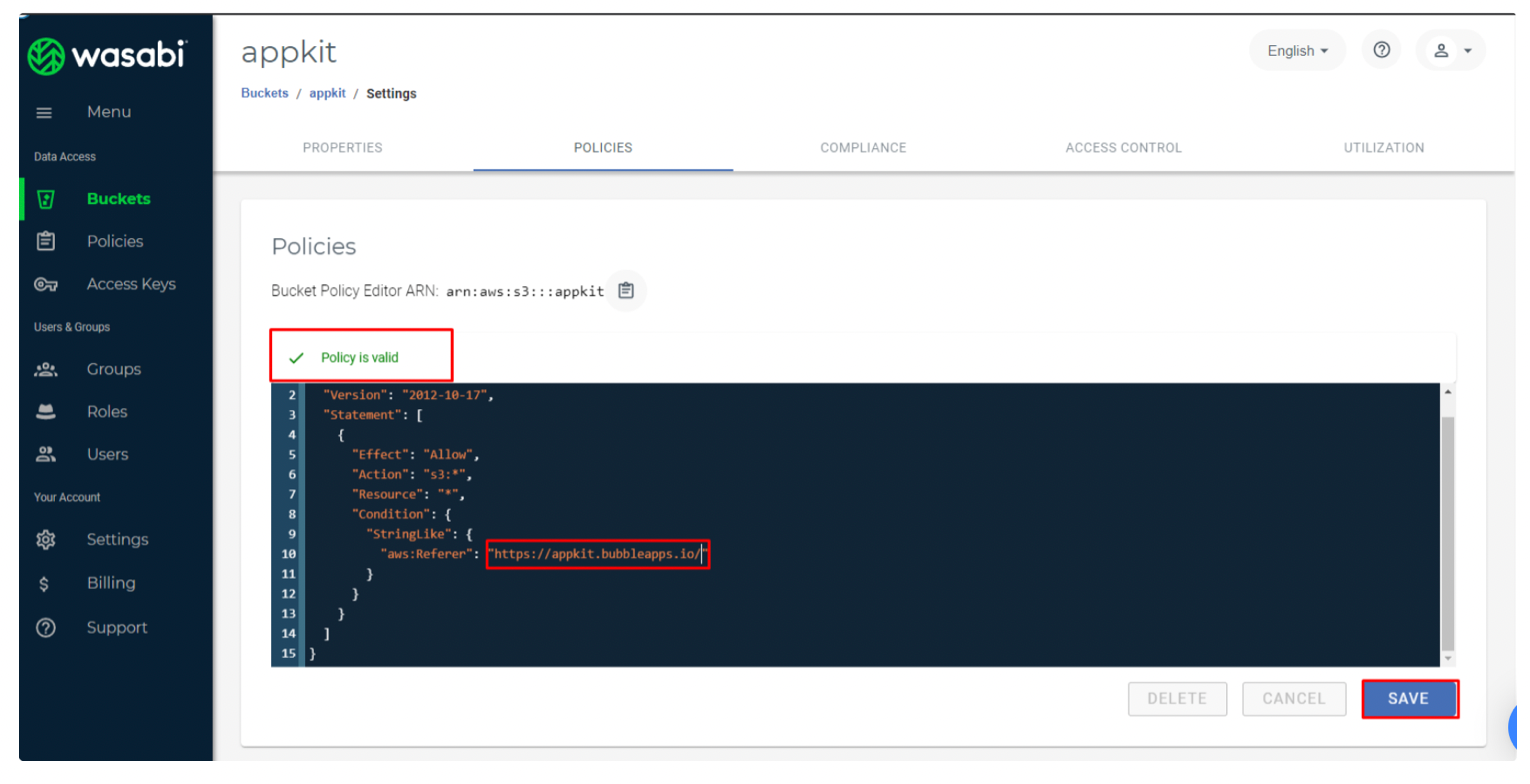
4. Add code to this area
javascript{
  "Version": "2012-10-17",
  "Statement": [
    {
      "Effect": "Allow",
			"Principal": {
			        "AWS": "*"
			      },
      "Action": "s3:*",
      "Resource": "*",
      "Condition": {
        "StringLike": {
          "aws:Referer": "YOUR_WEB_SITE_FULL_URL"
        }
      }
    }
  ]
}
And Save
2. Restrict access to the bucket (deny access to all except the application visitors).
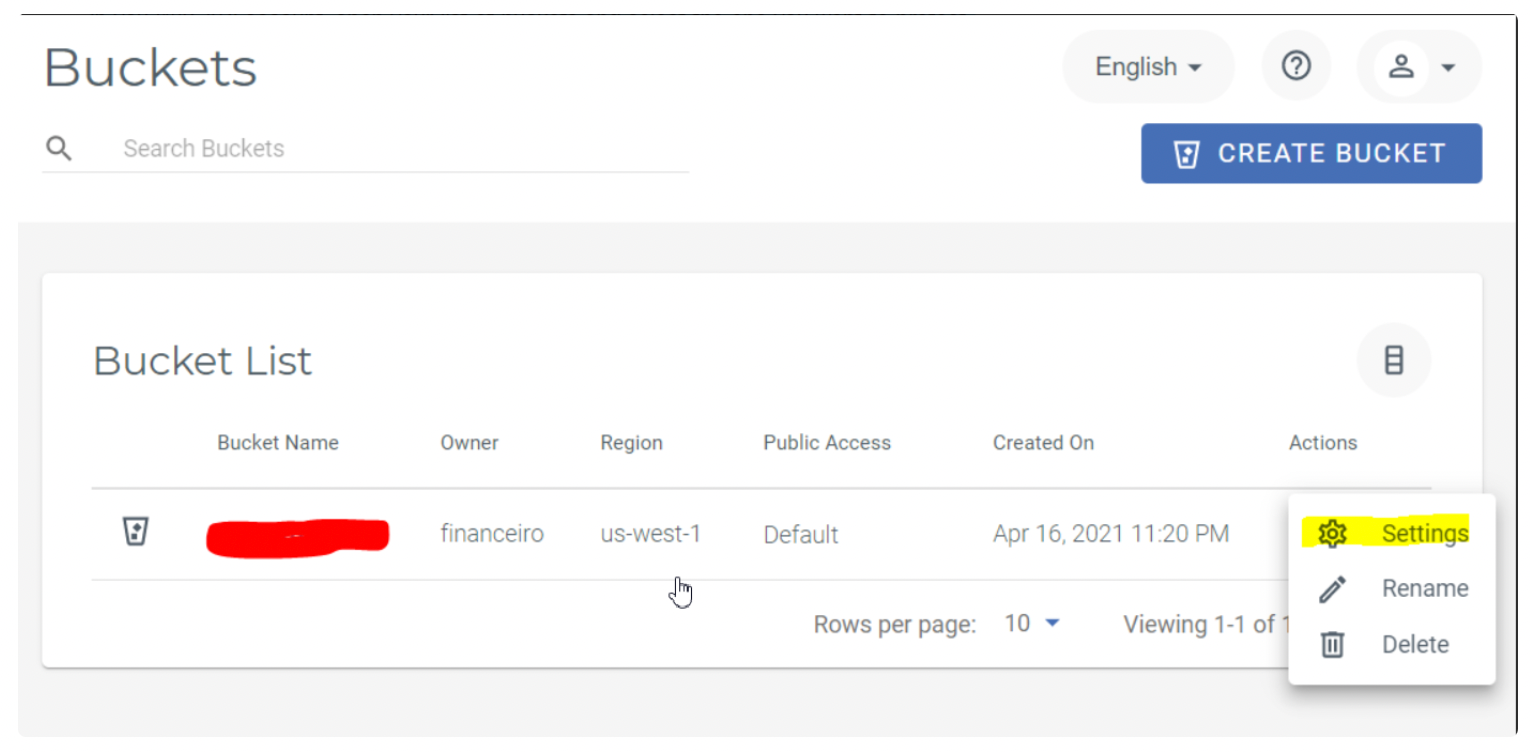
You can make your files private only for those who are trying to access them through a Bubble app. In your WASABI account, open your list of buckets and select the one you want to protect.
Click in Settings.
By default, public use of a bucket, folder, or file is allowed only by certain paid (not trial) accounts. If your account does not have access to this feature, contact Wasabi Support at support@wasabi.com for assistance.
Go to the POLICIES tab
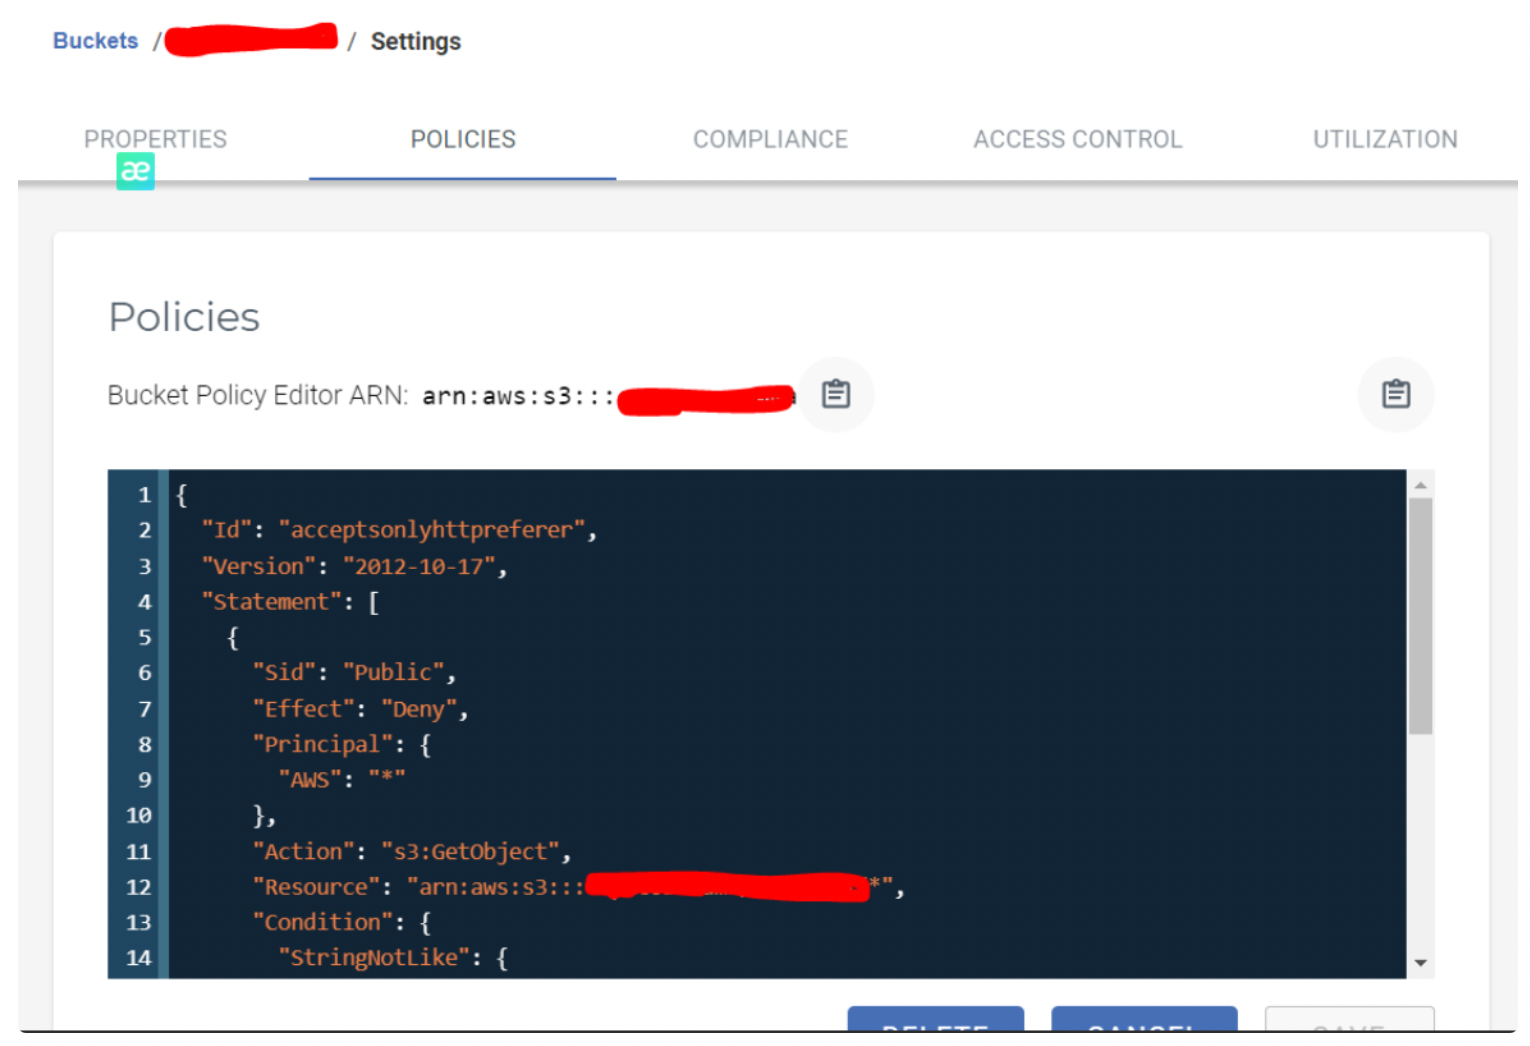
Paste the code below
javascript{
  "Id": "acceptsonlyhttpreferer",
  "Version": "2012-10-17",
  "Statement": [
    {
      "Sid": "Public",
      "Effect": "Deny",
      "Principal": {
        "AWS": "*"
      },
      "Action": "s3:GetObject",
      "Resource": "arn:aws:s3:::YOUR_BUCKET_NAME_HERE/*",
      "Condition": {
        "StringNotLike": {
          "aws:Referer": [
            "https://YOUR_BUBBLE_APP_URL_HERE/",
            "https://YOUR_BUBBLE_APP_URL_HERE/*",
            "https://console.wasabisys.com/",
            "https://console.wasabisys.com/*"
          ]
        }
      }
    }
  ]
}
When all this is set up, your files will be only accessible through
- Your Bubble app
- WASABI Console
Even if you copy and paste the file URL in your browser, it will not work. It will only work if the click comes from your app or from Wasabi console.
3. Object Lifecycle Mangement
The Object Lifecycle Management feature establishes a Lifecycle policy with rules to define actions that you want Wasabi to take during the life of an object.
This feature replaces the need to manually delete an object after a retention period.
Creating a Lifecycle Rule in Dashboard.


The Lifecycle feature is only supported for new buckets. Create a new bucket in order to create and apply lifecycle rules.
- Click CREATE NEW RULE. The Lifecycle Rule Settings panel is displayed.
- Enter a name for the Lifecycle rule. For example:

- Choose the scope of the rule. You can:— Limit the scope of the rule by using filters. Continue with Step 6.— Apply the rule to all objects in the bucket. Skip to Step 7.
- Filter options are provided when you choose to limit the scope of the rule. You can filter by a name prefix and/or the size of the object. For size, you can enter the minimum and/or maximum size in bytes, kilobytes, megabytes, or gigabytes.
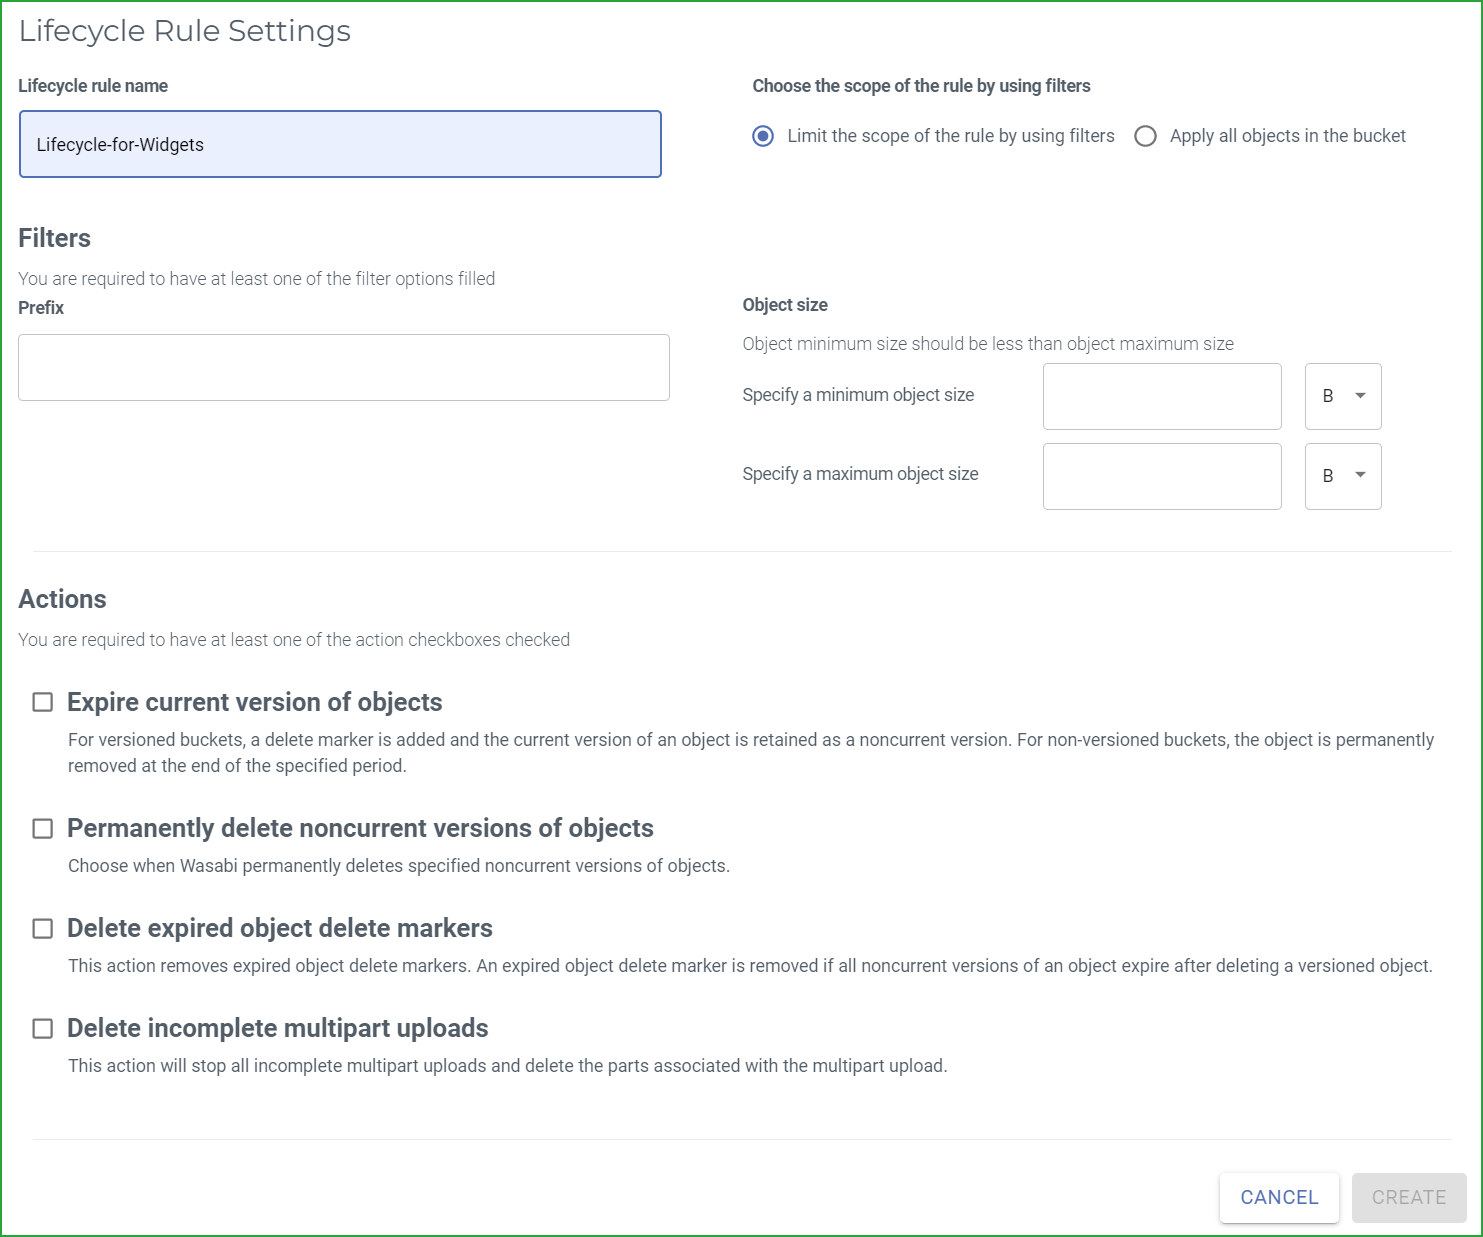
- Check at least one of the Action options. Follow the on-screen instructions for the selected option(s), as described in Lifecycle Rule Actions below.
- Click CREATE.
A rule list is displayed. Each rule is shown with its name, status, scope, and action information.

Quick setup
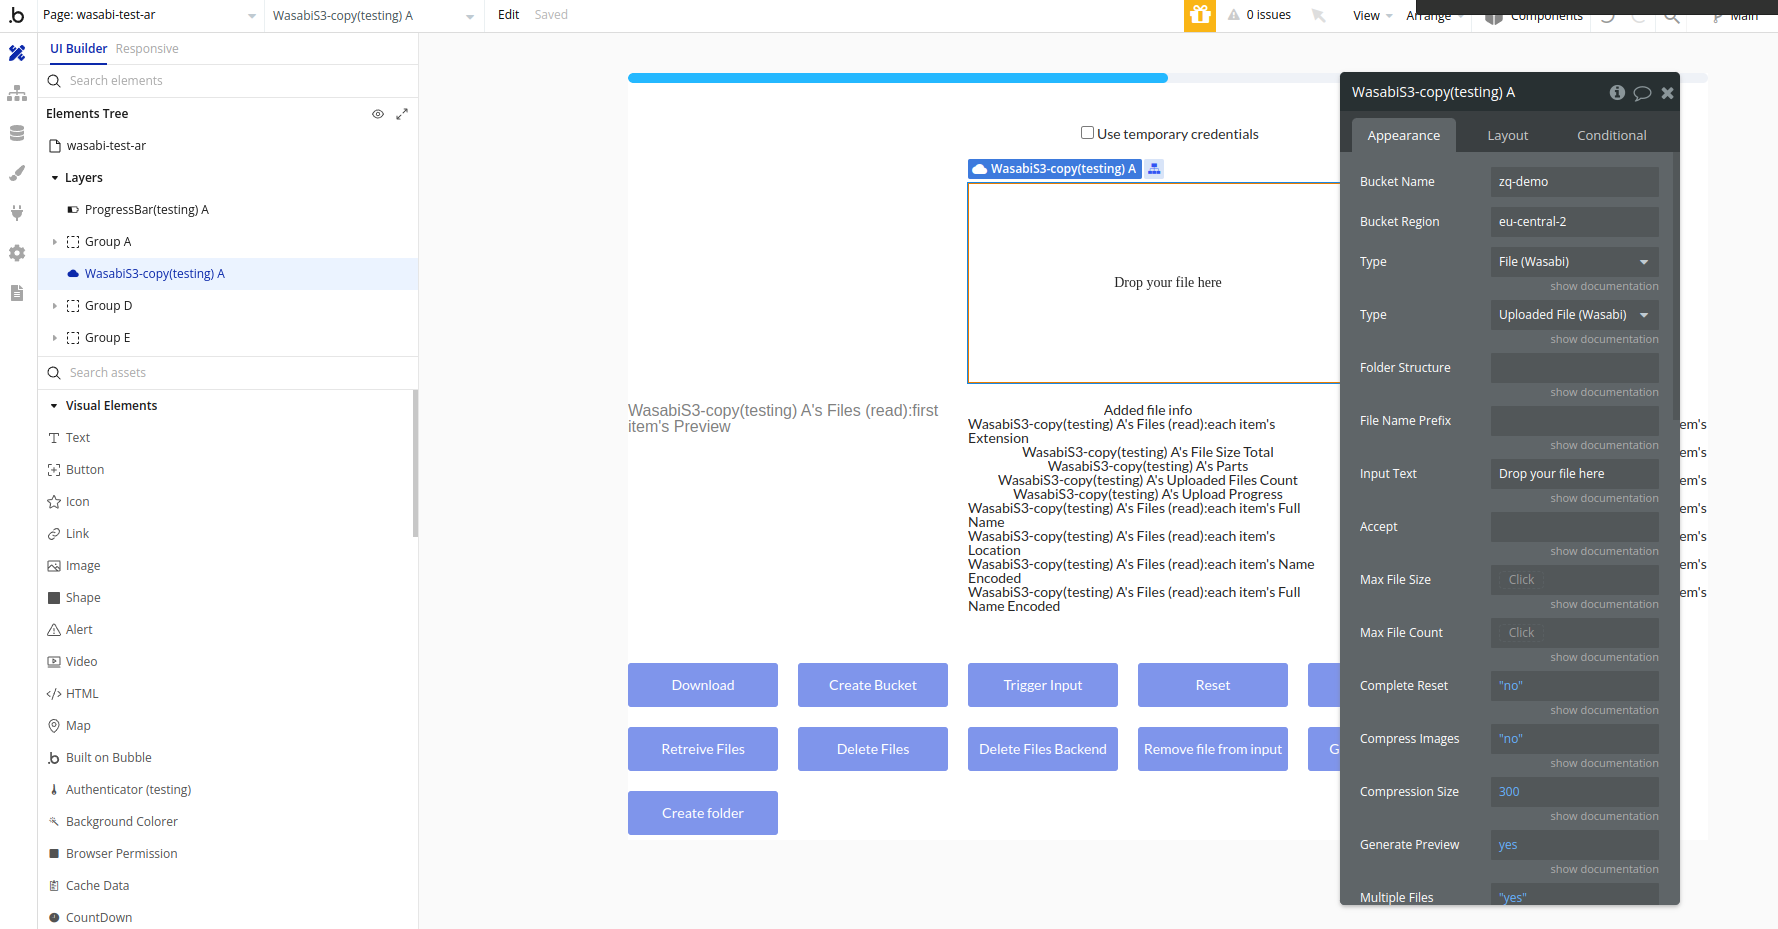
Place element on the page
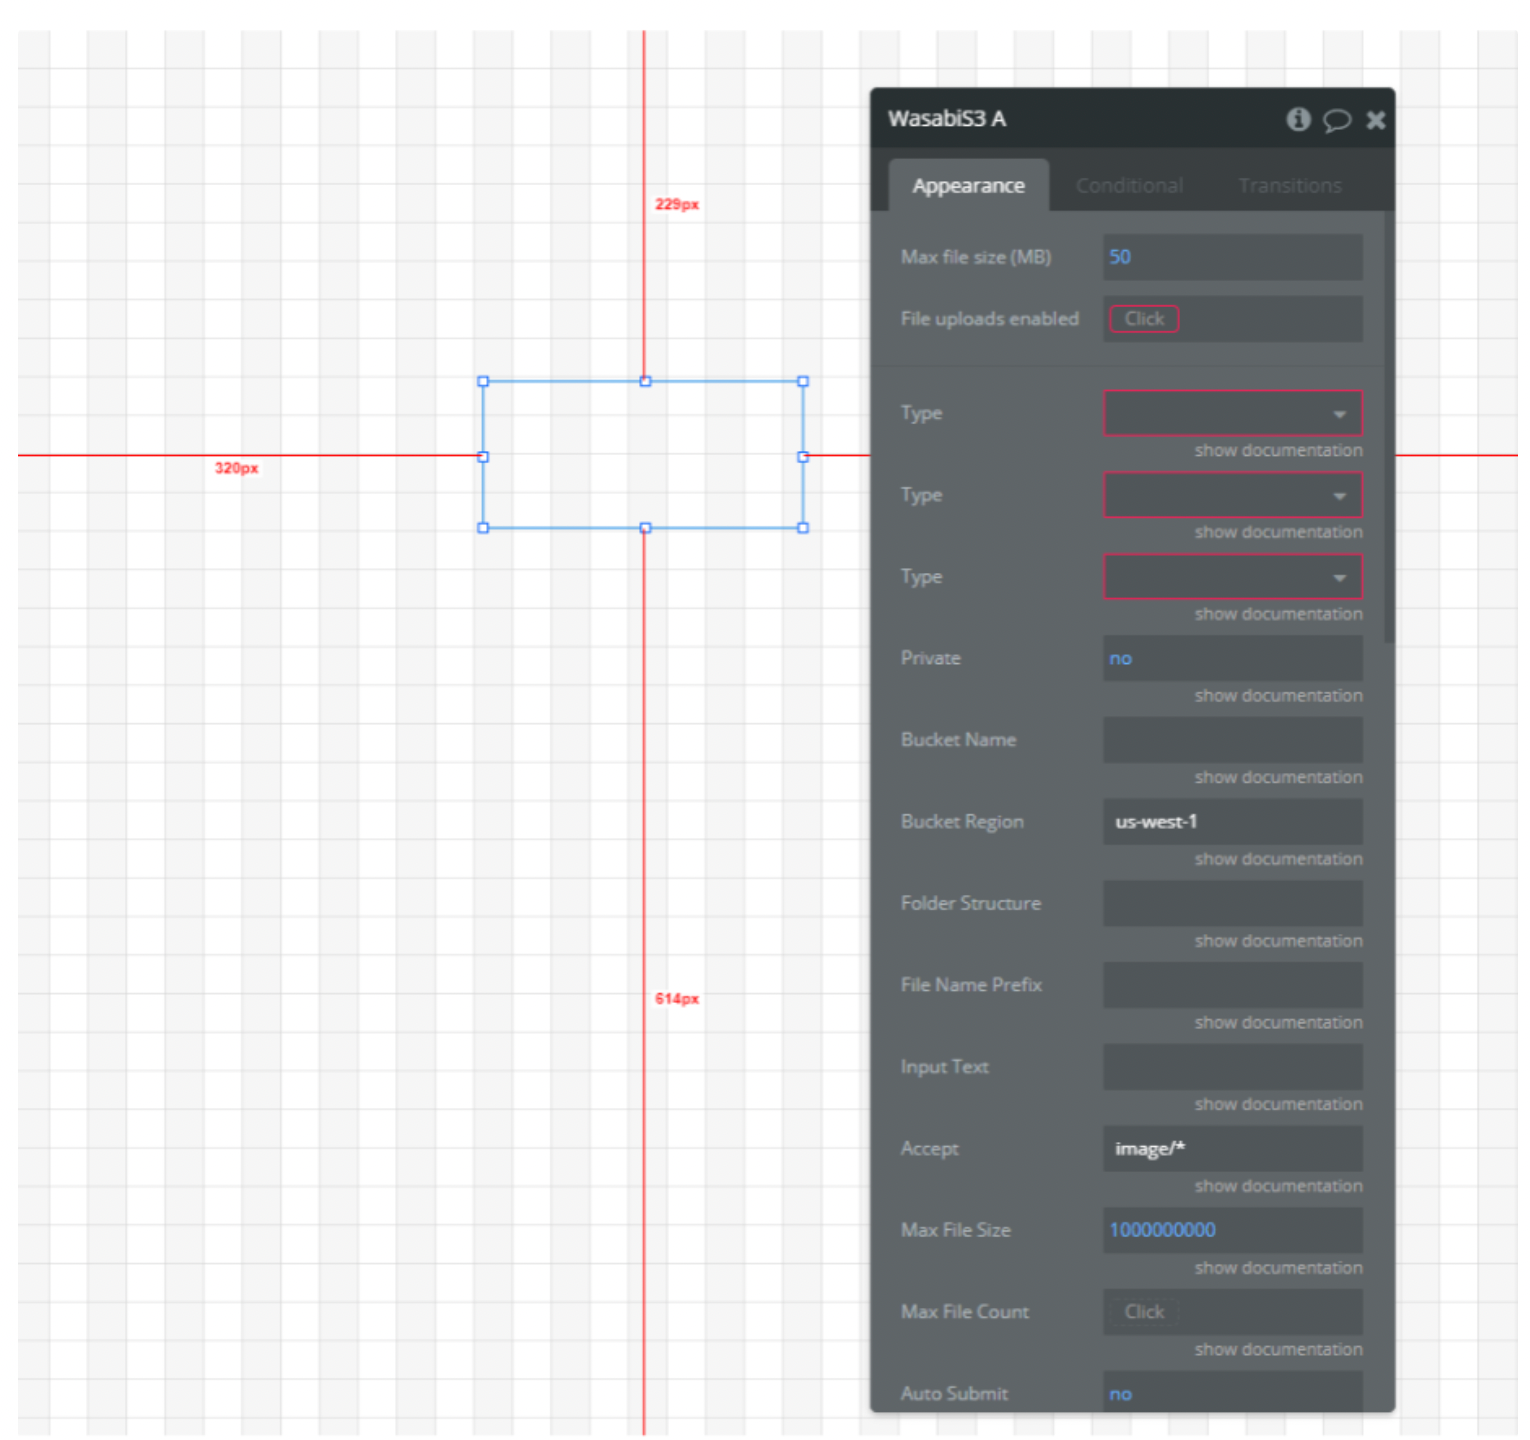
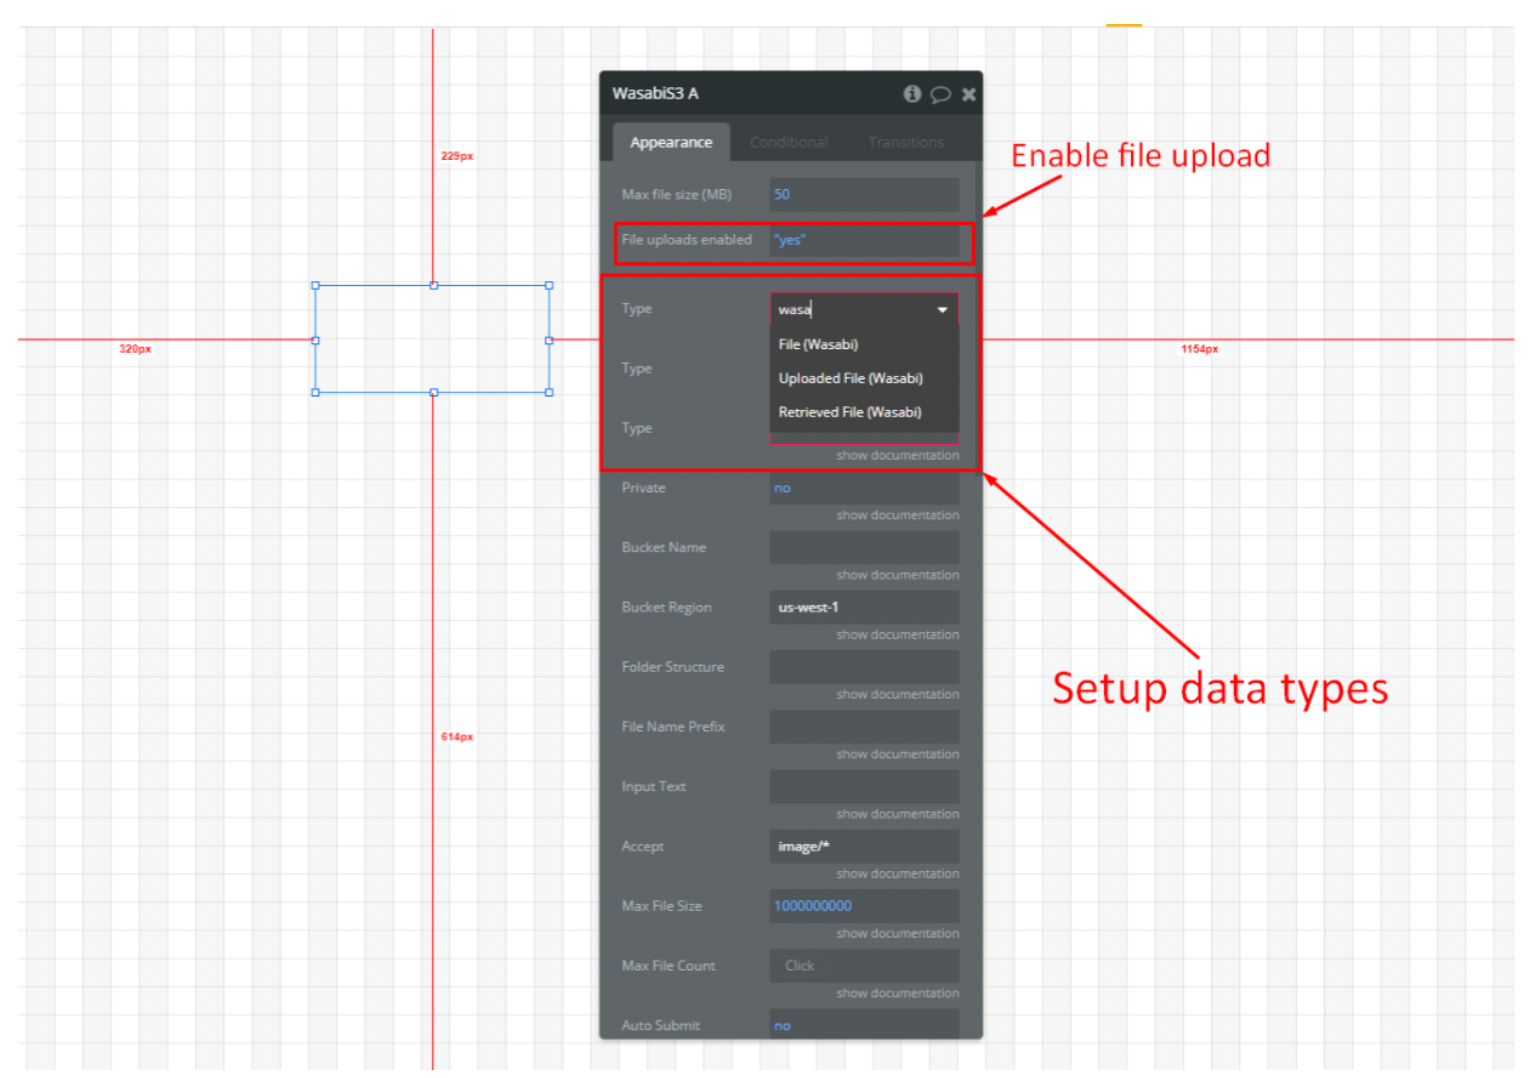
Setup your element
To correctly configure the fields named Type read the documentation attached to them.
Choose restrictions for uploading files
Change Bucket
Customize the file type accepted by the element
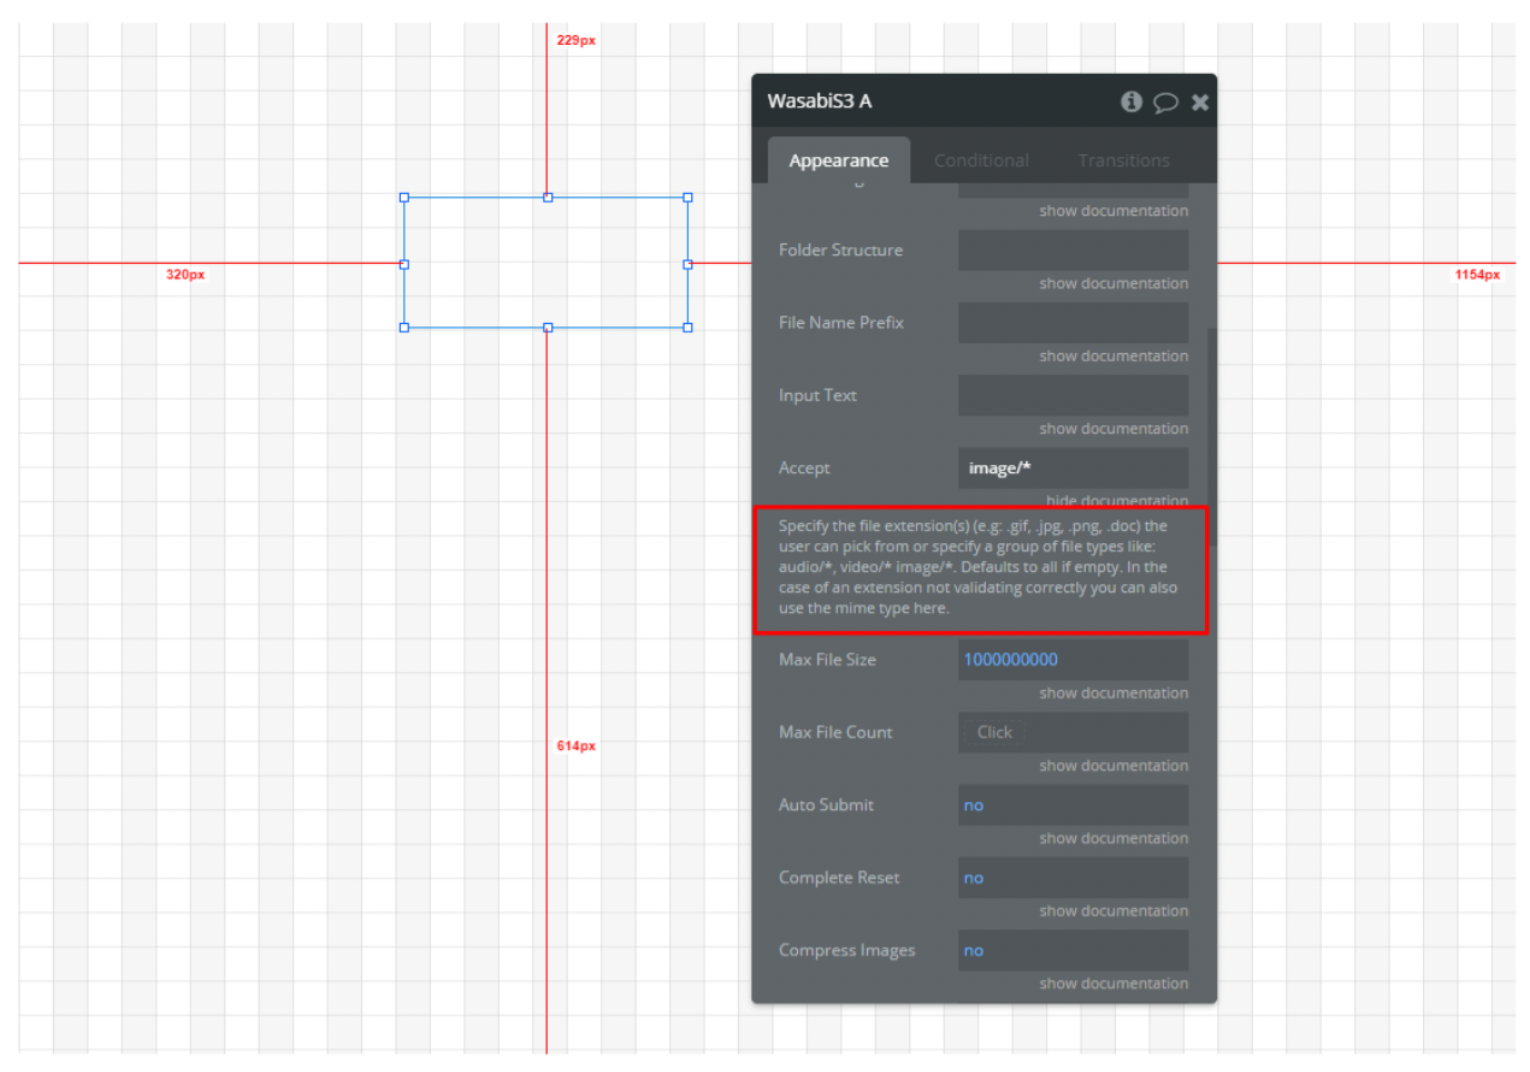
A filename extension, file extension, or file type is an identifier specified as a suffix to the name of a computer file. The extension indicates a characteristic of the file contents or its intended use.
More Information...
Example of Extensions:
- .jpg - JPEG has been the most widely used image compression standard in the world.
- .psd - Photoshop Document (PSD) is a raster format for storing graphic information using lossless compression, created specifically for Adobe Photoshop and supporting all its capabilities.
- .pdf - Portable Document Format (PDF) is a file format developed by Adobe in 1993 to present documents, including text formatting and images, in a manner independent of application software, hardware, and operating systems.
- etc.
Groups of file types:
- audio/* -any audio file.
- video/* -any video file.
- image/* -any image file.
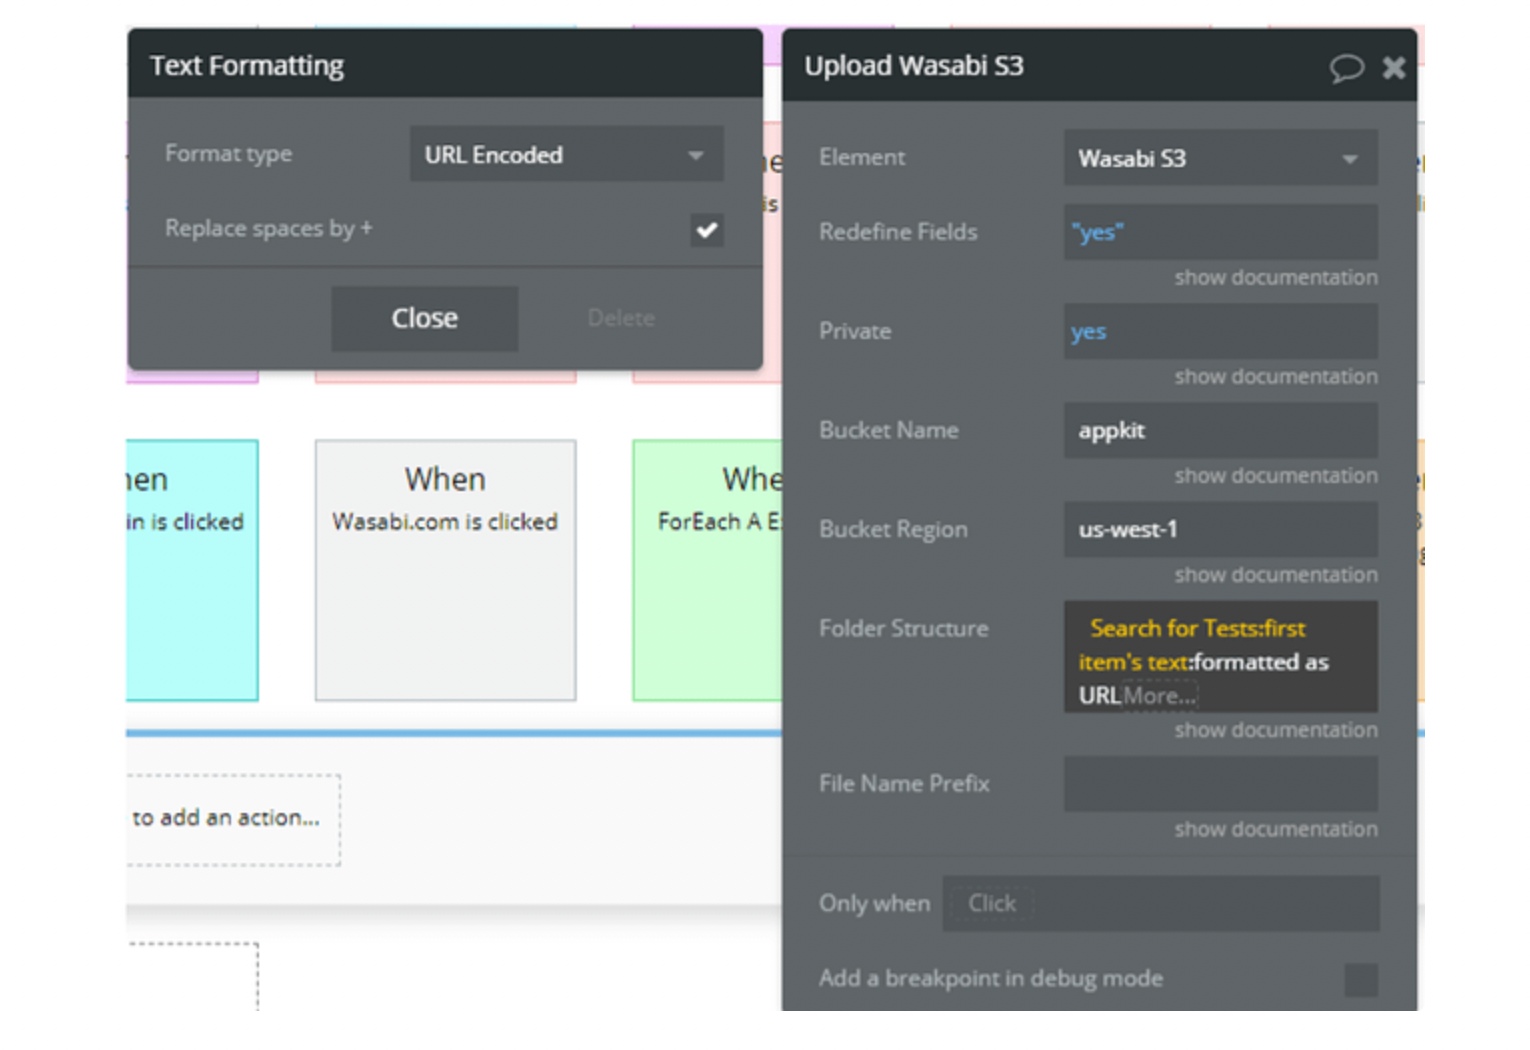
If you need to create a folder or file with diacritic you need to use text formatted as URL Encoded:
Workflow examples
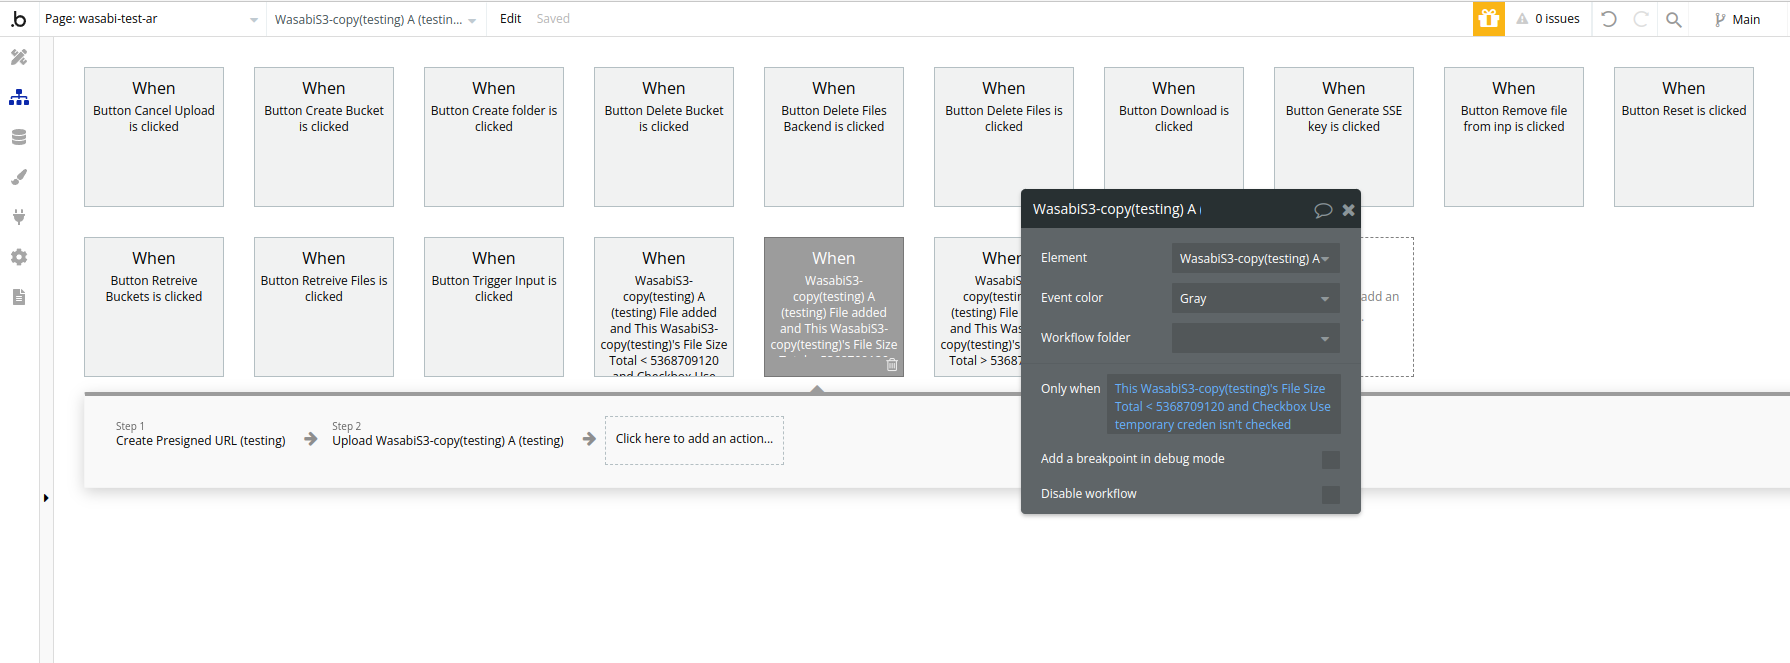
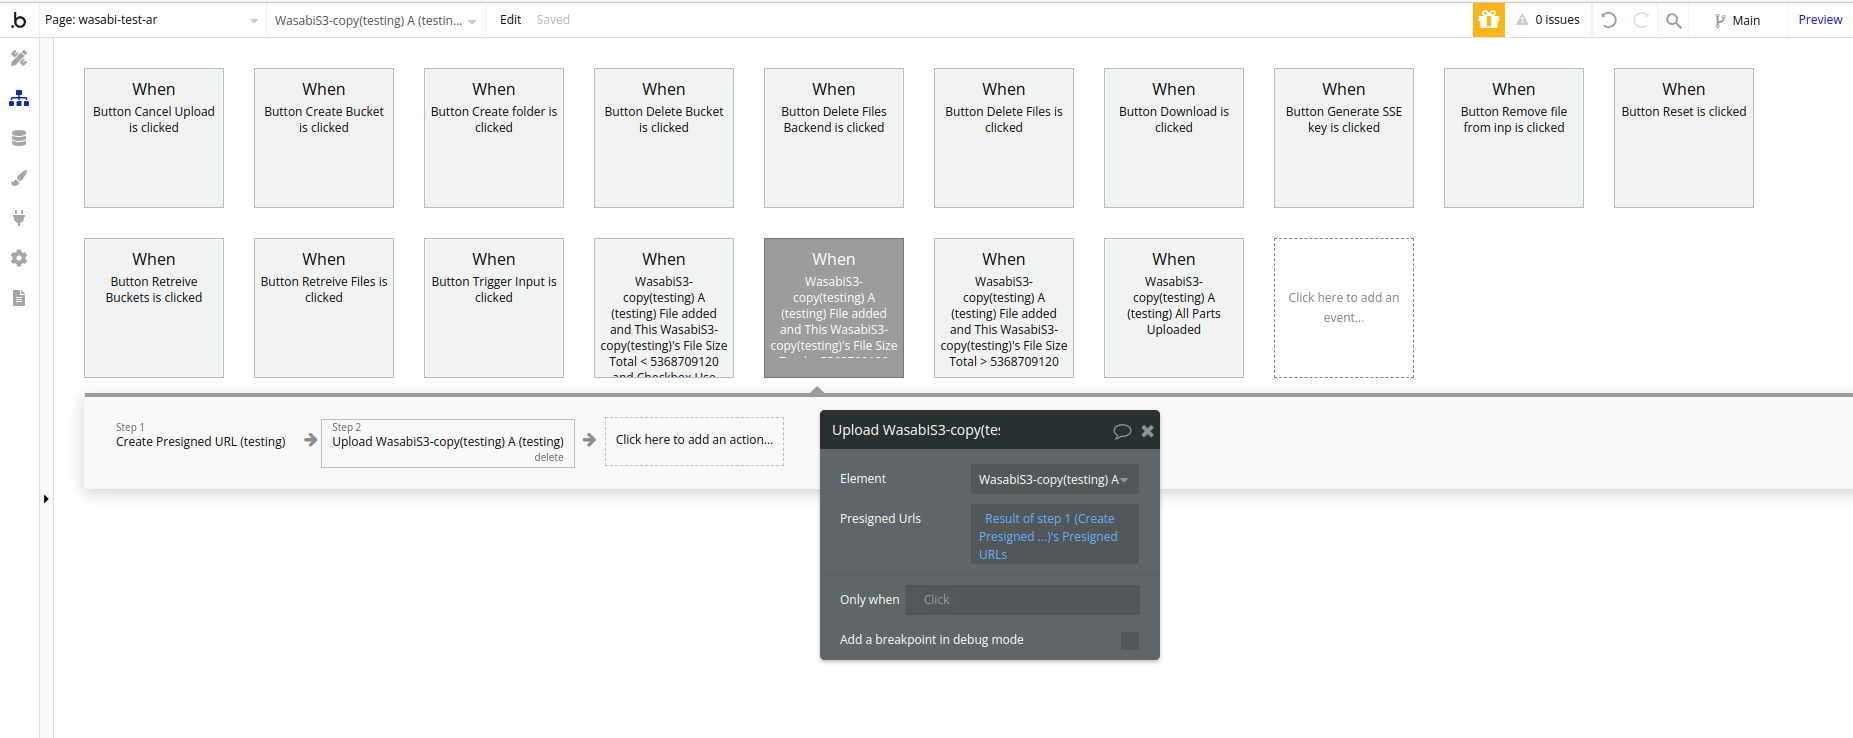
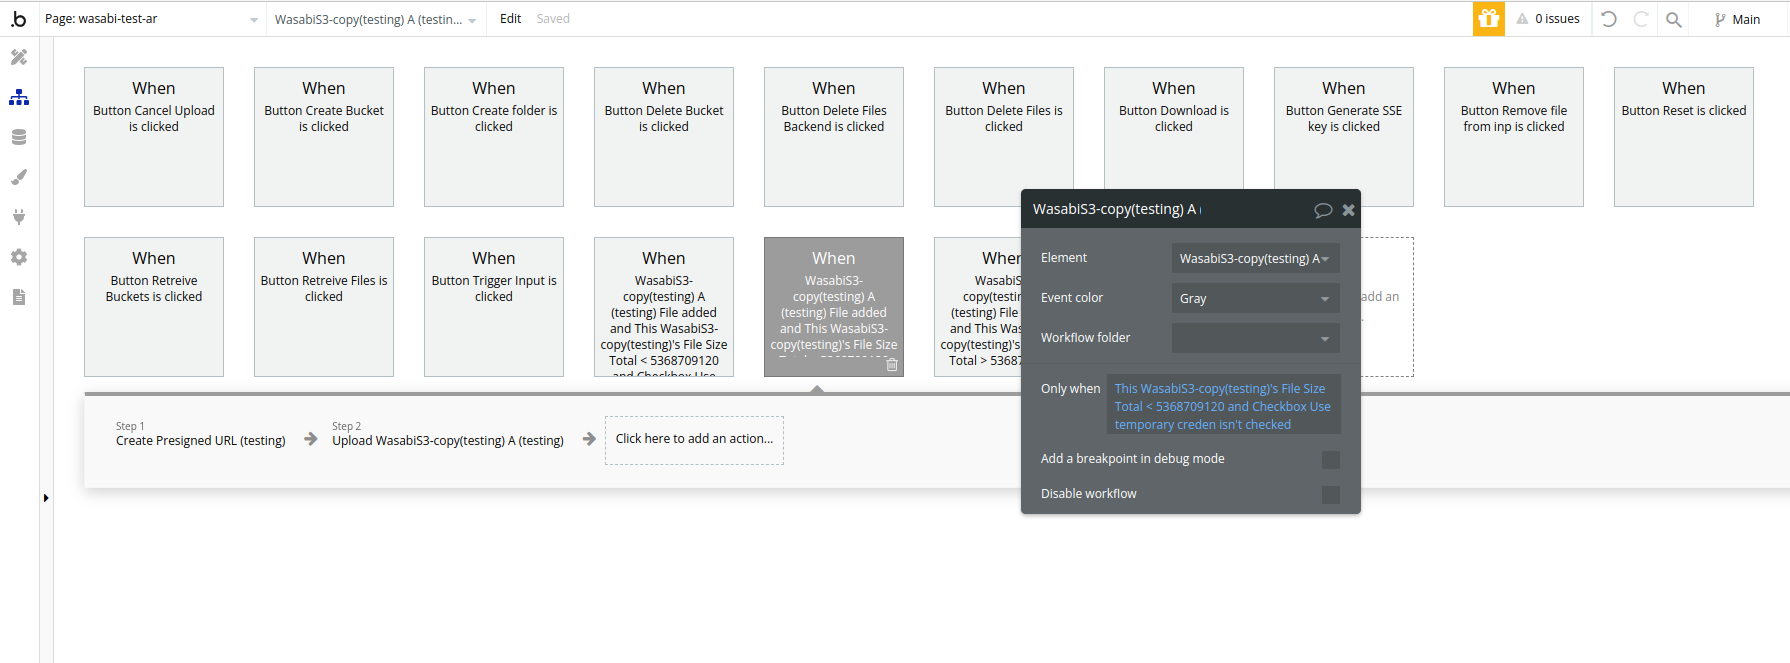
Simple upload workflow example( single part, file less than 5Gb in size)
Multipart upload workflow example( file more than 5Gb in size)
Delete file client-side workflow
Download file client-side workflow
Upload from another cloud example


