Link to plugin page: https://zeroqode.com/plugin/zq-drag-n-drop-calendar-1531403685344x504588587521015800
Demo to preview the settings
Introduction
This plugin is a powerful calendar with a fully customizable design and which connects directly to the Bubble database.

Getting started The plugin comes with two elements
Element Calendar
- Add calendar element on your page

- First we need type name for Calendars table and Events table.
Tip: What is Owner email needed for ?
This email will be used to locate user specific data, this is optional. But if you want to use it you should insert a dynamic expression pointing to the user's email address.
Creating Calendars table and Events table types in DataBase for element calendar
Calendars table is the database table that contains all the information about your calendar.
- First let's create a type for calendars table, add fields as in example below, you can name this type any way you want but for fields use names as in example below:
Note: Datatype Name should not have any spacing ( ). CalendarEvents - ok. Calendar Events - not ok.

- Now let's create Events table type, you can name it also any way you want but for fields use names from example.
Events table is the database table that contains all the information about your calendar.

Important: In order to get it work , it will be required to open this types for public end points (Exposing DATA and Workflow API)!
- To make them public, go to settings then API tab and set the checkmark to types that you just created.

To let the plugin edit, delete and update the data from the database of the app it is needed to set up privacy settings. In order to do that please open the Privacy tab, select from the left side the data type Calendars and TaskEvents and set the roles for both data types as shown in the image.

At this point, your calendar will be shown already, now you just need to customize it, if needed. You can add custom popups with fields to create new schedules or to update them and use calendar actions in the workflow.
You can easily customize colors of most inner elements like SIDE MENU(Background color, Button background, Button font color, Radio color), TOP MENU (Background color, Elements' background), POPUP, VIEW MENU, DATE PICKER, and others.
Element Calendar v2
- Add a calendar element on your page
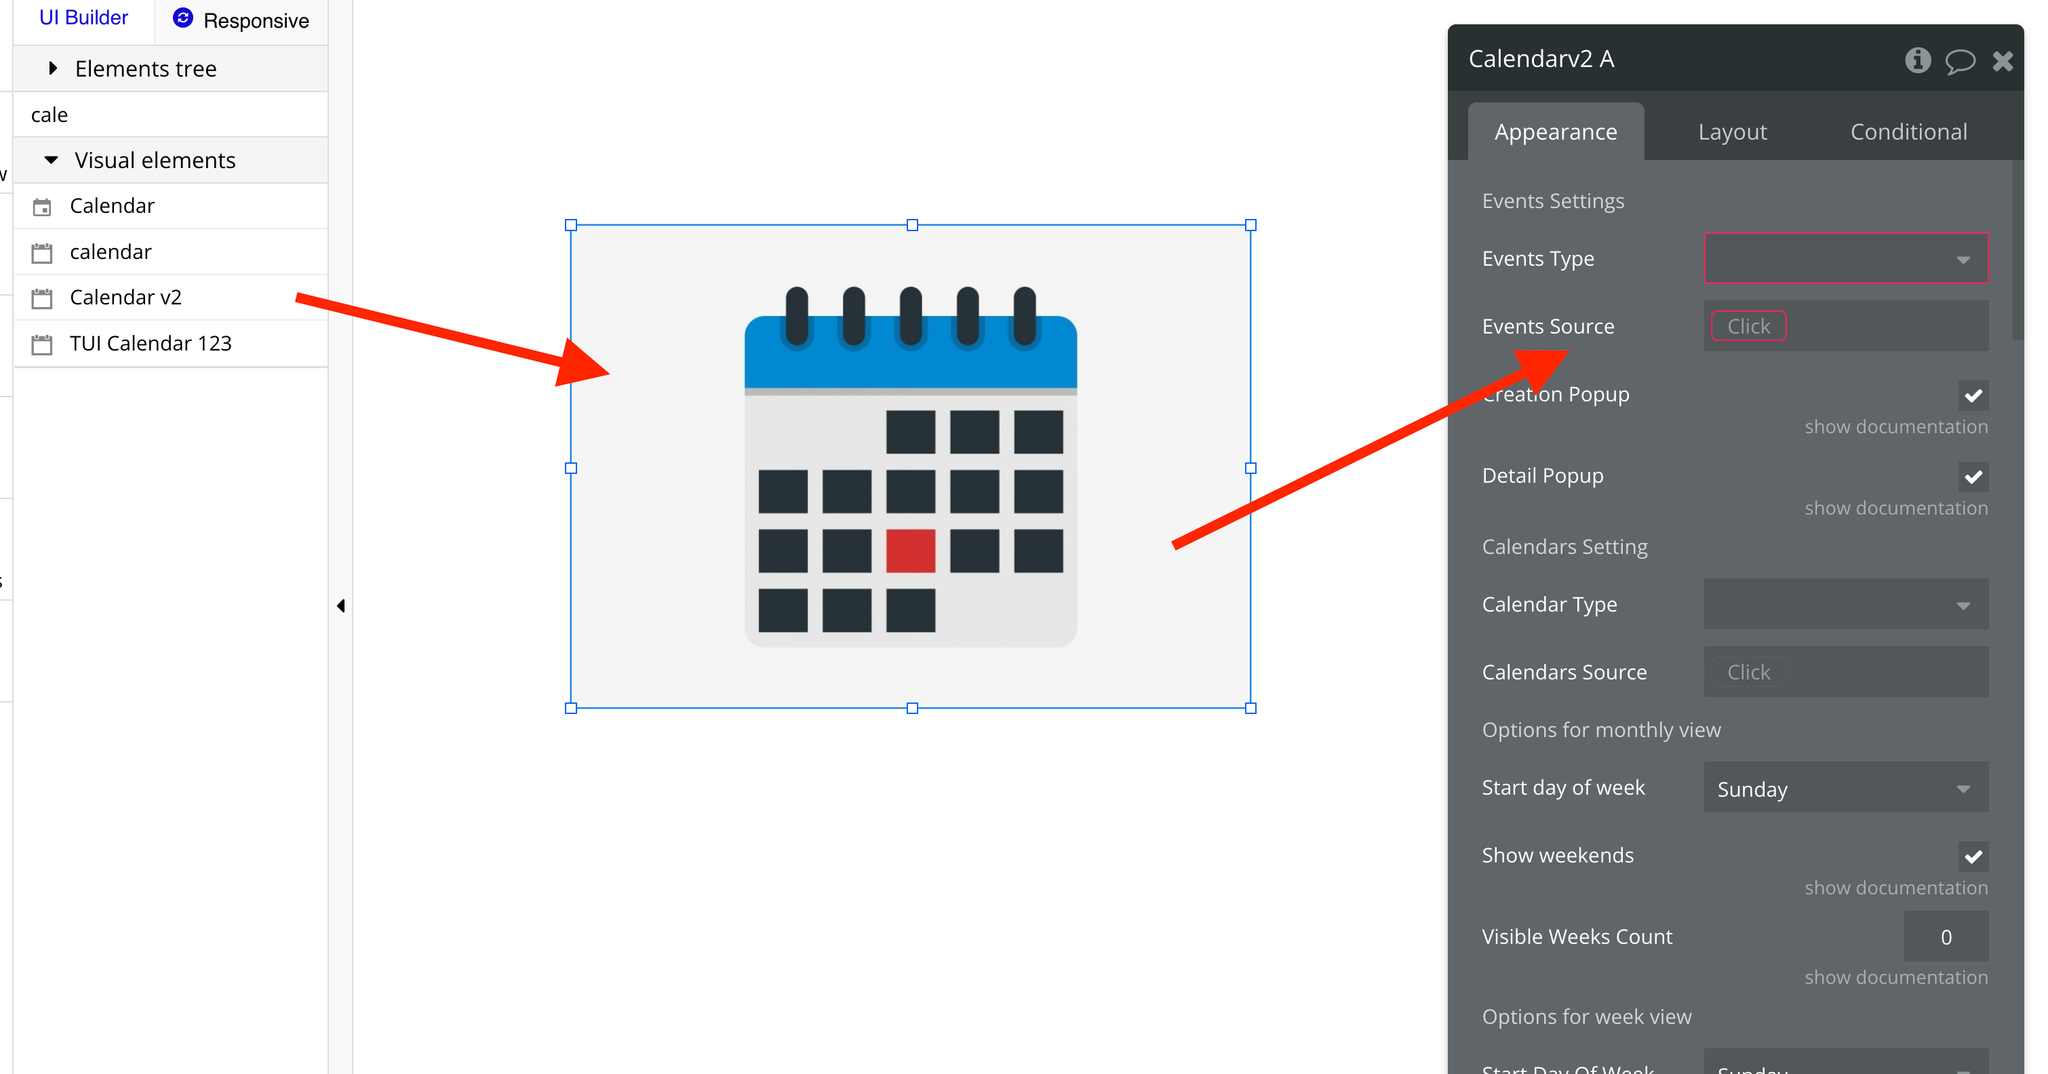
- First, create a table for the Calendars and Events types.
Creating Calendars table and Events table types in DataBase for element Calendar v2
- Create a type for the calendars table, and add fields as in the example below. You can name this type any way you want but for fields use names as in the example below:
Note: Datatype Name should not have any spacing ( ). CalendarEvents - ok. Calendar Events - not ok.
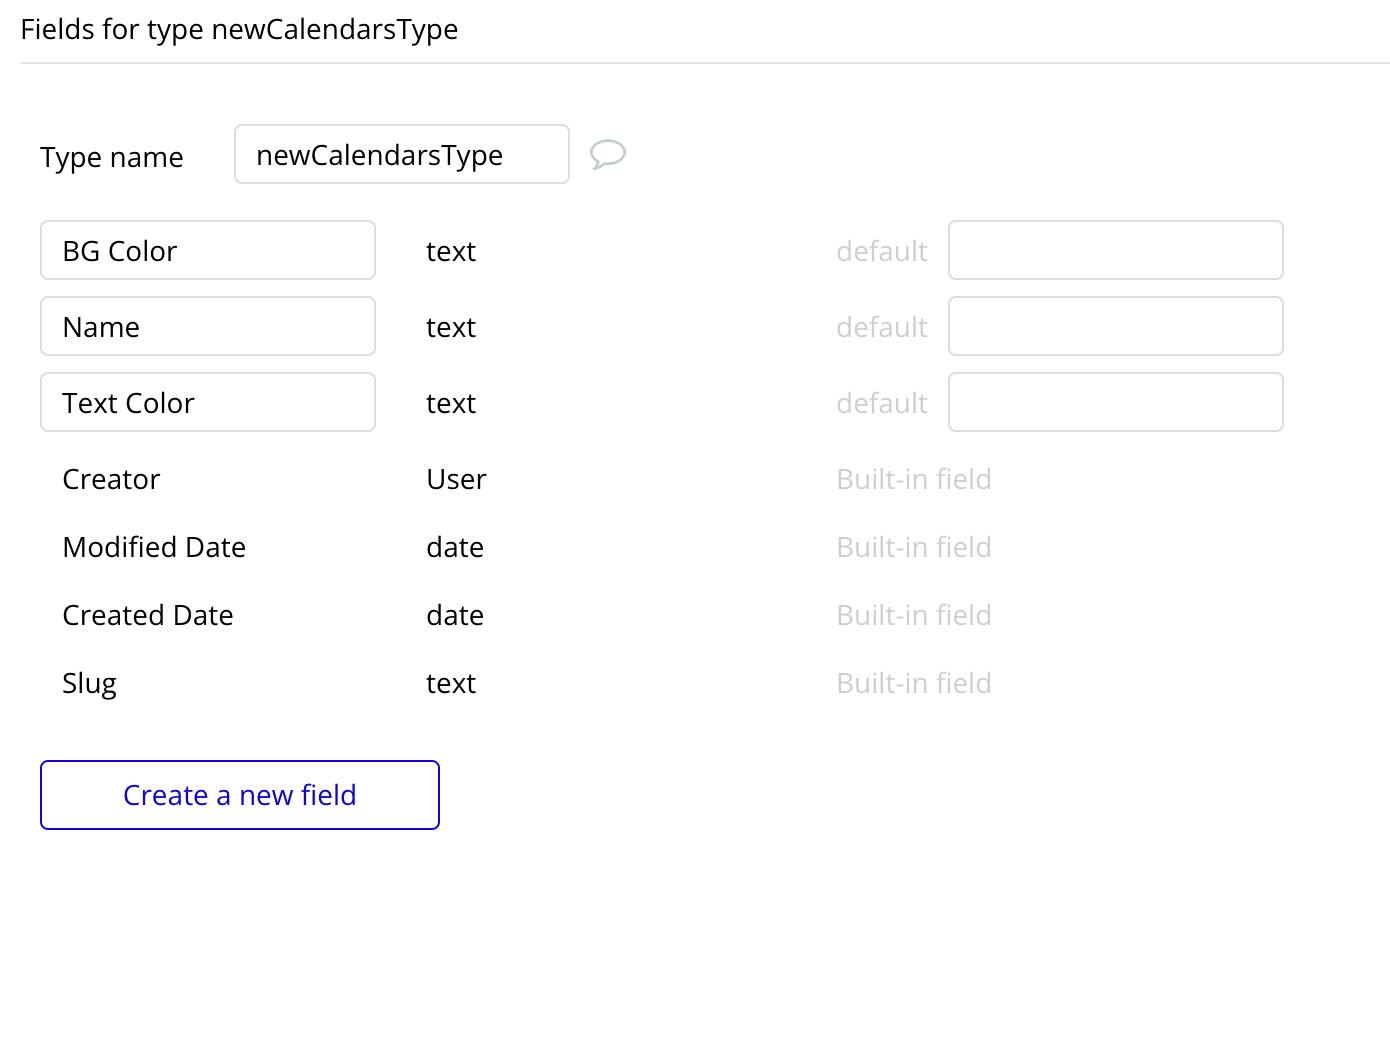
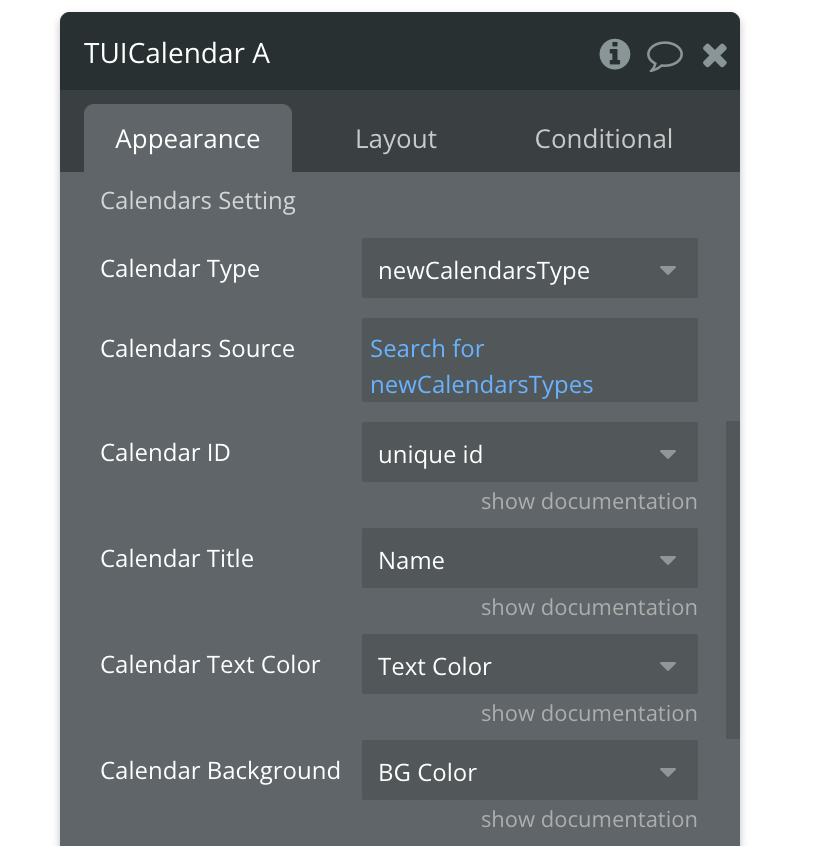
- Now let's create Events table type, you can name it also any way you want but for fields use names from the example.
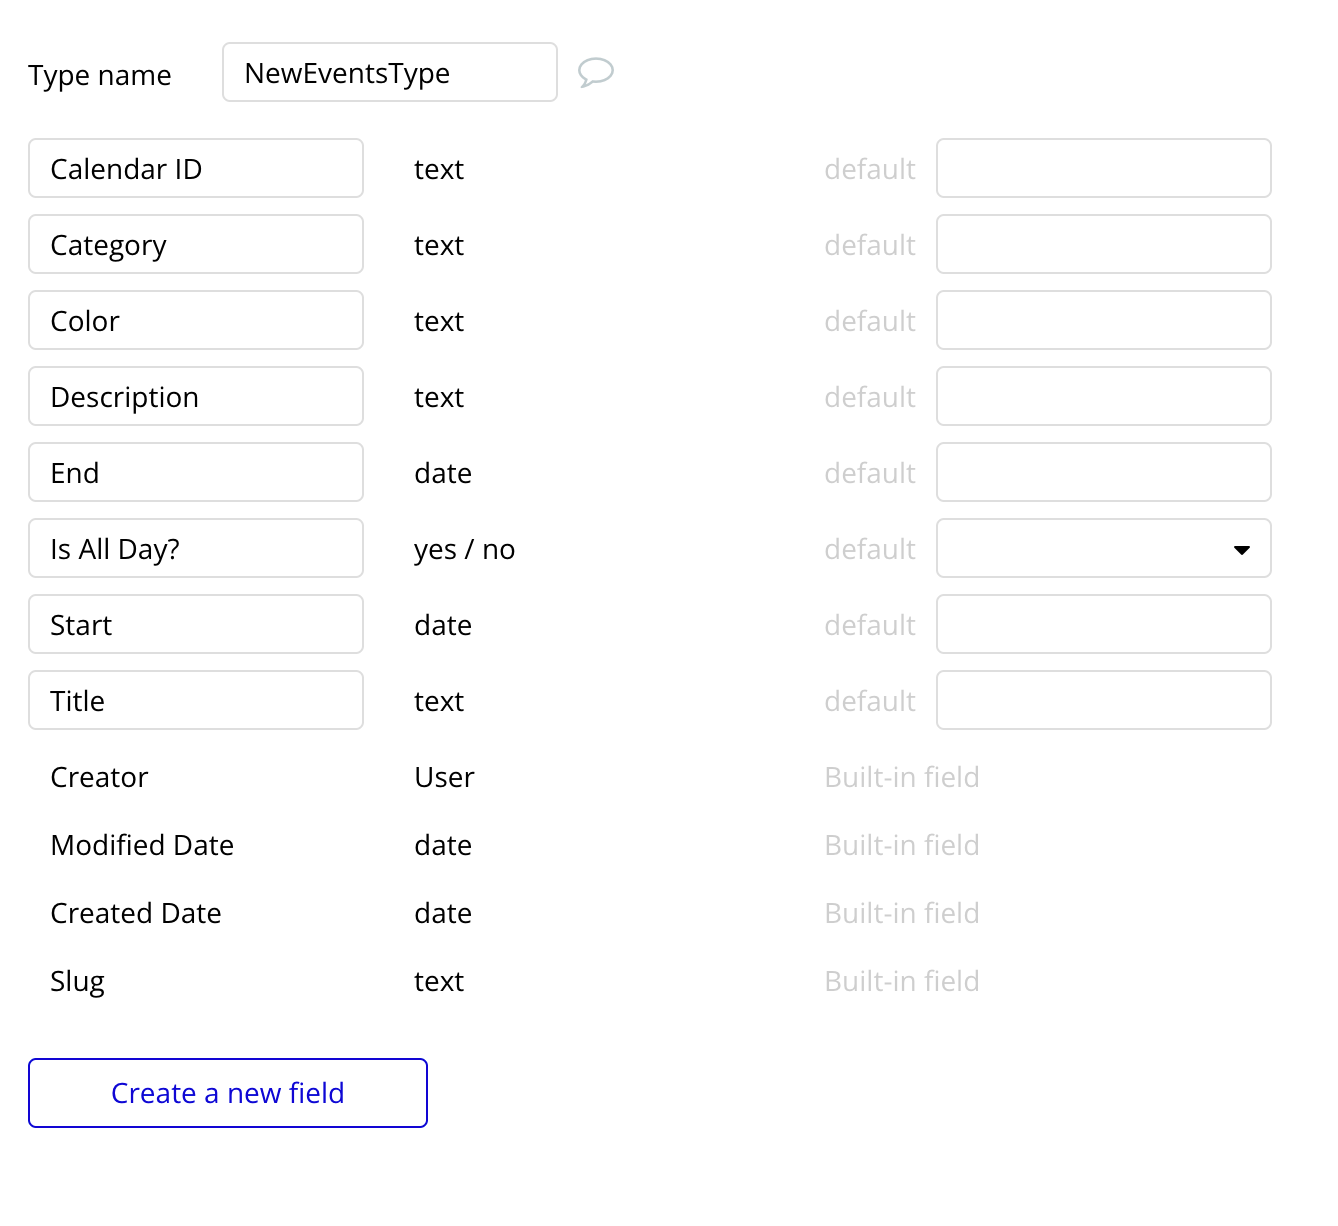
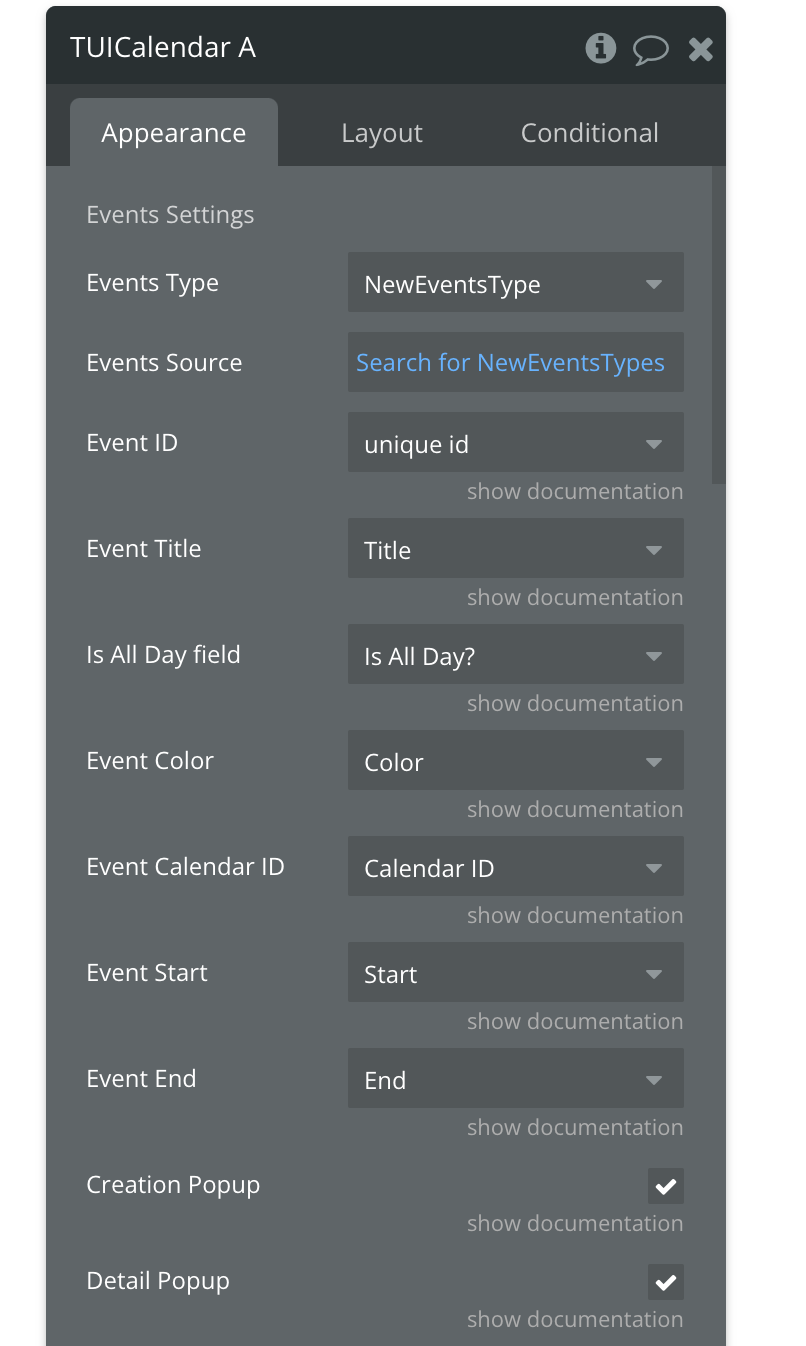
Fields
Title | Description | Type |
Events Type | the events table is the database table that contains all the information about your events. | App Type |
Events Source | data source from DB for Events type | as Event Type |
Event ID | unique id of the event | |
Event Title | title of the event | |
Is All Day field | field from DB contain data wheter the event is All Day or not | as Event Type |
Event Color | event color | |
Event Calendar ID | calendar unique ID | |
Event Start | start time f the event | |
Event End | end time of the event | |
Creation Popup | use built-in popup for event creation | Checkbox |
Detail Popup | use a built-in popup for displaying event details | Checkbox |
Calendar Settings | ||
Calendar Type | the calendar table is the database table that contains all the information about your calendar. | App Type |
Calendars Source | data source from DB for Calendar type | as calendar type |
Calendar ID | unique ID of the calendar | |
Calendar Title | title of the calendar | |
Calendar Text Color | text color of the calendar event when Day/Week view | |
Calendar Background Color | background color of the calendar event when Day/Week view | |
Options for monthly view | ||
Start day of week | Choices (Sunday, Monday, Tuesday, Wednesday, Thursday, Friday, Saturday) | Dropdown |
Show weekends | Whether to include Saturday and Sunday. | Checkbox |
Visible Weeks Count | A number of weeks to display. 0 means display all weeks. | Number |
Options for week view | ||
Start Day Of Week | Choices(Sunday, Monday, Tuesday, Wednesday, Thursday, Friday, Saturday) | Dropdown |
Hour Start | Start hour of the day. Available values are 0 to 23. | Number |
Hour End | End hour of the day. Available values are 0 to 24. Must be greater than Hour Start. | Number |
Calendar Settings | ||
Default View | Initial view type. (Day, Week, Month) | Dropdown |
Read Only | Whether the calendar is read-only. | yes/no |
Common Styling | ||
Background Color | background color of the calendar | Color |
Holiday Color | color of the Holiday | Color |
Saturday Color | color of Saturday | Color |
Dayname Color | color of the day name | Color |
Today Color | color of the today | Color |
Common Creation Styling | ||
Background Color | background color of the dedicated (day, period or hour) | Color |
Border color | border color of the dedicated (day, period or hour) | Color |
Month Styling | ||
Height | header dayname height | Number |
Font Size | header dayname font size | Number |
Bold | header dayname bold | Checkbox |
Day Styling | ||
Font Size | day font size applicable only when Month view | Number |
Week Styling | ||
Height | header dayname height | Number |
Today Color | color of today | Color |
Past Day Color | color of yesterday | Color |
Today Background Color | color of the today background | Color |
Week Timegrid Styling | ||
Left Width | left width to calendar margin | Number |
Left Font size | font size of the left timegrid | Number |
Hour Height | height of the hour | Number |
Week time settings | ||
Current time color | color of the current time | Color |
Current time font size | font size of the current time | Number |
Current time bold | bold of the current time | Checkbox |
Past time color | color of the past time | Color |
Past time bold | bold of the past time | Checkbox |
Future time color | color of the future time | Color |
Future time bold | bold of the future time | Checkbox |
Current time Timeline Color | color of the current time Timeline | Color |
Setup Workflow
For the calendar to work properly, you need to configure Workflow
- Event is created
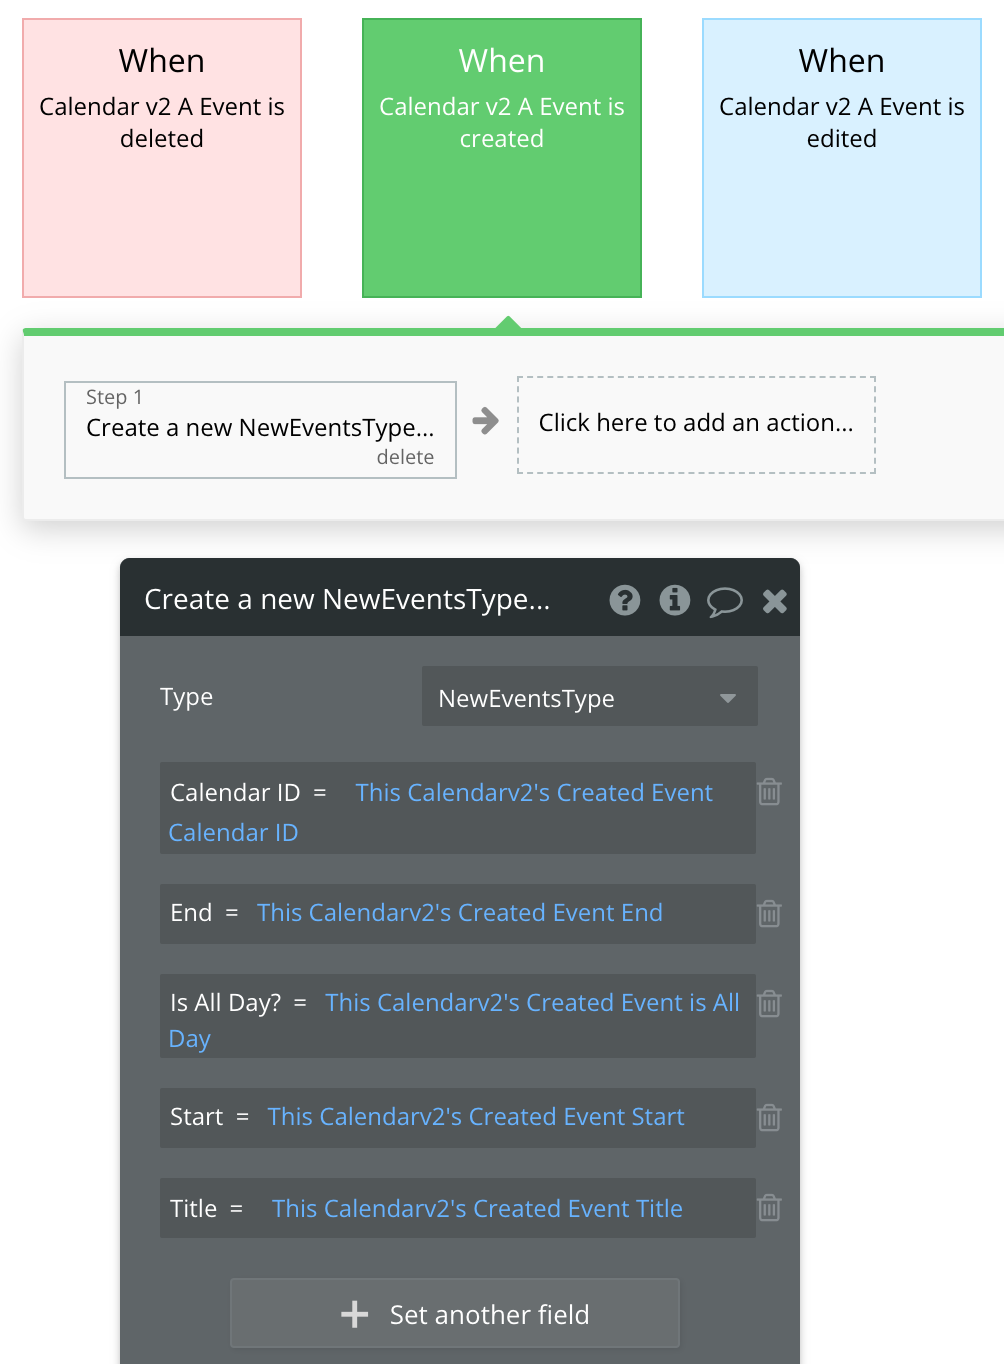
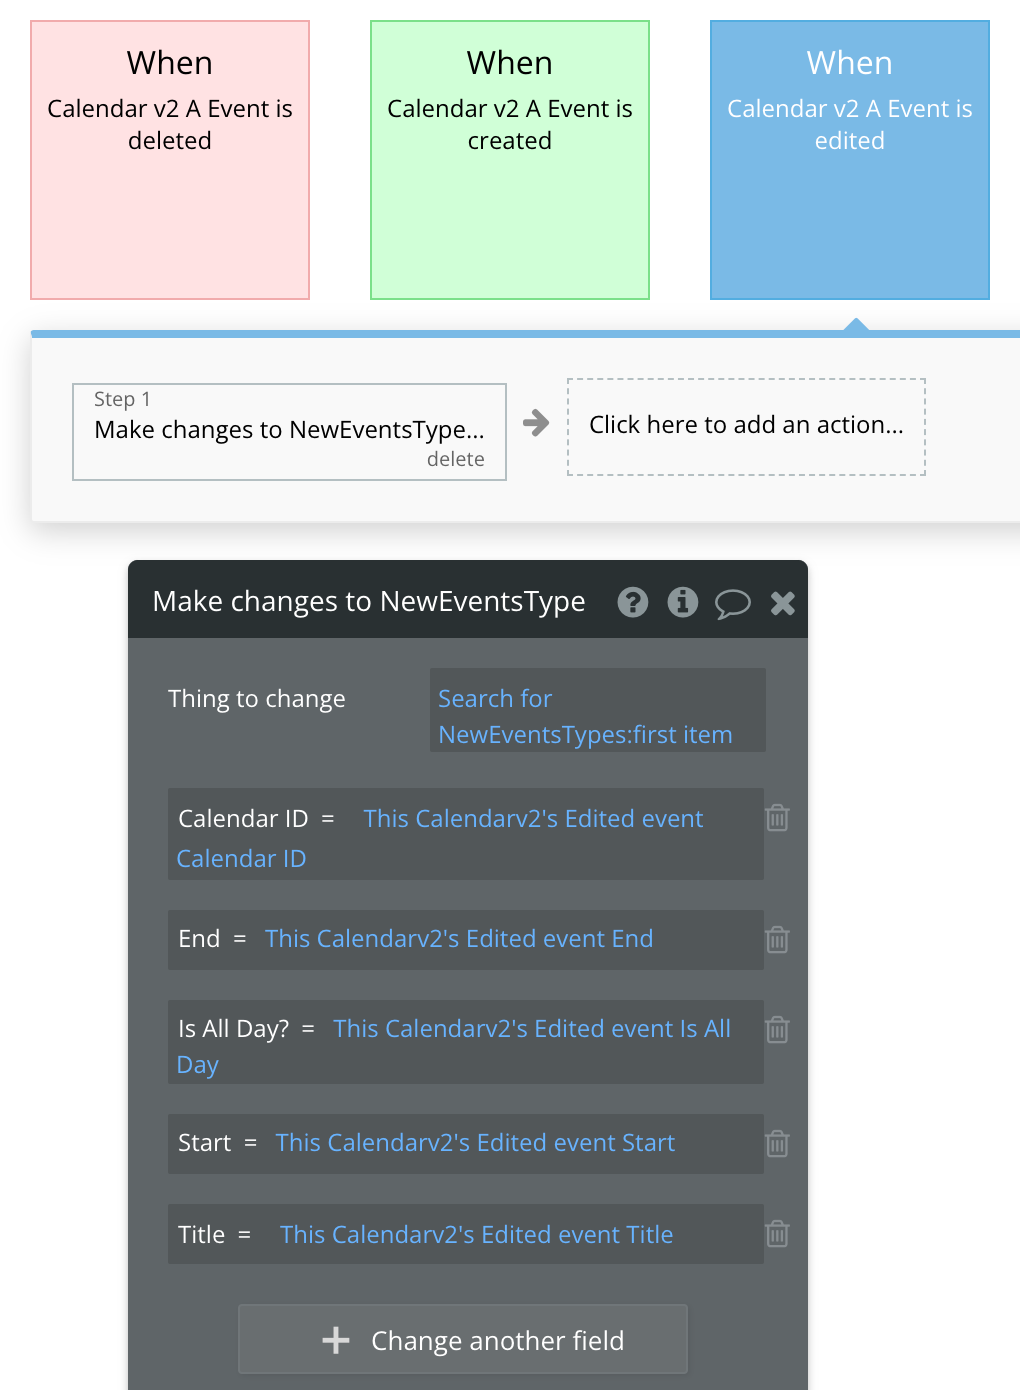
- Event is edited
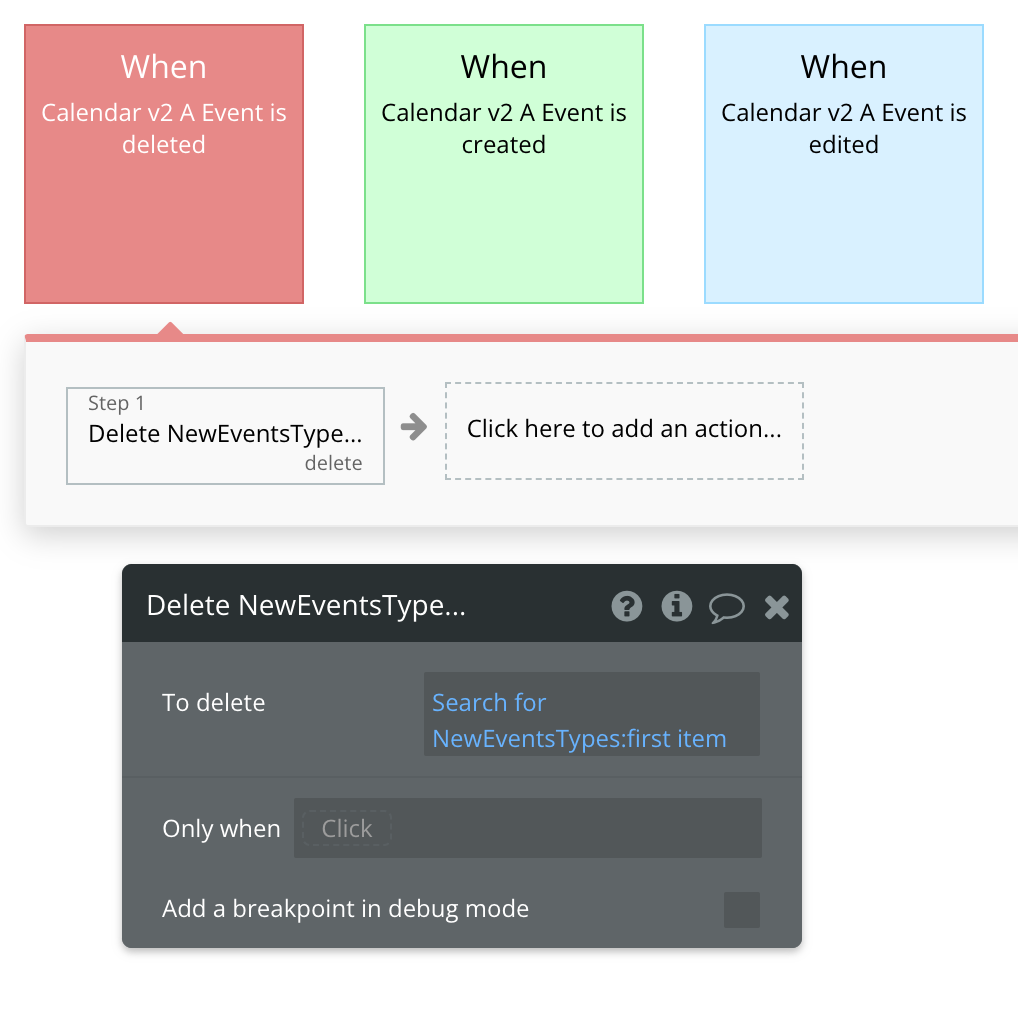
- Event is deleted
States
Title | Description | Type |
Clicked Event ID | ID Event clicked | string |
Deleted Event ID | ID Event deleted | string |
Created Event Start | Date created Event Start | date |
Created Event End | Date created Event End | date |
Created Event Calendar ID | Calendar ID Event Created | string |
Created Event Title | Title Event Created | string |
Created Event is All Day | Created Event is All Day | yes/no |
Edited event ID | ID Event Edited | string |
Edited event Title | Title event Edited | string |
Edited event Start | Start Event Edited | date |
Edited event End | End Event Edited | date |
Edited event Is All Day | Edited event Is All Day | yes/no |
Edited event Calendar ID | Edited event Calendar ID | string |
Actions
- Change current view - Change current view with view name ('day', 'week', 'month')
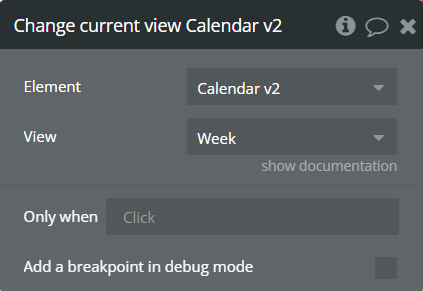
Fields:
Title | Description | Type |
View | view name ('day', 'week', 'month') | Dropdown |
- Clear all events
- Move next - Move the calendar forward a day, a week, a month
- Move prev - Move the calendar backward a day, a week, a month
- Go to date - Go to the selected day
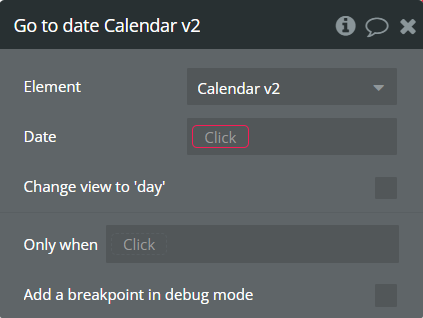
Fields:
Title | Description | Type |
Date | selected date | date |
Change view to 'day’ | Change view to 'day’ | checkbox |
- Go to today - Select a date today
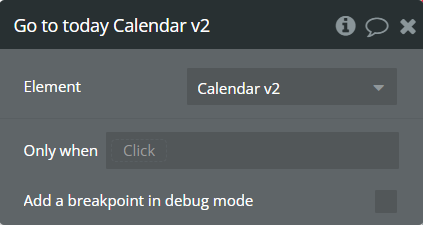
- Show events from one calendar
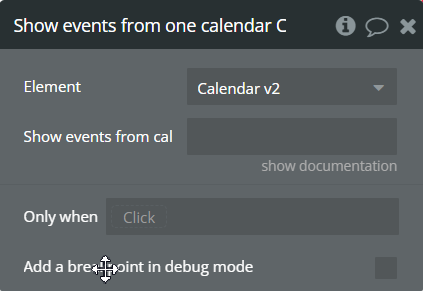
Fields:
Title | Description | Type |
Show events from calendar | Calendar ID | string (optional) |
Other functionality
Partial Multi-editing:
Partial Multi-editing means that any changes you apply will apply to the bubble database, but only that user who made those changes see them immediately, while others using the same calendar will need to reload the page in order to see them, but they are allowed to modify the fields at the same time and by manual re-initiation (through the workflow that is called "reload table")
