The Google Map Extender plugin enhances your Bubble app's mapping capabilities with a comprehensive suite of advanced features. This powerful plugin allows you to customize maps, add multiple layers, track users in real-time, display custom markers, draw routes, and much more. It is the perfect solution for applications requiring dynamic and interactive mapping functionality, such as logistics platforms, real estate applications, travel apps, delivery services, and location-based businesses.
The plugin seamlessly integrates with Google Maps API to provide professional-grade mapping features including 3D visualization, KML/GeoJSON layer support, real-time user tracking, custom marker clustering, route optimization, and extensive customization options. With this plugin, you can create sophisticated mapping experiences that enhance user engagement and provide valuable location-based insights.
Prerequisites
To use this plugin, you need:
A Google Maps API key configured in your Bubble application
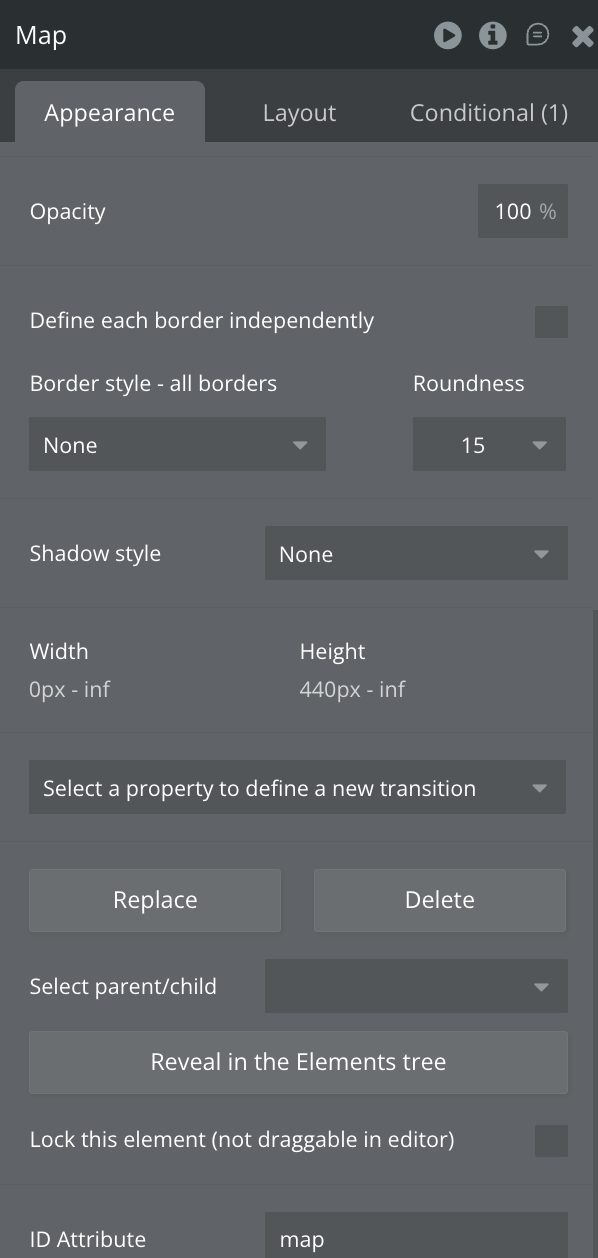
The native Bubble Map element added to your page (the plugin extends its functionality)
Internet connection to load Google Maps services
No additional external accounts or API keys are required beyond your Google Maps setup.
How to setup
Setting up the Google Map Extender plugin is straightforward:
Step 1 – Install the Plugin
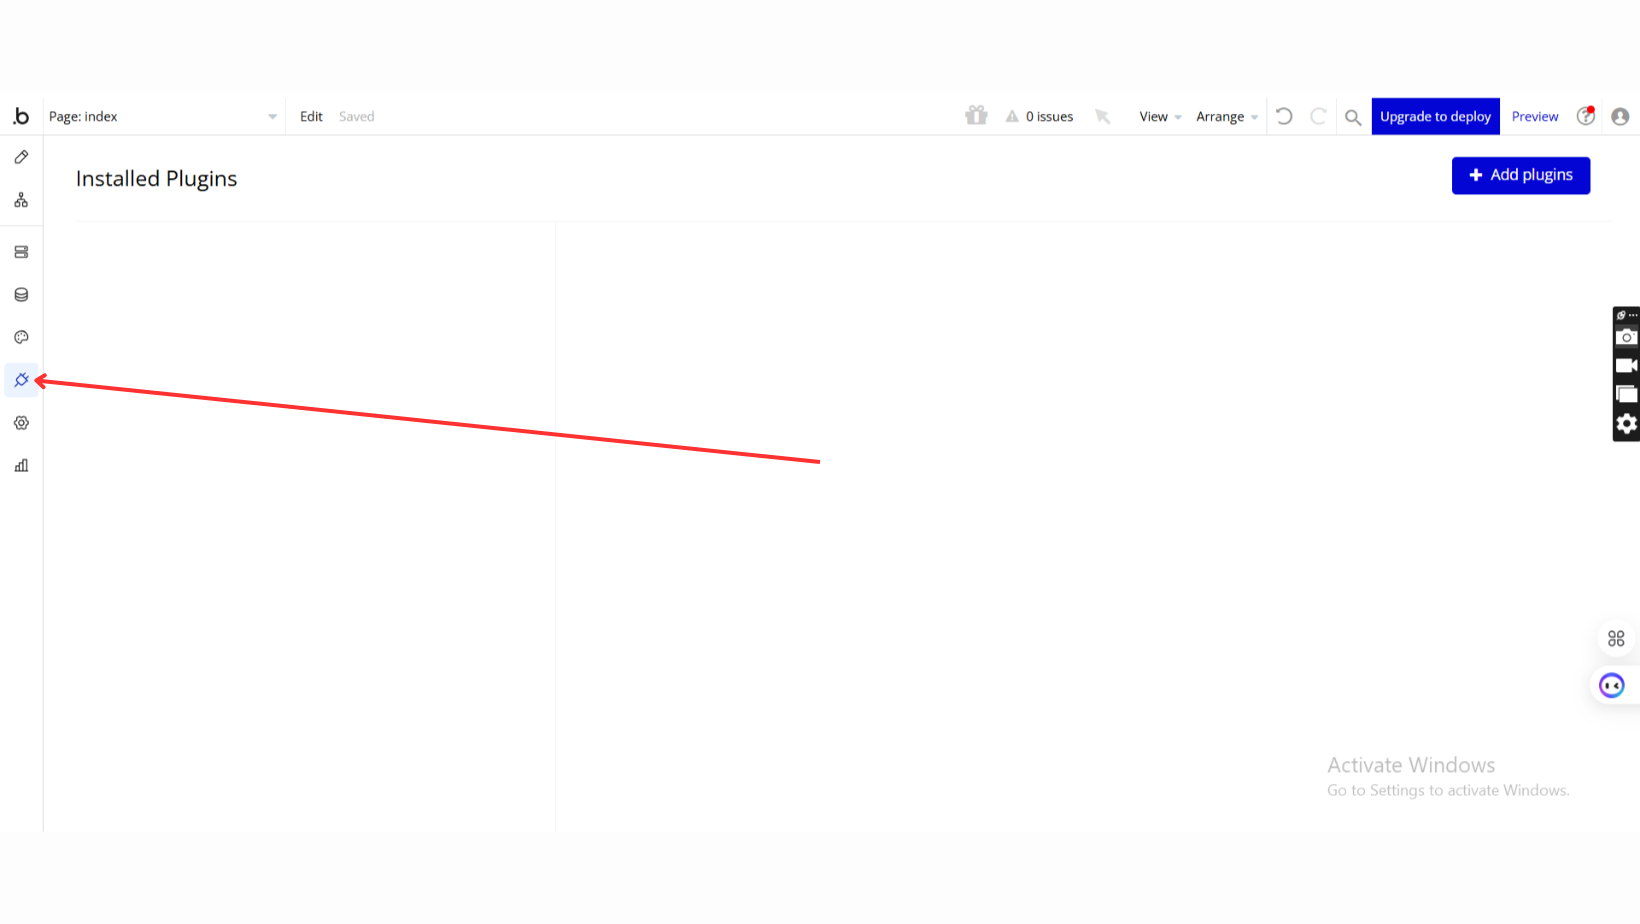
Go to the Plugin Tab
Open your Bubble Editor.
Navigate to the Plugins tab on the left panel.
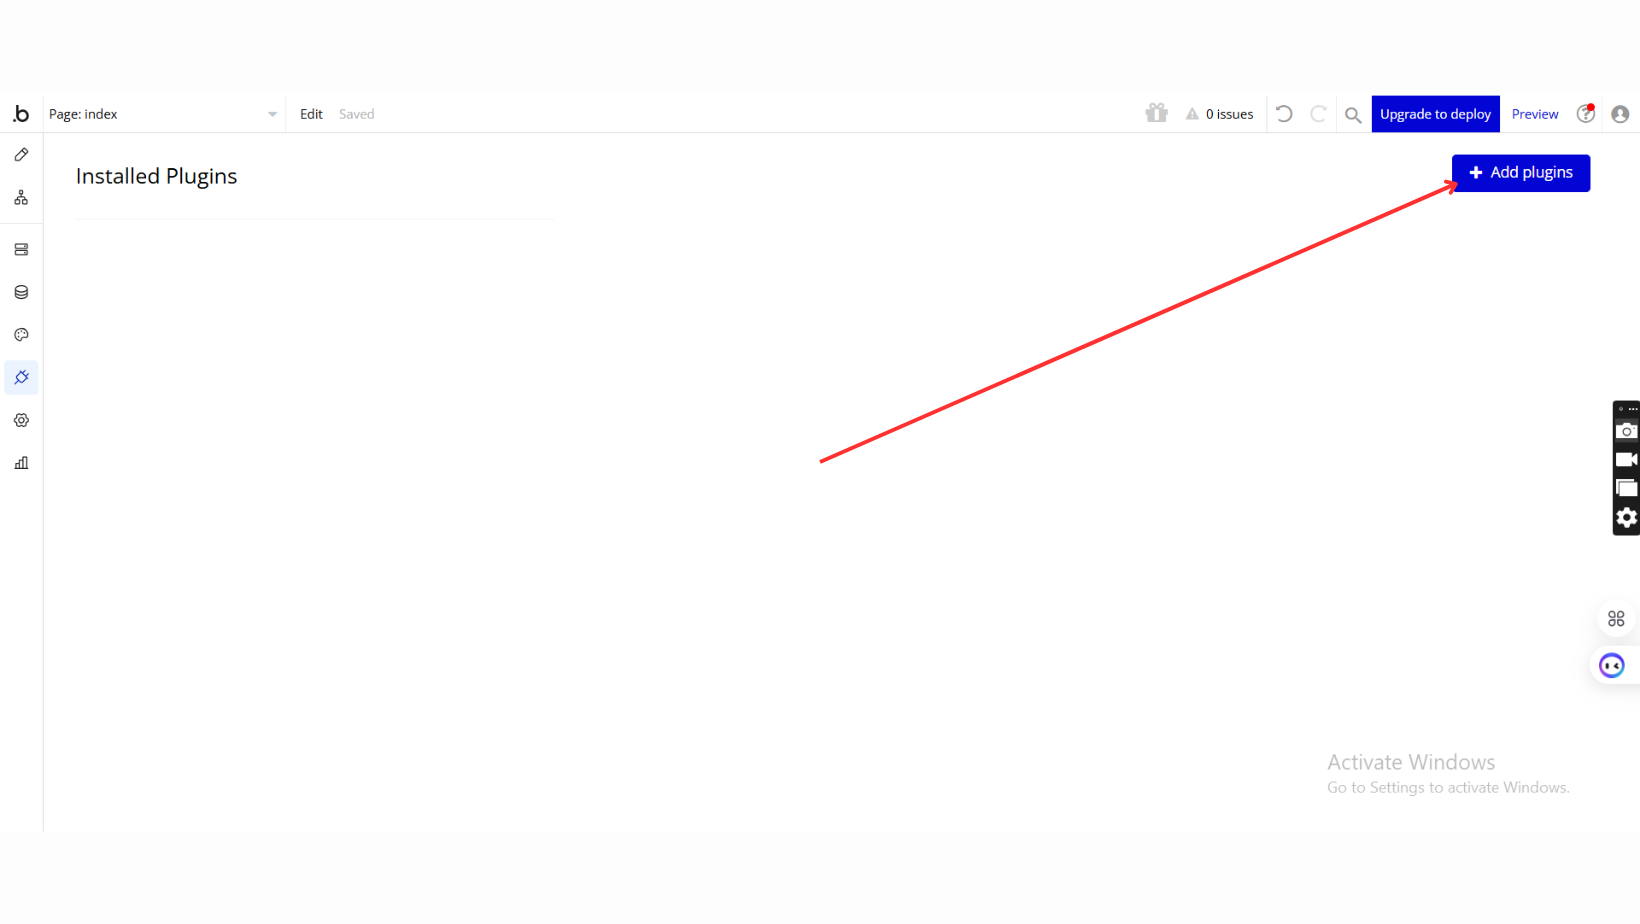
Add Plugins
Once in the Plugins tab, click the Add Plugins button.
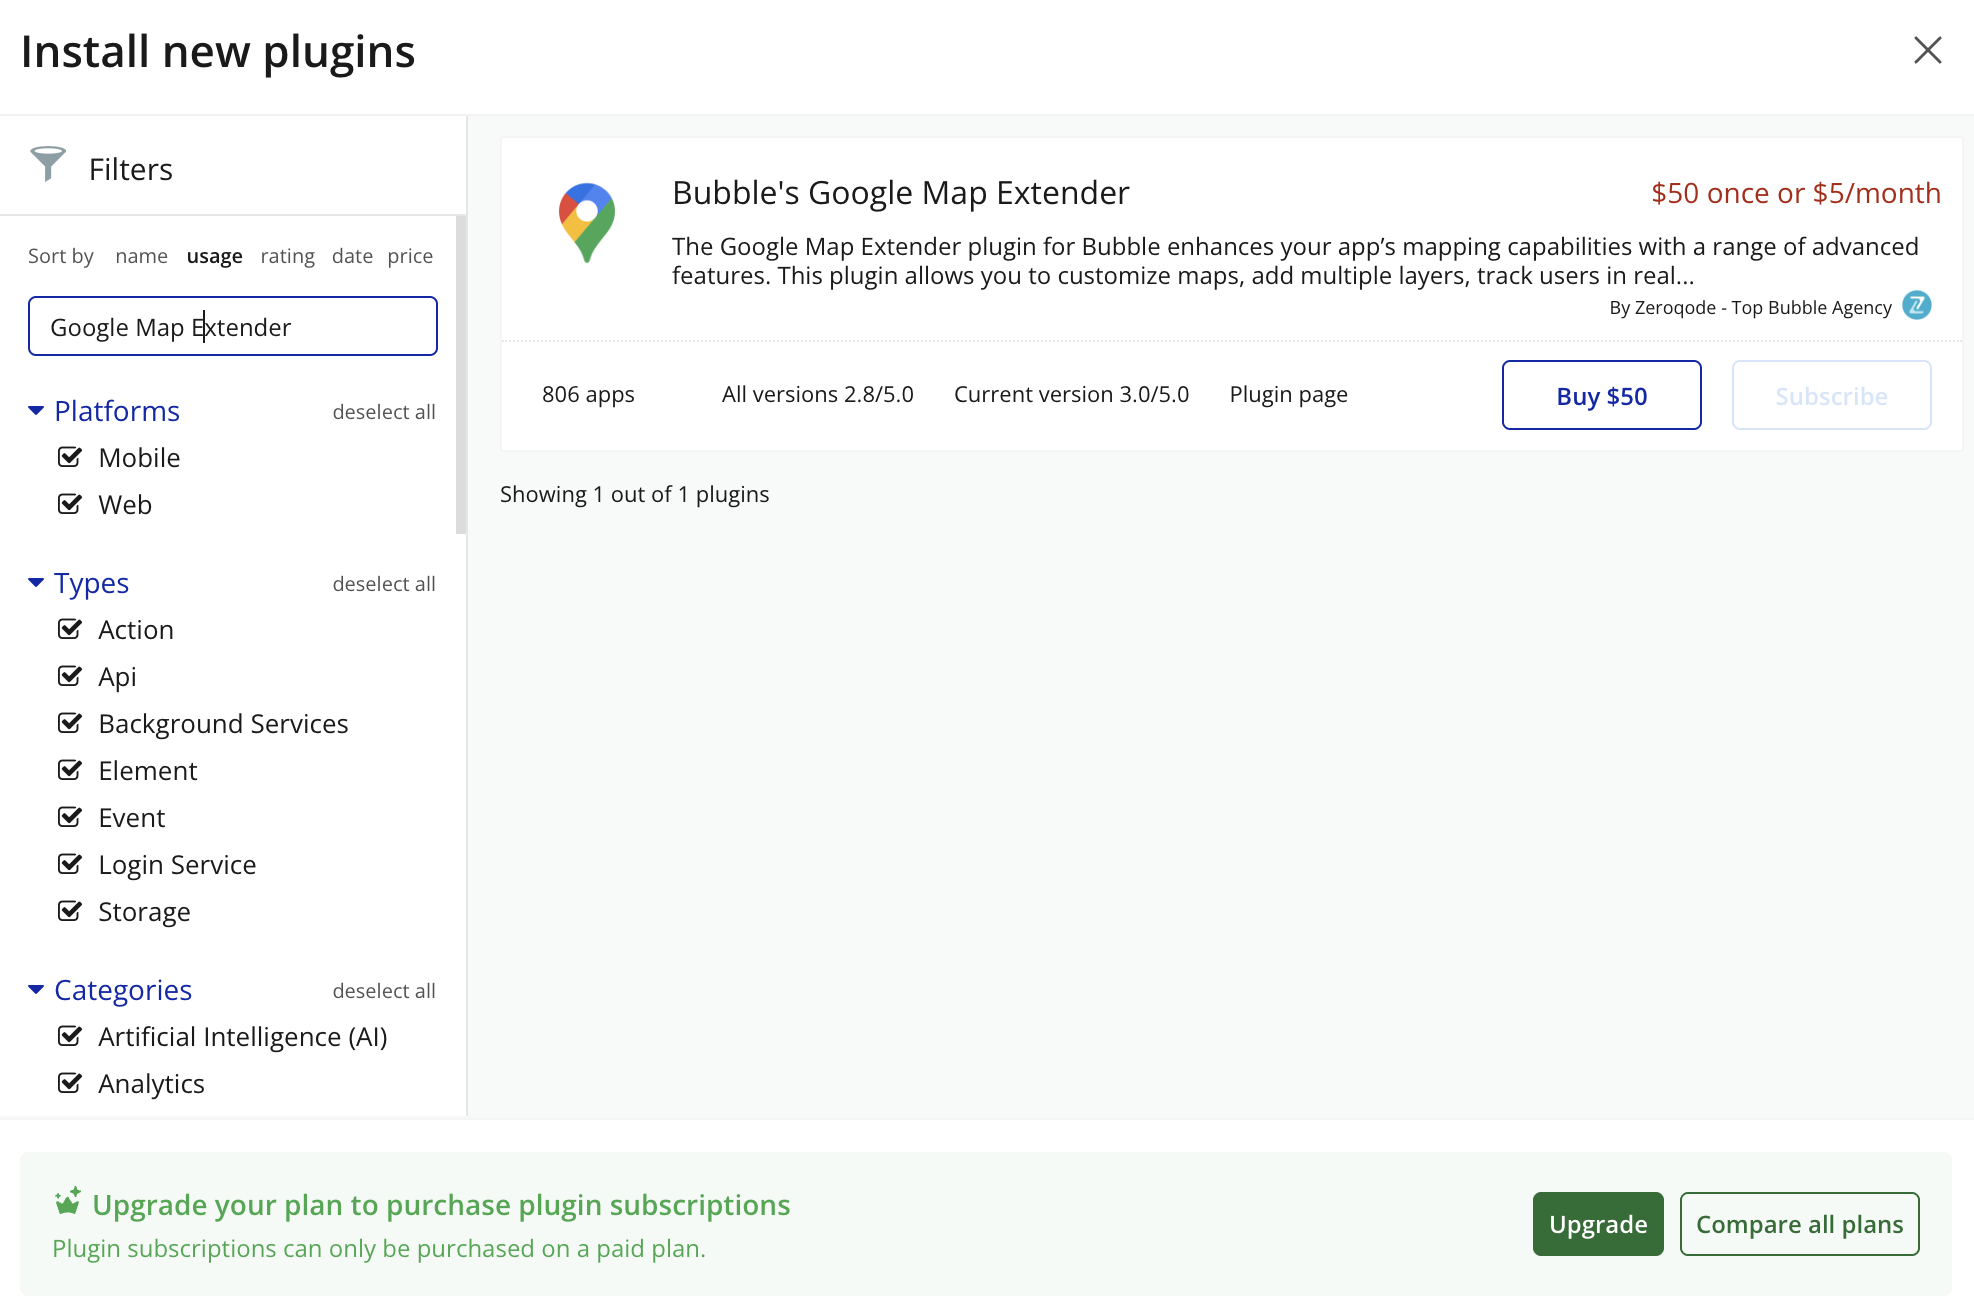
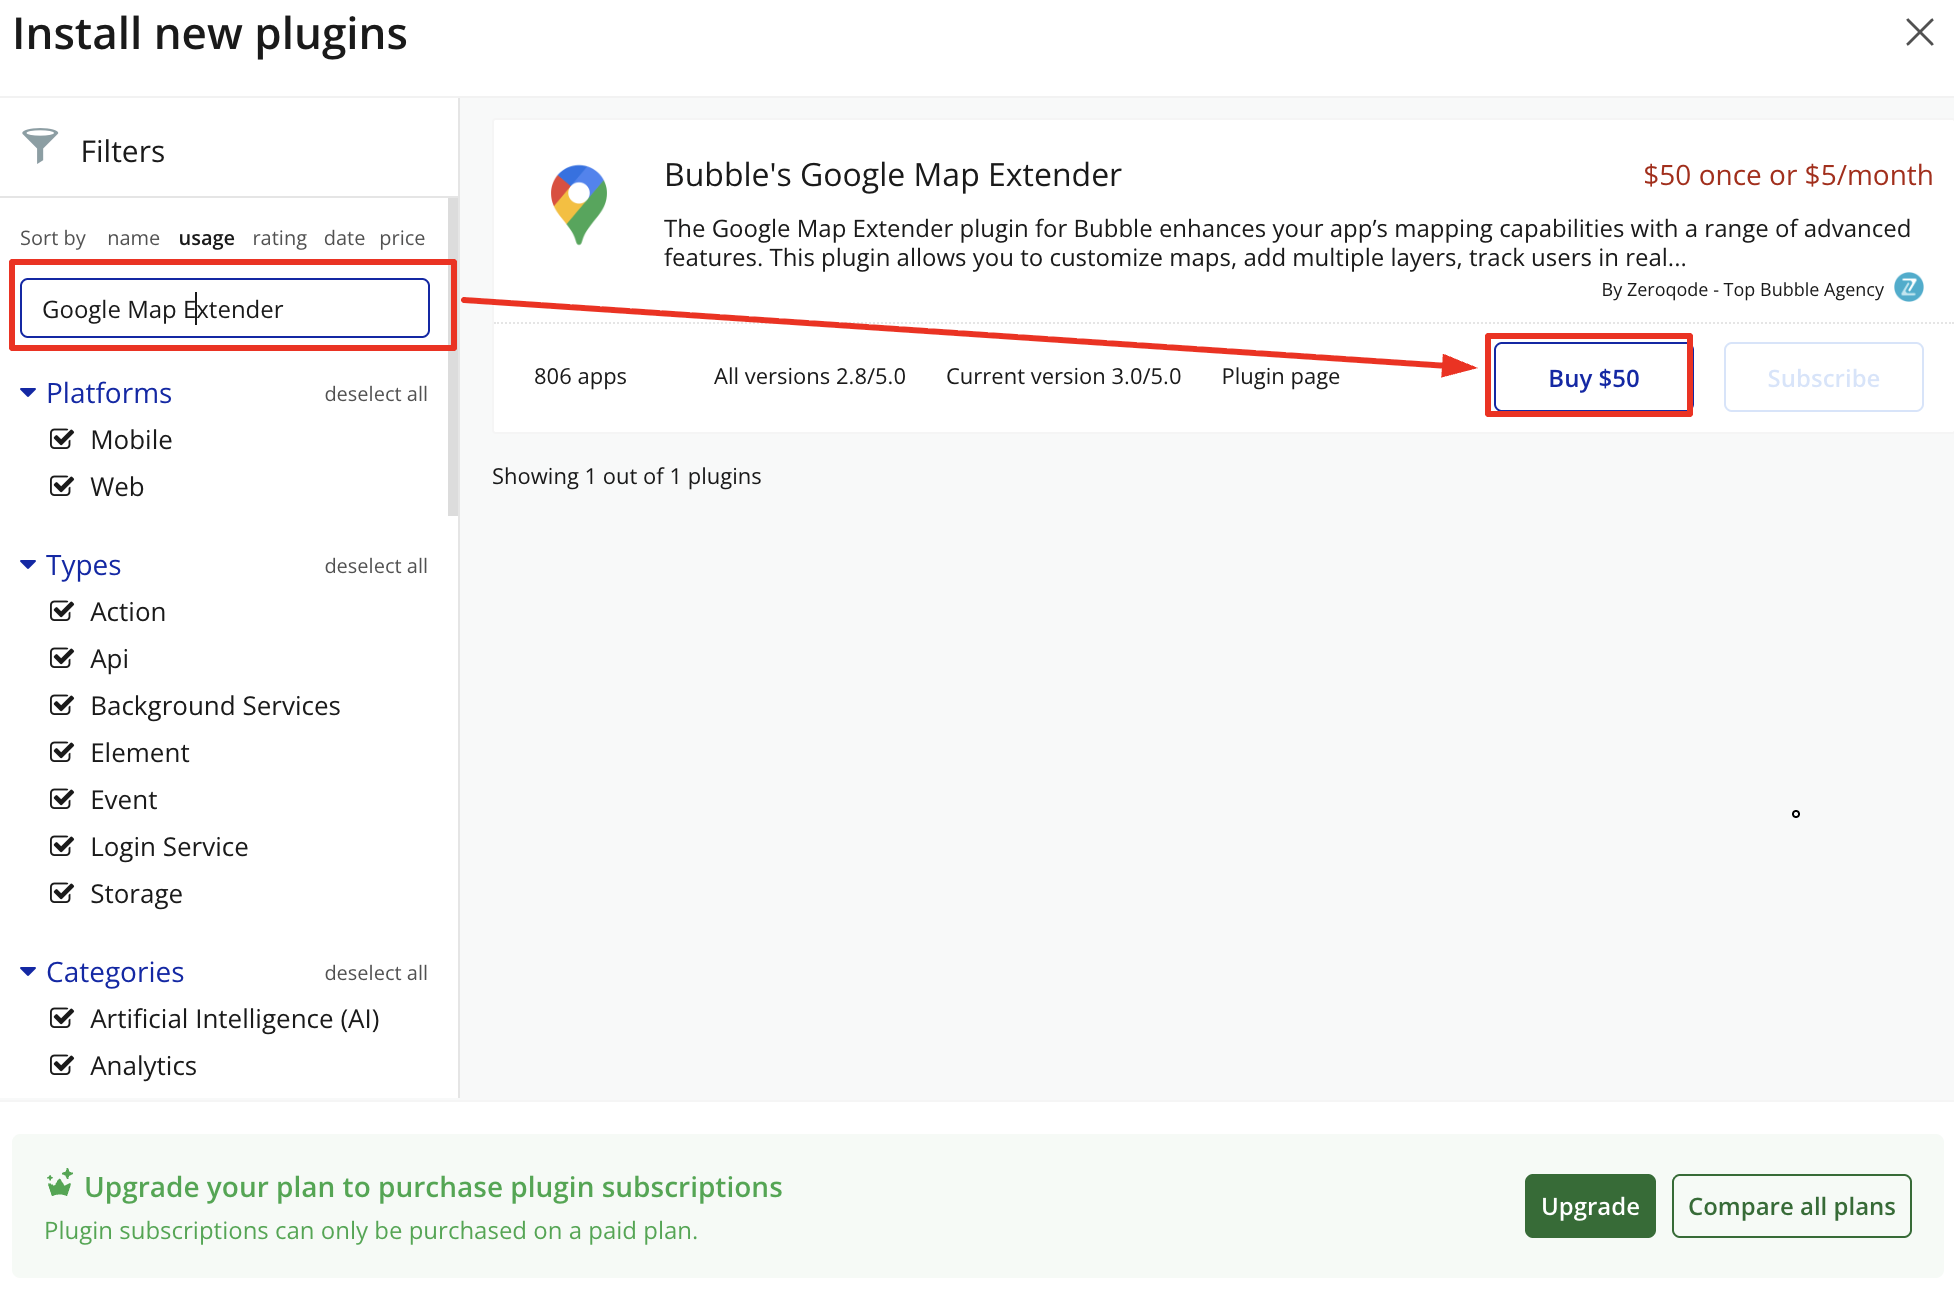
Search for the Plugin
Use the search bar to type Bubble’s Google Map Extender.
Locate the plugin in the search results.
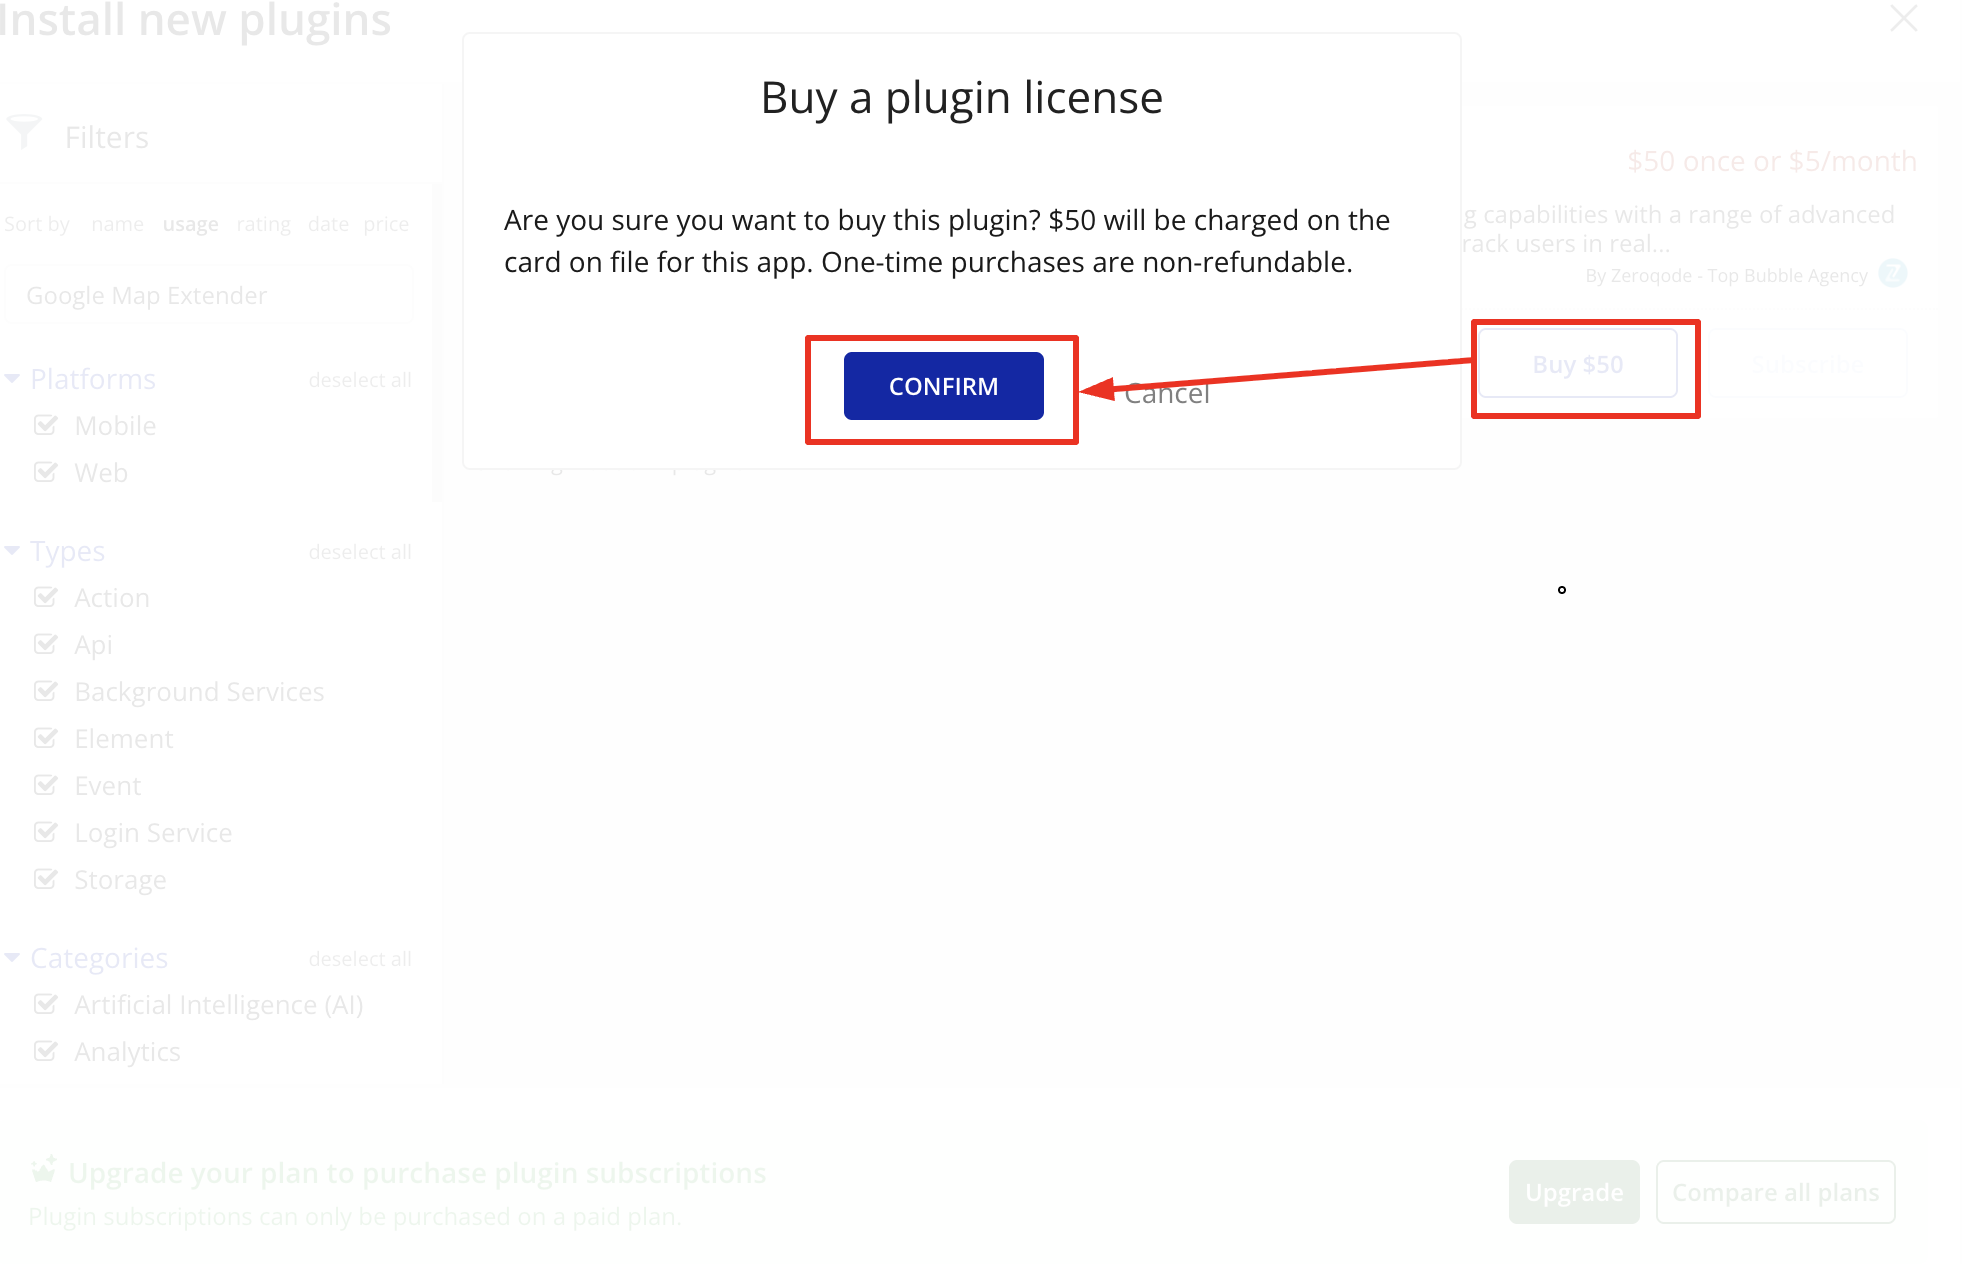
Install/Buy
Click Buy and follow the purchase instructions.
Payment Information
Fill in your payment details and make payment.
Charges will be added to your Bubble billing account.
Remember, if you unsubscribe from the plugin shortly after installation, charges will be prorated based on the days used.
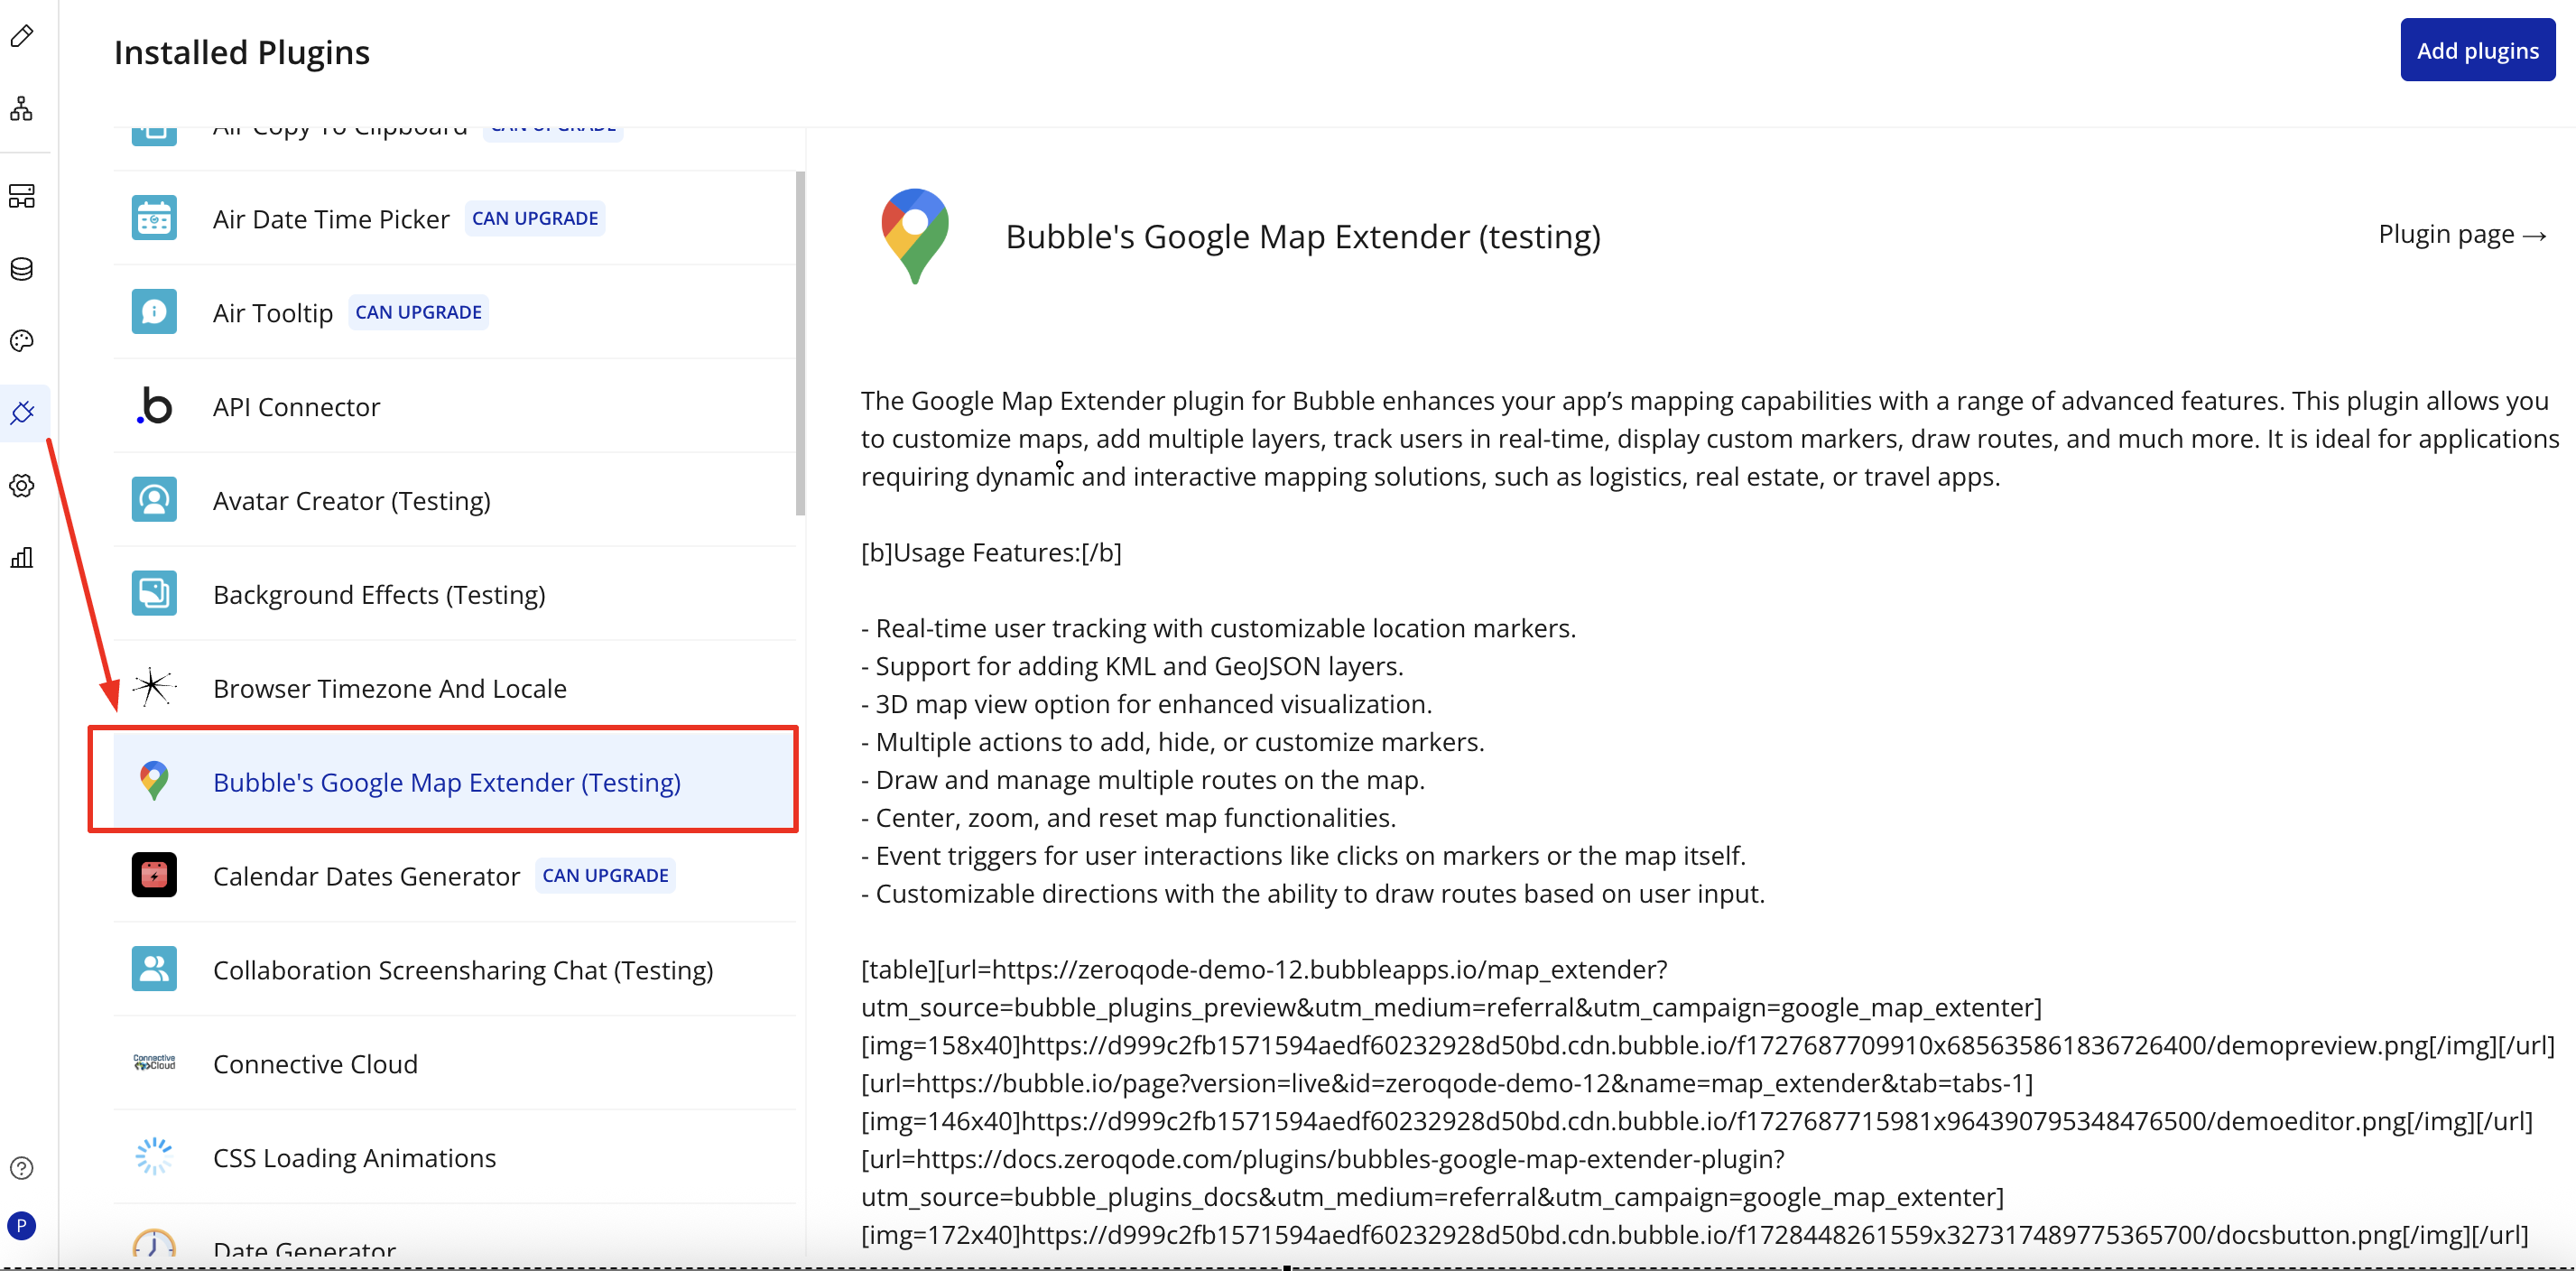
Plugin Installed
Once installed, the plugin will appear under the Installed Plugins list in your Bubble Editor.
Step 2 – Add the Plugin Element to Your Page
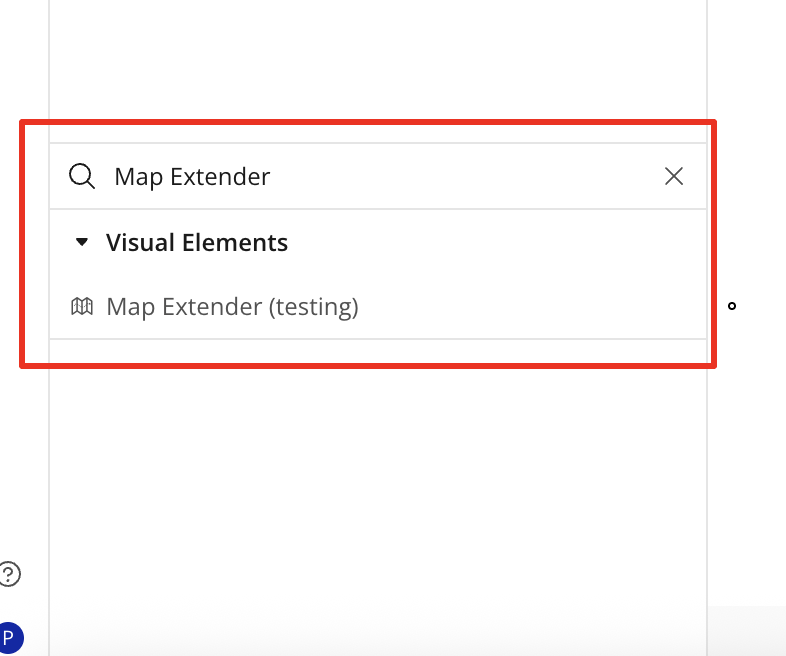
Open the Design tab in your Bubble editor.
Search for the Map Extender element in the Elements panel.
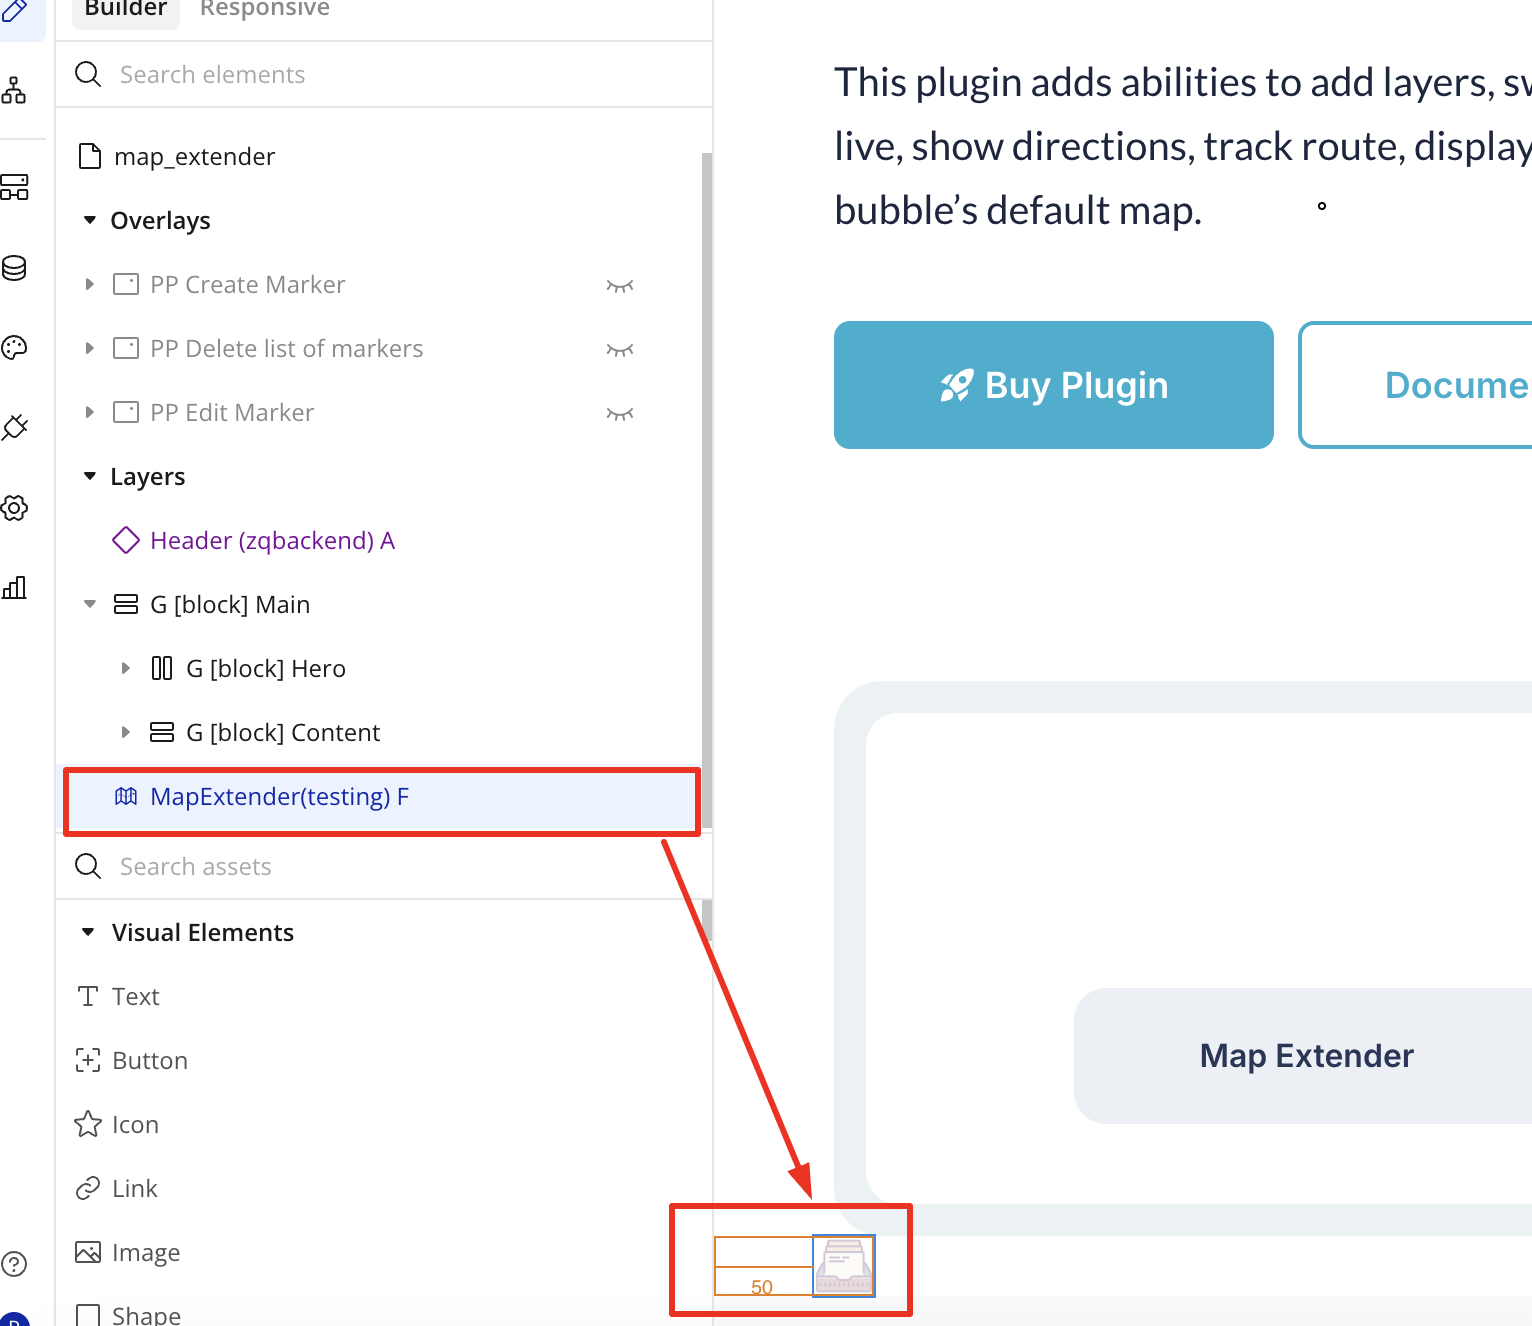
Drag and drop the element onto your page.
Step 3 – Configure Properties
Select the element and configure its properties in the Property Editor
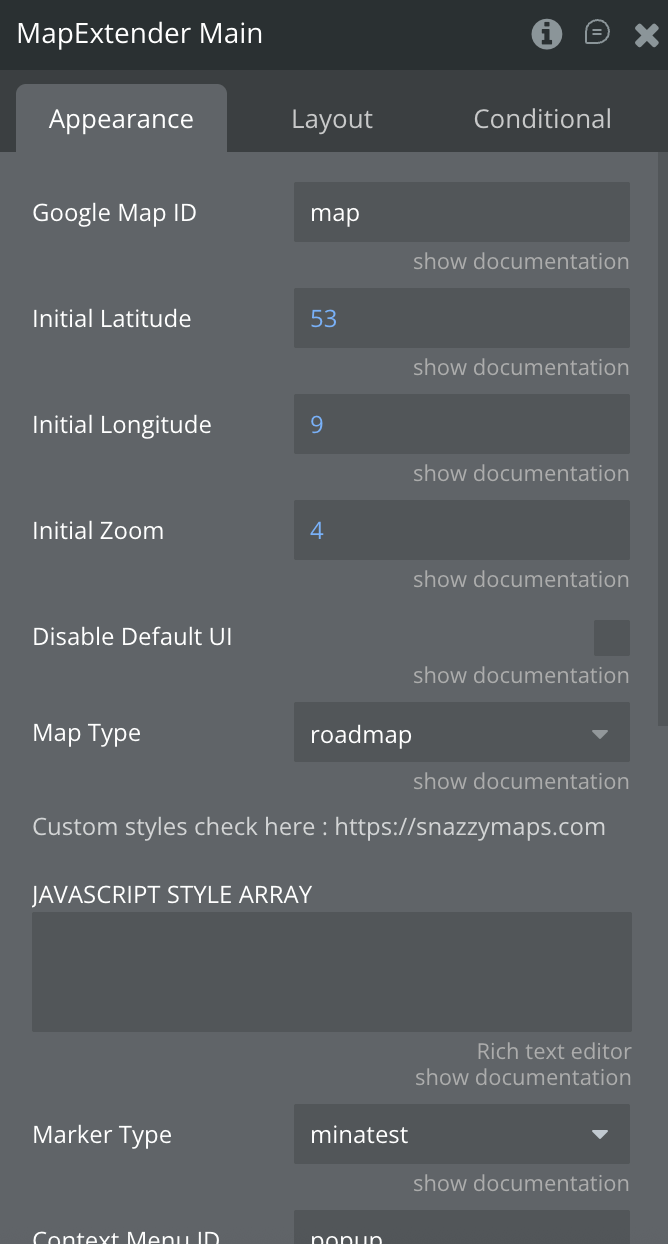
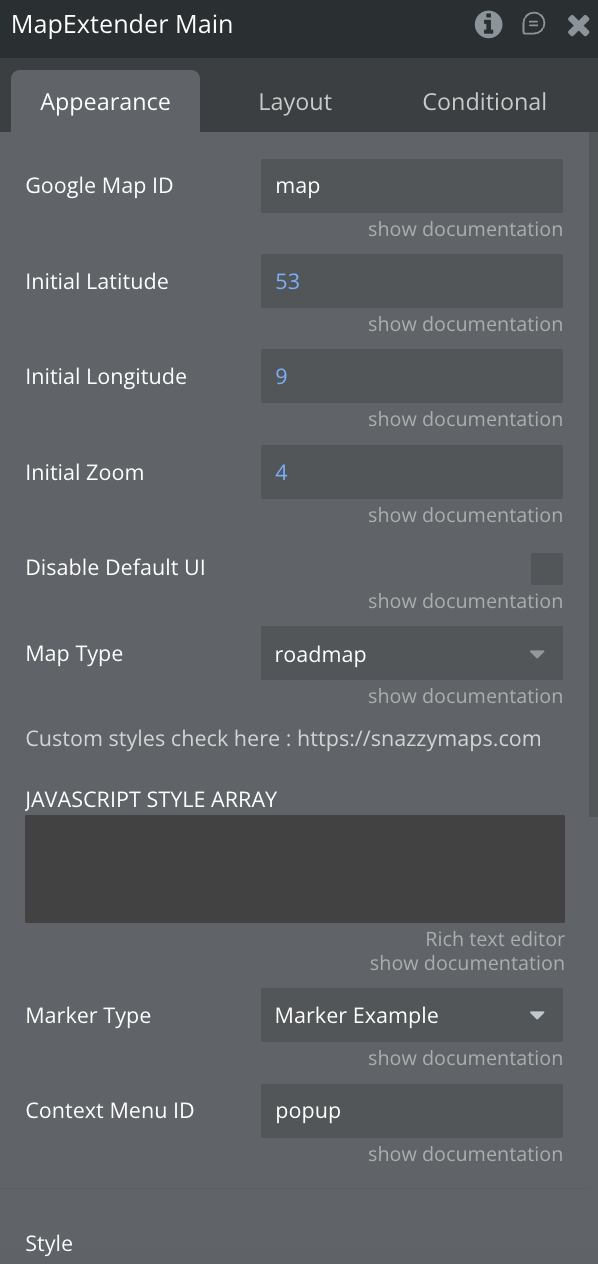
Plugin Element - Map Extender
Fields
Title
Description
Type
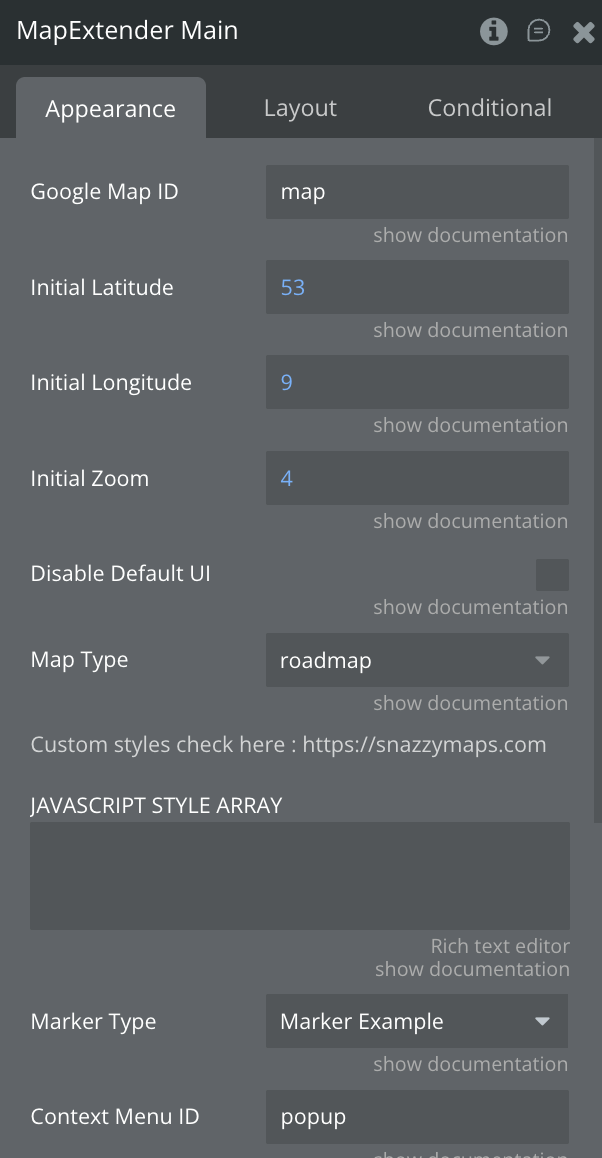
Google Map ID
The Element ID of your Bubble Map element that this plugin will extend
Text
Initial Latitude
The latitude coordinate for the initial map center position
Number
Initial Longitude
The longitude coordinate for the initial map center position
Number
Initial Zoom
The initial zoom level of the map (1-20, where higher values show more detail)
Number
Disable Default UI
When checked, hides the default Google Maps UI controls (zoom buttons, map type selector, etc.)
Boolean
Map Type
The type of map to display: roadmap, satellite, hybrid, or terrain
Dropdown
JAVASCRIPT STYLE ARRAY
Custom map styling in JSON format (can be obtained from Snazzy Maps website)
Text
Marker Type
Custom data type from your database representing markers (must contain a geographic address field)
Custom Type
Context Menu ID
The Element ID of a group to display as a context menu when right-clicking the map
Text
Element Actions
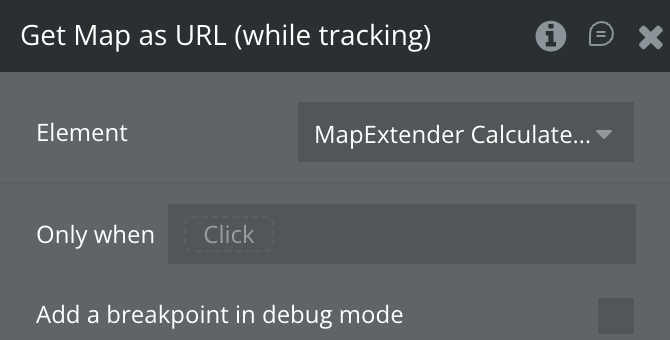
1. Get Map as URL (while tracking)
Returns the current map location as a Google Maps URL while tracking is active.
This action has no input fields. It publishes the current map URL to the "Map as URL" state.
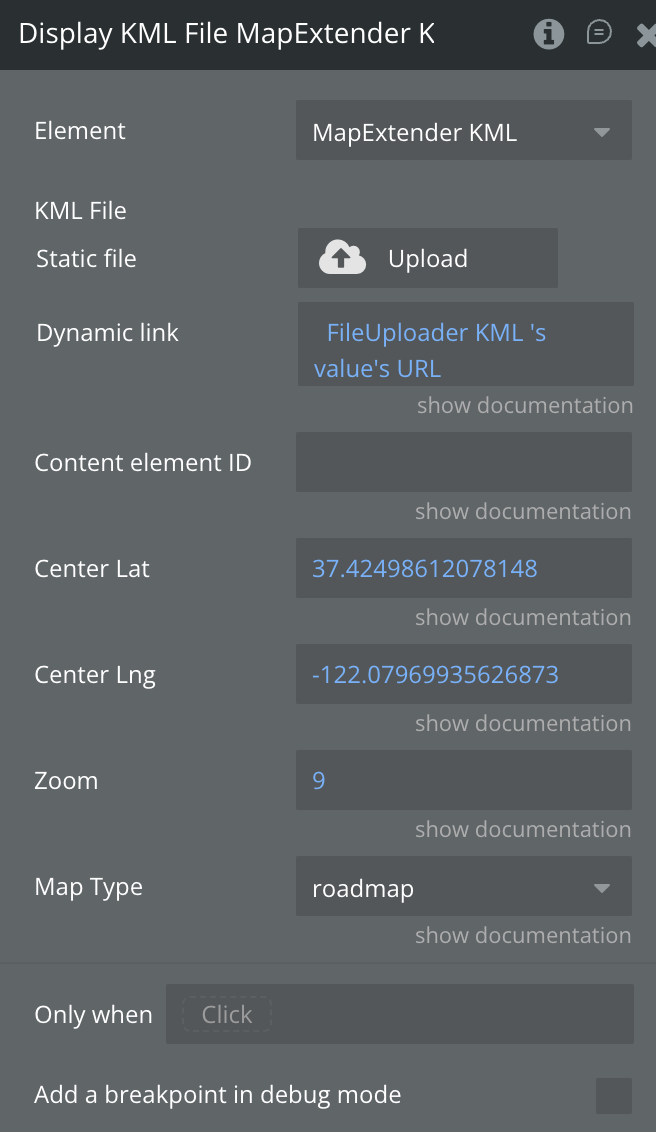
2. Display KML File
Displays a KML file on the map with custom positioning and styling.
Fields:
Title
Description
Type
KML File
The KML file to display on the map
File
Content element ID
The Element ID of a group where KML content will be displayed when clicked
Text
Center Lat
The latitude for centering the map when displaying the KML
Number
Center Lng
The longitude for centering the map when displaying the KML
Number
Zoom
The zoom level to apply when displaying the KML file
Number
Map Type
The map type to use (hybrid, roadmap, satellite, terrain)
Dropdown
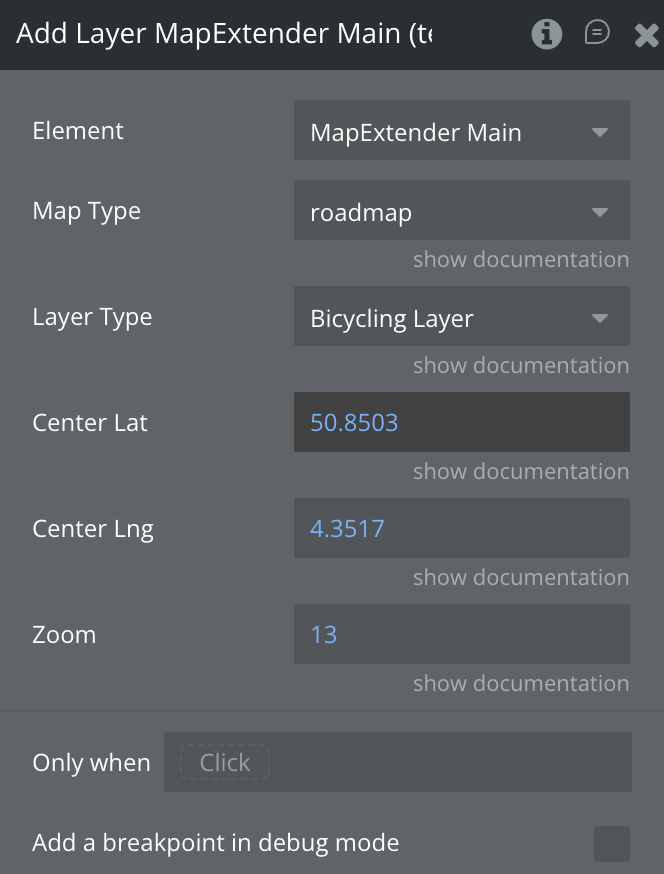
3. Add Layer
Adds a Google Maps layer (Traffic, Transit, Bicycling, or Data Layer) to the map.
Fields:
Title
Description
Type
Layer Type
The type of layer to add: Traffic Layer, Transit Layer, Bicycling Layer, or Data Layer
Dropdown
Center Lat
The latitude to center the map when adding the layer
Number
Center Lng
The longitude to center the map when adding the layer
Number
Zoom
The zoom level to apply when adding the layer
Number
Map Type
The map type to use (satellite, hybrid, roadmap, terrain)
Dropdown
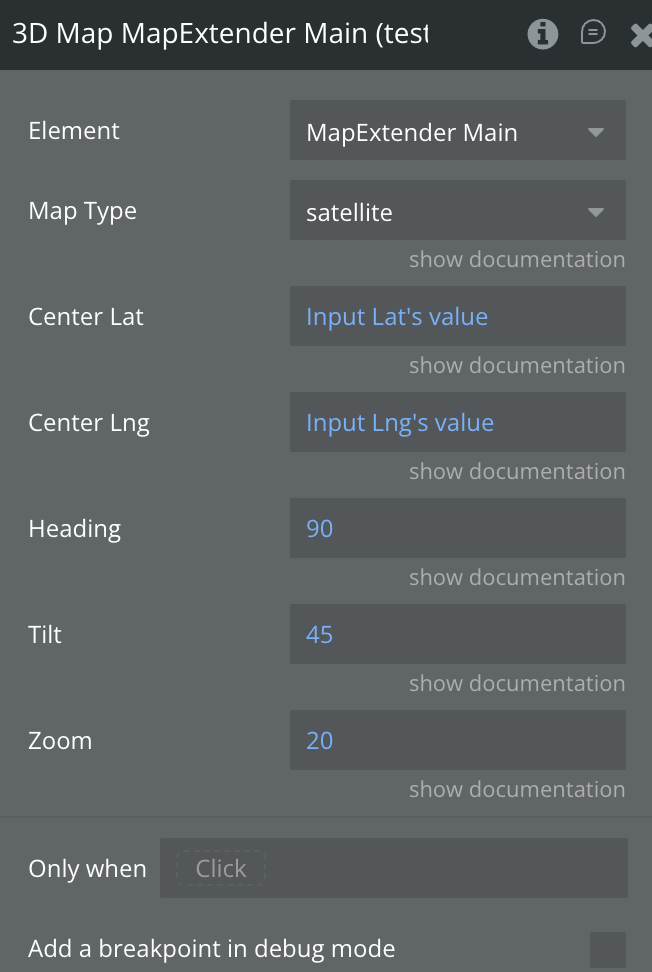
4. 3D Map
Enables 3D visualization mode for the map with customizable heading and tilt.
Fields:
Title
Description
Type
Map Type
The map type to use (satellite or hybrid - required for 3D view)
Dropdown
Center Lat
The latitude to center the 3D map view
Number
Center Lng
The longitude to center the 3D map view
Number
Heading
The compass heading in degrees (0-360) for the 3D view direction
Number
Tilt
The tilt angle in degrees (0-90) for the 3D perspective
Number
Zoom
The zoom level for the 3D map view
Number
5. Track User
Starts real-time tracking of the user's location and updates the map accordingly.
Fields:
Title
Description
Type
Default Lat
Default latitude if user location is unavailable
Number
Default Lng
Default longitude if user location is unavailable
Number
mapType
The type of map to display during tracking (hybrid, roadmap, satellite, terrain)
Dropdown
Zoom
The zoom level for the tracking view
Number
Marker Image
Custom image to use as the location marker icon
Image
Marker width
Width of the marker icon in pixels
Number
Marker height
Height of the marker icon in pixels
Number
6. Stop tracking user
Stops real-time user location tracking and saves the traveled route.
This action has no input fields. It stops tracking, removes the tracking marker, and publishes the traveled route to the "Mileage" state.
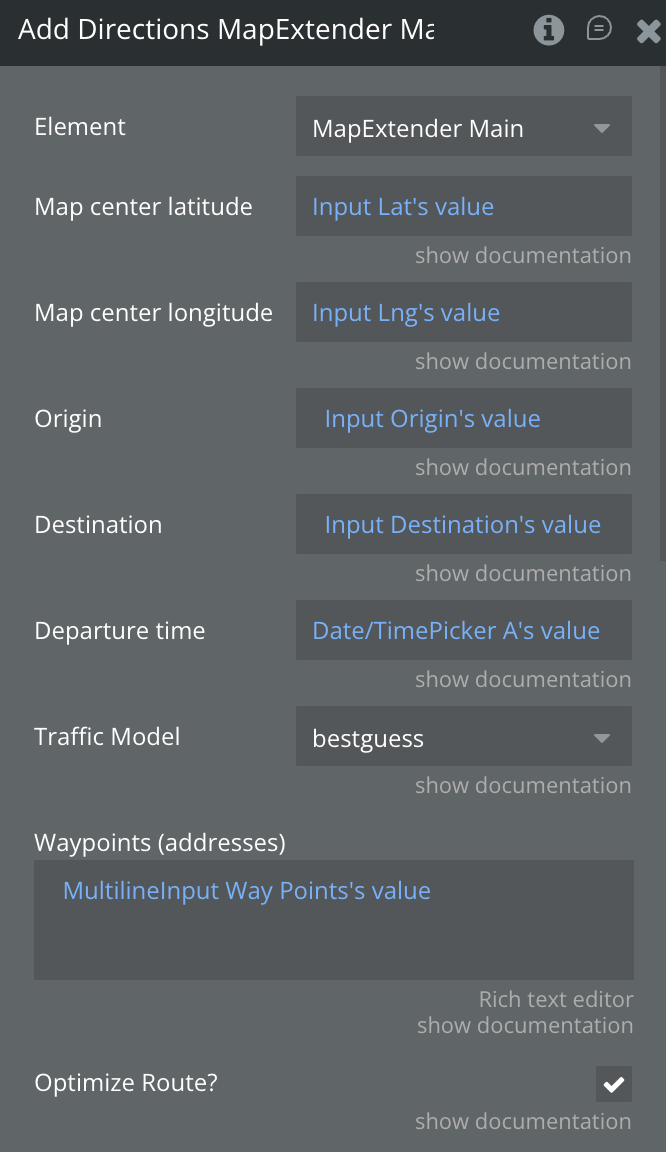
7. Add Directions
Creates a route between origin and destination with optional waypoints and customization.
Fields:
Title
Description
Type
Map center latitude
Latitude for centering the map when displaying the route
Number
Map center longitude
Longitude for centering the map when displaying the route
Number
Origin
Starting address or location for the route
Text
Destination
Ending address or location for the route
Text
Departure time
Optional departure time for traffic-aware routing
Date
Traffic Model
Traffic prediction model: bestguess, pessimistic, or optimistic
Dropdown
Waypoints (addresses)
Intermediate stops along the route (one per line, no commas)
Text
Optimize Route?
Whether to optimize the order of waypoints for the shortest route
Boolean
Provide Route Alternatives
Whether to show alternative routes
Boolean
Avoid Ferries?
Whether to avoid ferry routes
Boolean
Avoid Highways?
Whether to avoid highways
Boolean
Avoid Toll's?
Whether to avoid toll roads
Boolean
Region
Region bias for geocoding (e.g., "City, Country")
Text
Travel Model
Mode of transportation: DRIVING, BICYCLING, TRANSIT, or WALKING
Dropdown
Map Zoom
The zoom level for displaying the route
Number
Instructions Element ID
Element ID of a group where turn-by-turn directions will be displayed
Text
Waypoints DB Geo
List of geographic addresses from database to use as waypoints
Geographic Address List
Route without markers
When checked, hides markers along the route
Boolean
Route color
The color of the route line on the map
Color
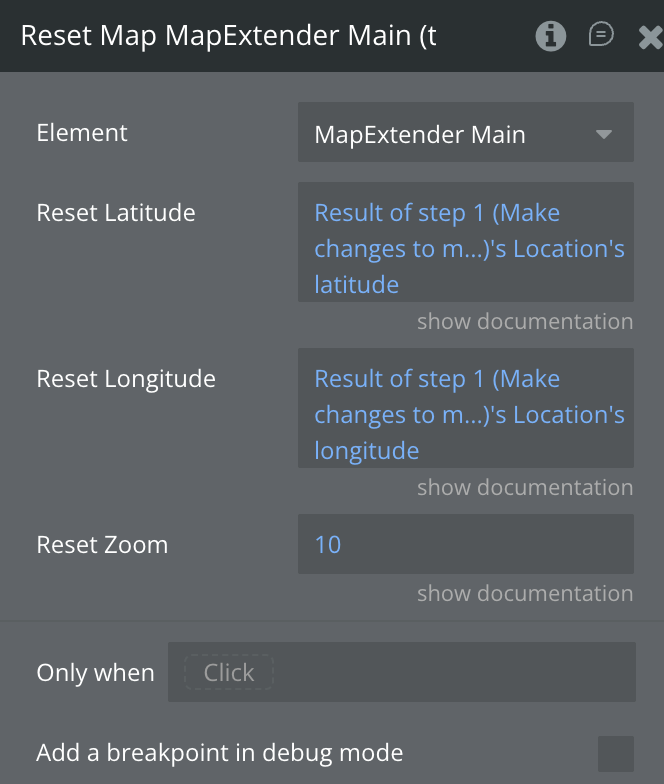
8. Reset Map
Clears all markers, routes, and tracking data and resets the map to initial or specified state.
Fields:
Title
Description
Type
Reset Latitude
Optional: New latitude to center map after reset
Number
Reset Longitude
Optional: New longitude to center map after reset
Number
Reset Zoom
Optional: New zoom level after reset
Number
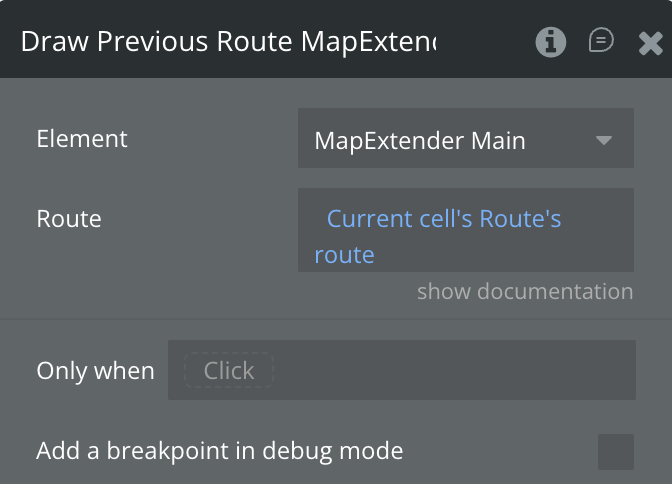
9. Draw Previous Route
Displays a previously saved route from the database on the map.
Fields:
Title
Description
Type
Route
A previously saved route in JSON format (from the Mileage state)
Text
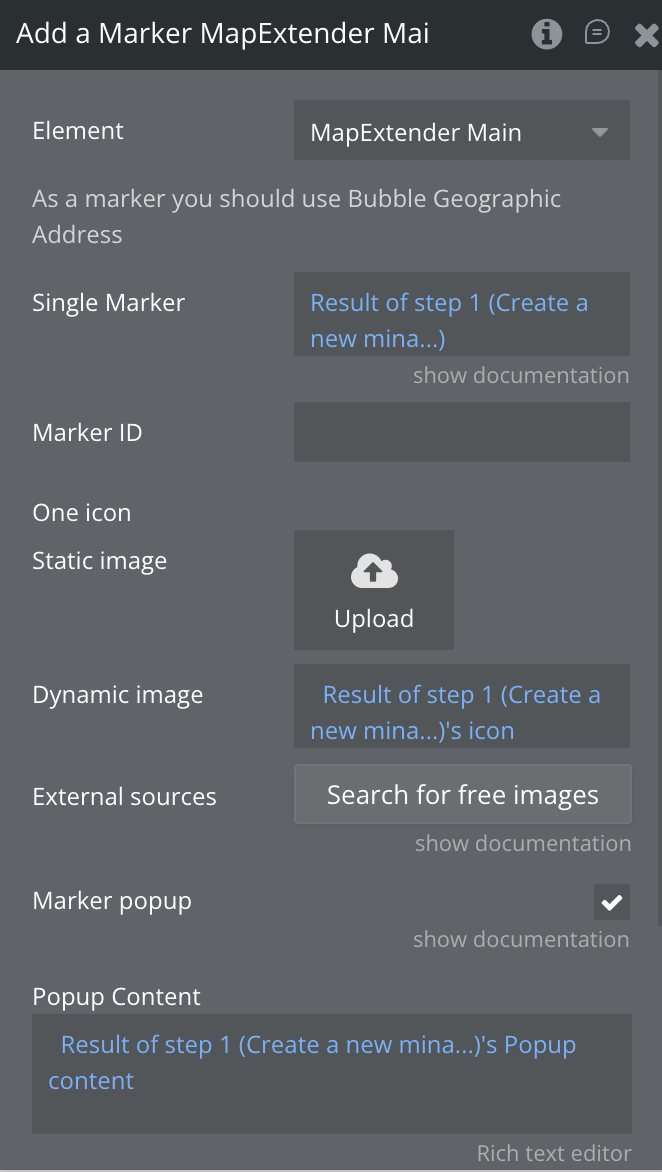
10. Add a Marker
Adds a single custom marker to the map with optional popup content.
Fields:
Title
Description
Type
Single Marker
The marker data must be of type Marker Type data
Custom Type
Marker ID
ID of the marker
Text
One icon
The icon image for the marker (recommended size: 64 pixels)
Image
Marker popup
Whether to show a popup when the marker is clicked
Boolean
Popup Content
HTML content to display in the marker popup
Text
Marker Size
The size of the marker icon in pixels
Number
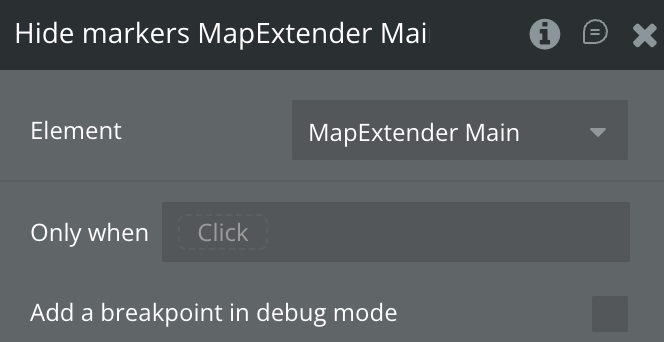
11. Hide markers
Hides all markers currently displayed on the map.
This action has no input fields. It hides all markers and clears any active marker clusters.
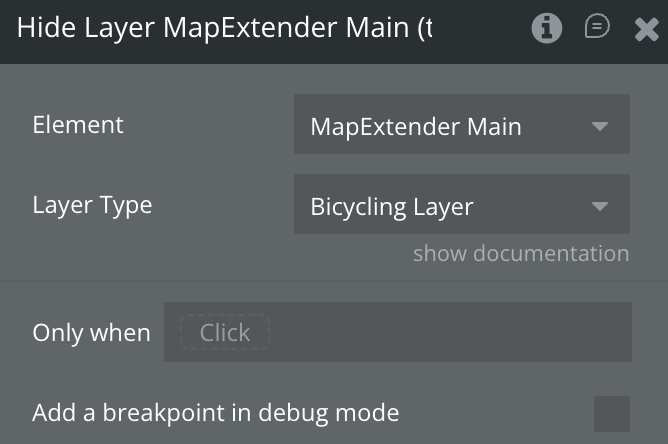
12. Hide Layer
Removes a previously added layer from the map.
Fields:
Title
Description
Type
Layer Type
The type of layer to hide: Traffic Layer, Transit Layer, Bicycling Layer, or Data Layer
Dropdown
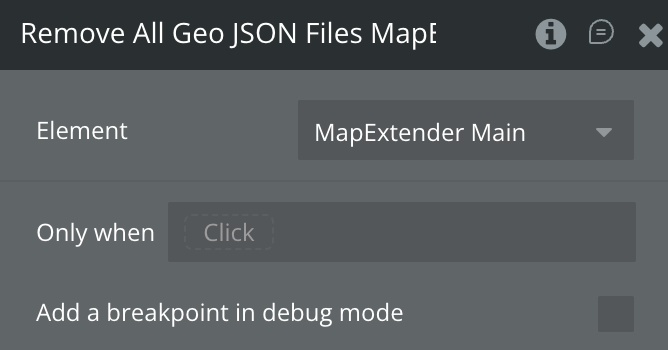
13. Remove All Geo JSON Files
Removes all GeoJSON layers that have been added to the map.
This action has no input fields. It removes all GeoJSON features from the map.
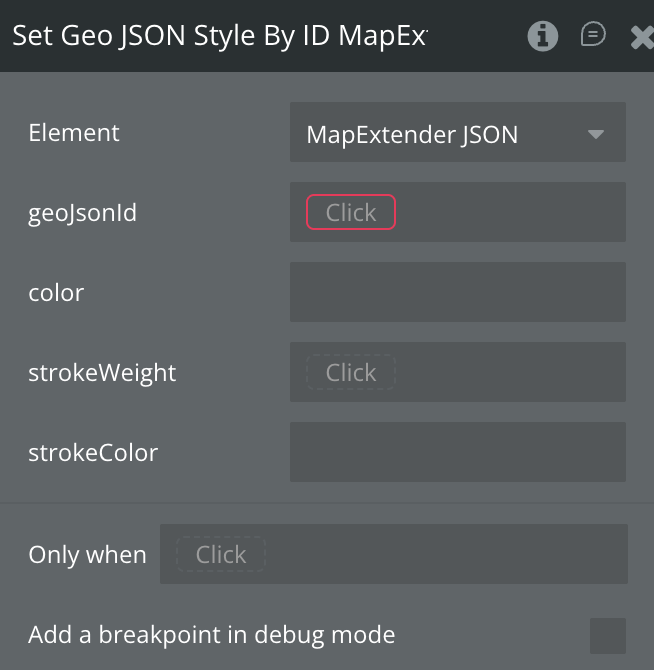
14. Set Geo JSON Style By ID
Applies custom styling to a specific GeoJSON layer by its ID.
Fields:
Title
Description
Type
geoJsonId
The ID number of the GeoJSON layer to style
Number
color
The fill color for the GeoJSON features
Text
strokeWeight
The width of the feature borders in pixels
Number
strokeColor
The color of the feature borders
Text
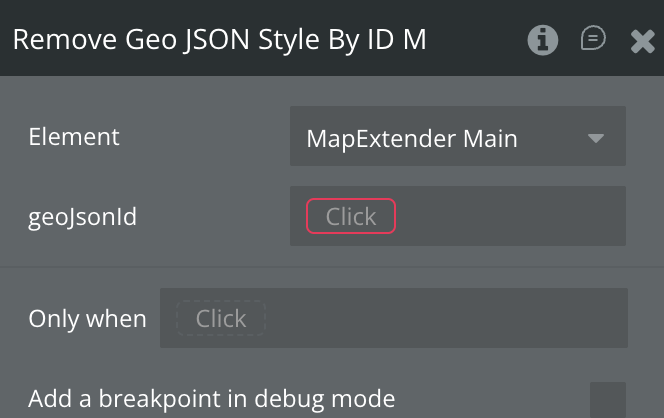
15. Remove Geo JSON Style By ID
Removes custom styling from a specific GeoJSON layer, reverting to default appearance.
Fields:
Title
Description
Type
geoJsonId
The ID number of the GeoJSON layer to reset styling
Number
16. Remove Geo JSON By ID
Removes a specific GeoJSON layer from the map by its ID.
Fields:
Title
Description
Type
geoJsonId
The ID number of the GeoJSON layer to remove
Number
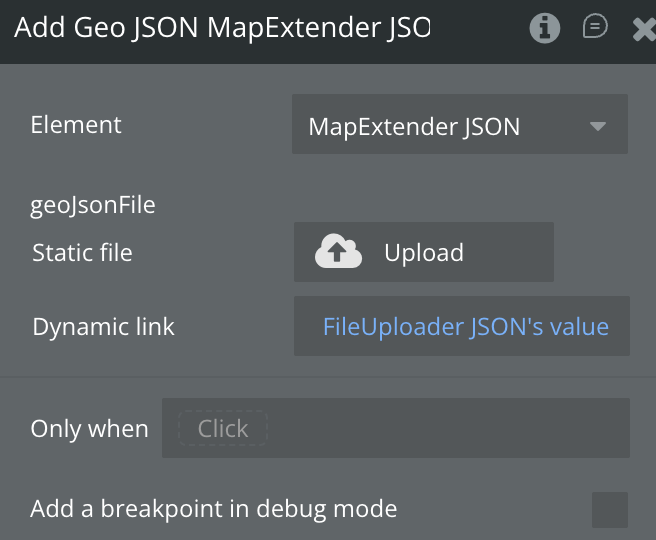
17. Add Geo JSON
Adds a GeoJSON file as a layer on the map.
Fields:
Title
Description
Type
geoJsonFile
The GeoJSON file to add to the map
File
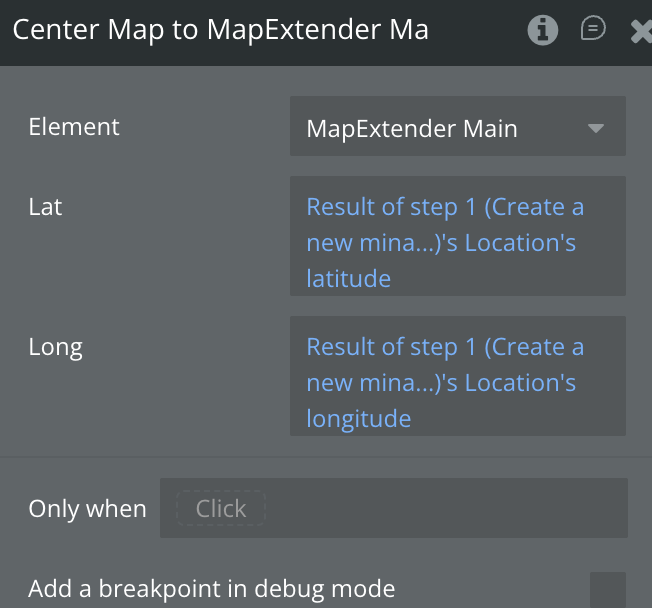
18. Center Map to
Centers the map to a specific geographic coordinate.
Fields:
Title
Description
Type
Lat
The latitude coordinate to center the map
Number
Long
The longitude coordinate to center the map
Number
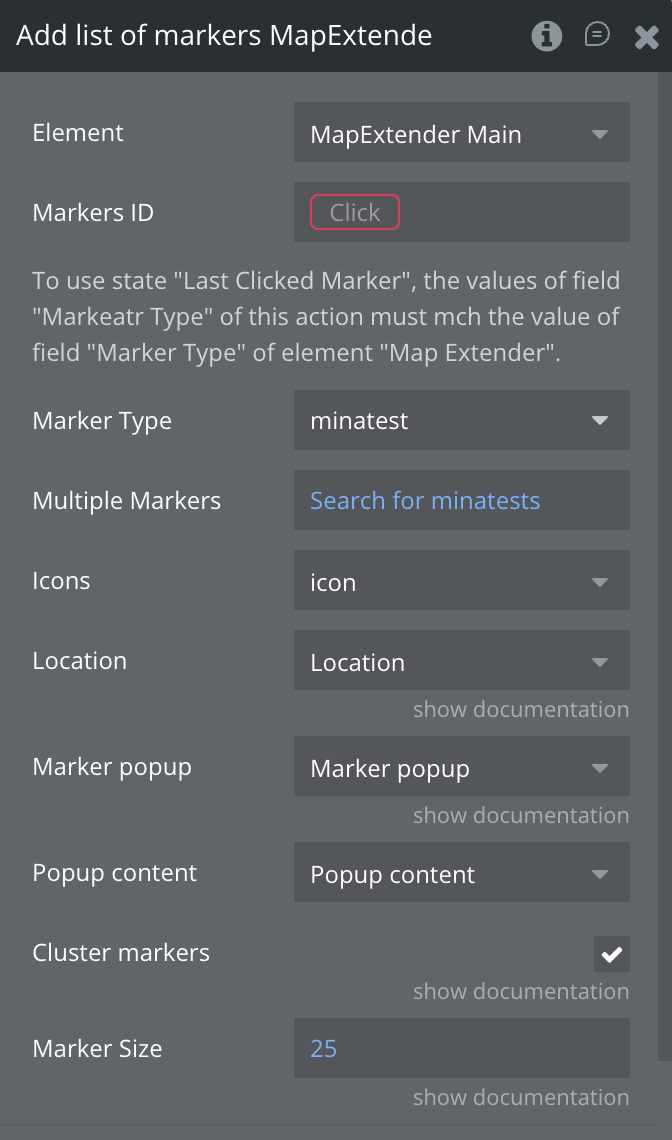
19. Add list of markers
Adds multiple markers to the map from a list of database items with optional clustering.
Fields:
Title
Description
Type
MarkerID
Optional unique identifier for the markers
Text
Marker Type
The custom data type for the markers (must match element property)
Custom Type
Multiple Markers
List of items from database to display as markers
List
Icons
Field containing the icon image for each marker
Custom Field
Location
Field containing the geographic address for each marker
Custom Field
Marker popup
Field containing whether to show popup (yes/no) for each marker
Custom Field
Popup content
Field containing the HTML content for each marker's popup
Custom Field
Cluster markers
Whether to combine nearby markers into clusters
Boolean
Marker Size
The size of marker icons in pixels
Number
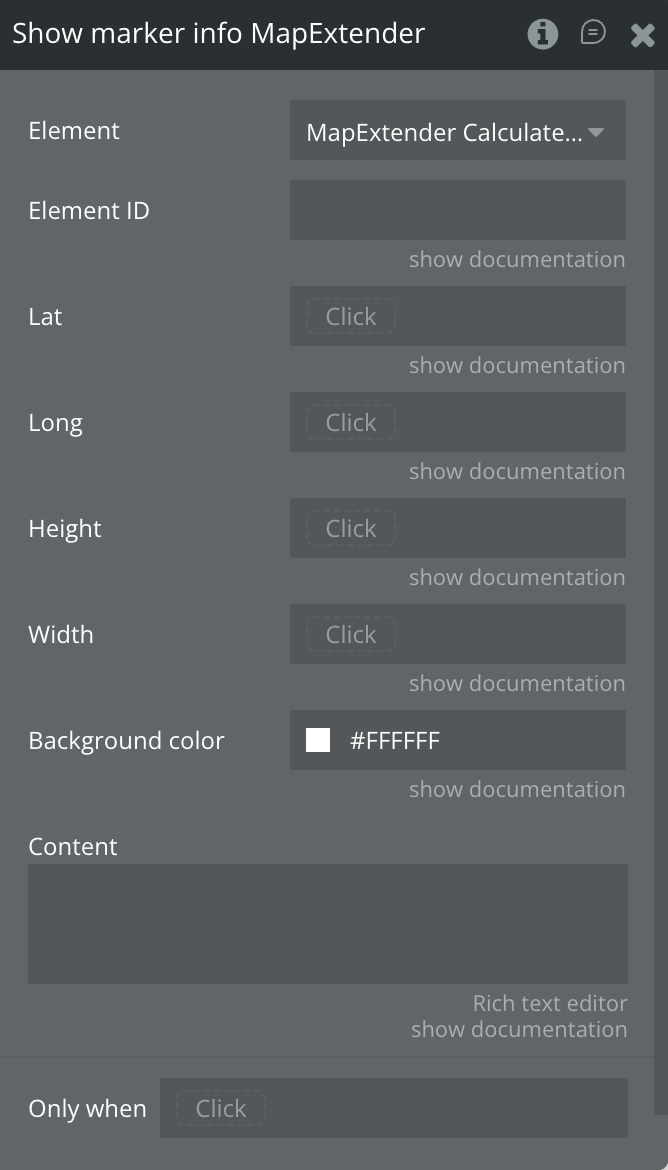
20. Show marker info
Displays a custom information popup at a specific location on the map.
Fields:
Title
Description
Type
Element ID
The Element ID of a group to display as the popup
Text
Lat
The latitude coordinate where the popup should appear
Number
Long
The longitude coordinate where the popup should appear
Number
Height
The height of the popup in pixels
Number
Width
The width of the popup in pixels
Number
Background color
The background color of the popup
Color
Content
HTML content to display in the popup
Text
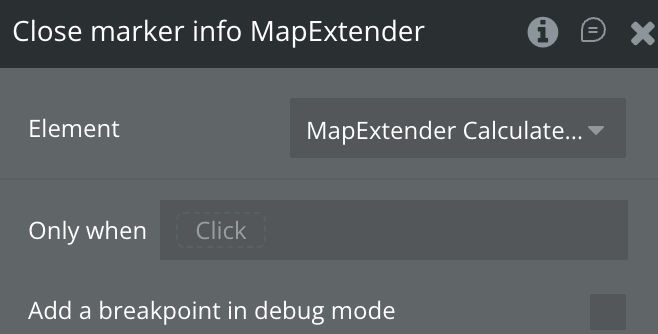
21. Close marker info
Closes the currently displayed marker information popup.
This action has no input fields. It closes the active popup window.
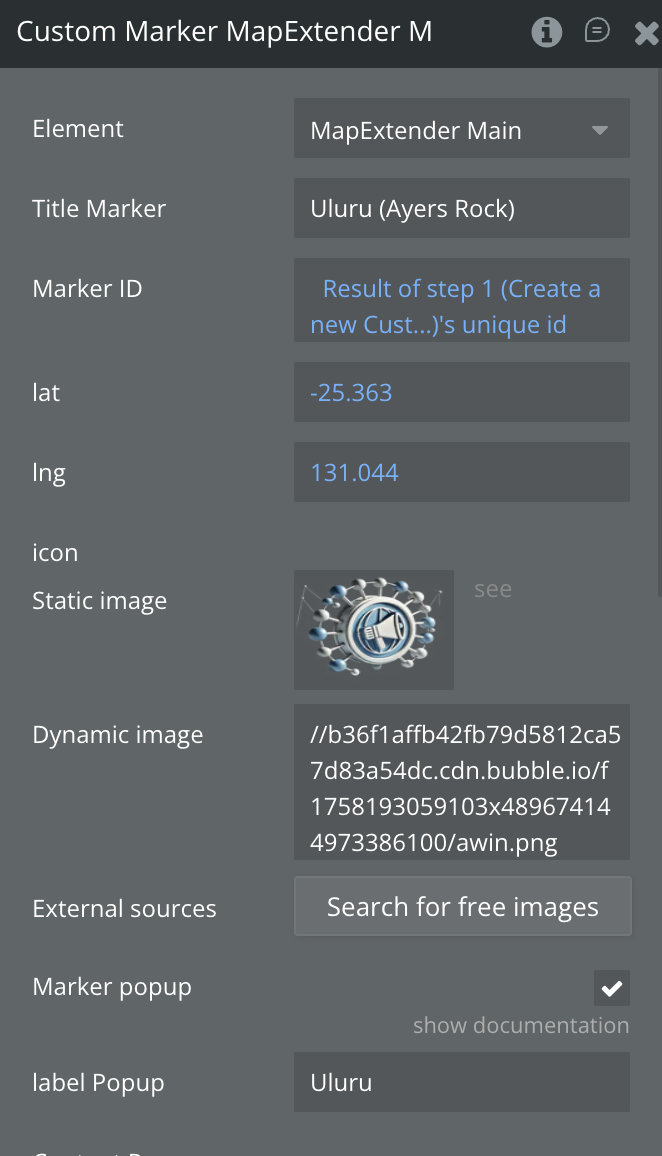
22. Custom Marker
Creates a highly customizable marker with full control over appearance and popup content.
Fields:
Title
Description
Type
Marker ID
Unique identifier for this marker
Text
Title Marker
The title text for the marker (displayed on hover)
Text
lat
The latitude coordinate for the marker
Number
lng
The longitude coordinate for the marker
Number
icon
The image to use as the marker icon
Image
Marker popup
Whether to show a popup when the marker is clicked
Boolean
label Popup
The label text for the popup
Text
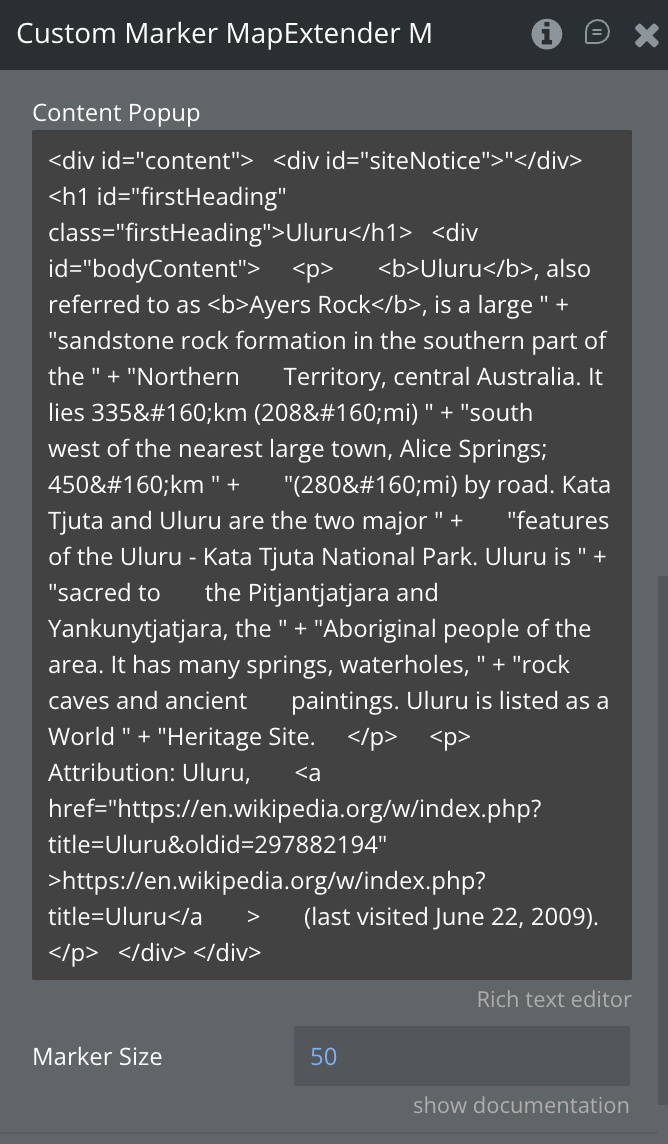
Content Popup
HTML content to display in the popup
Text
Marker Size
The size of the marker icon in pixels
Number
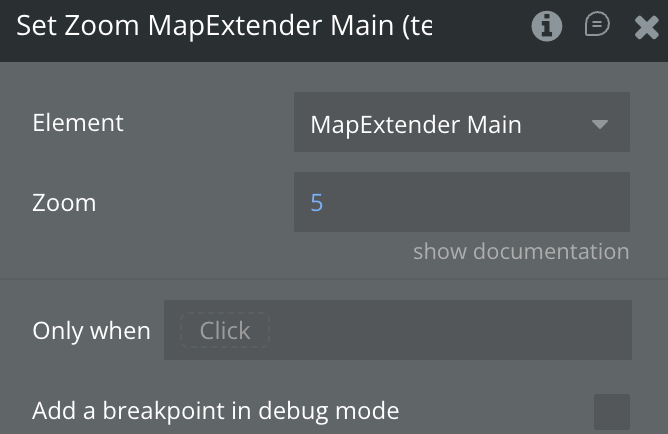
23. Set Zoom
Changes the map's zoom level programmatically.
Fields:
Title
Description
Type
Zoom
The zoom level to set (1 = World, 5 = Continent, 10 = City, 15 = Streets, 20 = Buildings)
Number
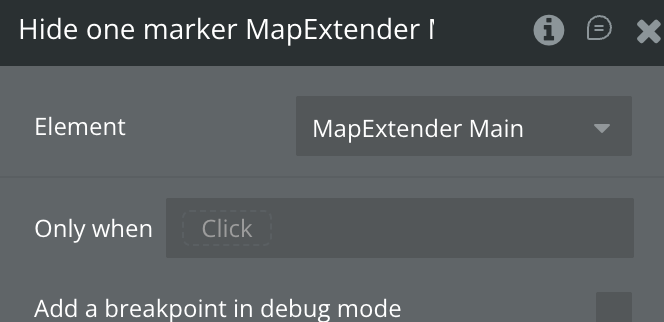
24. Hide one marker
Hides the most recently clicked marker from the map.
This action has no input fields. It uses the last clicked marker stored in state.
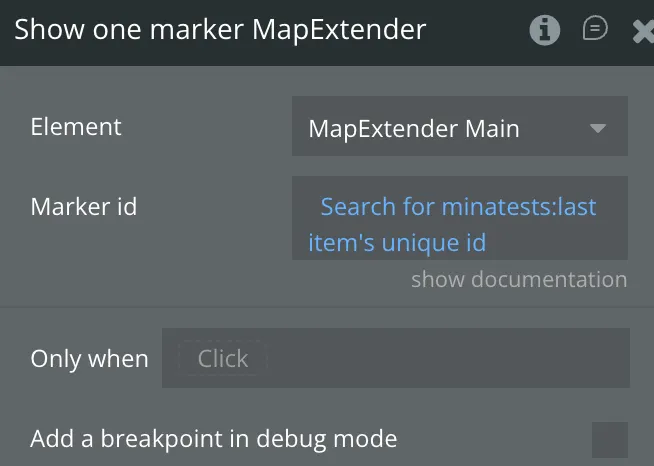
25. Show one marker
Shows a previously hidden marker by its ID.
Fields:
Title
Description
Type
Marker id
The ID of the marker to show (use the "Hide marker id" state)
Text
26. Show markers
Shows all markers that were previously hidden.
This action has no input fields. It displays all markers including clustered ones.
27. Add Routes
Adds multiple routes to the map simultaneously from a list of database items.
Fields:
Title
Description
Type
Data source
Custom data type containing route information
Custom Type
App Data
List of items from database containing route data
List
Origins
Field containing the starting geographic address for each route
Custom Field
Destinations
Field containing the ending geographic address for each route
Custom Field
Waypoints
Field containing intermediate stops for each route (one per line)
Custom Field
List Waypoints
Field containing a list of waypoint geographic addresses from database
Custom Field
Route color
Field containing the color for each route line
Custom Field
Travel Model
Mode of transportation: DRIVING, BICYCLING, TRANSIT, or WALKING
Dropdown
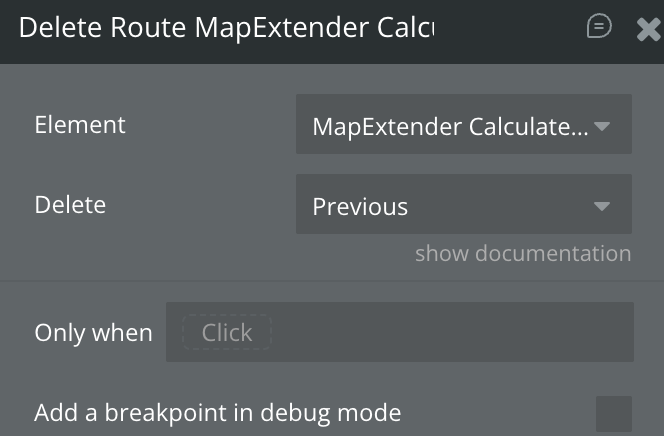
28. Delete Route
Removes either the most recently created route or all routes from the map.
Fields:
Title
Description
Type
Delete
Choose "Previous" to delete the last created route or "All" to delete all routes
Dropdown
Exposed states
Name
Description
Type
Map as URL
Returns the current map location as a Google Maps URL
Text
Mileage
Contains the traveled route as JSON data (can be saved and redrawn later)
Text
Directions Distance
The total distance of the current route in meters
Number
Directions Duration
The total travel time of the current route in seconds
Number
Latitude
The current latitude during user tracking
Number
Longitude
The current longitude during user tracking
Number
Last Clicked Marker
The unique ID of the most recently clicked marker
Text
Added Geo JSON ID
The ID of the most recently added GeoJSON layer
Number
Hide marker id
The ID of the most recently hidden marker
Text
List Directions Distance
List of distances for multiple routes in meters
Number List
List Directions Duration
List of travel times for multiple routes in seconds
Number List
Clicked lat
The latitude coordinate of the location clicked on the map
Number
Clicked lon
The longitude coordinate of the location clicked on the map
Number
Element Events
Name
Description
Geolocation is not supported
Triggered when the user's browser doesn't support geolocation
Geolocation find is not allowed
Triggered when the user denies permission to access their location
Directions Failed
Triggered when route calculation fails (invalid addresses, no route available, etc.)
Marker Clicked
Triggered when any marker on the map is clicked
Map Is Loaded
Triggered when the map has fully loaded and is ready for interaction
Map Left Clicked
Triggered when the user left-clicks (or taps) on the map
Map Right Clicked
Triggered when the user right-clicks on the map
Hide Context Menu
Triggered when the context menu should be hidden
Workflow example
Here are several workflow examples to help you get started with the Google Map Extender plugin:
Basic Map Setup with Custom Marker
Step 1: Set up Map Element
Add a Bubble Map element to your page with Element ID "map"
Step 2: Set up Map Extender Element
Add the Map Extender element with these settings:
Google Map ID: "map"
Initial Latitude: 53
Initial Longitude: 9
Initial Zoom: 4
Step 3: Create workflow
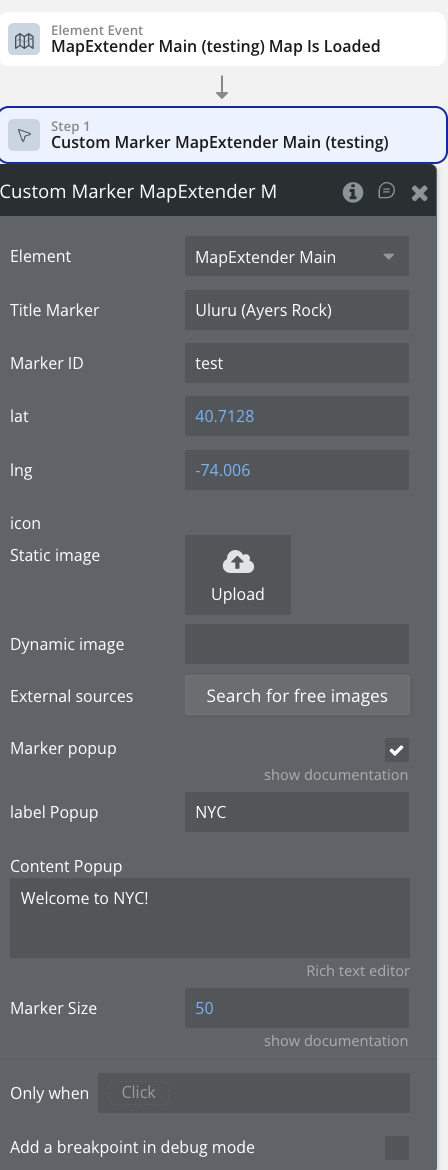
Create a workflow "When Map Extender A Map Is Loaded" with action "Map Extender - Custom Marker" with:
lat: 40.7128
lng: -74.0060
Title: "New York City"
Marker popup: checked
Content Popup: "Welcome to NYC!"
Step 4: Test the Workflow
Preview your page
Trigger your workflow
Verify the new custom marker appear
How to Add a Marker from Database
This guide explains how to dynamically add a new marker to your map from Database
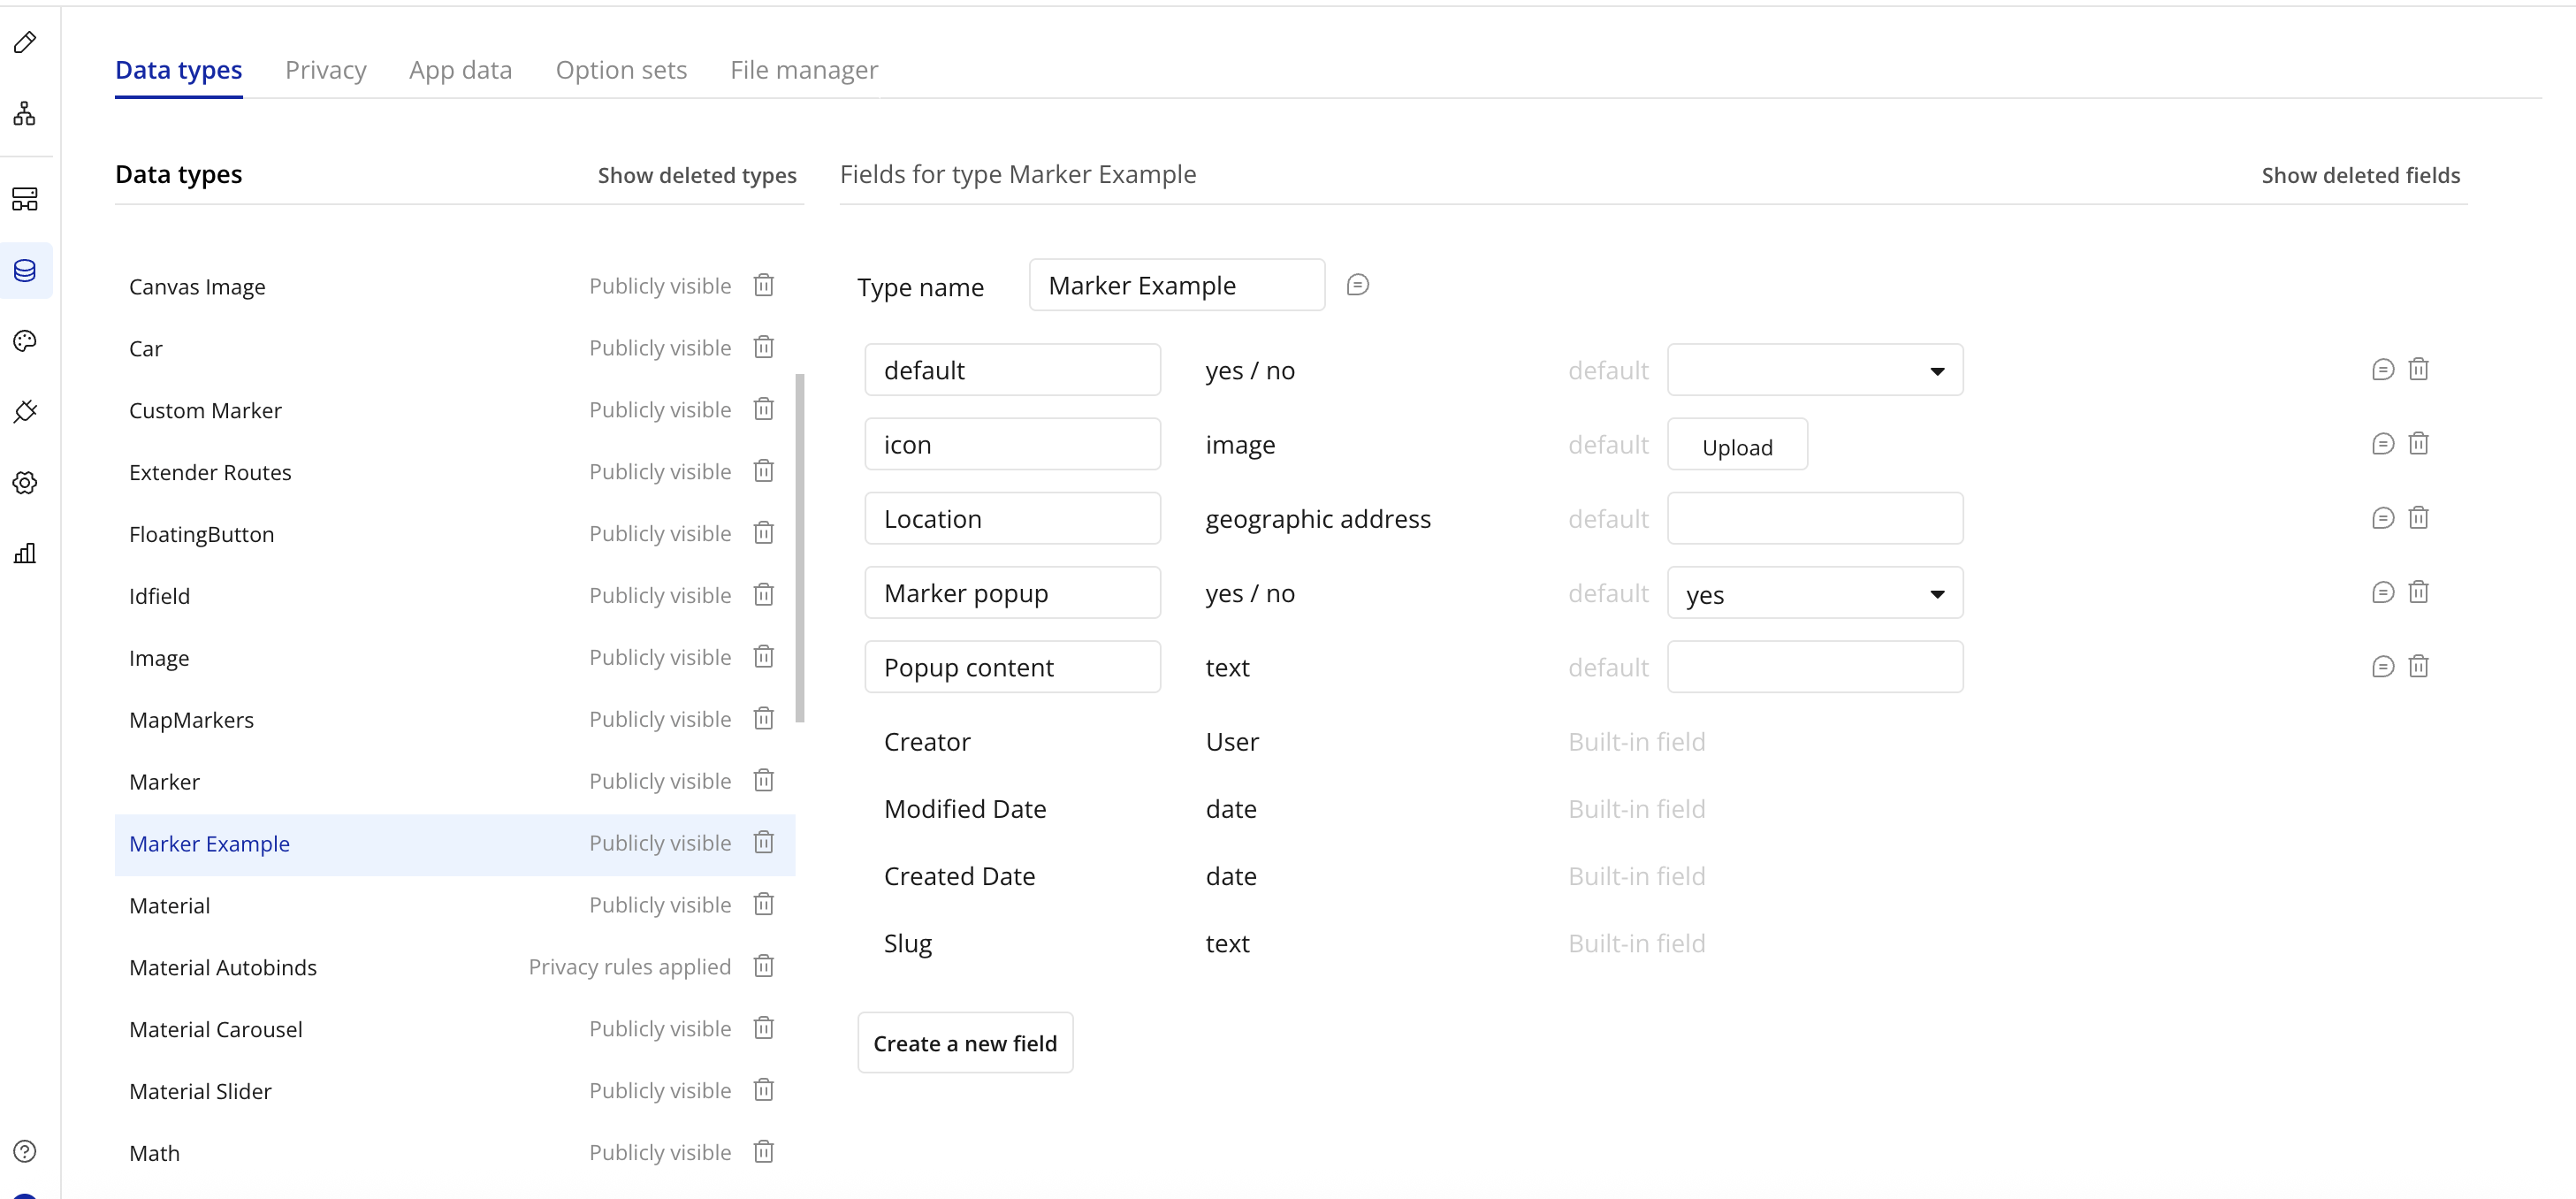
Step 1: Create a Marker Data Type
Open the Database and create a new Data Type with the following fields:
Default - Yes/No - This field is optional
Icon - Image
Location - geographic address
Marker popup - text
Popup content - text
Step 2: Set the Marker Data Type into the map
In the MapExtender element, set the created Data Type into the Marker Type field
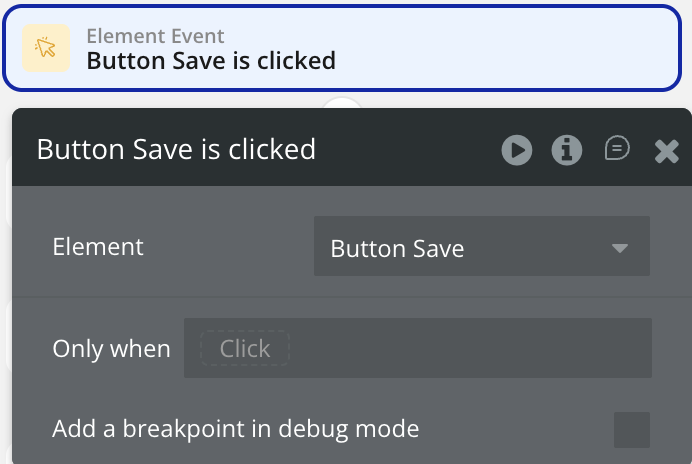
Step 3: Create the Workflow Trigger
Choose your trigger event, such as:
Button click ("When Button 'Add Series' is clicked")
Page load condition ("When Page is loaded" with conditional)
Custom event
Map click event ("When Map is clicked")
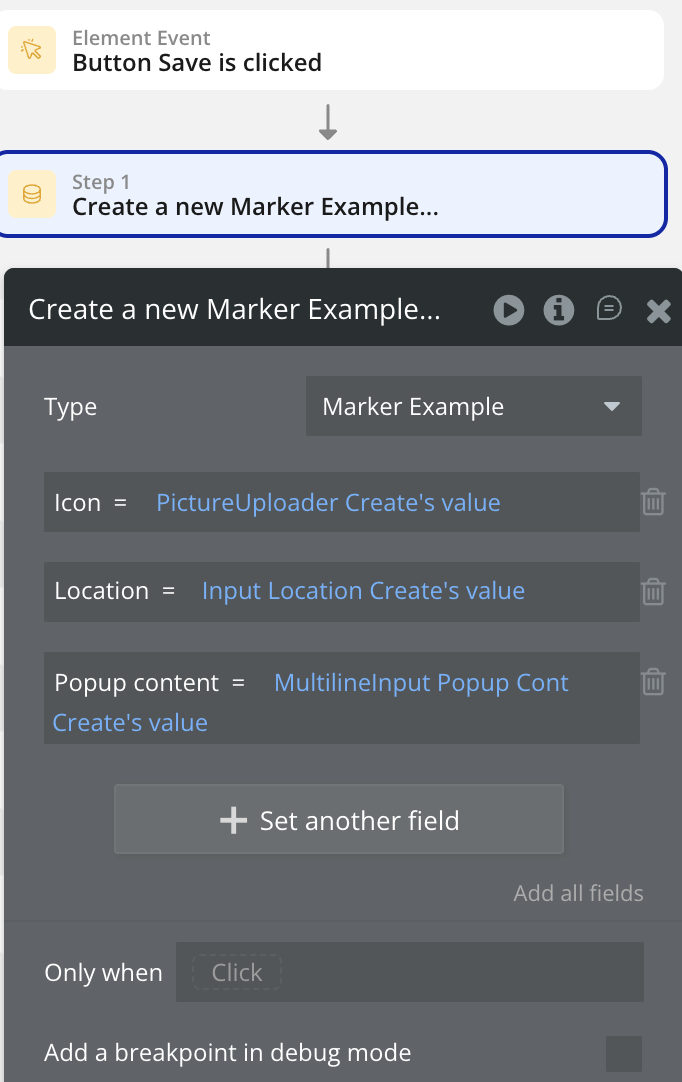
Step 4: Save a marker into the DB
In your workflow, add the “Create a new thing” Bubble action to store the details of the newly created marker in your database. This ensures that each marker is not only displayed on the map temporarily but also saved for later use.
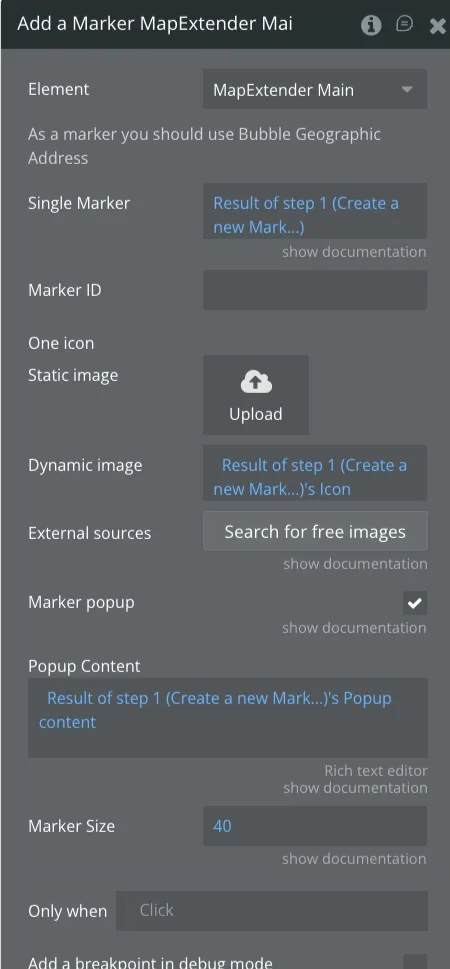
Step 5: Add the “Add Marker” Action
In your workflow, add the action that appends the new marker to the map instance. This action will use the marker’s coordinates, icon, and optional popup content.
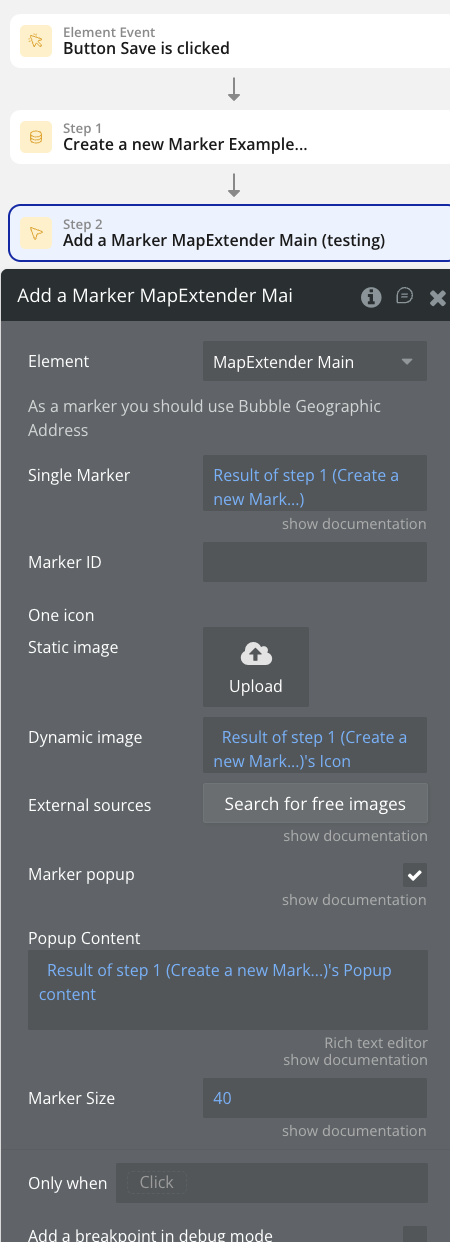
Step 6: Configure the Marker Properties
Set up the marker’s data source and visual styling with the result of the saved ones into database:
Single Marker – use result of the created Marker
Marker ID – provide a unique ID for the marker (can be auto-generated)
Marker Size & Icon – use result of the created Marker Icon and size
Popup Content –use result of the created Marker Popup content
Step 7: Test the Workflow
Preview your page
Trigger your workflow
Verify the new marker appear
How to Add a Marker from Search Box Element
This guide explains how to dynamically add a new marker to your map from a Search Box element
Step 1: Set the Marker Type into the map
In the MapExtender element, set the Marker Type field to geographic address
Step 2: Create the Workflow Trigger
Choose your trigger event, such as:
Button click ("When Button 'Add Series' is clicked")
Page load condition ("When Page is loaded" with conditional)
Custom event
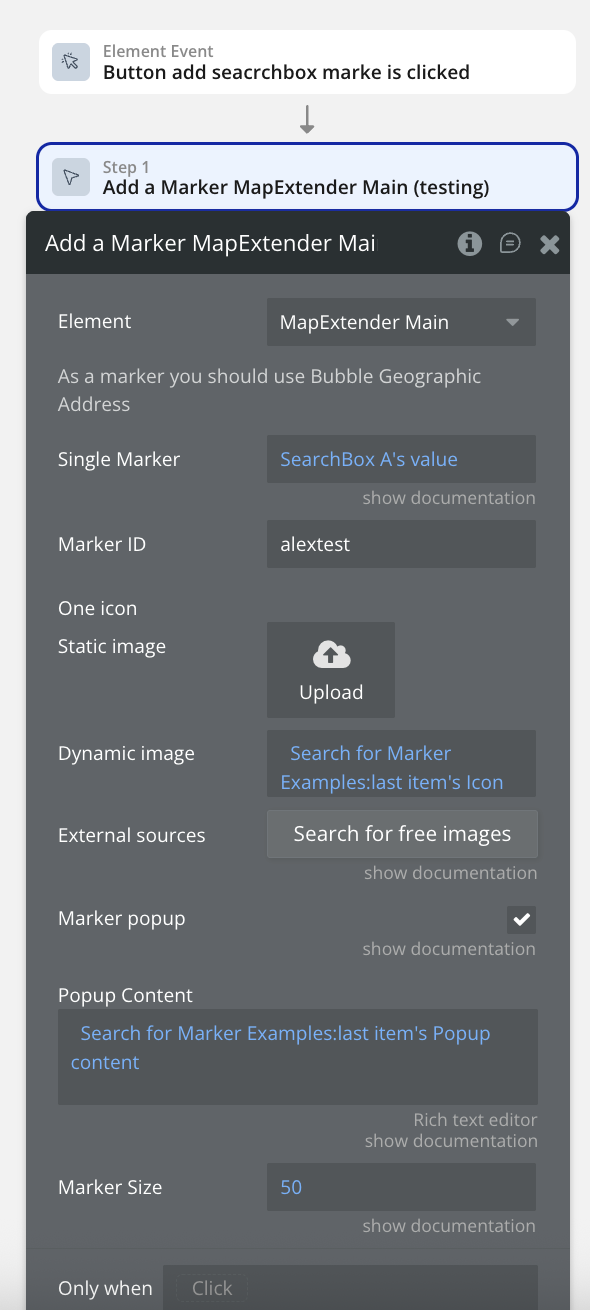
Step 3: Add the “Add Marker” Action
In your workflow, add the action that appends the new marker to the map instance. This action will use the marker’s coordinates, icon, and optional popup content.
Step 4: Configure the Marker Properties
Set up the marker’s data source and visual styling:
Single Marker – use value of the Search Box element
Marker ID
Marker Size & Icon
Popup Content
Step 5: Test the Workflow
Preview your page
Trigger your workflow
Verify the new marker appear
Real-time User Tracking
Step 1: Set up Start Tracking
Add a button "Start Tracking"
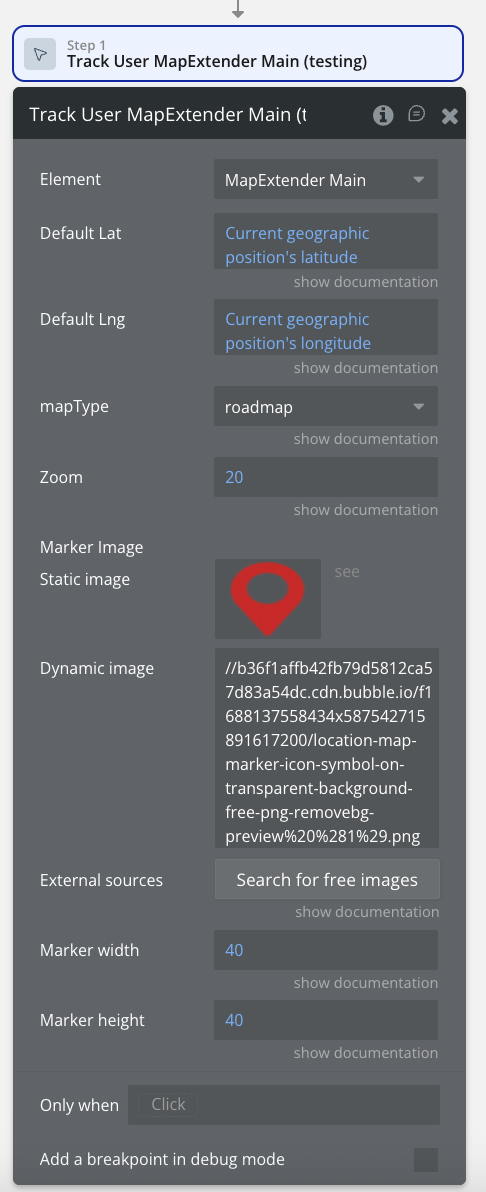
Step 2: Create workflow to start tracking
Create workflow "When Button Start Tracking is clicked" with action "Map Extender - Track User" with default settings
Step 3: Set up Stop Tracking
Add a button "Stop Tracking"
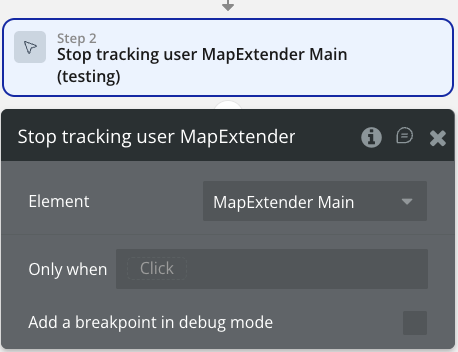
Step 4: Create workflow to stop tracking
Create workflow "When Button Stop Tracking is clicked" with action "Map Extender - Stop tracking user"
Step 5: Test the Workflow
Preview your page
Trigger your workflow
Verify the live location
Display Markers from Database
Step 1: Create a Marker Data Type
Open the Database and create a new Data Type with the following fields:
Default - Yes/No - This field is optional
Icon - Image
Location - geographic address
Marker popup - text
Popup content - text
Step 2: Create the Workflow
Choose your trigger event, such as:
Button click ("When Button 'Add Series' is clicked")
Page load condition ("When Page is loaded" with conditional)
Custom event
Map click event ("When Map is clicked")
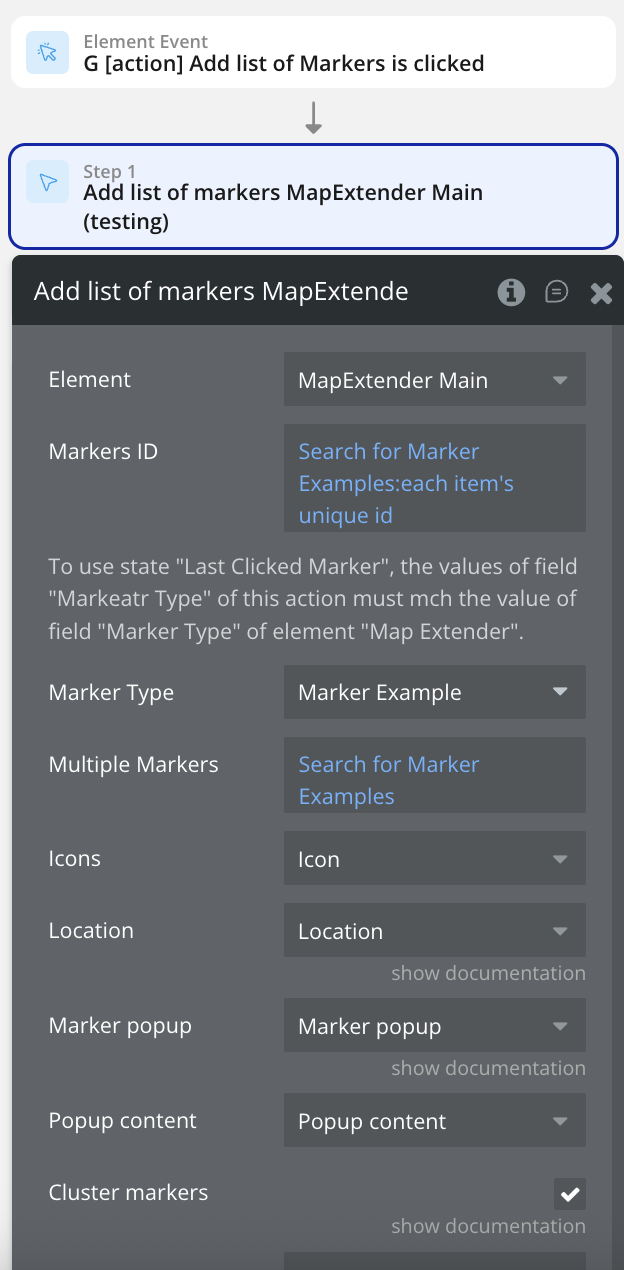
Add action "Map Extender - Add list of markers" with:
Multiple Markers: Do a search for Locations
Markers ID: Do a search for Marker Example:each items unique_id
Marker Type: Location
Icons: Current Location's icon
Location: Current Location's address
Marker popup: checked
Popup content: Current Location's name
Cluster markers: checked
Step 3: Test the Workflow
Preview your page
Trigger your workflow
Verify the markers appear
Create Route with Directions
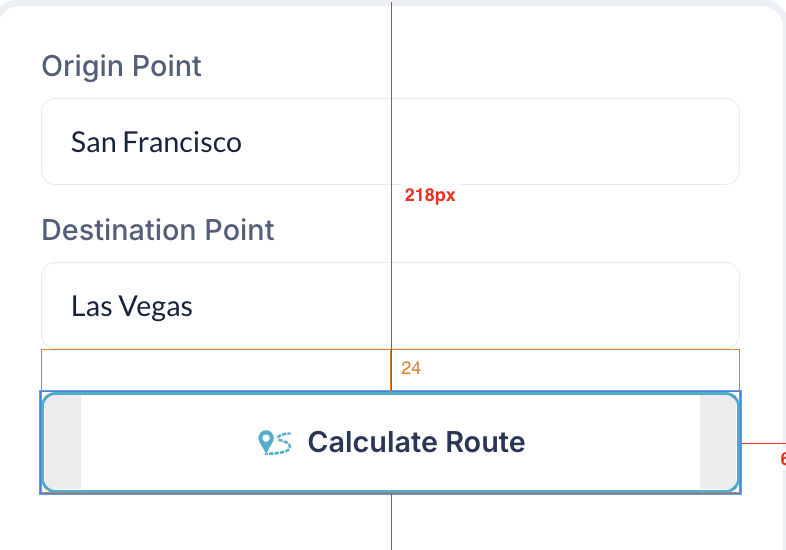
Step 1: Initial Setup
Add two input fields: "Origin Input" and "Destination Input".
Add a button "Calculate Routes"
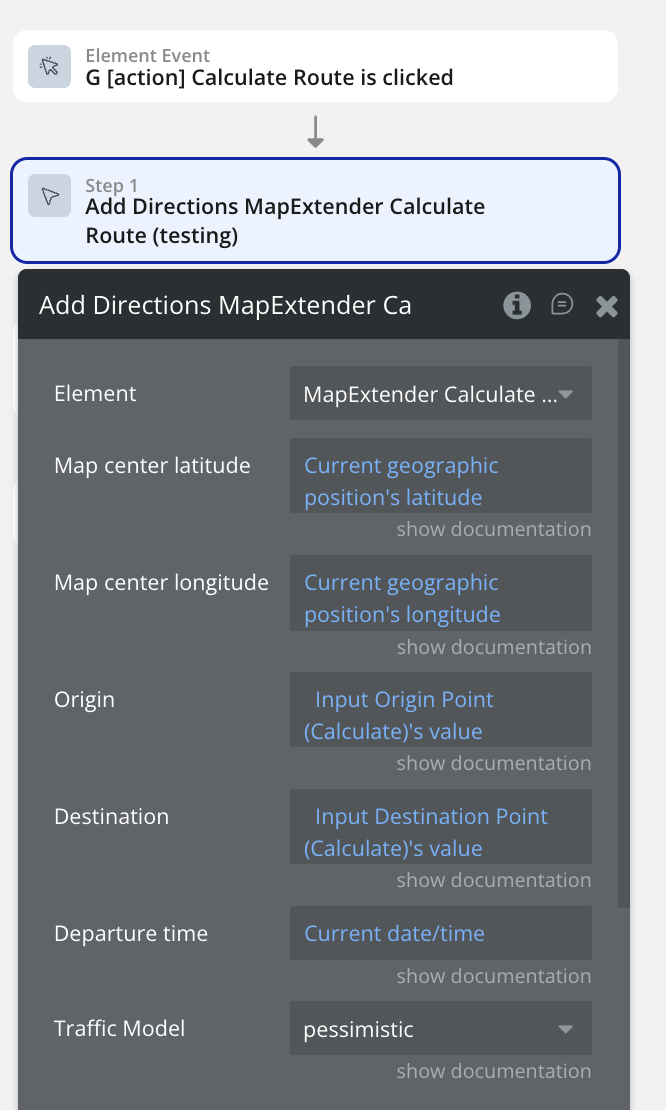
Step 2: Create workflow
For the button create a workflow with the "Map Extender - Add Directions" action with:
Origin: Input Origin Point value
Destination: Input Destination Point value
Step 3: Display Routes
Add a text element to display "Route distance: Map Extender A's Directions Distance meters"
Add a text element to display "Travel time: Map Extender A's Directions Duration seconds"
Step 4: Test the Workflow
Preview your page
Trigger your workflow
Verify the routes appear
Changelogs
Update 08.10.25 - Version 1.63.0
Added Support for Raw SearchBox Addresses.
Update 03.10.25 - Version 1.62.0
Corrected behavior of Last Clicked Marker so it no longer always returns an array of IDs.
Update 26.09.25 - Version 1.61.0
new Marker ID field.
Update 27.08.25 - Version 1.60.0
changed type of "Last Clicked Marker" into text.
Update 19.11.24 - Version 1.59.0
Minor update(Marketing update).
Update 12.11.24 - Version 1.58.0
New marker ID field.
Update 20.07.24 - Version 1.57.0
Minor update.
Update 19.06.24 - Version 1.56.0
Minor update.
Update 10.06.24 - Version 1.55.0
Updated demo/service links.
Update 03.06.24 - Version 1.54.0
Added "Marker size" field for actions: "Add a Marker", "Add list of markers", "Custom Marker".
Added description to fields in the 'Add list of markers' action.
Update 24.08.21 - Version 1.30.0
Added a new action "Add a list of markers" and a new option to use custom icons for this.
Update 28.07.21 - Version 1.29.0
Updated description.
Update 16.07.21 - Version 1.28.0
Added new action 'Center Map to' and fixed issue with GeoJSON.
Update 14.07.21 - Version 1.27.0
Updated icon.
Update 22.06.21 - Version 1.26.0
Fixed issue with displaying maps.
Update 09.02.21 - Version 1.25.0
Updated icon.
Update 10.12.20 - Version 1.24.0
Added 6 new actions, 1 state. See plugin documentation for more details.
Update 11.11.20 - Version 1.23.0
Fixed kml file display.
Update 21.04.20 - Version 1.22.0
Documentation fixes.
Update 03.02.20 - Version 1.21.0
Update - adding single marker or multiple markers are now independent from each other..
Update 30.01.20 - Version 1.20.0
Added field "Marker Type" to the plugin element as a helper for "Add Marker(s)" action and "Last Clicked Marker" state, for returning custom user states..
Update 21.01.20 - Version 1.19.0
Update - added new features (Marker Clicked event, Last Clicked Marker state).
Update 10.01.20 - Version 1.18.0
Fix - first time rendering the map fixed..
Update 10.01.20 - Version 1.17.0
Fix - map rendering fixed.
Update 09.01.20 - Version 1.16.0
Update - new actions: Add Markers, Toggle Markers Visibility. New features: Map Type, Custom Style.
Update 12.12.19 - Version 1.15.0
Update - unit system removed from the add directions action.
Update 04.12.19 - Version 1.14.0
Fix - add directions fixes for maps in popups.
Update 05.11.19 - Version 1.13.0
Minor improvements.
Update 30.10.19 - Version 1.12.0
please update, minor fixes. .
Update 29.07.19 - Version 1.11.0
updated description.
Update 23.07.19 - Version 1.10.0
Added field Waypoints DB Geo (optional) in action, Add Directions. This is a List of geographic addresses from data base. Changed sorting method for Waypoints field - text. Now If there are more than one waypoint, write each one on new line without comma..