Agora.io is on a mission to change the way the world communicates. Agora is known for developing the industry-leading real-time communication framework that serves over 10 billion minutes a month of real-time video, audio, and live interactive broadcasting.
❕
The AgoraRTC element is represented here based on the New Agora version - V4.5.
Prerequisites
You must have an account with Agora.IO to interact with the API. Create your development account at: https://docs.agora.io/en
❕
Note: There are certain factors that affect the plugin's workload possibilities such as Bubble application plan, user’s connection bandwidth, type of connection, and Agora limitations related to device and browser / OS version.
Please follow Agora's and its plugin's documentation carefully to properly configure the plugin.
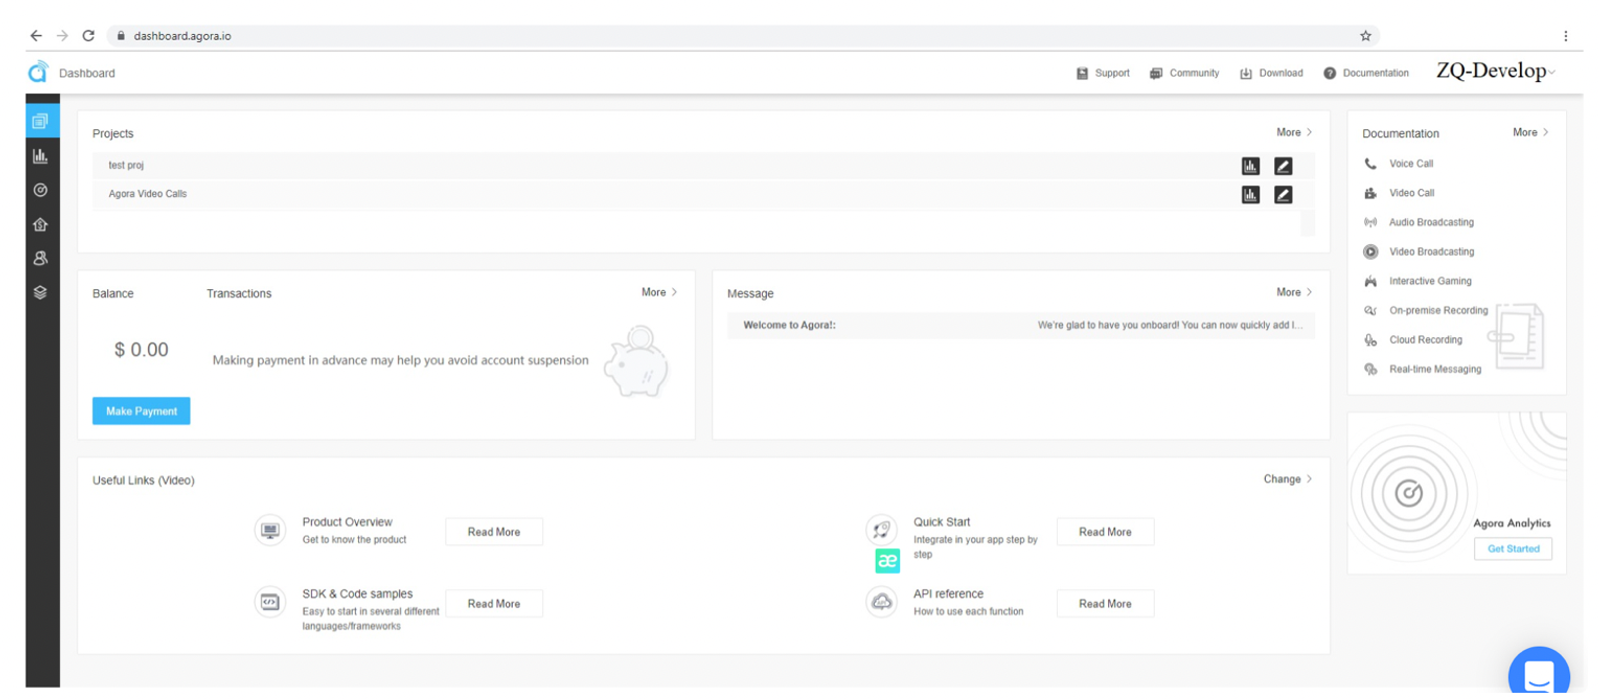
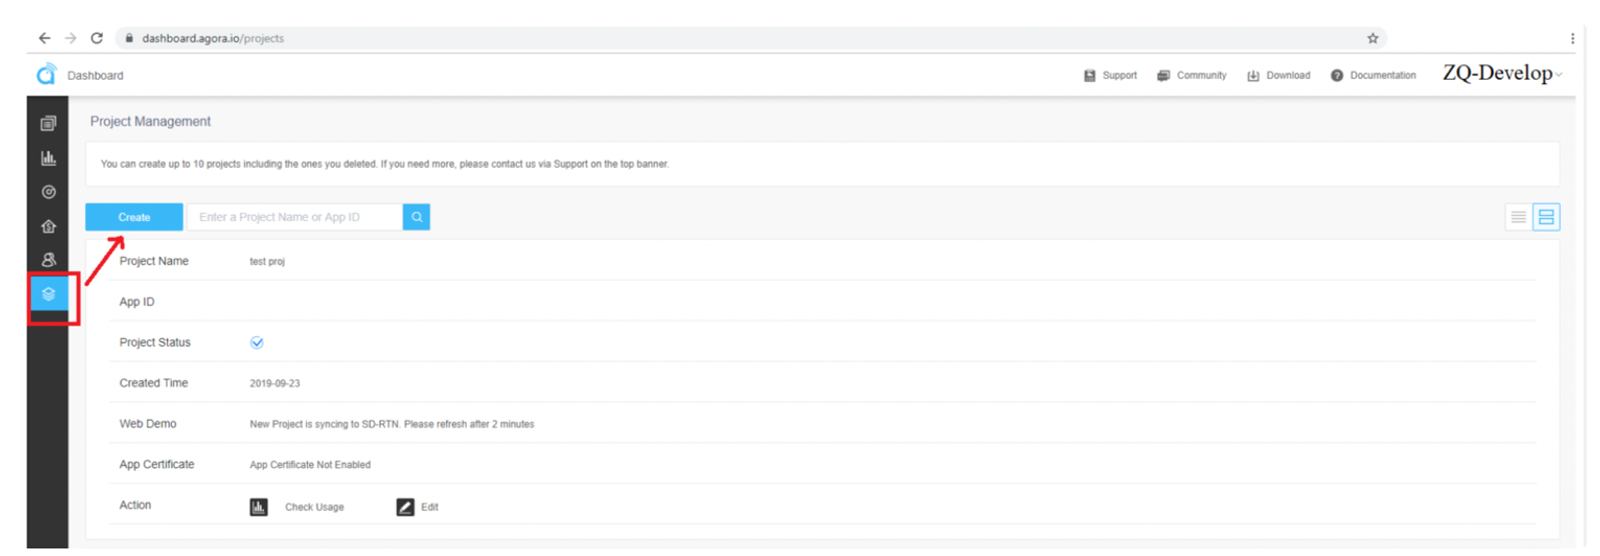
2. Open the Console (https://console.agora.io), go to the Project Management tab, and create a new project.
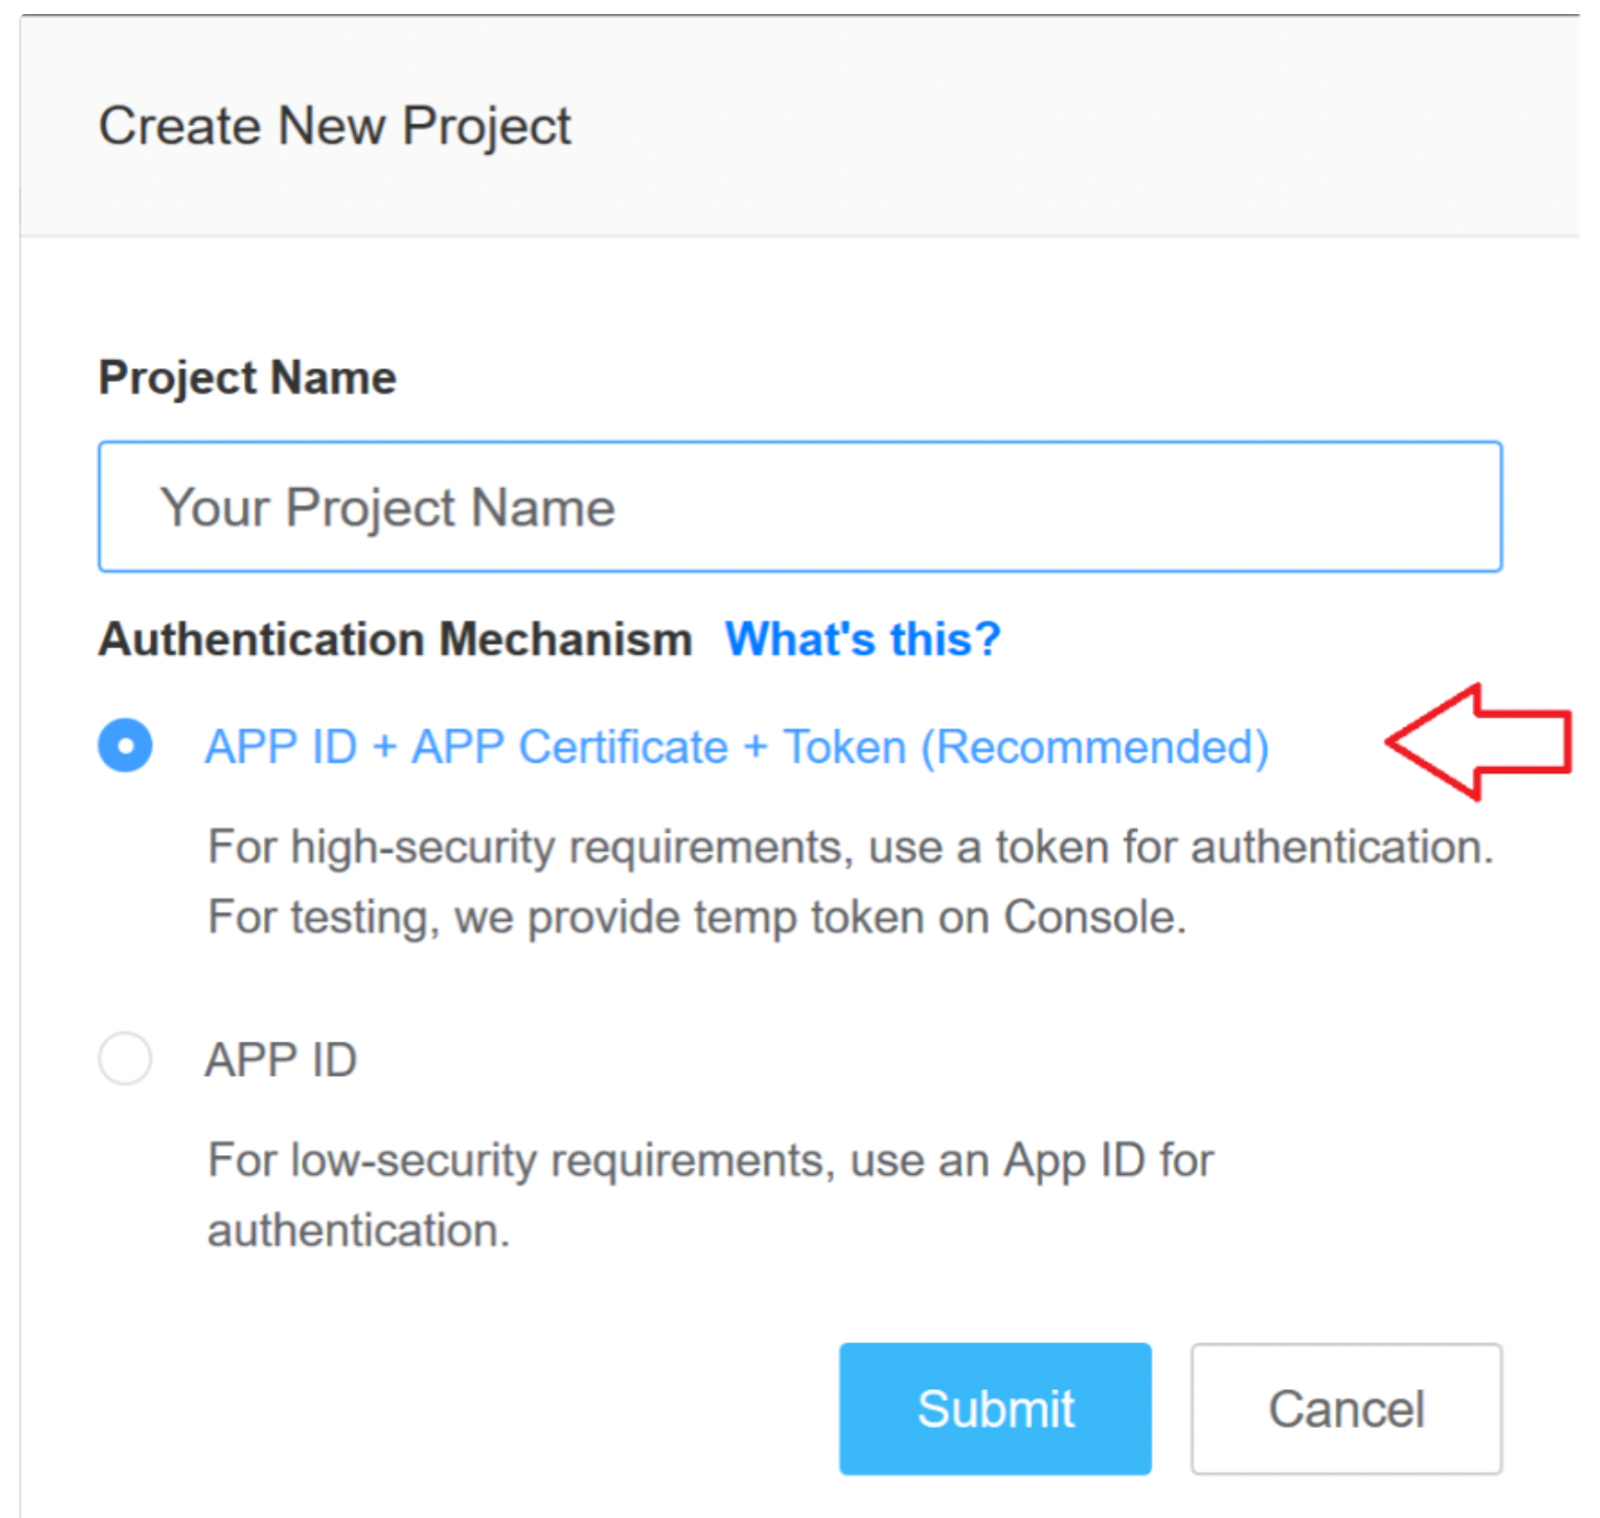
3. In the pop-up window enter your project name and select APP ID + APP Certificate.
❗
Note: Create an APP ID + APP Certificate application in the project management dashboard for Sthe treaming Component. 4. Get the App ID and APP Certificate for your project.
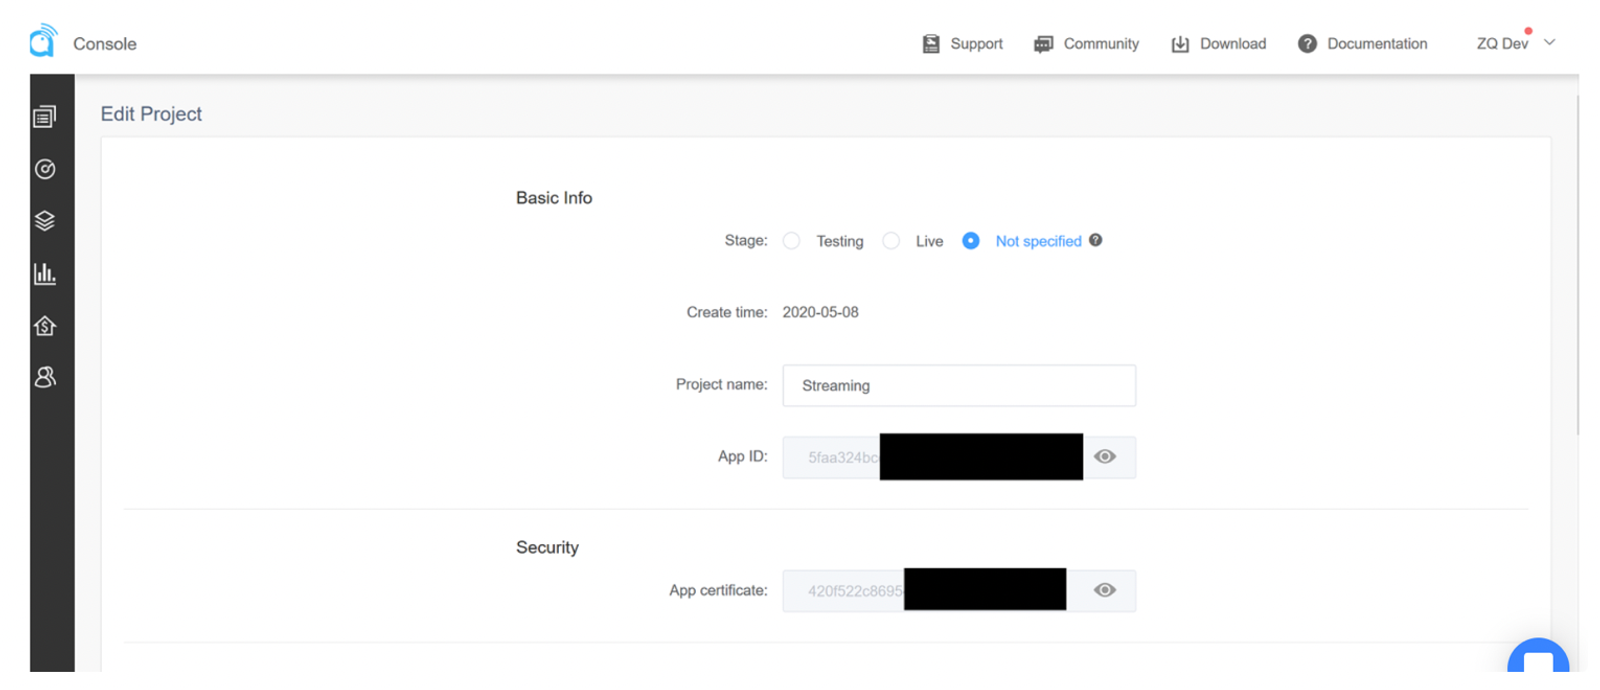
4. Get the App ID and APP Certificate for your project.
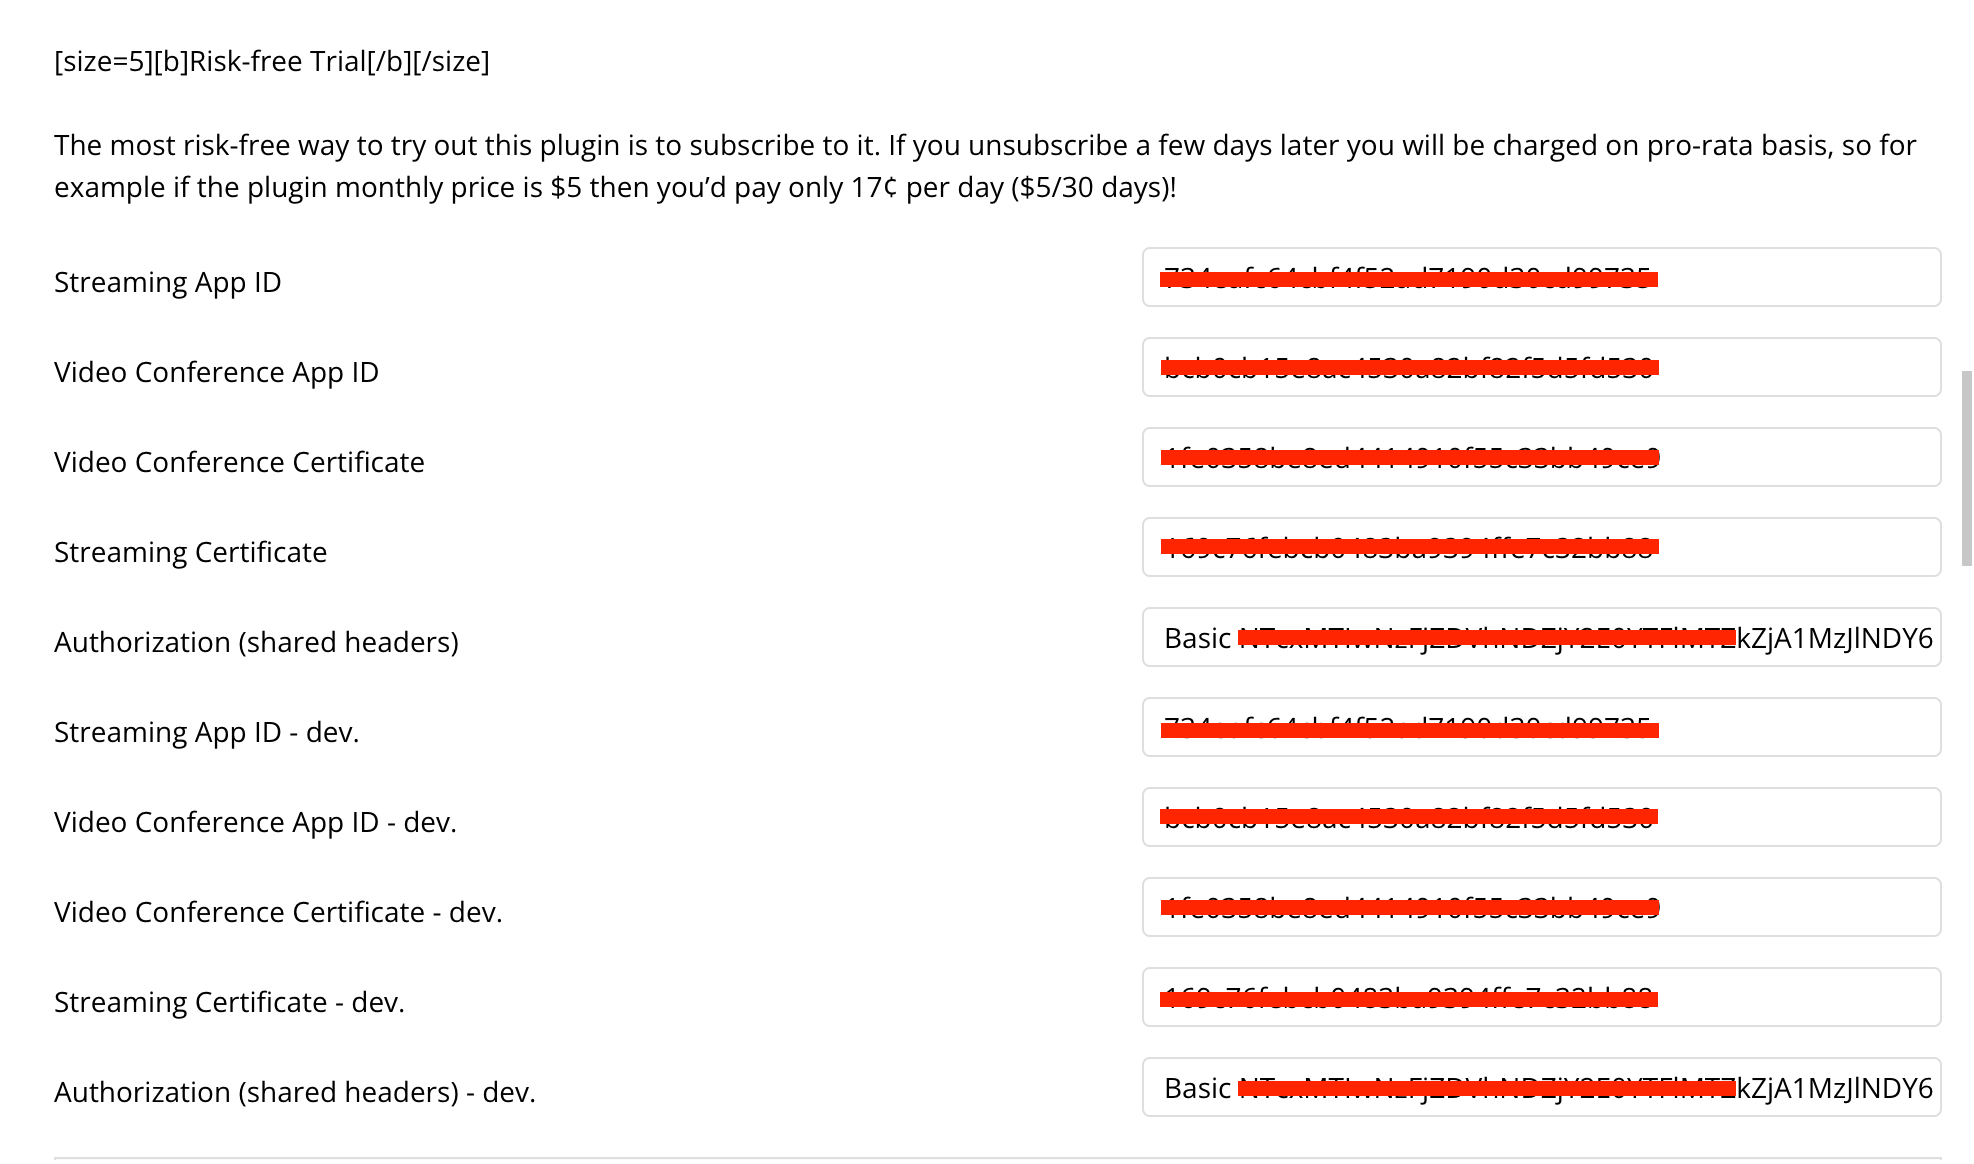
5. Place App ID and App Certificate in the Bubble > plugins settings tab:
❕
In order to establish the connection between Application and Agora, please wait up to 10 minutes.
You're all set to use plugin actions, events, and states.
Streaming Component Setup
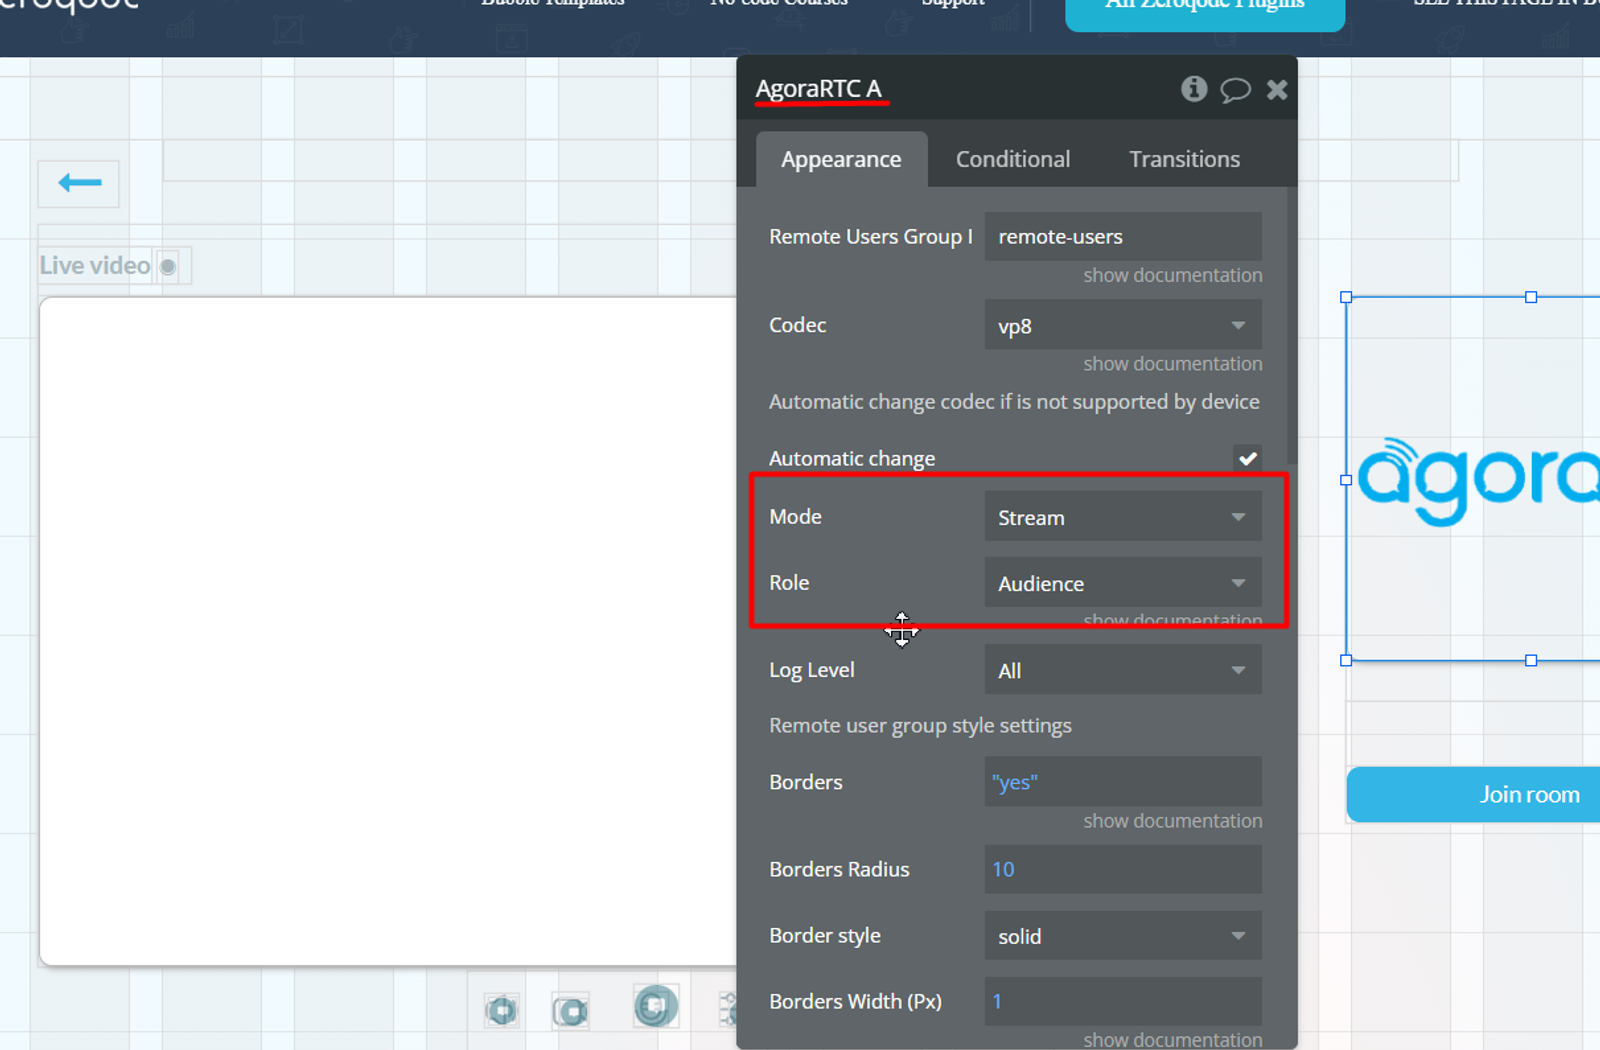
Place the Element on the page and set the mode to 'Stream' and the role to 'Host'.
2. Place to another page Element and set the mode to 'Stream' and role to 'Audience'.
❕
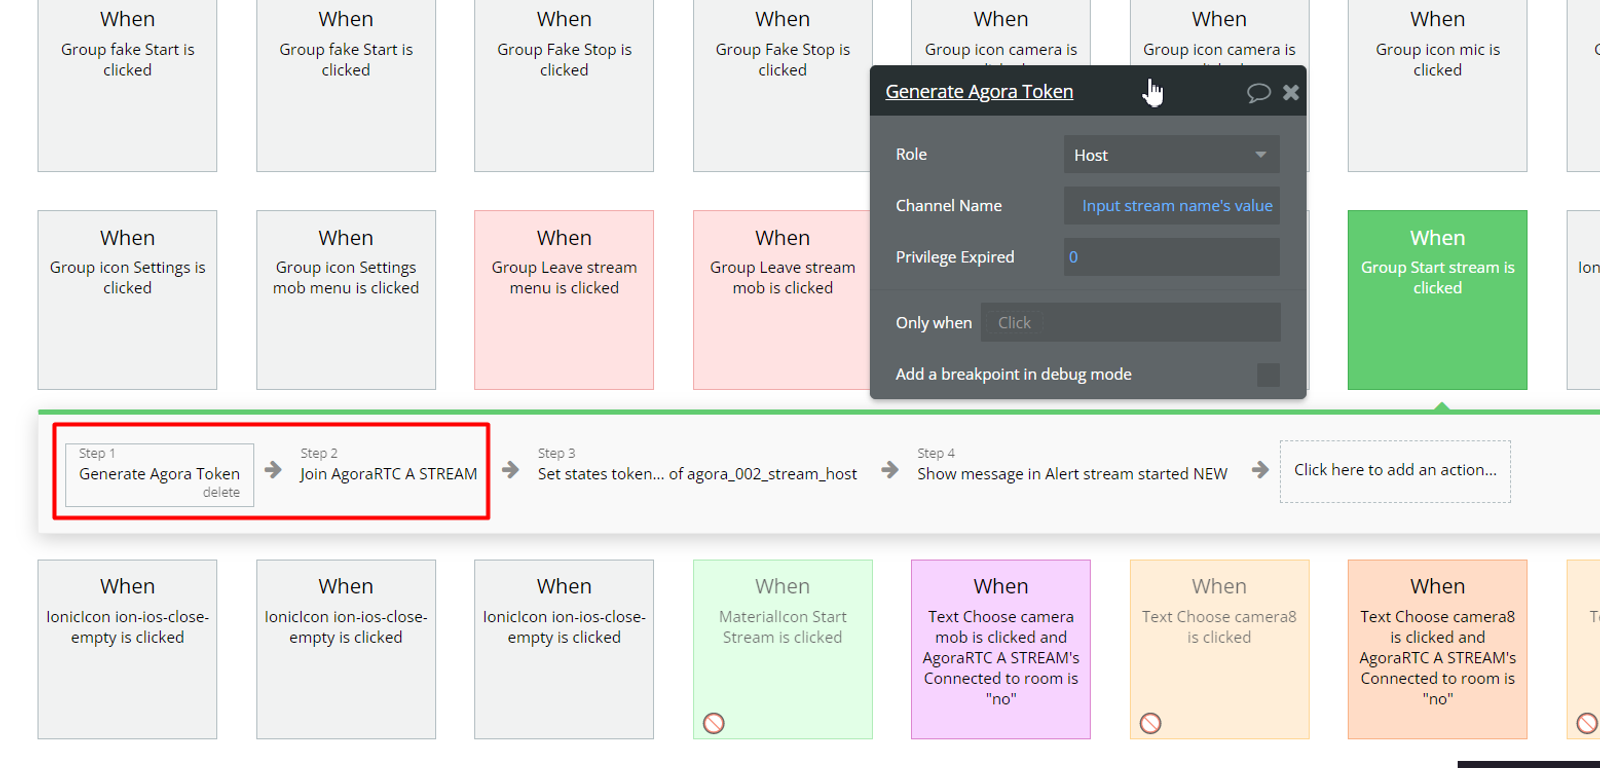
For the Streaming it's needed to generate a token before starting.
Recommendation: Do not use parameters from the URL as the name of the channel (room) or part of it.
Video Conference Setup
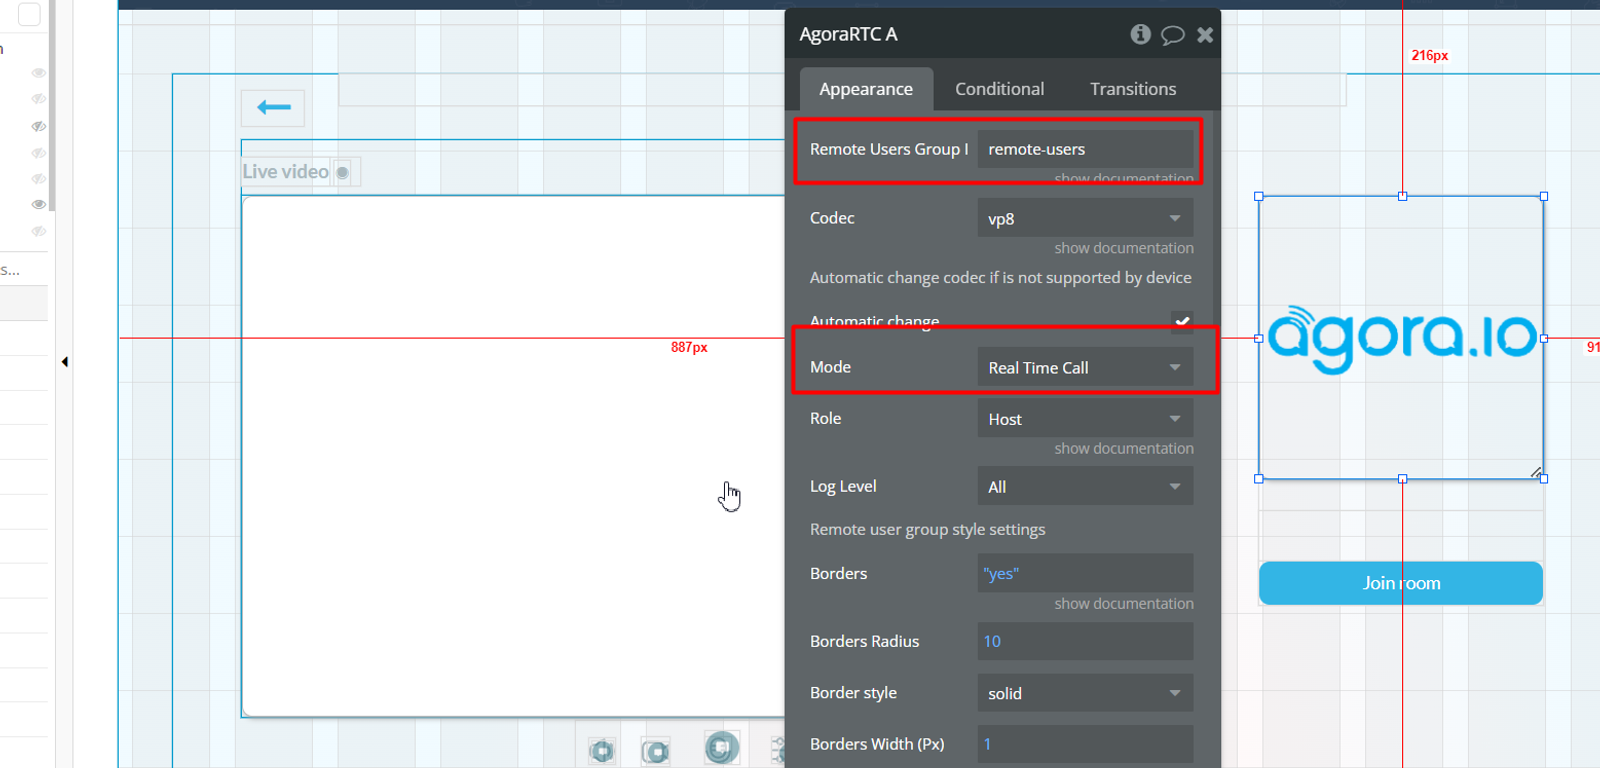
Place the Element to the page, set the mode to Real-time Call, and set a unique id for the remote user group.
/
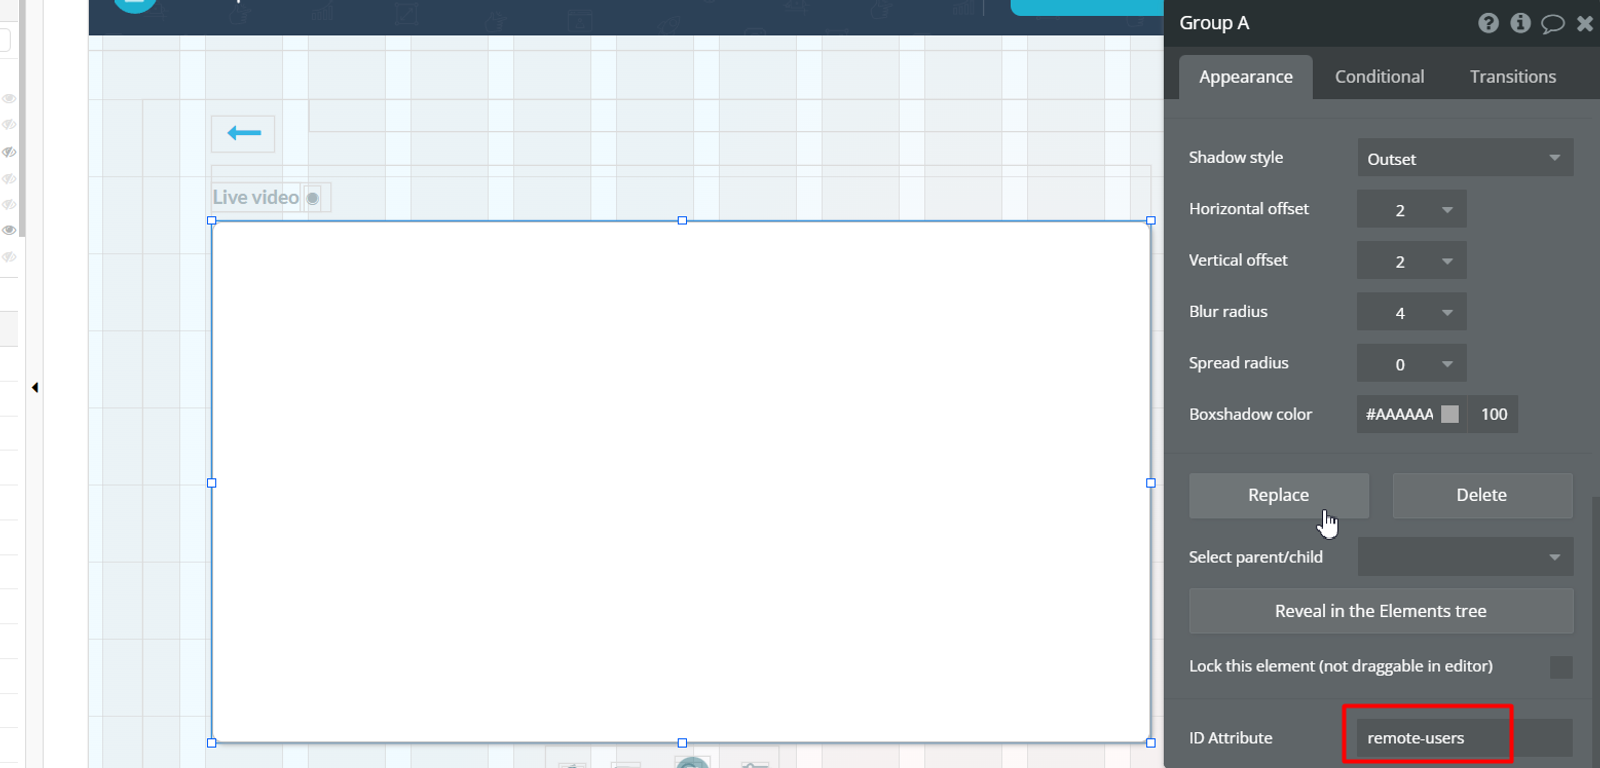
Add a group to the page and set its ID Attribute.
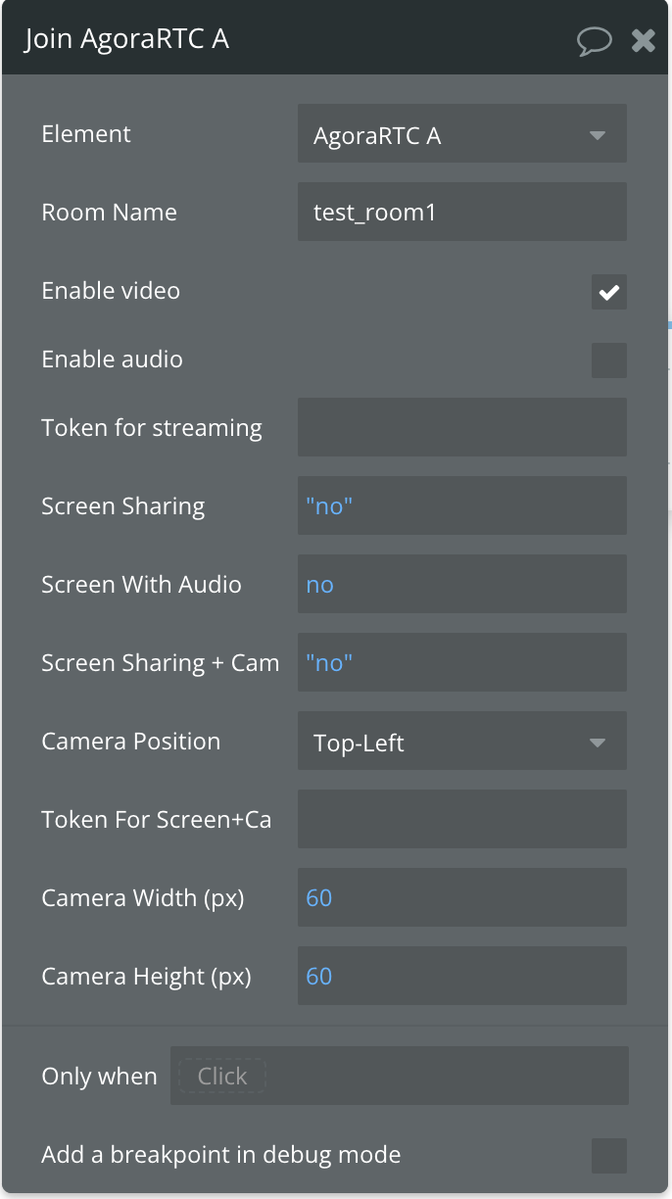
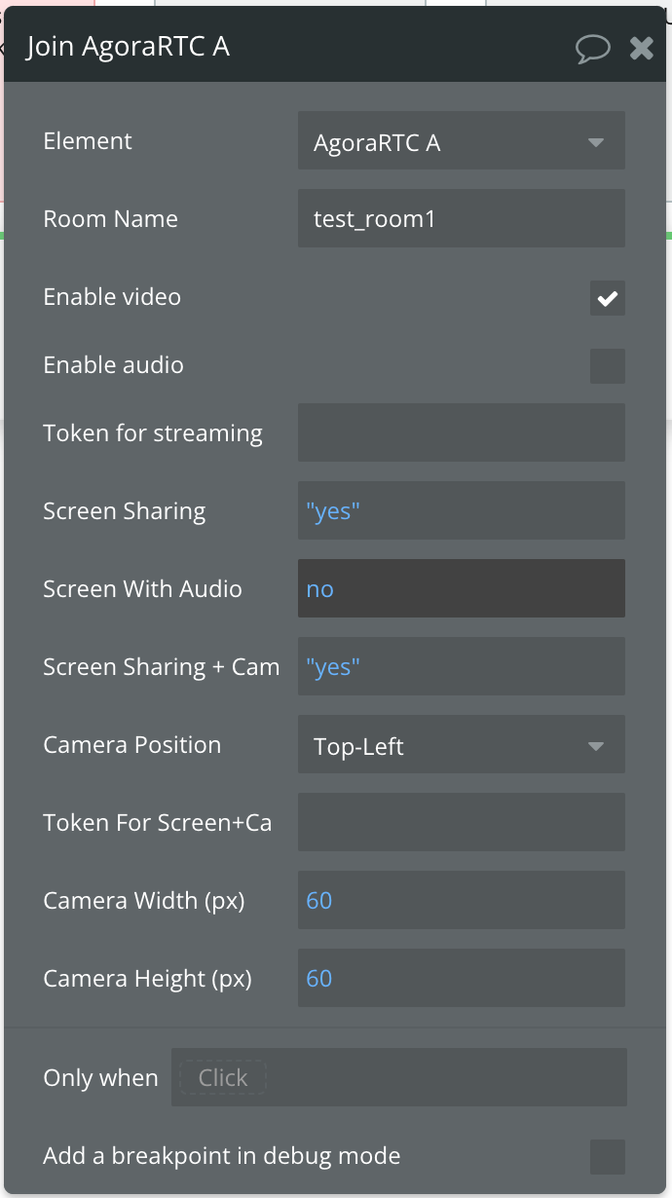
Add a button on the page to start a real-time call, use the “Join Room” plugin action. There might be a few setup variants of this button:
just a video
video + screen sharing
just screen sharing
Note, you can not switch from video only to video + screen sharing during a call. You need to stop the current conference and initiate a new one with the appropriate action setup.
Since AgoraRTC version 4 and below uses those dependencies that browsers now no longer support, version 4.5+ of the library was released. The new AgoraRTC element works on the latest up-to-date version.
❕
The new version of the library allows using only one element for both streaming and real-time calls.
Fields
Title
Description
Type
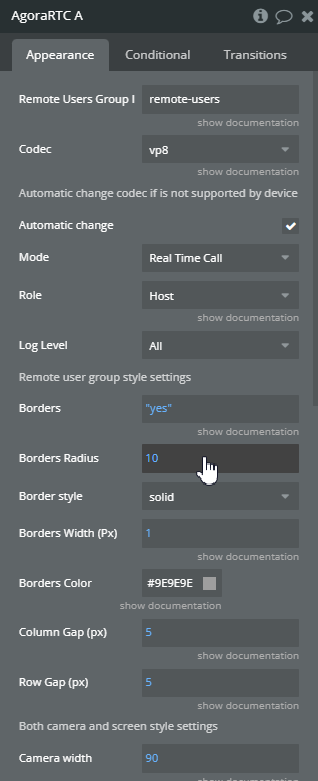
Remote Users Group ID
Group where will be displayed video tracks of remote users.
text
Codec
The codec that the Web browser uses for encoding
dropdown
Automatic change
Change automatic supported by the Web browser codec.
yes\no
Mode
Element use mode.
dropdown
Role
If the mode is "Stream" this field change role of the user.
dropdown
Log level
Sets the Agora log mode.
dropdown
Remote user group style settings
Borders
Enable borders
yes\no
Borders Radius
Borders Radius
number
Border style
Border style
dropdown
Borders Width (Px)
Borders Width (Px)
number
Borders Color
Borders Color
color
Column Gap (px
Distance between columns
number
Row Gap (px)
Distance between rows
number
Both camera and screen style settings
Camera width
Width in pixels of camera then both mode is enabled
number
Camera heigth
Height in pixels of camera then both mode is enabled
number
Camera position
Camera position
dropdown
Enable close detection
The checkbox allows you to enable/disable the detection to close the page
yes\no
Display mode
Sets video display mode
dropdown
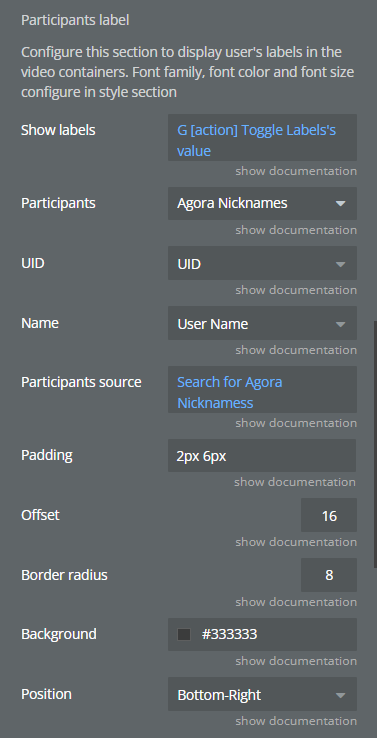
Participants label
Configure this section to display user's labels in the video containers. Font family, font color and font size configure in style section
Show labels
Yes to show labels in video container
yes\no
Participants
App Type representing Participants table with UID and Names
App type
UID
Represents UID of user
Participants: string
Name
Represents Name of user
Participants: string
Participants source
A list of Participants things from Database, filtered by room name
List of items representing “Participants”
Padding
Vertical and Horizontal padding
string
Offset
Offset of the label In pixels
number
Border radius
In pixels
number
Background
Background of the label
color
Position
Label's position.
Available options: Top-Left, Top-Center, Top-Right, Bottom-Left, Bottom-Center, Bottom-Right
dropdown
❗
Note: Safari 12.1 or earlier does not support the VP8 codec.
❕
About log levels:
DEBUG. Output all API logs.
INFO. Output logs of the INFO, WARNING, and ERROR level. WARNING. Output logs of the WARNING and ERROR level.
ERROR. Output logs of the ERROR level.
NONE. Do not output any log.
Logs are written to the console.
Element States
Title
Description
Type
Connected to room
Indicates if the current user is connected to the room.
yes/no
Video is enabled
Indicates if the current user video is enabled.
yes/no
Microphone is enabled
Indicates if the current user microphone is enabled.
yes/no
List of cameras
Returns the list of all available device cameras.
list of text
List of microphones
Returns a list of all available device microphones.
list of text
Number of users
Returns the number of users in the channel.
number
User Leave Reason
Returns the reason why the user leaves the channel.
text
Joined User UID
Returns the UID of the last joined user.
text
Leaved User UID
Returns the UID of the last leaved user.
text
User UID
Returns the UID of the current user.
text
Current Used Microphone
Returns the label of the currently used microphone.
text
Current Used Camera
Returns the label of the currently used camera.
text
Channel closed
Indicates if the channel is closed.
text
Microphone Check
Indicates if the current user microphone is active.
yes/no
Camera Check
Indicates if the current user camera is active.
yes/no
duration
Returns the duration of the user into the call in seconds.
number
available regions
Returns the list of available areas of connection.
list of text
Screen Sharing Quality
Returns the current quality of shared screen (resolution, framerate, bitrate)
text
Received Video Quality
Returns the quality of received video (resolution, framerate, bitrate)
text
⚠️
In Streaming Mode, the Number of users returns only the number of hosts.
☝
Possible User Leave Reason values:
"Quit": The user calls leave and leaves the channel.
"ServerTimeOut": The user has dropped offline.
"BecomeAudience": The client role is switched from host to audience.
Events
Title
Description
Joined
Is triggered when the current user is joined to the channel
Agora is not compatible
Is triggered when the Web browser does not support AgoraRTC
User joined
Is triggered when the user is joined to the channel
User left
Is triggered when the user leaves the channel
Viewer left
Is triggered when the viewer leaves the channel
Closing
It is triggered when the session is completed
Camera changed
It is triggered when the camera is changed
Microphone Changed
It is triggered when the microphone is changed
User joined and User left triggers only in real-time calls. In Streaming this event is triggered only by the host.
Actions
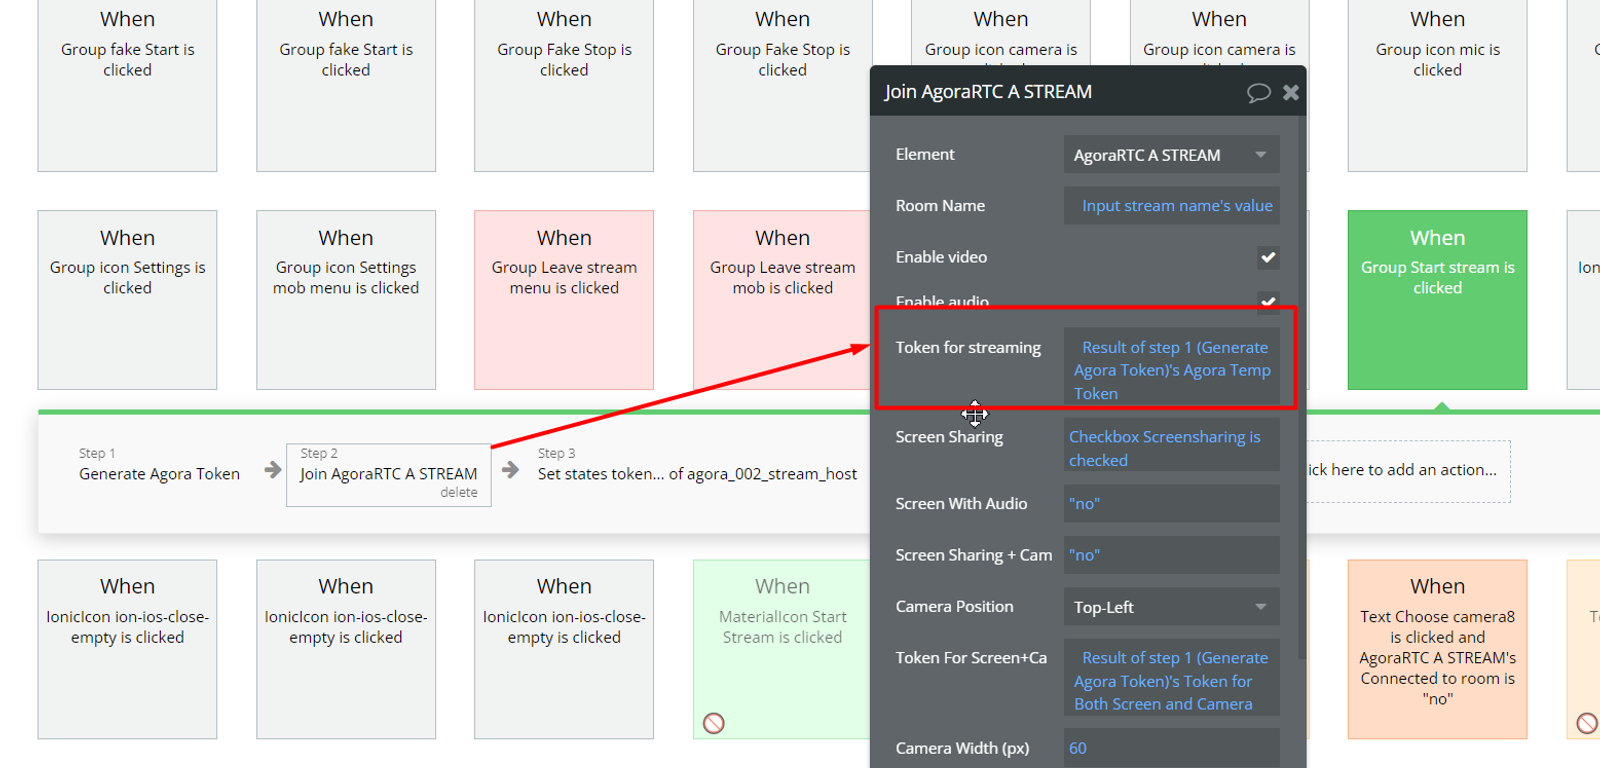
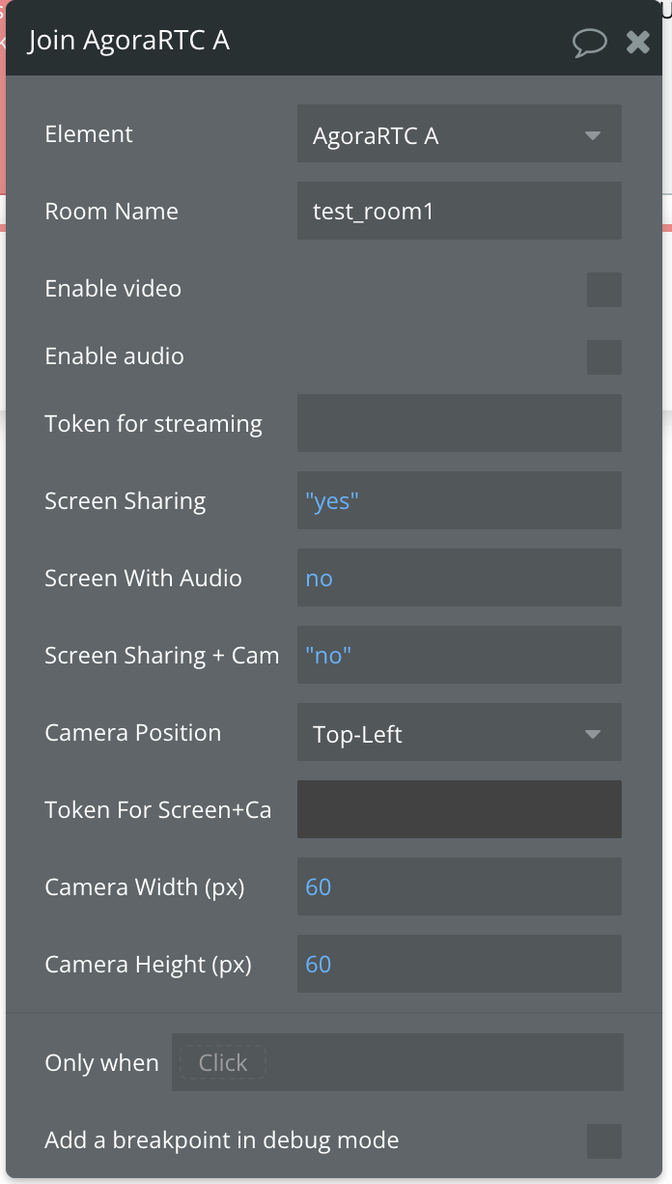
Join AgoraRTC action allows the user to connect to RTC or Stream.
Title
Description
Type
Room Name
Name of room there to connect
Text
Enable video
Enable video
Checkbox (yes/no)
Enable audio
Enable audio
Checkbox (yes/no)
Screen Sharing
Token
The token generated by action “Generate Agora Token” to join the channel
Text (optional)
Screen Sharing
Screen Sharing
Checkbox (yes/no)
Screen With Audio
Screen With Audio
Checkbox (yes/no)
Screen Sharing + Camera
Screen Sharing + Camera
Checkbox (yes/no)
Screen Quality
Screen sharing quality preset. For Safari browser, 720p_auto will be used automatically if set “Safari 720p_auto” checkbox.
Available values: 480p_1, 480p_2, 480p_3, 720p_1, 720p_2, 720p_3, 1080p_1, 1080p_2, 1080p_3
Dropdown
Safari 720p_auto
Check this option to set 720_auto for Safari browser.
Recommended to be set on Safari to ensure dynamic adjustment of the encoding resolution
Checkbox
Optimization Mode
Available values: "detail" and "motion".
The "detail": prioritizes video quality.
The "motion": prioritizes video smoothness
Text
Camera
Camera Position
Available options: Top-Left, Top-Right, Bottom-Left, Bottom-Right
Dropdown
Token For Screen+Camera
Token For Screen+Camera
Text (optional)
Camera Width (px)
Camera Width
Number
Camera Height (px)
Camera Height
Number
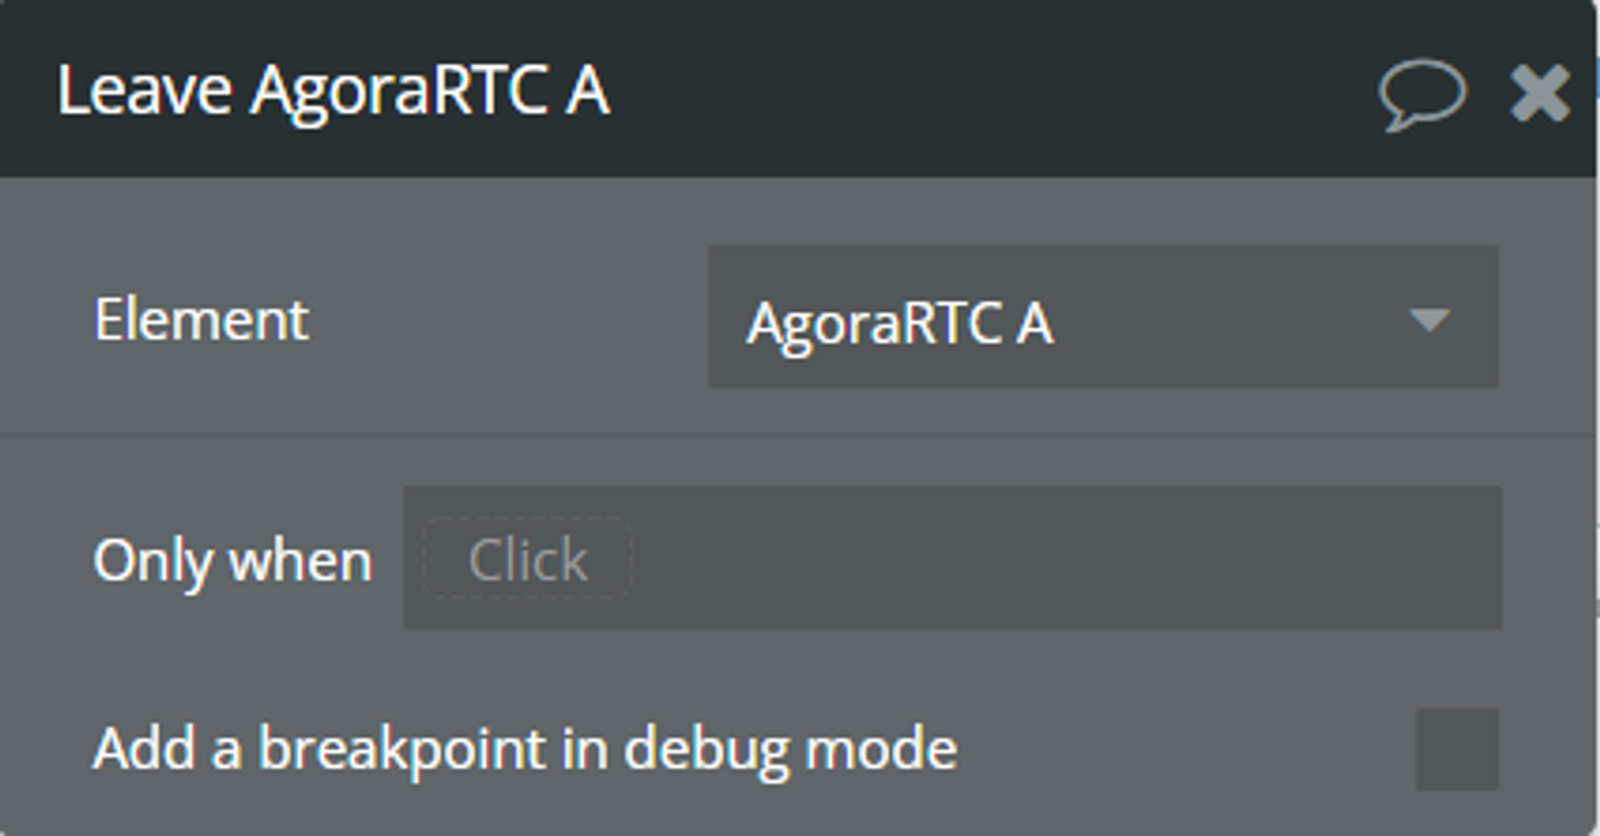
2. Leave AgoraRTC action allows leaving from the currently connected room.
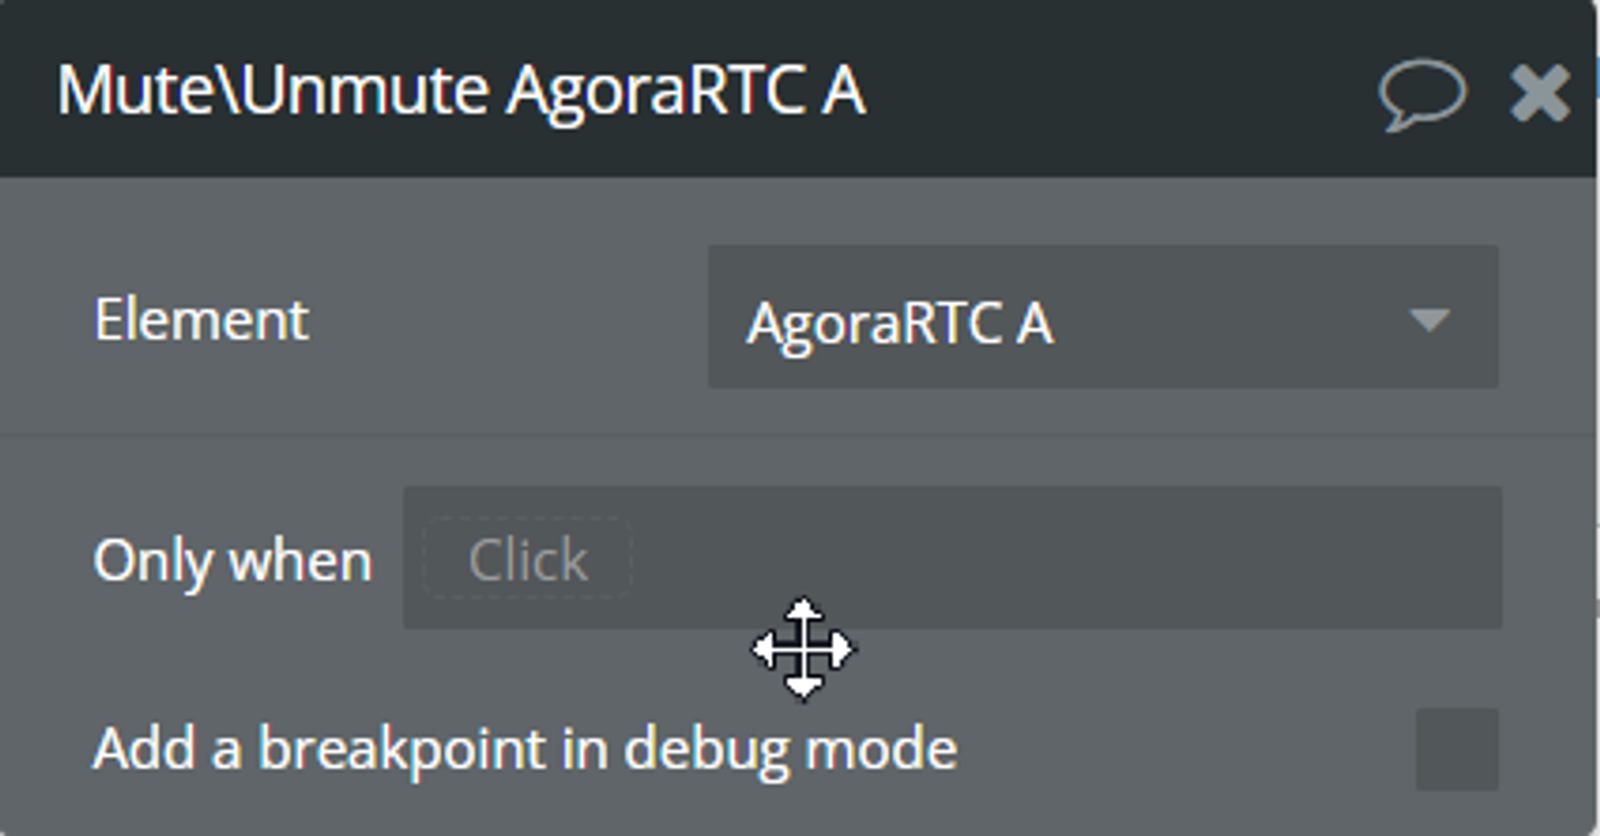
3. Mute/Unmute AgoraRTC action allows disabling/enabling the user's microphone.
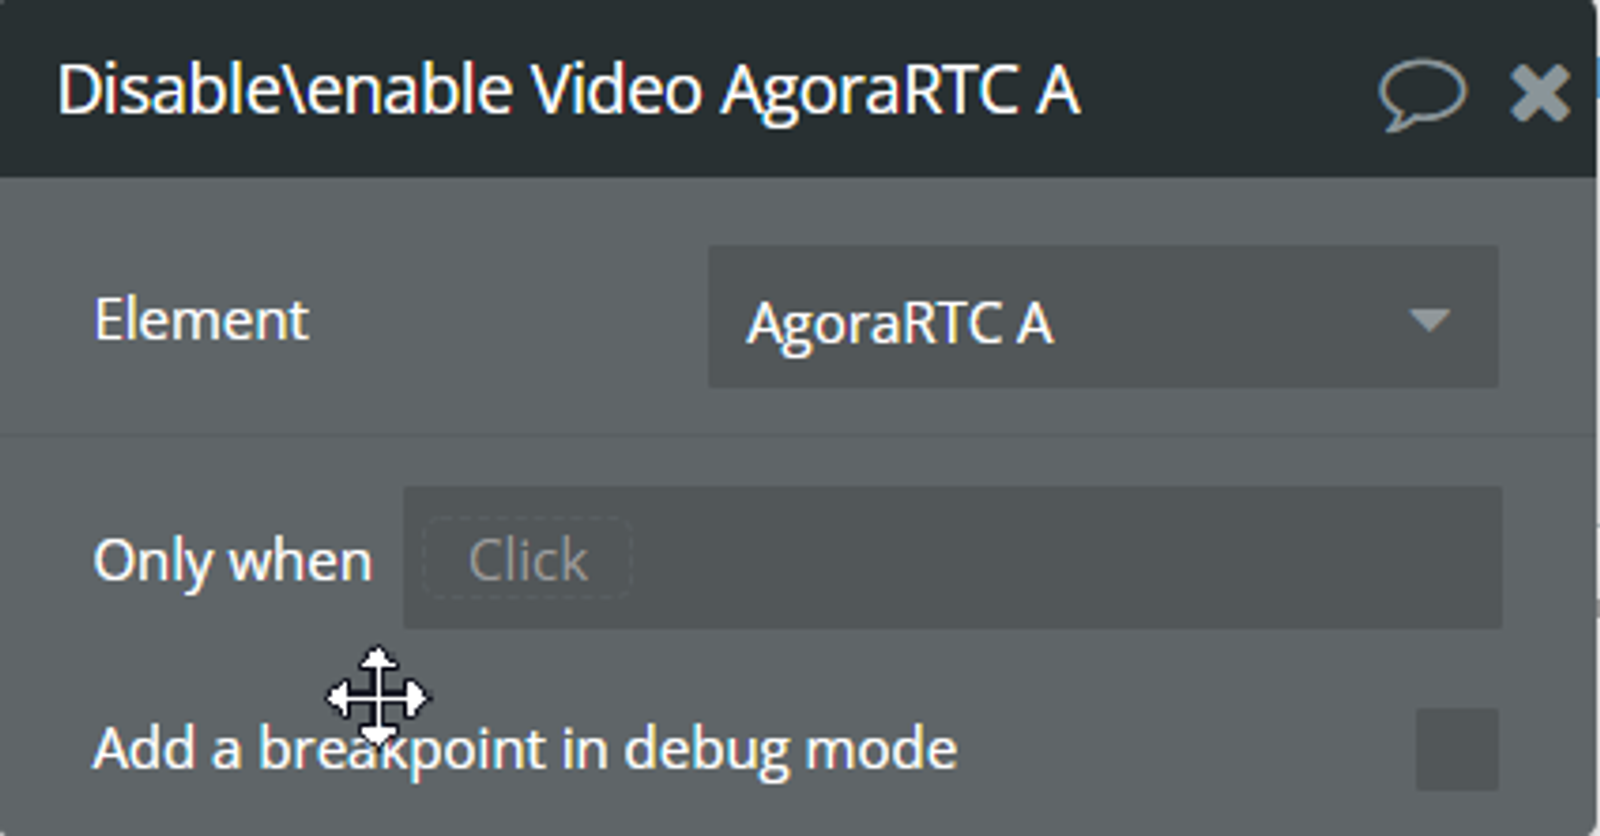
4. Disable/Enable Video AgoraRTC action allows turning on/off the user's Video.
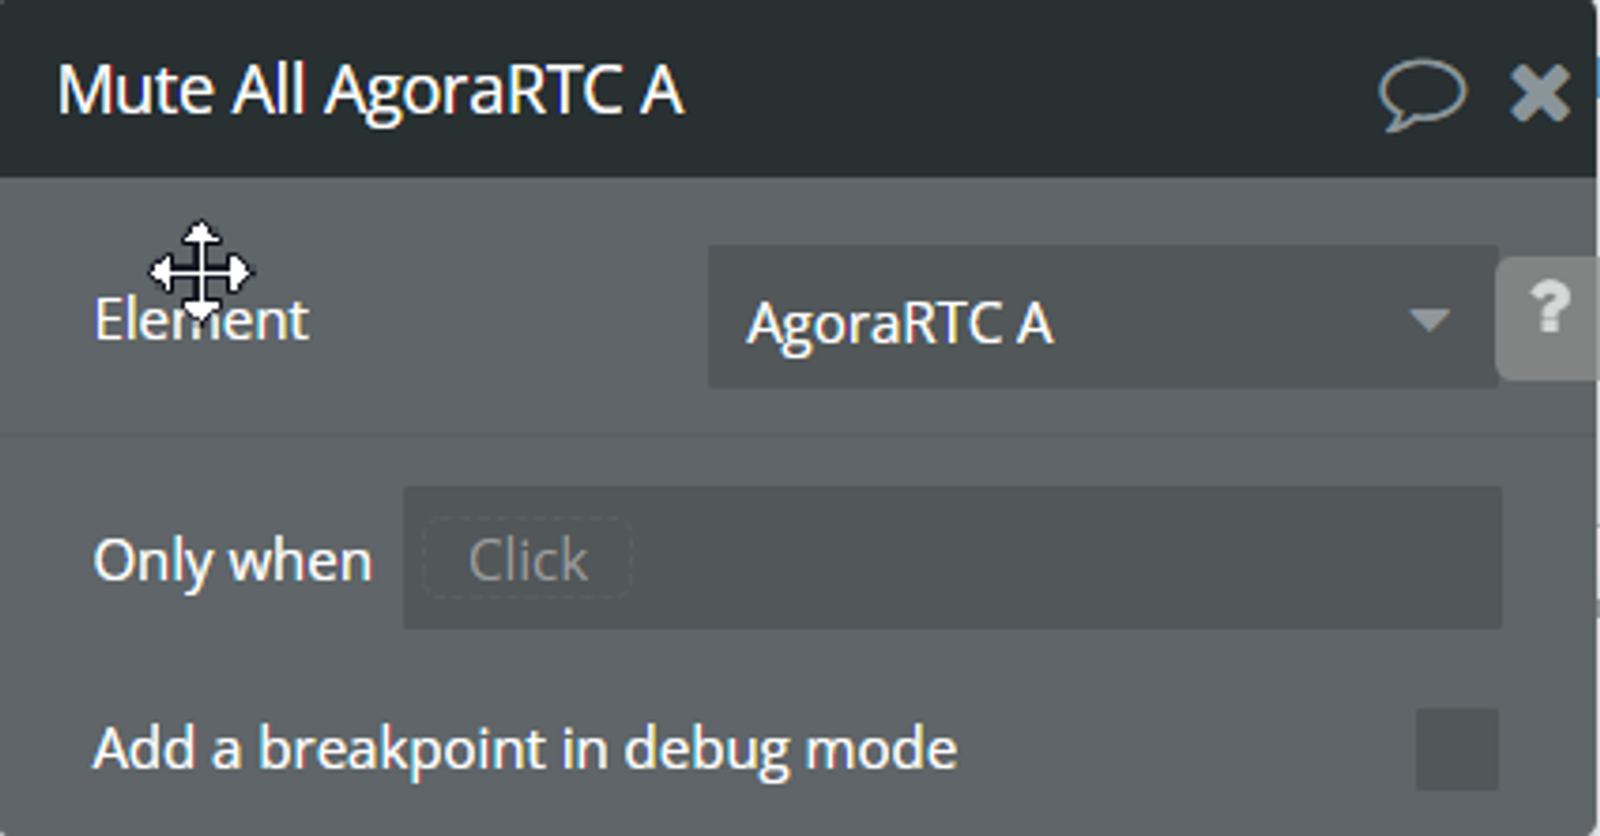
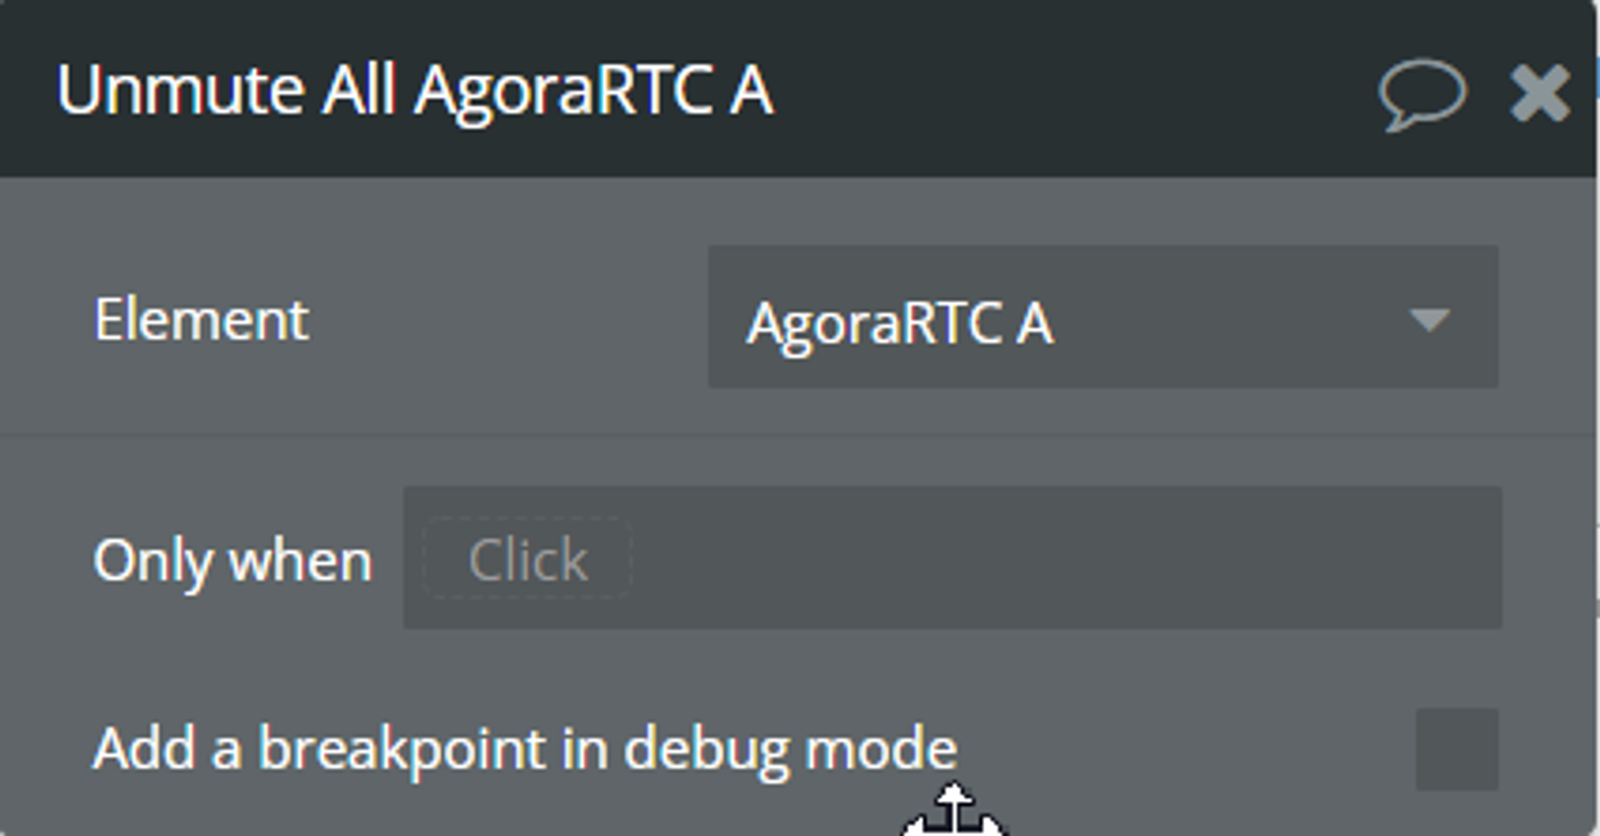
5. Mute/Unmute All AgoraRTC actions allow enabling/disabling microphones of all the interlocutors.
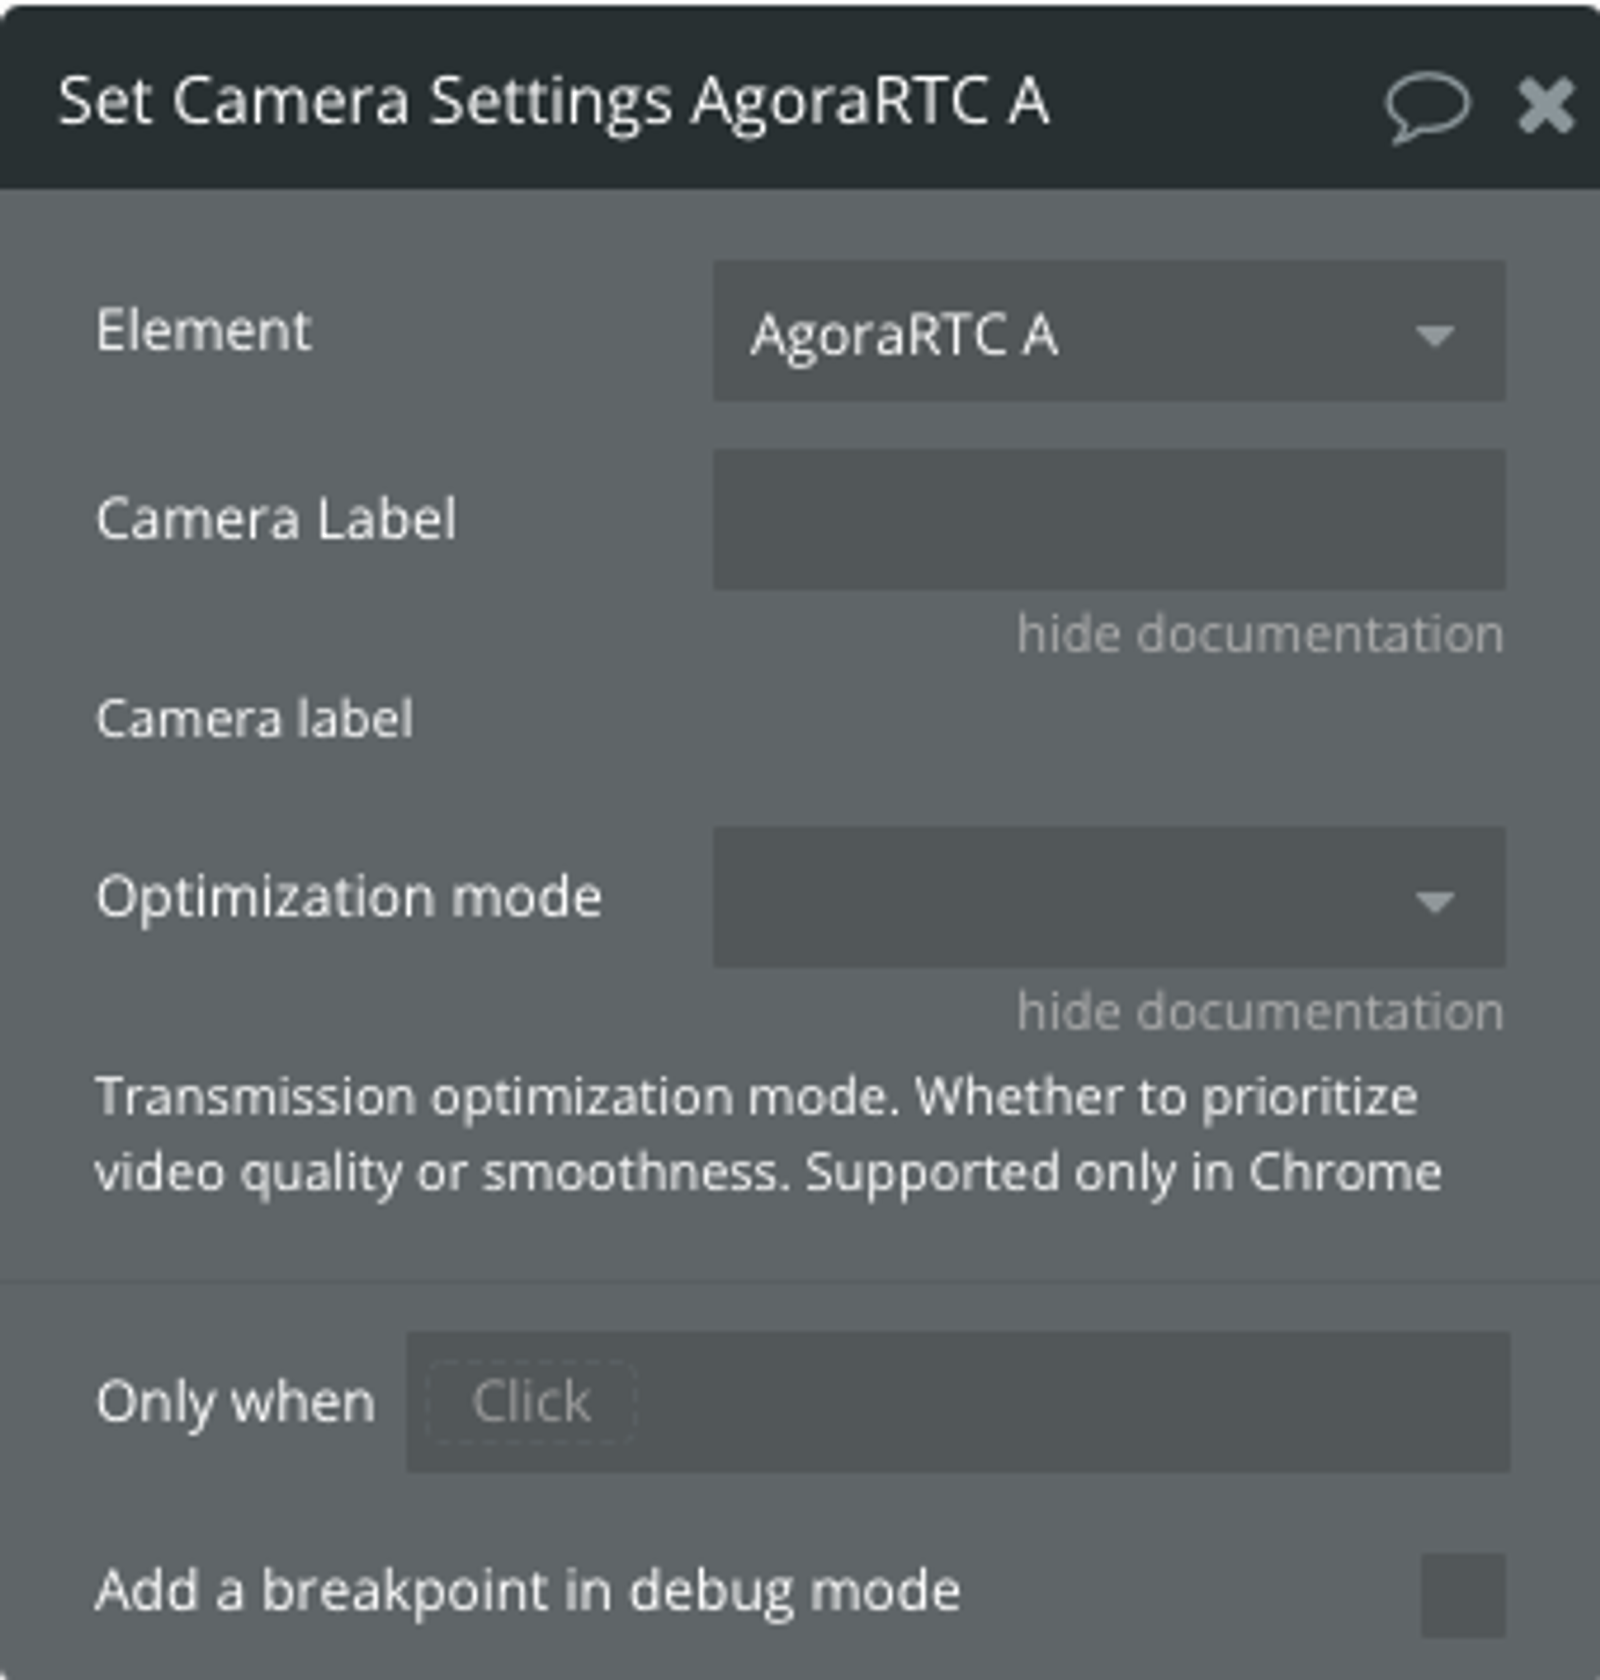
6. Set Camera Settings AgoraRTC action allows you to switch and configure the camera before starting a conference or streaming.
Fields
Title
Description
Type
Camera Label
The label of the camera you want to use. The list of labels can be found in state "List of cameras" exposed by plugin element.
Text
Optimization mode
Transmission optimization mode. Whether to prioritize video quality or smoothness. Supported only in Chrome Available options: detail, motion
Dropdown (optional)
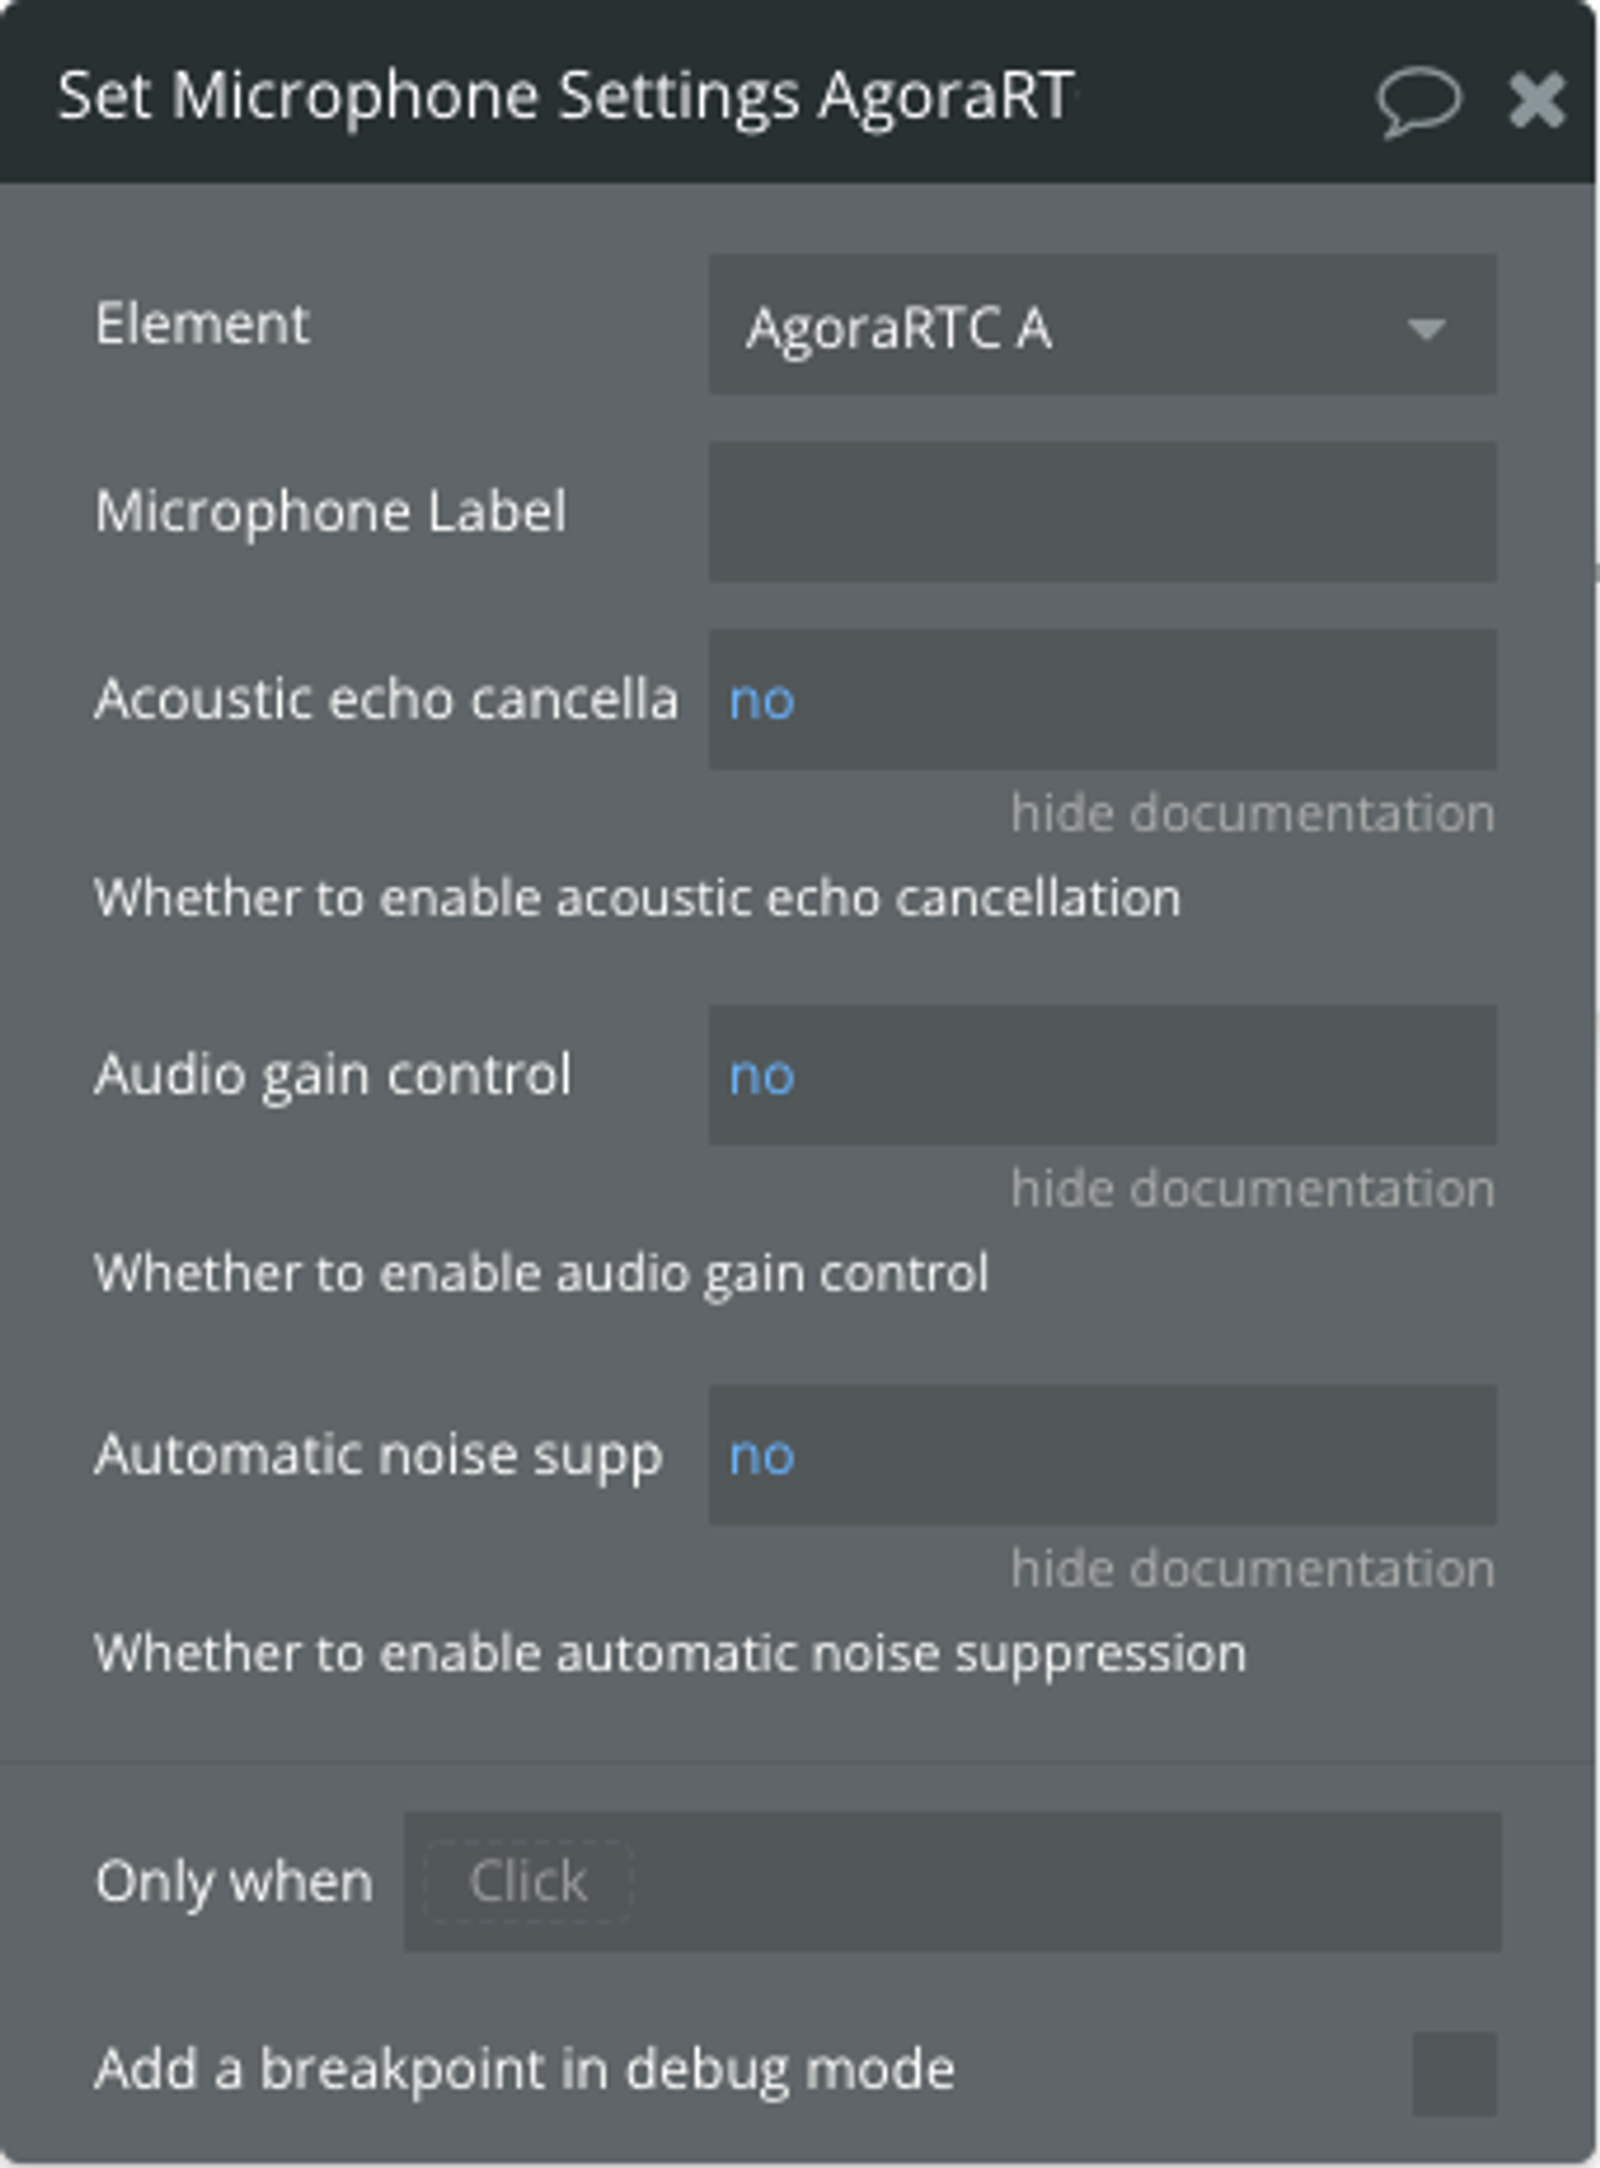
7. Set Microphone Settings AgoraRTC action allows you to switch and configure the microphone before starting a conference or streaming.
Fields
Title
Description
Type
Microphone Label
The label of the microphone you want to use. The list of labels can be found in state "List of microphones" exposed by plugin element.
Text (optional)
Acoustic echo cancellation
Whether to enable acoustic echo cancellation
Checkbox (yes/no)
Audio gain control
Whether to enable audio gain control
Checkbox (yes/no)
Automatic noise suppression
Whether to enable automatic noise suppression
Checkbox (yes/no)
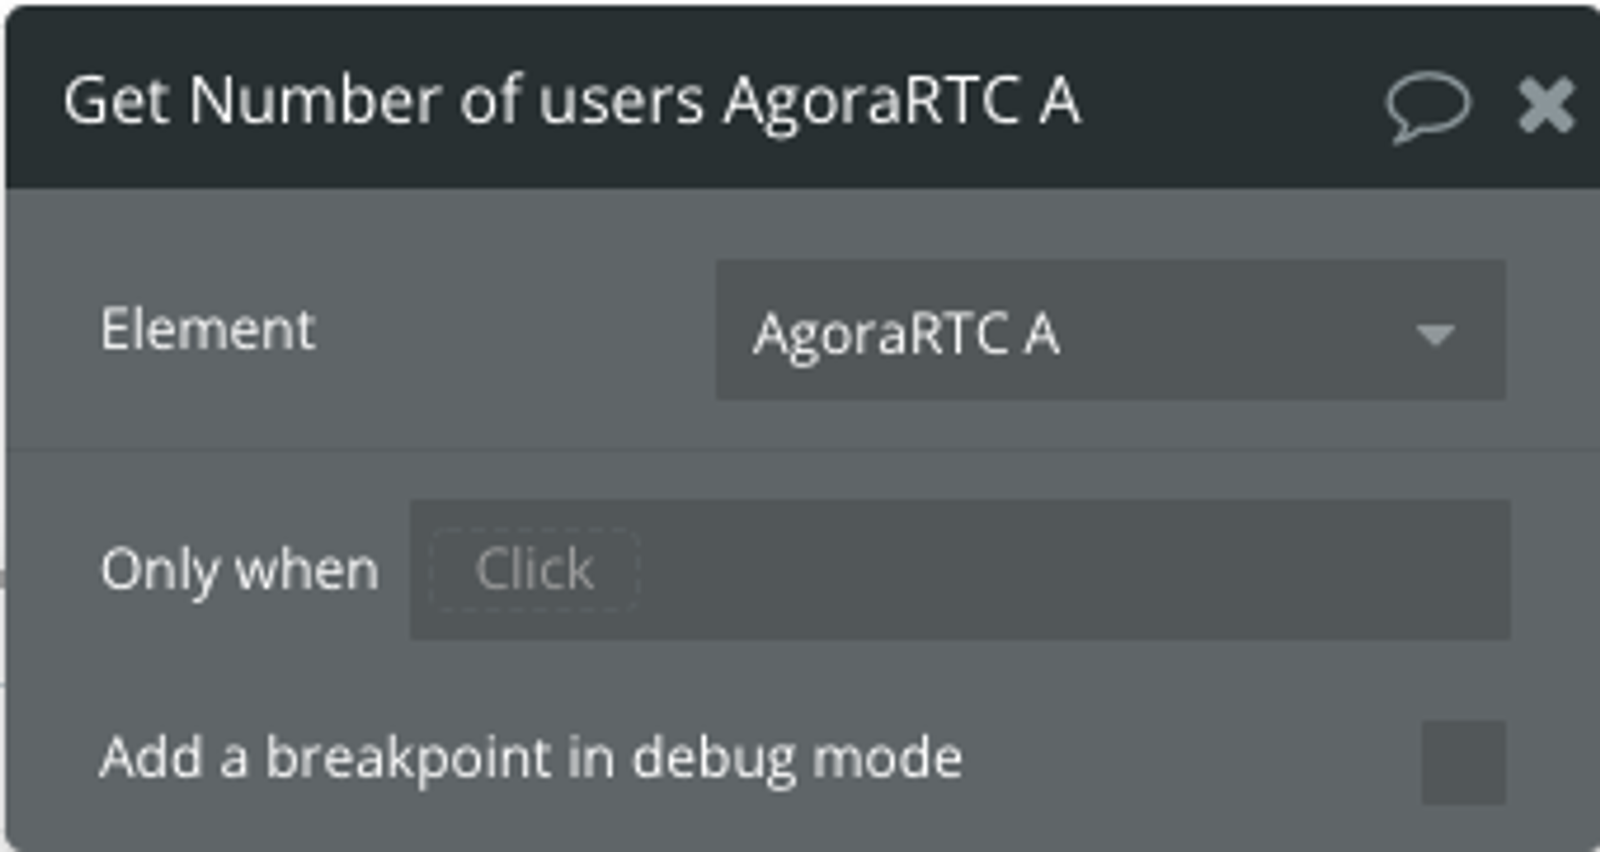
8. Get Number of users AgoraRTC returns the number of users connected to the room
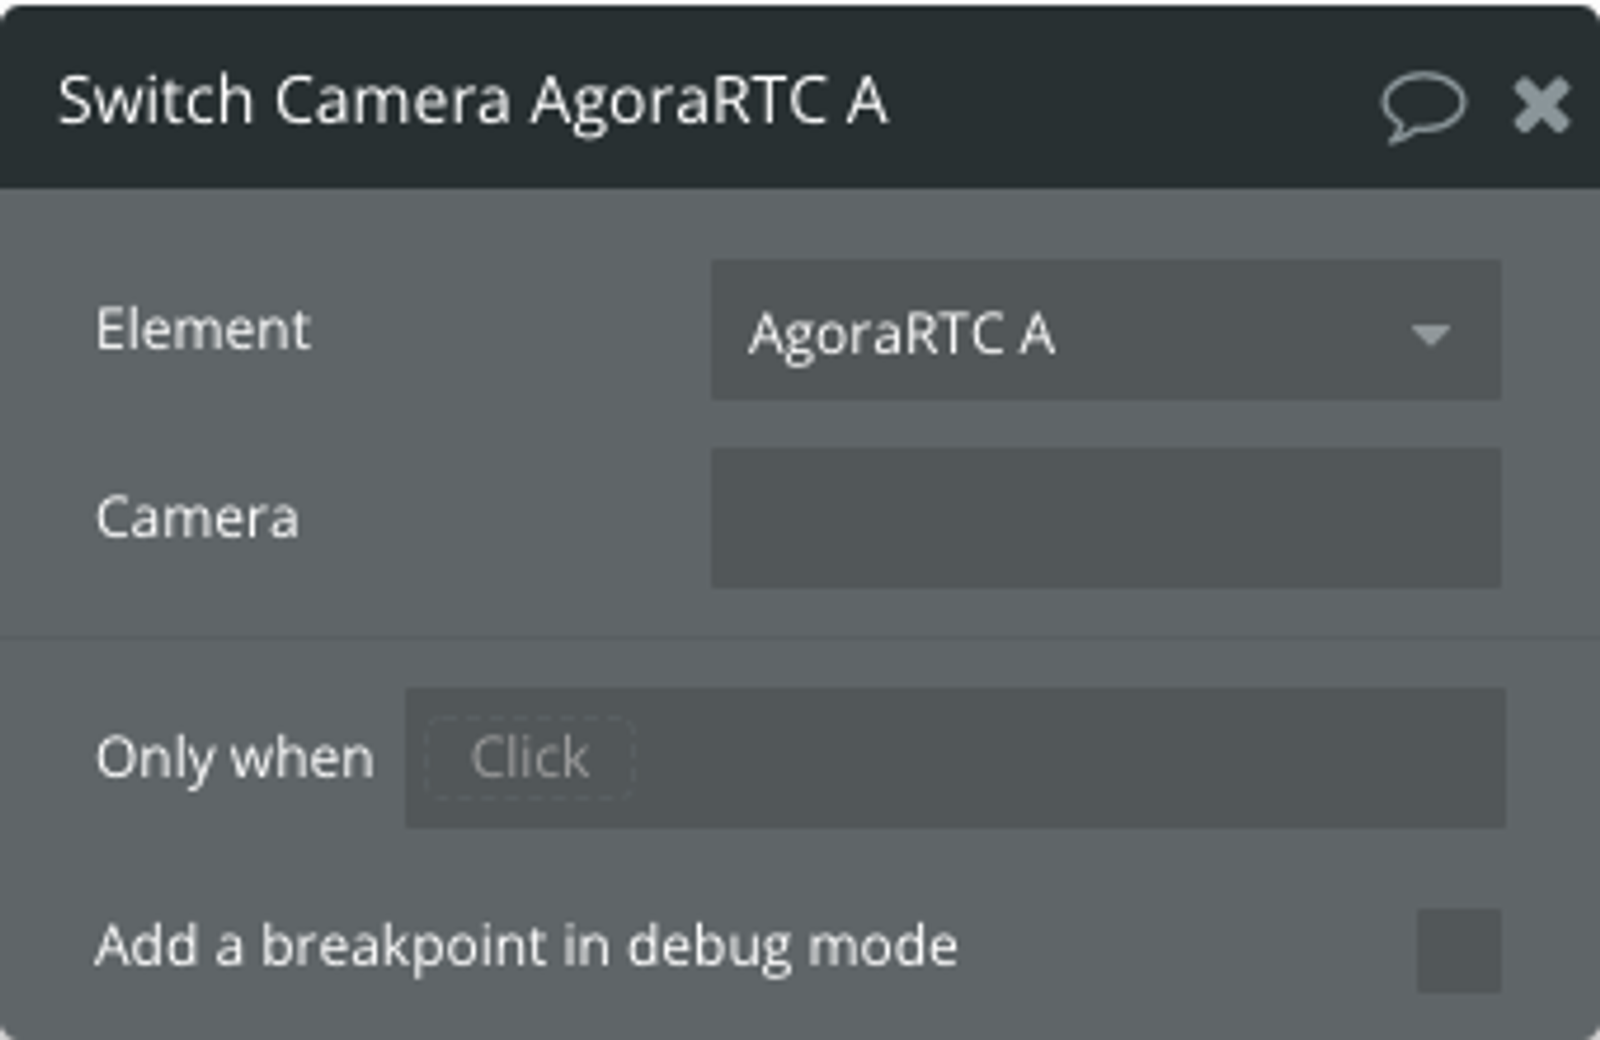
9. Switch Camera AgoraRTC allows you to switch the camera by its label during a conference
Fields
Title
Description
Type
Camera
The label of the camera you want to use. The list of labels can be found in state "List of cameras" exposed by plugin element.
Text
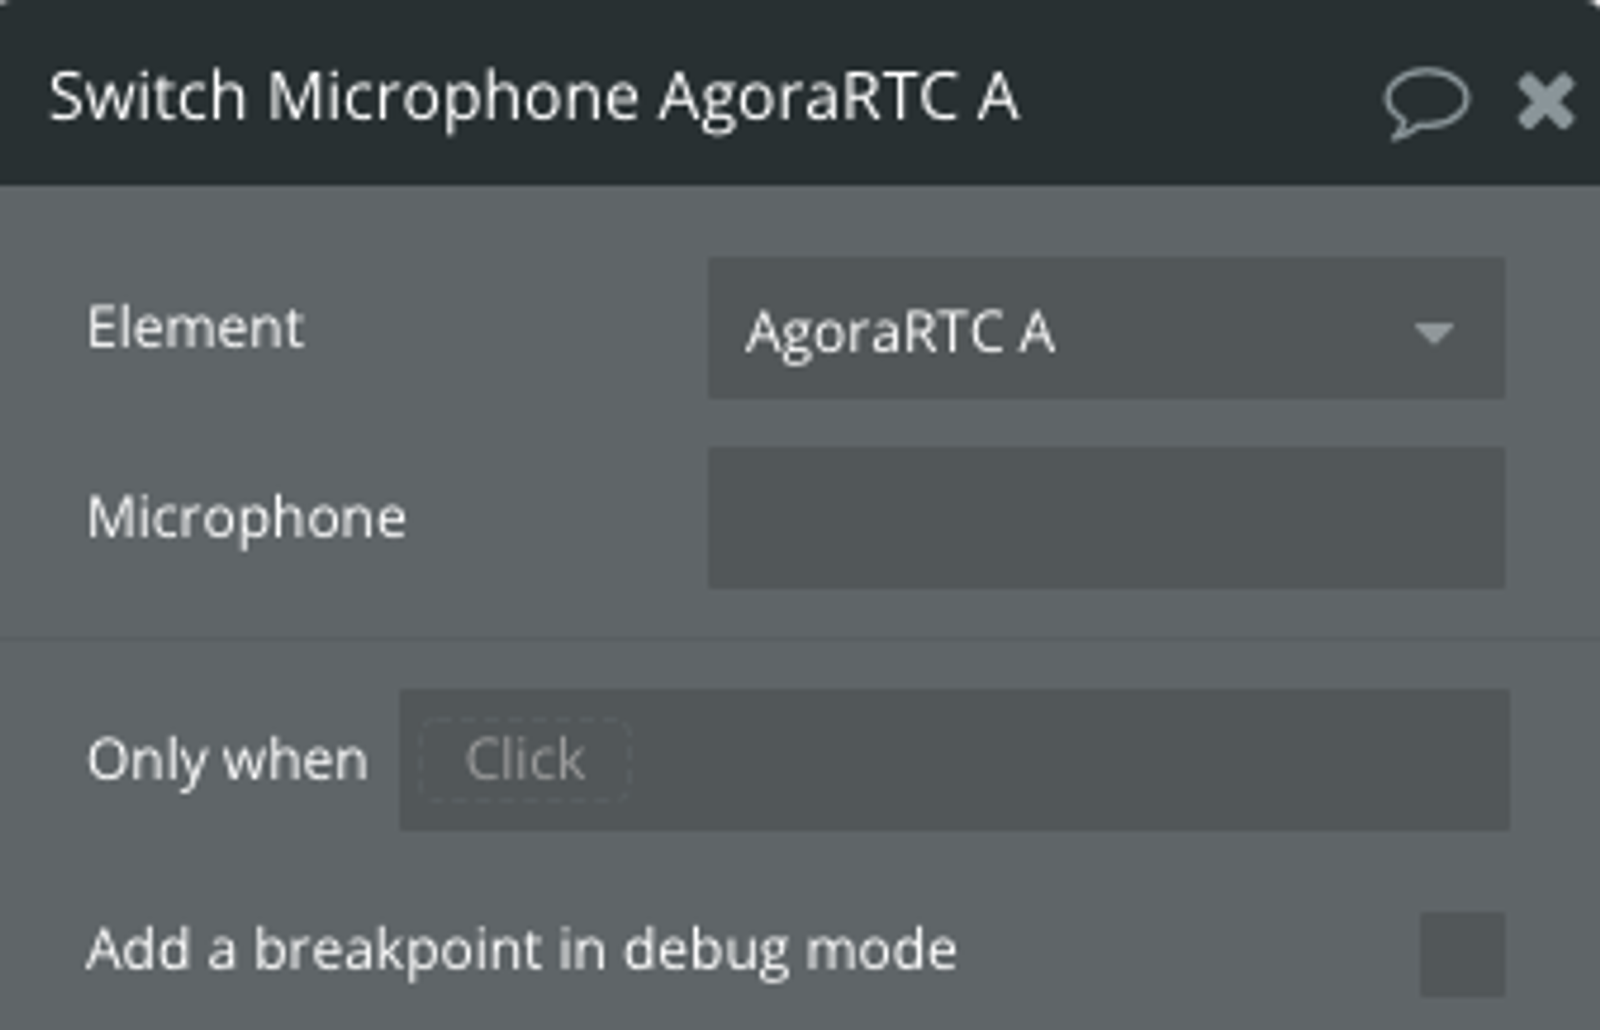
10. Switch Microphone AgoraRTC allows you to switch the microphone by its label during a conference
Fields
Title
Description
Type
Microphone
The label of the microphone you want to use. The list of labels can be found in state "List of microphones" exposed by plugin element.
Text
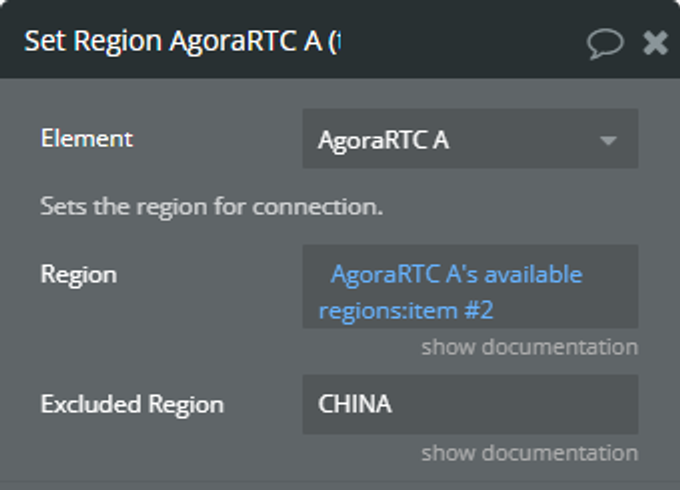
11. Set Region - Sets the region for connection.
Fields:
Title
Description
Type
Region
Specifies only one region for connection. Insert one of the regions from the "available regions" state.
text
Excluded Region
Set the "Region" to specify a large region and the "Excluded Region" to specify a small region. The region for connection is the large region excluding the small region. You can only specify the large region as "GLOBAL".
text
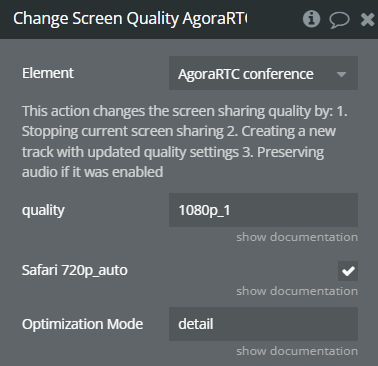
12. Change Screen Quality - This action changes the screen sharing quality by:
Stopping current screen sharing
Creating a new track with updated quality settings
Preserving audio if it was enabled.
Fields:
Title
Description
Type
Quality
Screen sharing quality preset. For Safari browser, 720p_auto will be used automatically.
Available values: 480p_1, 480p_2, 480p_3, 720p_1, 720p_2, 720p_3, 1080p_1, 1080p_2, 1080p_3
Text
Safari 720p_auto
Check this option to set 720_auto for Safari browser.
Recommended to be set on Safari to ensure dynamic adjustment of the encoding resolution
Checkbox
Optimization Mode
Available values: "detail" and "motion".
The "detail": prioritizes video quality.
The "motion": prioritizes video smoothness
Text
Plugin Action Calls
Get resource ID
Get a cloud recording resource ID.
Name
Description
Type
App ID
The “App ID” for your project. Ensure that the cloud recording service has been enabled for this “App ID”.
Text
Channel Name
The name of the channel to be recorded.
Text
Unique ID
The unique ID that contains only digits. Can be used a value in the range from 1 to 4294967295.
Text
Expired Hour
Time limit (in hours) for the Cloud Recording RESTful API calls. It must be between 1 and 720. Note: Starts after obtaining the “sid” (Recording ID).
Text
Start individual cloud recording
Call the start individualmethod within five minutes of getting a resource ID to join a channel and start recording.
Name
Description
Type
App ID
The “App ID” for your project. Ensure that the cloud recording service has been enabled for this “App ID”.
Text
Resource ID
The “resource ID” obtained from the “Get resource ID” action.
Text
Channel Name
The name of the channel to be recorded. Should be the same as the “Channel Name” from the “Get resource ID” action.
Text
Unique ID
The unique ID that contains only digits. Can be used a value in the range from 1 to 4294967295. Should be the same as the “Unique ID” from the “Get resource ID” action.
Text
Token
The authentication token for verification of the user’s identity. If you have no a token, please fill this field with 2 quotation marks (““). Otherwise, please insert the token between 2 quotation marks (”“). For example,”YOUR_TOKEN”.
Text
Storage Vendor
Number. The third-party cloud storage platform. Check the right value on https://docs.agora.io/en/cloud-recording/reference/restful-api#properties-2
Text
Storage Region
Number. The region information specified for the third-party cloud storage. Check the right value on https://docs.agora.io/en/cloud-recording/reference/region-vendor
Text
Storage Bucket
The bucket name of the third-party cloud storage.
Text
Storage Access Key
The access key of the third-party cloud storage.
Text
Storage Secret Key
The secret key of the third-party cloud storage.
Text
Directory 1
Optional. Sets the 1st directory path of the recorded files in the third-party cloud storage. You would find the records on the following path “directory1/directory2/xxx.m3u8.”
Text
Directory 2
Optional. Sets the 2nd directory path of the recorded files in the third-party cloud storage. You would find the records on the following path “directory1/directory2/xxx.m3u8.”
Text
Stop individual cloud recording
Call the stop API to end the recording session.
Name
Description
Type
App ID
The “App ID” for your project. Ensure that the cloud recording service has been enabled for this “App ID”.
Text
Resource ID
The “resource ID” obtained from the “Get resource ID” action.
Text
SID
The “sid” (recording ID) obtained from the “Start stream…” action.
Text
Channel Name
The name of the channel to be recorded. Should be the same as the “Channel Name” from the “Get resource ID” action.
Text
Unique ID
The unique ID that contains only digits. Can be used a value in the range from 1 to 4294967295. Should be the same as the “Unique ID” from the “Get resource ID” action.
Text
Query status
During a recording session, can call the query method to query the recording status.
Name
Description
Type
App ID
The “App ID” for your project. Ensure that the cloud recording service has been enabled for this “App ID”.
Text
Resource ID
The “resource ID” obtained from the “Get resource ID” action.
Text
SID
The “sid” (recording ID) obtained from the “Start stream…” action.
Text
Mode
Use the following values: “individual” - individual recording mode, “mix” - composite recording mode.
Text
Start individual cloud recording (video only)
Call the start individualmethod (video only) within five minutes of getting a resource ID to join a channel and start recording.
Name
Description
Type
App ID
The “App ID” for your project. Ensure that the cloud recording service has been enabled for this “App ID”.
Text
Resource ID
The “resource ID” obtained from the “Get resource ID” action.
Text
Channel Name
The name of the channel to be recorded. Should be the same as the “Channel Name” from the “Get resource ID” action.
Text
Unique ID
The unique ID that contains only digits. Can be used a value in the range from 1 to 4294967295. Should be the same as the “Unique ID” from the “Get resource ID” action.
Text
Token
The authentication token for verification of the user’s identity. If you have no a token, please fill this field with 2 quotation marks (““). Otherwise, please insert the token between 2 quotation marks (”“). For example,”YOUR_TOKEN”.
Text
Storage Vendor
Number. The third-party cloud storage platform. Check the right value on https://docs.agora.io/en/cloud-recording/reference/restful-api#properties-2
Text
Storage Region
Number. The region information specified for the third-party cloud storage. Check the right value on https://docs.agora.io/en/cloud-recording/reference/region-vendor
Text
Storage Bucket
The bucket name of the third-party cloud storage.
Text
Storage Access Key
The access key of the third-party cloud storage.
Text
Storage Secret Key
The secret key of the third-party cloud storage.
Text
Directory 1
Optional. Sets the directory path of the recorded files in the third-party cloud storage. You would find the records on the following path “directory1/xxx.m3u8.”
Text
Start individual cloud recording (audio only)
Call the start individualmethod (audio only) within five minutes of getting a resource ID to join a channel and start recording.
Name
Description
Type
App ID
The “App ID” for your project. Ensure that the cloud recording service has been enabled for this “App ID”.
Text
Resource ID
The “resource ID” obtained from the “Get resource ID” action.
Text
Channel Name
The name of the channel to be recorded. Should be the same as the “Channel Name” from the “Get resource ID” action.
Text
Unique ID
The unique ID that contains only digits. Can be used a value in the range from 1 to 4294967295. Should be the same as the “Unique ID” from the “Get resource ID” action.
Text
Token
The authentication token for verification of the user’s identity. If you have no a token, please fill this field with 2 quotation marks (““). Otherwise, please insert the token between 2 quotation marks (”“). For example,”YOUR_TOKEN”.
Text
Storage Vendor
Number. The third-party cloud storage platform. Check the right value on https://docs.agora.io/en/cloud-recording/reference/restful-api#properties-2
Text
Storage Region
Number. The region information specified for the third-party cloud storage. Check the right value on https://docs.agora.io/en/cloud-recording/reference/region-vendor
Text
Storage Bucket
The bucket name of the third-party cloud storage.
Text
Storage Access Key
The access key of the third-party cloud storage.
Text
Storage Secret Key
The secret key of the third-party cloud storage.
Text
Directory 1
Optional. Sets the directory path of the recorded files in the third-party cloud storage. You would find the records on the following path “directory1/xxx.m3u8.”
Text
Start composite cloud recording
Call the start compositemethod within five minutes of getting a resource ID to join a channel and start recording.
Name
Description
Type
App ID
The “App ID” for your project. Ensure that the cloud recording service has been enabled for this “App ID”.
Text
Resource ID
The “resource ID” obtained from the “Get resource ID” action.
Text
Channel Name
The name of the channel to be recorded. Should be the same as the “Channel Name” from the “Get resource ID” action.
Text
Unique ID
The unique ID that contains only digits. Can be used a value in the range from 1 to 4294967295. Should be the same as the “Unique ID” from the “Get resource ID” action.
Text
Storage Vendor
Number. The third-party cloud storage platform. Check the right value on https://docs.agora.io/en/cloud-recording/reference/restful-api#properties-2
Text
Storage Region
Number. The region information specified for the third-party cloud storage. Check the right value on https://docs.agora.io/en/cloud-recording/reference/region-vendor
Text
Storage Bucket
The bucket name of the third-party cloud storage.
Text
Storage Access Key
The access key of the third-party cloud storage.
Text
Storage Secret Key
The secret key of the third-party cloud storage.
Text
Directory 1
Optional. Sets the 1st directory path of the recorded files in the third-party cloud storage. You would find the records on the following path “directory1/directory2/xxx.m3u8.”
Text
Directory 2
Optional. Sets the 2nd directory path of the recorded files in the third-party cloud storage. You would find the records on the following path “directory1/directory2/xxx.m3u8.”
Text
Token
The authentication token for verification of the user’s identity. If you have no a token, please fill this field with 2 quotation marks (““). Otherwise, please insert the token between 2 quotation marks (”“). For example,”YOUR_TOKEN”.
Text
Stop composite cloud recording
Call the stop API to end the recording session.
Name
Description
Type
App ID
The “App ID” for your project. Ensure that the cloud recording service has been enabled for this “App ID”.
Text
Resource ID
The “resource ID” obtained from the “Get resource ID” action.
Text
SID
The “sid” (recording ID) obtained from the “Start stream…” action.
Text
Channel Name
The name of the channel to be recorded. Should be the same as the “Channel Name” from the “Get resource ID” action.
Text
Unique ID
The unique ID that contains only digits. Can be used a value in the range from 1 to 4294967295. Should be the same as the “Unique ID” from the “Get resource ID” action.
Text
Return Values:
Return type: empty
Plugin Actions
Generate Agora Token - generates a token to connect to the channel
Title
Description
Type
Mode
Available options: Real Time Call, Stream
Dropdown (optional)
Role
Available options: Host, Audience
Dropdown
Channel Name
Name of room there to connect
Text
Privilege Expired
Token expiration time in seconds
Number
Return Values:
Title
Description
Type
Agora Temp Token
Agora Temp Token
Text
Token for Both Screen and Camera
Token for Both Screen and Camera
Text
UID
UID
Text
Generate Recording Token - generates a token for recording
Title
Description
Type
Mode
Available options: Real Time Call, Stream
Dropdown (optional)
Channel Name
Name of room there to connect
Text
Expire IN
Token expiration time in seconds
Number
UID
The unique ID that contains only digits. Can be used a value in the range from 1 to 4294967295.
Text
Return Values:
Title
Description
Type
Agora recording token
Agora recording token
Text
UID
UID
Text
Changelogs
Update 16.05.25 - Version 1.74.0
Added screen sharing quality options, display of participant name in video container.
Update 15.04.25 - Version 1.73.0
Fixed behavior when camera is off.
Update 27.02.25 - Version 1.72.0
Fixed issue with redistributing users when they leave the conference.
Update 10.01.25 - Version 1.71.0
Certificate keys security updates
Update 03.12.24 - Version 1.70.0
Fixed changing camera and microphone.
Update 18.11.24 - Version 1.69.0
Fixed and updated feature of cloud recording.
Update 14.11.24 - Version 1.68.0
Minor update (Marketing update).
Update 25.07.24 - Version 1.67.0
Fixed AgoraRTC "Disable\enable Video" action.
Update 24.07.24 - Version 1.66.0
Minor update (Marketing update).
Update 19.07.24 - Version 1.65.0
Minor update.
Update 16.07.24 - Version 1.64.0
Minor update (Marketing update).
Update 12.06.24 - Version 1.63.0
Minor update.
Update 12.06.24 - Version 1.62.0
Minor update.
Update 10.06.24 - Version 1.61.0
Updated demo/service links.
Update 06.06.24 - Version 1.60.0
Minor update.
Update 20.02.24 - Version 1.59.0
Added the possibility to set the region of connection.
Added new state “available regions”.
Added the new action “Set Region” for the element “AgoraRTC”.
Update 15.02.24 - Version 1.58.0
Added "duration" state.
Update 24.01.24 - Version 1.57.0
updated description.
Update 27.12.23 - Version 1.56.0
updated description.
Update 26.12.23 - Version 1.55.0
Fixed "group containing the users".
Update 19.10.23 - Version 1.54.0
Updated description.
Update 15.09.23 - Version 1.53.0
updated description.
Update 12.09.23 - Version 1.52.0
minor updates.
Update 06.09.23 - Version 1.51.0
Obfuscation.
Update 06.09.23 - Version 1.50.0
Obfuscation.
Update 05.09.23 - Version 1.49.0
Updated to the new responsive.
Update 11.07.23 - Version 1.48.0
updated description.
Update 19.06.23 - Version 1.47.0
Updated the description .
Update 01.03.23 - Version 1.46.0
Update Agora library.
Update 23.02.23 - Version 1.45.0
deleted the icons.
Update 22.02.23 - Version 1.44.0
updated the description.
Update 02.02.23 - Version 1.43.0
Updated description.
Update 20.01.23 - Version 1.42.0
Updated description.
Update 13.12.22 - Version 1.41.0
Added multi streaming possibility.
Update 05.12.22 - Version 1.40.0
Added check camera\microphone actions.
Update 19.09.22 - Version 1.39.0
Adjusted common part.
Update 29.08.22 - Version 1.38.0
updated common part.
Update 27.07.22 - Version 1.37.0
minor fixies.
Update 26.07.22 - Version 1.36.0
deprecated Agora component and Agora Connector elements.
Update 22.06.22 - Version 1.35.0
added possibility to enable microphone using "mute/unmute" action.
Update 19.05.22 - Version 1.34.0
Added new field in the element params 'display mode' for aspect ratio.
Update 04.05.22 - Version 1.33.0
added - possibility to record real time calls.
added - an action that generates a token for cloud recording.
Update 25.02.22 - Version 1.32.0
fixed error in screensharing+camera.
Update 17.12.21 - Version 1.31.0
Added checkbox to enable window closing detection.
Update 02.12.21 - Version 1.30.0
Fixed back camera mirror.
Update 24.11.21 - Version 1.29.0
Fixed recording for streaming mode.
Update 29.10.21 - Version 1.28.0
minor changes.
Update 27.09.21 - Version 1.27.0
added posibility to Simultaneously Share Screen and Camera.
Update 26.08.21 - Version 1.26.0
removed microphone and camera request for audience role of stream..
Update 13.08.21 - Version 1.25.0
Added new element based on new AgoraRTC 4.6.
Update 28.07.21 - Version 1.24.0
Updated description.
Update 14.07.21 - Version 1.23.0
Updated icon.
Update 08.06.21 - Version 1.22.0
Added a new option to enable or disable video and audio in the streaming component.
Update 23.05.21 - Version 1.21.0
Added to streaming element new calls to separate recording and new exposed state with client ID.
Update 17.03.21 - Version 1.20.0
Added an option to choose the camera if more than one.
Update 15.03.21 - Version 1.19.0
Updated description.
Update 27.01.21 - Version 1.18.0
Added a new function which allows loading logs to Agora..
Update 27.01.21 - Version 1.17.0
Added a new function which allows loading logs to Agora..
Update 24.01.21 - Version 1.16.0
Added new functionality for getting Agora logs with a checkbox to manage it and new parameter for choosing the browser's.
Update 14.01.21 - Version 1.15.0
Fixed issue with continuing streaming after closing window.
Update 17.10.20 - Version 1.14.0
Fixed issue with sound on iOS.
Update 13.10.20 - Version 1.13.0
Updated description.
Update 09.10.20 - Version 1.12.0
Added the ability to record in streaming mode and to choose between the camera and screen sharing".
Update 01.09.20 - Version 1.11.0
Improved condition for displaying interlocutors in a multi-user conference.
Update 15.05.20 - Version 1.10.0
Added new Streaming Component , improved stability by updating to latest SDK.
Update 15.05.20 - Version 1.9.0
Added new Streaming Component , improved stability by updating to latest SDK.
Update 05.05.20 - Version 1.8.0
Updated AgoraRTCSDK package.
Update 27.03.20 - Version 1.7.0
Fixed - audio enabled..
Update 26.11.19 - Version 1.6.0
Update - removed default video controls from iOS, be cause of native bugs.
Update 15.11.19 - Version 1.5.0
Improvement - intuitive integrated UI buttons.
Update 08.11.19 - Version 1.4.0
Update - ES6 fetures translated to ES5.
Update 27.10.19 - Version 1.3.0
Fixed the audio.
Update 23.10.19 - Version 1.2.0
Updated description.
Update 21.10.19 - Version 1.1.0
Improvements - render in bubble elements, responsive, integrated UI buttons, simplified to use.