Link to the plugin page: https://zeroqode.com/plugin/1589725860438x720991841375494800
Demo to preview the plugin:
Introduction
Enhance the visual appeal of your Bubble app by integrating this no-code plugin and personalize your user interface by applying a 3D effect that dynamically moves with the mouse.

How to setup
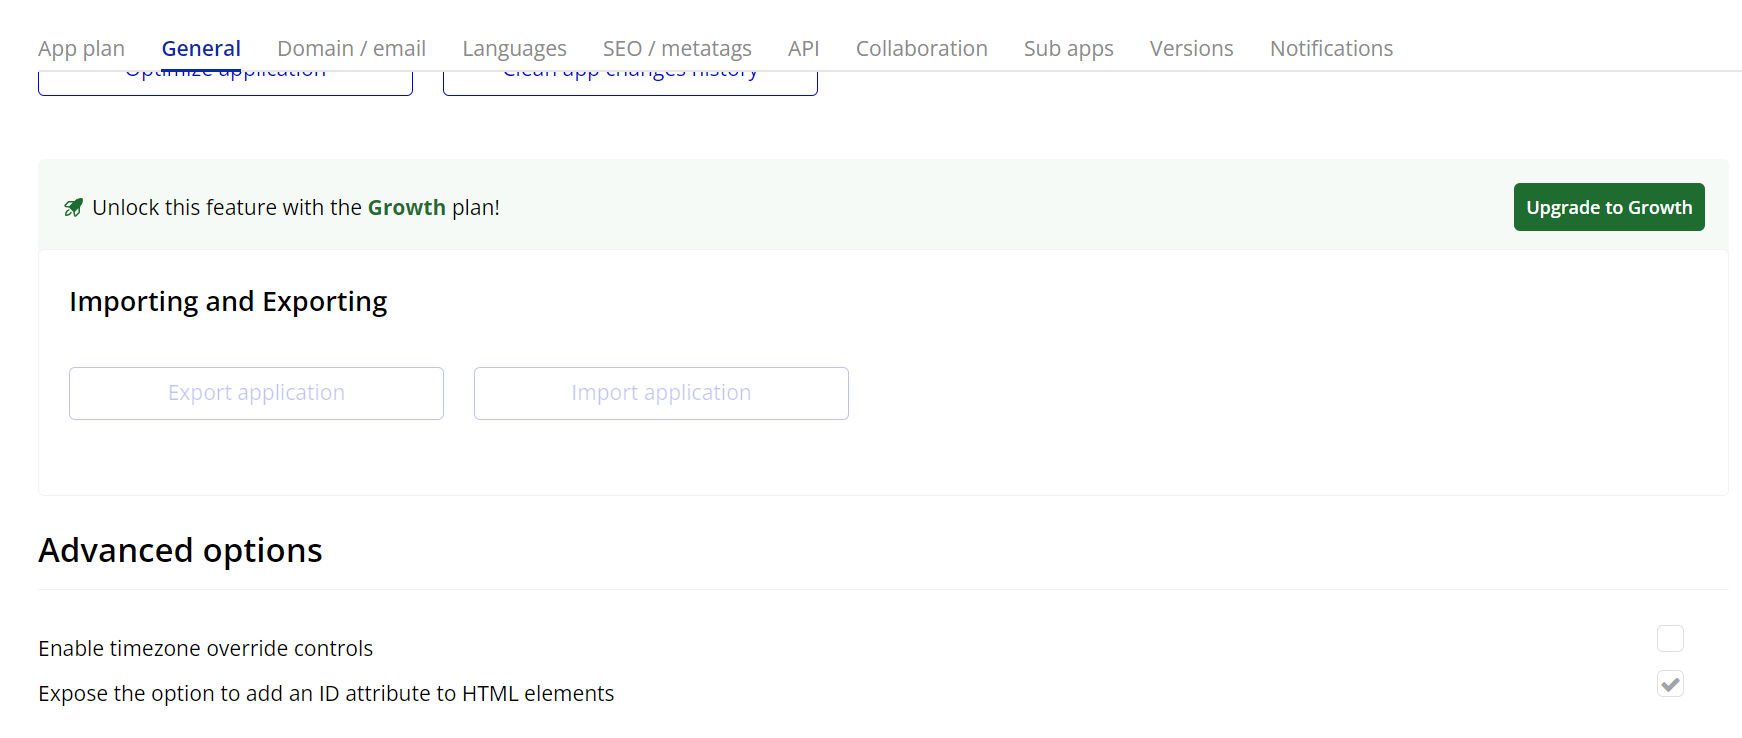
- Enable ID Attributes
Go to the settings page in your editor. Under the General tab click on the checkbox “Expose the option to add an ID attribute to HTML elements”
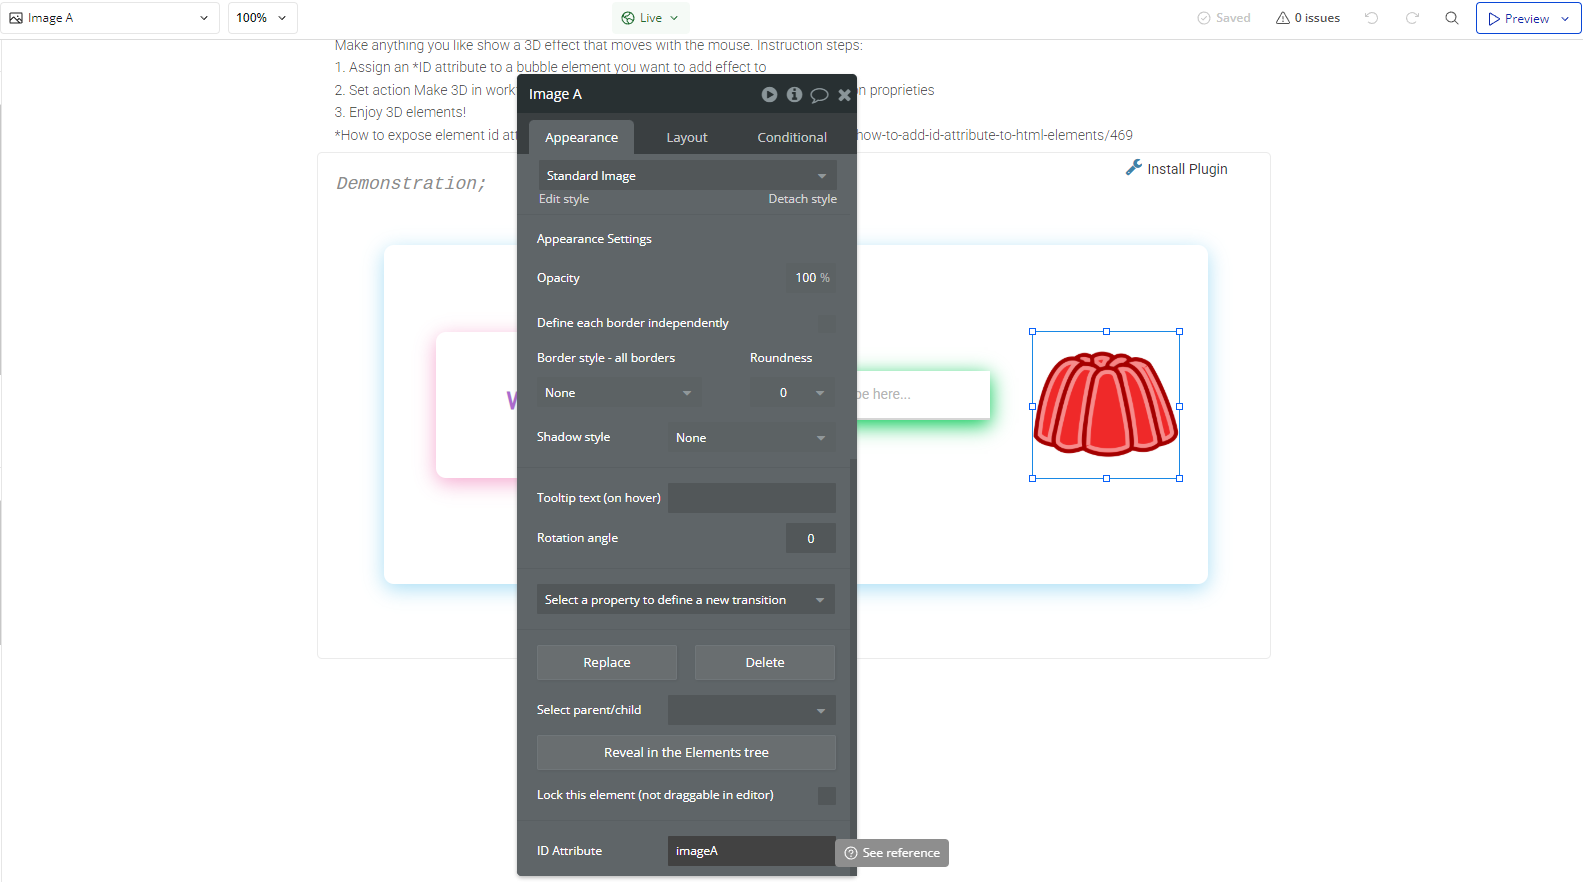
- Add the Element and Assign a Unique ID
- In the Bubble editor, add the element you want to transform into 3D (e.g., a Group, Text, or Image).
- In the Appearance tab, locate the ID Attribute field and assign a unique name (e.g.,
myElement).
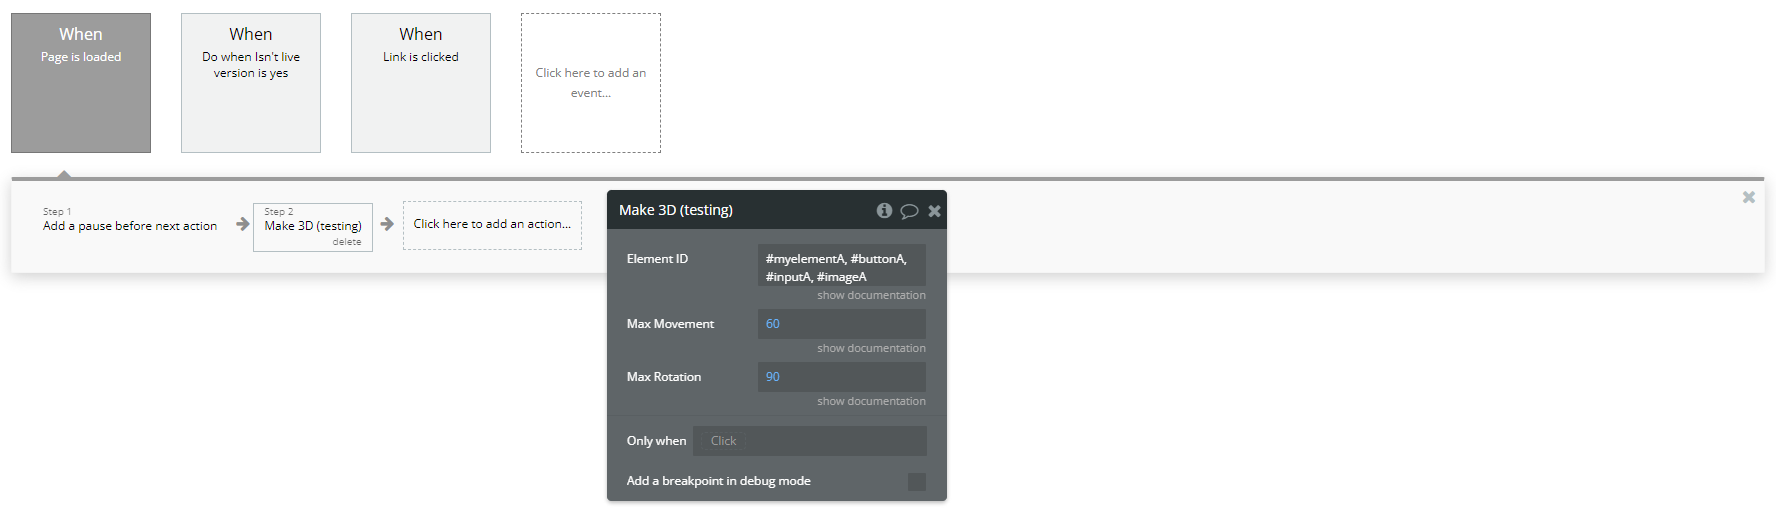
- Create a Workflow to Apply the 3D Effect
- Go to the Workflows tab and create a new event (e.g., When Button is Clicked).
- Add the Make 3D action
Plugin Actions
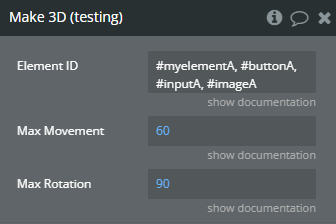
- Make 3D - The Make 3D action applies a 3D transformation effect to an element, making it appear dynamic and interactive. This effect is achieved through movement and rotation based on user interactions or preset values.
Title | Description | Type |
Element ID | Prefix # for id’s, . for classes or just type and element type such as div. | Text |
Max Movement | Max movement in pixels. | Number |
Max Rotation | Max rotation in degrees. | Number |