
JSON Payload Formatting
Handling JSON-Sensitive Characters
When working with JSON payloads in Supabase operations, it’s crucial to properly format your data to avoid malformed JSON requests that can cause operations to fail.
❗
Important: If your data contains JSON-sensitive characters, always apply the
:formatted as JSON-safe option before sending the payload.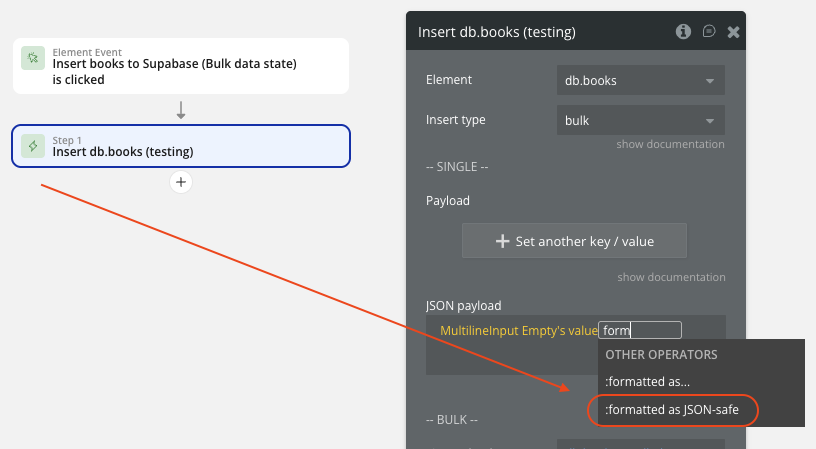
Common JSON-Sensitive Characters:
- Backslashes (
\)
- Double quotes (
")
- Single quotes (
')
- Forward slashes (
/)
- Curly braces (
{,})
- Square brackets (
[,])
- Control characters (newlines, tabs, etc.)
Example Scenarios:
❌ Problematic - Without JSON-safe formatting:
plain textUser input: John's "favorite" book\notes
Direct JSON payload: {"description": "John's "favorite" book\notes"}
Result: Malformed JSON causing operation failure
✅ Correct - With JSON-safe formatting:
plain textUser input: John's "favorite" book\notes
Apply: [Field]:formatted as JSON-safe
Result: {"description": "John's \"favorite\" book\\notes"}
Operation: Succeeds
Use Cases by Component:
Database Operations
- Insert/Update/Upsert: When inserting user-generated content that may contain special characters
- JSON Payload field: Always use
:formatted as JSON-safefor dynamic content
- Advanced Filters: When filtering by values that contain JSON-sensitive characters
Authentication
- User Metadata: When storing user profile information with special characters
- JSON User Metadata field: Apply JSON-safe formatting for user-provided data
Edge Functions
- JSON Body field: Essential when passing user input to edge functions
- Function Parameters: When arguments contain dynamic content with special characters
Storage
- Metadata field: When storing file metadata with user-generated descriptions or tags
Realtime
- JSON Message field: When broadcasting messages containing user input
- User State JSON: When tracking user states with dynamic content
Common Issue Resolution
Symptom: Supabase operations fail silently or return unexpected errors, especially with filtering functionality
Cause: Malformed JSON due to unescaped special characters
Solution: Apply
:formatted as JSON-safe to all dynamic content before including in JSON payloadsBest Practices:
1. Always use
:formatted as JSON-safe when dealing with user input
2. Test with various special characters during development3. Monitor for JSON parsing errors in your application logs
4. Consider validating user input on the frontend to prevent issues
Implementation Examples:
Database Insert with JSON-safe formatting:
plain textPayload field: name → [User's Name]:formatted as JSON-safe
JSON Payload: {"description": "[User's Description]:formatted as JSON-safe"}
Authentication User Metadata:
plain textUser Metadata field: bio → [User's Bio]:formatted as JSON-safe
JSON User Metadata: {"preferences": "[User's Preferences]:formatted as JSON-safe"}
Migrating your users to Supabase
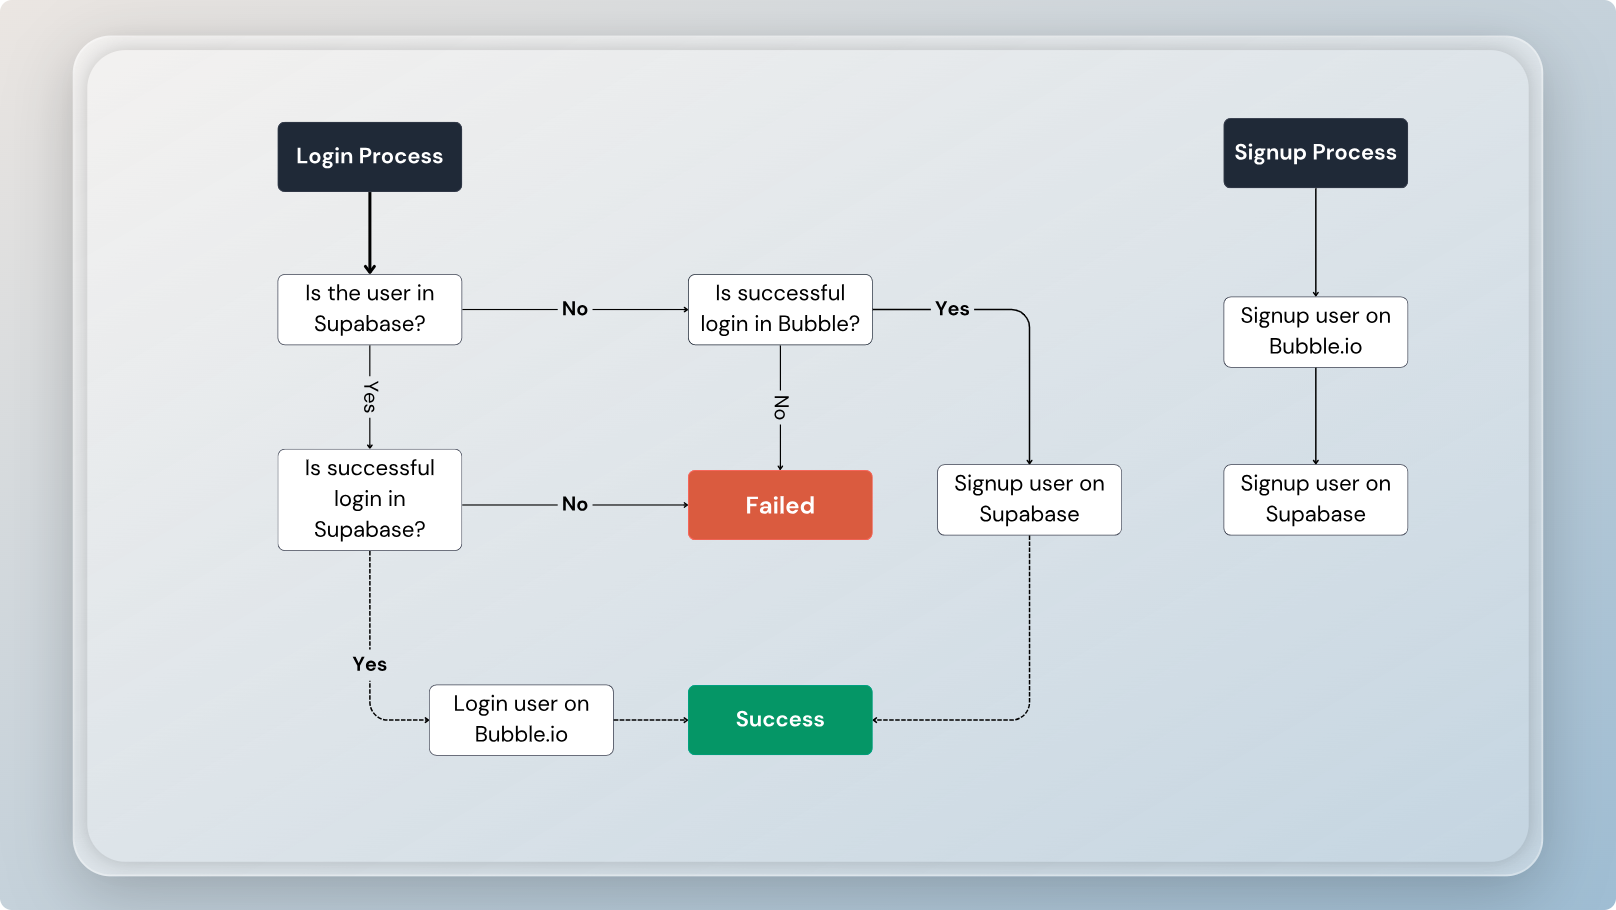
To migrate your users from Bubble.io to Supabase, the first step involves determining if a user already exists in your Supabase instance.
To check for user existence by querying their email address, you can implement an RPC function on your Supabase instance using the following SQL code:
Step 1 - Create the function on Supabase
sqlCREATE OR REPLACE FUNCTION public.is_user_exists(user_email TEXT)
RETURNS JSON AS $$
DECLARE
    user_exists BOOLEAN;
BEGIN
    SELECT EXISTS(SELECT 1 FROM auth.users WHERE email = user_email) INTO user_exists;
    RETURN json_build_object('exists', user_exists);
END;
$$ LANGUAGE plpgsql VOLATILE SECURITY DEFINER;
GRANT EXECUTE ON FUNCTION public.is_user_exists(TEXT) TO anon;
Step 2 - Create the datatype on the API connector
On your Bubble app, create a new datatype (e.g., is_user_exists), click on "Manually enter API response," and copy/paste the following schema:
json{
  "exists": false
}
❗
JSON Safety Note: When working with RPC functions that return dynamic content, ensure any user-generated data passed as arguments uses the
:formatted as JSON-safe option to prevent malformed JSON requests.Step 3 - Calling the function
On your Bubble.io page, add an RPC component, set up the datatype you just defined, and call the function, passing the user's email as an argument when a user attempts to sign in.
The complete process for migrating and authenticating users involves several steps outlined in the diagram above.
User file management
Allow users to upload, delete, and display their files.
Editor
In this demo, we will walk through the steps to allow users to upload, delete, and list their files using the storage component.
Implementation on Supabase
To implement this, we are creating a bucket named "storage." This bucket will be used to store files for all users.
Each user will have their own subfolder within the bucket. We are using the "User ID" state from the auth component as a prefix for all storage and uploader actions.The RLS policies below ensure users can only manage files within their own subfolders:
RLS - Allow users to upload files to their folder
sqlCREATE POLICY "Allow users to upload files to their folder"
ON storage.objects
FOR INSERT
TO authenticated
WITH CHECK (
  bucket_id = 'storage' AND
  (storage.foldername(name))[1] = auth.uid()::text
);
RLS - Allow users to update their own files
sqlcreate policy "Allow users to list their own files"
on storage.objects
for select
to authenticated
using (
  bucket_id = 'storage' and
  (storage.foldername(name))[1] = auth.uid()::text
);
RLS - Allow users to list their own files
sqlcreate policy "Allow users to list their own files"
on storage.objects
for select
to authenticated
using (
  bucket_id = 'storage' and
  (storage.foldername(name))[1] = auth.uid()::text
);
RLS - Allow users to delete their own files
sqlcreate policy "Allow users to delete their own files"
on storage.objects
for delete
to authenticated
using (
  bucket_id = 'storage' and
  (storage.foldername(name))[1] = auth.uid()::text
);
Implementation on Bubble
First, add a storage component to your page. Then make sure to set the value of the field Datatype to "Storage (Supabase)."
This type is automatically defined by the Supabase plugin and allows for exposing buckets, files, signed URLs, and uploads.
Listing the files
To list the files on page load, we rely on the state "Is logged in?" from the auth component. We use the Bubble trigger "Do when condition is true." and set "Run once".
In this workflow, we simply call the "List files" action using the "User ID" from the auth state as the path.We display the files in a repeating group using "Storage file (Supabase)" as the type. This is a custom type implemented by the plugin.Each file has these properties:
sqlname
id
updated_at
created_at
last_accessed_at
metadata eTag
metadata size
metadata mimetype
metadata cacheControl
metadata lastModified
metadata contentLength
metadata httpStatusCode
Uploading a new file
You can now add the uploader component, using the "User ID" from the auth state as the path. We then use the "File upload success" event triggered by the uploader in case of success to call the "List files" action again and refresh our list of files.
❗
JSON Safety Note: When working with file metadata that includes user-generated content (custom file descriptions, tags, etc.), always apply
:formatted as JSON-safe to metadata fields to prevent JSON formatting issues during storage operations.Deleting a file
To delete a file, you can call the "Delete file" action using the User ID concatenated with the current row file name.
Downloading a file
To download a file, you can call the "Download a file from bucket" action, using "private" as "Bucket type" and the User ID concatenated with the current row file name as path.
Displaying a file
To display a file, you can call the "Create a signed URL" action for each row (file) of the repeating group. In this demo, we are using the free plugin "Loaded trigger" for this. We then set a state "signedUrl" on the row and use the value for the "Dynamic image" field of the image.
Structuring your app
To simplify the management of your Supabase tables and facilitate the reuse of workflows, you can use reusable components. The main idea is to have:
A reusable component for all actions related to authentication (containing the Auth component).A reusable component for each table you want to manage (containing the Database component).
On the reusable components, we'll then define:
• Custom states: to be able to access the states from other pages (DB Objects, User email, ...)
• Custom events: to be able to trigger plugin actions (Insert, Fetch, Login, ...)
You can use the "Trigger a custom event from a reusable element" Bubble.io action to call the events defined by a reusable.
This demo showcases only two reusables (reusable.auth and reusable.db.todos). You can, of course, use the same logic with other plugin components such as RPC or Edge functions.
❗
JSON Safety Note: When using reusable components for database operations that handle user-generated content, ensure all dynamic text fields use
:formatted as JSON-safe before being passed to Insert, Update, or Upsert actions to prevent JSON formatting errors.Auth
Open the reusable "reusable.auth"
Custom events
The reusable auth defines the following events:
• Signup
• Login
• Logout
Custom states
The reusable auth defines the following states:
• Is logged in
• User ID
• User email
• User metadata
• App metadata
Basic chat
How-to create a basic chat application with Supabase
Editor
We'll use the example of creating a basic chat application with Supabase. This initial version uses a simple messages table to demonstrate the core functionality.
❗
JSON Safety Note: When implementing chat functionality, user messages often contain special characters that can break JSON formatting. Always apply
:formatted as JSON-safe to message content when inserting or updating messages through database operations.In future updates, we'll expand this demo to include support for channels, permissions, and more advanced features.
Step 1 - Create the messages table
sqlCREATE TABLE messages (
  id UUID PRIMARY KEY DEFAULT gen_random_uuid(),
  user_id UUID NOT NULL REFERENCES auth.users(id) ON DELETE CASCADE,
  content TEXT NOT NULL,
  created_at TIMESTAMPTZ DEFAULT NOW()
);
Step 2 - Enable RLS
sqlALTER TABLE messages ENABLE ROW LEVEL SECURITY;
Step 3 - Allow authenticated users to insert messages
sqlCREATE POLICY "Allow authenticated users to insert messages" ON messages
FOR INSERT
TO authenticated
WITH CHECK (auth.uid() = user_id);
Step 4 - Allow authenticated users to view messages
sqlCREATE POLICY "Allow authenticated users to view messages" ON messages
FOR SELECT
TO authenticated
USING (true);
Step 5 - Enable realtime
sqlalter publication supabase_realtime add table messages;
Sign in with Google
Google setup
If you have not done so yet, the first thing to do is to create an app on the Google Cloud console. You can follow this guide from Supabase for all the details: Login with Google
Under "Authorized redirect URLs", if you have not set up a custom domain, the format will be: https://<project_id>.supabase.co/auth/v1/callback.
(Please make sure to replace <project_id> with your Supabase project ID)
Supabase setup
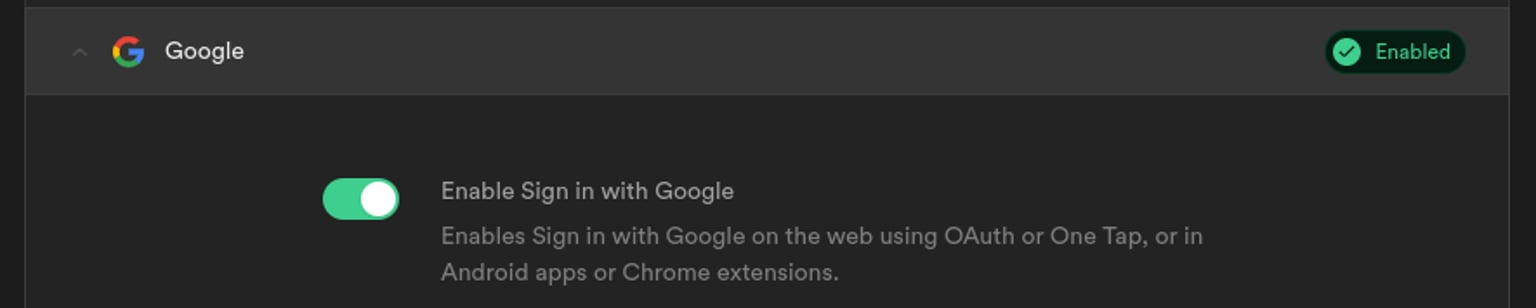
You can then enable Google as an auth provider on your Supabase project. You can do this on your Supabase dashboard > Authentication > Providers > Google and copy/paste the Client ID and Client Secret values.
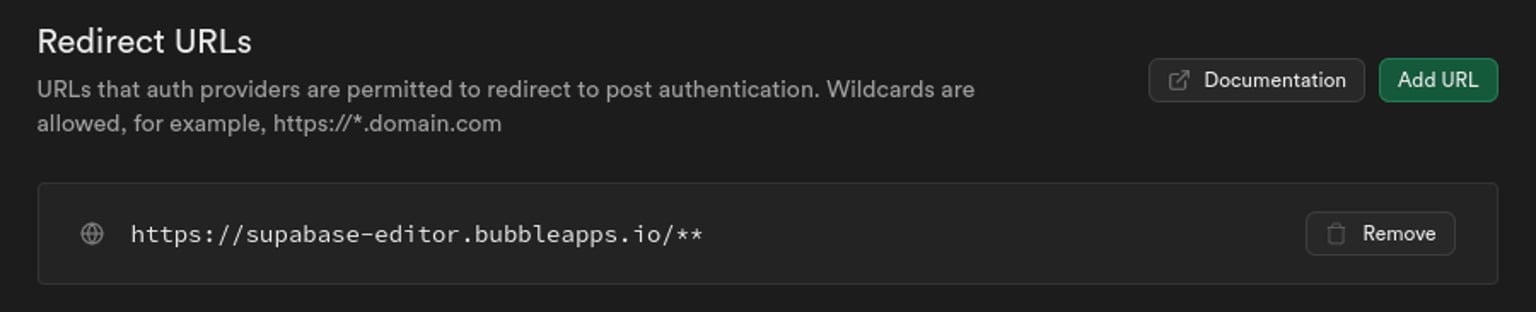
Make sure to allow Google to redirect the user to your Bubble app after authentication. You can configure the allowed URLs on your Supabase dashboard > Authentication > URL Configuration > Redirect URLs.For example:https://supabase-editor.bubbleapps.io/**
Bubble setup
Now, to allow your users to sign in to your app, you can simply call the "Log the user in with OAuth" action from the auth component. You must define values for the "Provider", "Scopes," and "Redirect to" fields.
Provider: googleScopesThe list of scopes to request from the third-party provider. For the Google provider, you can use these values:https://www.googleapis.com/auth/userinfo.emailhttps://www.googleapis.com/auth/userinfo.profile, openidRedirect toThe URL to redirect the user to after they sign in with Google. For example:https://supabase-editor.bubbleapps.io/version-test/
If the user successfully login on Google, the user will then be redirecting to your Bubble app and will be automatically logged-in.
Sign in with Slack
Slack setup
If you have not done so yet, the first thing to do is to create an Slack OAuth application on your Slack dashboard. You can follow this guide from Supabase for all the details: Login with Slack
Under "Redirect URLs", if you have not set up a custom domain, the format will be: https://<project_id>.supabase.co/auth/v1/callback.
(Please make sure to replace <project_id> with your Supabase project ID)
Supabase setup
You can then enable Slack as an auth provider on your Supabase project. You can do this on your Supabase dashboard > Authentication > Providers > Slack and copy/paste the Client ID and Client Secret values.

Make sure to allow Slack to redirect the user to your Bubble app after authentication. You can configure the allowed URLs on your Supabase dashboard > Authentication > URL Configuration > Redirect URLs.For example:https://supabase-editor.bubbleapps.io/**
Bubble setup
Now, to allow your users to sign in to your app, you can simply call the "Log the user in with OAuth" action from the auth component. You must define values for the "Provider", "Scopes," and "Redirect to" fields.
Provider: slackScopesThe list of scopes to request from the third-party provider. For the Slack provider, you can use these values:profileemailopenidRedirect toThe URL to redirect the user to after they sign in with Slack. For example:https://supabase-editor.bubbleapps.io/version-test/
If the user successfully login on Slack, the user will then be redirecting to your Bubble app and will be automatically logged-in.
Custom authentication
In this guide, we’ll set up a todos table on Supabase and securely grant access to it for our Bubble users.
The Custom Auth component offers all the necessary actions and events to handle authentication and token management, making it easy to implement this use case.
Generate JWT (Server-side action)
This action allows you to generate a JWT (token) for the user. The JWT is then used for every call to Supabase when using other components (Database, RPC, Edge Function, etc.).
Token valid
This event is triggered when the token provided to the auth component is successfully validated.
Token invalid
This event is triggered when the token provided to the auth component is not valid.
Token expires soon
This event is triggered when the token provided to the auth component is about to expire.
Supabase is loaded
This event is triggered when the auth component is fully loaded and ready to use.
Bubble setup
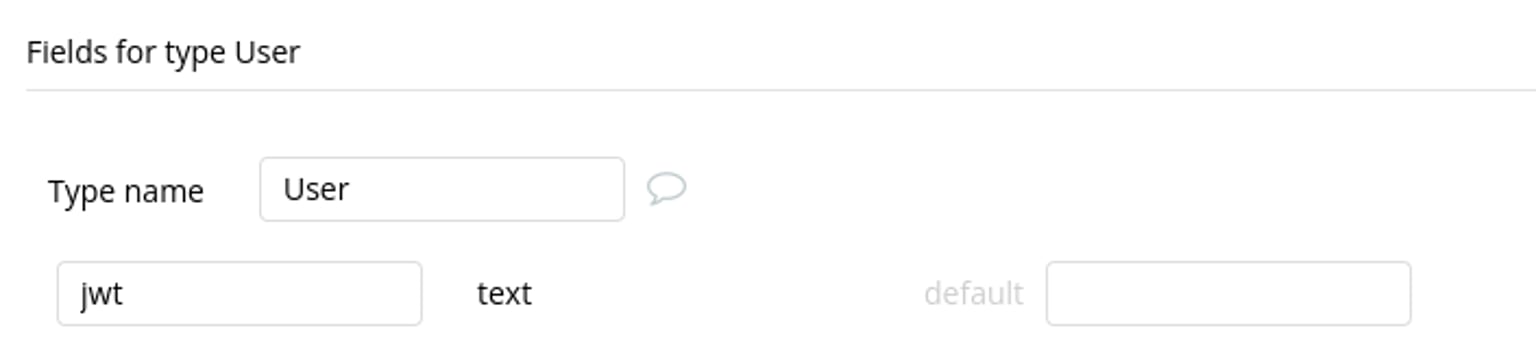
Step 1 - Store the JWT
The JWT is unique to each user and will be stored in the users table in Bubble. You can create a new field called JWT in the users table.
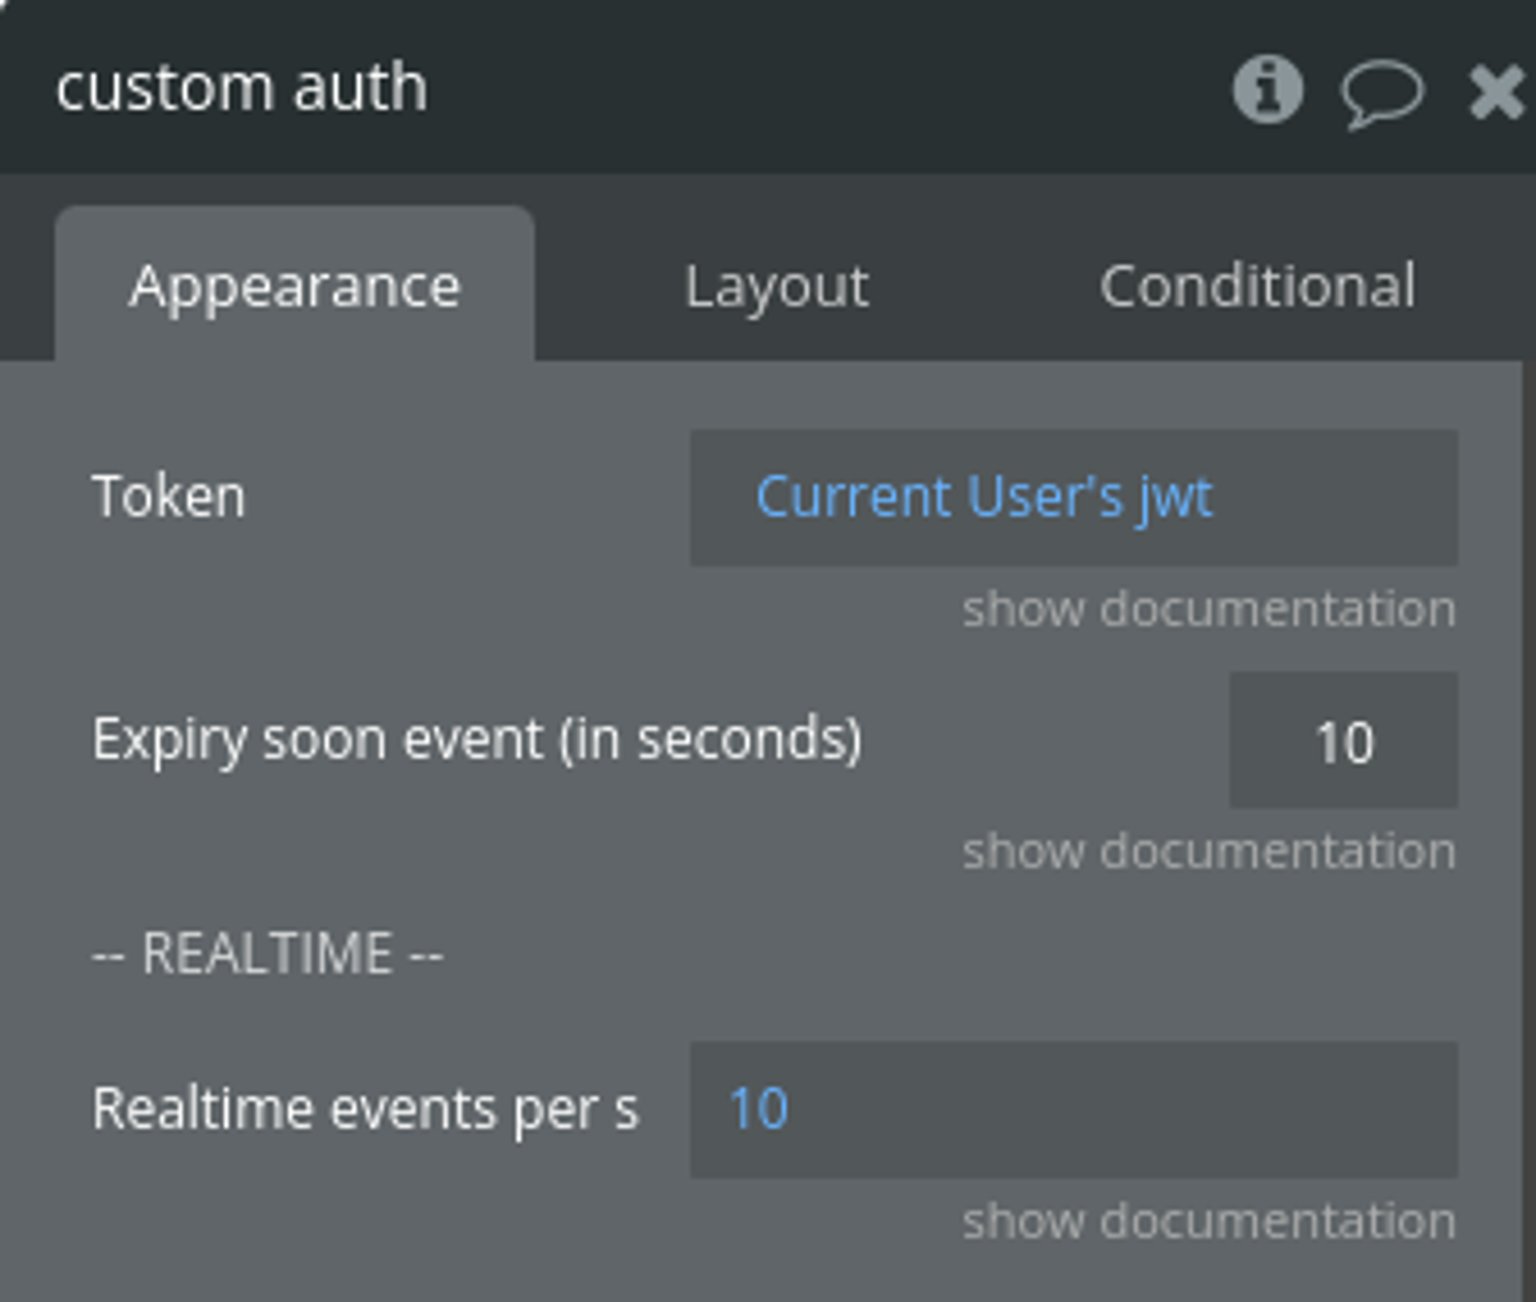
Step 2 - Add and configure the custom auth component
Simply add the custom auth component to your page, and set the "token" field to the user's JWT field (e.g., Current User's JWT).
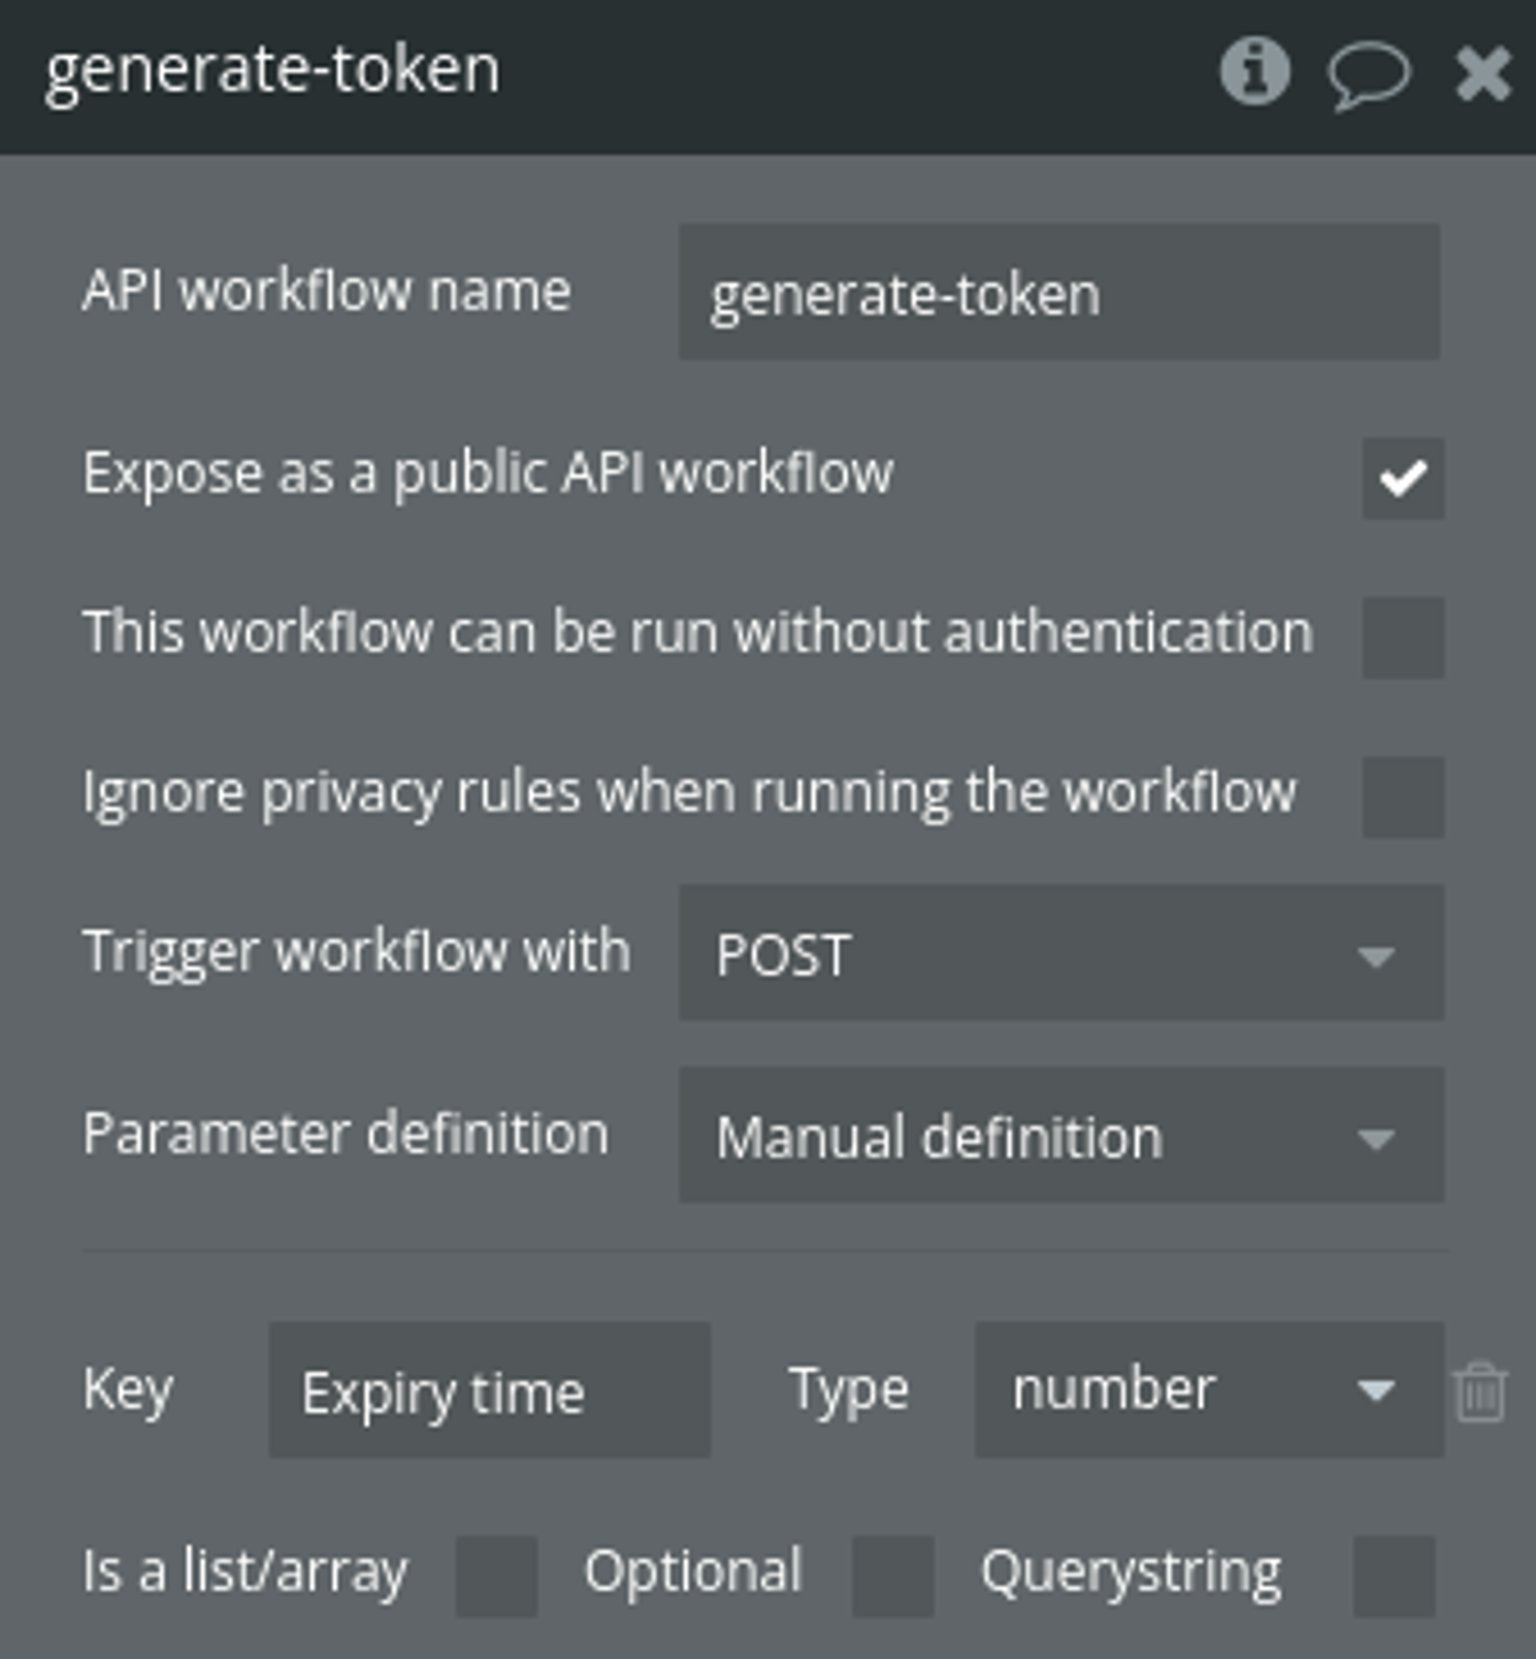
Step 3 - Add a new API WF for generating JWT
The Generate JWT action is a server-side action. You can create a new API workflow (e.g. generate-token) in order to call the action.
Step 4 - Call the Generate JWT action
Inside the workflow, simply call the Generate JWT action to generate a token for the current user.
You can configure various claims for the token. The Sub (subject) field uniquely identifies the user, and you can use Bubble's unique ID (Current User's unique ID).Since Bubble's unique ID is not in UUID format, you can check the "Use UUID for the sub claim" option. This will convert the unique ID into a UUID format for the subject claim.
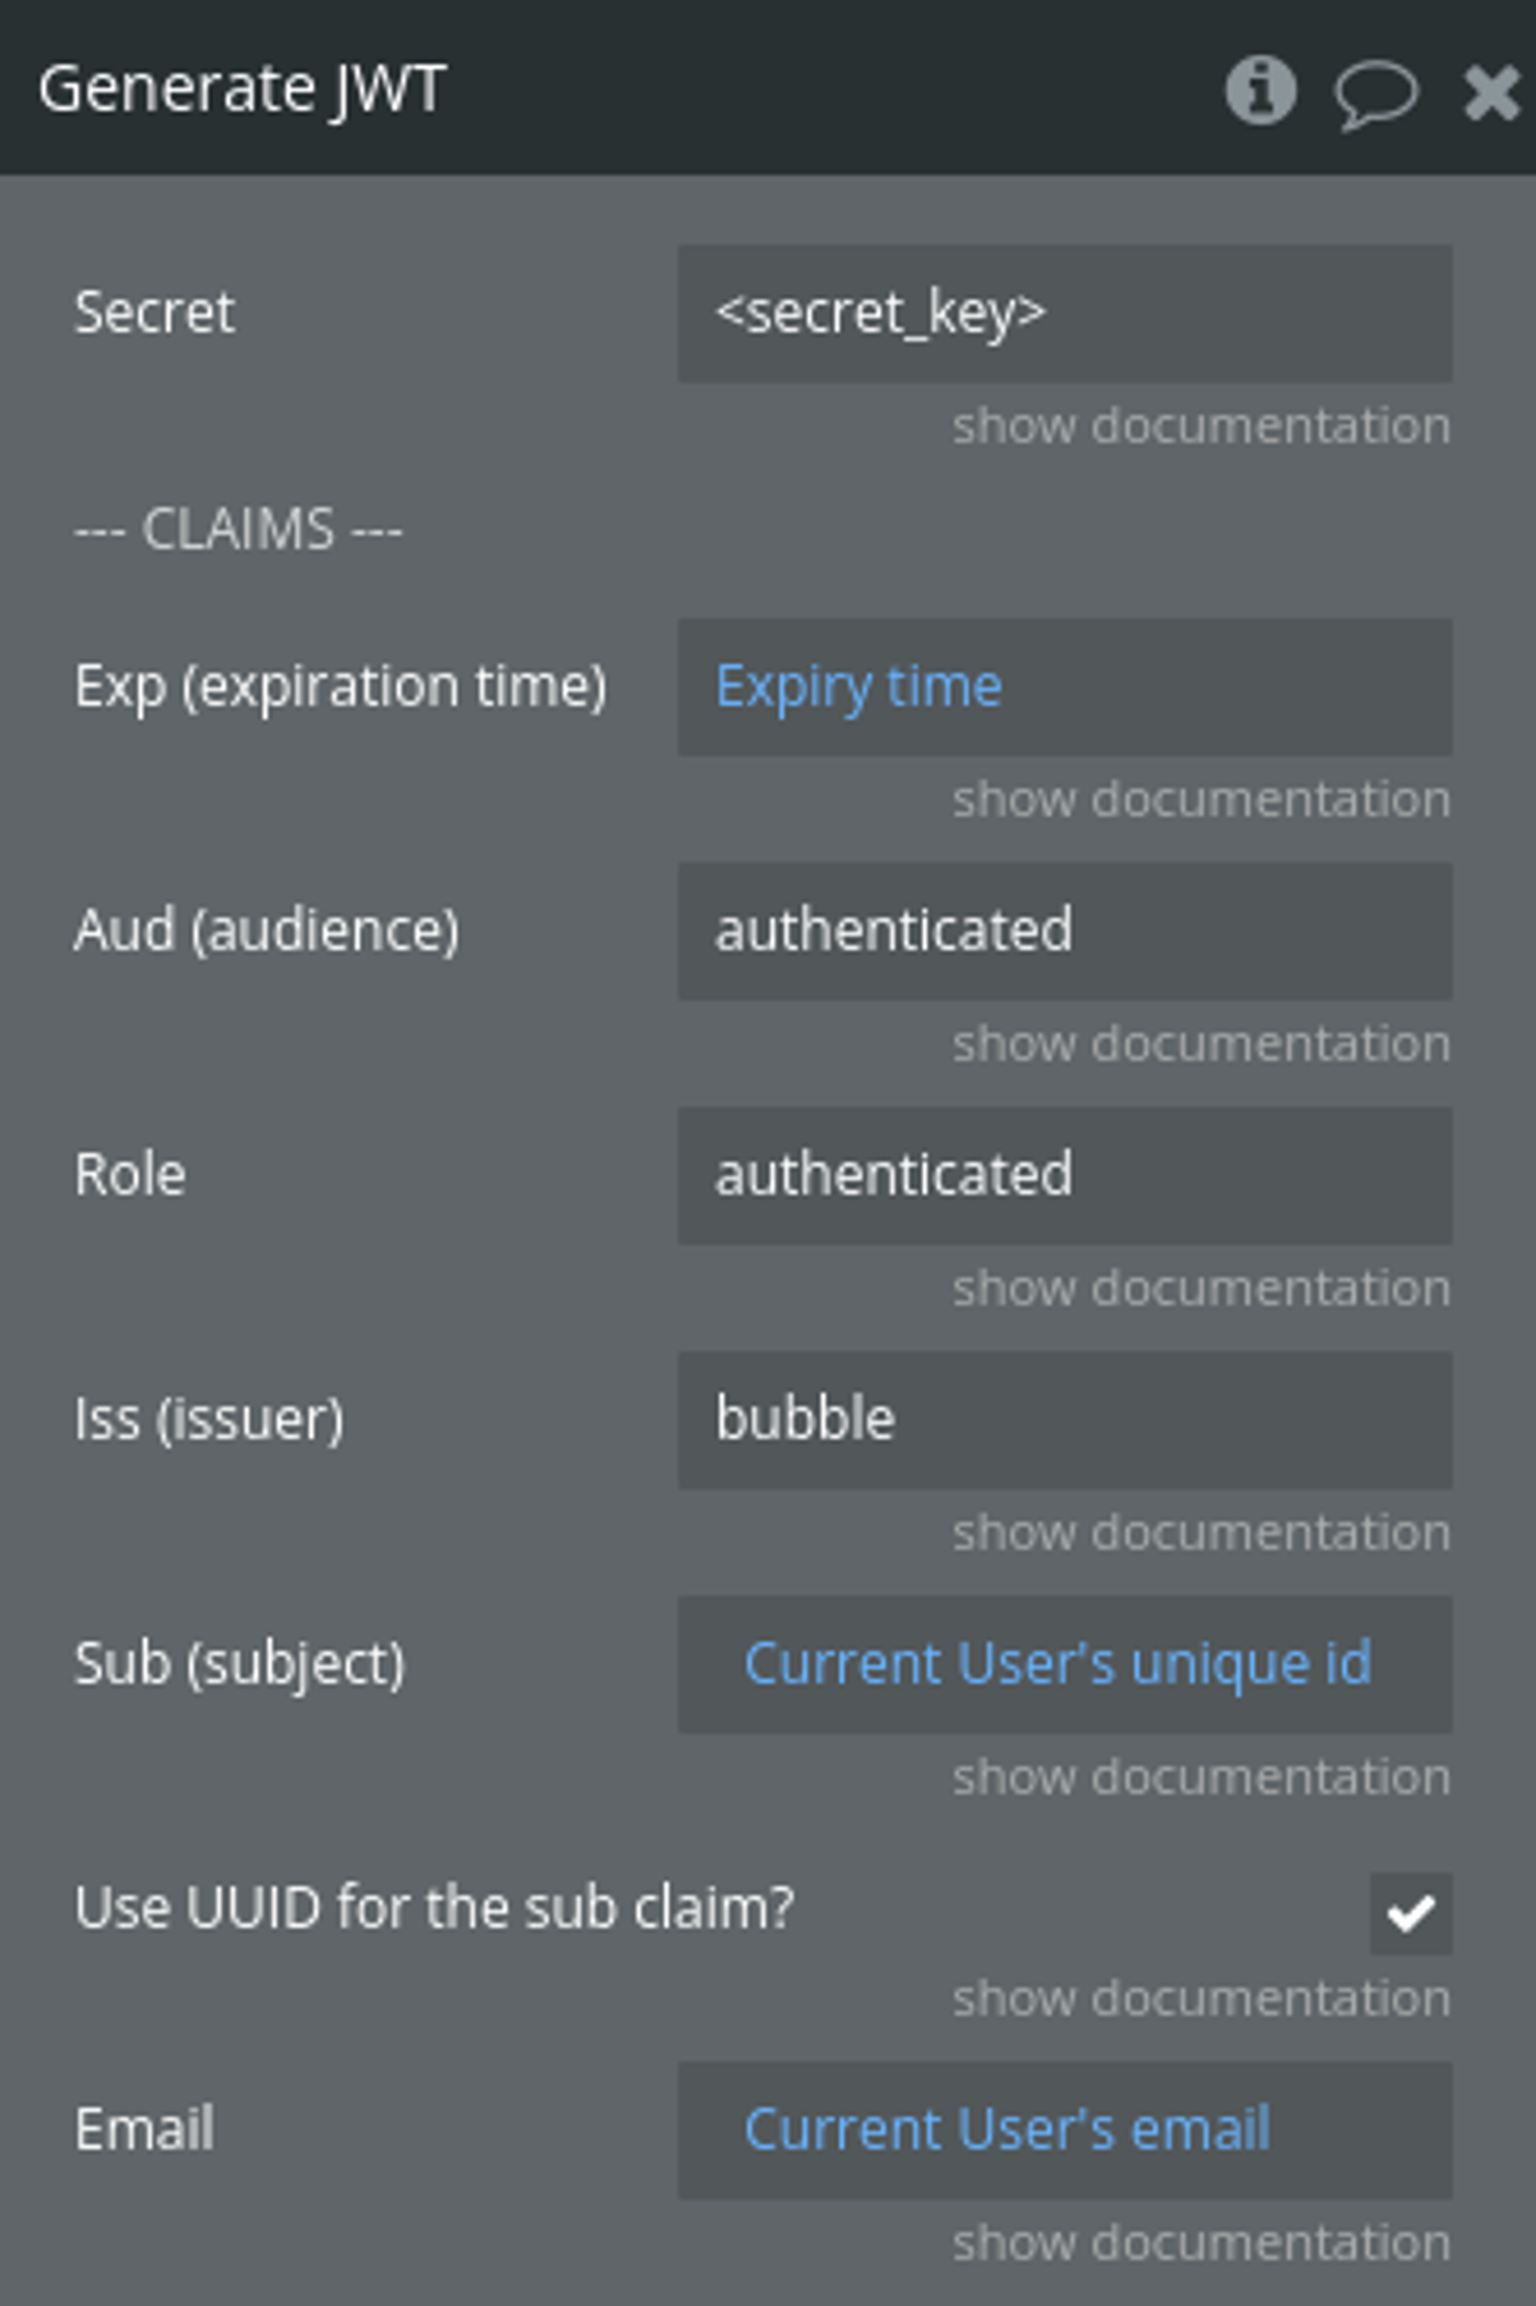
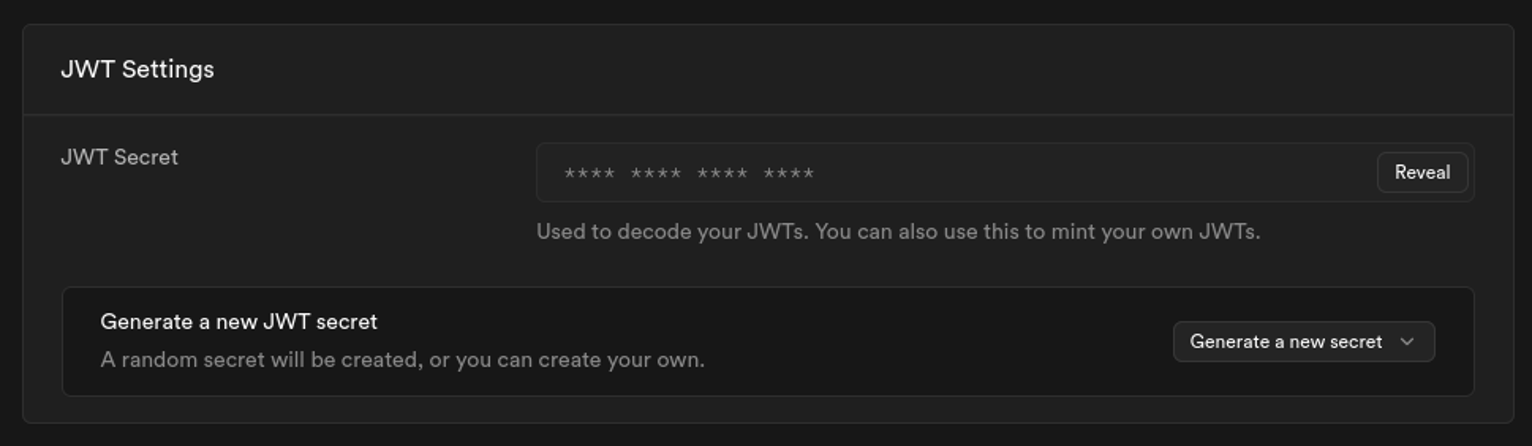
You can find the Secret Key on your Supabase Dashboard > API > JWT Secret
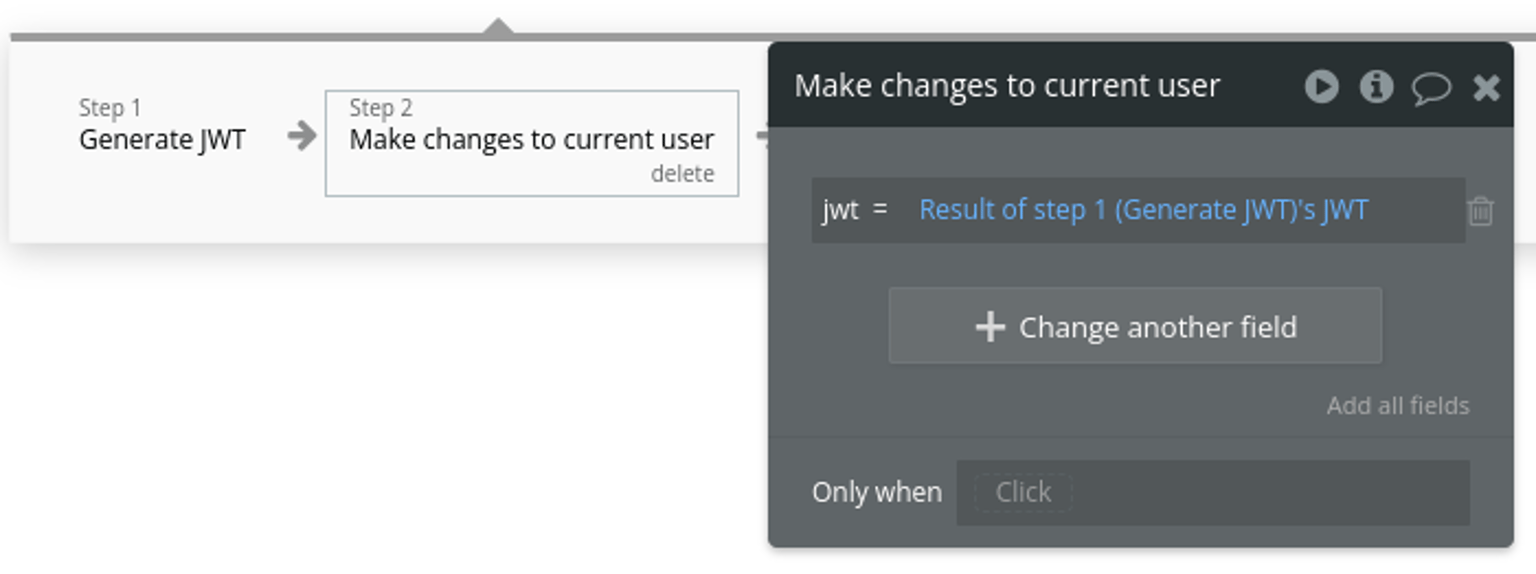
Step 5 - Save the JWT to the current user
After the JWT is generated, simply save its value to the JWT field you created earlier.
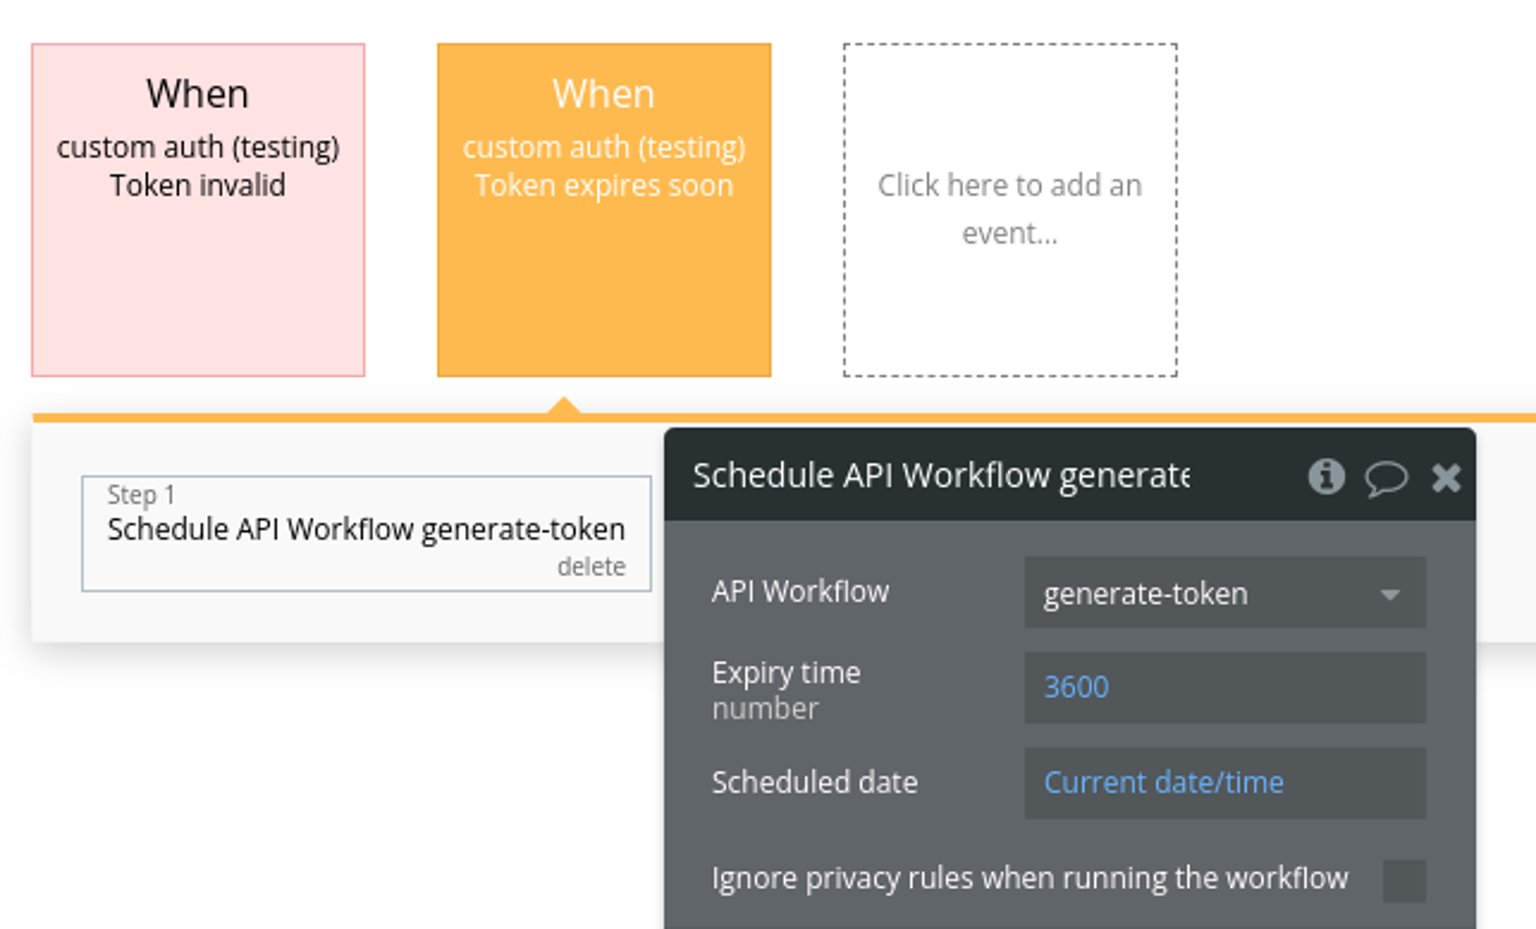
Step 6 - Generate a new JWT
Now, we'll need to call the API workflow (generate-token) to generate a new JWT for the user when needed. We'll generate a new JWT in both of the following cases:
- > when the JWT is invalid (e.g., on new login)
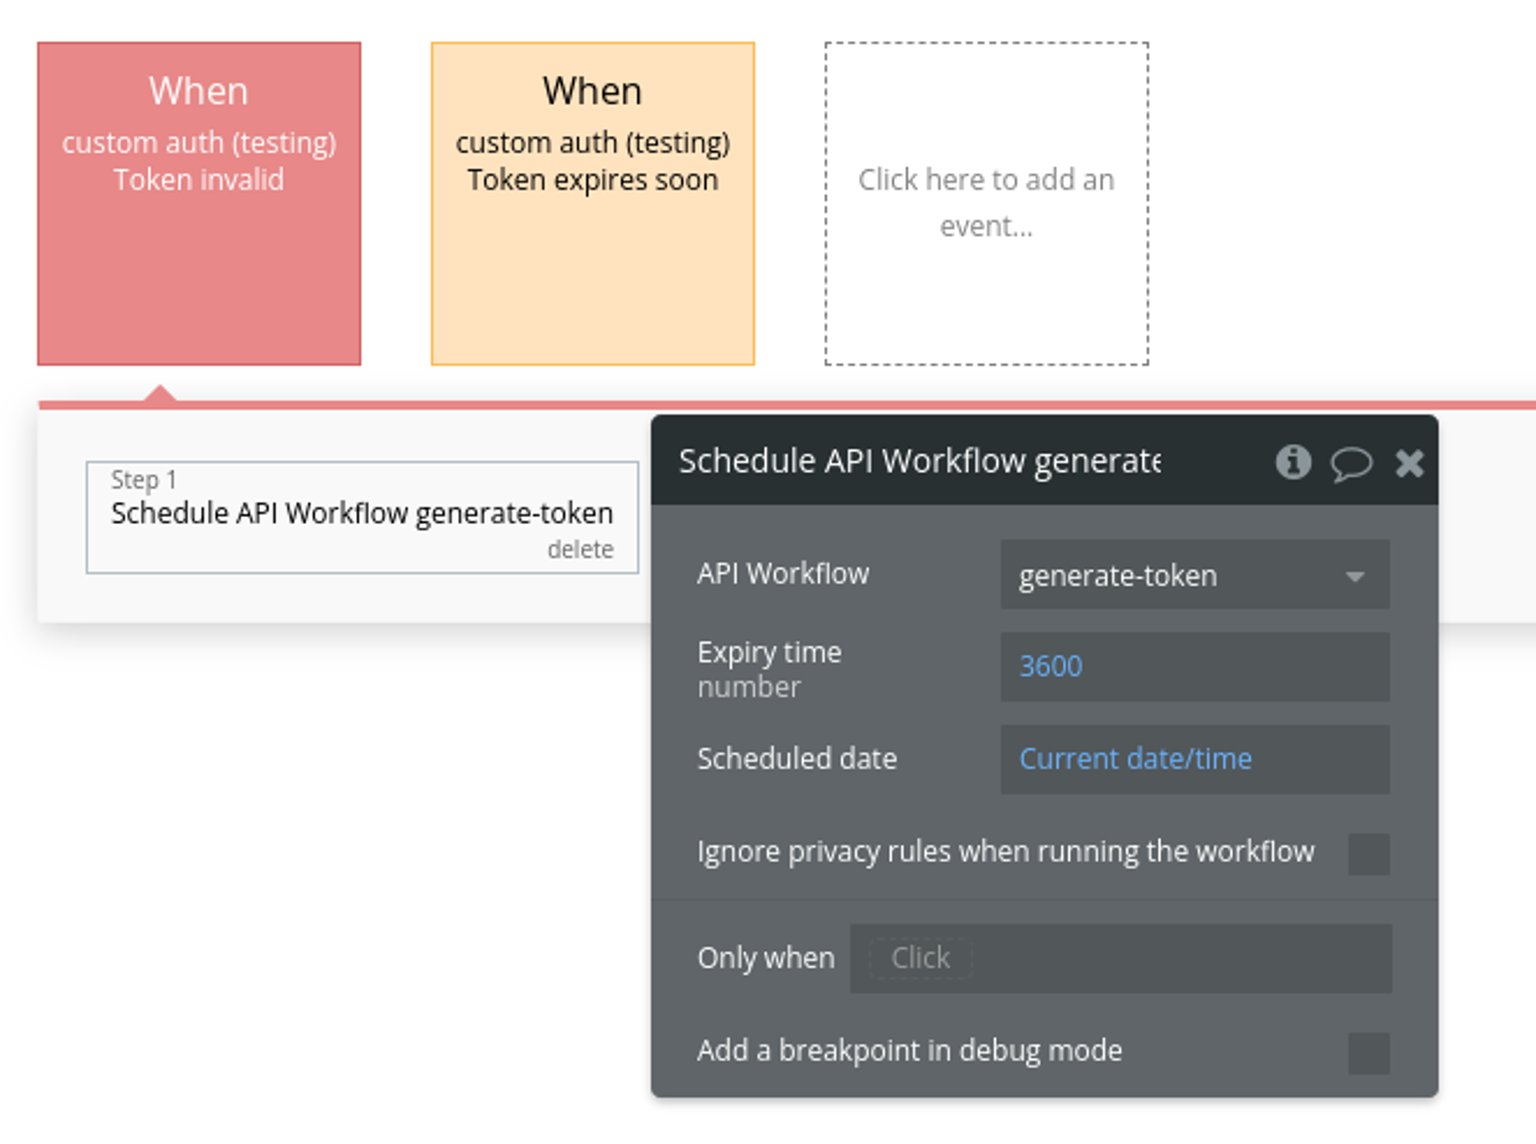
- > when the JWT is about to expire
Well done! We've set up everything we need on Bubble. Now, let's move on to implementing the requirements on Supabase.
Supabase setup
Let’s start by creating the todos table in Supabase and setting up secure access for our Bubble users using RLS.
Create the todos table in Supabase:
sqlcreate table todos (
  id uuid default uuid_generate_v4() primary key,
  user_id uuid not null,
  title text not null,
  completed boolean default false,
  created_at timestamp with time zone default now()
);
The user_id column stores the unique ID of the Bubble user who owns each todo item, allowing us to control access through RLS.
❗
JSON Safety Note: When implementing todos functionality with user-generated content (titles, descriptions, etc.), always apply
:formatted as JSON-safe to text fields in database operations (insert, update, upsert) to prevent malformed JSON from breaking your operations.Enable Row Level Security (RLS) on the todos table:
sqlalter table todos enable row level security;
Create a function to get the user_id from the JWT
This function is used to extract the sub (subject) field from the JWT, which is the unique identifier for the user. The sub field is included in the JWT when it's passed with each request from Bubble to Supabase.
Once this function is created, it can be used in your RLS (Row Level Security) policies to identify and secure access for each Bubble user based on their unique user_id.
sqlcreate or replace function auth.user_id()
returns uuid as $$
  select nullif(current_setting('request.jwt.claims', true)::json->>'sub', '')::uuid;
$$ language sql stable;
Create an RLS policy that ensures users can only access their own todos:
sqlcreate policy "Allow user to access their own todos"
on todos
for select
using (user_id = auth.user_id());
Create an RLS policy that ensures users can only insert their own todos
sqlcreate policy "Allow user to insert their own todos"
on todos
for insert
with check (user_id = auth.user_id());
Create an RLS policy that ensures users can only update their own todos
sqlcreate policy "Allow user to update their own todos"
on todos
for update
using (user_id = auth.user_id())
with check (user_id = auth.user_id());
Create an RLS policy that ensures users can only delete their own todos
sqlcreate policy "Allow user to delete their own todos"
on todos
for delete
using (user_id = auth.user_id());
Conclusion
When calling Supabase actions from Bubble, the JWT will be passed, and the RLS policy will use the auth.user_id() function to ensure that each Bubble user can only access their own todos.
You can now store any data on Supabase and easily control access using Row Level Security (RLS). This ensures that your Bubble users have secure access to their data.