This guide will help you set up the plugin in your Bubble editor to make it work properly.
This plugin is a bridge between your native shell and your Bubble app.
Prerequisites
OneSignal
Setup keys in plugins tab.
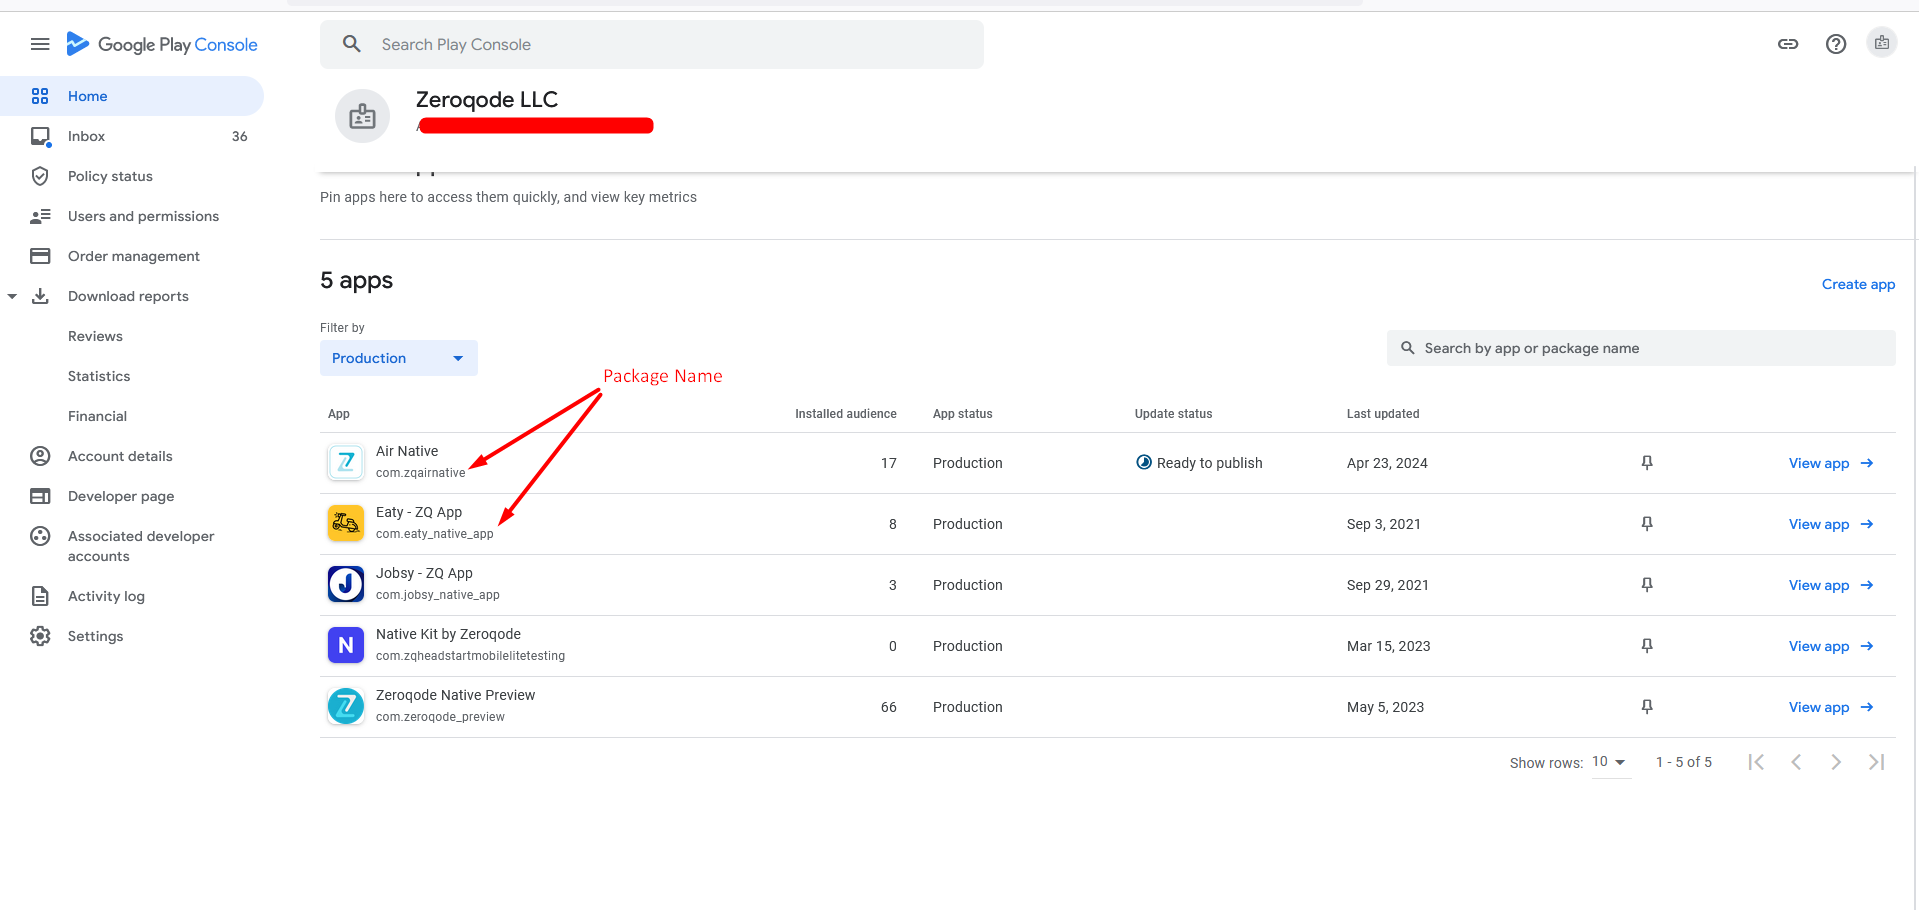
1) Find your app in the list of apps:
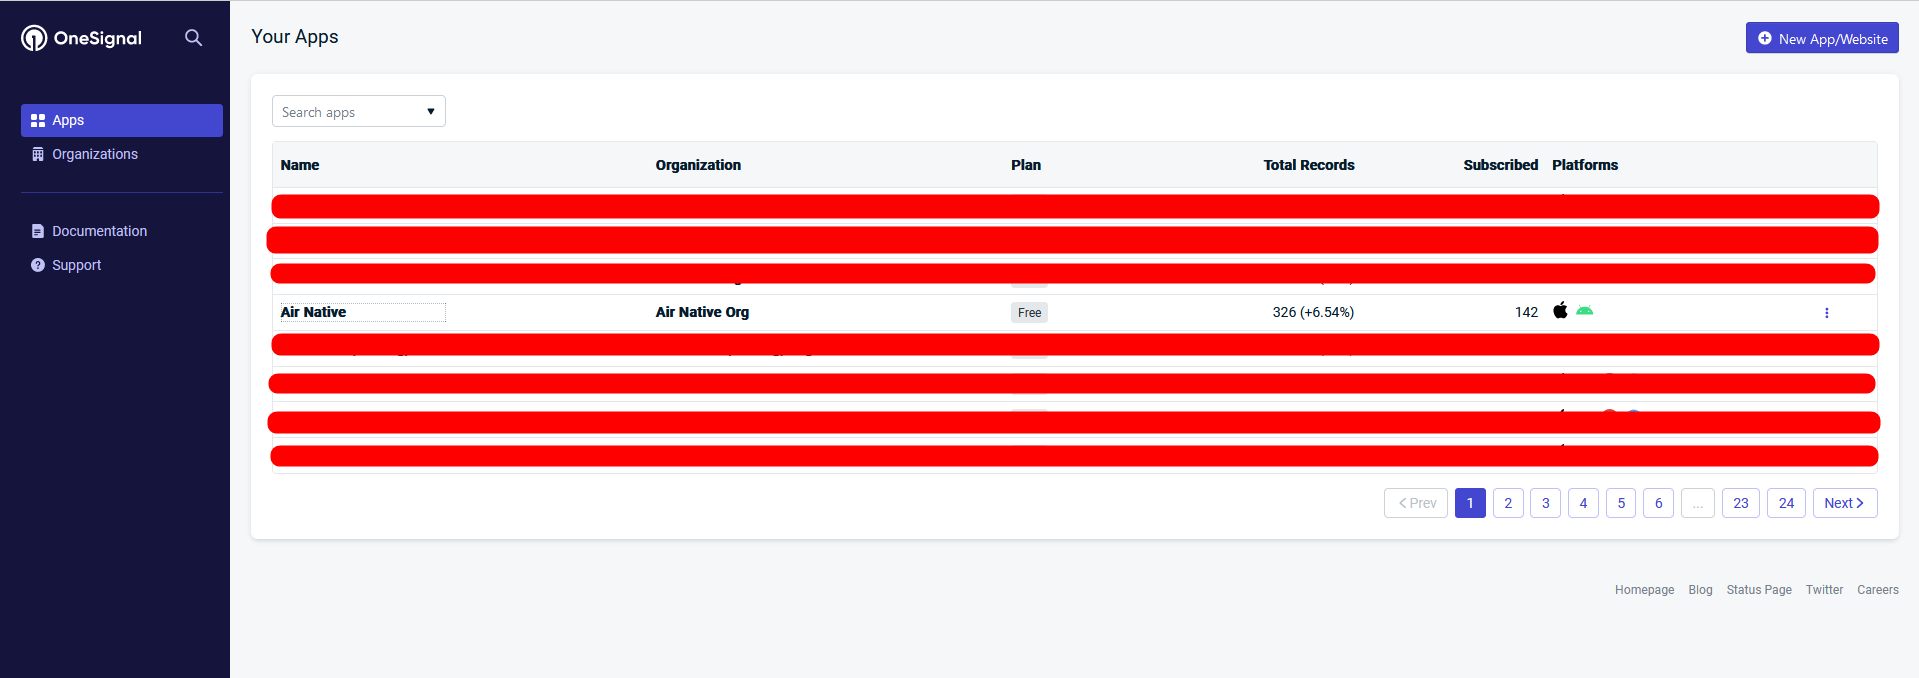
2) Clicking on the app name will open the Dashboard of the app:
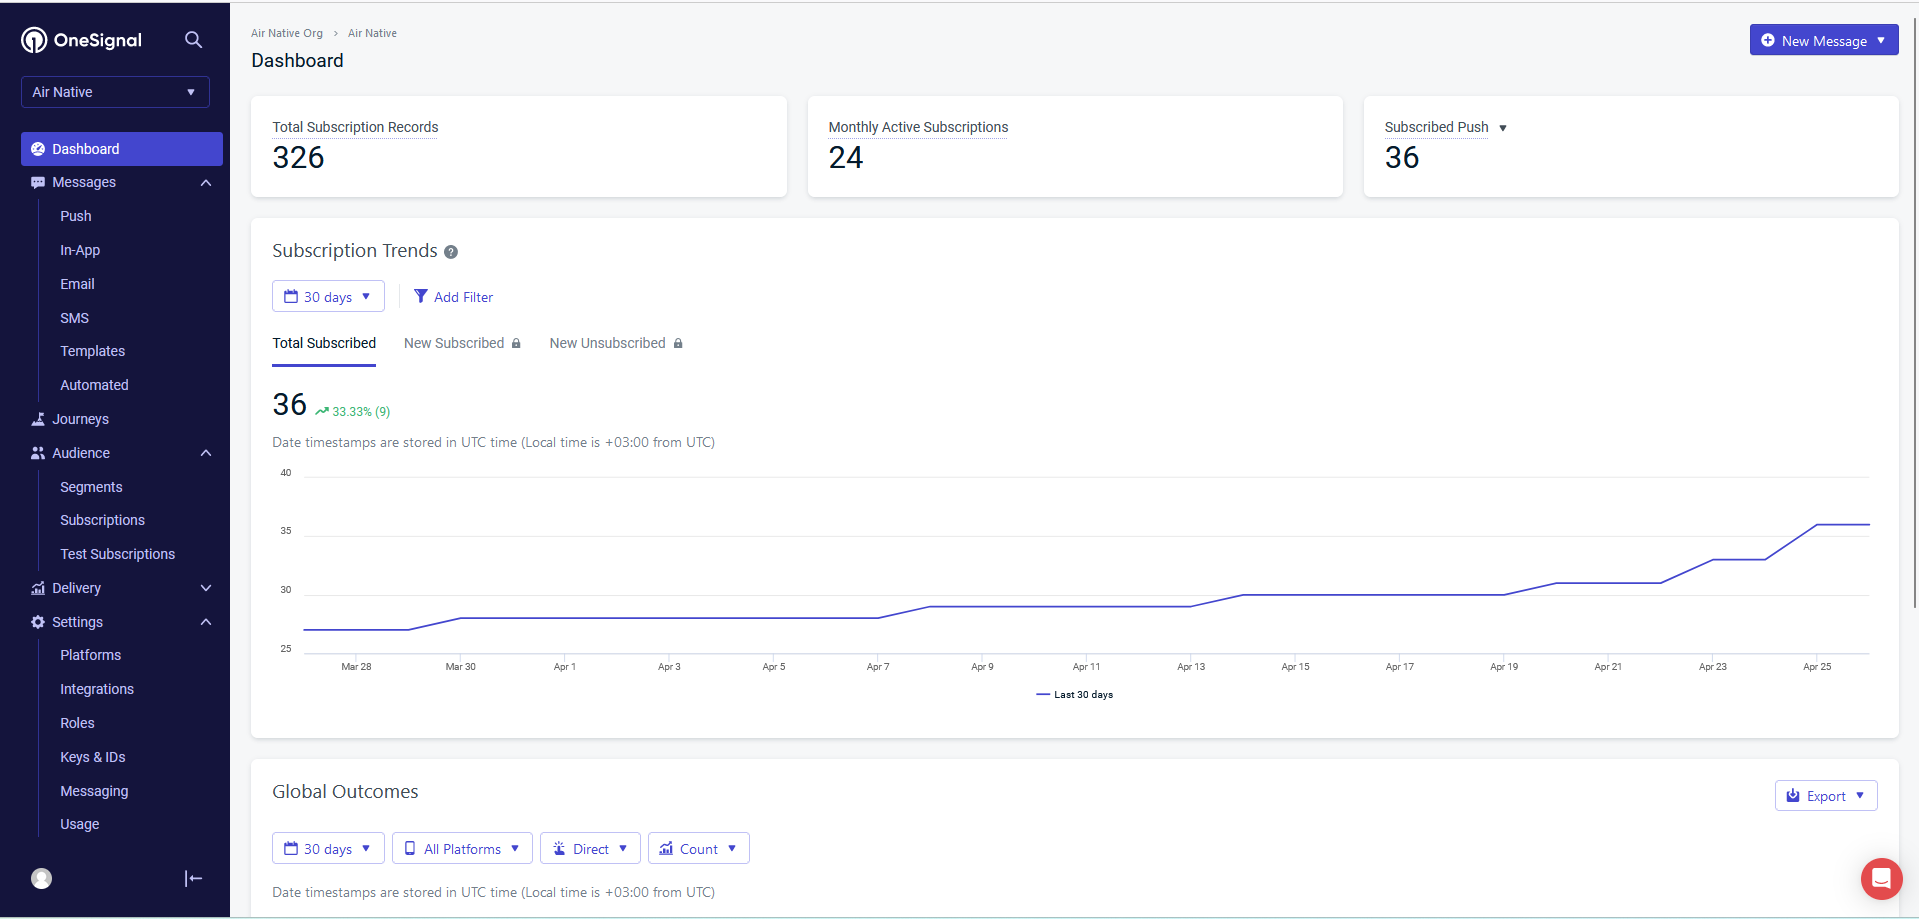
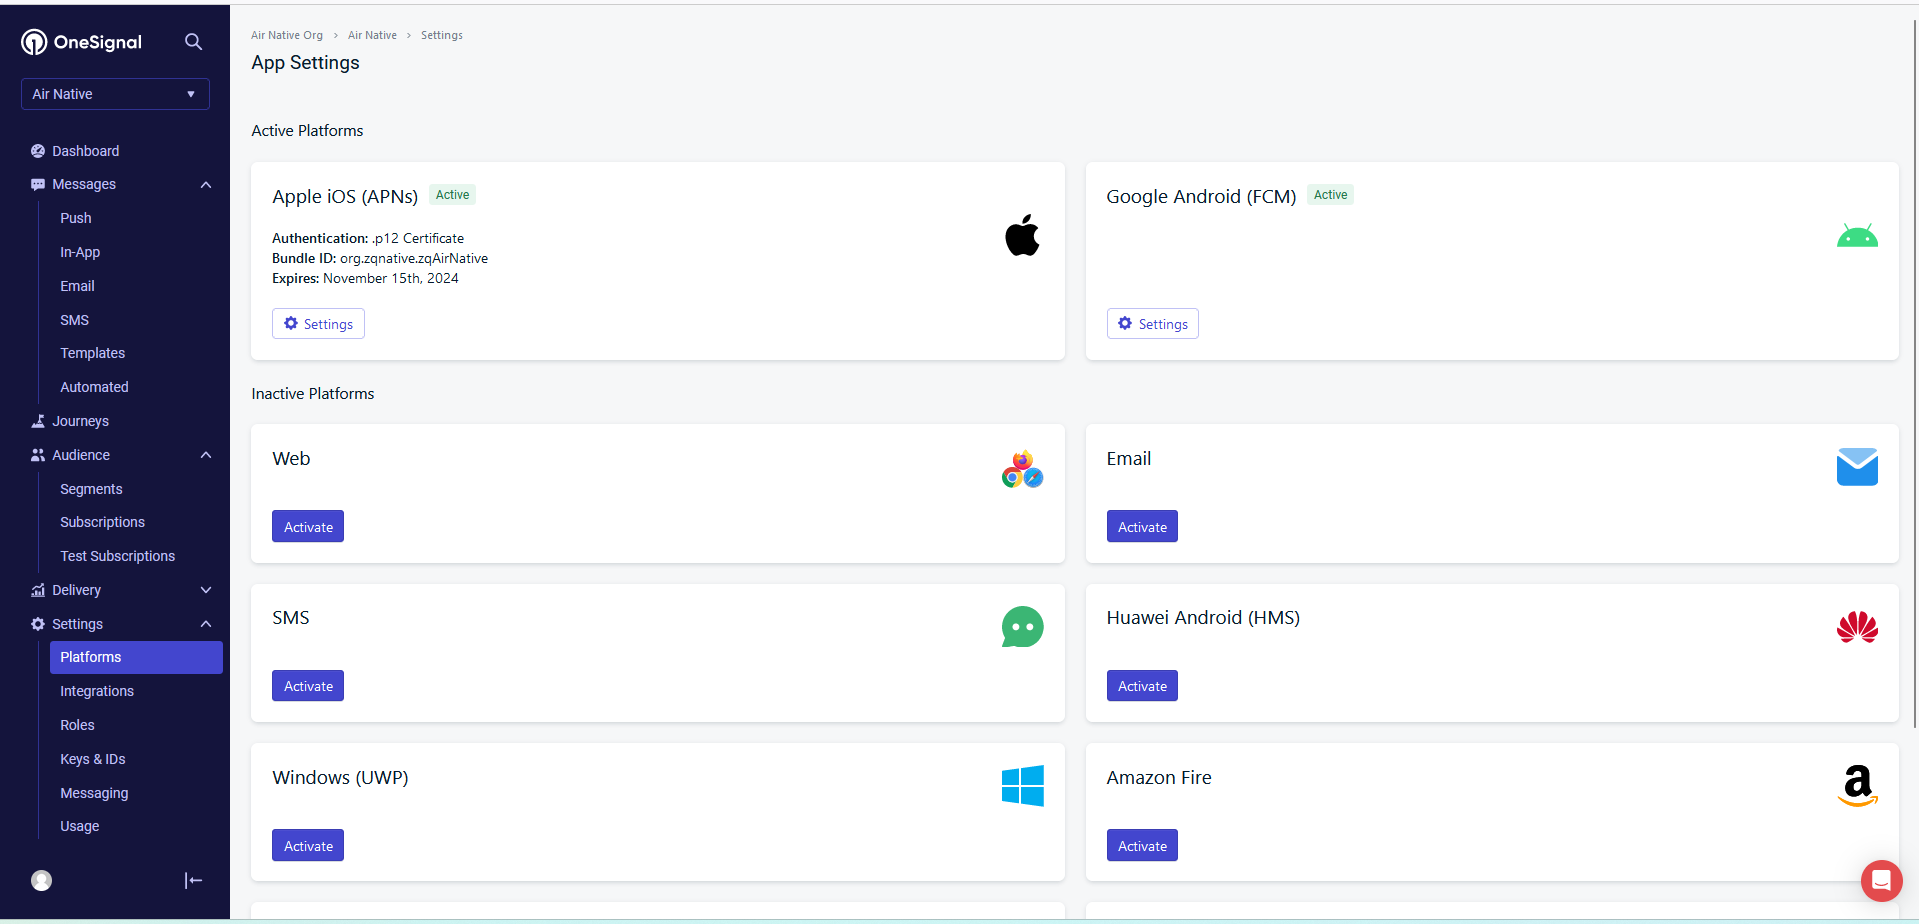
3) Go to the Settings tab:
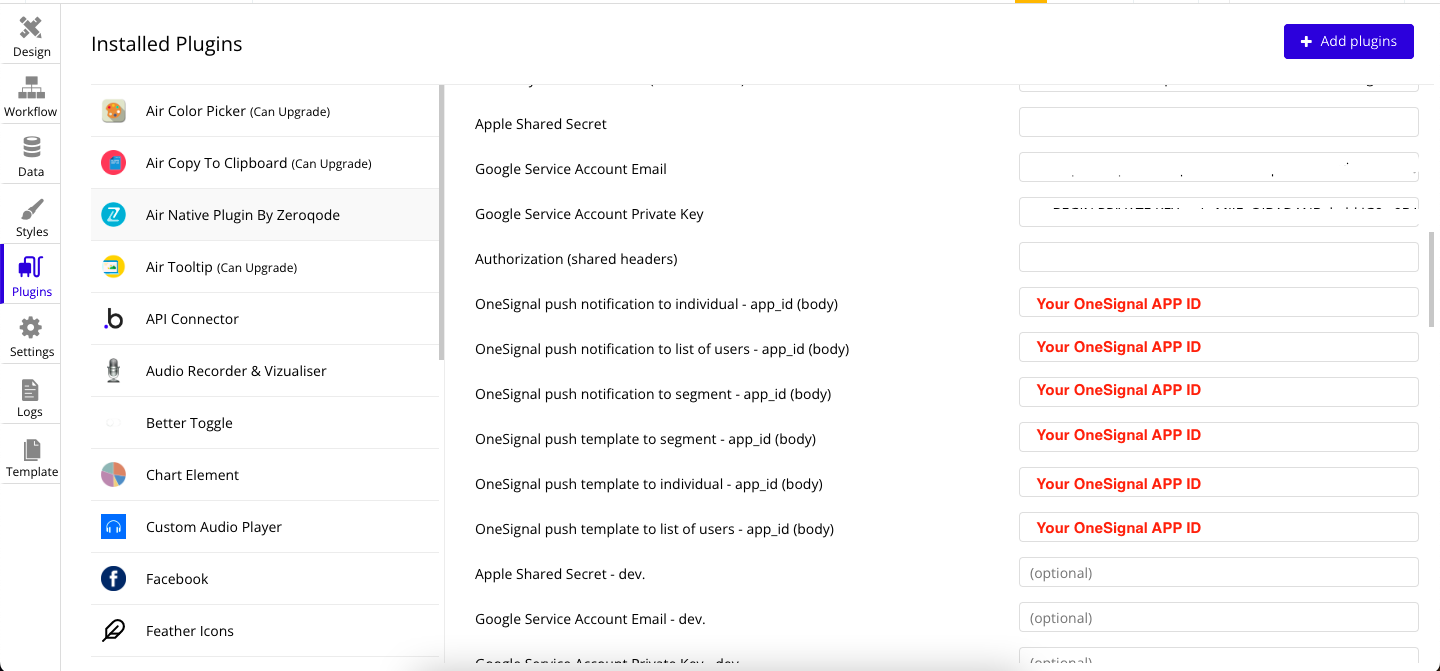
4) **Keys & IDs **section:
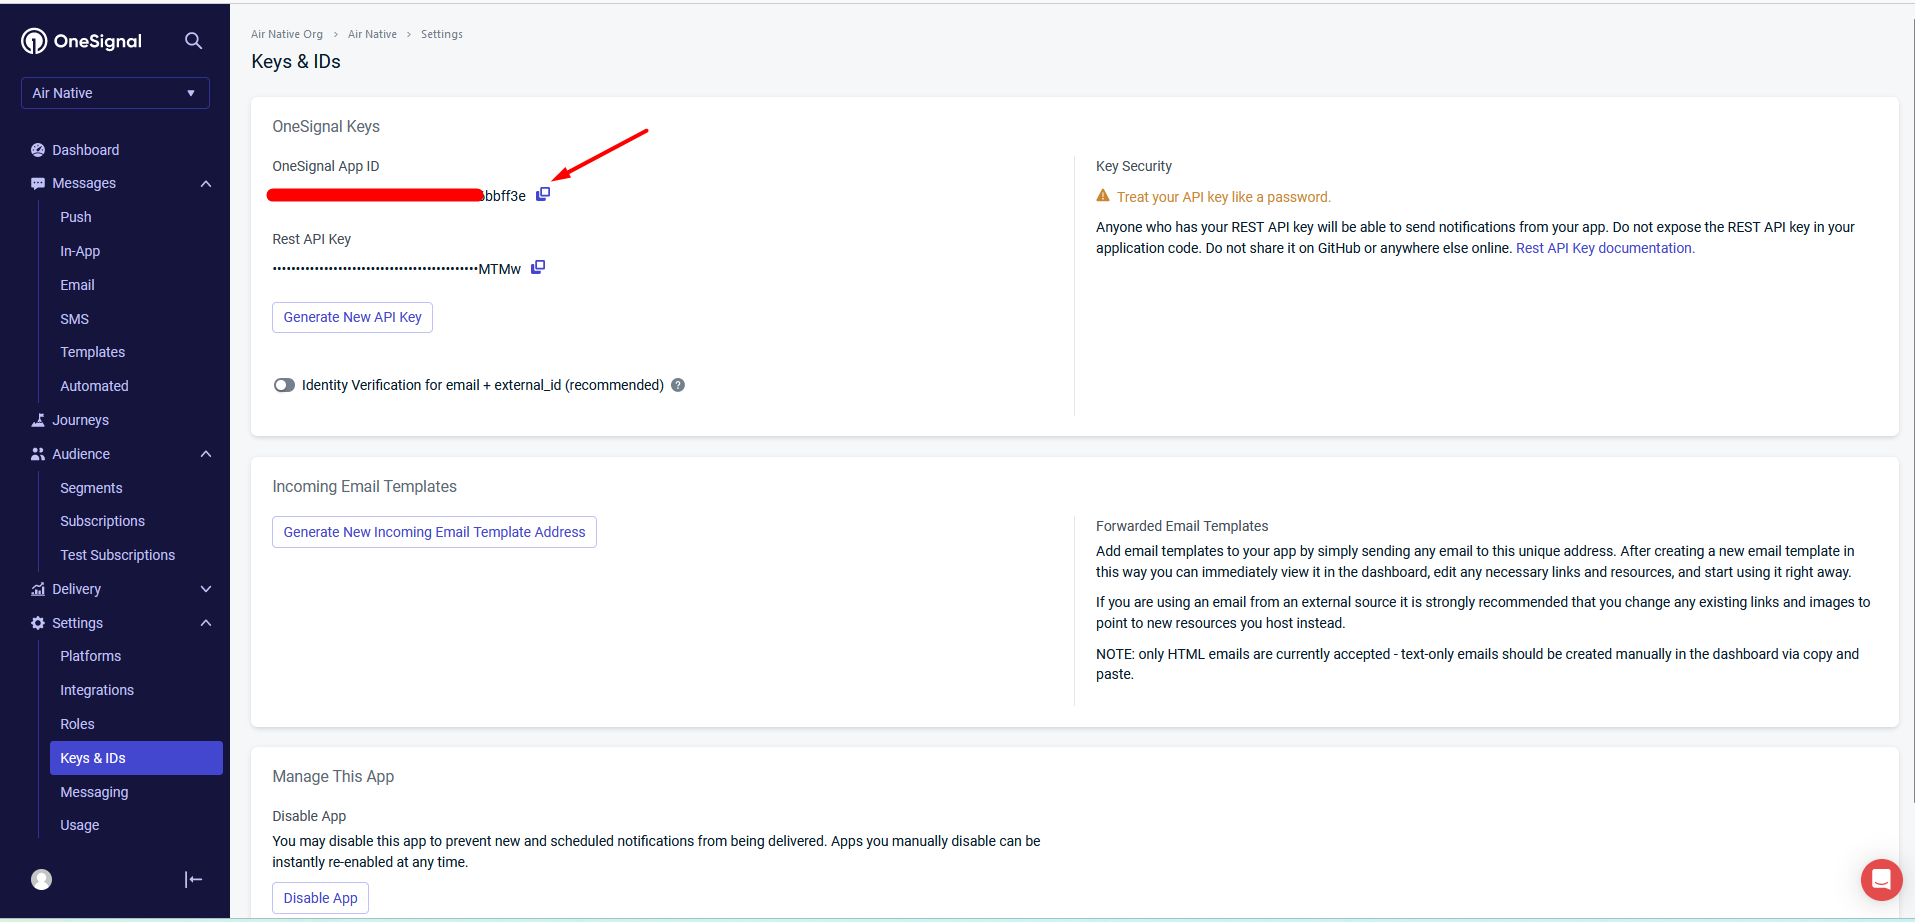
5) Copy your app ID (OneSignal App ID) and place it in the Air Native plugin tabs.
6) For "
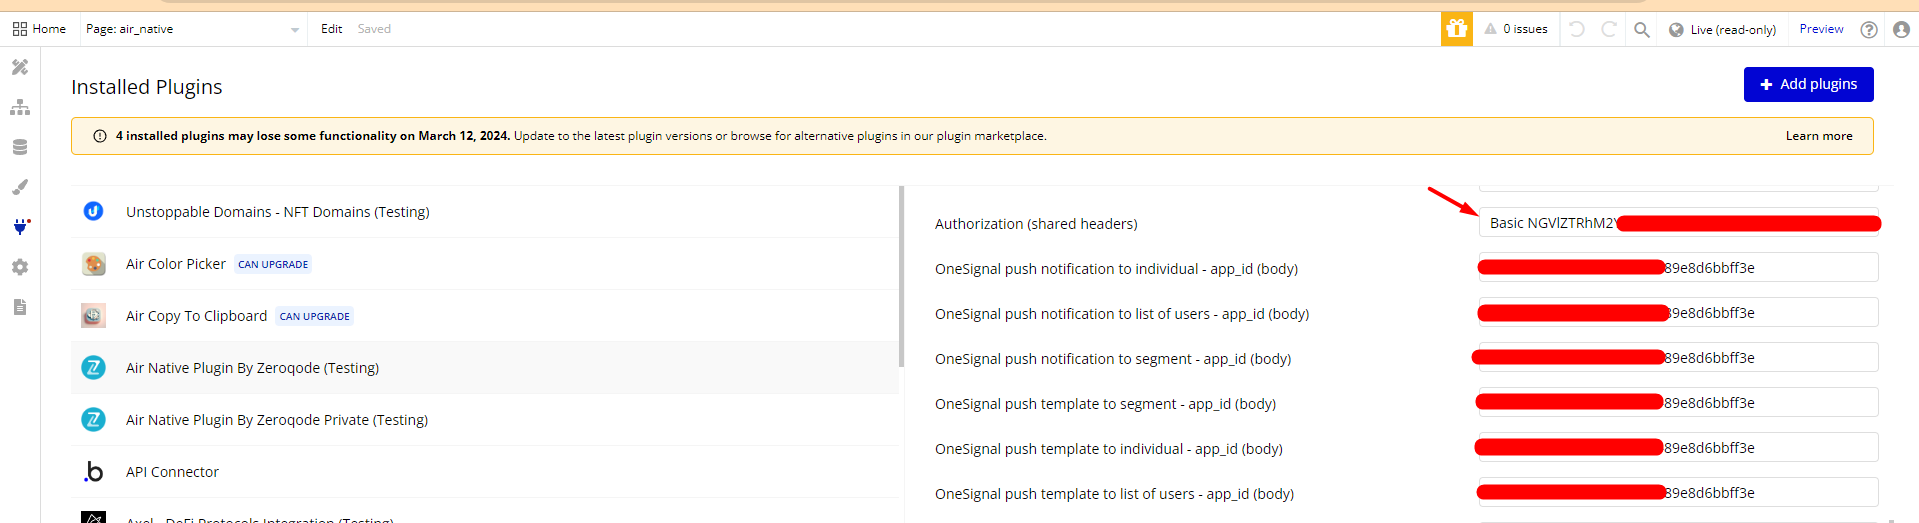
Authorization (shared header)" you need to copy your Rest API Key from "Keys & IDs" tab.Copy the Rest API Key from OneSignal Dashboard, and add "
Basic ``Your Rest API Key" in this field:
Google Service Account (this section is required only if your Android app contains In-App Billing or Subscriptions)
To connect IAP for Android applications you need to create a Service Account.
1) First, go to your Google Cloud account.
2) Select your project from the Dropdown and select ➕ Create Service Account.
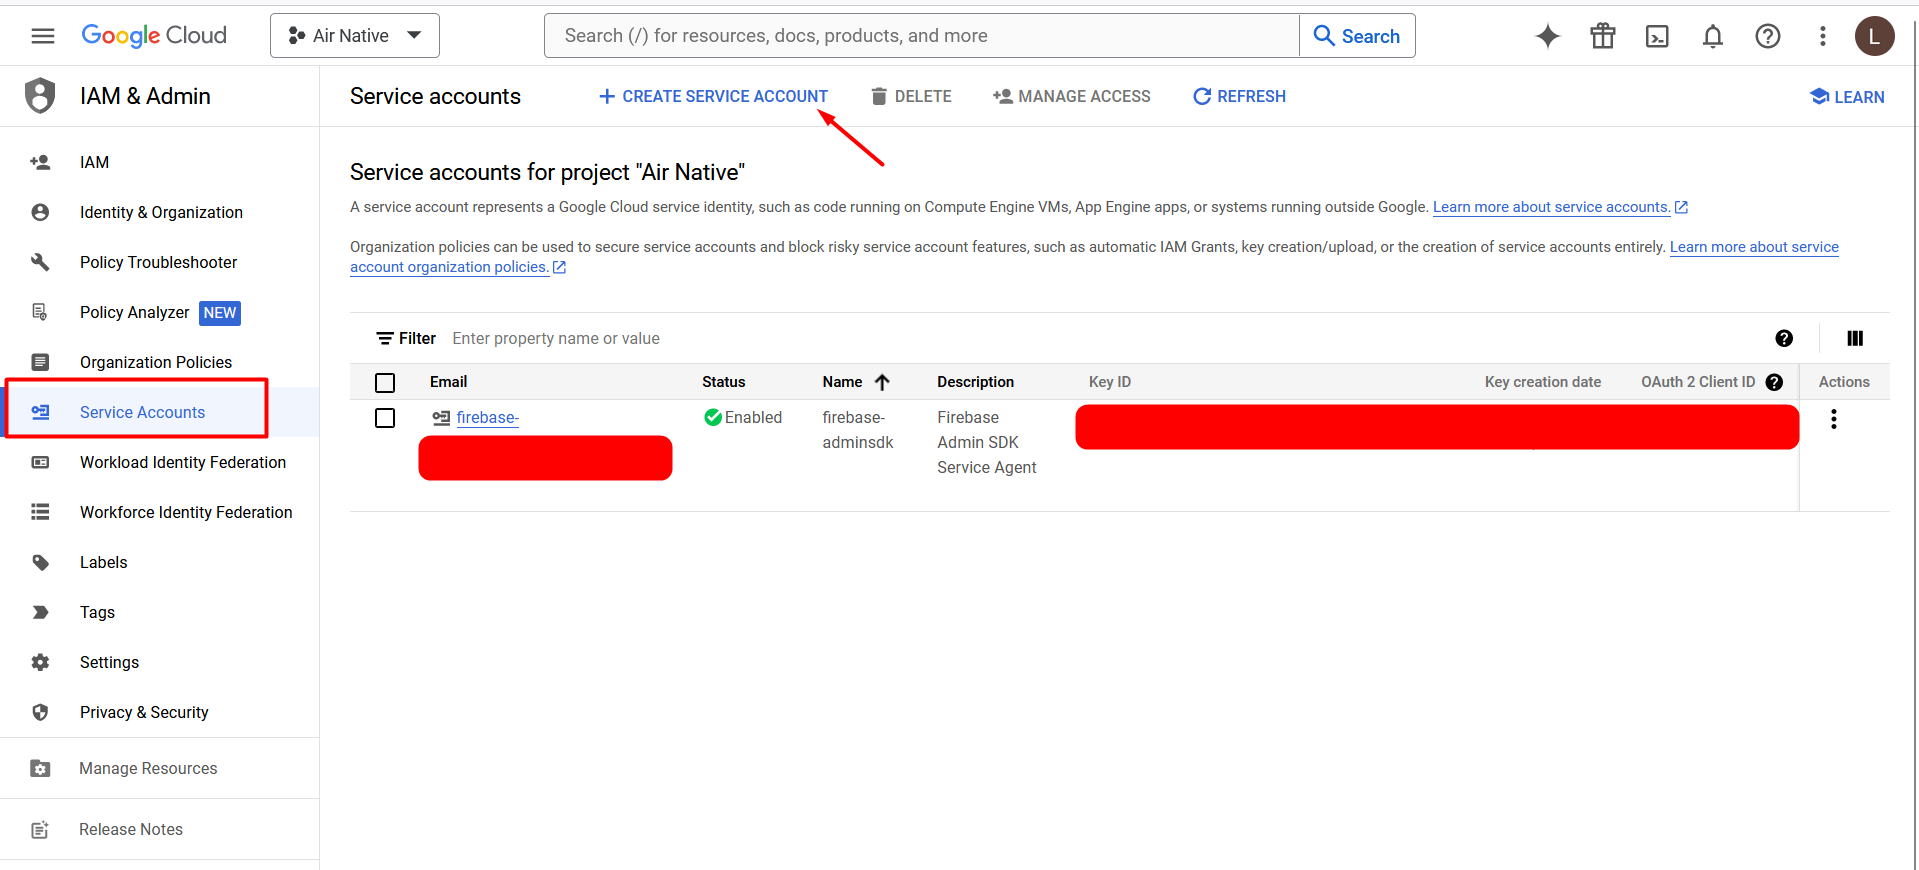
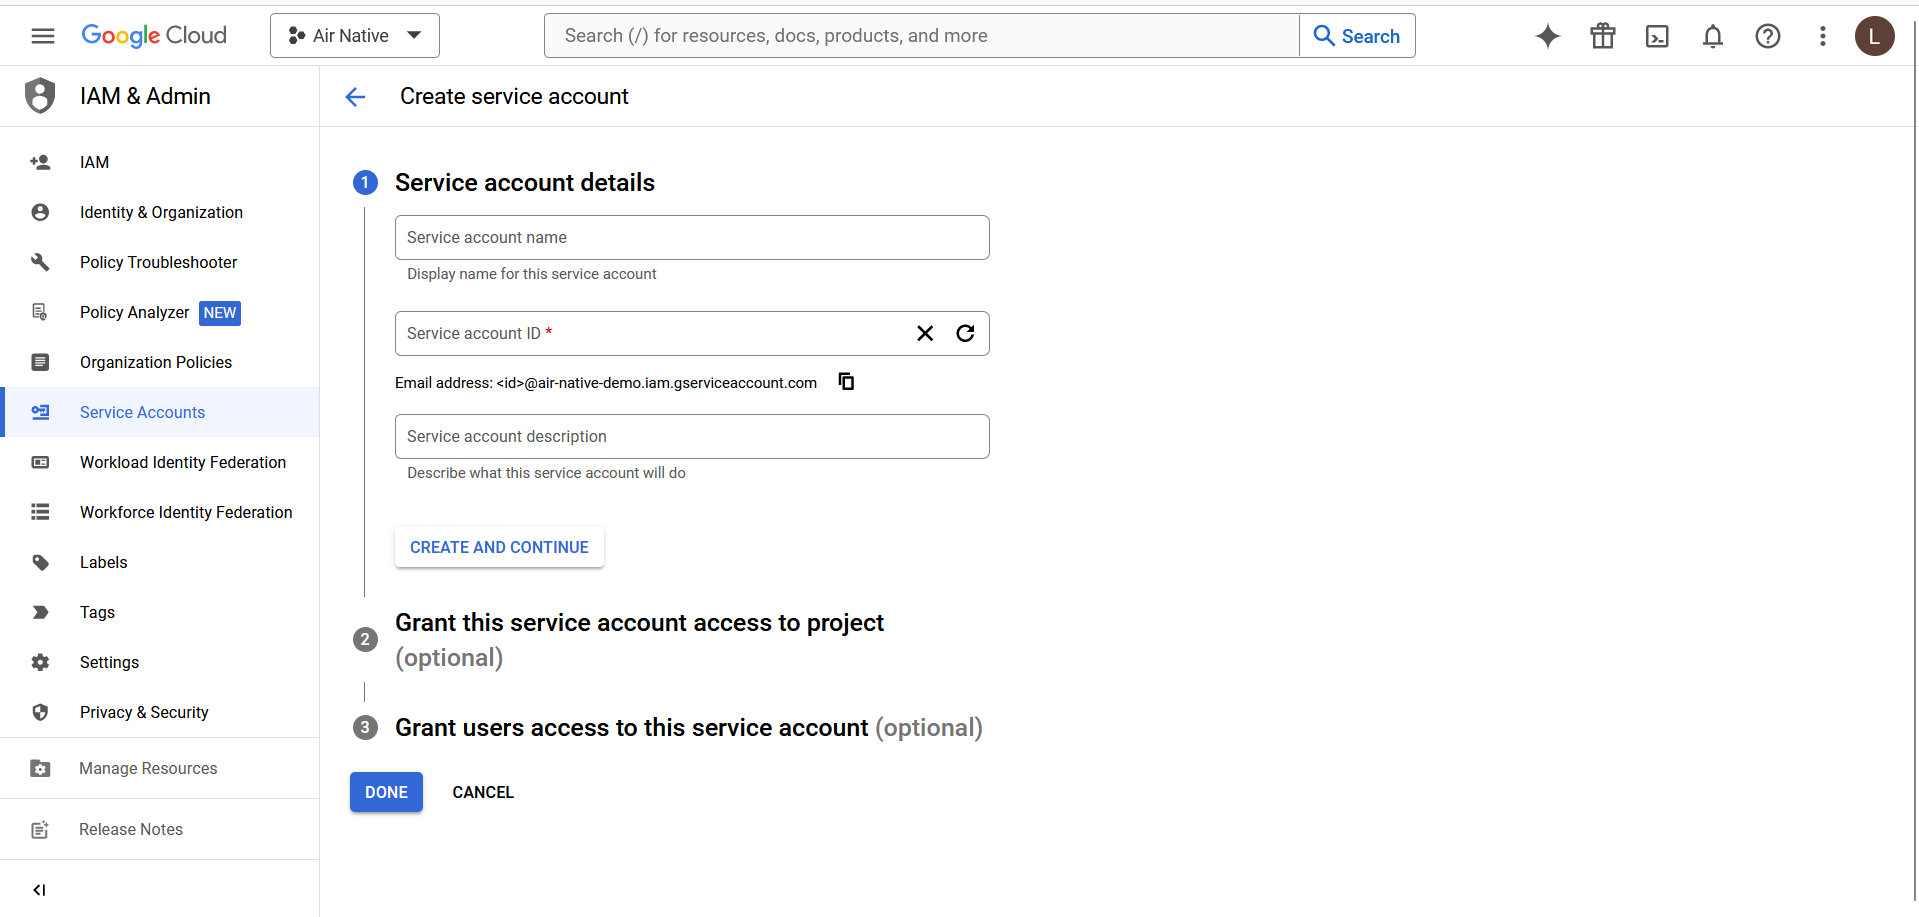
Don't skip step 2 "
Grant this service account access to project".
You can select role "Owner" - this role give full access and grant all permimssions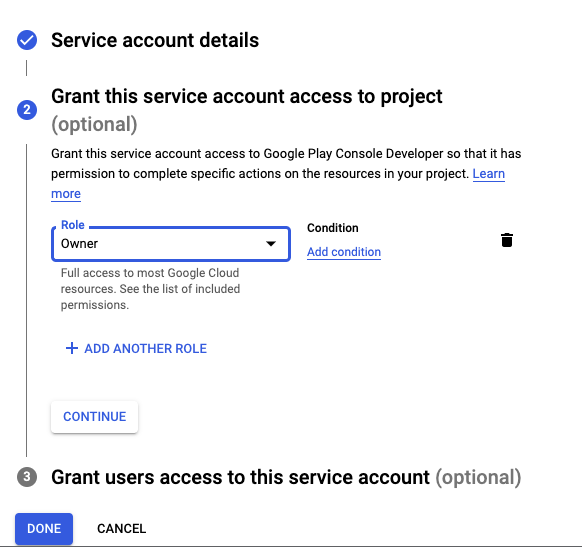
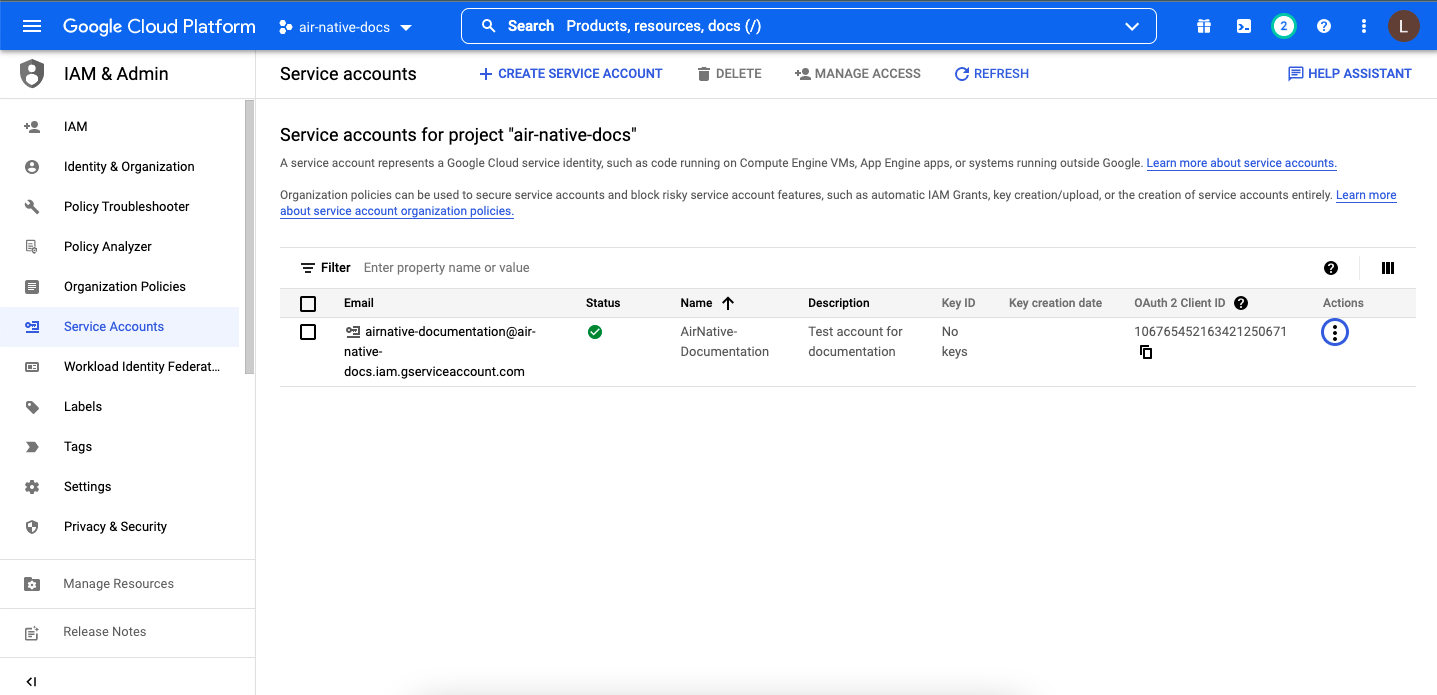
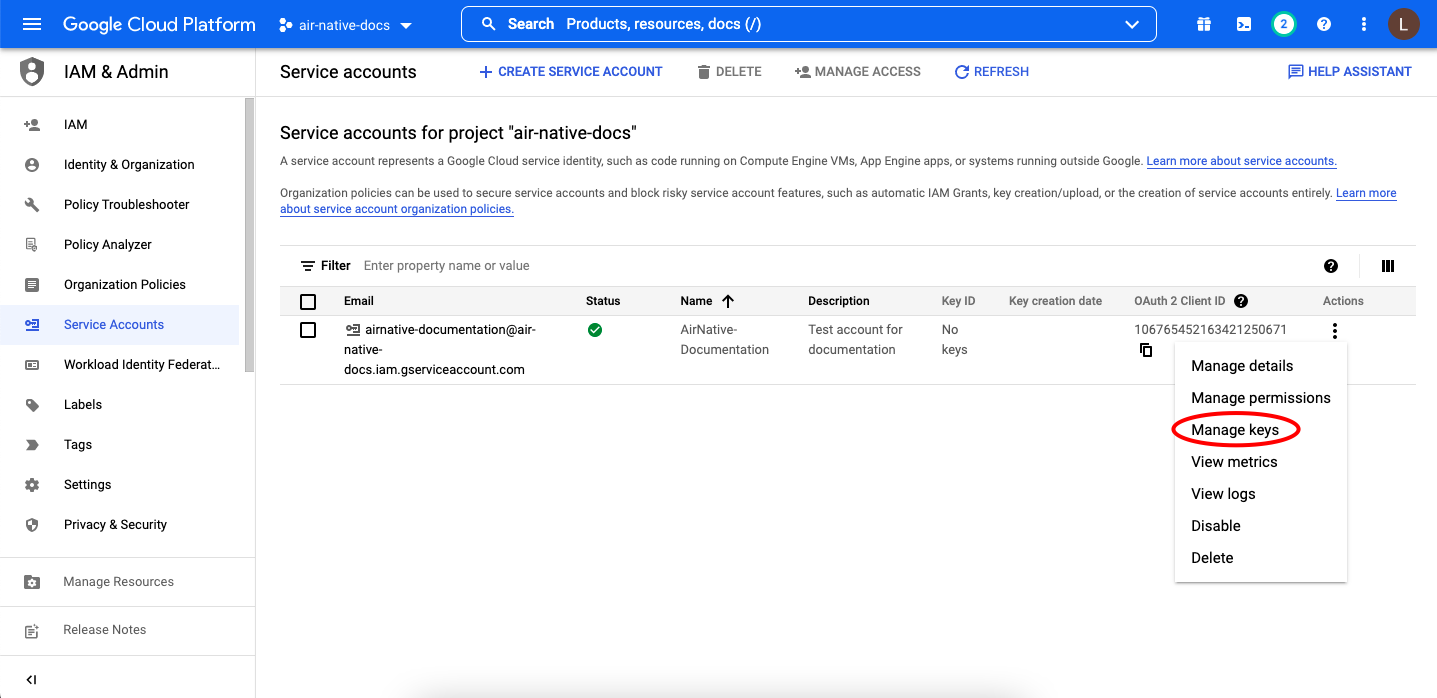
Created account will appear in the list of accounts:
3) Now click on account settings and select "Manage keys":
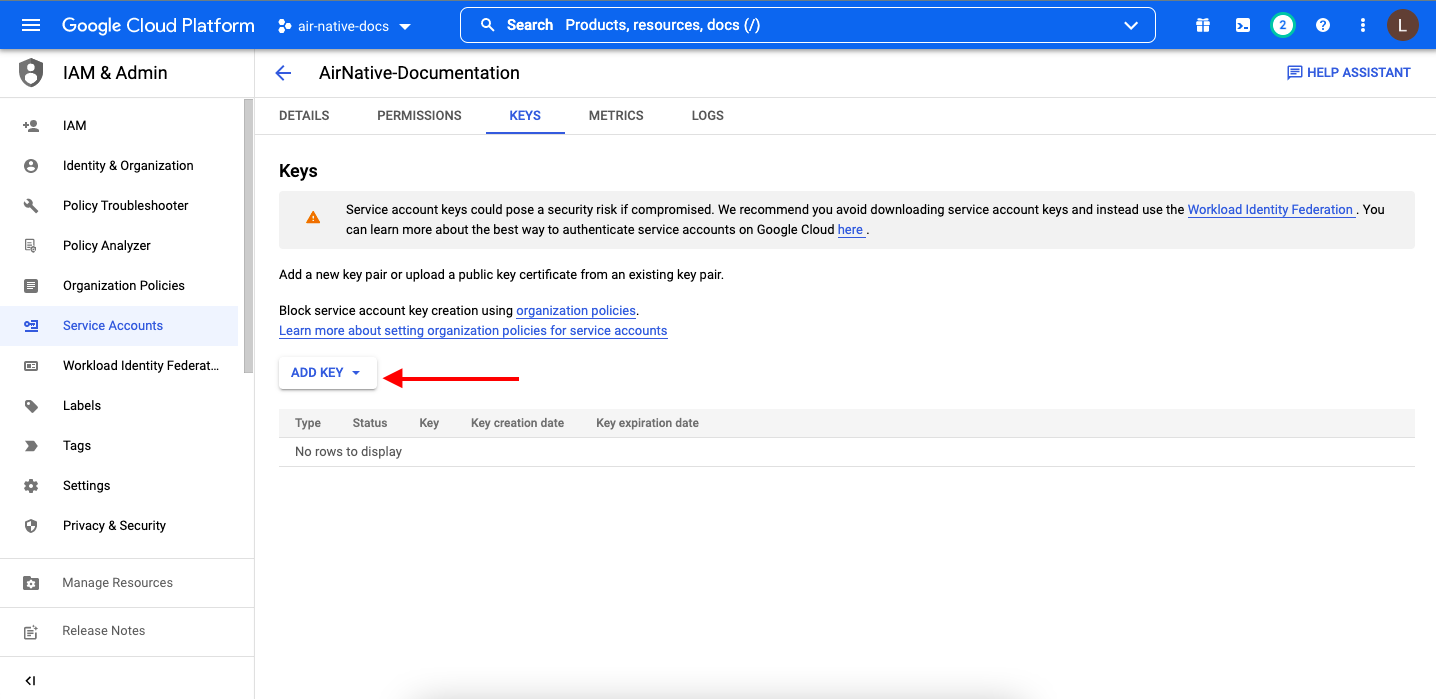
4) Add key:
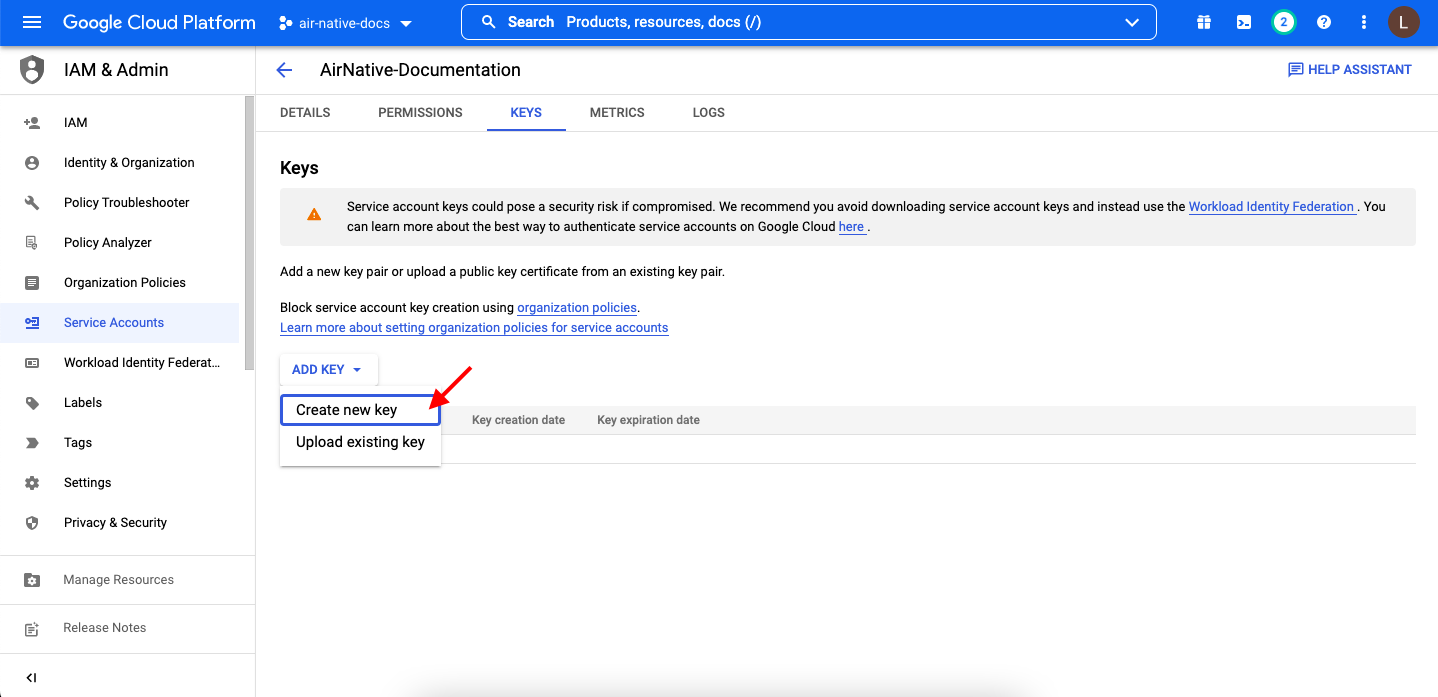
5) Select JSON type:
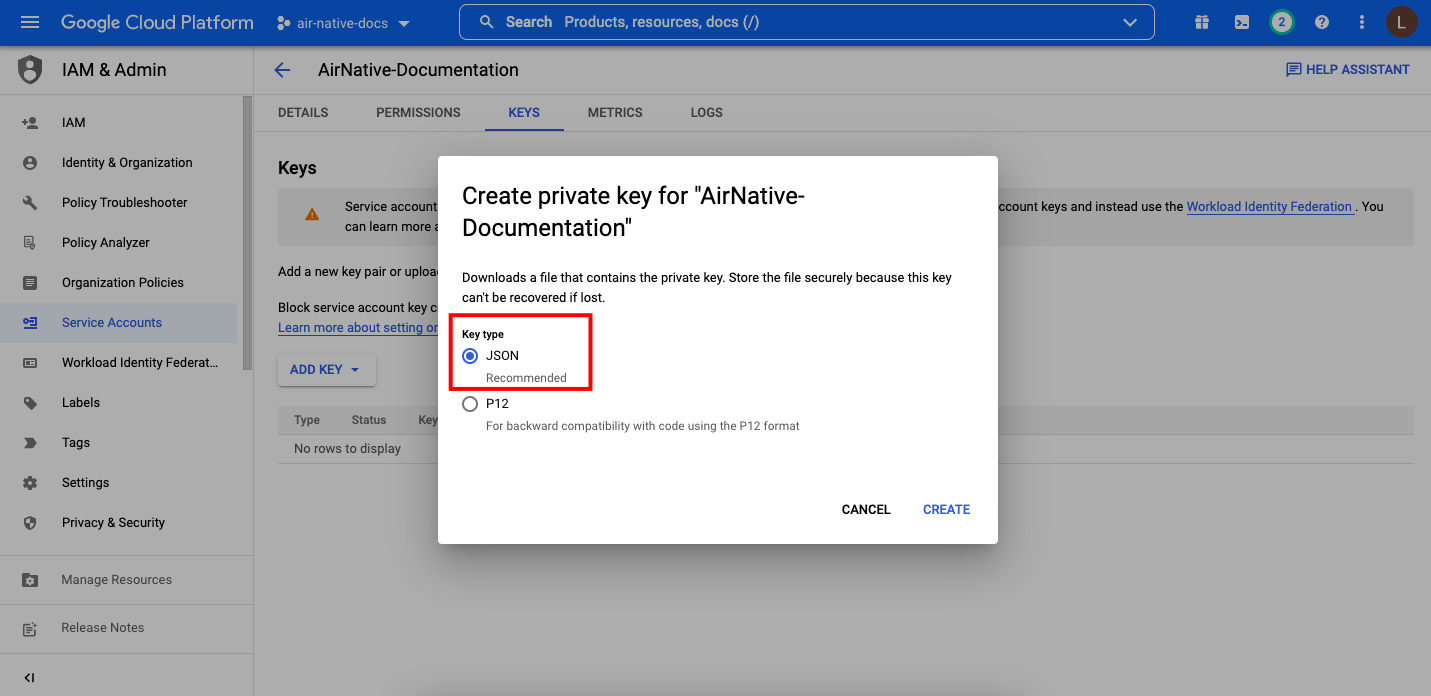
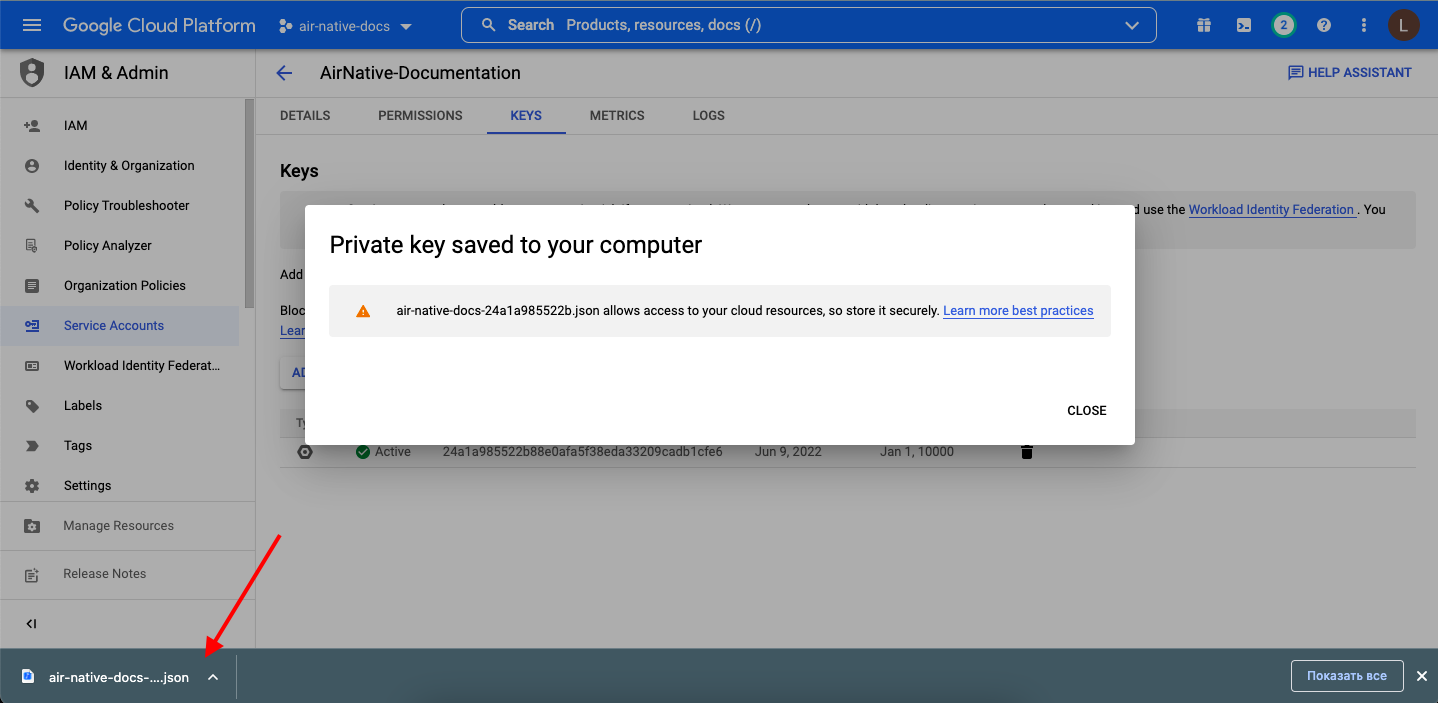
6) The key will be downloaded on your PC:
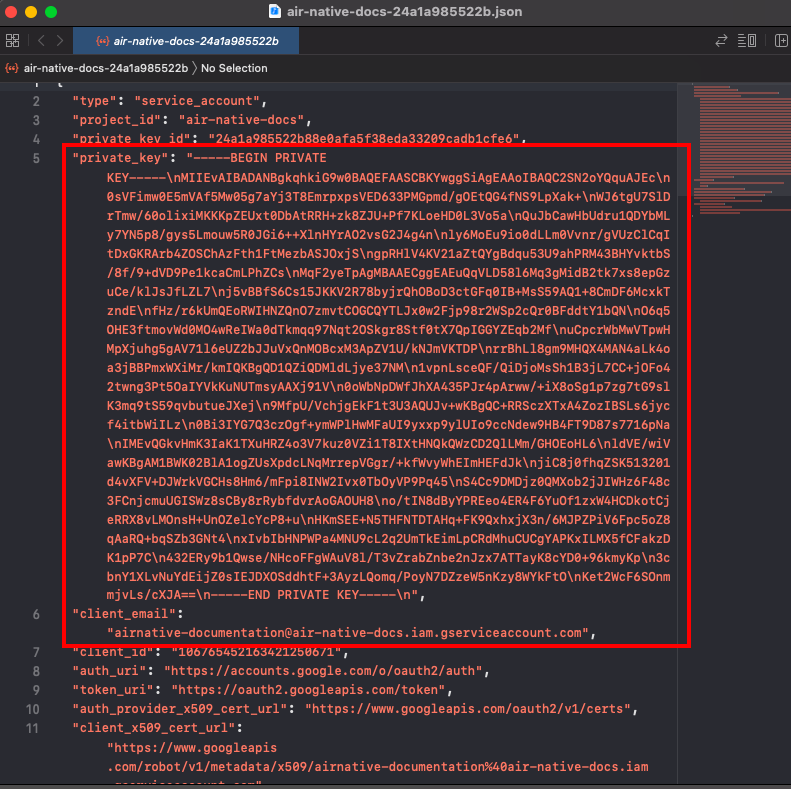
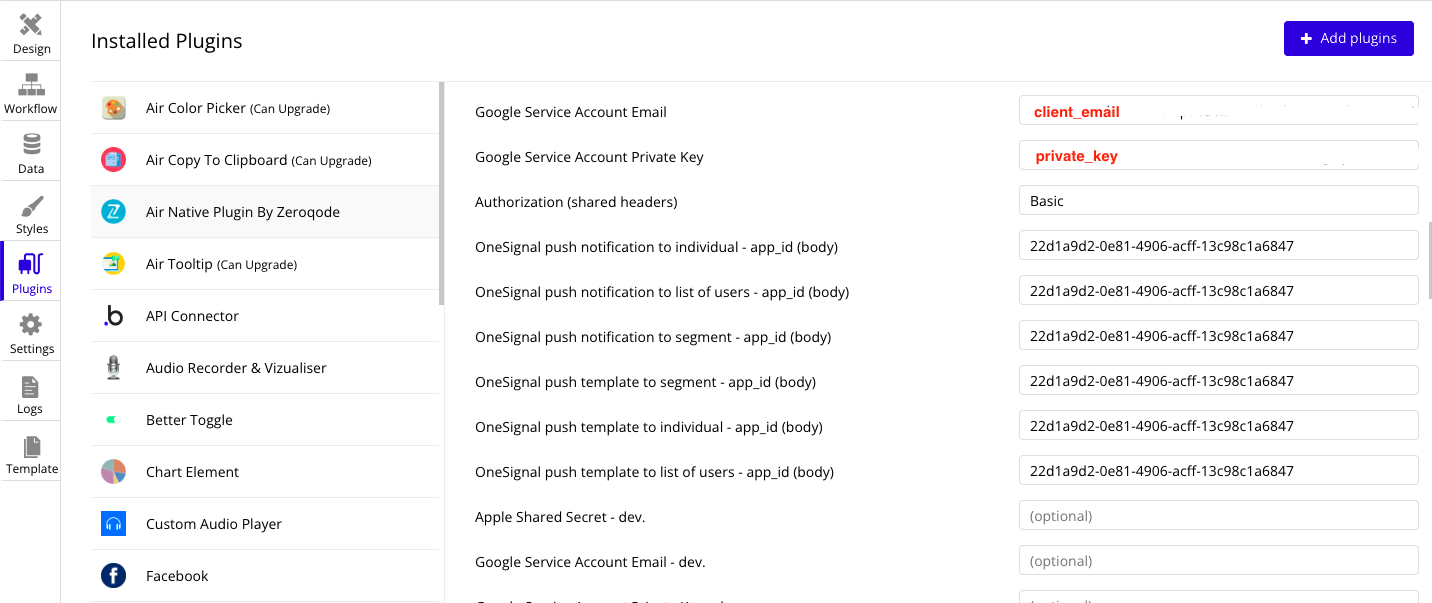
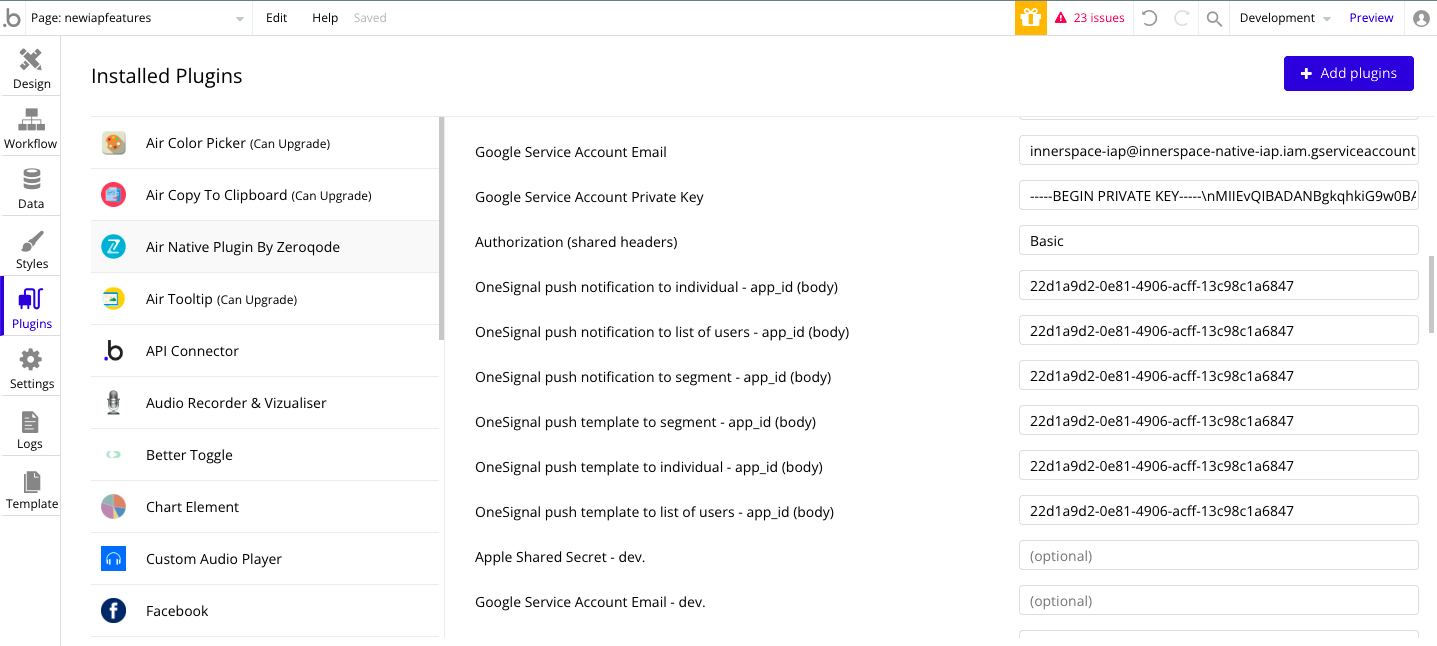
7) Open the downloaded file with any text editor and complete fields in plugin tabs using data from this file:
8) Go to APIs & Services:
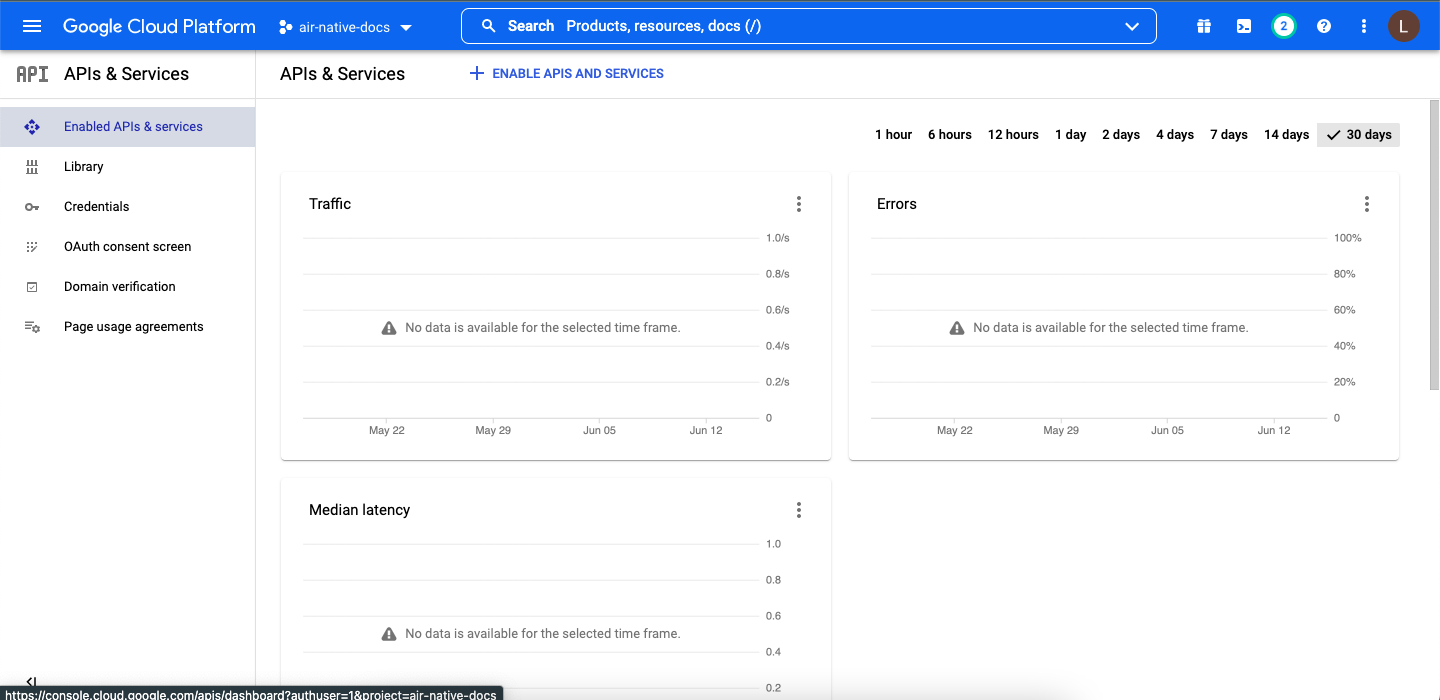
9) Select "
Enable APIs and Services"And find
Google Play Android Developer API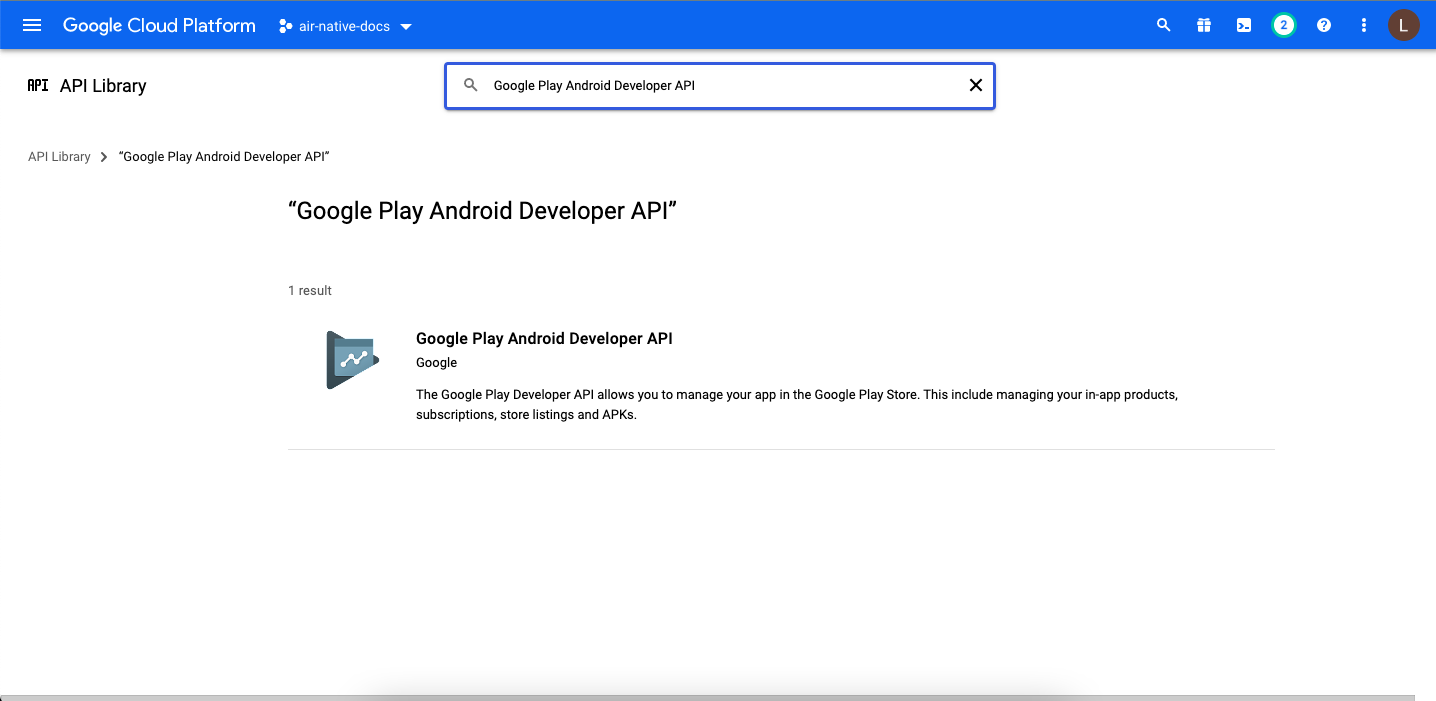
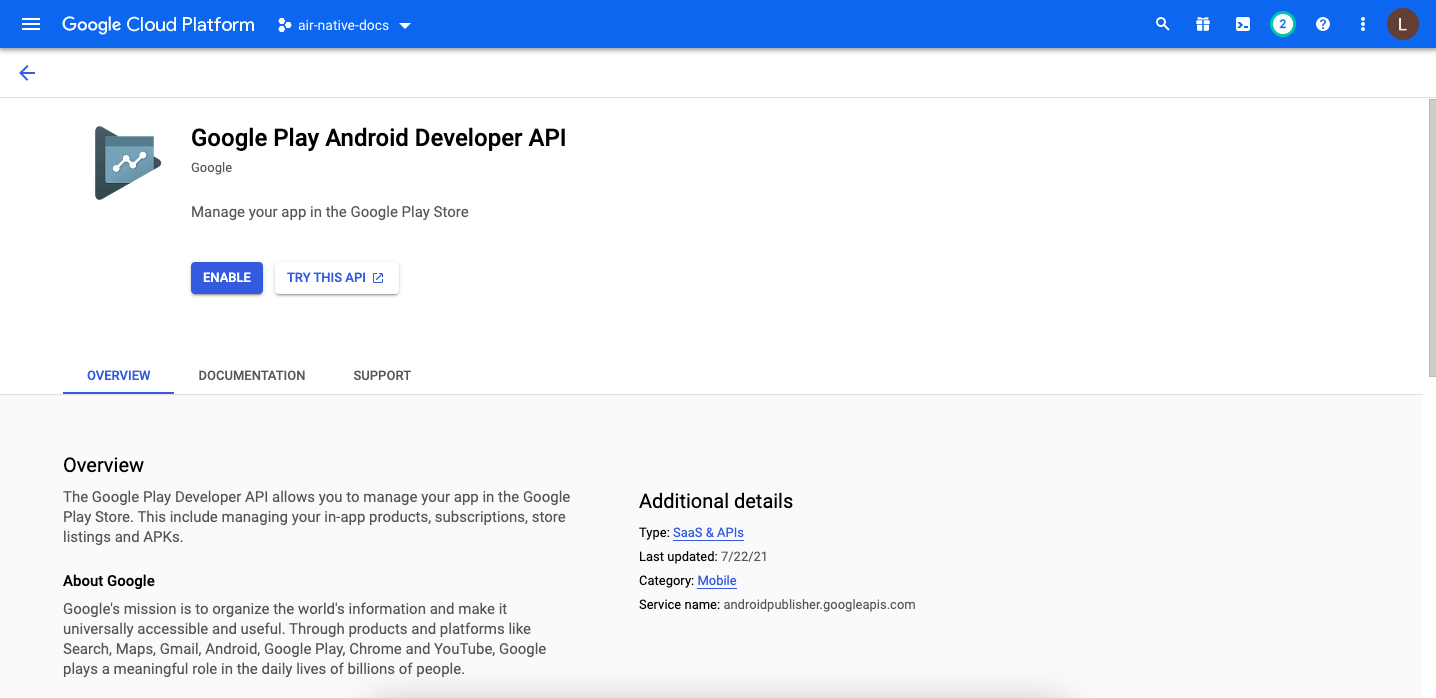
10) Enable this API:
Apple Shared Secret (this section is required only if your iOS app contains In-App Purchases or Subscriptions)
To offer in-app purchases, you must accept the Paid Applications Agreement in App Store Connect. For details on how to do this, read Agreements, Tax, and Banking Overview.
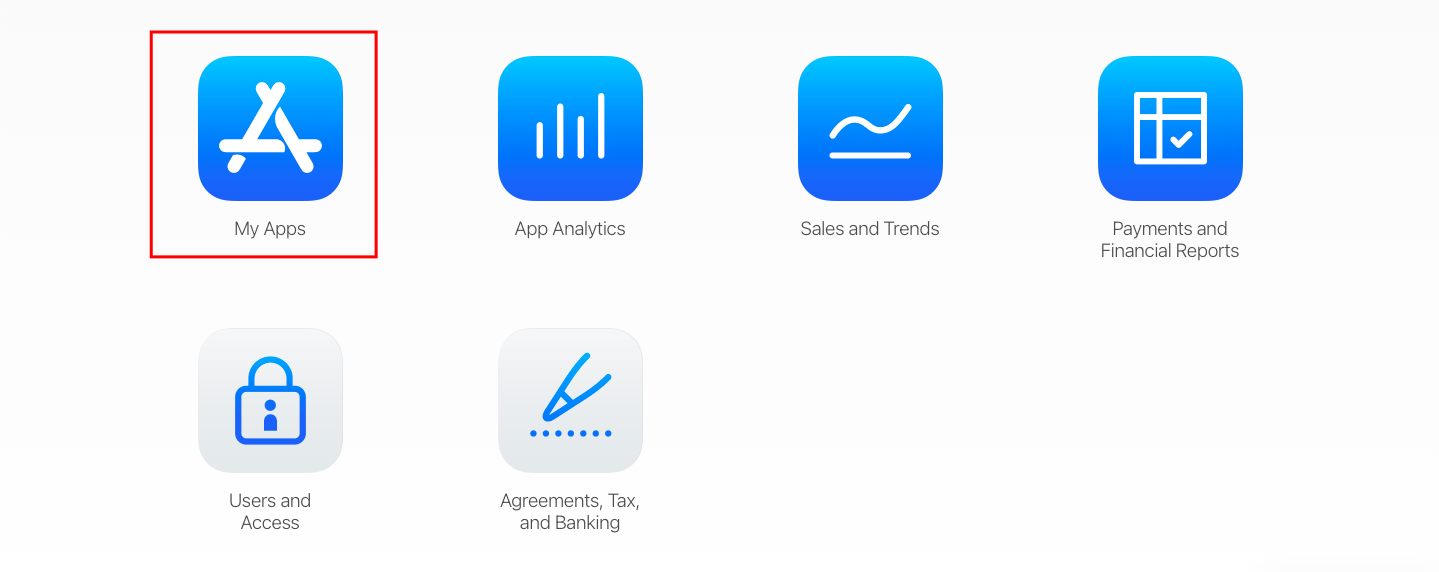
Select the application for which you are setting up purchases.
2) In the sidebar select "App Information":
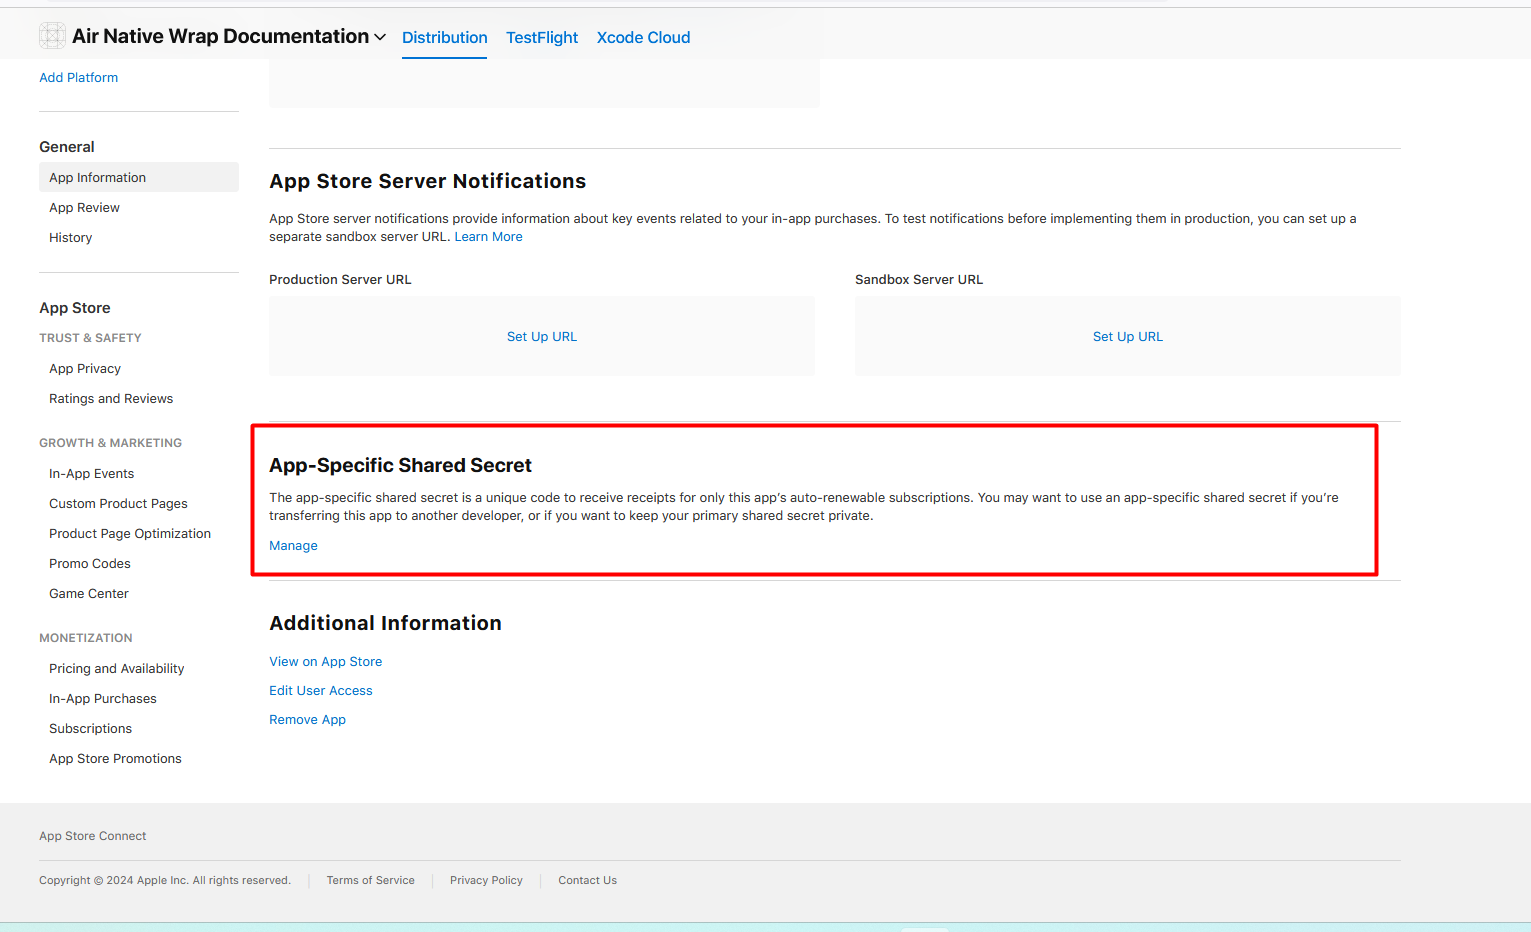
3) Scroll to the bottom until you will see "App-Specific Shared Secret" and select Manage:
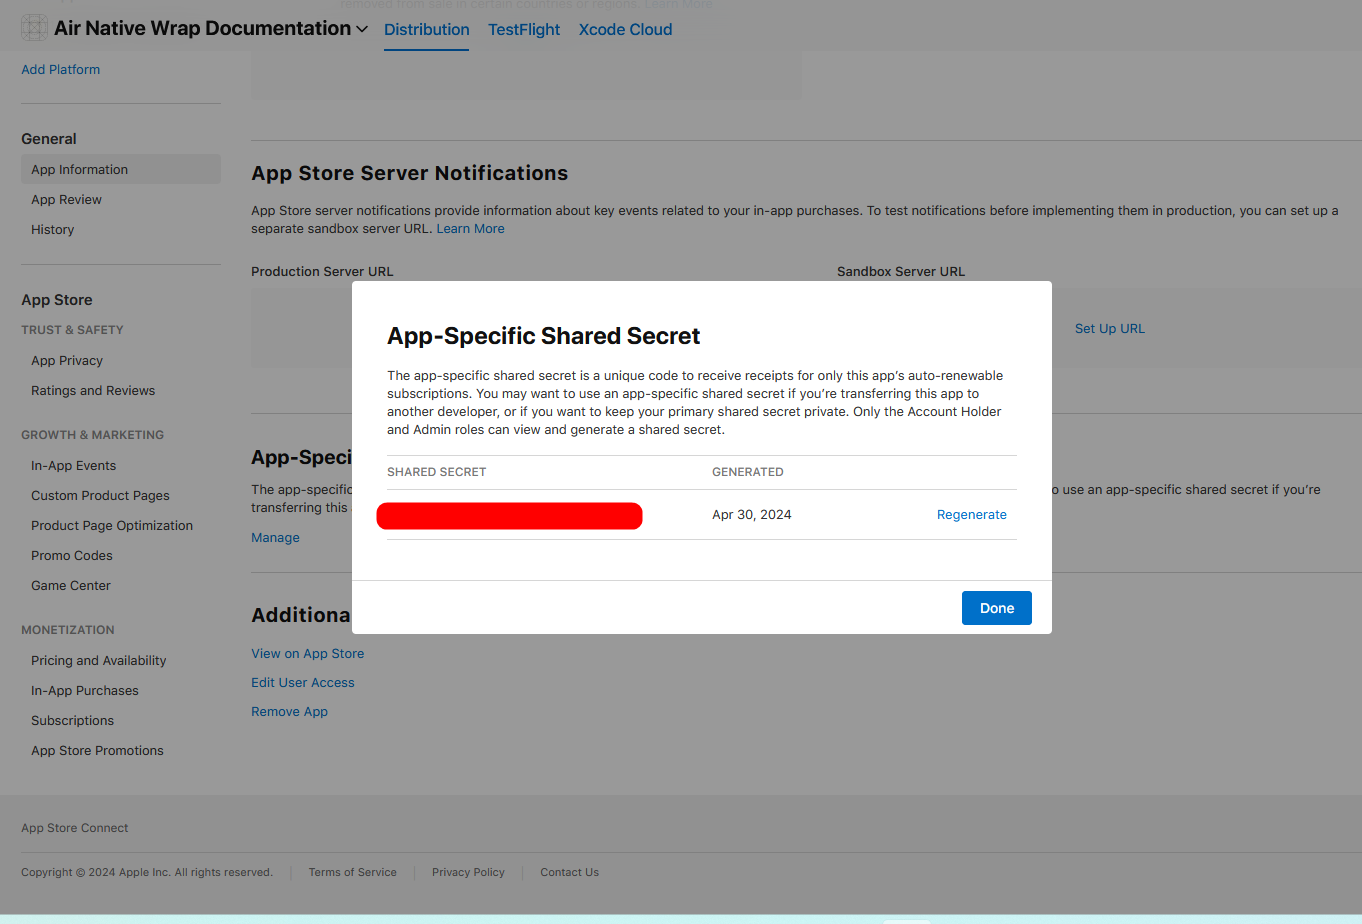
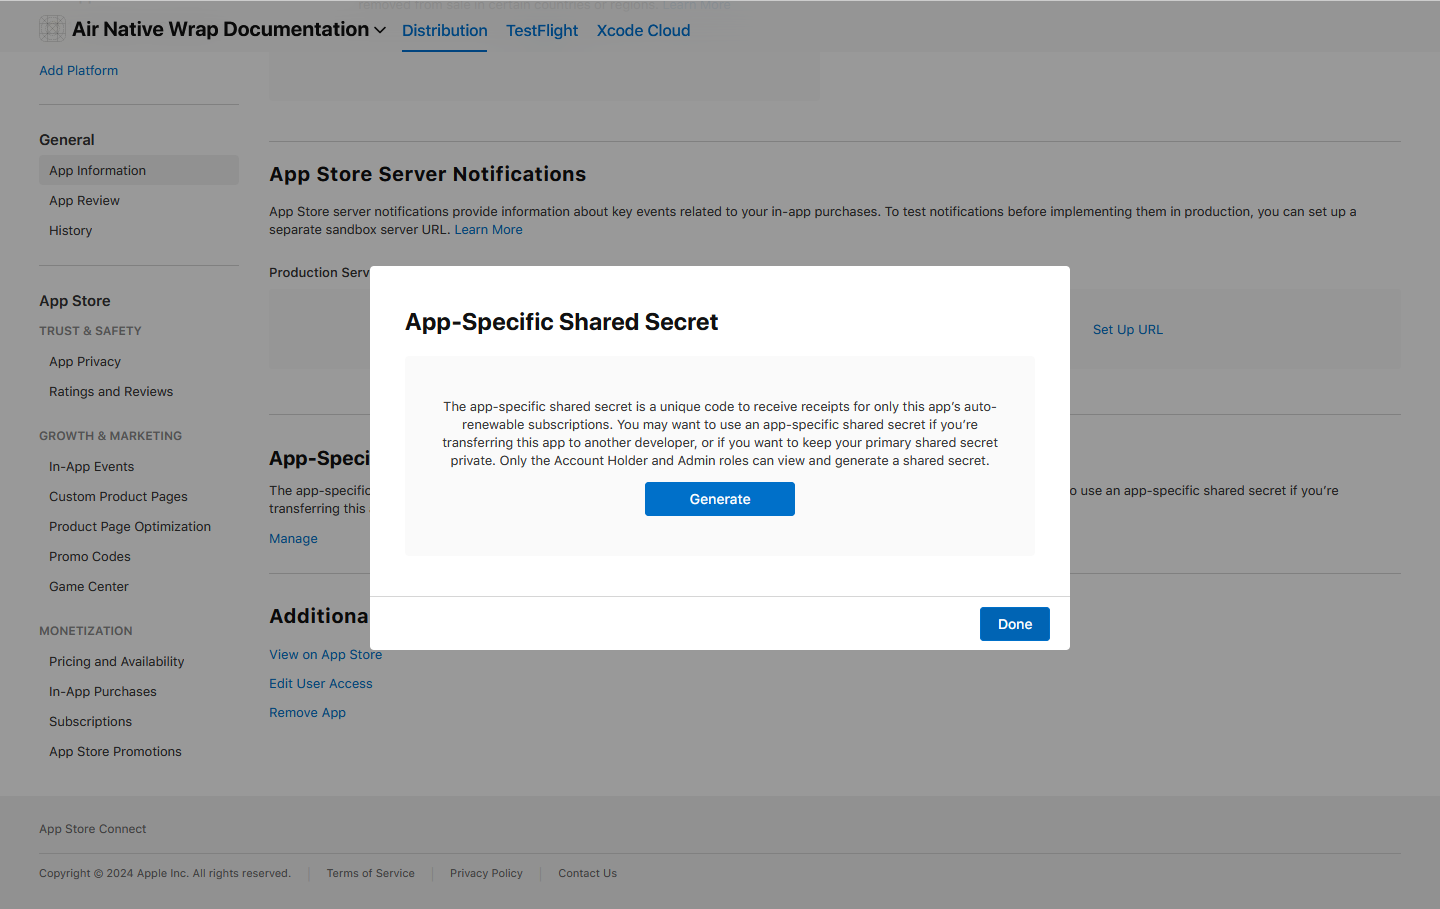
If you don't see your shared secret - generate it:
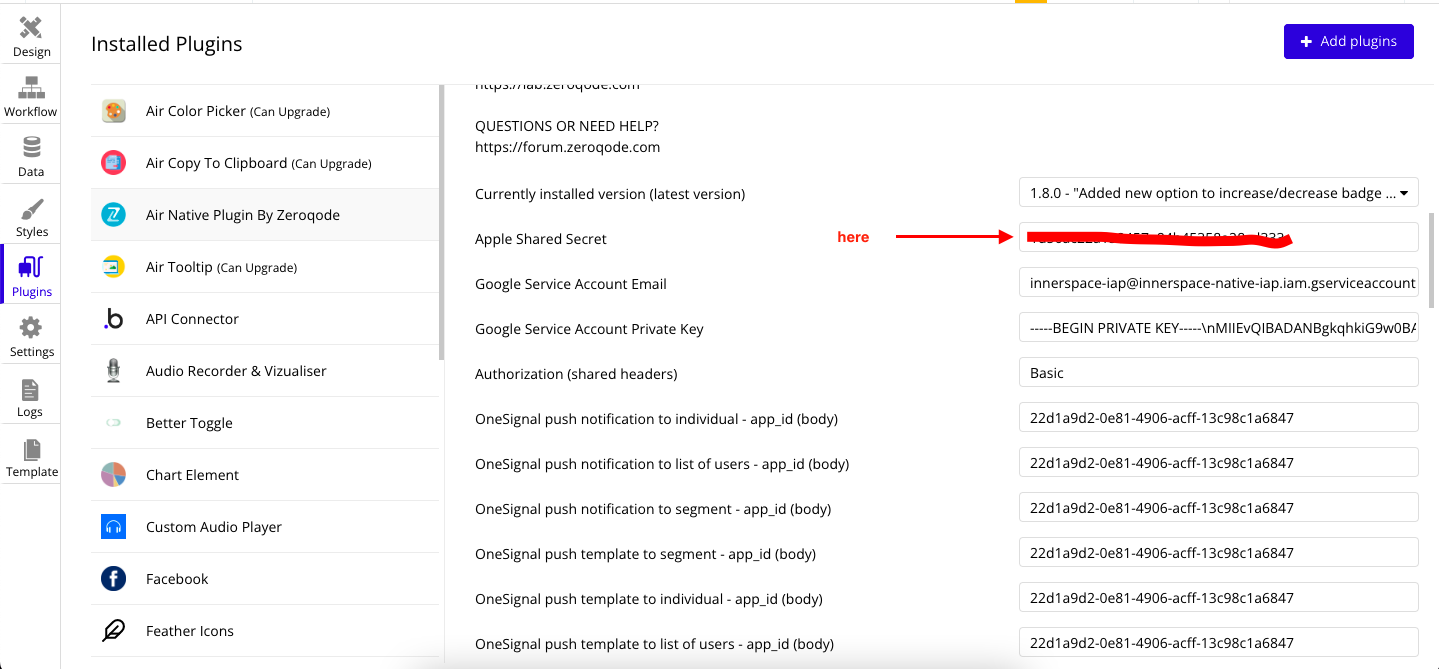
4) Now copy Apple's shared secret and place it in the specified field in the plugins tab:
Apple Private Key ID, Apple Issuer ID, Apple Private Key, Bundle ID
To make the subscription status feature work, it is required to set up the Apple Private Key ID, Apple Issuer ID, and Apple Private Key. All three are located in the same App Store Connect.
Apple Private Key ID, Apple Issuer ID, Apple Private Key
1) Go to App Store Connect > Users and Access > Integration > In-app Purchase section:
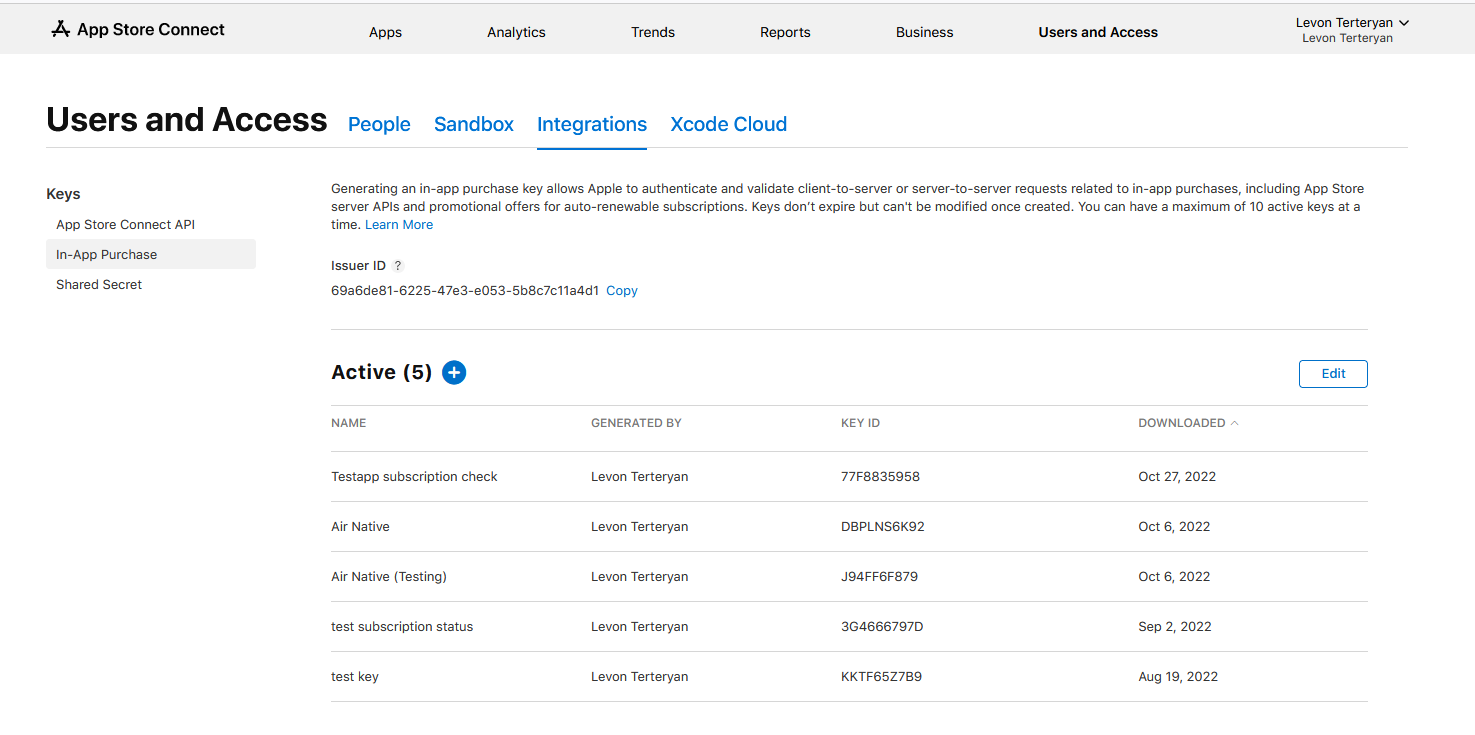
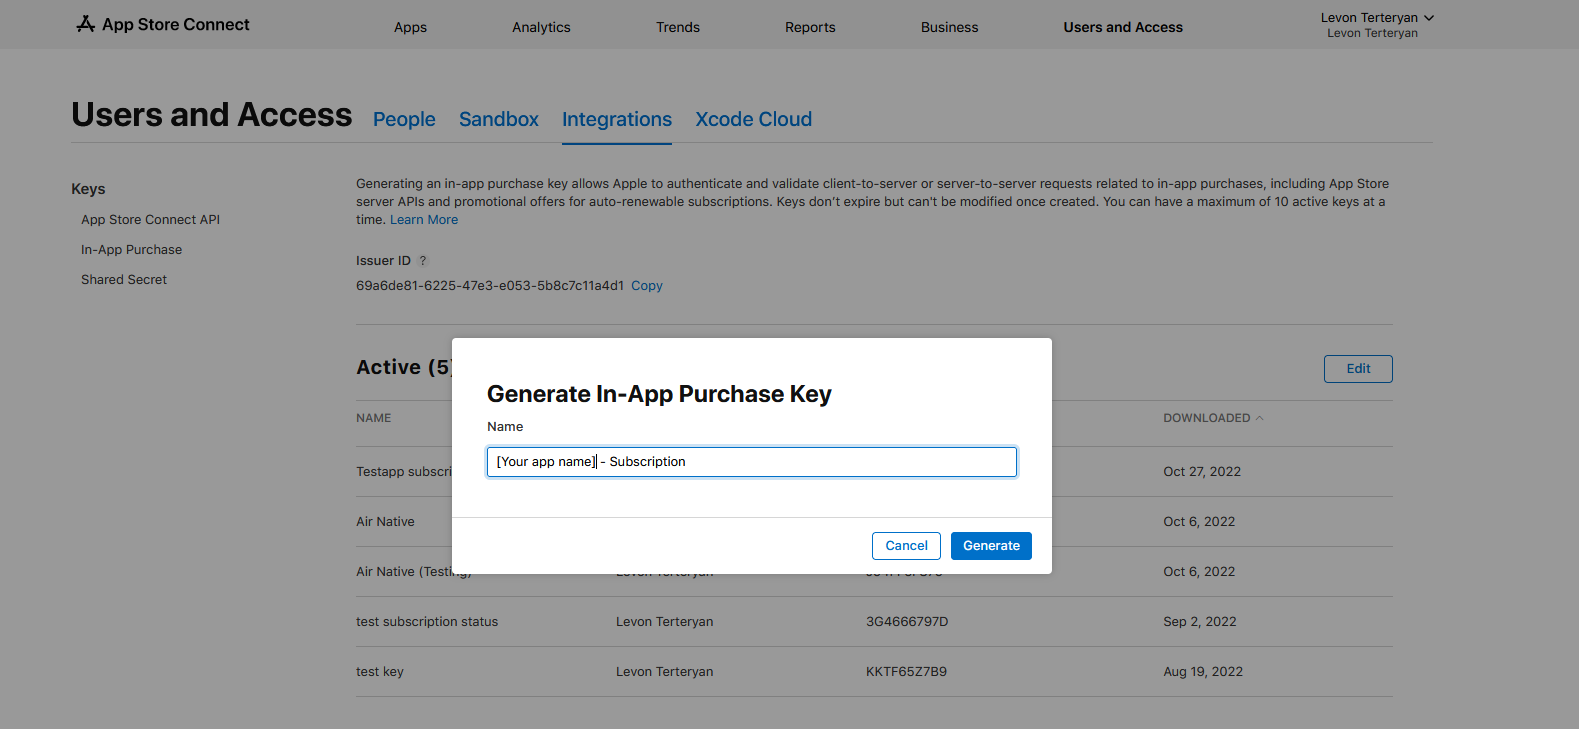
2) Click the + button to create a new key and give it any name you prefer, e.g.:
3) Copy the keys and paste them into the Plugins tab in your Bubble editor:
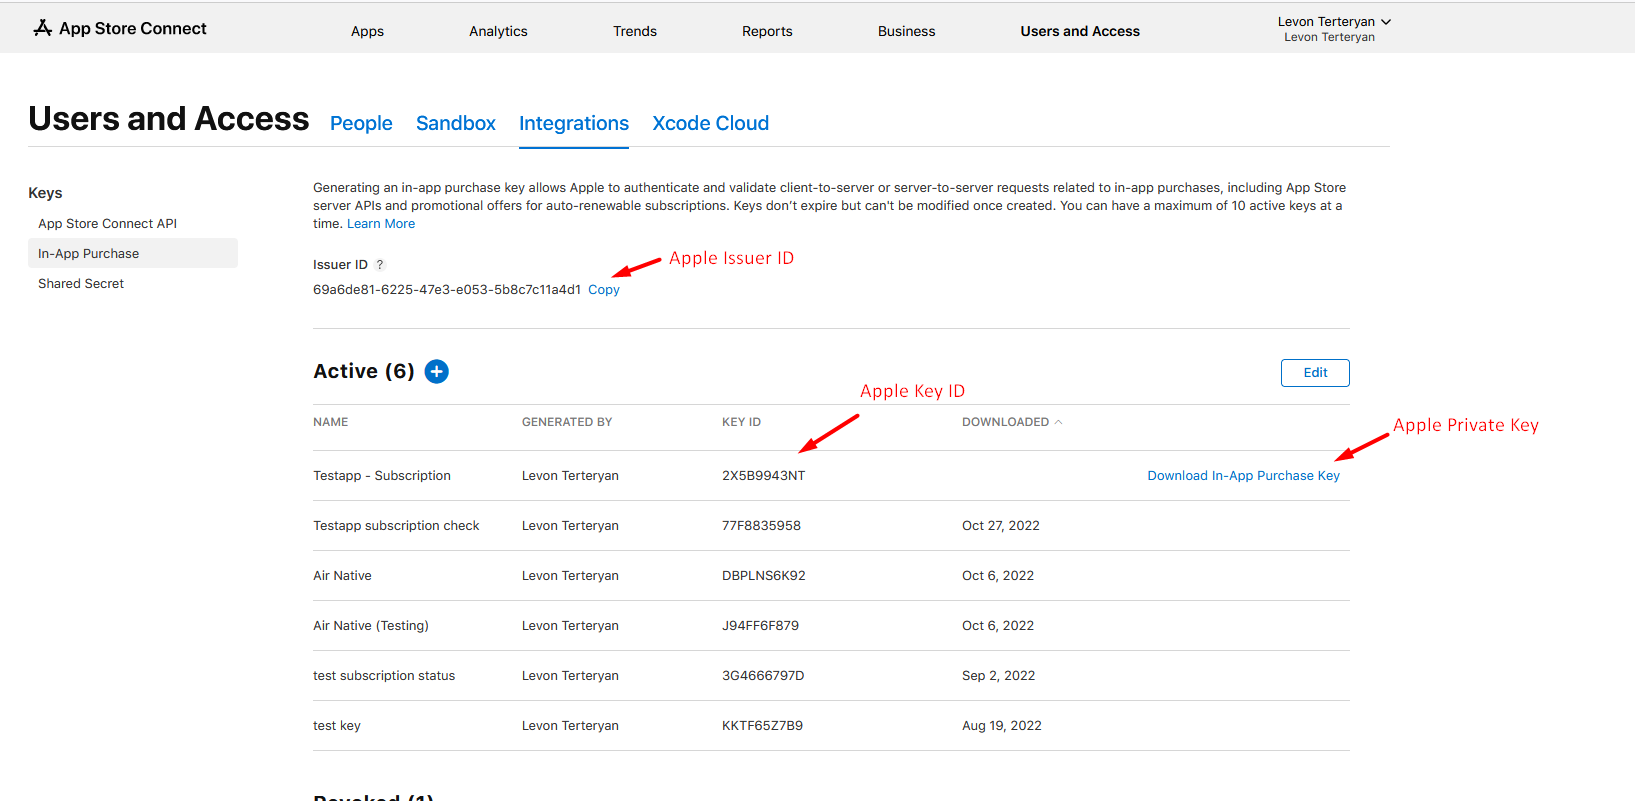
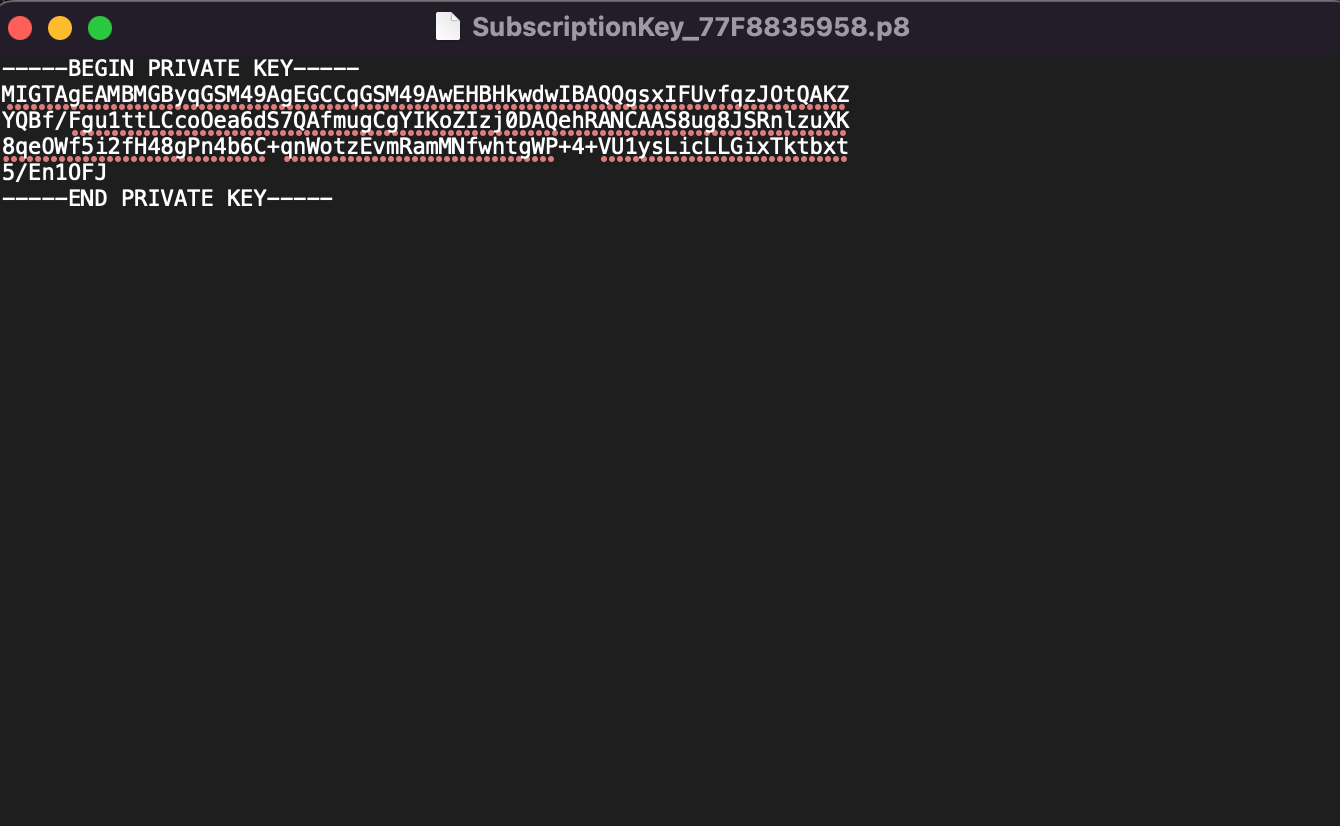
To get the Apple Private Key, hit the “Download In-App Purchase Key” button to get the
.p8 file with your private key.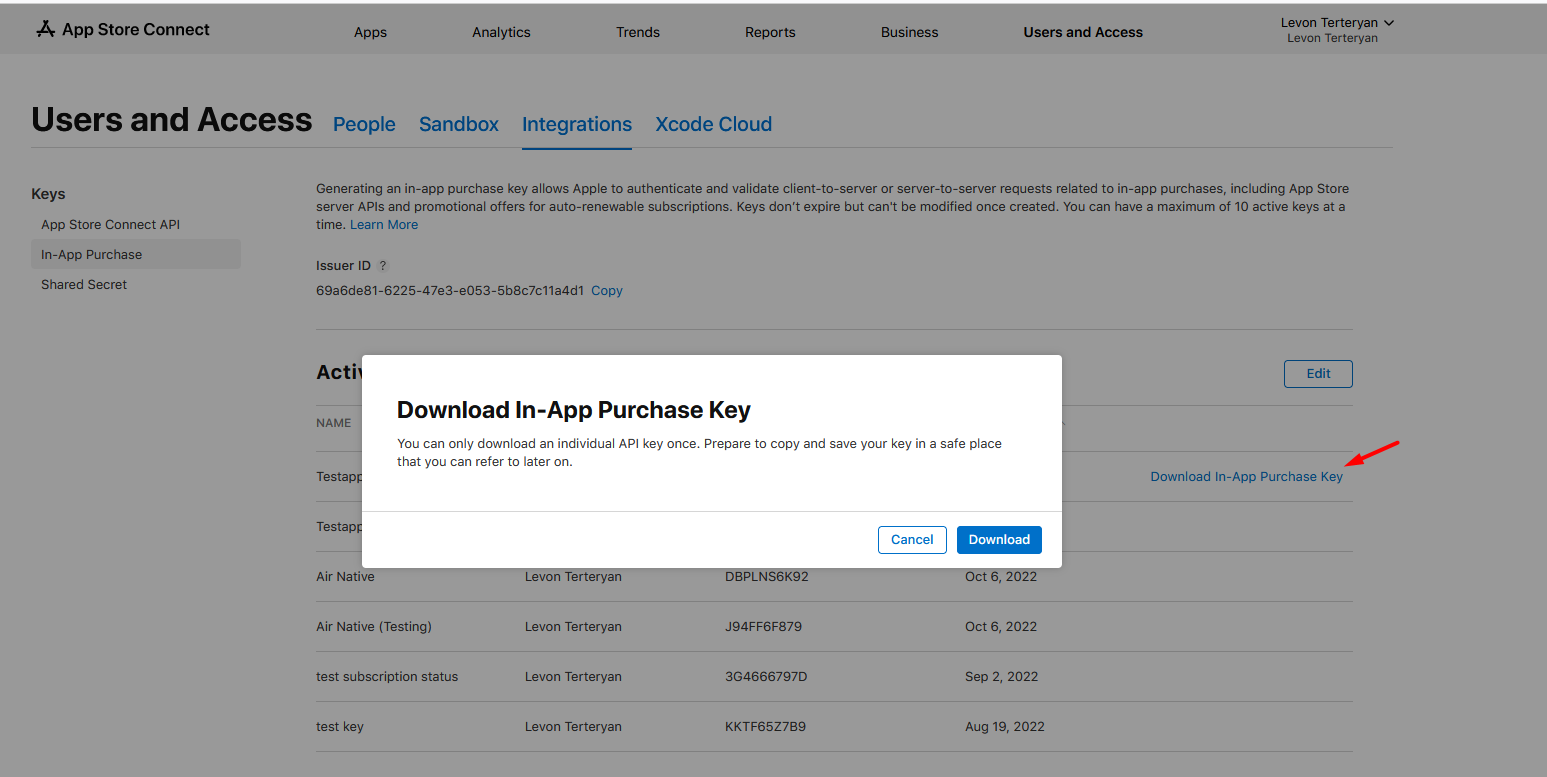
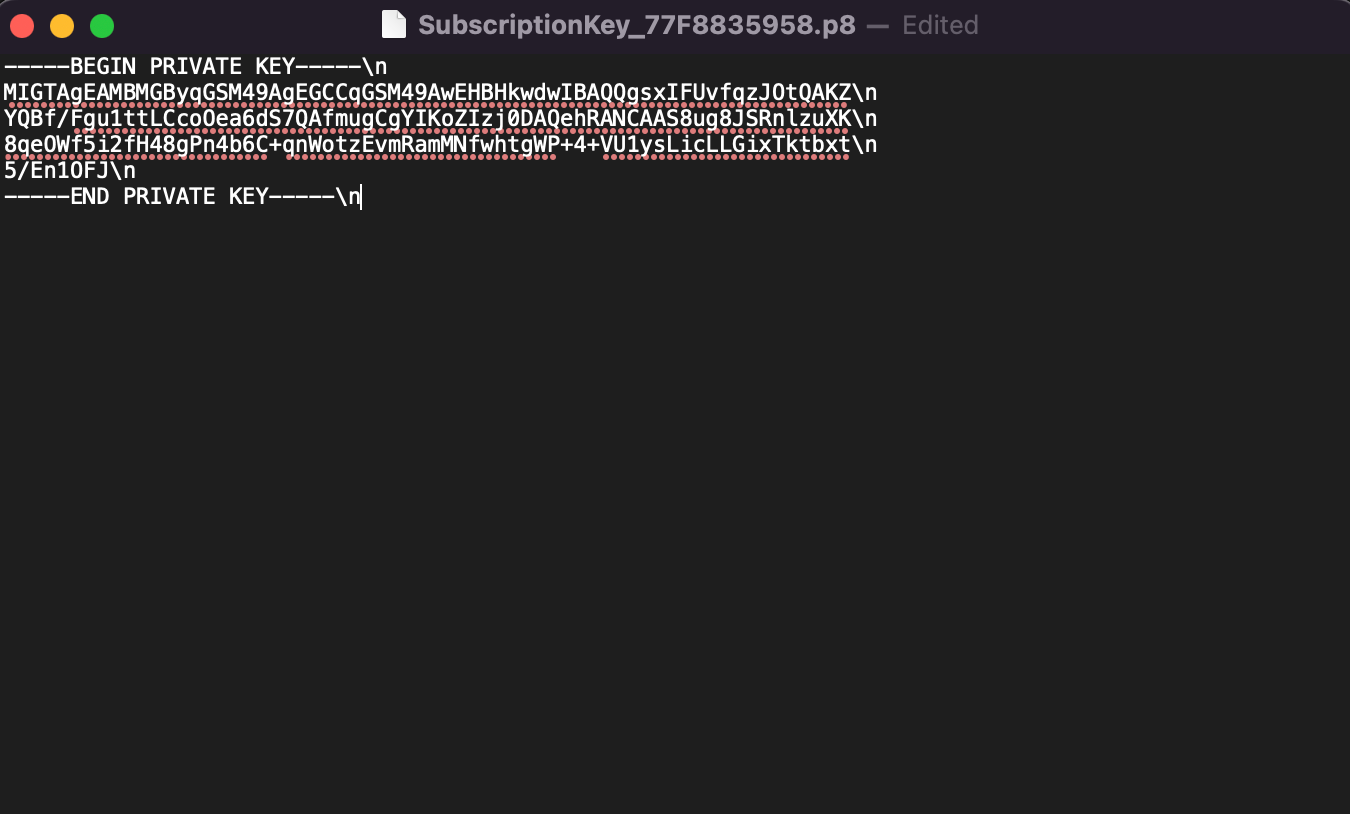
4) Once downloaded, open the file with any text editor:
Important: Add the \n at the end of each line, like this:
And remove the spaces between the lines, so it looks like a complete key in a single row, like this:
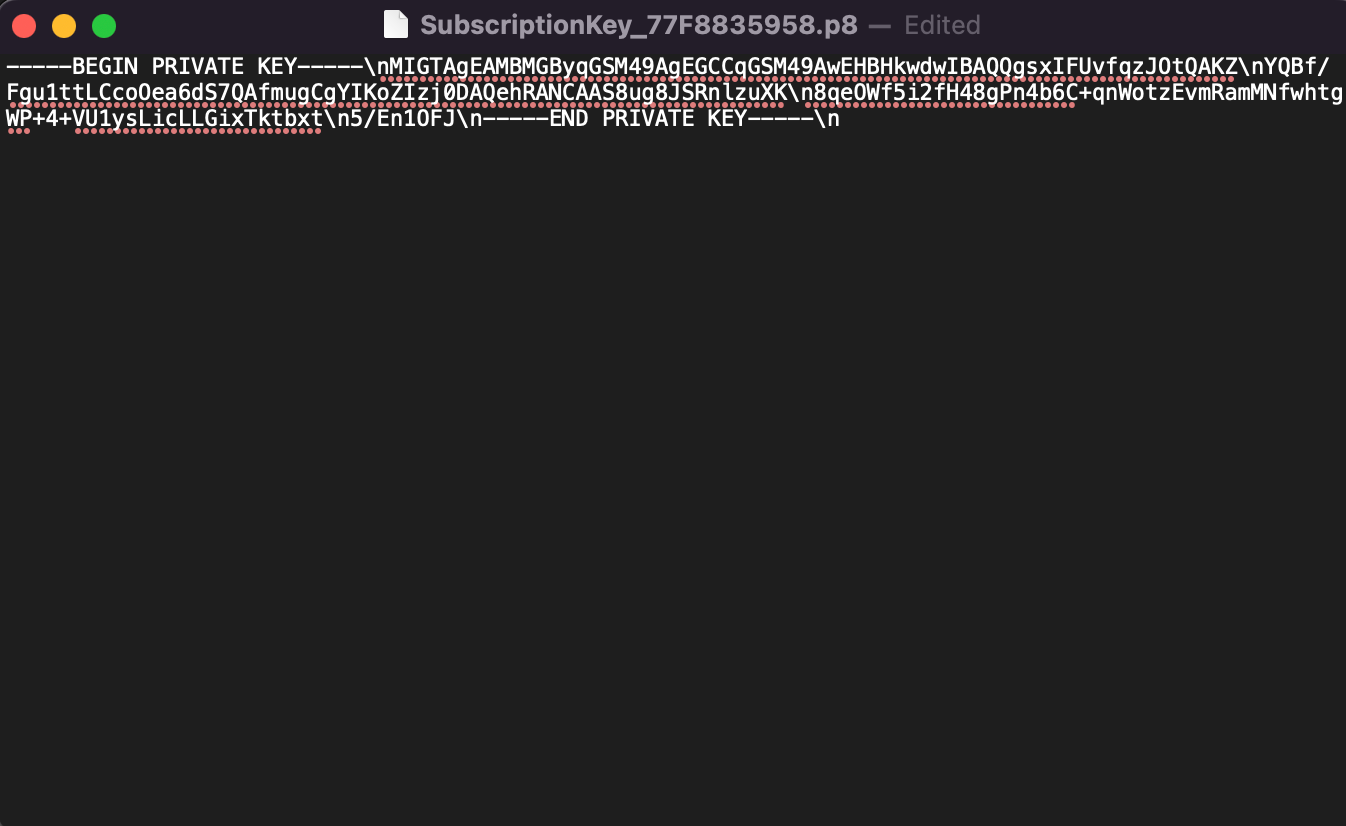
Now simply copy this value into the
Apple Private Key field in the Plugins tab.
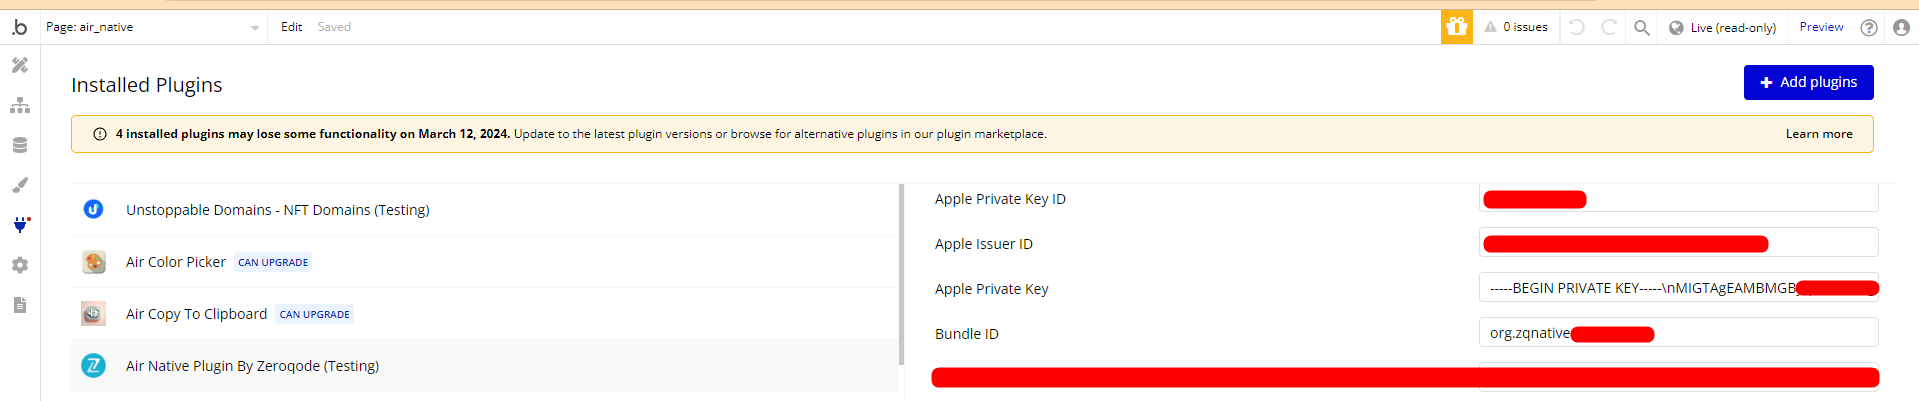
Bundle ID
Go to App Store Connect > Distribution > App Information section to copy the Bundle ID value:
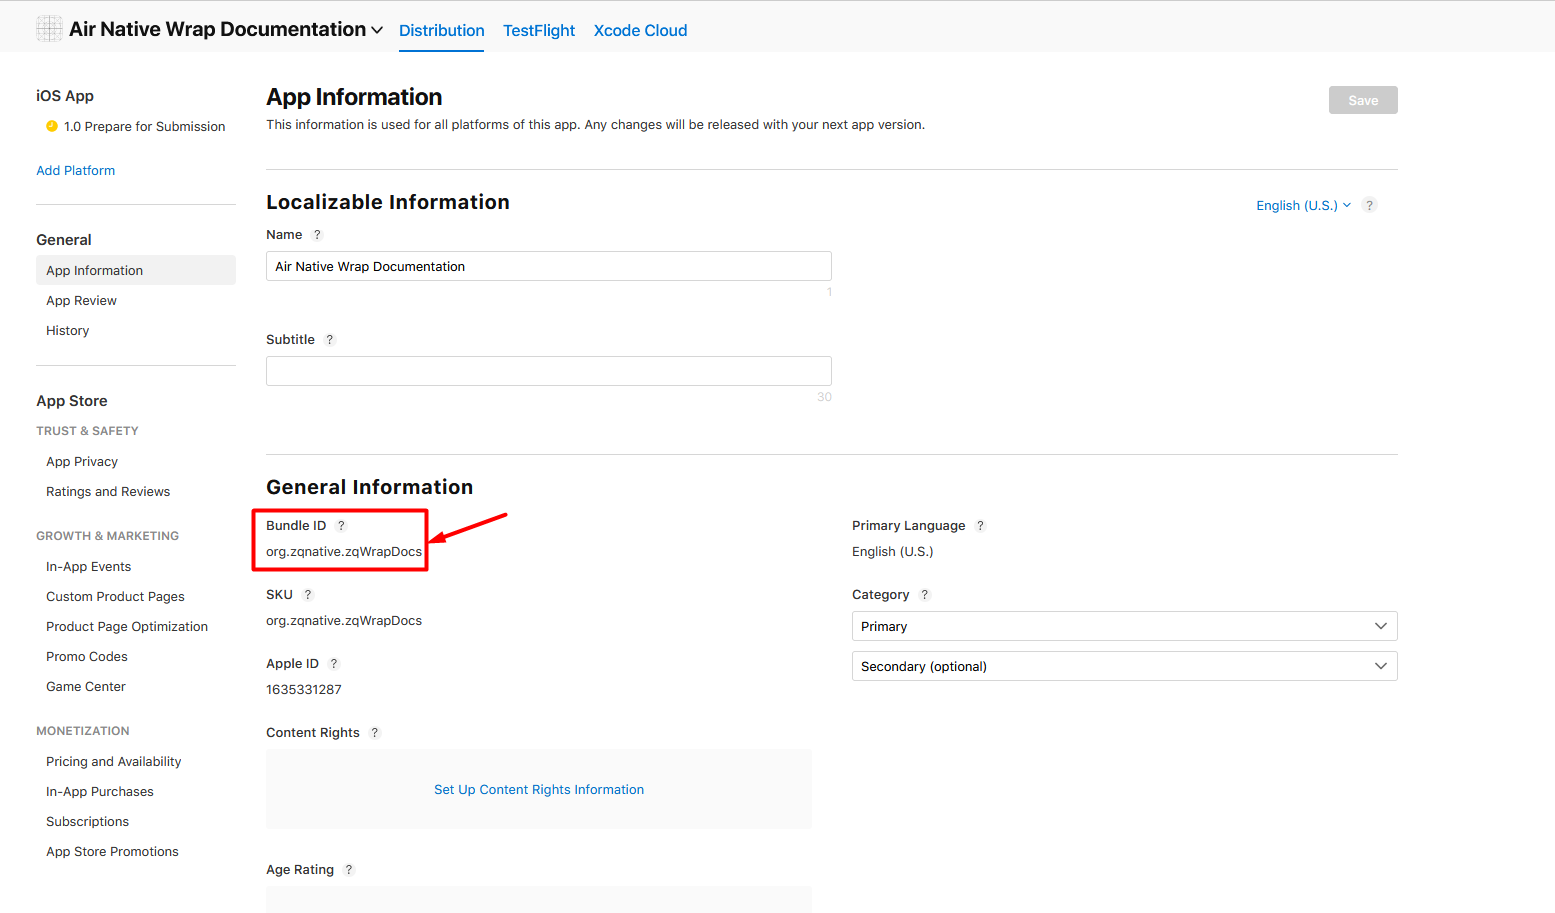
Now simply paste it into the
Bundle ID field in the Plugins tab.

- Air Native Element - For optimal functionality in the native app, it's crucial to have only one plugin element per page, and it should remain visible at all times.
Air Native plugin - Actions
Biometric Scanner
This action brings up a context menu of the device with a request for biometric data.
On iOS devices, it will prompt Touch ID/Face ID.
On Android devices, it prompts for fingerprints.
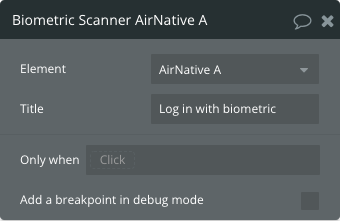
Title | Description |
Title | This text will appear in messages on Android device |
Get OneSignal deviceID
This action return OneSignal deviceID (Player ID) in the plugin state
OneSignal Device ID then triggers the event Device ID Getted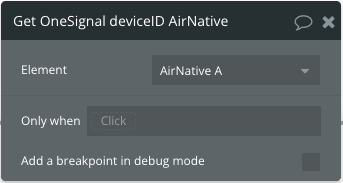
ℹ️You can save the OneSignal deviceID in your Database and use it further to send Push Notifications to the Current User or a List of users.
Alert Word
Launches an alert dialog with the specified title and message.
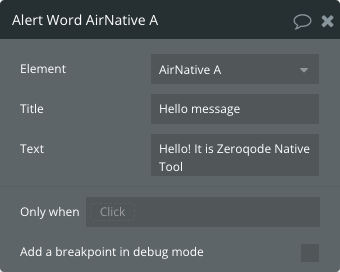
Title | Description |
Title | The dialog's title. |
Text | An optional message appears below the dialog's title. |
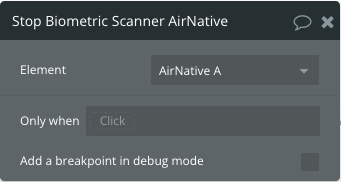
Stop Biometric Scanner
Stops fingerprint scanner listener, releases cache of internal state in native code, and cancels native prompt if visible.
Use vibration
Triggers a vibration with a fixed duration.
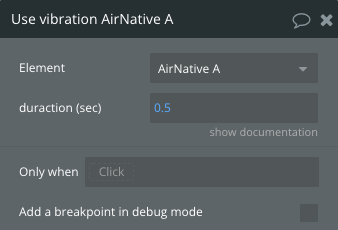
Title | Description |
duration (sec) | Vibration duration in seconds |
Share
Open a dialog to share text content.

Title | Description |
Message | A message to share |
URL | A URL to share |
Start Location Tracking
Starts geolocation tracking.
Information about geolocation is returned in plugin states:
Current Position*, Moving Speed, Heading, Accuracy, *Altitude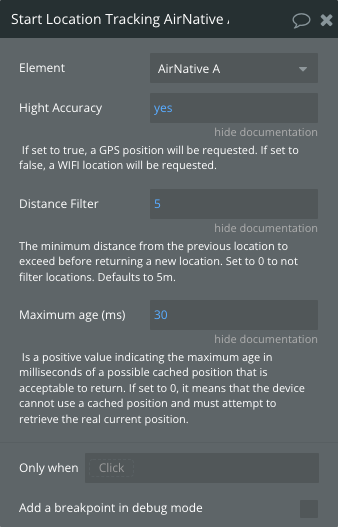
Title | Description |
High Accuracy | Is a boolean representing whether to use GPS or not. If set to true, a GPS position will be requested. If set to false, a WIFI location will be requested. |
Distance Filter | The minimum distance from the previous location is to exceed before returning to a new location. Set to 0 to not filter locations. Defaults to 5m. |
Maximum age (ms) | Is a positive value indicating the maximum age in milliseconds of a possible cached position that is acceptable to return. If set to 0, it means that the device cannot use a cached position and must attempt to retrieve the real current position. If set to Infinity the device will always return a cached position regardless of its age. ( 1s = 1000ms ) |
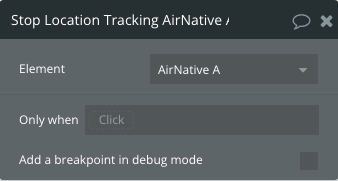
Stop Location Tracking
Disable location tracking.
Change StatusBar Background Color
Set the background color for the status bar and status bar style.

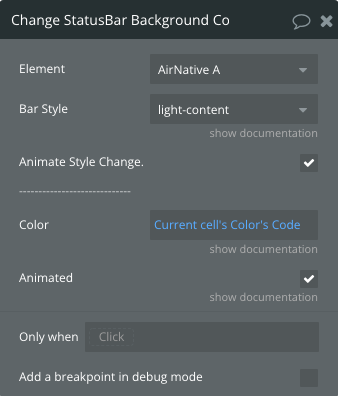
Title | Description |
Bar Style | Status bar style to set. |
Animate Style Change | Animate the style change. |
Color | Background color. |
Animated | Animate the style change. |
Change the Color of the Header Button
Set the color of header button if it is enabled in the build.
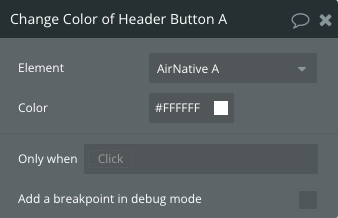
Title | Description |
Color | Color of Header Button |
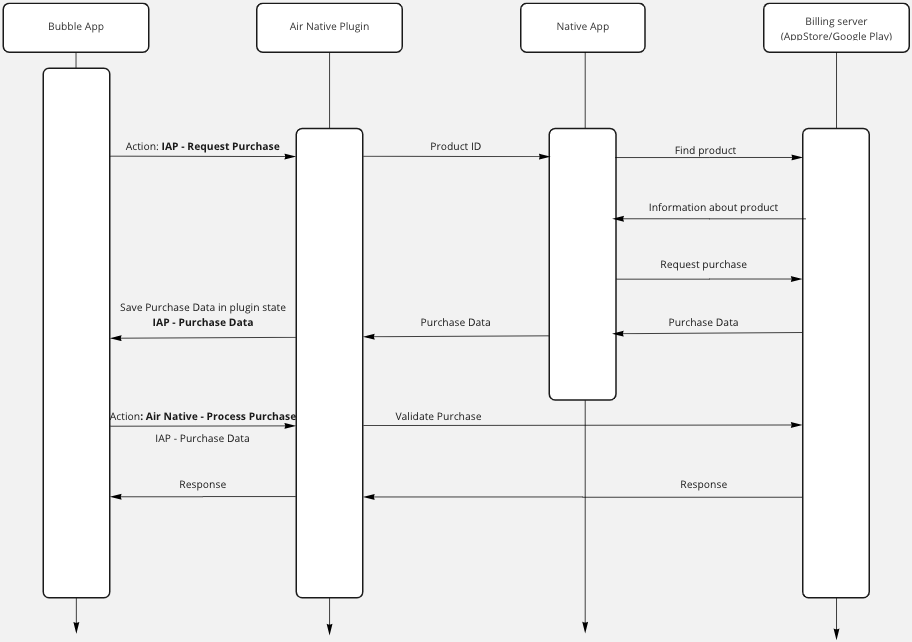
IAP - Request Purchase
Request a purchase.
This action stores in the plugin state
IAP - Purchase Data and IAP - Transaction ID information about the last transaction.
Then purchase is successful plugin event IAP - Purchase data is available will be triggered.
If in a transaction an error is found - the plugin event IAP - Purchase data error will be triggered. Error information will be shown in the alert message.
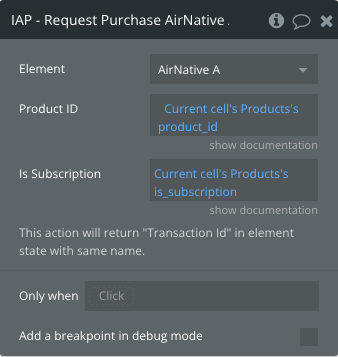
Title | Description |
Product ID | Product ID from the store. |
Is Subscription | Type of product. |
IAP - Cancel a subscription
Starting the unsubscribe workflow.
For both iOS and Android, your users cannot cancel subscriptions inside your app. Users will be redirected to the App Store or Google Play.
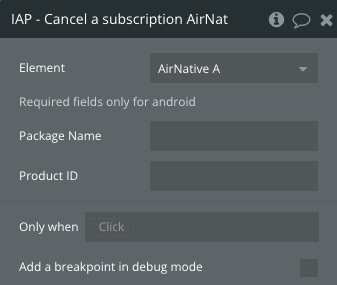
Title | Description |
Package Name | Package Name of your app |
Product ID | Product ID of your subscription |
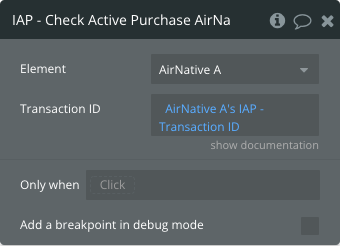
IAP - Check Active Purchase
This action is used to check status of the transaction using its Transaction ID. Transaction ID is stored in a plugin state with the same name.
Title | Description |
Transaction ID | Transaction ID returned by action " IAP - Request Purchase" |
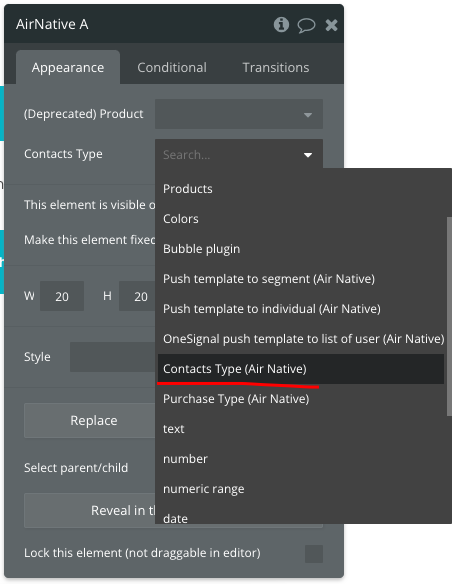
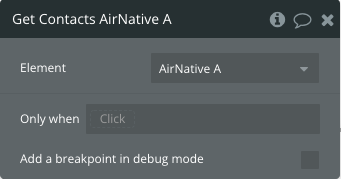
Get Contacts
This action is used to get contacts from the user's device.
Don't forget to set the Contacts type in the plugin element field. As type use stored with plugin type "Contacts Type".
Exposed states
Title | Description | Value |
OneSignal Device ID | Onesignal Player ID.
The OneSignal Player Id is a UUID that OneSignal creates per device per OneSignal App Id. | The format is lowercase letters and numbers 8 characters-4 characters-4 characters-4 characters-12 characters like b3aaabc2-9a47-4647-adda-3e4583a2d19e. |
Current Position | Geographic address. | |
Moving Speed | Represent the velocity of the device in meters per second | |
Heading | Represent the direction towards which the device is facing. This value, specified in degrees, indicates how far off from heading true north the device is. | |
Accuracy | Representing the accuracy of the latitude and longitude properties, expressed in meters. | |
Altitude | Representing the position's altitude in meters, relative to sea level. | |
Device OS | Current user device OS. | Can be:
ios - if app is running on ios device
android - if app is running on an Android device
can be empty - if is loaded from the browser |
IAP - Purchase Data | Information about purchase. | |
List of Contacts | Return list of contacts from users device | List of Contacts Type. |
Contacts Error Text | Error generated when the app tries to get contact data | |
IAP - Current Purchase Is Subscription | Return the boolean value indicated purchase type | Can be Yes or No |
IAP - Transaction ID | Transaction ID from Purchase Data | String. Example: |
IAP - Purchase is active | Using Transaction ID check if the transaction is active | Can be Yes or No |
Events
Title | Description |
Device ID Getted | Triggered when OneSignal returns the current user device ID |
Biometric Data Correct | Triggered when the biometric scanner is successfully used |
Biometric Data Error | Triggered when biometric scanner returns error |
Right Button Clicked | Triggered when the right button in the header button is clicked |
Center Button Clicked | Triggered when the center button in the header button is clicked |
IAP - Purchase data is available | Triggered when purchase data is returned by the app |
Contacts returned | Triggered when the list of contacts is returned by the app |
Error in getting contacts | Triggered when an error occurs when requesting contacts |
Air Native is initialized | Triggered when the plugin is connected to native app |
IAP - Purchase data error | Triggered when an error occurs when requesting purchase data |
Back Button | Triggered when the hardware back button is used on Android |
IAP - Purchase checked | Triggered when purchase is checked |
App Loaded From Background | Triggered when your app awakes from background |
Air Native - Process Purchase
This action is server-side action. It is used for validation of purchase and acknowledgment of Android purchases.
This action can be found in the "Payment" tab.
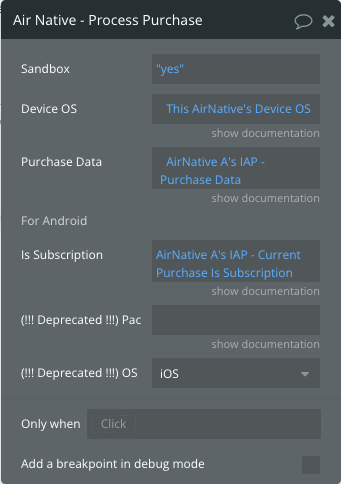
Title | Description |
Sandbox | Indicates the type of server for purchase processing. |
Device OS | Type of operating system. Use the plugin state "Device OS" as a value. |
Purchase Data | Data returned by action " IAP - Request Purchase" and stored in plugin state "IAP - Purchase Data" |
Is Subscription | Indicates if the product is a Subscription. Use the plugin state " IAP - Current Purchase is Subscription" as data for this field |
Returned values:
Successful - Boolean. Indicates if validation and acknowledge are successful.
Message - Text. If validation is successful here will be stored information about acknowledge, else there will be an error message.
Error - Text. If validation is successful this value will be empty, else there will be a stored error message.OneSignal Push Notifications
Air Native uses OneSignal RESTful API for push notifications.
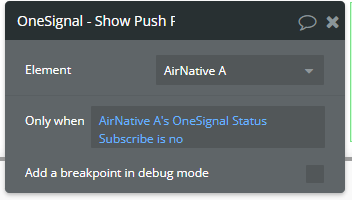
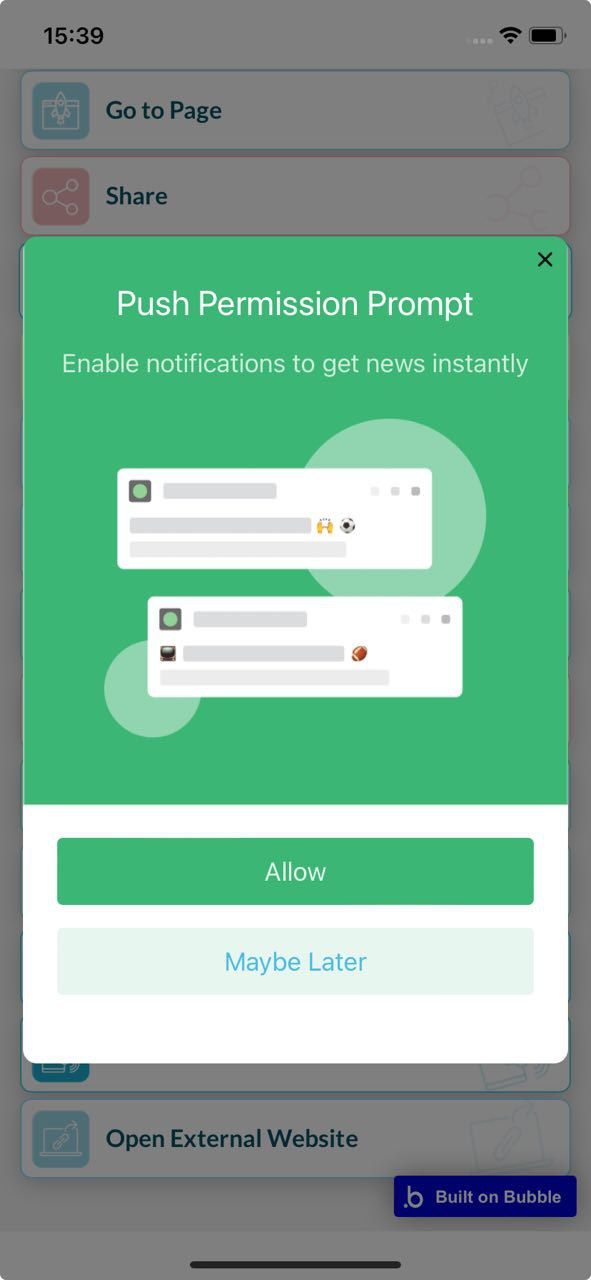
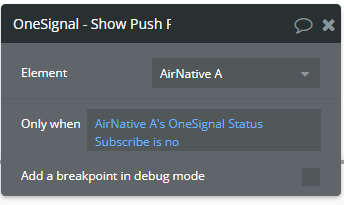
OneSignal Show Push Prompt
The OneSignal Push Prompt appears to verify the user's ability to receive push notifications. If the user does not accept this prompt, they will not receive any further push notifications.
OneSignal push notification to individual
Sends push notifications to one user.
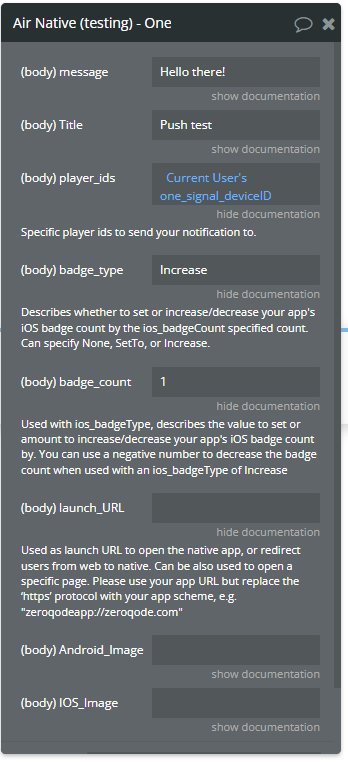
Title | Description |
message | The notification's content |
Title | The notification's title |
player_ids | Specific playerids ( OneSignal Device ID state*) to send* |
badge_type | Describes whether to set or increase/decrease your app's iOS badge count by the ios_badgeCount specified count. Can specify None, SetTo, or Increase. |
badge_count | Used with ios_badgeType, describes the value to set or amount to increase/decrease your app's iOS badge count by. You can use a negative number to decrease the badge count when used with an ios_badgeType of Increase |
launch_URL | Used as Launch URL to open the native app. Can be also used to open a specific page. Please use your app URL, but replace the “HTTPS” protocol with your app scheme, e.g:
”zeroqodeapp://zeroqode.com”
Make sure to insert the launch URl in double quotation marks
”zeroqodeapp://zeroqode.com” |
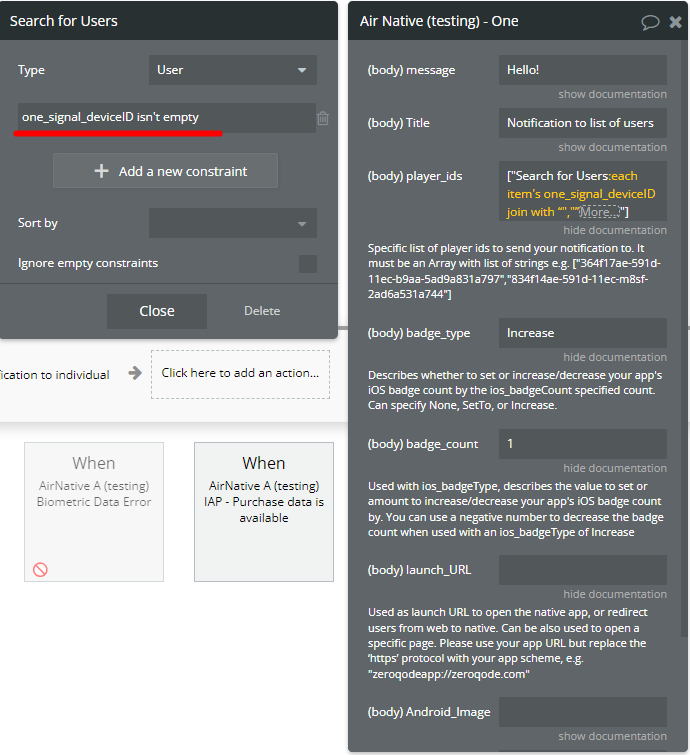
OneSignal push notification to list of users
Sends notifications to a list of users.
Title | Description |
message | The notification's content |
Title | The notification's title |
player_ids | List of player IDs ( OneSignal Device ID).
Example: ["364f17ae-591d-11ec-b9aa-5ad9a831a797","834f14ae-591d-11ec-m8sf-2ad6a531a744"]
To avoid errors, we recommend using constraints that will filter empty player_IDs. |
badge_type | Describes whether to set or increase/decrease your app's iOS badge count by the ios_badgeCount specified count. Can specify None, SetTo, or Increase. |
badge_count | Used with ios_badgeType, describes the value to set or amount to increase/decrease your app's iOS badge count by. You can use a negative number to decrease the badge count when used with an ios_badgeType of Increase |
launch_URL | Used as Launch URL to open the native app. Can be also used to open a specific page. Please use your app URL, but replace the “HTTPS” protocol with your app scheme, e.g:
”zeroqodeapp://zeroqode.com”
Make sure to insert the launch URl in double quotation marks
”zeroqodeapp://zeroqode.com” |
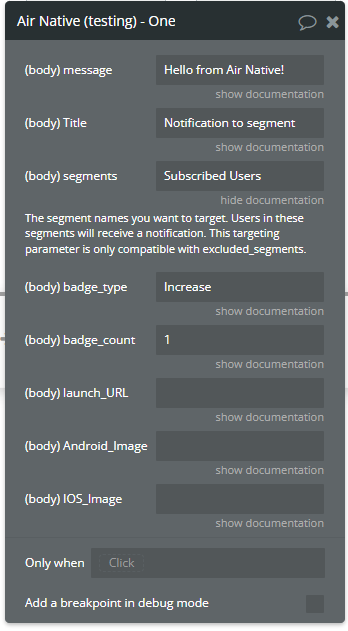
OneSignal push notification to segment
Sends notifications to a specific segment of users.
Segments
Cohorts or Groups of users based on data collected and sent to OneSignal.
https://documentation.onesignal.com/docs/segmentation
Title | Description |
message | The notification's content |
Title | The notification's title |
segments | The segment names you want to target. Segment names can be found in OneSignal Console. Go to Audience -> Segments |
badge_type | Describes whether to set or increase/decrease your app's iOS badge count by the ios_badgeCount specified count. Can specify None, SetTo, or Increase. |
badge_count | Used with ios_badgeType, describes the value to set or amount to increase/decrease your app's iOS badge count by. You can use a negative number to decrease the badge count when used with an ios_badgeType of Increase |
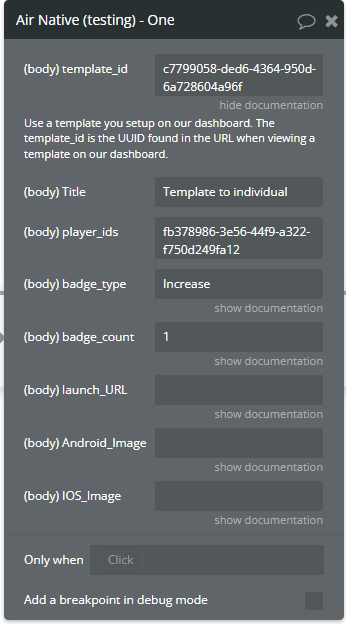
OneSignal push template to individual
Sends notifications using a predefined template to a specific user.
Templates
OneSignal Reusable Push Notification, SMS, and Email Templates
https://documentation.onesignal.com/docs/templates
Title | Description |
template_id | Use a template you set up on our dashboard. The template_id is the UUID found in the URL when viewing a template on our dashboard.
Example: be4a8044-bbd6-11e4-a581-000c2940e62c |
Title | The notification's title |
player_ids | Specific playerids ( OneSignal Device ID state*) to send* |
badge_type | Describes whether to set or increase/decrease your app's iOS badge count by the ios_badgeCount specified count. Can specify None, SetTo, or Increase. |
badge_count | Used with ios_badgeType, describes the value to set or amount to increase/decrease your app's iOS badge count by. You can use a negative number to decrease the badge count when used with an ios_badgeType of Increase |
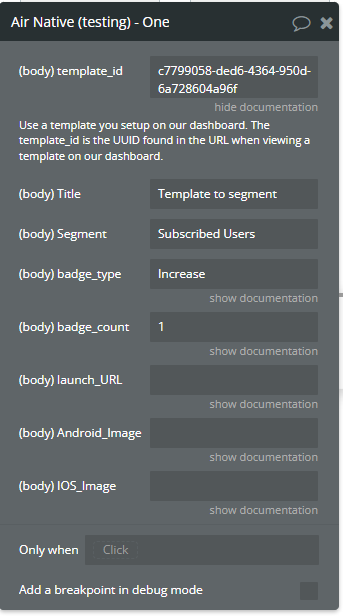
OneSignal push template to segment
Sends notifications using predefined template to segment.
Title | Description |
template_id | Use a template you setup on our dashboard. The template_id is the UUID found in the URL when viewing a template on our dashboard.
Example: be4a8044-bbd6-11e4-a581-000c2940e62c |
Title | The notification's title |
Segment | The segment names you want to target. Segments names can be founded in OneSignal Console. Go to Audience -> Segments |
badge_type | Describes whether to set or increase/decrease your app's iOS badge count by the ios_badgeCount specified count. Can specify None, SetTo, or Increase. |
badge_count | Used with ios_badgeType, describes the value to set or amount to increase/decrease your app's iOS badge count by. You can use a negative number to decrease the badge count when used with an ios_badgeType of Increase |
OneSignal push template to list of users
Sends notifications to specific segment of users using a predefined template.
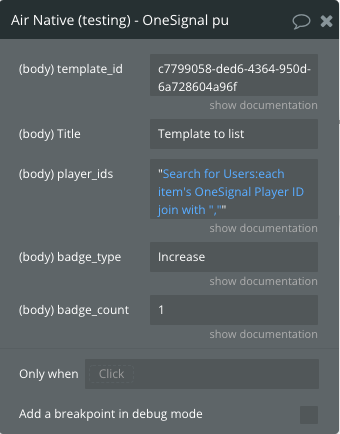
Title | Description |
template_id | Use a template you set up on our dashboard. The template_id is the UUID found in the URL when viewing a template on our dashboard.
Example: be4a8044-bbd6-11e4-a581-000c2940e62c |
Title | The notification's title |
player_ids | List of player ids ( OneSignal Device ID).
Example: ["364f17ae-591d-11ec-b9aa-5ad9a831a797","834f14ae-591d-11ec-m8sf-2ad6a531a744"] |
badge_type | Describes whether to set or increase/decrease your app's iOS badge count by the ios_badgeCount specified count. Can specify None, SetTo, or Increase. |
badge_count | Used with ios_badgeType, describes the value to set or amount to increase/decrease your app's iOS badge count by. You can use a negative number to decrease the badge count when used with an ios_badgeType of Increase |
Understanding In-App Purchases
Steps to set up a product, either as a subscription model or as a one-time in-app purchase.
Auto-renewable Subscriptions - App Store - Apple Developer
Provide a seamless experience for auto-renewable subscriptions in your apps. You’ll receive more revenue for qualifying subscriptions after one year, have greater pricing flexibility, and more.
https://developer.apple.com/app-store/subscriptions/
App Store Connect (for iOS app)
Go to the Subscriptions menu (or In-App Purchases, the steps are similar):
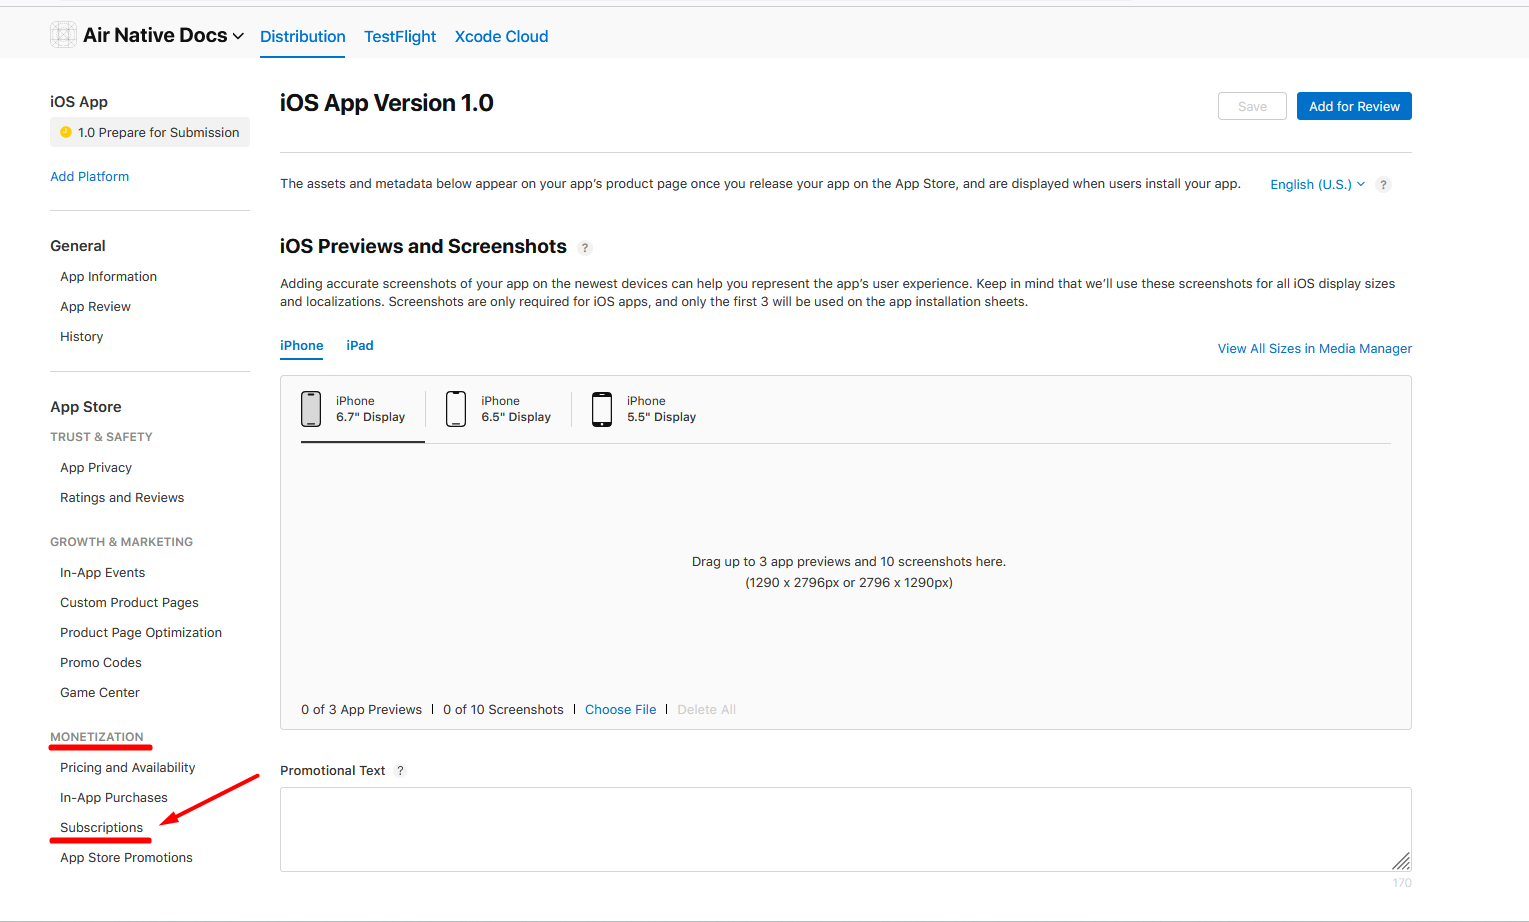
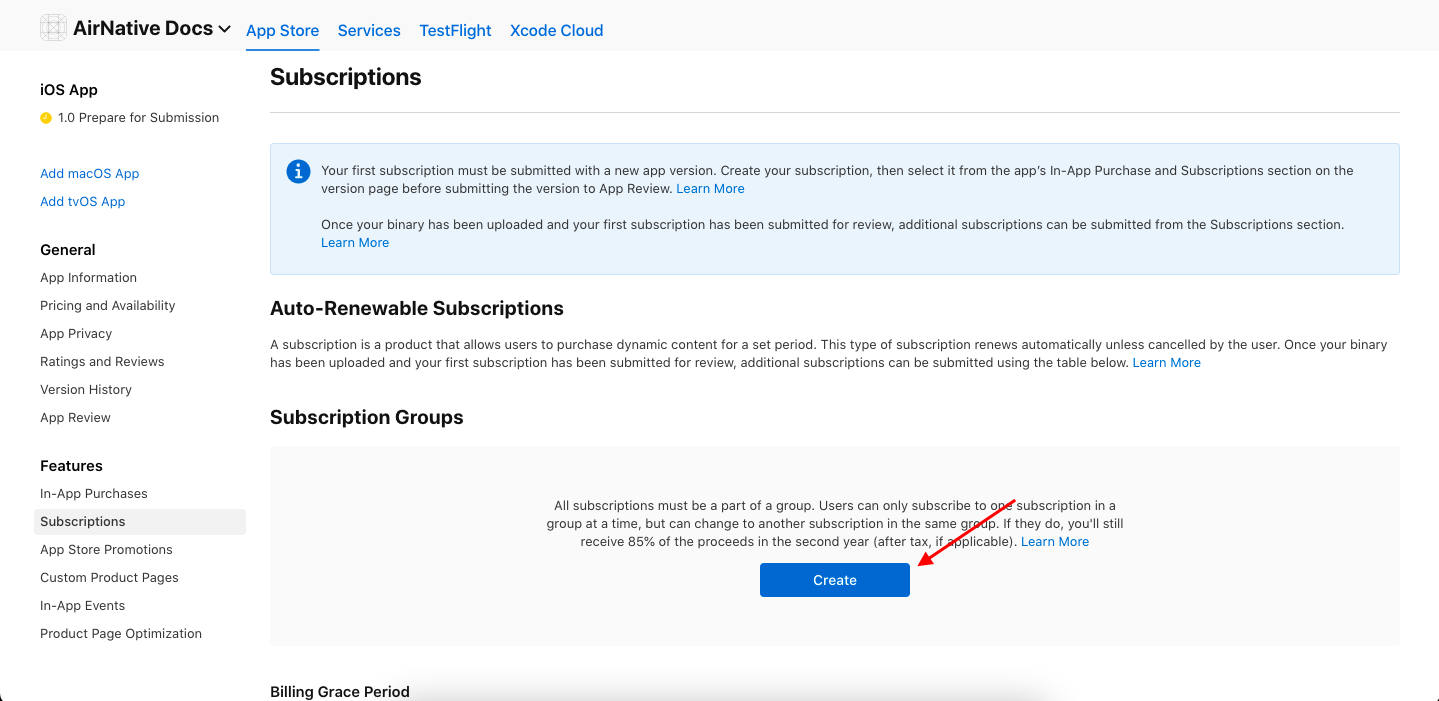
Create a new Subscription group:
Create a new subscription:
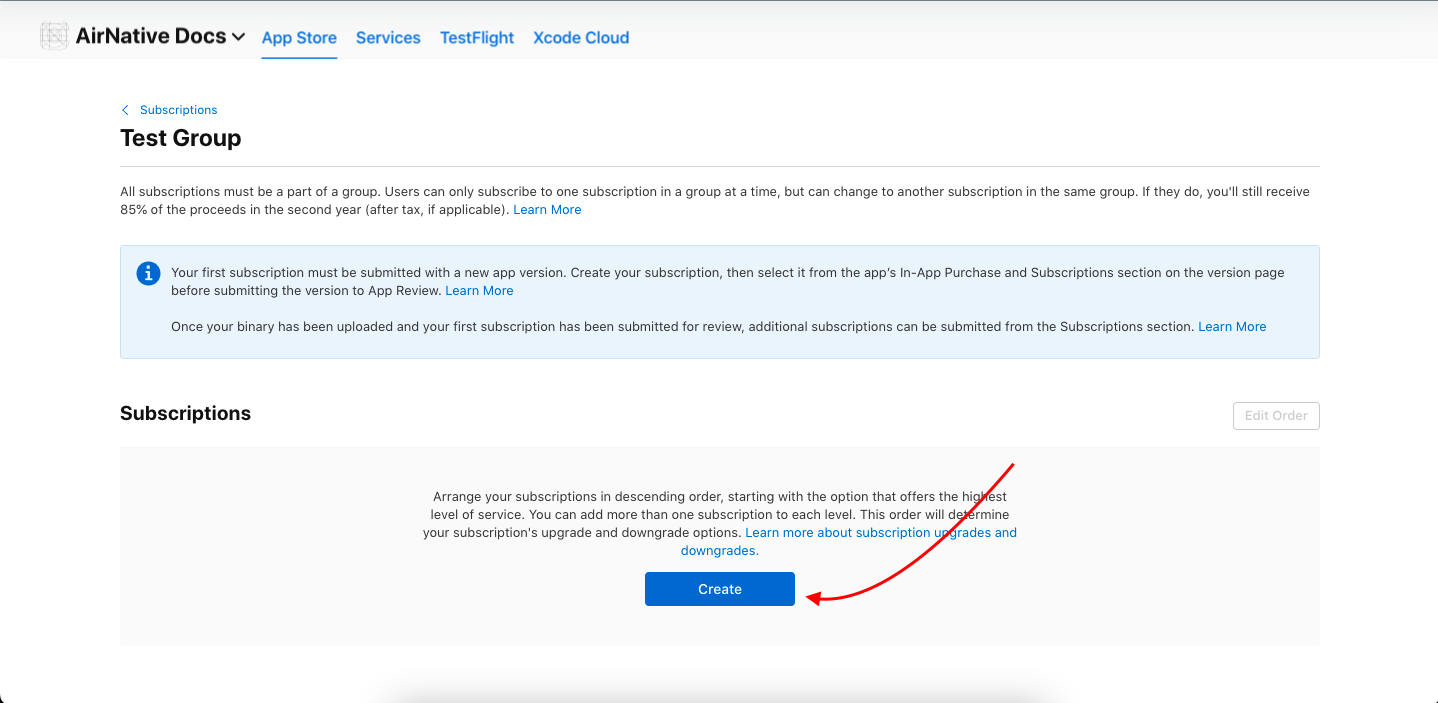
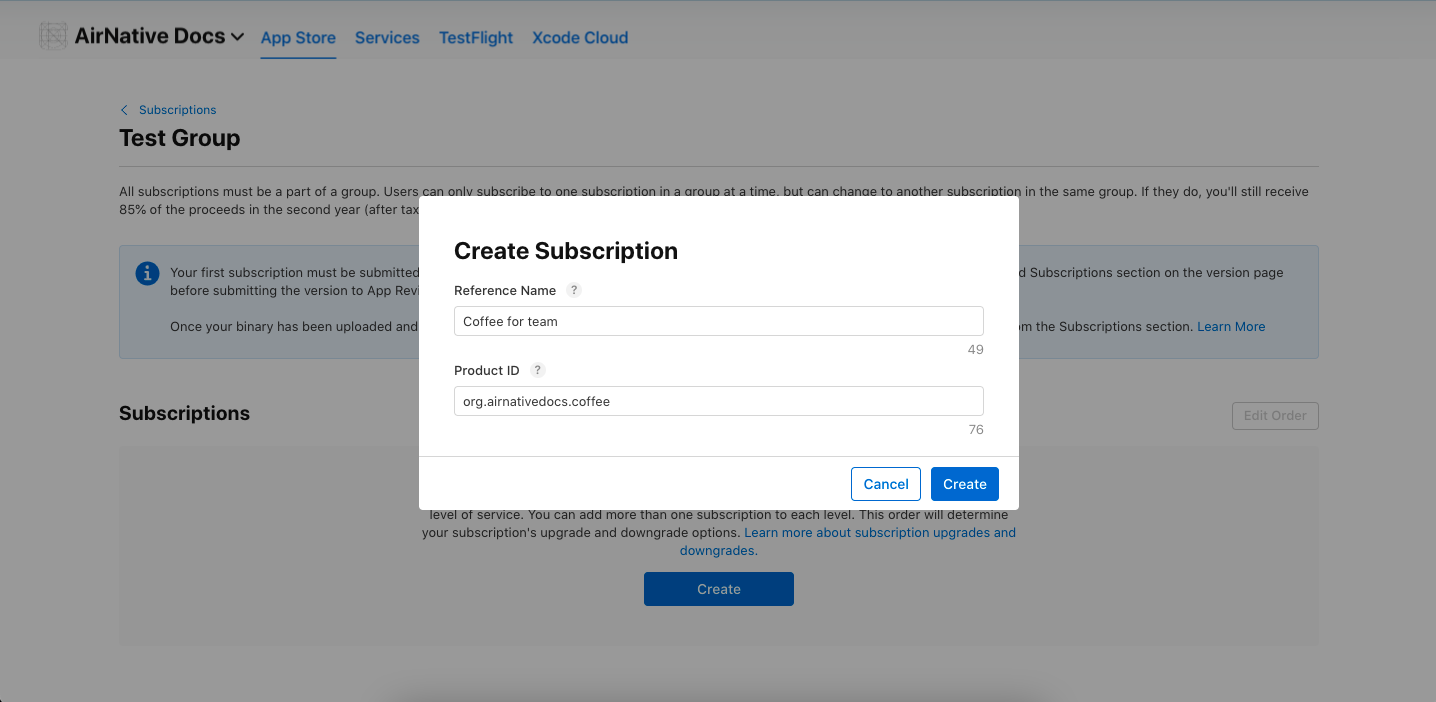
Set the Reference name and Product ID of your subscription and click "Create":
Now you can configure your Subscription:
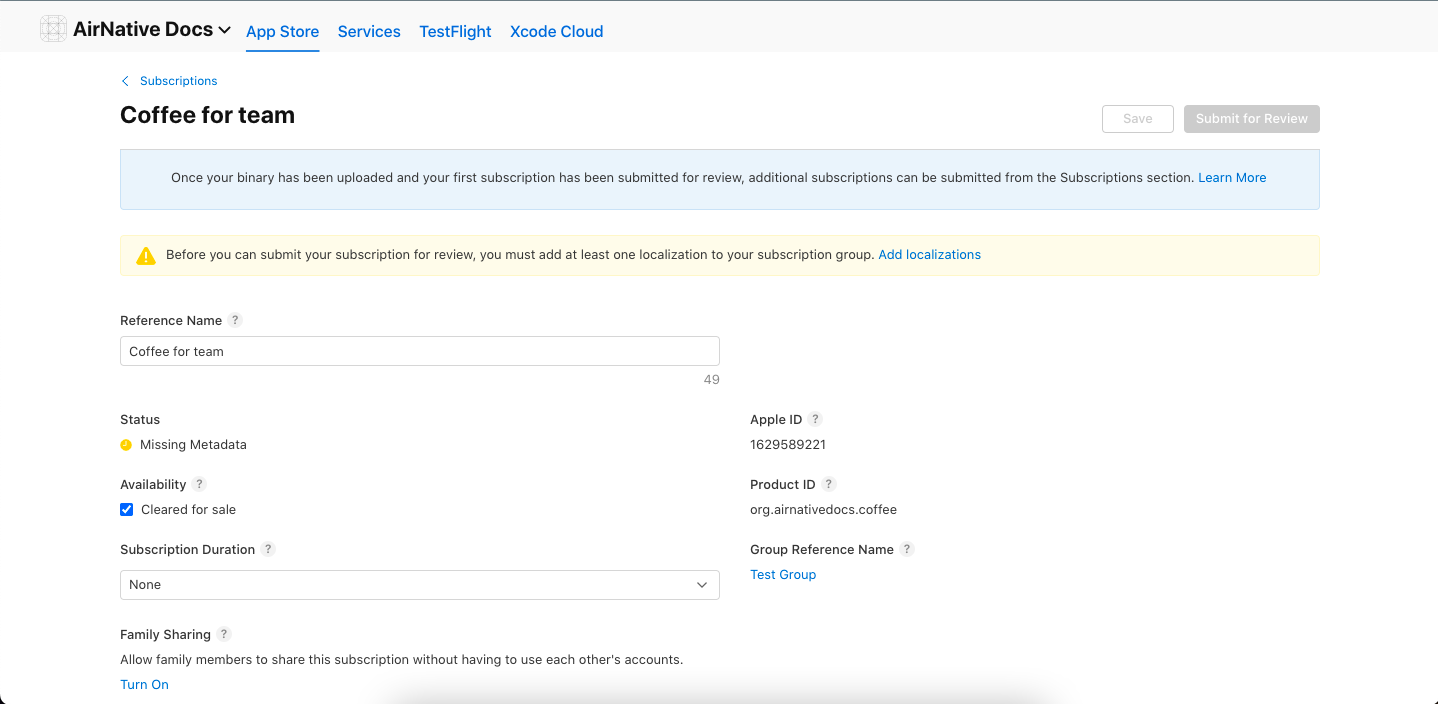
Choose Subscription duration:
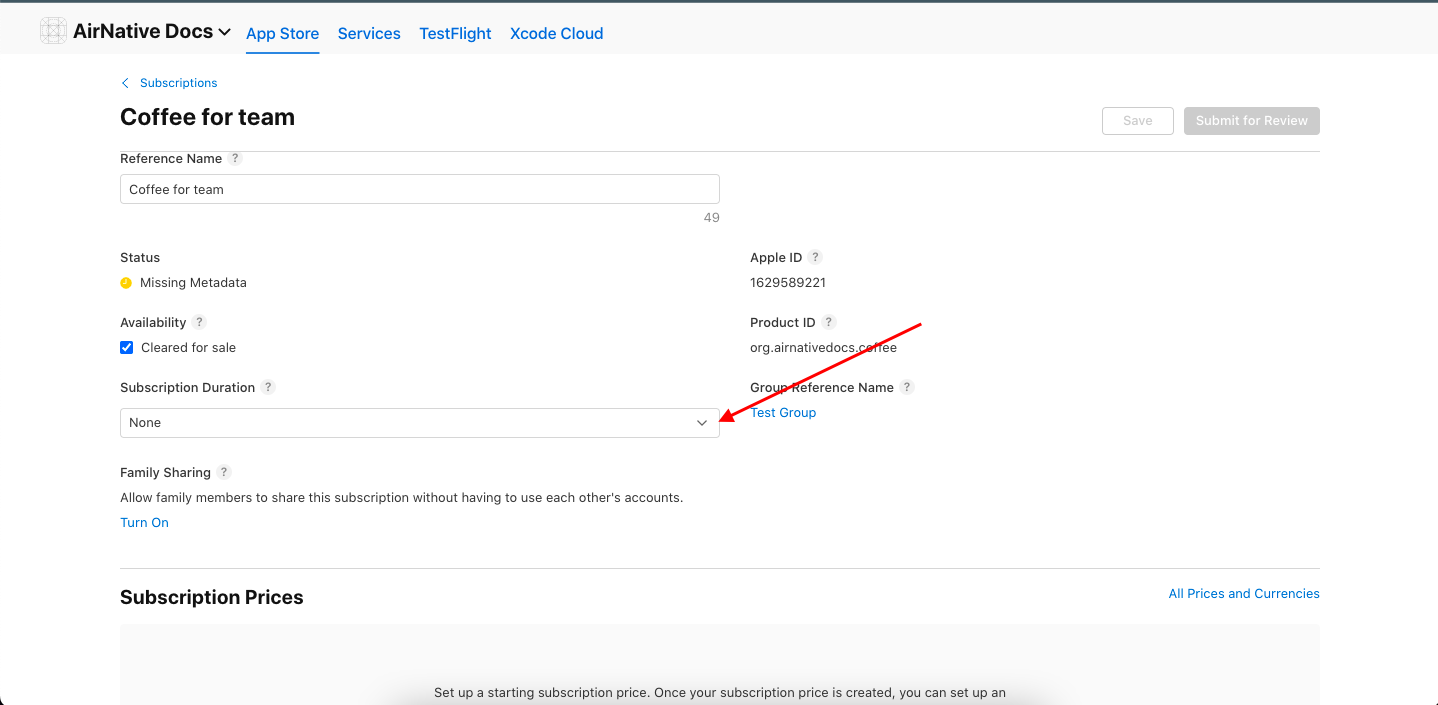
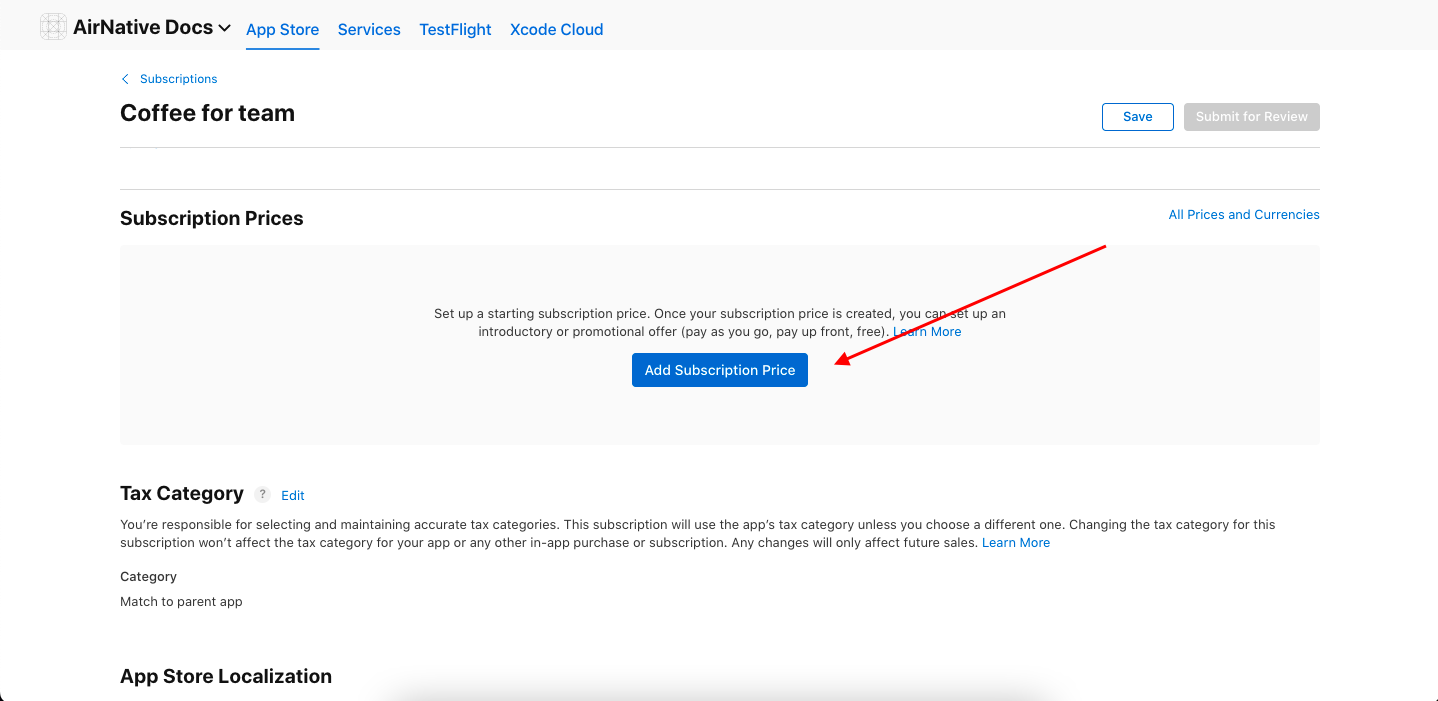
Add subscription price:
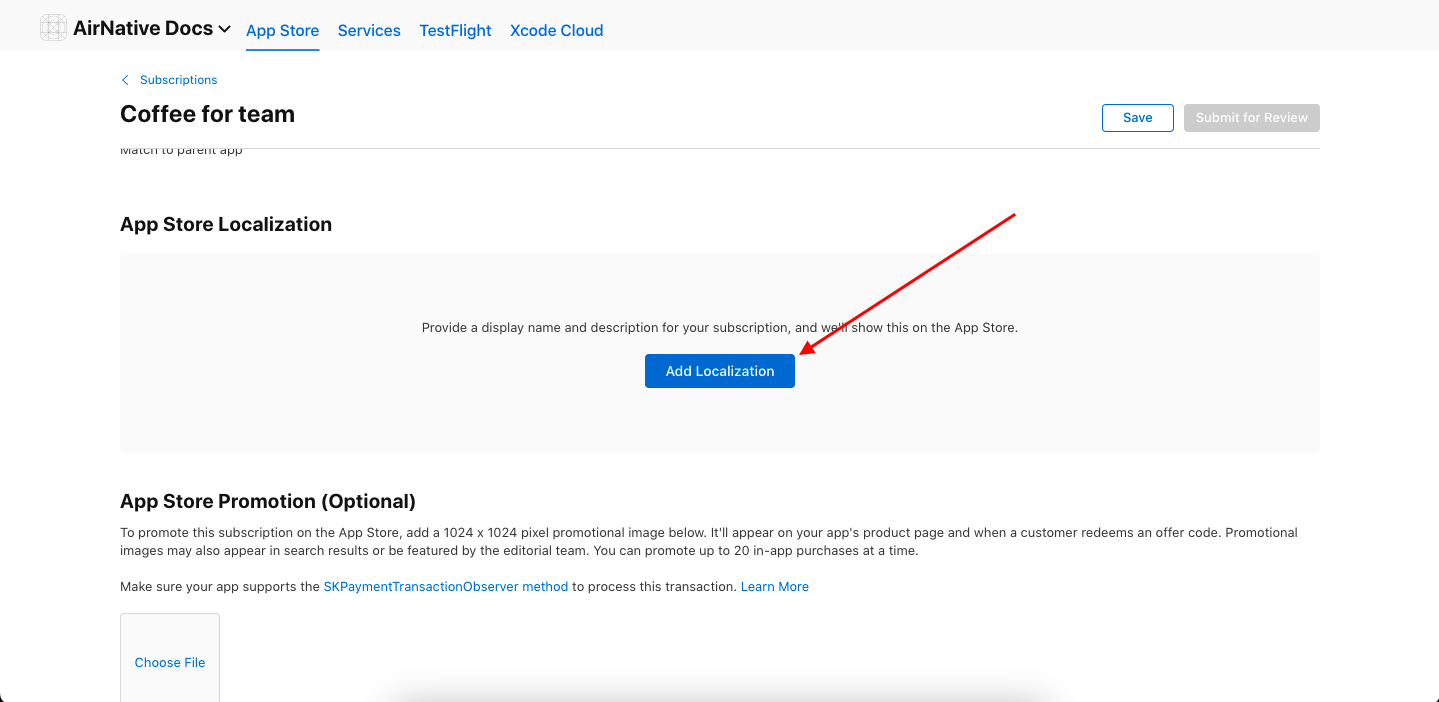
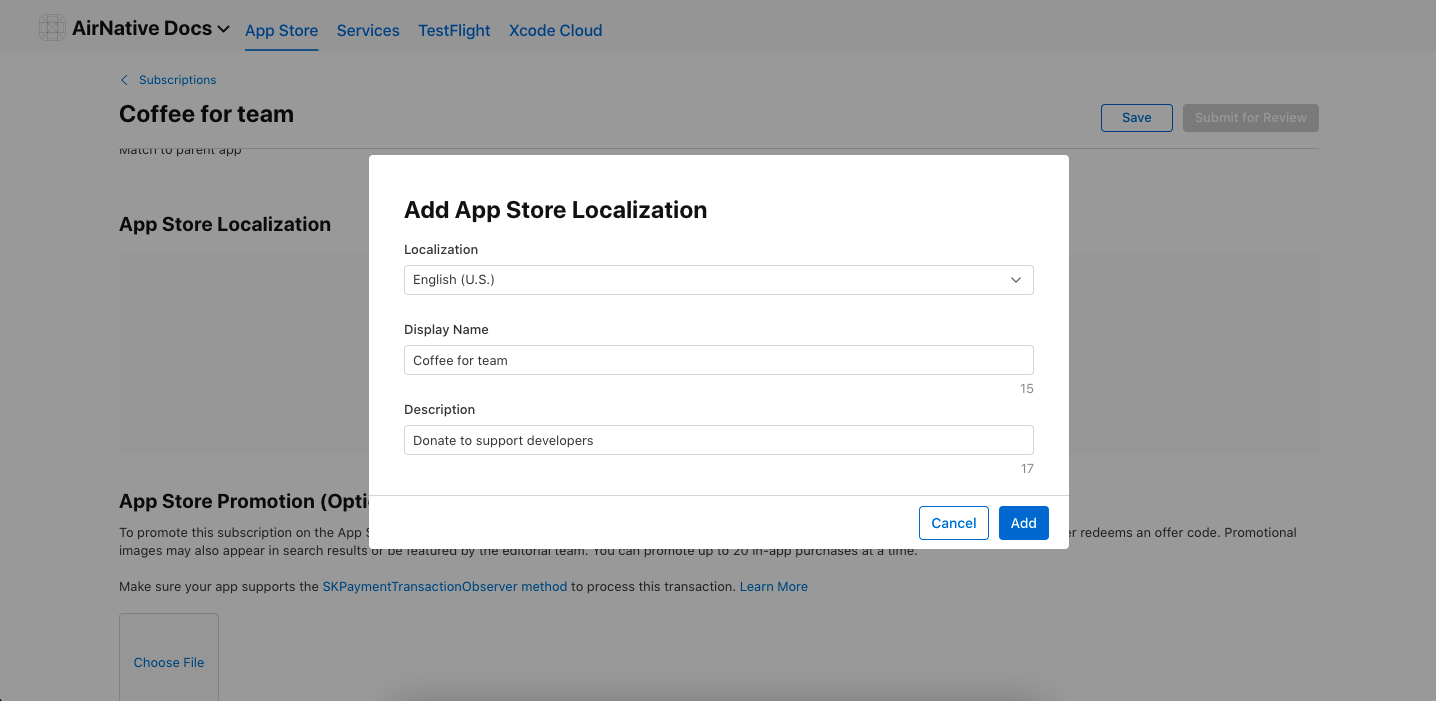
Add localization for your subscription:
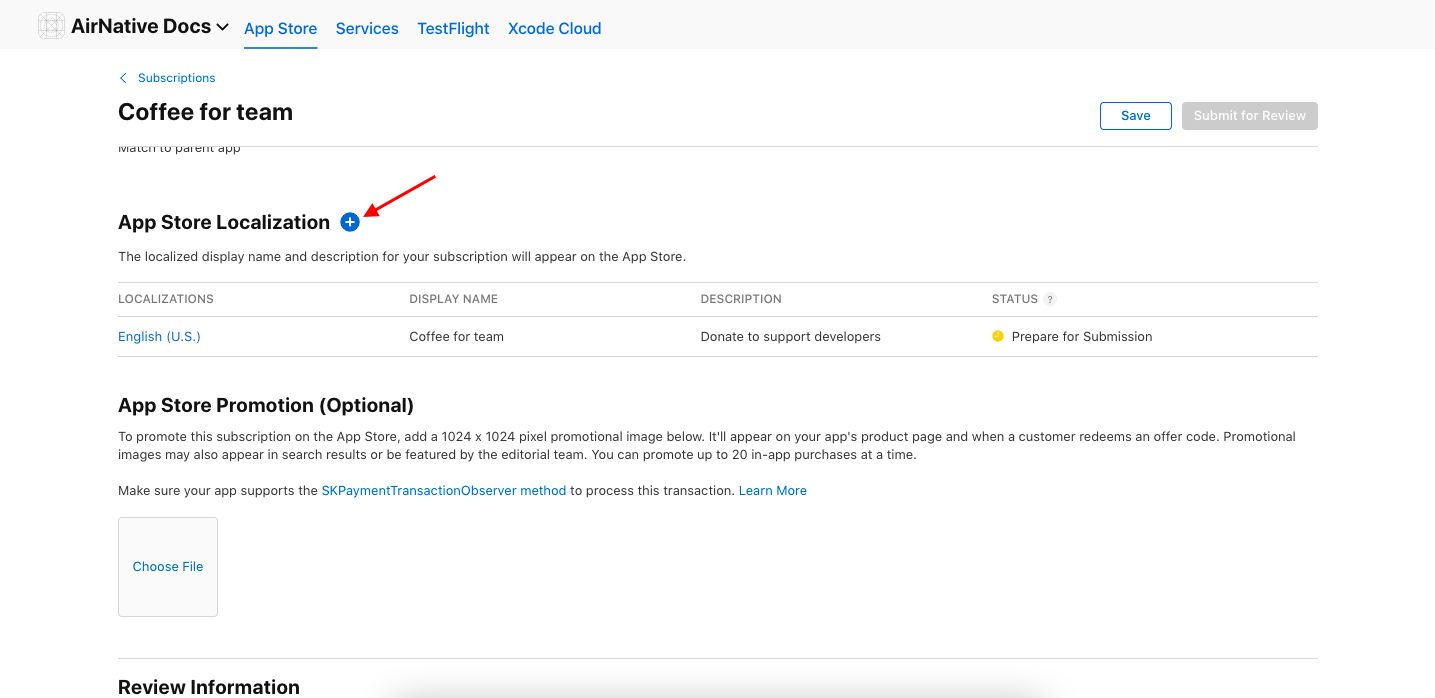
You can add more than one localization:
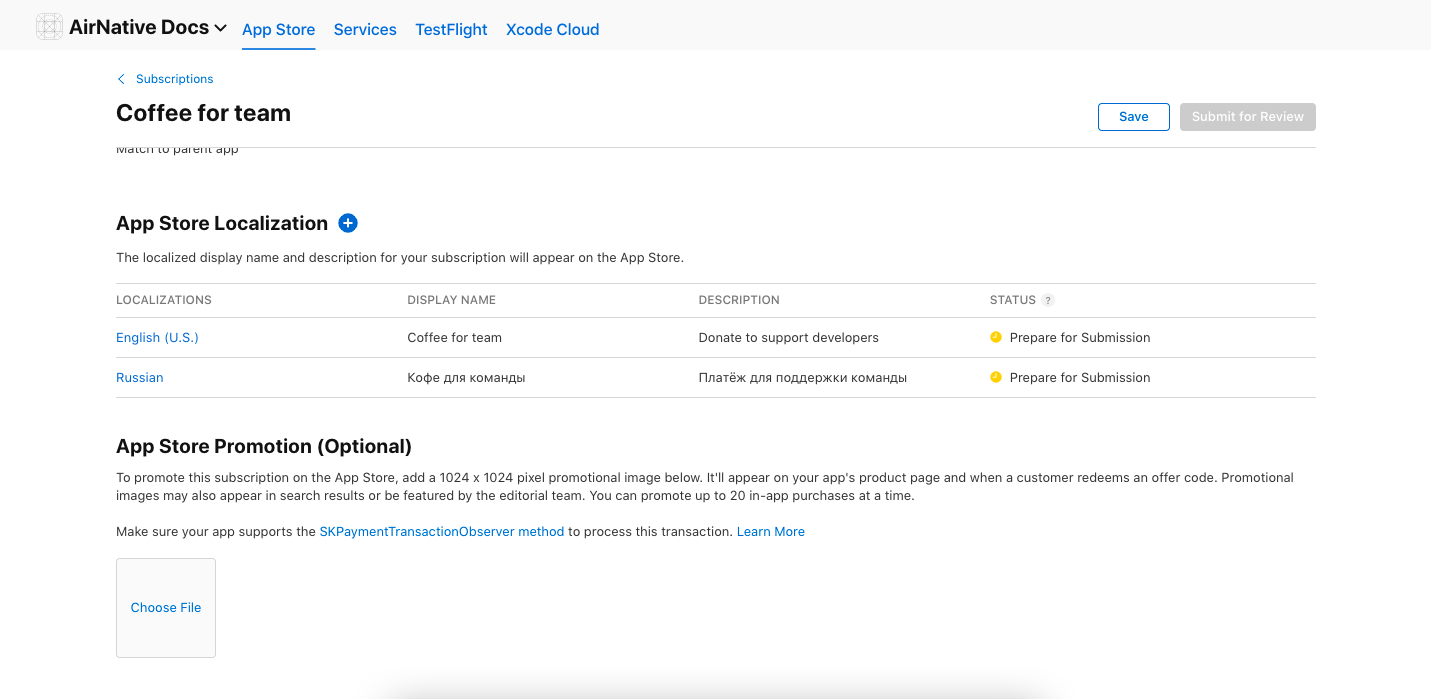
To submit your payment you need to fill out these data forms:
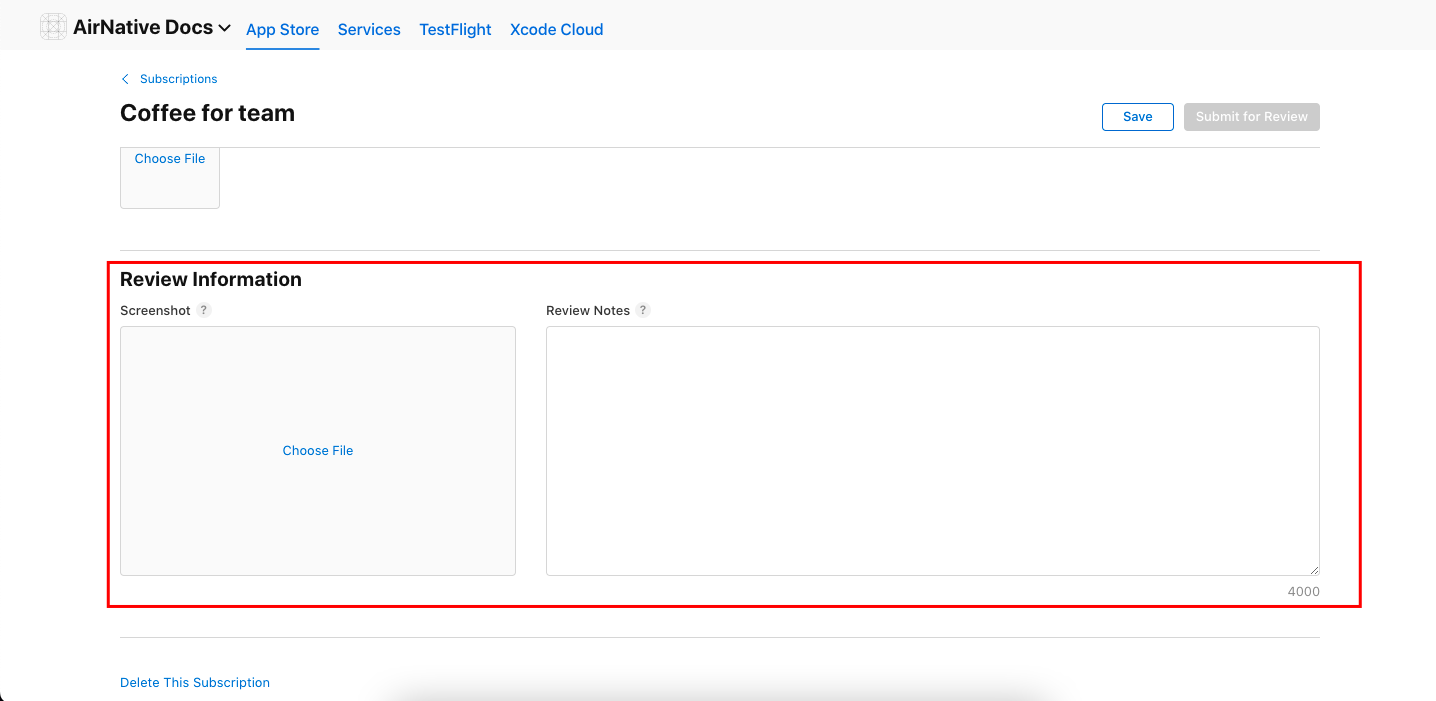
Save your changes:

Your first subscription must be submitted with a new app version. Create your subscription, then select it from the app’s In-App Purchase and Subscriptions section on the version page before submitting the version to App Review. Learn More
Once your binary has been uploaded and your first subscription has been submitted for review, additional subscriptions can be submitted from the Subscriptions section.
Google Play (for Android app)
Go to Google Play Console.
Select your app and go to the subscriptions menu:
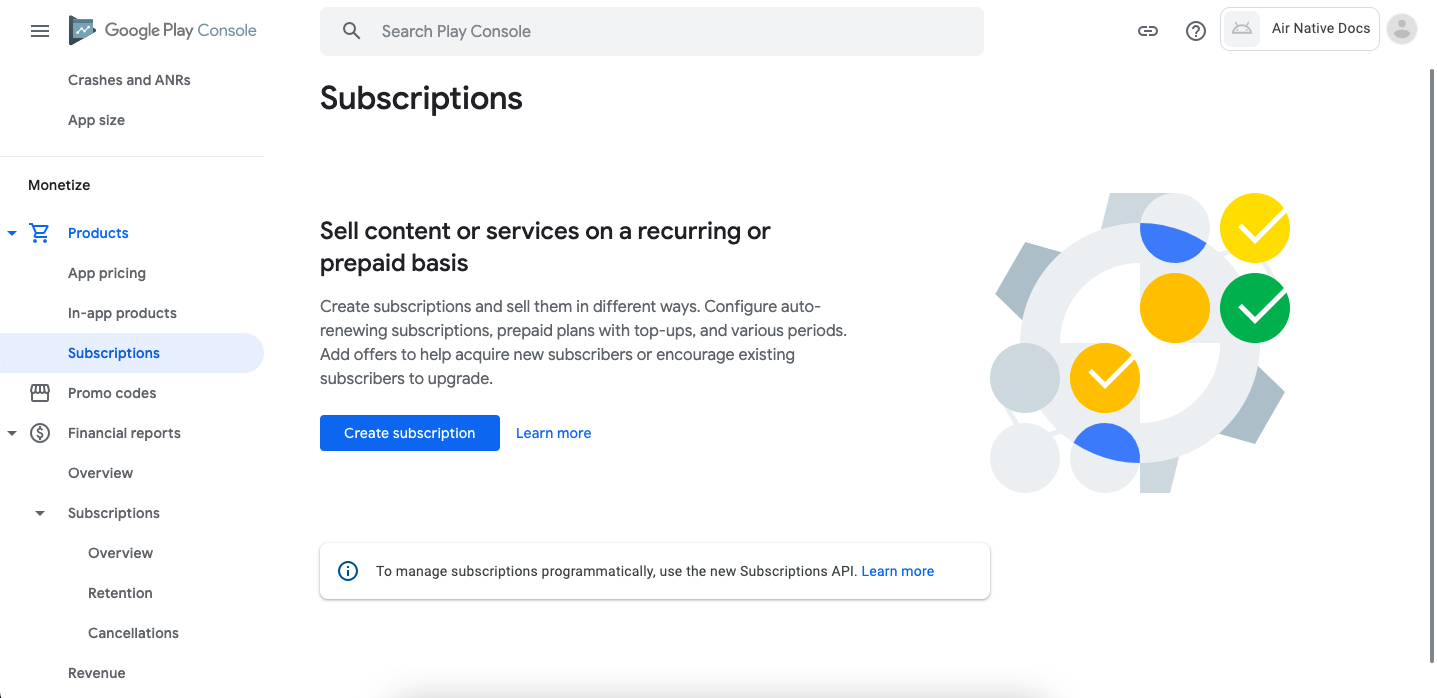
Create a subscription:
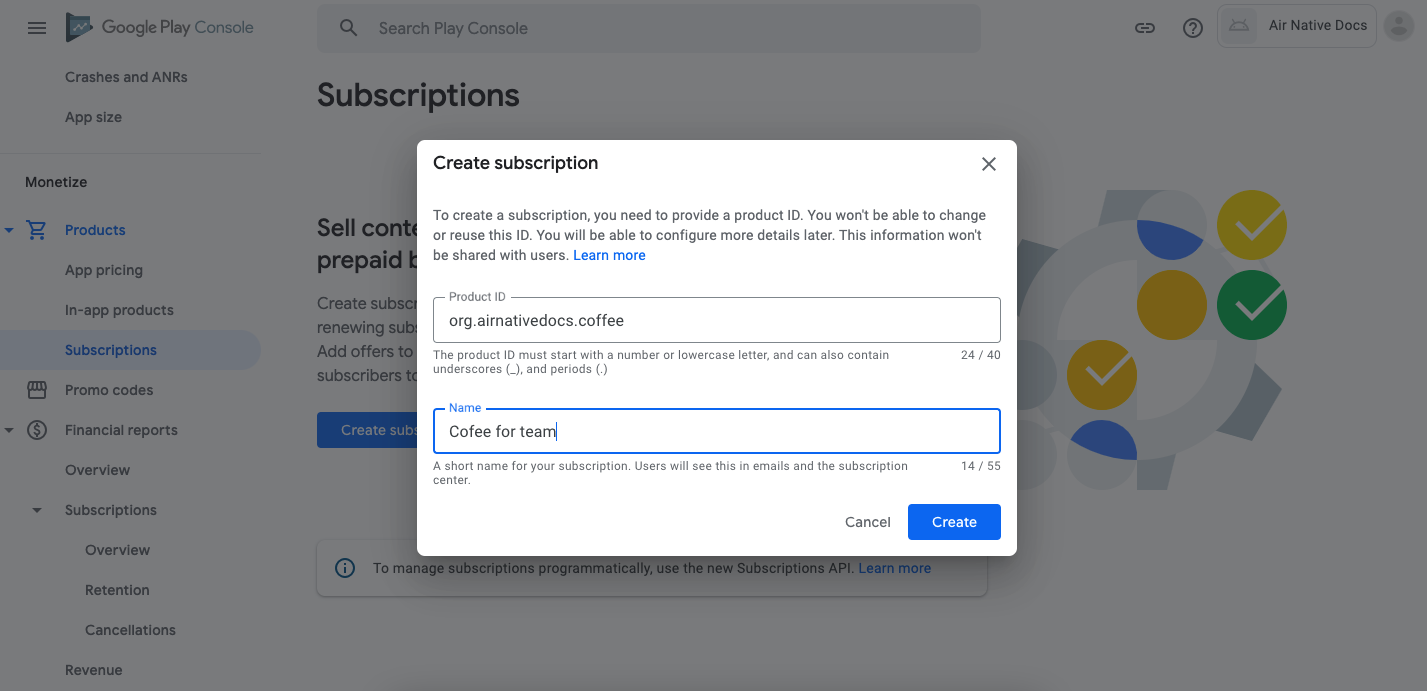
Follow Google's instructions for setting up the product:
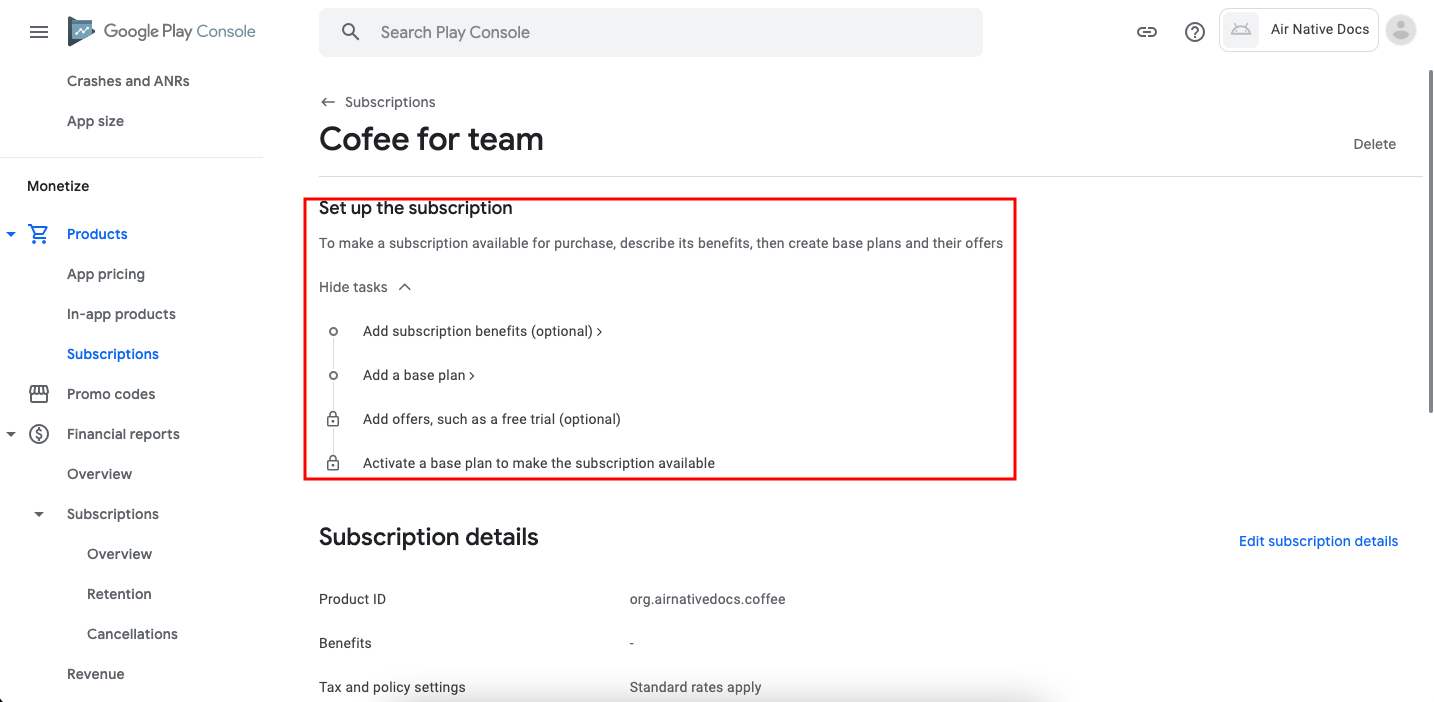
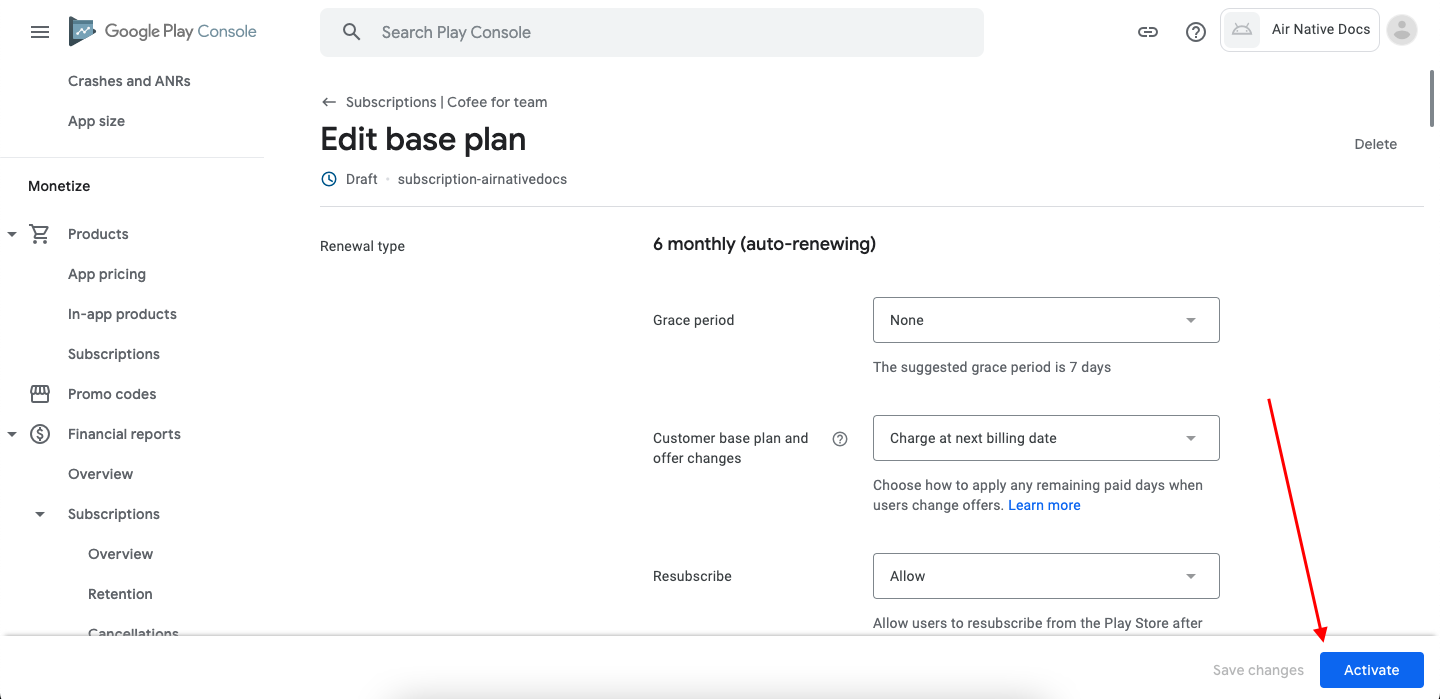
Add base plan:

Save changes and activate the product:
How IAP purchases work
Set up IAP workflow
To separate iOS and Android use the conditions and state of the plugin
Device OS1) Use action "
IAP - Request Purchase":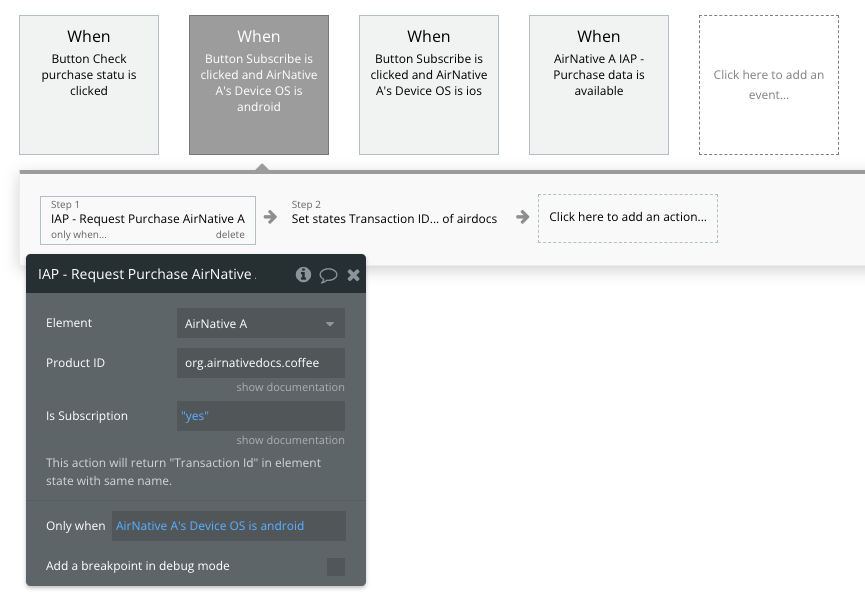
2) Use the plugin event "
IAP - Purchase data is available" to continue the IAP workflow: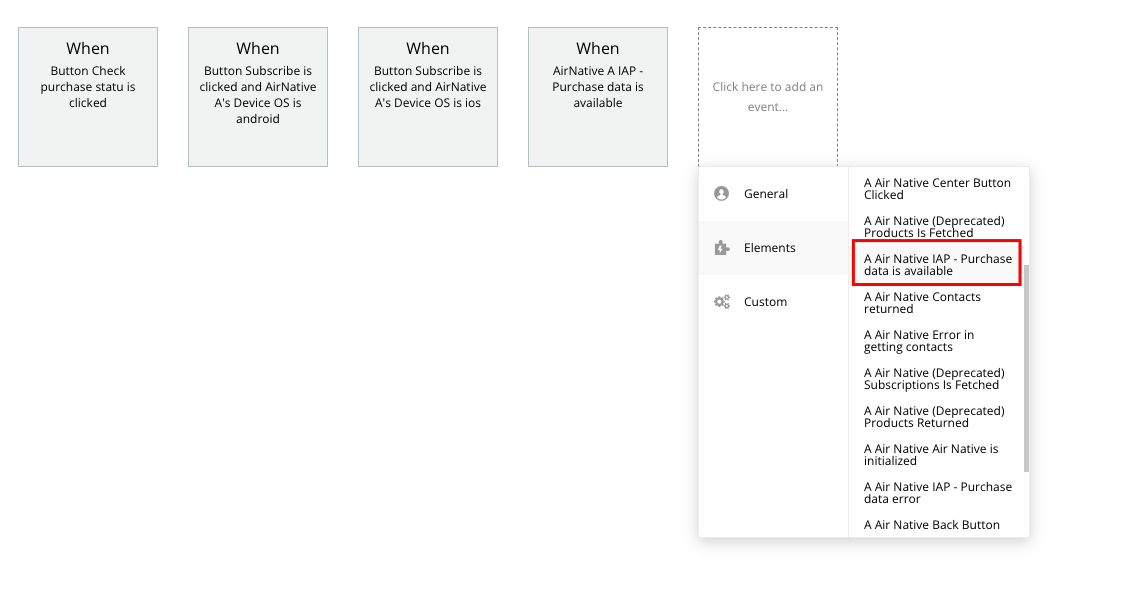
3) Use the "
Air Native - Process Purchase" action:
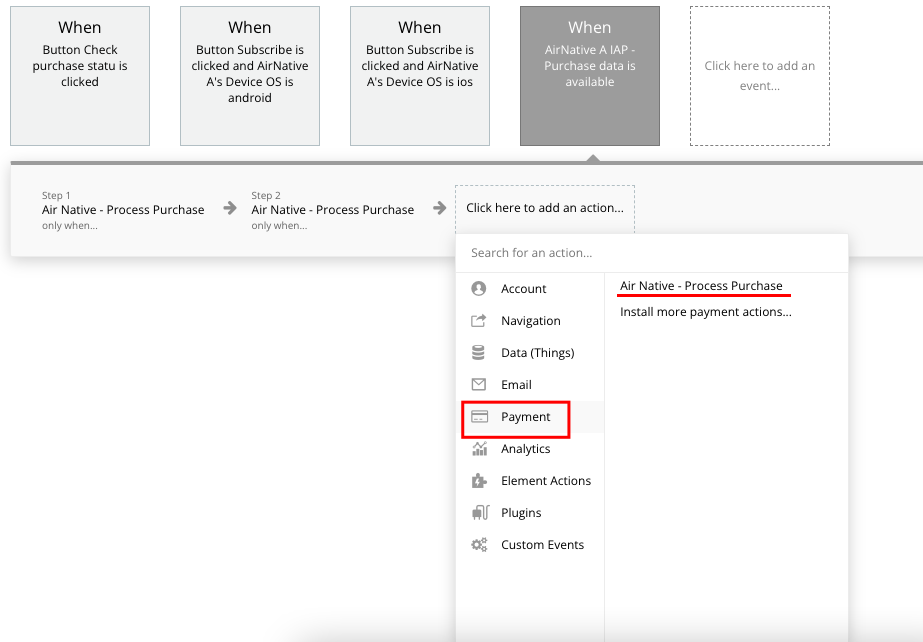
4) Action "
Air Native - Process Purchase" can be found in the Payment tab:Test In-App purchases on iOS ℹ️Important - Before sending the app for review, ensure the Subscription works on different devices by using the sandbox account
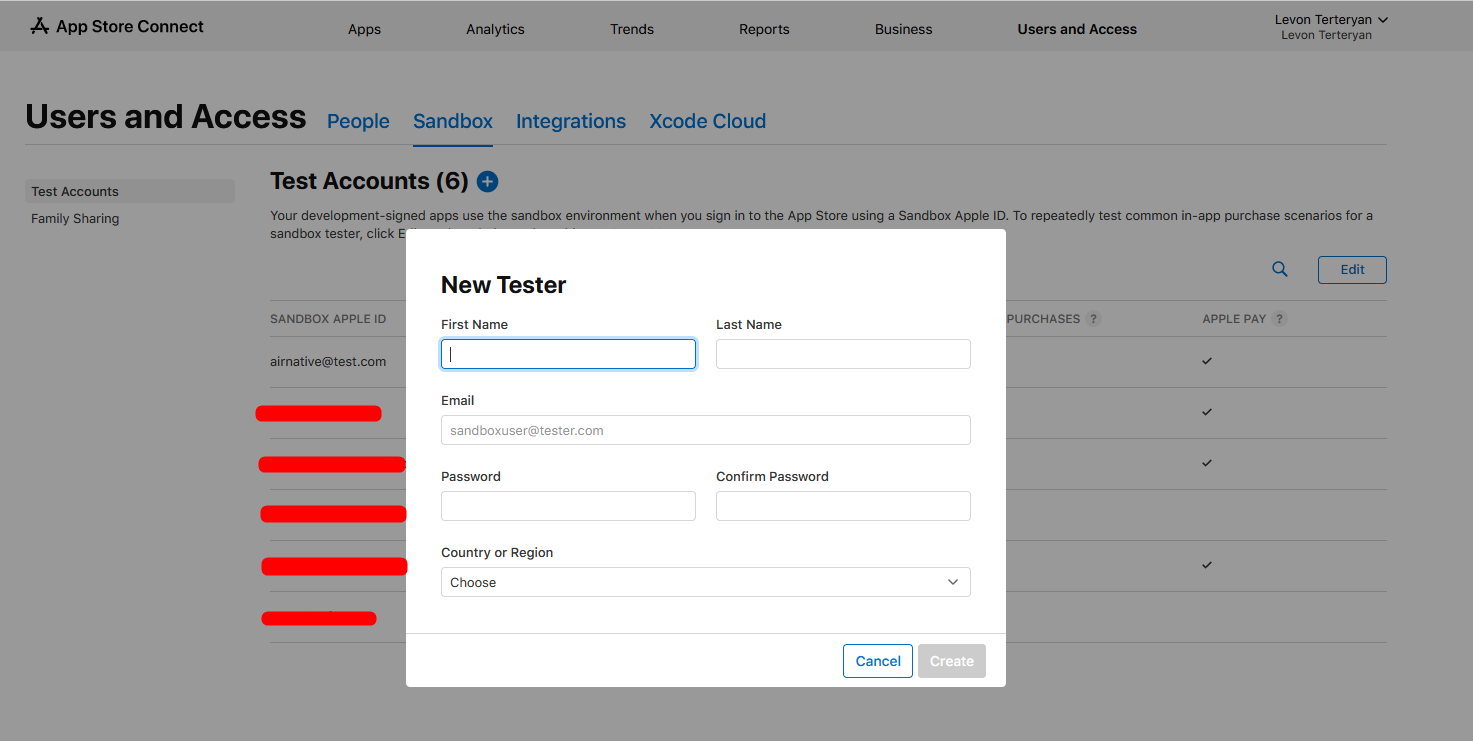
If you are unable to test payments you need to create a sandbox account for testing.
Navigate to the Sandbox page
And add a new Sandbox Tester:

Use this account for authentification when you make a test purchase.
Testing in-app purchases with sandbox | Apple Developer Documentation
Test your implementation of in-app purchases using real product information and server-to-server transactions in the sandbox environment.
https://developer.apple.com/documentation/storekit/in-app_purchase/testing_in-app_purchases_with_sandbox

OneSignal Push Opt-In Prompt
- Android devices should be prompted to subscribe to push notifications.
- iOS devices should be prompted to subscribe to push notifications.
Setup Guide - See the description of the Show Push Prompt action above.
You can configure and customize the design of the iOS Push Opt-In Prompt within your personal OneSignal Console - Instruction from OneSignal.
Set up a custom icon for OneSignal Push Notifications
Here is a doc instruction on how to set a custom icon for push notifications to see them in the Notification Center.
Plugin Overview
Elements
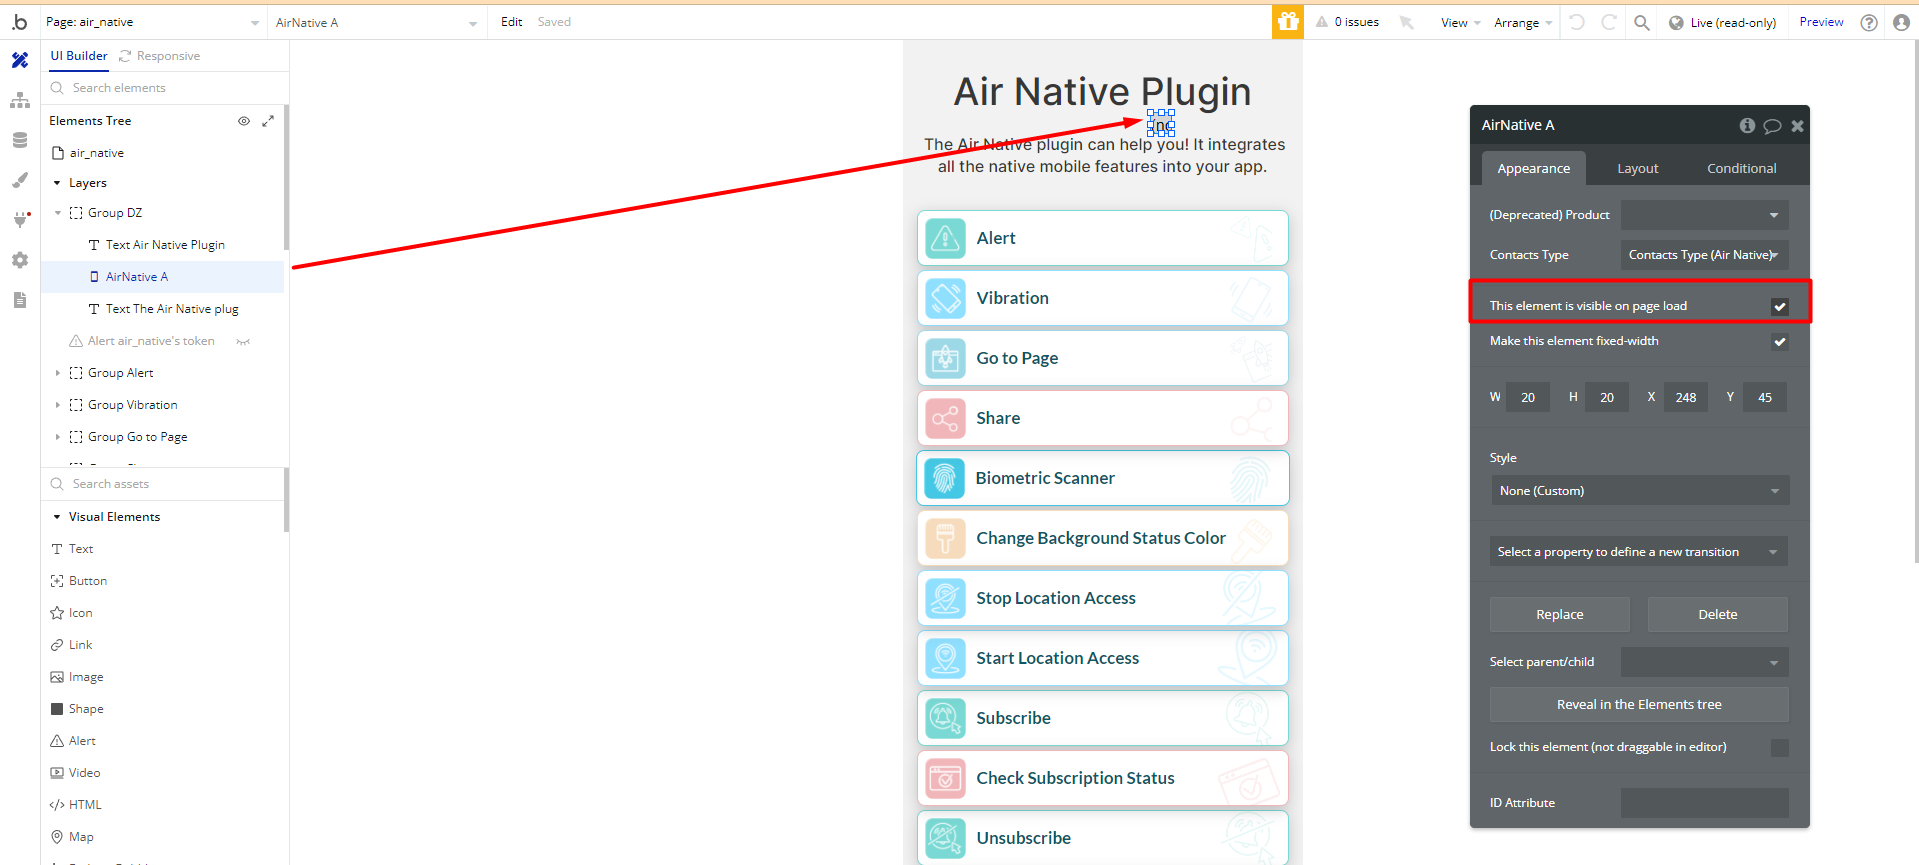
The plugin comes with a single plugin element - AirNative. Place this element on the working page and use all its available features.
ℹ️Ensure the plugin element is visible on the page load.
Data calls
The available data calls are listed below.
- Air Native - OneSignal Push Template To Segment
- Air Native - OneSignal Push Template To Individual
- Air Native - OneSignal Push Template To List of Users
- Air Native - Contacts Type
- Air Native - Products Type
Events
The available events are listed below.
- Air Native Device ID Getted
- Air Native Biometric Data Correct
- Air Native Biometric Data Error
- Air Native Right Button Clicked
- Air Native Center Button Clicked
- Air Native (Deprecated) Products Is Fetched
- Air Native IAP - Purchase Data is Available
- Air Native - Contacts Returned
- Air Native - Error In Getting Contacts
- Air Native (Deprecated) Subscriptions Is Fetched
- Air Native (Deprecated) Products Returned
- Air Native Air Native Is Initialized
- Air Native IAP - Purchase Data Error
- Air Native Back Button
- Air Native IAP - Purchase Checked
- Air Native App Loaded From Background
Actions
The available actions are listed below.
- Air Native - OneSignal Push Template To Individual
- Air Native - OneSignal Push Template To List of Users
- Air Native - OneSignal Push Template To Segment
- Biometric Scanner A Native
- Get OneSignal DeviceID Air Native
- Alert Word Air Native
- Stop Biometric Scanner Air Native
- Use Vibration Air Native
- Share Air Native
- Start Location Tracking Air Native
- Stop Location Tracking Air Native
- Change StatusBar Background Color Air Native
- Toggle Header Button Air Native
- Change Color Of Header Button Air Native
- (Deprecated) Get All Fetched Products Air Native
- IAP - Request Purchase Air Native
- (Deprecated) Fetch Products Air Native
- IAP - Cancel A Subscription Air Native
- Get Contacts Air Native
- (Deprecated) Fetch Subscriptions Air Native
- IAP - Check Active Purchase Air Native
- Air Native - Process Purchase
Table of Contents
In order to properly configure the plugin please read the *required sections of this documentation.