
✅
Link to plugin page: https://zeroqode.com/plugin/multi-uploader-1550378962519x766759789228458000
Demo to preview the settings
✅
Introduction
The Files Pro – Multi File Uploader plugin is designed to enhance the file uploading experience in Bubble applications by allowing users to upload multiple files simultaneously. This significantly improves productivity and efficiency for both developers and end-users. The plugin features a seamless, user-friendly interface that simplifies file uploads, enabling users to select multiple files at once rather than uploading them individually. It supports a wide range of file types—including images, videos, documents, and audio files—making it suitable for diverse application needs.
In addition to its powerful multi-upload capabilities, the plugin offers extensive customization options for developers. The upload interface can be tailored to match an application’s branding and design, ensuring a consistent and polished user experience. Developers can also set maximum file sizes and enforce file type restrictions to maintain security and data integrity. With its flexibility, reliability, and ease of use, the Files Pro – Multi File Uploader plugin helps Bubble users streamline file uploads while delivering a smooth and professional experience.
Prerequisites
You must have a Uploadcare/Filestack/Digital Ocean, Bubble or Azure developer account to use the plugin and upload to these buckets by accessing:
- For Uploadcare - https://uploadcare.com/
- For Filestack - https://www.filestack.com/
- For Azure - https://azure.microsoft.com/en-us/
- For Digital Ocean - https://cloud.digitalocean.com
UploadCare Account Creation
- Create a Free Account
- 100 upload units
- 1 GB traffic / month
- 1 MB of smart storage
Go to https://uploadcare.com and click "Get started for free".
The Free Plan includes:
- Verify and Access the Dashboard
After signing up and confirming your email, you’ll be redirected to your Dashboard, where you can either create a new project or use the default one.

- Copy the Public and Secret Keys
In your selected project, locate and copy the following:
- Public Key – used on the frontend for uploading
- Secret Key – used for generating secure upload signatures

⚙️ Configure in Bubble
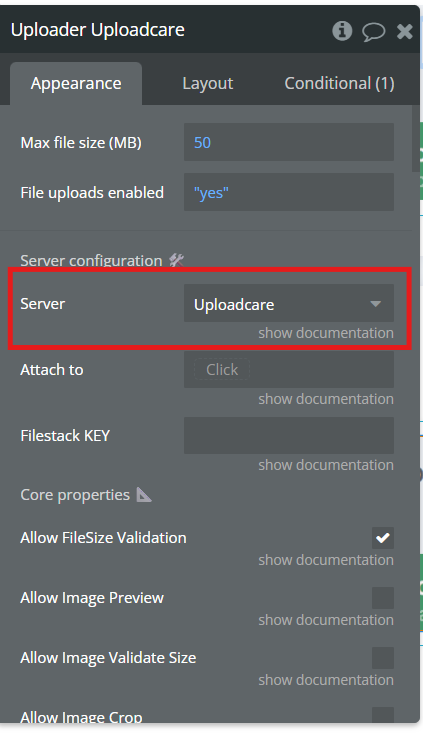
- Place the Uploadcare Uploader on the Page
- Drag the Uploader Uploadcare element onto your page.
- Make sure "Setting Uploadcare" is selected.
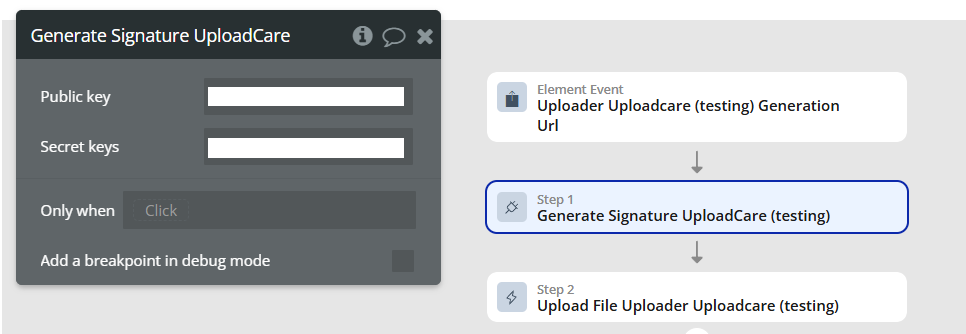
- Set Up the Workflow
- Go to the Workflow tab.
- Choose the event:
- Add the action:
- Public Key: Paste the public key from your Uploadcare project
- Secret Key: Paste the secret key from the same project
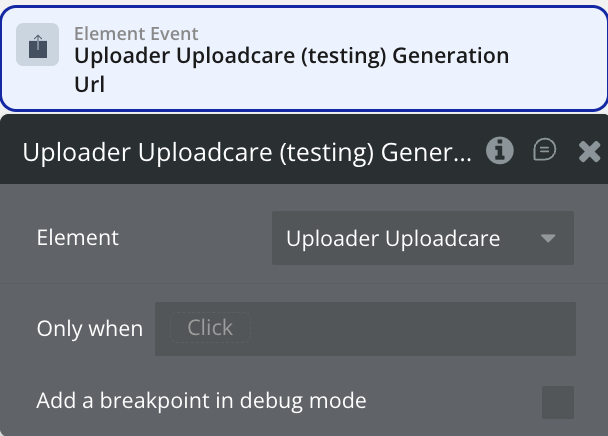
Element Event → Uploader → Generation Url
(select your uploader element from the dropdown)
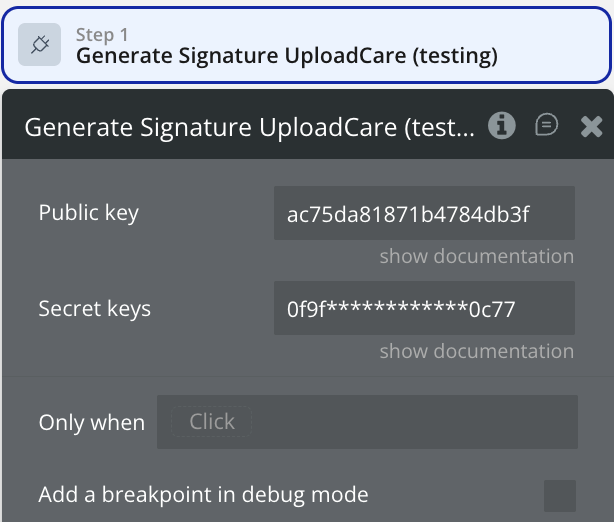
Generate Signature UploadCare
Fill in the fields:
- Connect the Signature to the Upload Action
- Public Key →
Result of step 1 > Public Key - Signature →
Result of step 1 > Signature - Expire →
Result of step 1 > Expire
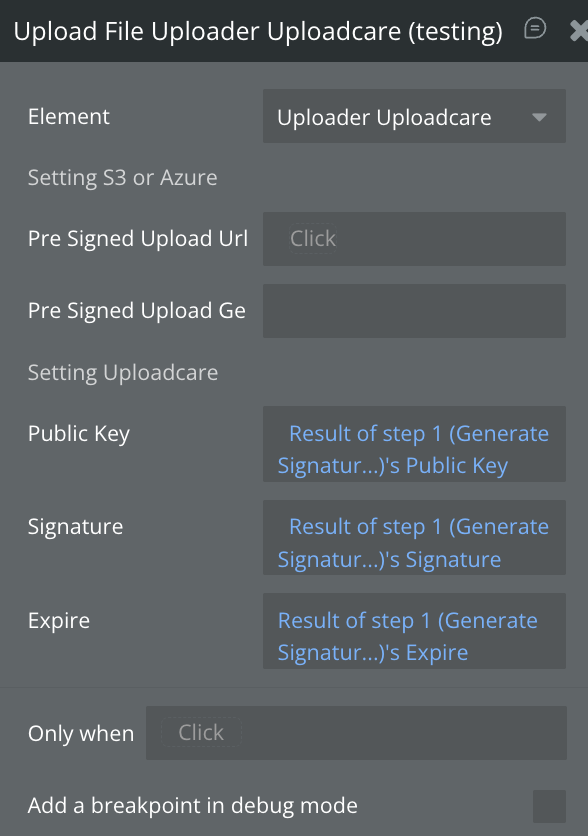
Add the next action:
Upload File → Uploader Uploadcare
Populate the fields using the result from Step 1:
Filestack Account Creation
- Create an account on Filestack Sign Up.
- Once you have an account you can begin creating applications. Each application is given a public API key and a secret key, these are used throughout Filestack to authenticate and authorize operations on your resources. Having an API key gives you access to upload and transform files using Filestack.
- Create a New Application of Filestack to obtain the key

⚙️ Configure in Bubble
- Place the Uploader on the Page
- Drag the Uploader Filestack element onto your page.
- Make sure "Setting Filestack" is selected.

Azure Account Creation
- Create a Microsoft Azure Account
- Go to https://portal.azure.com and sign in or create a free account.
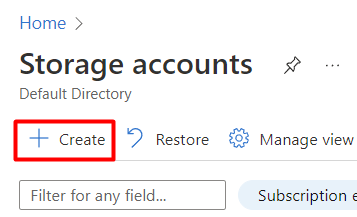
- Create a Storage Account
- In the Azure Portal, navigate to "Storage accounts" and click "Create".
- Fill in the required details (subscription, resource group, region, name, etc.), then click "Review + Create".

3. Create a New Project
This step helps you organize your containers and configurations.
4. Generate Shared Access Signatures (SAS)
- In the left-hand menu of your storage account, go to "Shared access signature".
- Configure the allowed services, permissions, and expiry.
- Click "Generate SAS and connection string".

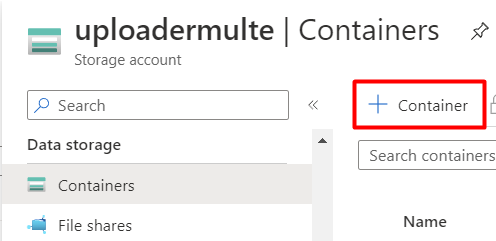
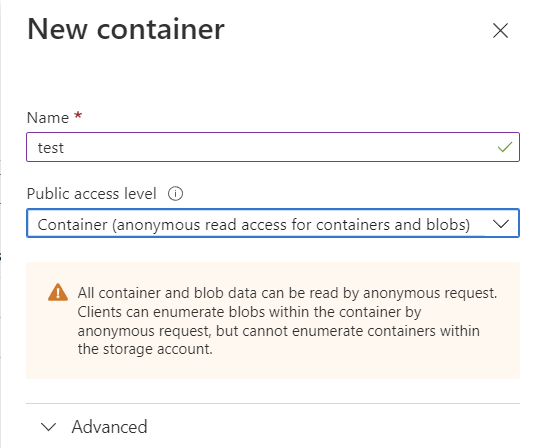
5. Create a Blob Container
- In your storage account, go to "Containers" and click "New container".
- Configure Container Settings
- Set the Container name.
- Set Public access level to your needs (e.g., Blob or Private).
- Open the Container
- Select the newly created container from the list.
- Generate SAS Token and URL for Container
- Click on "Shared access tokens" from the container view.
- Set permissions and expiration, then generate the token.
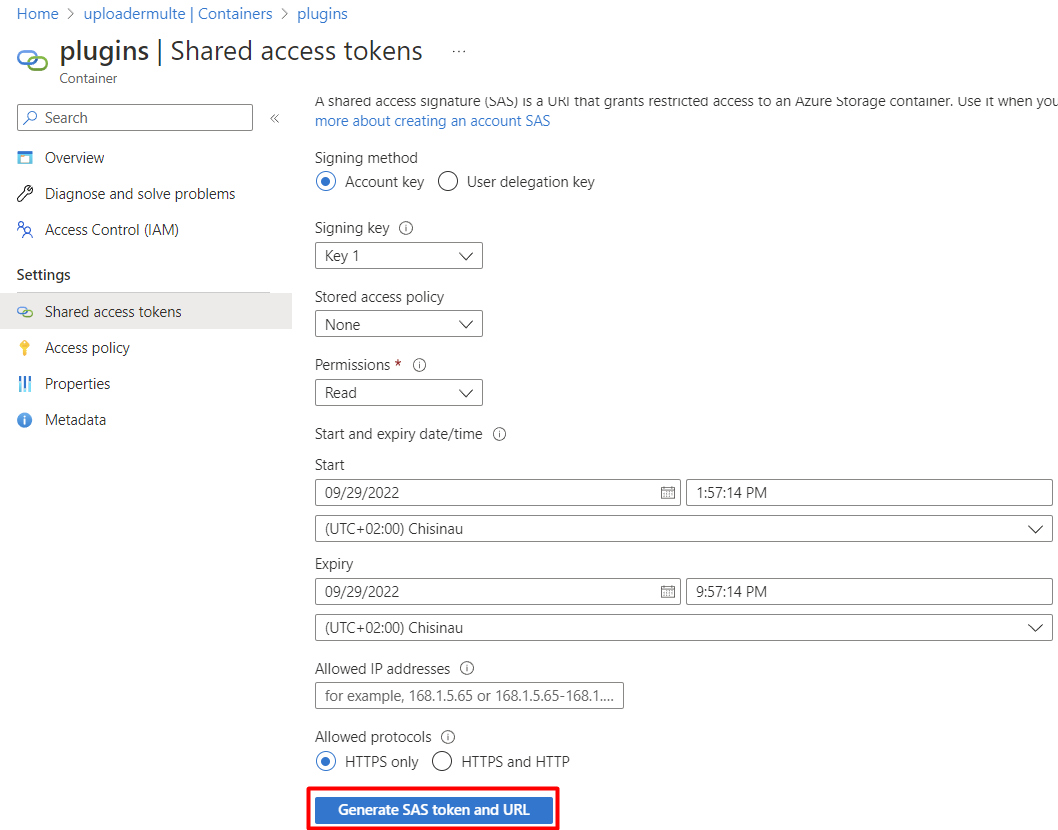
- Copy the Blob SAS Token
- This token will be required to authorize uploads from your application.
10. Set CORS Rules (Cross-Origin Resource Sharing)
- Go to your Storage Account → Settings → Resource sharing (CORS)
- Add a rule that allows requests from your domain (e.g.,
https://your-app.com)
- Specify allowed methods:
GET, PUT, POST, OPTIONS

⚙️ Configure in Bubble
- Place the Uploader on the Page
- Make sure "Setting Azure" is selected.
- Set Up the Workflow
- Go to the Workflow tab.
- Choose the event:
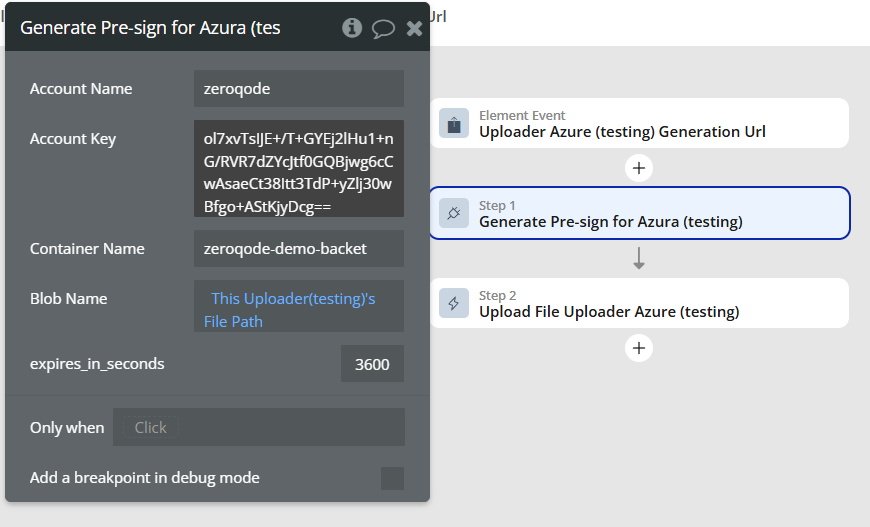
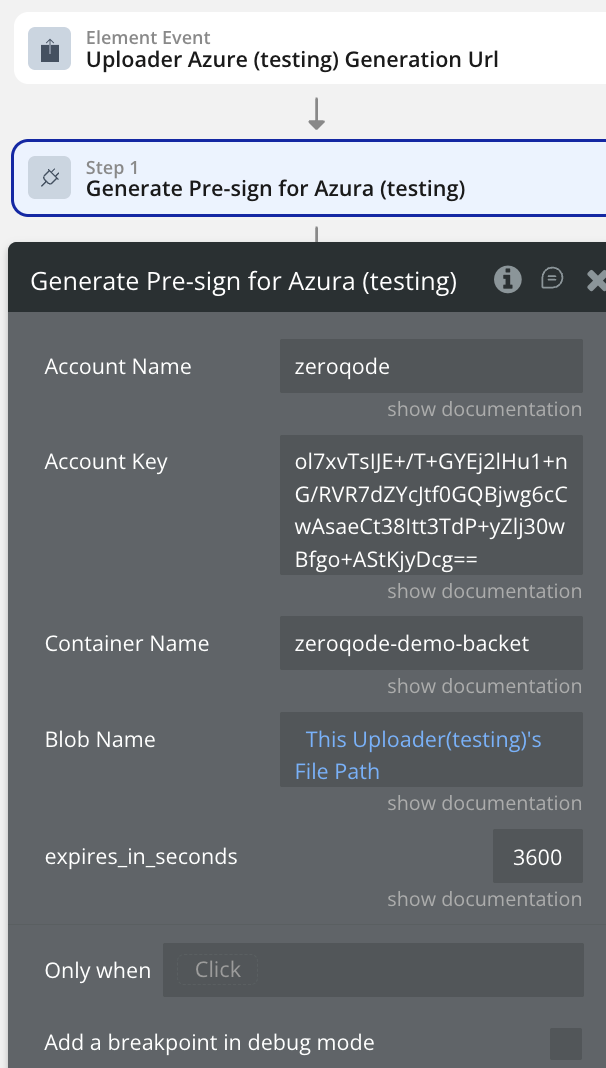
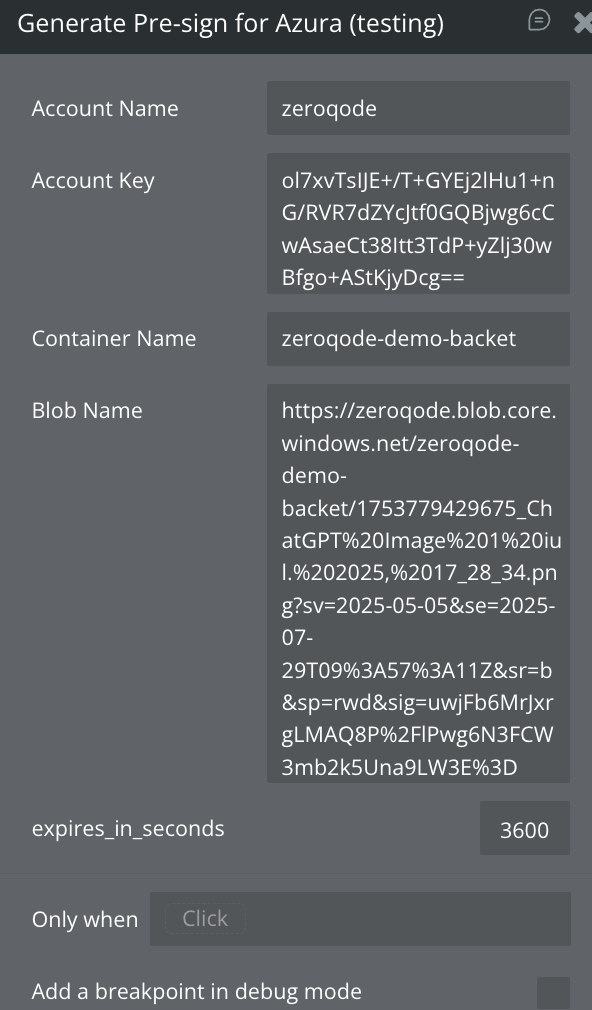
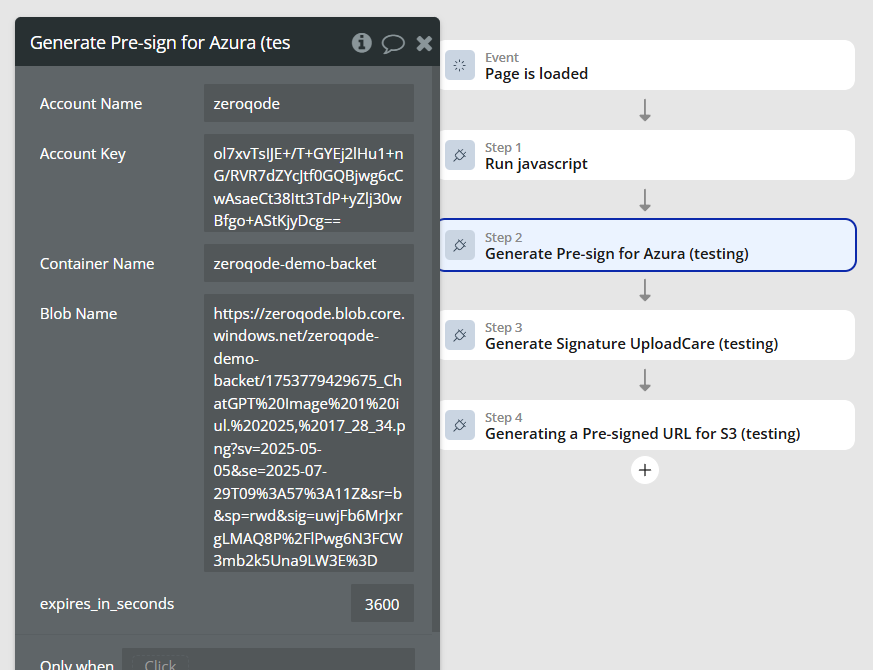
- Add the action: Generate Pre-sign for Azura
- Account Name: enter your Azure Storage account name (e.g.,
mystorageaccount) - Account Key: paste your Azure Storage access key (from the Azure Portal)
- Container Name: type the name of the Blob container where you want to store the files
- Blob Name: use the dynamic expression
This Uploader's File Path(from the uploader element) - expires_in_seconds: enter how long the pre-signed URL should remain valid, in seconds (e.g.,
3600for 1 hour)
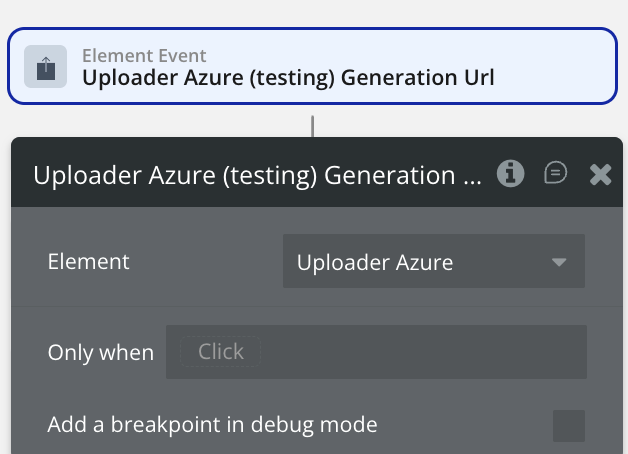
Element Event → Generation Url
(select your uploader element from the dropdown)
Inside the workflow event, add the action “Generate Pre-sign for Azure”.
Fill in the fields as follows:
This step generates a secure upload URL.
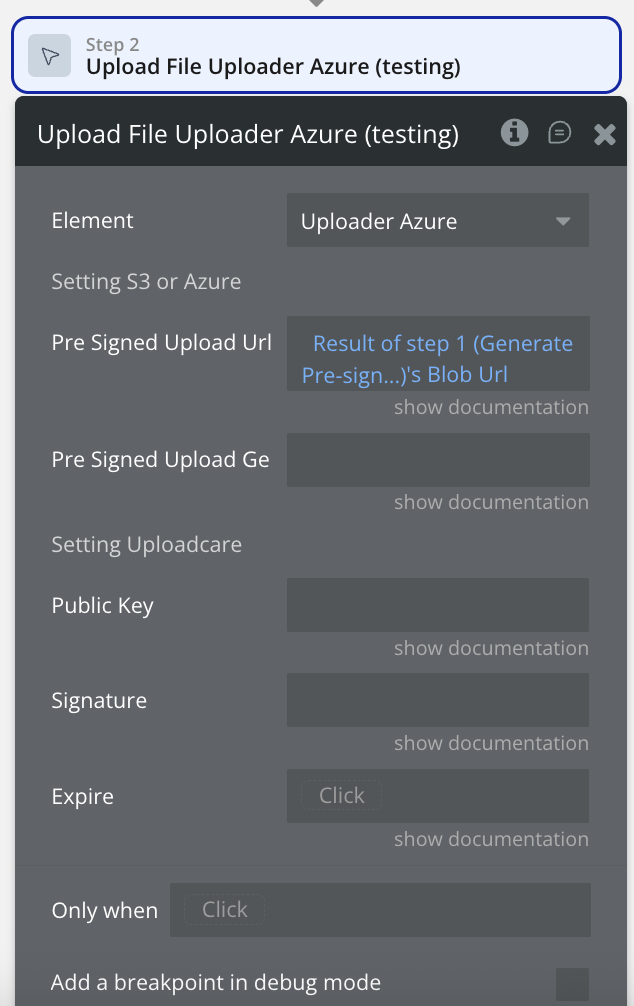
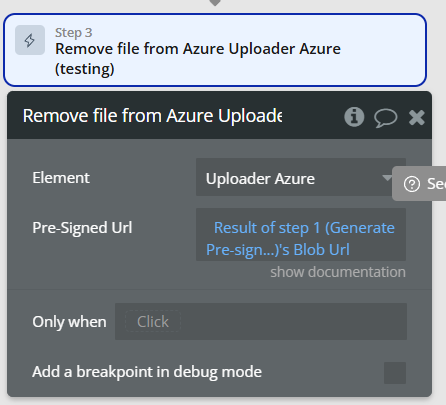
- Add the “Upload File Uploader Azure” Action
Immediately after the previous action, add a second action: Upload File Uploader Azure.
In this action:
- Set the Pre Signed Upload Url to:
Result of step 1 (Generate Pre-sign for Azure)'s Blob Url
Digital Ocean Account Creation
- Create a DigitalOcean Account
- Go to https://www.digitalocean.com and sign in or create a free account.
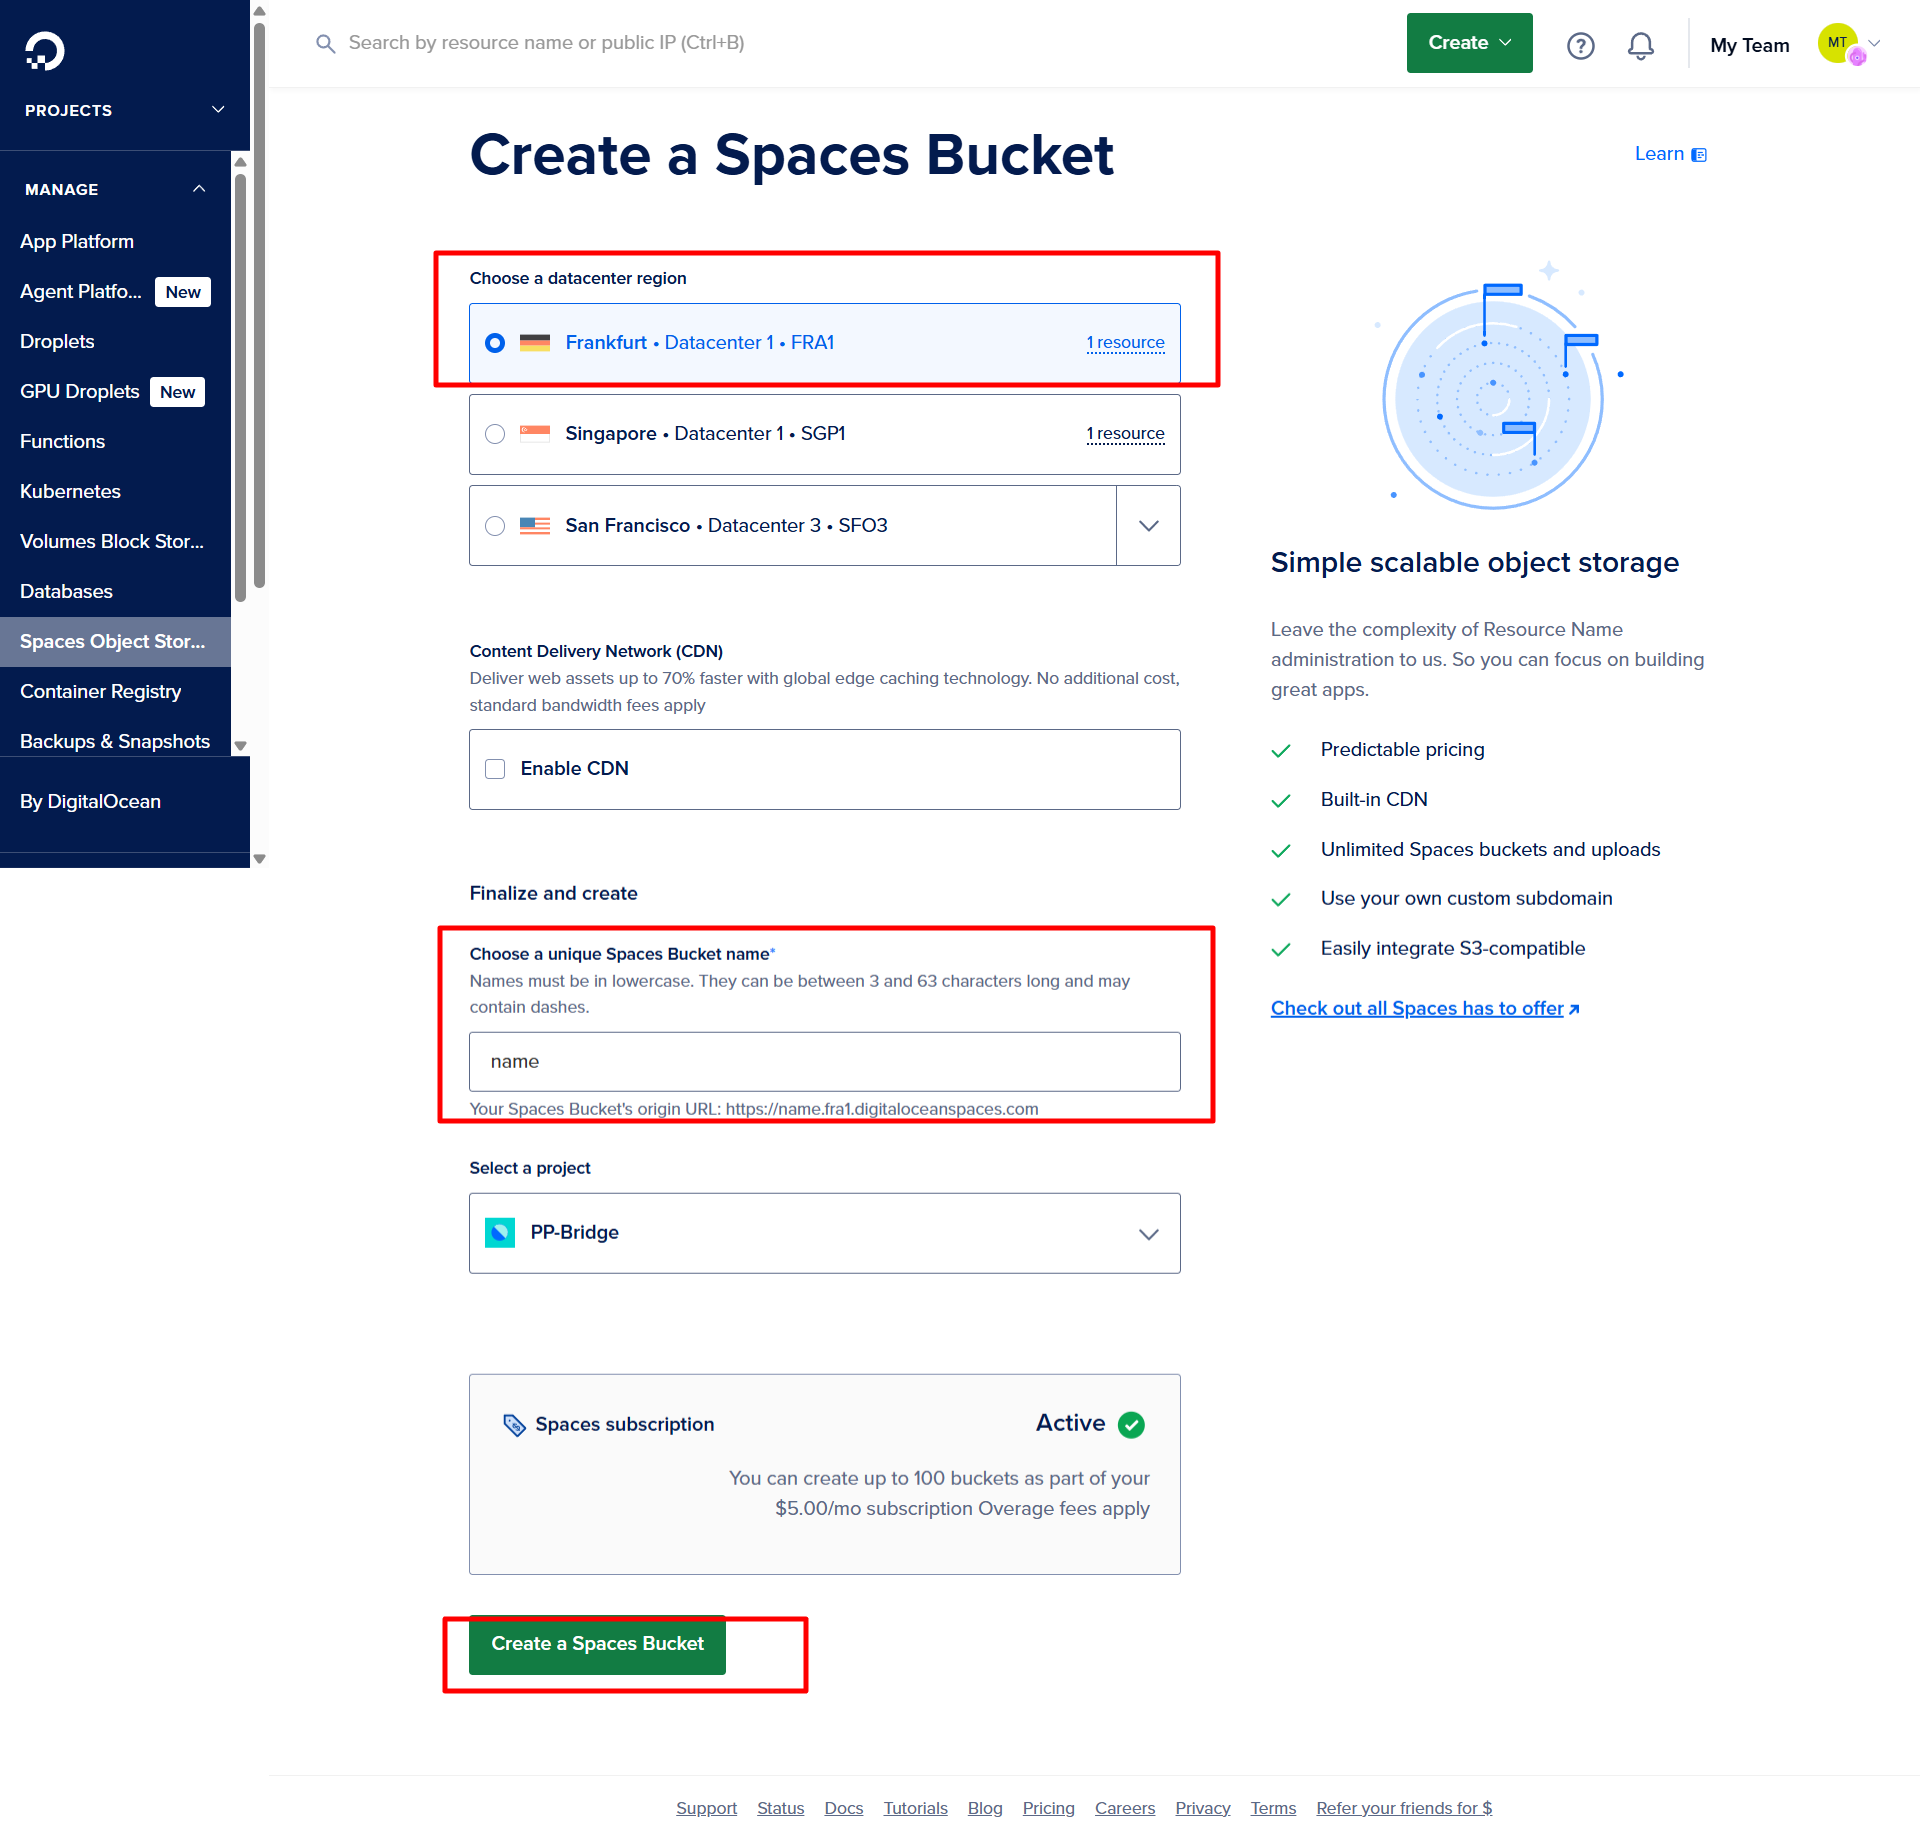
- Create a New Space
- From the DigitalOcean dashboard, go to the "Spaces" section.
- Click "Create a Space".
- Choose a datacenter region (e.g.,
AMS3,NYC3, etc.)
- Set your Space name and choose if it should be public or private.
- Click "Create a Space" to finish.
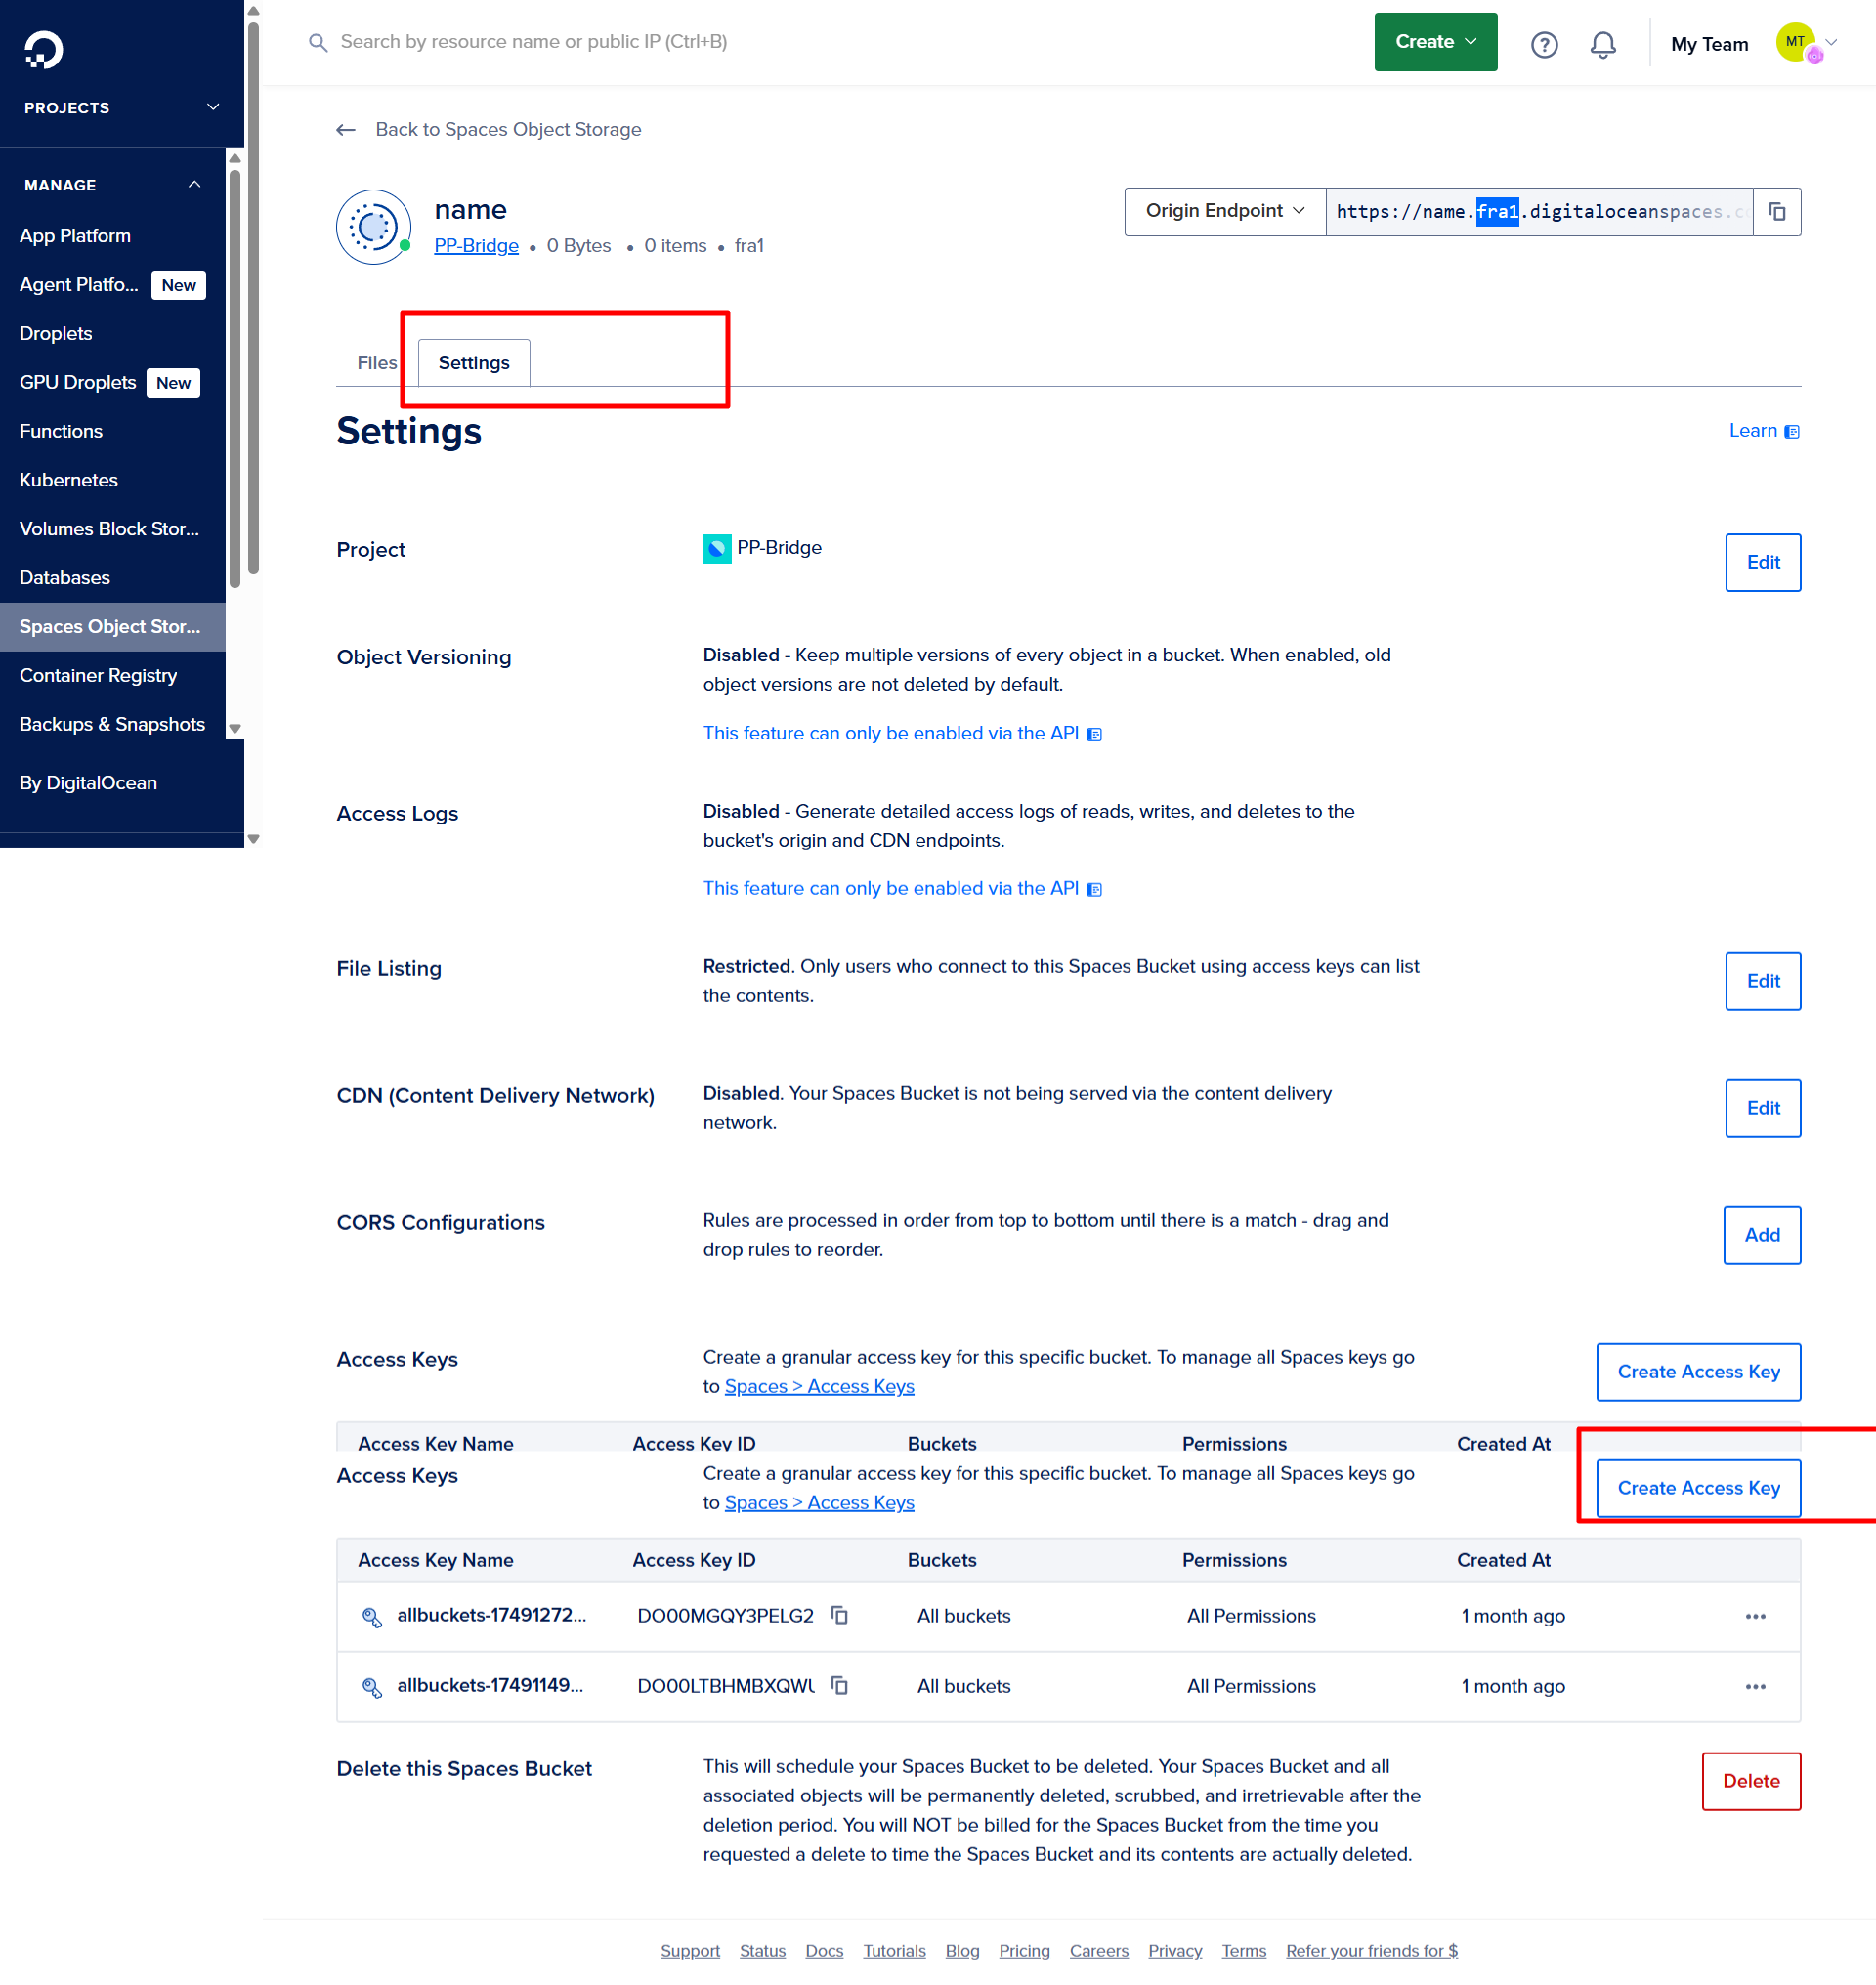
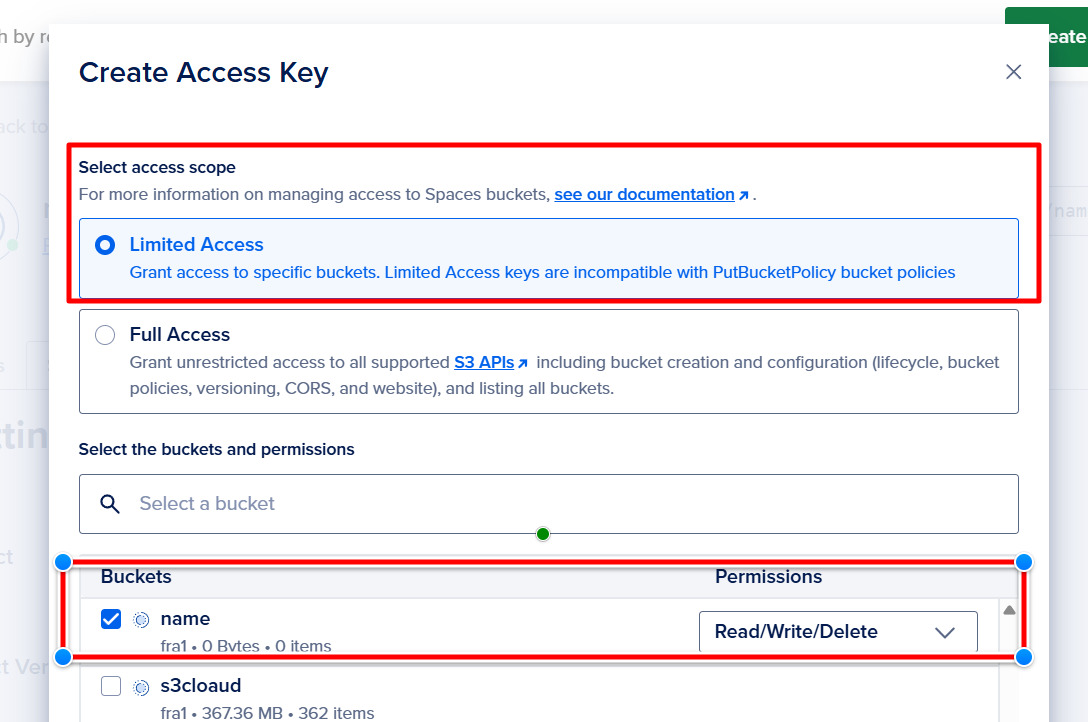
- Create Access Keys
- Go to API → Tokens/Keys
- Under the Spaces access keys section, click "Generate New Key"
- Set a name, then copy the resulting:
- Access Key
- Secret Key
- Set Permissions (Public or Private)
- You can manage access at the file or folder level if your space is private.
- For public access: set your file/folder permissions to "Public".
- Enable CORS (Optional but Recommended)
- If your app is hosted on a different domain, add a CORS policy via the Settings tab of the Space.
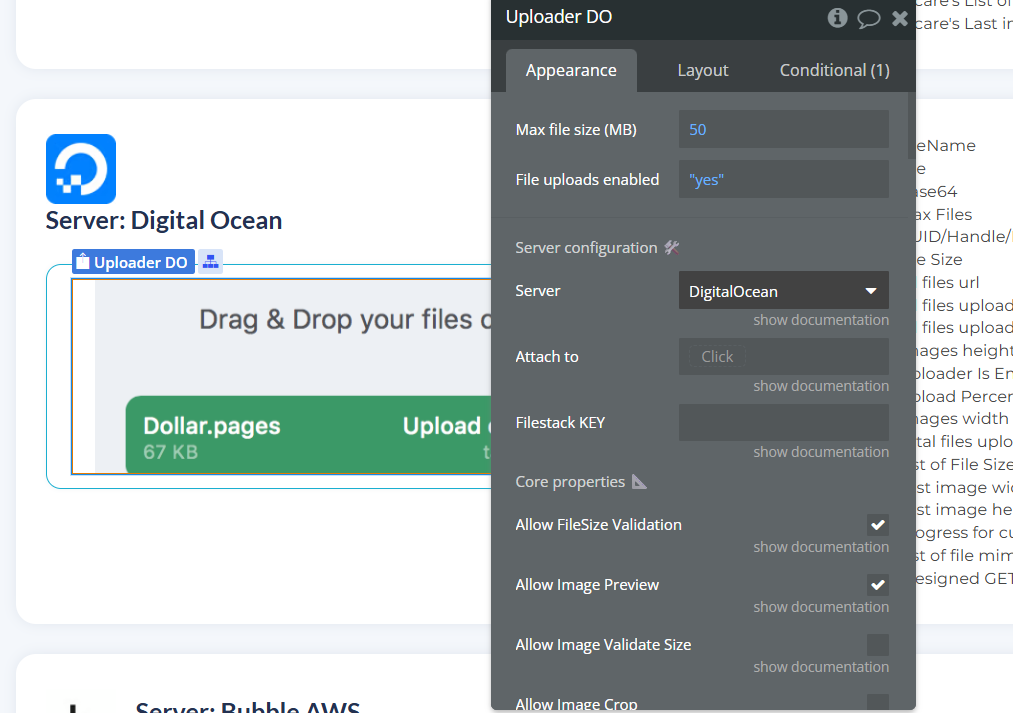
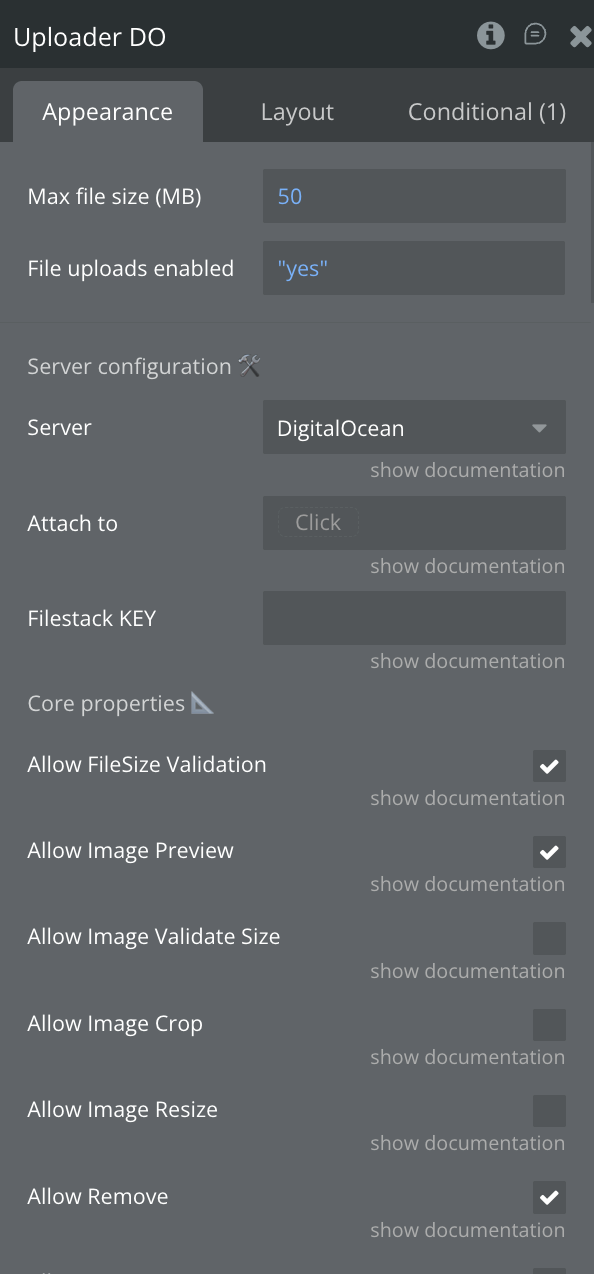
- Place the Uploadcare Uploader on the Page
- Drag the Uploader element onto your page.
- Make sure "Setting DigitalOcean" is selected.
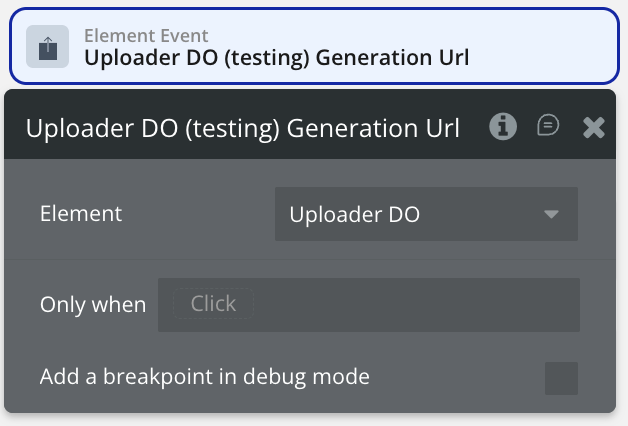
- Set Up the Workflow
- Go to the Workflow tab.
- Choose the event:
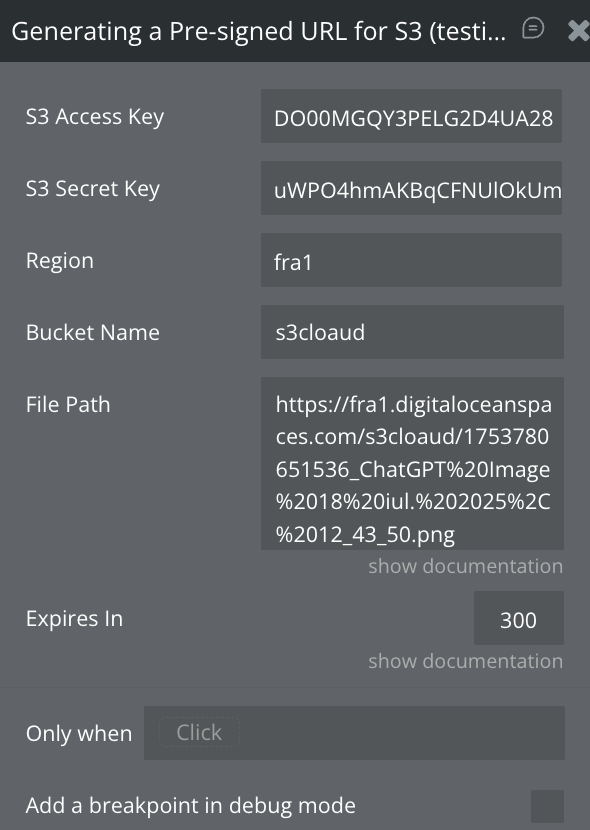
Element Event → Uploader → Generation Url - Add the action:
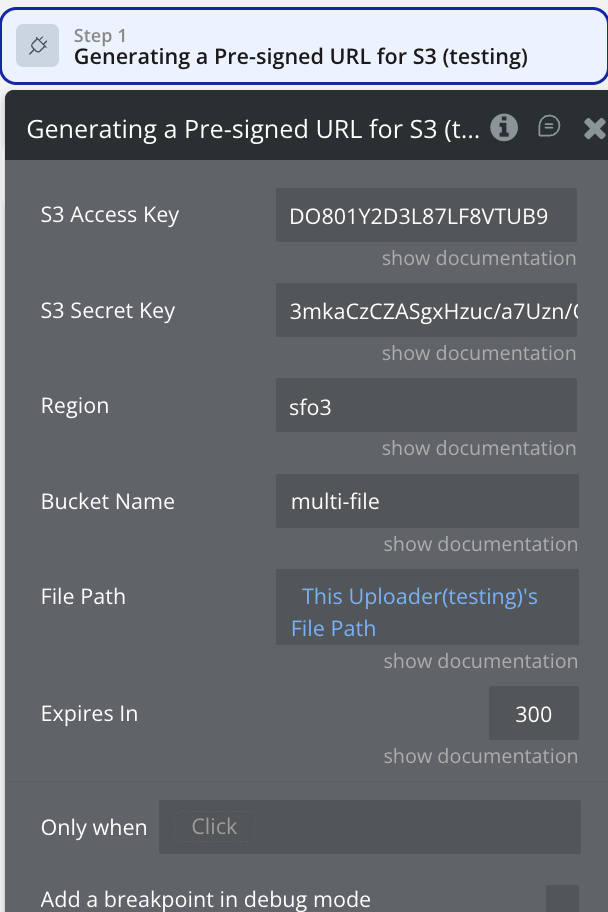
Generating a Pre-signed URL for S3 - S3 Access Key: your DigitalOcean Spaces access key
- S3 Secret Key: your DigitalOcean Spaces secret key
- Region: the region code of your Space (e.g.,
fra1,nyc3) - Bucket Name: the name of your Space (e.g.,
s3clouad) - File Path: use the dynamic value
This Uploader's File Path - Expires In: number of seconds the signed URL should remain valid (e.g.,
300= 5 minutes) - Add the “Upload File Uploader” Action
- Pre Signed Upload Url:
- Pre Signed Upload Get Url (optional, for download/view link after upload):

⚙️ Configure in Bubble
(select your uploader element from the dropdown)
Fill in the fields:

Immediately after generating the pre-signed URL, add the action:
Upload File → Uploader
In this step, fill in:
Result of step 1's Pre-signed_url Upload UrlResult of step 1's Pre-signed Get Url☝
Note: Check pricing details for available plans for respective services in order to use them.

Tutorial
☝
IMPORTANT: Default Bubble picture uploader will not work on the same page if you are using this multi-uploader, & IE is not supported.
How to setup
Step 1 – Install the Plugin
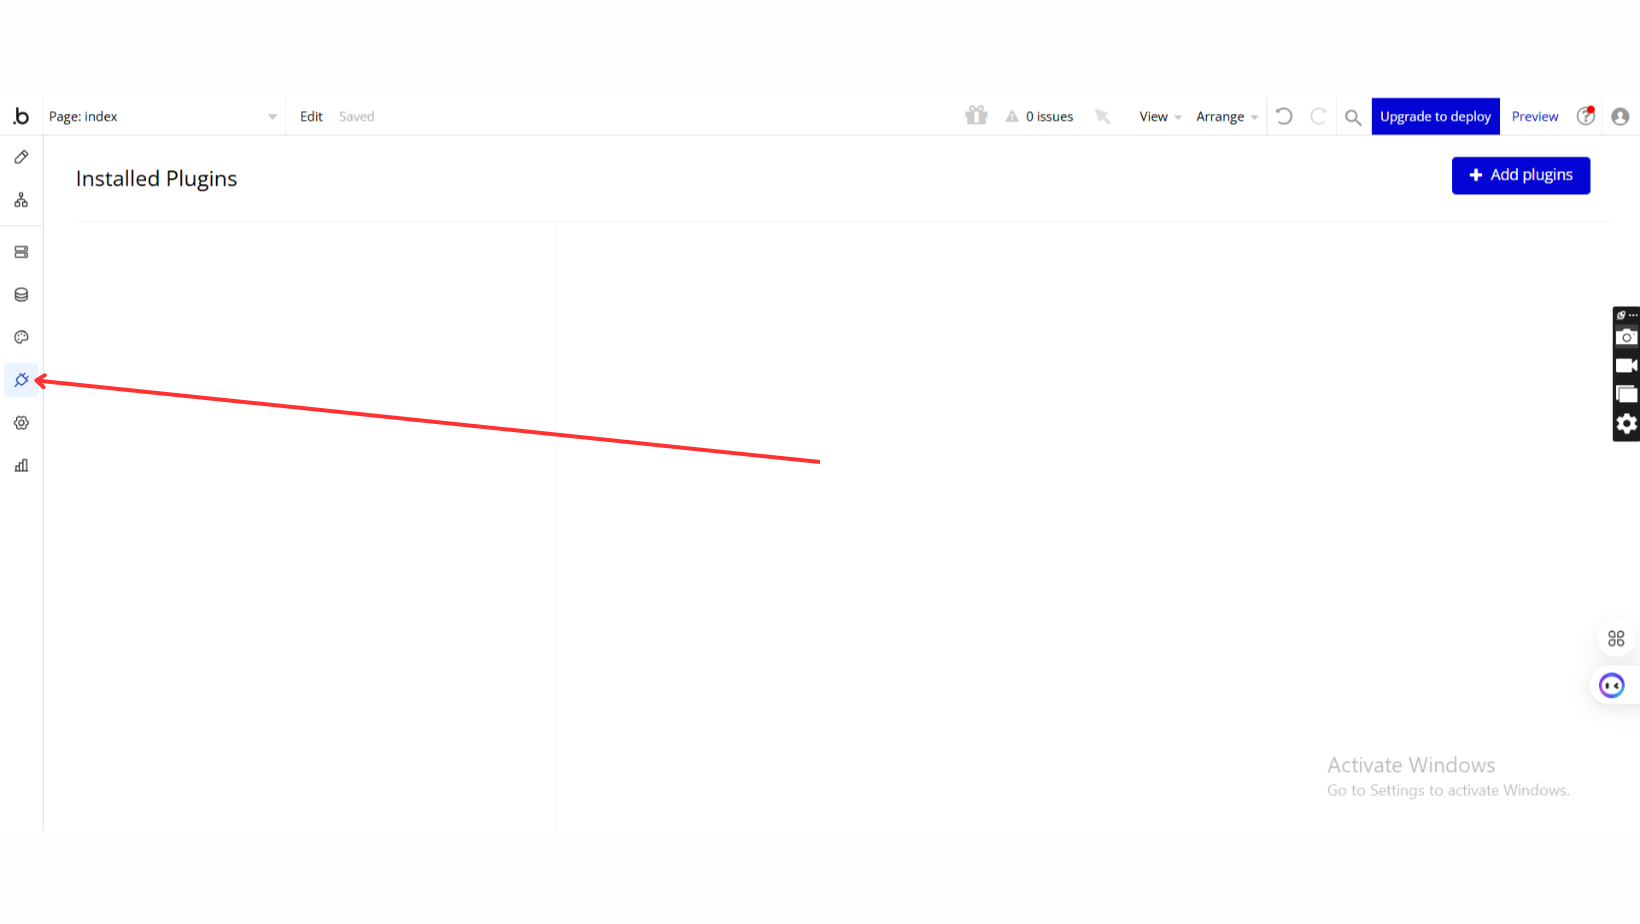
- Go to the Plugin Tab
- Open your Bubble Editor.
- Navigate to the Plugins tab on the left panel.
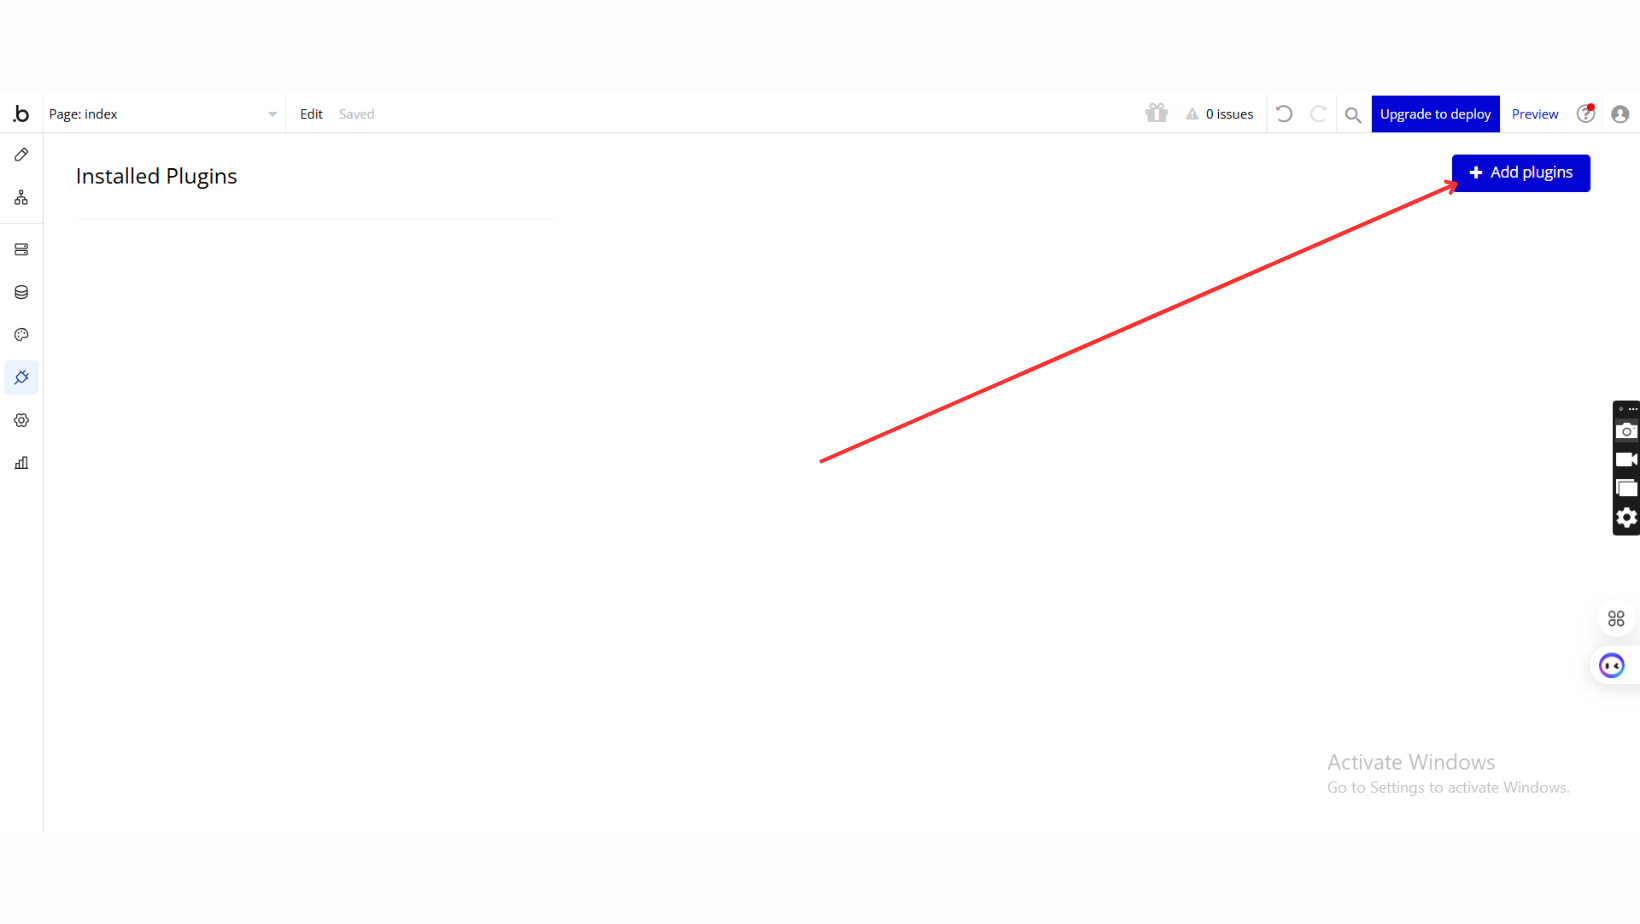
- Add Plugins
- Once in the Plugins tab, click the Add Plugins button.
- Search for the Plugin
- Use the search bar to type Files Pro - Multi File Uploader.
- Locate the plugin in the search results.
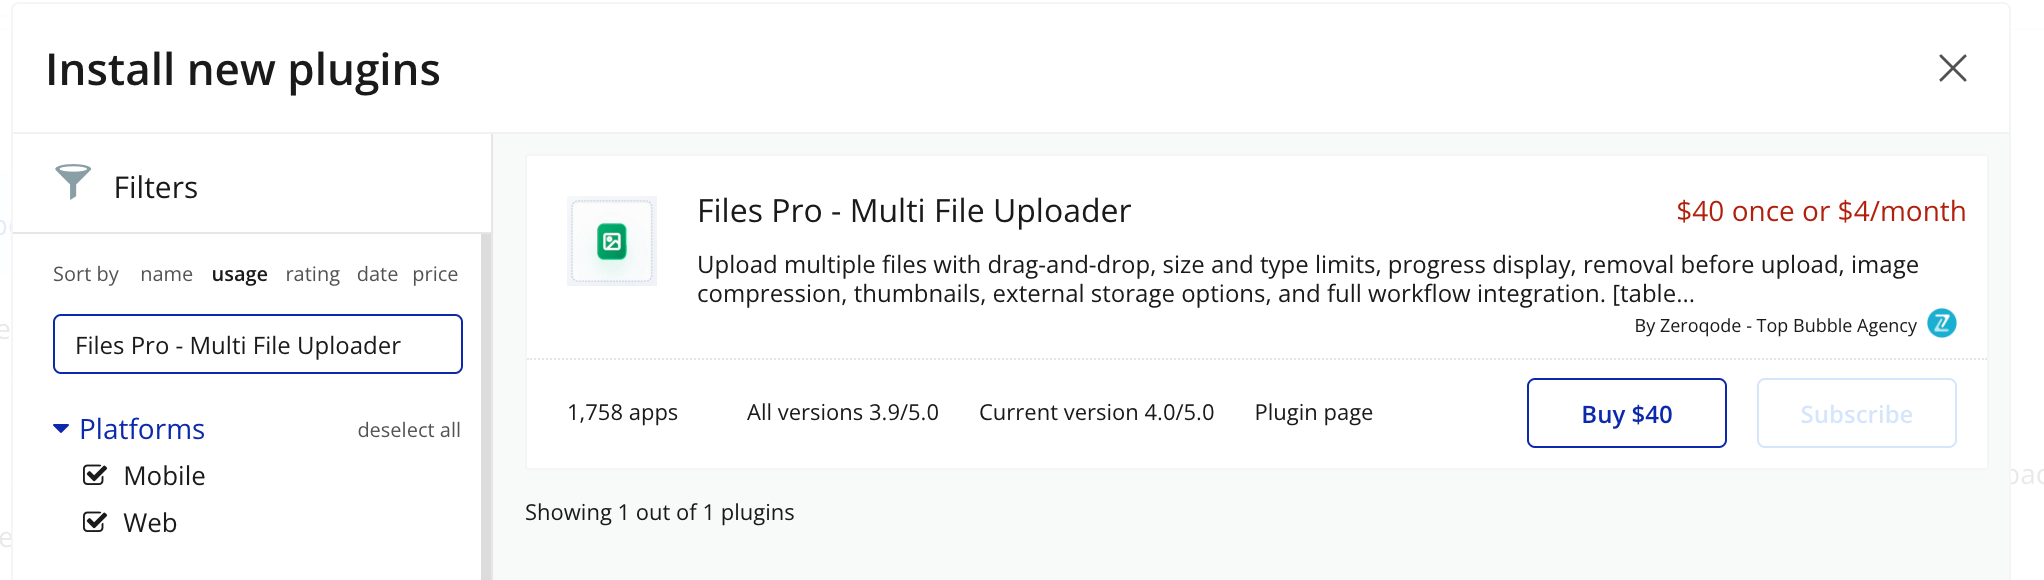
- Install/Buy
- Click Buy and follow the purchase instructions.
- Charges will be added to your Bubble billing account.
- Remember, if you unsubscribe from the plugin shortly after installation, charges will be prorated based on the days used.
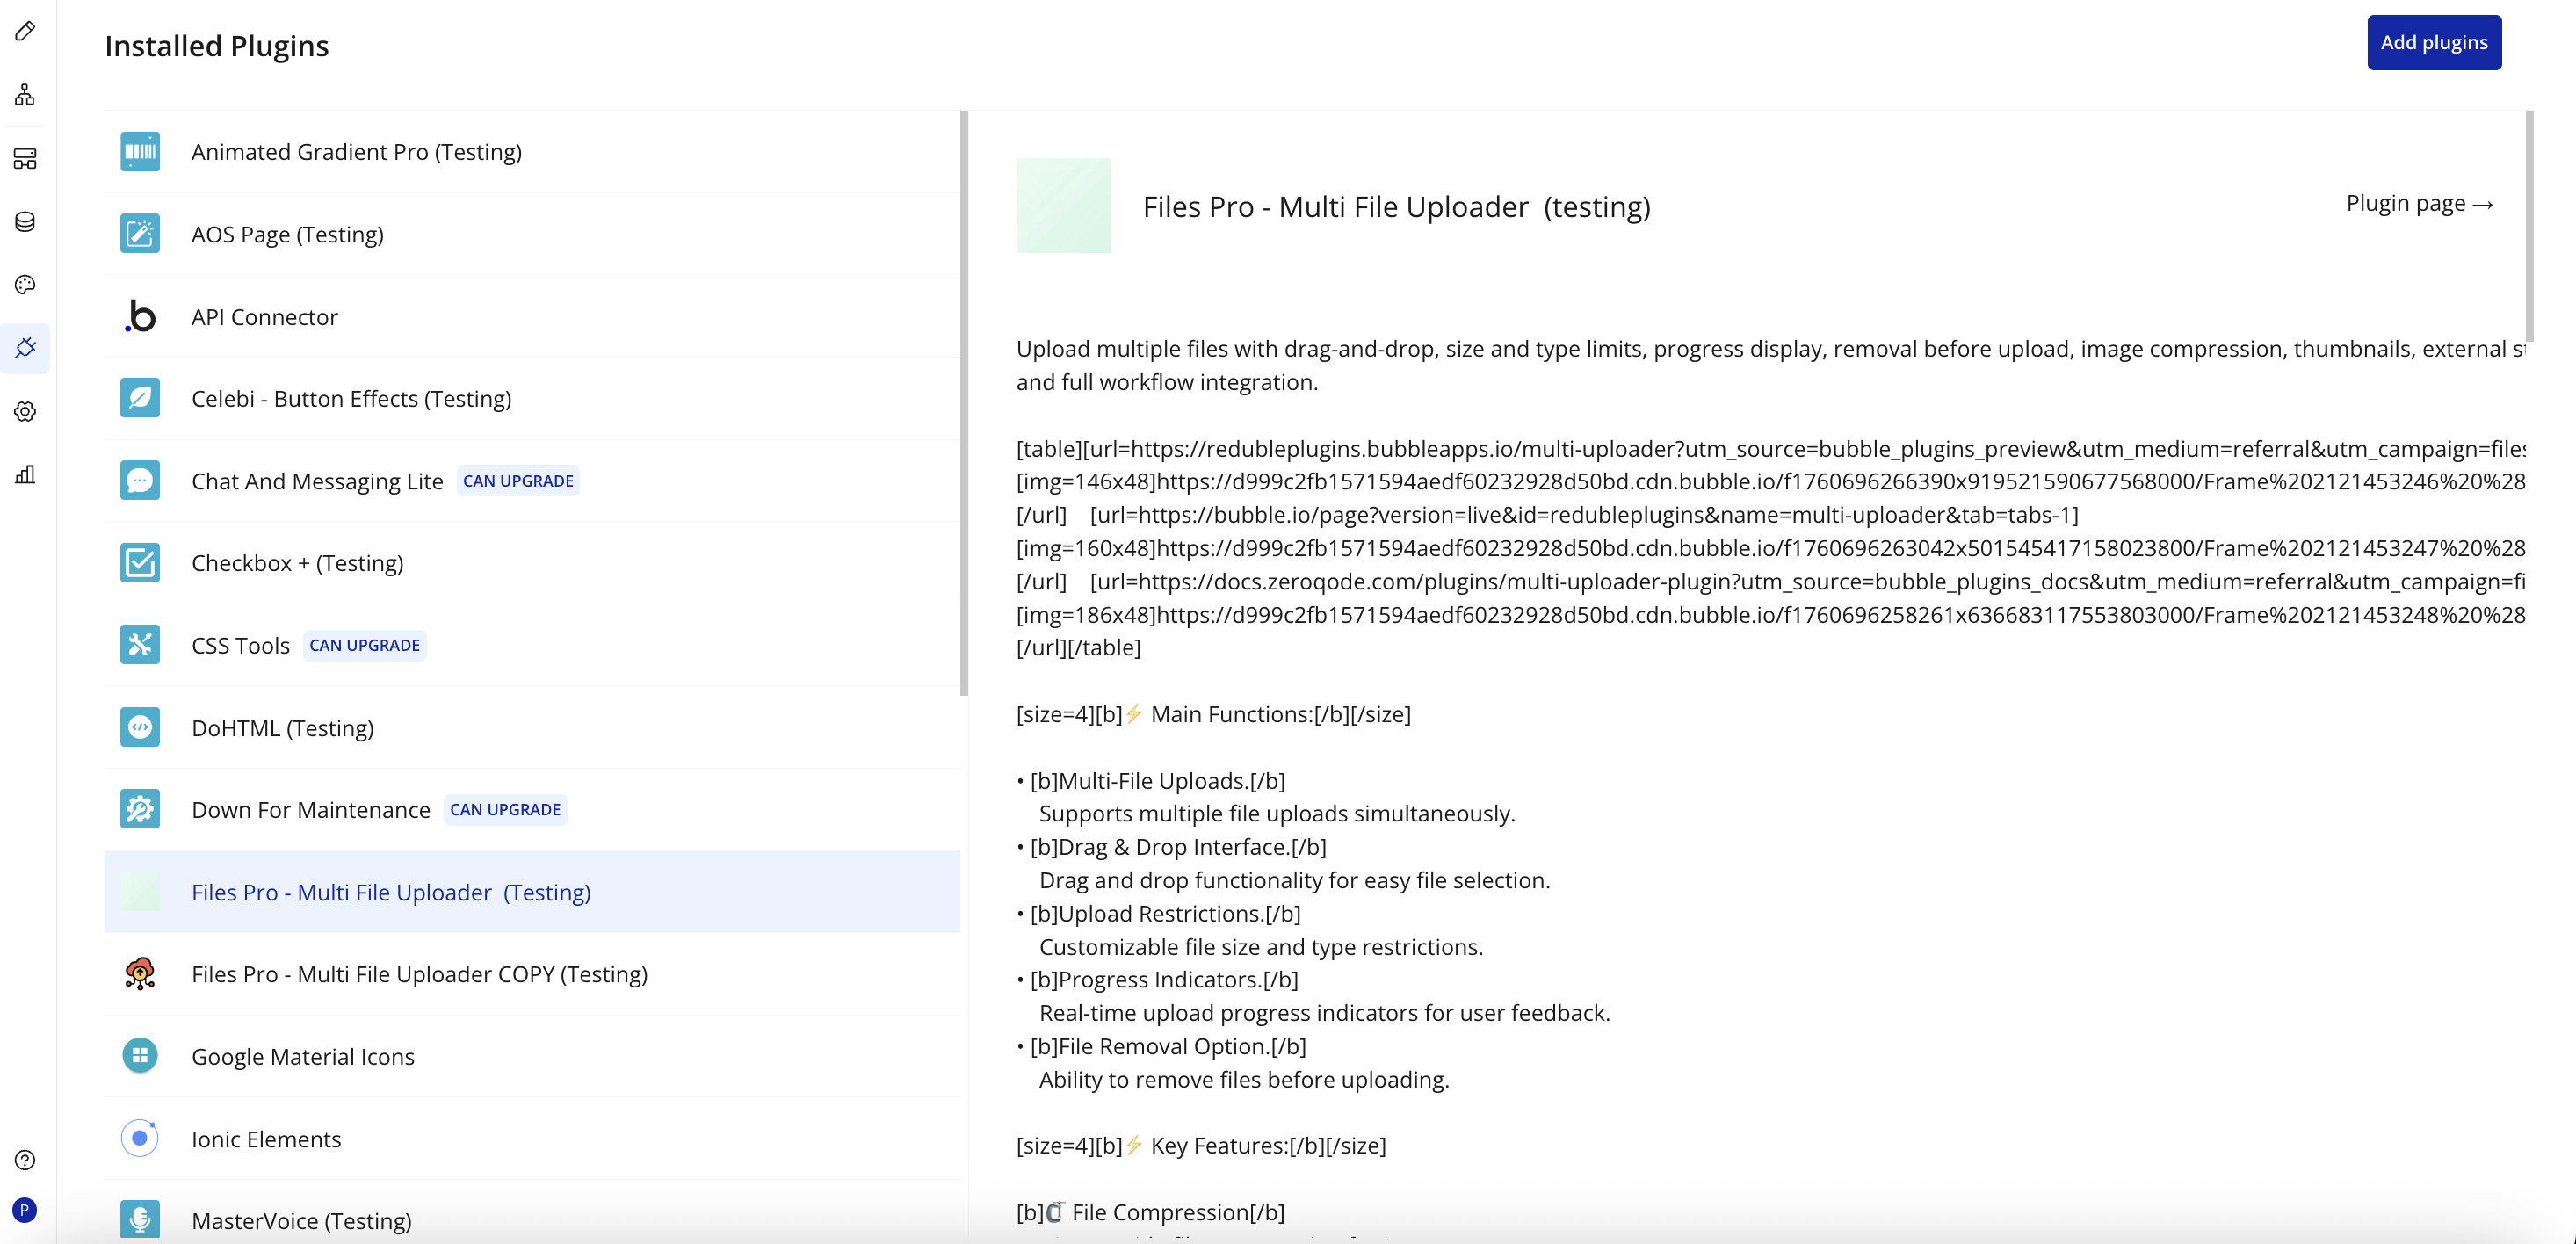
- Plugin Installed
- Once installed, the plugin will appear under the Installed Plugins list in your Bubble Editor.
Step 2 – Add the Plugin Element to Your Page
- Open the Design tab in your Bubble editor.
- Search for the Uploader element in the Elements panel.
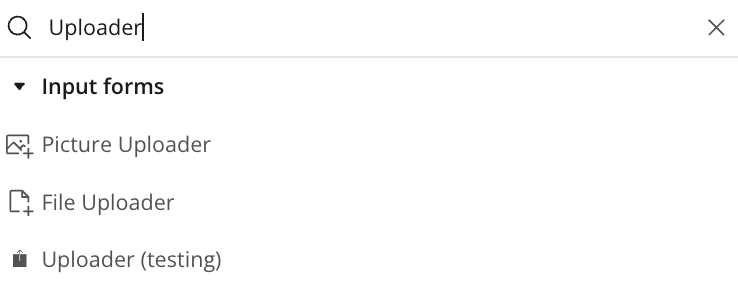
- Drag and drop the element onto your page.
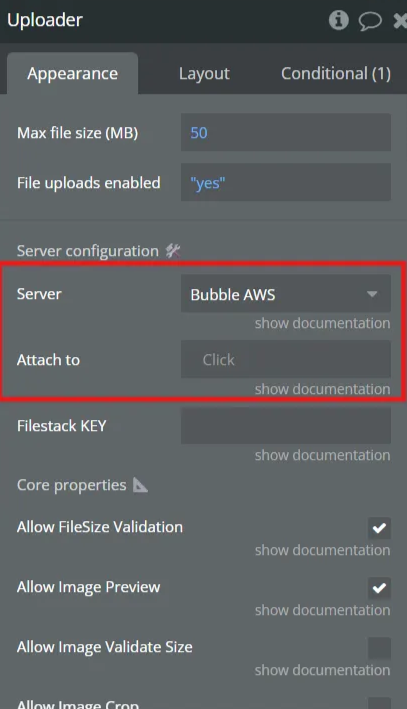
Step 3 – Configure Properties
Select the element and configure its properties in the Property Editor. Make sure "Setting Bubble" is selected.
Steps for Configuring the “Uploader" and Azure

- Adding the Element to the Page
- Open the page editor and navigate to the page where you want to add the Azure file upload functionality.
- Select the “Uploader” element from the component library.
- Add the element on the page.
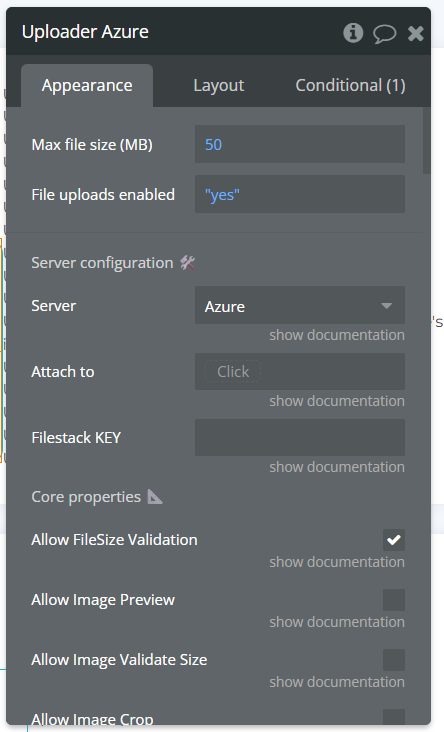
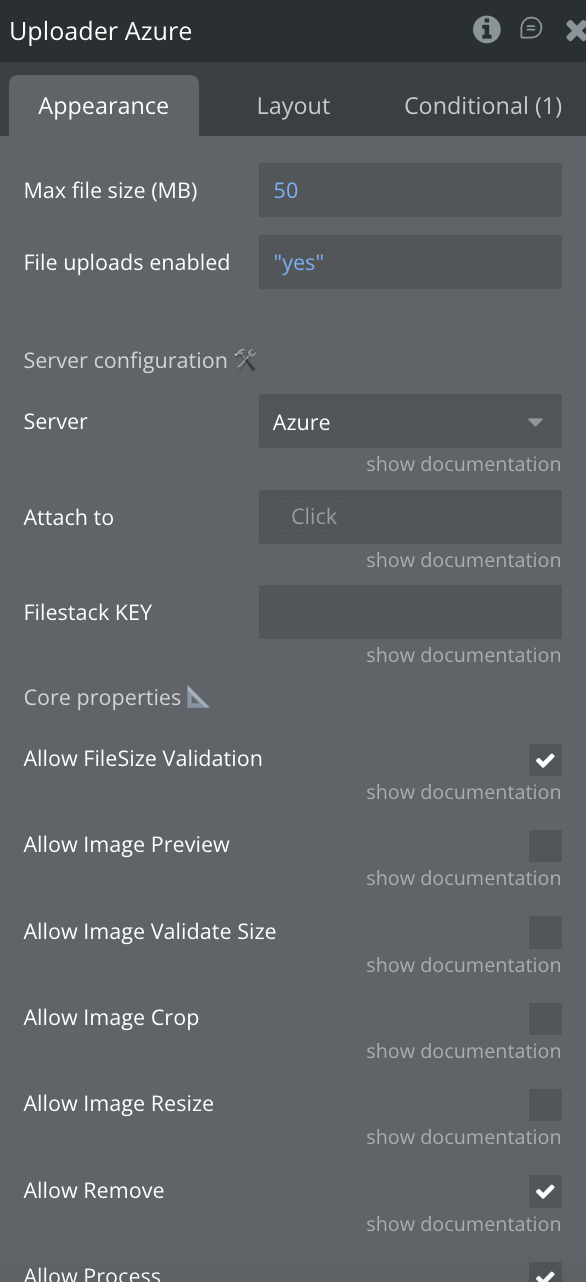
- Set up the “Server” field to “Azure”
- Configuring the "Generation URL" Event
- In the Workflow section, add a new event by selecting "Generation URL" from the list of available events.
- Select the Azure Uploader element from the Element dropdown.
- Adding the "Generate Pre-Signed URL" Action
- In the "Generation URL" event, add a new action.
- Select "Generate Pre-signed URL for Azura" from the list of available actions.
- Configuring Fields for "Generate Pre-signed URL"
- Account Name - The name of your Azure Storage account (e.g. mycompanystorage)
- Account Key - The secret access key from your Azure portal, used to authorize the requestThe secret access key from your Azure portal, used to authorize the request
- Container Name - The name of the Azure Blob container where the file will be stored
- Blob Name - The file path from the uploader element — typically This Uploader's File Path
- expires_in_seconds - Time in seconds before the signed URL expires (e.g. 3600 = 1 hour)
- Adding the "Upload File" Action
- After configuring the "Generate Pre-signed URL for Azura" action, add a new action under the same "Generation URL" event.
- Select "Upload File" from the list of available actions for the new elements.
- Configuring Fields for "Upload tFile"
- Element - Select the wanted element from the dropdown.
- Pre-signed upload URL - The pre-signed URL that points to the file you want to upload
- Pre Signed Upload Get - Pre-signed GET (download/view) URL corresponding to the same uploaded object as Pre Signed Upload Url
- Public Key - Uploadcare public key used for signed uploads.
- Signature - Uploadcare upload signature (server-generated) for signed uploads
- Expire - Uploadcare signature expiration timestamp (typically UNIX time)
Steps for Configuring the “Uploader" and DigitalOcean Spaces

- Adding the Element to the Page
- Open the page editor and navigate to the page where you want to add the Azure file upload functionality.
- Select the “Uploader” element from the component library.
- Add the element on the page.
- Set up the “Server” field to “DigitalOcean”
- Configuring the "Generation URL" Event
- In the Workflow section, add a new event by selecting "Generation URL" from the list of available events.
- Select the DigitalOcean Uploader element from the Element dropdown.
- Adding the "Generate Pre-Signed URL" Action
- In the "Generation URL" event, add a new action.
- Select "Generate Pre-signed URL for S3" from the list of available actions.
- Configuring Fields for "Generate Pre-signed URL for S3"
- S3 Access Key - The access key of your S3-compatible storage (e.g., from DigitalOcean or AWS)
- S3 Secret Key - The secret key associated with the access key; used to generate the signature
- Region - The region code of your bucket (e.g., fra1 for DigitalOcean Frankfurt or us-east-1 for AWS)
- Bucket Name - The name of your bucket (e.g., my-space-name)
- File Path - This field requires the file path in order to generate the Pre-Signed URL. If you use this action to upload files from our uploader elements NOGUI and GUI, please make sure to set the element's file path state.
- Expires In - This parameter is expressed in seconds and specifies the duration for which the pre-signed URL can be used to access protected resources in S3 (e.g., upload, download, delete).
- Adding the "Upload File" Action
- After configuring the "Generate Pre-signed URL for S3" action, add a new action under the same "Generation URL" event.
- Select "Upload File" from the list of available actions for the new elements.
- Configuring Fields for "Upload tFile"
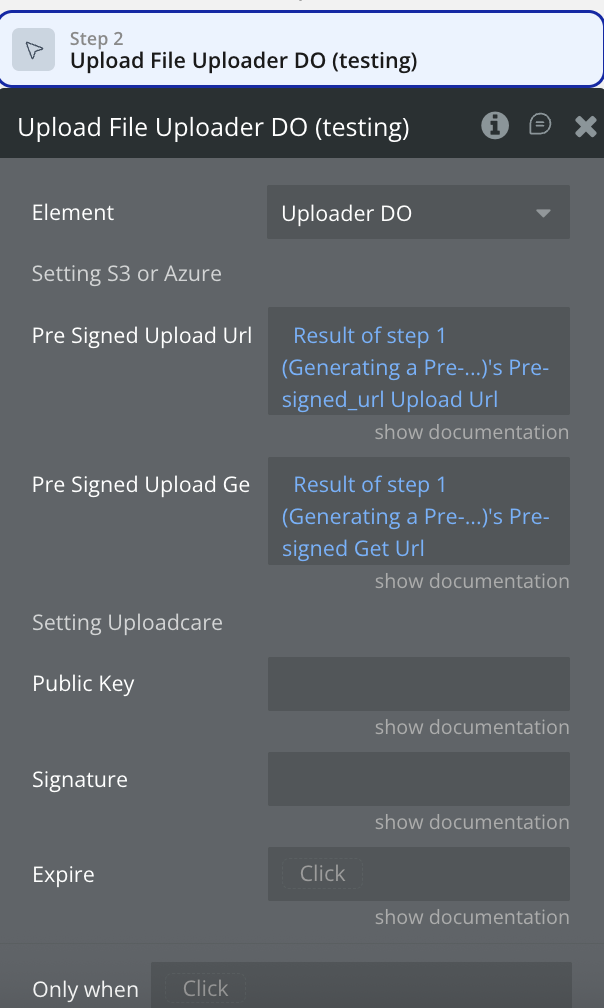
- Element - Select the wanted element from the dropdown.
- Pre-signed upload URL - The pre-signed URL that points to the file you want to upload
- Pre Signed Upload Get - Pre-signed GET (download/view) URL corresponding to the same uploaded object as Pre Signed Upload Url
- Public Key - Uploadcare public key used for signed uploads.
- Signature - Uploadcare upload signature (server-generated) for signed uploads
- Expire - Uploadcare signature expiration timestamp (typically UNIX time)
Steps for Configuring the “Uploader" and Uploadcare

- Adding the Element to the Page
- Open the page editor and navigate to the page where you want to add the Uploadcare file upload functionality.
- Select the “Uploader” element from the component library.
- Add the element on the page.
- Set up the “Server” field to “Uploadcare”
- Configuring the "Generation URL" Event
- In the Workflow section, add a new event by selecting "Generation URL" from the list of available events.
- Select the Uploadcare Uploader element from the Element dropdown.
- Adding the "Generate Signature Uploadcare" Action
- In the "Generation URL" event, add a new action.
- Select "Generate Signature Uploadcare" from the list of available actions.
- Configuring Fields for "Generate Signature Uploadcare"
- Public key - The public API key from your UploadCare project (used to identify your app)
- Secret keys - The secret key from your UploadCare project (used to generate the signature securely)
- Adding the "Upload File" Action
- After configuring the "Generate Pre-signed URL for Azura" action, add a new action under the same "Generation URL" event.
- Select "Upload File" from the list of available actions for the new elements.
- Configuring Fields for "Upload tFile"
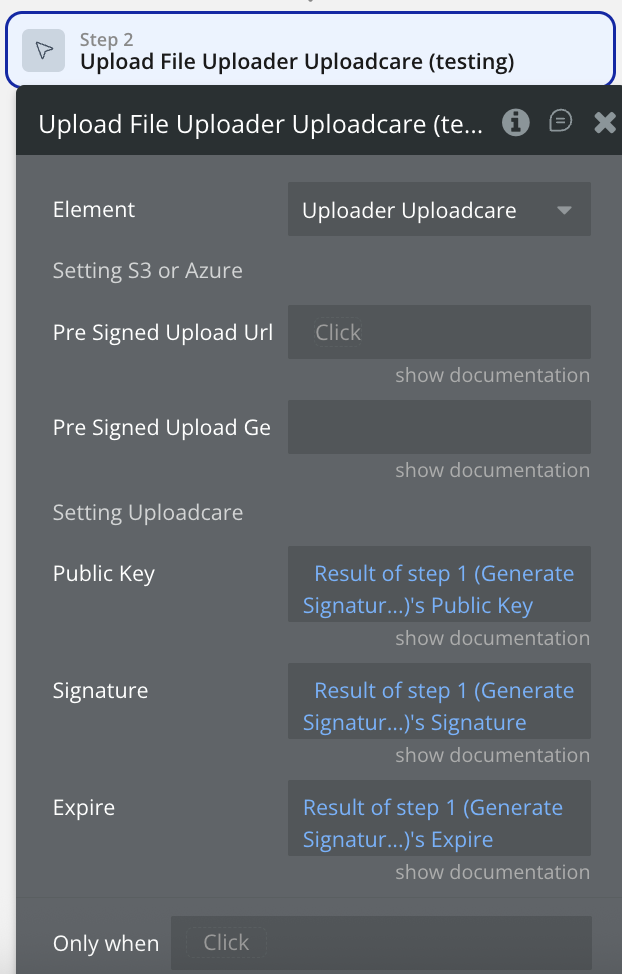
- Element - Select the wanted element from the dropdown.
- Pre-signed upload URL - The pre-signed URL that points to the file you want to upload
- Pre Signed Upload Get - Pre-signed GET (download/view) URL corresponding to the same uploaded object as Pre Signed Upload Url
- Public Key - Uploadcare public key used for signed uploads.
- Signature - Uploadcare upload signature (server-generated) for signed uploads
- Expire - Uploadcare signature expiration timestamp (typically UNIX time)
Plugin Element - Uploader
The plugin contains the Uploader visual element which should be used on a page.

Fields
Title | Description | Type |
Server configuration 🛠️ | ||
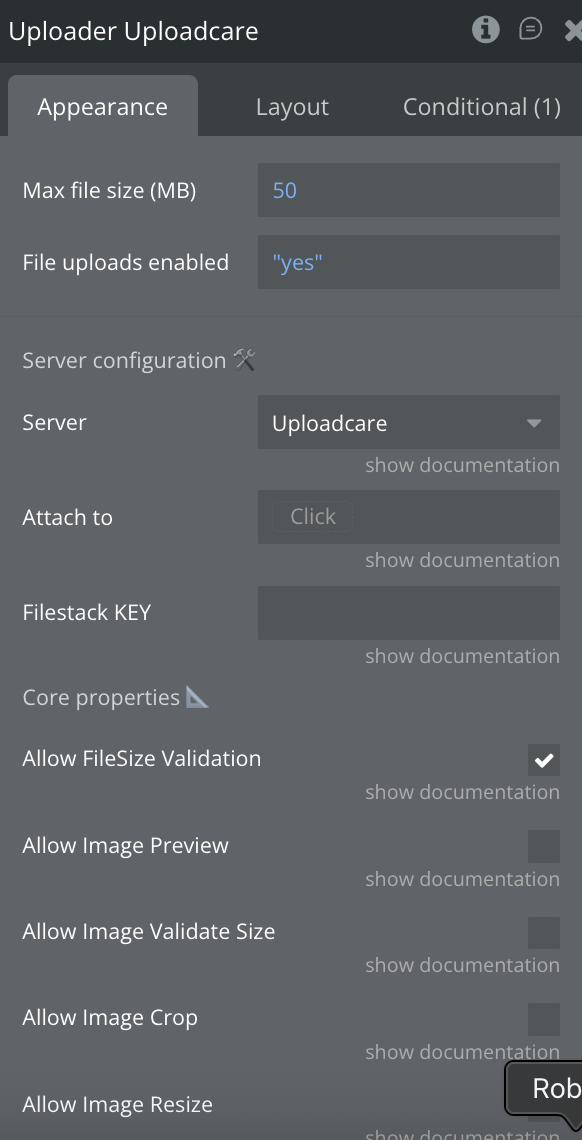
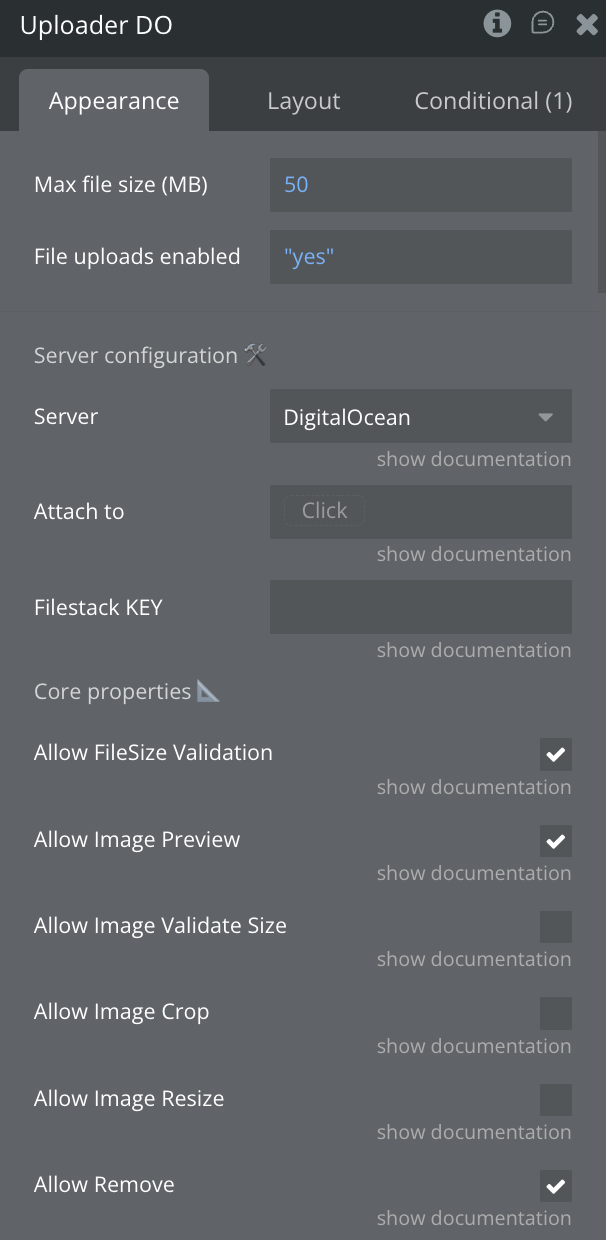
Server | Bubble , Uploadcare, Filestack, Azure, DigitalOcean. When a server different from Bubble is used, it requires a Service key obtained from the Service provider. | Dropdown |
Attach to | This only works for Bubble's internal AWS storage. If the thing is not valid, it will return an error. | Any Thing (optional) |
FileStack KEY | FileStack key (optional). | Text (optional) |
Core properties 📐 | ||
Allow File Size Validation | Enable or disable file size validation. | Checkbox (yes/no) |
Allow Image Preview | Enable or disable preview mode. To ensure proper preview functionality, the plugin automatically converts HEIC files to PNG on the client side. | Checkbox (yes/no) |
Allow Image Validate Size | Enable or disable image size validation. | Checkbox (yes/no) |
Allow Image Crop | Enable or disable image cropping. If disabled other proprieties related to cropping will not work | Checkbox (yes/no) |
Allow Image Resize | Enable or disable image resizing | Checkbox (yes/no) |
Allow Remove | When set to false the remove button is hidden and disabled. | Checkbox (yes/no) |
Allow Process | Enable or disable the process button. | Checkbox (yes/no) |
Allow Multiple | Enable or disable adding multiple files. | Checkbox (yes/no) |
Allow Image Transform | Boolean that allows image transformation (e.g., cropping, resizing). | Checkbox (yes/no) |
Image quality | The quality of the output image supplied as a value between 0 and 100. Where 100 is best quality and 0 is worst. When not supplied it will use the browser default quality which averages around 94. | Number (optional) |
Max Files | Maximum number of files. | Number |
Accepted File Extensions | File extensions - Enter extensions for validation | Text |
Blocked file extensions | Ex: .png, .jpg, .pdf (only extensions) | Text (optional) |
File Size (KB/MB) | The maximum size of a file for example 100MB or 100KB. | Text (optional) |
Total File Size (KB/MB) | Maximum size of all files in the list, same format as File Size | Text (optional) |
File Validate Type Label | Message is shown to indicate the allowed file types. | Text (optional) |
Min Width | The minimum image width | Number (optional) |
Max Width | The maximum image width | Number (optional) |
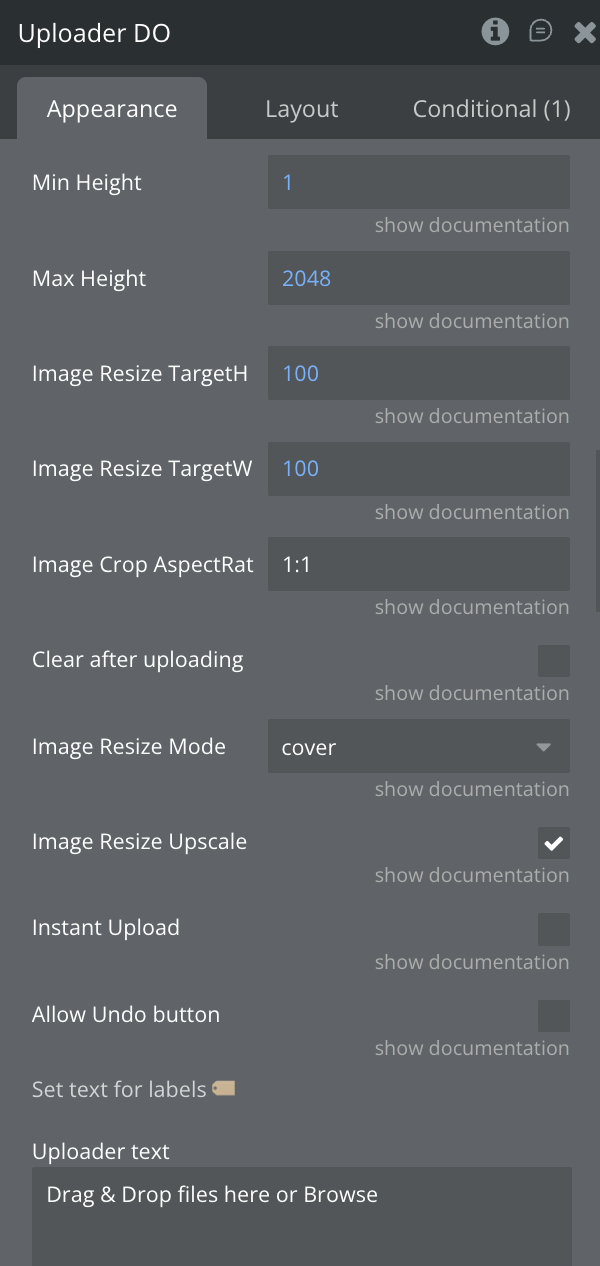
Min Height | The minimum image height | Number (optional) |
Max Height | The maximum image height | Number (optional) |
Image Resize Target Height | The output height in pixels | Number (optional) |
Image Resize Target Width | The output width in pixels | Number (optional) |
Image Crop Aspect Ratio | The aspect ratio of the crop in human-readable format, for example:'1:1' or '16:10' | Text (optional) |
Clear after uploading | Clear the input value after upload | Checkbox (yes/no) |
Image Resize Mode | The method by which the images are resized. Choose between ' force', 'cover', or 'contain'. Force will ignore the image aspect ratio. The cover will respect the aspect ratio and will scale to fill the target dimensions. Contain also respects the aspect ratio and will fit the image inside the set dimensions. All three settings will upscale images when there are smaller than the given target dimensions | Dropdown |
Image Resize Upscale | Set to false to prevent upscaling of images smaller than the target size | Checkbox (yes/no) |
Instant Upload | Immediately upload new files to the server. | Checkbox (yes/no) |
Allow Undo button | Enable or disable the revert processing button | Checkbox (yes/no) |
Set text for labels 🏷️ | ||
Uploader text | Write the text that will be displayed in the element. | Text |
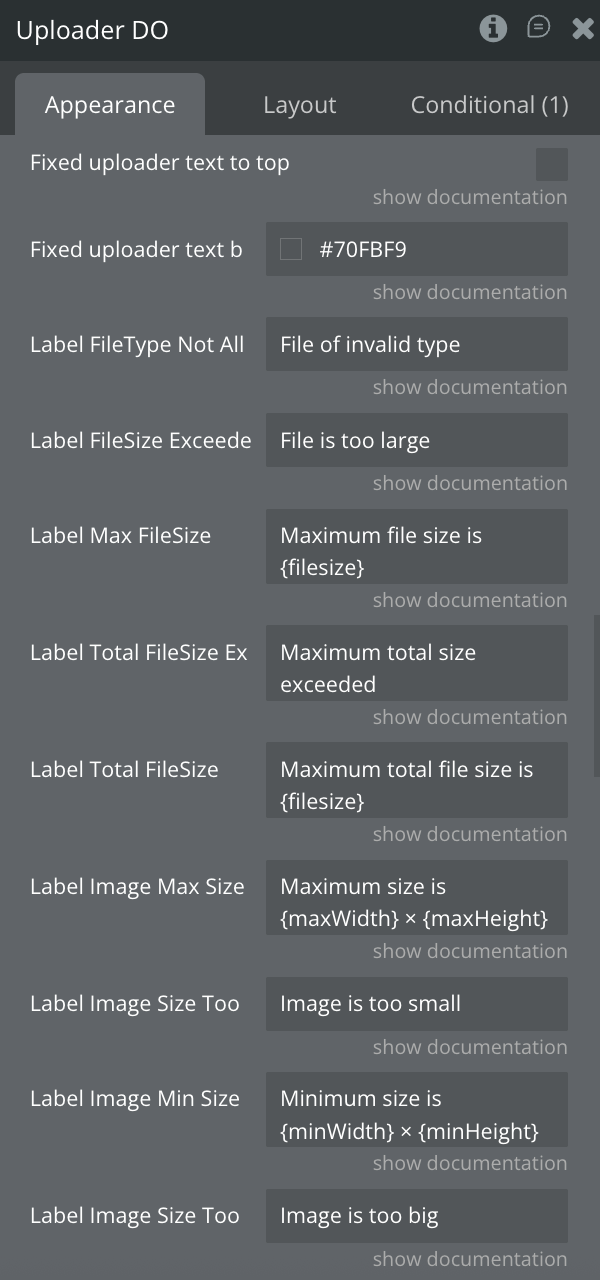
Fixed uploader text to top | If it is checked, the “Uplaoder text” will be on the top of element every time. | Checkbox (yes/no) |
Fixed uploader text background color | This color is used to differentiate the “Uploader text” when this is fixed on the top. | Color |
Label File Type Not Allowed | A Message is shown when an invalid file is added. | Text (optional) |
Label File Size Exceeded | Status message shown when a large file is dropped. | Text (optional) |
Label Max File Size | Detail message shown when max file size was exceeded. {filesize} is replaced with the value of the maxFileSize property. | Text (optional) |
Label File Size Exceeded | Status message shown when total file size exceeds maximum. | Text (optional) |
Label Total File Size | A detail message is shown when the total file size exceeds the maximum. | Text (optional) |
Label Image Size Too Small | The message is shown when the image is too small. | Text (optional) |
Label Image Size Too Big | he message is shown when the image is too big. | Text (optional) |
Label Image Min Size | Message is shown to indicate the minimum image size. | Text (optional) |
Label Image Max Size | Message is shown to indicate the maximum image size | Text (optional) |
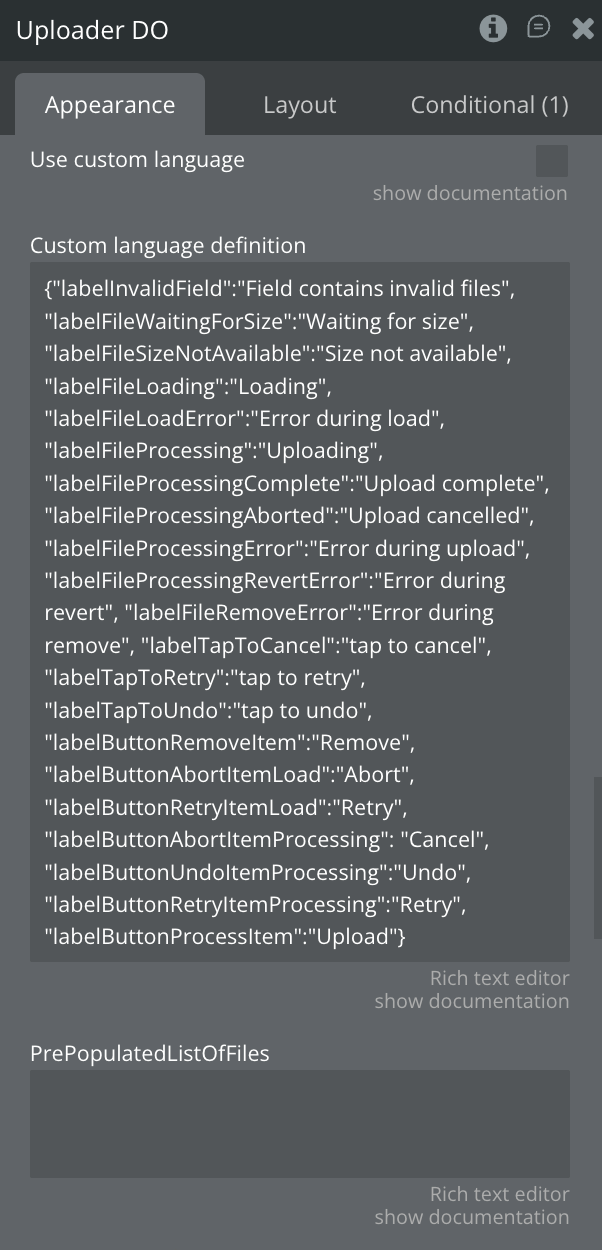
Use custom language | Boolean that allows the use of custom language definitions. | Checkbox (yes/no) |
Custom language definition | JSON string containing custom language definitions. | Text |
PrePopulated List Of Files | A list of file locations that should be loaded Immediately | Text (optional) |
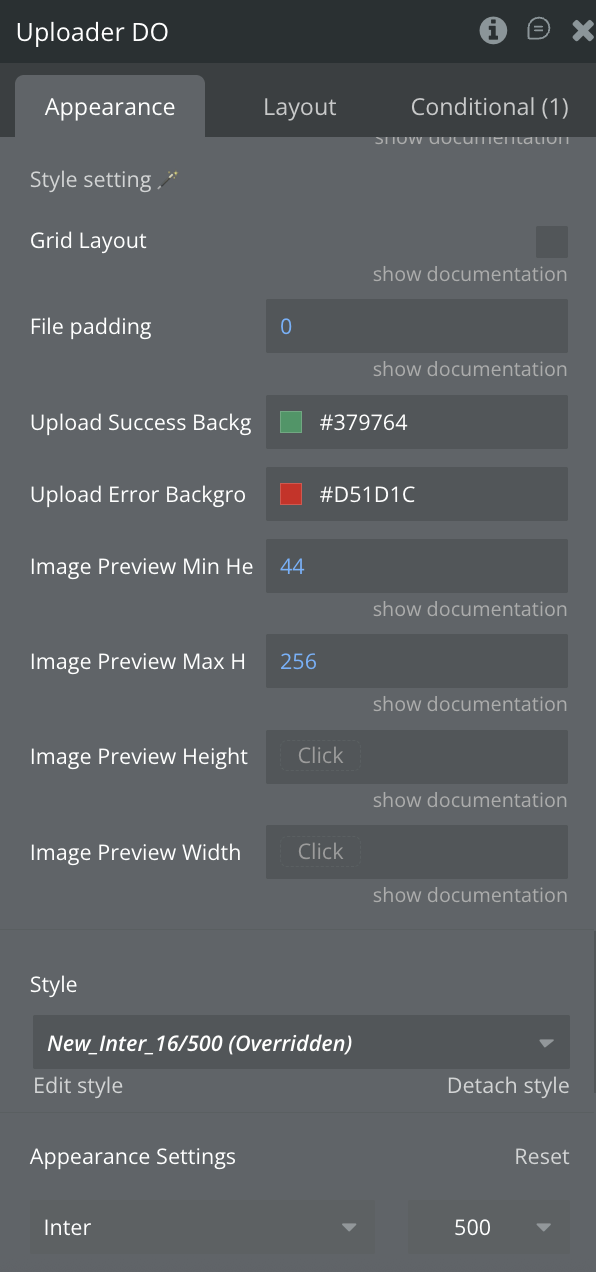
Style setting 🪄 | ||
Grid Layout | it can render items in a grid | Checkbox (yes/no) |
File padding | Padding around each file in the grid layout. | Number |
Upload Success Background | Success message Background color | Color |
Upload Error Background | Error message Background color | Color |
Preview Min Height | Minimum image preview height | Number |
Preview Max Height | Maximum image preview height | Number |
Preview Height | Fixed image preview height, overrides min and max preview height | Number (optional) |
Preview Width | Fixed image preview width | Number (optional) |
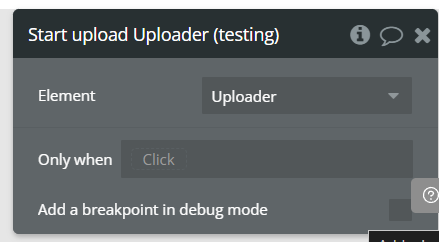
Element Actions
Start upload
Manually triggers the upload process for a specific uploader element. It is used when the upload should not start automatically after file selection, allowing full control over when the file is sent (e.g., after generating a pre-signed URL).
Reset file uploader
Cleans the input of all files

Remove files from Azure
Deletes a previously uploaded file from Azure Blob Storage using its pre-signed URL. This action should be used with the same Blob URL generated during the upload step to ensure valid authorization.
Title | Description | Type |
Pre-Signed Url | The pre-signed URL that points to the file you want to delete. | Text |
Upload File
Generates and assigns secure upload parameters (either pre-signed URLs or Uploadcare signatures) to pending files and triggers their upload processing once the parameters are available.
Title | Description | Type |
Pre-Signed Url | The pre-signed URL that points to the file you want to upload | Text |
Pre Signed Upload Get | Pre-signed GET (download/view) URL corresponding to the same uploaded object as Pre-Signed Url | Text |
Public Key | Uploadcare public key used for signed uploads. | Text |
Signature | Uploadcare upload signature (server-generated) for signed uploads | Text |
Expire | Uploadcare signature expiration timestamp (typically UNIX time) | Number |
Element Events
Title | Description |
File is uploaded | This event will let you know that the file has been uploaded |
All files uploaded | This event shows that all files pending or uploaded has loaded |
Error Occurred | Triggered when an error occurs |
Upload is started | Triggered when an upload starts |
Remove file from file uploader | Triggered when a file is removed |
Generation URL | is an event triggered when a file is selected in the uploader. It starts the workflow where the pre-signed URL (for upload or GET) is generated, using the upcoming file's path and metadata. |
Element States
Title | Description | Type |
File Name | The name of the uploaded file | Text |
File | URL of the uploaded file | File |
Base64 | Here is a file encoded in base64 that will be returned | Text |
UUID/Handle/MD5 | A 128-bit number used to identify information in computer systems. | Text |
Max Files | Returns yes/no value for when max files are in the element | yes/no |
File Size | The uploaded file size in KB | Number |
All files url | All uploaded files URL’s | Text |
All files uploaded | state that shows that all files have been uploaded | yes/no |
Images height | List of images heights | Number |
Images width | List of images widths | Number |
Uploader Is Empty | The element has nothing waiting to be loaded. | yes/no |
Upload Percent | The percentage of file uploads on the server. | Number |
Total files uploaded | The total number of uploaded files | Number |
Total files error | The total number of files that throw errors when loading. | Number |
List of File Sizes | A list with the size of all files. | Number |
Last image width | The width of the last loaded image | Number |
Last image height | The height of the last loaded image. | Number |
Progress for current file | the loading progress of the current file. | Number |
Error message | The error message that is available after “error occurred” event. | Text |
List of file mime types | A list of mime types of all files | Text |
Last image’s mime type | the mime type of the last loaded image. | Text |
Url For Delete | URL of the file removed from the uploader | Text |
All files name | List of all uploaded files names | Text |
File Path | is the path of the file to be uploaded, automatically generated by the uploader element and passed to the pre-signing action to ensure the signature is valid for that specific file. | Text |
Pre-signed GET URL | is a temporary, secure link generated for accessing (viewing or downloading) a specific file that was uploaded. It is usually created after the file is uploaded, using the same file path, and is valid only for a limited time. | Text |
Plugin Server Side Actions
Generate Pre-sign for Azure
This action generates a temporary, secure URL that allows uploading a file directly to Azure Blob Storage. It uses account credentials, container details, and file path to sign the request. The resulting signed URL is used in the next upload step.
Field Name | Description | Data Type |
Account Name | The name of your Azure Storage account (e.g. mycompanystorage) | Text |
Account Key | The secret access key from your Azure portal, used to authorize the request | Text |
Container Name | The name of the Azure Blob container where the file will be stored | Text |
Blob Name | The file path from the uploader element — typically This Uploader's File Path | Text (Dynamic) |
expires_in_seconds | Time in seconds before the signed URL expires (e.g. 3600 = 1 hour) | Number |
Generating a Pre-signed URL for S3
This action generates a temporary, secure upload URL for an S3-compatible storage (such as DigitalOcean Spaces or Amazon S3). The resulting URL allows direct file upload without exposing secret keys, and it expires after a set time.
Field Name | Description | Data Type |
S3 Access Key | The access key of your S3-compatible storage (e.g., from DigitalOcean or AWS) | Text |
S3 Secret Key | The secret key associated with the access key; used to generate the signature | Text |
Region | The region code of your bucket (e.g., fra1 for DigitalOcean Frankfurt or us-east-1 for AWS) | Text |
Bucket Name | The name of your bucket (e.g., my-space-name) | Text |
File Path | The path of the file to be uploaded; usually taken dynamically from the uploader: This Uploader's File Path | Text (Dynamic) |
Expires In | How long the signed URL will remain valid (in seconds), e.g., 300 = 5 minutes | Number |
Generate Signature UploadCare
This action generates a secure signature for UploadCare file uploads. The signature is required when using signed uploads to ensure authorized and secure file handling. It is generated using your public and secret API keys from your UploadCare project.
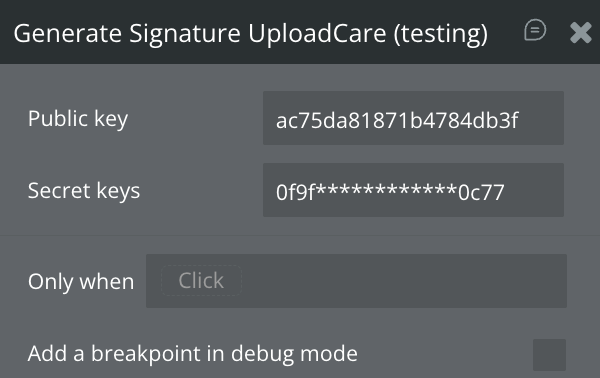
Field Name | Description | Data Type |
Public key | The public API key from your UploadCare project (used to identify your app) | Text |
Secret keys | The secret key from your UploadCare project (used to generate the signature securely) | Text |
Workflow example
How to save a thing in the database using default bubble actions
In this workflow, we will show you how to save a thing in the database using default bubble actions and plugin event
- On the Uploader element, all files uploaded event

2. Add a step to create an object, by providing the Uploader's File exposed element state and save the value to a field (file)

3. The file will be saved in Bubble's Data field with respective %name% in table

Tips for warm start
This issue is related to how Bubble works. Server-side actions have a specific set of modules that Bubble installs temporarily during the first execution of the action. To bypass this behavior and make Bubble install the required libraries faster, we can execute the function when the page loads using a dummy object. This way, the action will run before the user interacts with the page, avoiding the unpleasant delay caused by Bubble installing the necessary module.

Changelogs
Update 10.04.26 - Version 2.149.0
- Extend click-to-browse area to full uploader root element.
Update 06.03.26 - Version 2.148.0
- Bubble Plugin Page Update (Category).
Update 18.12.25 - Version 2.147.0
- Bubble Plugin Page Update (Logo).
Update 27.11.25 - Version 2.146.0
- Added automatic HEIC → WebP conversion in FilePond to enable proper image preview..
Update 17.11.25 - Version 2.145.0
- Added automatic HEIC → PNG conversion in FilePond to enable proper image preview.
Update 17.11.25 - Version 2.144.0
- Bubble Plugin Page Update (Forum button).
Update 31.10.25 - Version 2.143.0
- Bubble Plugin Page Update (Description).
Update 12.09.25 - Version 2.142.0
- Bubble Plugin Page Update (Tutorial).
Update 02.09.25 - Version 2.141.0
- Import the dependent libraries into the memory allocated for the plugin.
Update 28.08.25 - Version 2.140.0
- Bubble Plugin Page Update (Logo).
Update 29.07.25 - Version 2.139.0
- Major changes have been made to the plugin regarding security. Please consult the documentation before upgrading.
Update 09.07.25 - Version 2.138.0
- Bubble Plugin Page Update (Logo).
Update 13.06.25 - Version 2.137.0
- Marketing update (minor change).
Update 08.05.25 - Version 2.136.0
- Fixed problem with actualization style.
Update 01.05.25 - Version 2.135.0
- Fixed problem with prepopulated files.
Update 30.04.25 - Version 2.134.0
- Fixed issue with prepopulated files and image transform options.
Update 17.04.25 - Version 2.133.0
- Fixed an issue related to custom styles being incorrectly applied to the canvas element.
Update 14.04.25 - Version 2.132.0
- The plugin code has been fully rewritten to improve performance, stability, and overall efficiency.
Update 09.12.24 - Version 2.131.0
- Grid layout fix.
Update 25.11.24 - Version 2.130.0
- Fix bug on Android 14 when camera option missing during image upload.
Update 14.11.24 - Version 2.129.0
- Minor update (Marketing update).
Update 24.10.24 - Version 2.128.0
- Added timeout on removing file from input.
Update 16.10.24 - Version 2.127.0
- Allow multiple checkbox bug fix.
Update 23.07.24 - Version 2.126.0
- Minor update.
Update 19.07.24 - Version 2.125.0
- Fixed folder uploading feature.
Update 16.07.24 - Version 2.124.0
- Minor update (Marketing update).
Update 05.07.24 - Version 2.123.0
- State on reset bug fix.
Update 19.06.24 - Version 2.122.0
- Minor update.
Update 13.06.24 - Version 2.121.0
- Code refactoring.
Update 10.06.24 - Version 2.120.0
- Updated demo/service links.
Update 06.06.24 - Version 2.119.0
- Minor update.
Update 05.06.24 - Version 2.118.0
- Progress percentage display fix.
Update 22.04.24 - Version 2.117.0
- Added preview size adjustment feature.
Update 05.04.24 - Version 2.116.0
- Added 2 new fields ,,Upload Success Background" & ,,Upload Error Background".
Update 03.04.24 - Version 2.115.0
- updated description.
Update 20.03.24 - Version 2.114.0
- Displayed file size fix.
Update 19.03.24 - Version 2.113.0
- Added new field Blocked file extiension to block certain types of extensions.
Update 07.03.24 - Version 2.112.0
- Fixed problem with "Pre-Populated List Of Files".
Update 06.02.24 - Version 2.111.0
- Allowed file extensions bug fix.
Update 24.01.24 - Version 2.110.0
- updated description.
Update 15.01.24 - Version 2.109.0
- Pre-populated list fix.
Update 27.12.23 - Version 2.108.0
- updated description.
Update 27.12.23 - Version 2.107.0
- Fixed problem with actualization pre-populate files.
Update 21.12.23 - Version 2.106.0
- Fixed problem with states "List of File Mime Types" and "Last Image's Mime Type".
Update 19.12.23 - Version 2.105.0
- updated description.
Update 18.12.23 - Version 2.104.0
- Fix problem with states "List of File Mime Types" and "Last Image's Mime Type".
Update 12.12.23 - Version 2.103.0
- Fixed the validation type.
Update 29.11.23 - Version 2.102.0
- added original "icon Undo".
Update 27.11.23 - Version 2.101.0
- 'Added new state - all file names'.
Update 22.11.23 - Version 2.100.0
- 'Added custom validation and 'Pre-populated file list' and 'File padding' fields.
Update 09.11.23 - Version 2.99.0
- Fixed wrong file status on Filestack and Adjust element size.
Update 23.10.23 - Version 2.98.0
- Added DigitalOcean as storage provider.
Update 19.10.23 - Version 2.97.0
- Updated description.
Update 13.10.23 - Version 2.96.0
- Prevented flickering of the input field.
Update 03.10.23 - Version 2.95.0
- problem with progress bar.
Update 02.10.23 - Version 2.94.0
- add opstion "allow Image Transform".
Update 27.09.23 - Version 2.93.0
- Fixed "Uploader text". Clikable element area has been expanded.
Update 18.09.23 - Version 2.92.0
- updated description.
Update 13.09.23 - Version 2.91.0
- minor updates.
Update 04.09.23 - Version 2.90.0
- Updated description field "File extensions".
Update 04.09.23 - Version 2.89.0
- Added possibility to get URL for deletion on server.
Update 21.08.23 - Version 2.88.0
- Was fixed problem with file info.
Update 02.08.23 - Version 2.87.0
- minor fixes.
Update 01.08.23 - Version 2.86.0
- Added fields "Use custom language", "Custom language definition.
Update 29.06.23 - Version 2.85.0
- updated the name.
Update 20.06.23 - Version 2.84.0
- Added field "Container ID".
Update 17.06.23 - Version 2.83.0
- Updated the description .
Update 16.06.23 - Version 2.82.0
- updated the description.
Update 24.05.23 - Version 2.81.0
- Added mime types to the state.
Update 22.05.23 - Version 2.80.0
- Minor fixes.
Update 15.05.23 - Version 2.79.0
- Added "error message" state and "error occurred" event..
Update 09.03.23 - Version 2.78.0
- Fixed background style issues.
Update 21.02.23 - Version 2.77.0
- updated the description.
Update 20.02.23 - Version 2.76.0
- improved options for custom style.
Update 03.02.23 - Version 2.75.0
- added possibility to customization font-family and font-size.
Update 02.02.23 - Version 2.74.0
- Updated description.
Update 20.01.23 - Version 2.73.0
- Updated description.
Update 02.01.23 - Version 2.72.0
- added possibility to work with tiff files.
Update 02.01.23 - Version 2.71.0
- Was change the logic for drawing the element.
Update 19.12.22 - Version 2.70.0
- "added page-break".
Update 21.11.22 - Version 2.69.0
- improved with new options "Allow Remove" and "Allow Process".
Update 17.11.22 - Version 2.68.0
- fixed the problem with validation of the event drag.
Update 31.10.22 - Version 2.67.0
- The error catcher was added.
Update 26.10.22 - Version 2.66.0
- Added option hover color.
Update 19.10.22 - Version 2.65.0
- Change the logic for type validation.
Update 19.09.22 - Version 2.64.0
- Adjusted common part.
Update 29.08.22 - Version 2.63.0
- updated common part.
Update 29.08.22 - Version 2.62.0
- files validation by extension.
Update 03.08.22 - Version 2.61.0
- updated links in the header.
Update 01.06.22 - Version 2.60.0
- fixed problem with all files.
Update 17.05.22 - Version 2.59.0
- added the progress on the element.
Update 13.05.22 - Version 2.58.0
- fixed problem with field 'attachment to'".
Update 08.04.22 - Version 2.57.0
- Progress for current file.
Update 01.04.22 - Version 2.56.0
- fixed issue for new responsive.
Update 09.03.22 - Version 2.55.0
- file size.
Update 05.03.22 - Version 2.54.0
- add new state "Progress for current file".
Update 16.02.22 - Version 2.53.0
- was added two new states.
Update 20.12.21 - Version 2.52.0
- improve "height and width states" for many files.
Update 15.12.21 - Version 2.51.0
- fixed bug with checkbox "Clear after uploading".
Update 15.09.21 - Version 2.50.0
- style update.
Update 03.09.21 - Version 2.49.0
- fixed the problem with key loading uploadcare.
Update 28.07.21 - Version 2.48.0
- Updated description.
Update 14.07.21 - Version 2.47.0
- Updated icon.
Update 19.06.21 - Version 2.46.0
- improve with new states.
Update 31.03.21 - Version 2.45.0
- The problem with height.
Update 24.03.21 - Version 2.44.0
- fixed action Start Upload.
Update 23.03.21 - Version 2.43.0
- fixed problem with state The 's Uploader Is Empty.
Update 21.03.21 - Version 2.42.0
- Plugin Upgrade.
Update 03.03.21 - Version 2.41.0
- Updated description.
Update 25.02.21 - Version 2.40.0
- fixed duplicate the Uploader text whenever two Uploader elements are in the same group and replacing text when uploading.
Update 09.02.21 - Version 2.39.0
- Updated icon.
Update 27.01.21 - Version 2.38.0
- Fixed the problem with 'Instant upload' feature.
Update 06.11.20 - Version 2.37.0
- Fixed image rotation bug on iOS.
Update 01.11.20 - Version 2.36.0
- Fixed upload for some raw filetypes.
Update 16.10.20 - Version 2.35.0
- "Fixed 'Uploader Is Empty' state in case of multiple inputs on the page. Removed extra elements from the page.
Update 25.09.20 - Version 2.34.0
- Fixed Camera Roll display when all file types are allowed.
Update 23.09.20 - Version 2.33.0
- Fixed Camera Roll problem for iOS 13.
Update 15.09.20 - Version 2.32.0
- Fixed 'Uploader Is Empty' state.
Update 10.09.20 - Version 2.31.0
- Fixed error for large files uploads to Azure, added 'support uploading large files' feature.
Update 12.08.20 - Version 2.30.0
- Fixed double 'all_files_uploaded' call with 'Start upload' action.
Update 12.08.20 - Version 2.29.0
- Fixed double 'all_files_uploaded' call with 'Start upload' action.
Update 12.08.20 - Version 2.28.0
- Fixed double 'all_files_uploaded' call with 'Start upload' action.
Update 06.08.20 - Version 2.27.0
- Added unique filenames for files uploaded to Azure.
Update 01.07.20 - Version 2.26.0
- Improved 'Clear after uploading' functionality. Fixed 'All files uploaded' state".
Update 18.06.20 - Version 2.25.0
- Fixed bug with 'All Files uploaded' state.
Update 15.06.20 - Version 2.24.0
- fixed bug with "All files uploaded" state.
Update 05.05.20 - Version 2.23.0
- fixed issue with "upload is Empty" state..
Update 23.04.20 - Version 2.22.0
- minor fixes.
Update 23.04.20 - Version 2.21.0
- minor fixes.
Update 22.04.20 - Version 2.20.0
- Fixed bug csv file validation..
Update 26.03.20 - Version 2.19.0
- added new function "Remove File on Azure " and refactoring code..
Update 20.02.20 - Version 2.18.0
- Bug Fixes and pause functionality deprecated.
Update 03.01.20 - Version 2.17.0
- Fixed a bug when uploading more than 1 file using upload from workflow.
Update 04.10.19 - Version 2.16.0
- Added percentage indicator for all servers. Added checkbox, Instant Upload.
Update 20.05.19 - Version 2.15.0
- minor improvements.
Update 17.05.19 - Version 2.14.0
- Minor Updates.
Update 14.05.19 - Version 2.13.0
- added new state that returns image height and width.
Update 12.05.19 - Version 2.12.0
- Fixed for using in reusable elements.
Update 10.05.19 - Version 2.11.0
- added plugin state and event: All files uploaded - Yes/No.
Update 07.05.19 - Version 2.10.0
- improvements.
Update 24.04.19 - Version 2.9.0
- minor improvements.
Update 25.03.19 - Version 2.8.0
- Updated description.
Update 25.03.19 - Version 2.7.0
- Updated description.
Update 13.03.19 - Version 2.6.0
- Added ability to add multiply types of accepted files, also added small documentation and examples for Accepted file types field.
Update 02.03.19 - Version 2.5.0
- Added new state, All files url, this is a list of urls to uploaded files. Added 2 new actions, start upload and remove files. In plugin settings added checkbox "Start upload from workflow", when it is checked upload will start only from workflow.
Update 24.02.19 - Version 2.4.0
- Fixed Max files triggering only once and changed files size to the actual final saved file size. .
Update 22.02.19 - Version 2.3.0
- added 2 states 1. Max files - Yes/No 2. File Size (in KB).
Update 17.02.19 - Version 2.2.0
- Transferred to Zeroqode.
Update 10.12.18 - Version 2.1.0
- Updated assets server.
Update 08.11.18 - Version 2.0.2
- Minor fixes (Allow Image Resize).
Update 07.11.18 - Version 2.0.1
- Minor bug fixes (Filetype validation + Image size).
Update 05.11.18 - Version 2.0.0
- BIG UPDATE!!! -- READ FORUM THREAD BEFORE UPDATING!!! THIS UPDATE CAN BREAK YOUR UPLOADERS!!!.
Update 03.10.18 - Version 1.1.3
- Bug fixes.
Update 29.08.18 - Version 1.1.2
- Fixes - Improved plugin..
Update 22.08.18 - Version 1.1.1
- Added option to clear uploader after success upload..
Update 22.08.18 - Version 1.1.0
- Important stability fixes -- Update to this version!.
Update 21.08.18 - Version 1.0.8
- Added attach_to option..
Update 21.08.18 - Version 1.0.7
- Minor fixes. Now works on groups/pop-ups..
Update 19.08.18 - Version 1.0.6
- Description changes and minor fixes..
Update 18.08.18 - Version 1.0.5
- Added Azure server.
Update 18.08.18 - Version 1.0.4
- Added Filestack server.
Update 17.08.18 - Version 1.0.3
- Added Image crop, resize and quality.
Update 17.08.18 - Version 1.0.2
- Updated descriptions.
Update 16.08.18 - Version 1.0.1
- Release.
Update 16.08.18 - Version 1.0.0
- Public release.