The Firebase Data Sync plugin provides a seamless solution for exporting and synchronizing data from your Bubble app across various applications. With features such as exporting Bubble data, syncing across different apps, offline persistent storage, and running data as JavaScript/jQuery, this plugin offers a robust toolkit for managing and utilizing your app's data effectively. Whether you need to integrate data with external platforms or ensure offline functionality, the Firebase Data Sync plugin streamlines the process with its powerful capabilities.
In Firebase, collections are containers for documents, and documents are individual records within those collections. A Firebase project can have multiple collections, each containing documents.
Collections are used to organize and query data in Firestore, which is Firebase's flexible, scalable database for mobile, web, and server development. Firestore collections can be thought of as similar to tables in a traditional relational database, but with some key differences. For example, Firestore collections don't require a predefined schema, and they can contain nested objects and arrays.
❗
The Firebase Data Sync plugin is compatible only with Firestore. To work with Realtime Database, please use the Firebase Realtime Database plugin.
Prerequisites
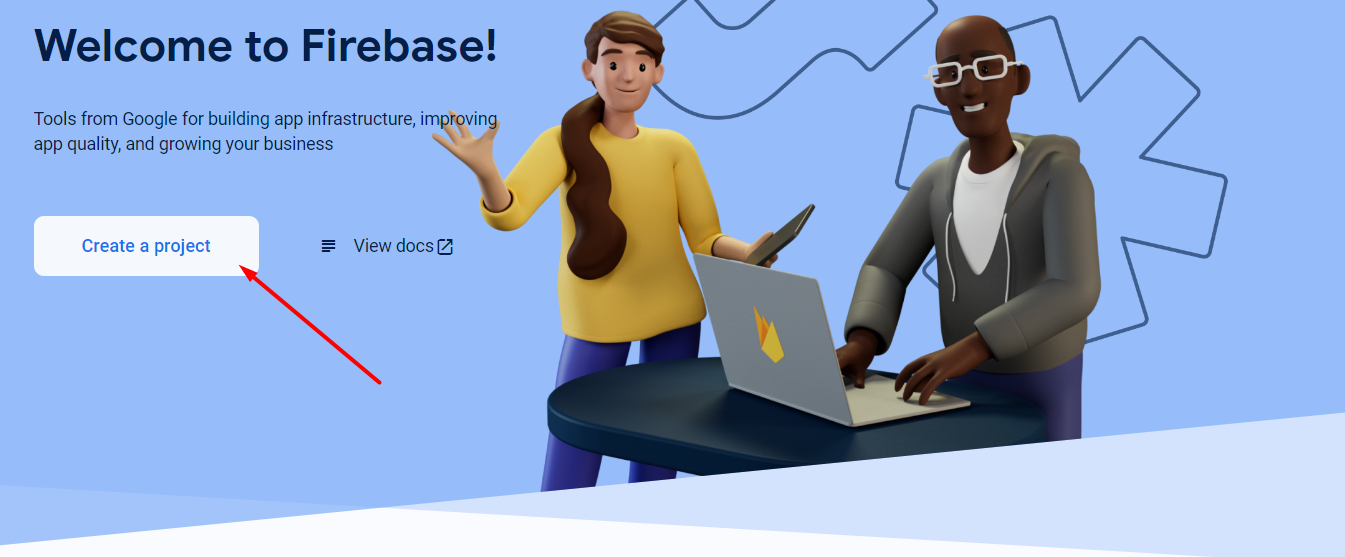
You must have an account with Firebase to interact with the Firebase. Create you development account at: https://firebase.google.com/
Follow the instructions and fill in all the necessary fields:
Or use the created one, if you have one.
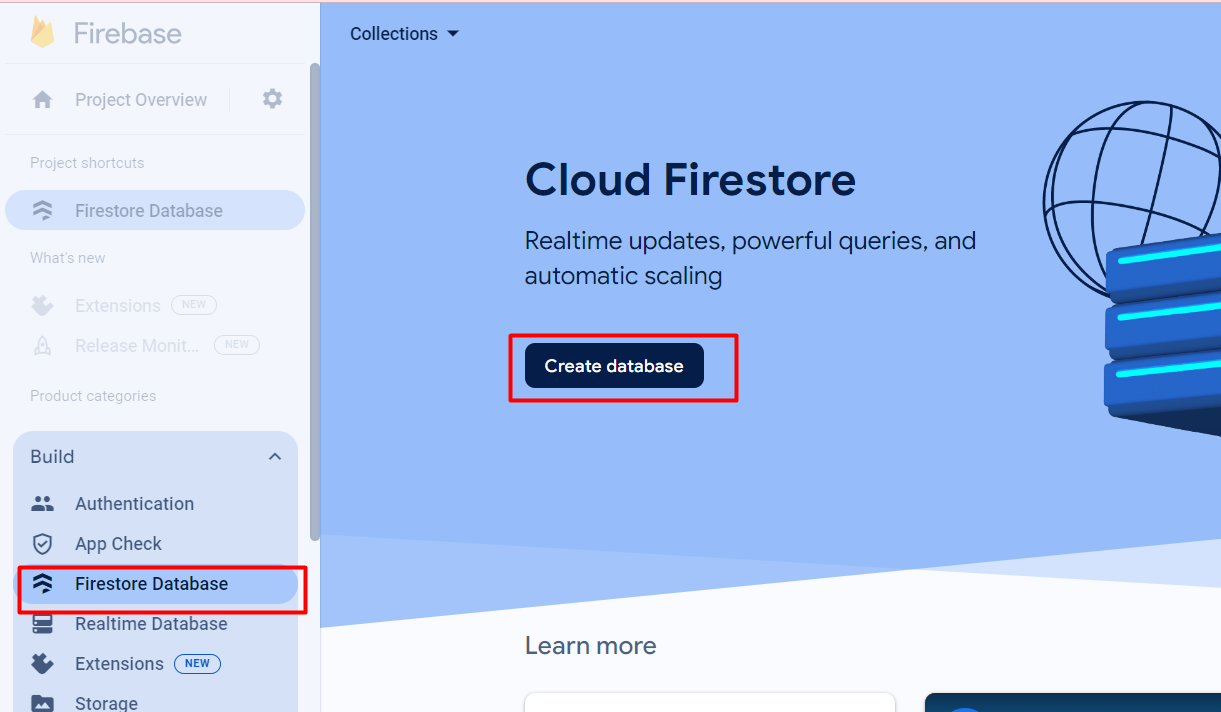
Create a Firestore Database.
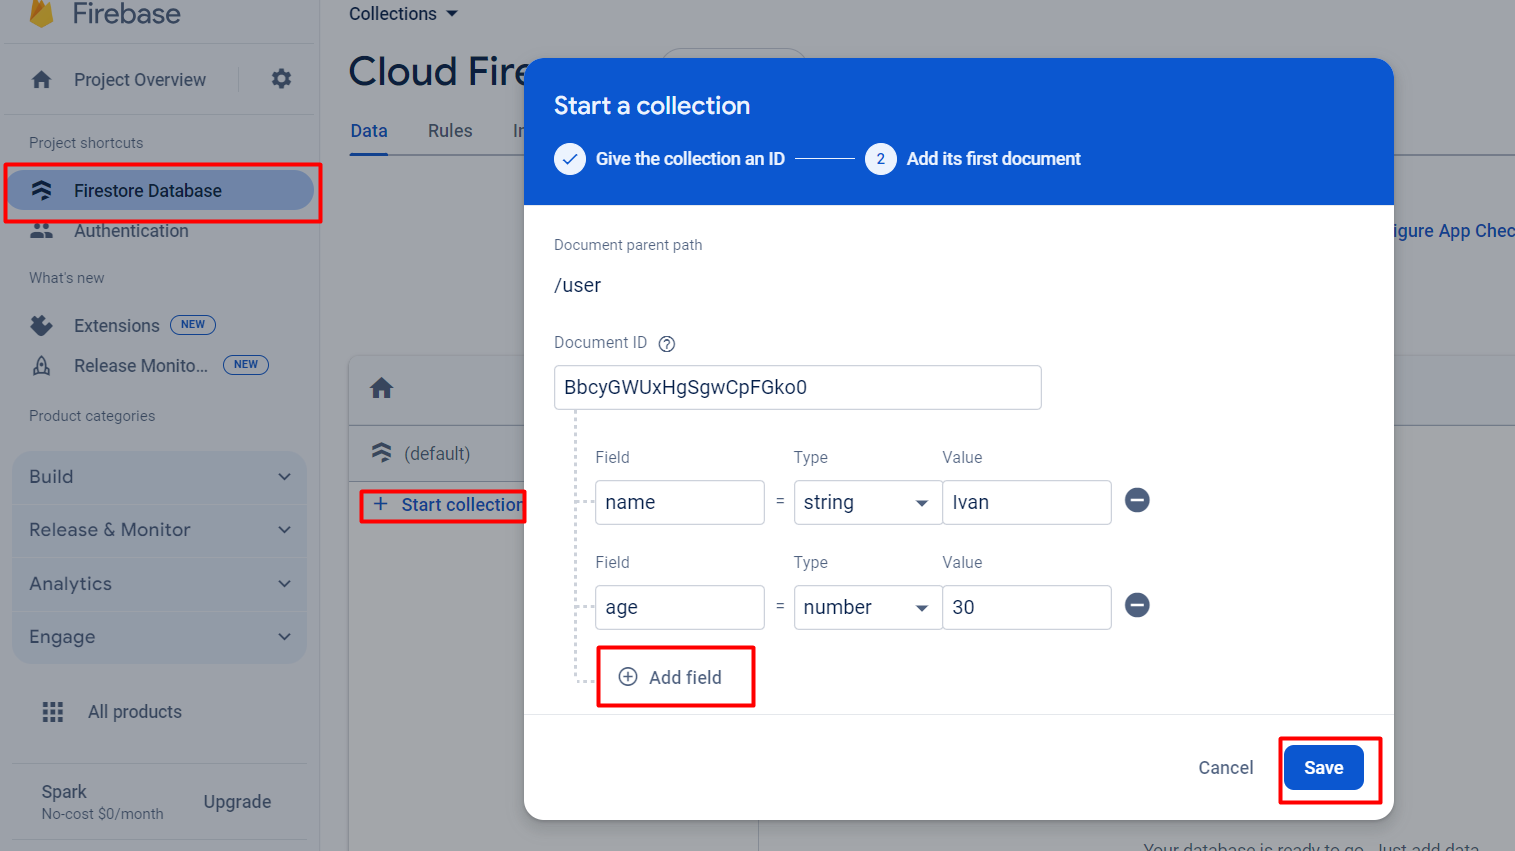
Create database collections you need for your app.
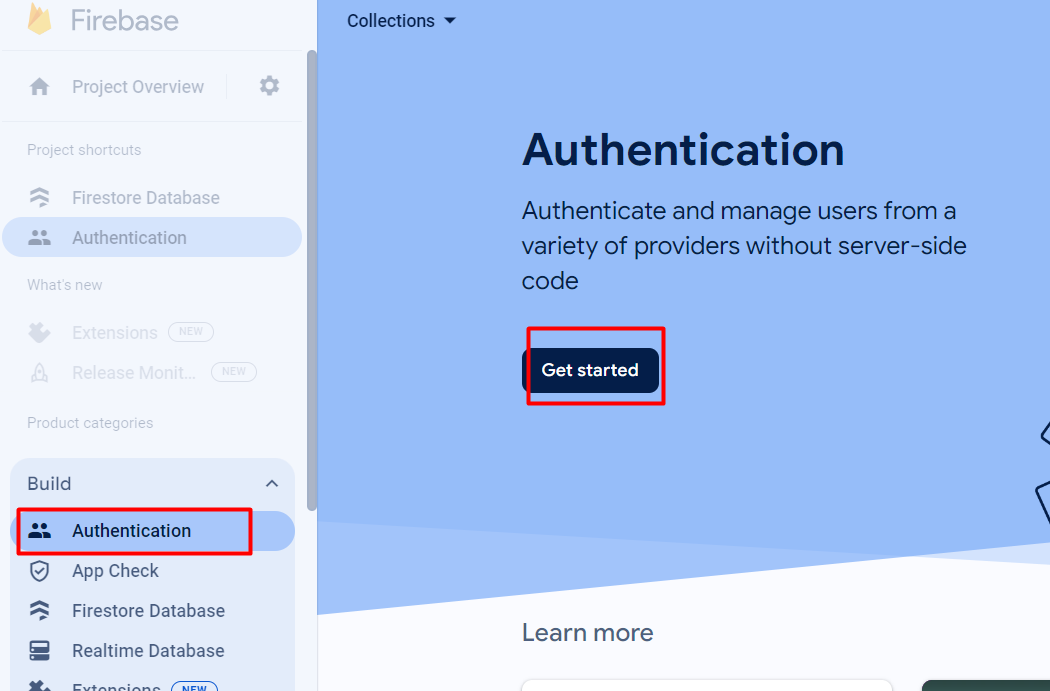
Configure Authentication
In your Firebase Console, choose your project, then navigate to 'Authentication'.
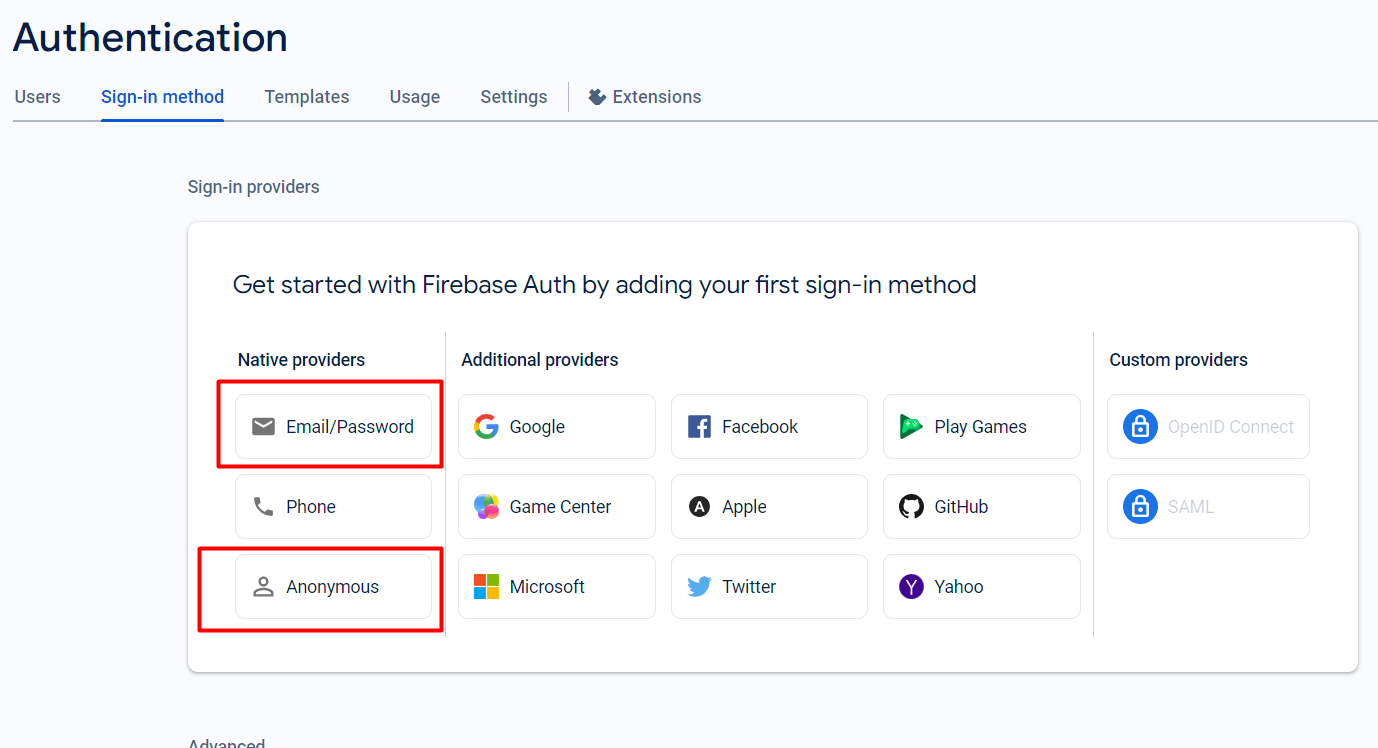
A good practice is to set up both authentication methods.
Set up Plugin Settings Fields
In the Firebase console open your app and go to project settings in the settings tab.
On the "General" tab, you will see all the necessary information for your plugin.
Copy the ”Web API Key” and paste it into the plugin settings “API KEY” field.
Copy the “Project ID” and paste it into the plugin settings corresponding field.
💡
If “Web API Key” is empty, just go to the “Authentication” section, click “get started”, configure Authentication and after that the key will be there.
☝
Note: Make sure you only copy the values without the quotes, for example this line,projectId: "my-firebase-project",
Would mean your ID is, my-firebase-project
For plugin settings field “Bubble Data API Key” generate it in your bubble app Settings tab.
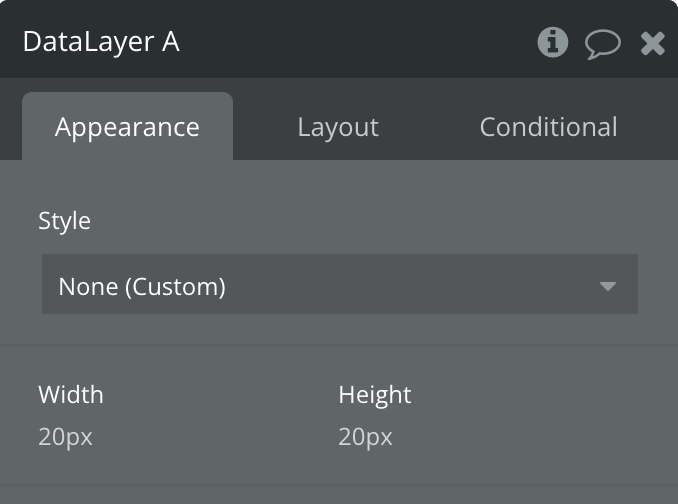
Paste plugin element “Data Layer” on your page and you are all done with setting up.
Once you have setup your Firebase Console & finished adding the required values into the plugin settings tab, your can place the 'Data Layer' element on each page its required on. Once this element is on a page you will then have access to its actions & states.
❗
Important: Ensure only ONE 'Data Layer' element is placed on each page.
If you have public data you wish to use in your Firebase Database, you should add a 'Initialize Data Layer' action in an 'On Page Load' event and define the Main Collection name(s).
❗
Note: If you want to initialize more than one Main Collection, you can separate them with a comma.
Example:Site_Assets,Public_Data,JS
❗
Note: You can use the 'Initialize Data Layer' as many times as you like. This should be done in cases such as a user has signed in or out using the plugin events as such. This is because you may initialize on page load a Main Collection called public_data because the user is not yet signed in then once the 'Signed In' event fires you can initialize public_data, user_data. You must include the public_data again because calling 'Initialize Data Layer' also clears the Data Layer so that any Main Collection that is not included is no longer part of the Data Layer to prevent data remaining that should no longer be available.
:::
❗
Note: The events for 'Signed In' & 'Signed Out' fire on page load so if a user is logged in and returns to your site then the relevant event will fire automatically. This is also true for other events such as 'Data Offline', 'Data Online' & 'Data Layer Updated'.
Now that the Data Layer is setup you can start making use of the other element action's to read, write & delete data & also export your bubble data or post the Data Layer JSON to your apps workflow API.
The 'Export Bubble Data' action comes in two parts, first you need to run the 'Export Bubble Data (1)' action followed by the 'Export Bubble Data (2)' action. To use the export actions you need to enable your apps Data API (GET), check all 'things' you want to export & generate an API key. The API Key is required in the plugin's settings in the field Bubble Data API Key.
Exporting is as simple as defining your Data API's URL for the thing your exporting, then using the resulting JSON in the 'Export Bubble Data (2)' action.
The resulting data in your Firebase Database will be structured as follows:
user (Main Collection) / unique_id (List of Thing's ID's) / this_users_data (JSON Data of this Thing)
Plugin element - Data Layer
Exposed States
Title
Description
Type
String Output
The data retrieved from the Firestore collection, but it's represented as a JSON string or just string. This allows for easy handling and display of the retrieved data within the Bubble application.
Returned from “Get Data” action.
Text
Logged In
Is the user logged into firebase.
Yes/No
Number Output
The data retrieved from the Firestore collection when it is of number type.
Returned from “Get Data” action.
Number
Boolean Output
The data retrieved from the Firestore collection when it is of boolean type(yes/no).
Returned from “Get Data” action.
Yes/No
Display Name
User's display name retrieved from Firebase authentication.
Text
Email
User's email address retrieved from Firebase authentication.
Text
Email Verified
State indicating whether the user's email address has been verified. This information is retrieved from Firebase authentication.
Yes/No
Photo URL
User's profile photo URL retrieved from Firebase authentication.
Text
Is Anonymous
State indicating whether the user is authenticated anonymously. This information is retrieved from Firebase authentication.
Yes/No
User UID
State of the user's unique identifier (UID) retrieved from Firebase authentication.
Text
Provider Data (JSON)
Refers to details about the authentication provider used by the user to sign in. Firebase supports various authentication providers such as Google, Facebook, Twitter, and email/password authentication.
Text
Data Offline
Reflects whether the Firebase data source is currently operating in an online or offline mode.
Yes/No
Search Results id
Document IDs where the search term was found.
Returned from “Search Data Layer” action.
Text List
Type of returned data
Represents the type of data retrieved from Firebase Firestore.
Text
Search Results field
Contains the names of the fields within the documents where the search term was found.
Returned from “Search Data Layer” action.
Text List
Search Results value
Stores the corresponding values of the fields where the search term was found.
Returned from “Search Data Layer” action.
Text List
Element Events
Title
Description
Data Layer Updated
Triggers when Firebase collections have been updated.
Signed out
Triggered when the user signed out.
Signed In
Triggered when the user signed in.
Data Offline
Event triggered when the Firebase data has transitioned to an offline state, meaning that it is currently disconnected from the server or experiencing network connectivity issues.
Data Online
Event is triggered in response to a server-side update of Firebase collections, indicating that the application is now connected and receiving updates from the server.
Data Deleted
Event is triggered when a document within a Firebase collection is deleted.
Search Finished
Search action has finished.
Login failure
Event triggered when login fails
Returned data is string
Event triggered when type of returned data is string
Return data is number
Event triggered when type of returned data is number
Return data is boolean
Event triggered when type of returned data is boolean
☝
Note: The 'Data Layer Updated' event is fired each time the Data Layer changes, this includes if another app was to update the Firebase database as any changes to the Firebase database will trigger this event while online. If the app is offline the event will fire when the app connects again.
Element Actions
Plugin Server Side Actions
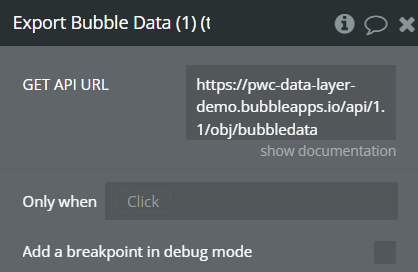
Export Bubble Data (1)
This action fetches data from bubble database and returns it in a structured format.(for a better understanding check the Set Up section).
Fields:
Title
Description
Type
GET API URL
This property represents the URL from which data will be fetched. (explained better in Set Up section)
Text
Returned Value:
Title
Description
Type
json
This property represents the JSON object returned by the action. It includes an ID extracted from the URL and data retrieved from the response, both serialized into a JSON string.
Text
Workflow example
Here's a basic workflow example to get started with the Firebase Data Sync plugin:
Setup Initial Connection:
Add a Data Layer element to your page.
Use the "Initialize Data Layer" action on page load with your main collection names (e.g., "users,posts,settings").
User Authentication:
Create a login form with email and password fields.
Connect the login button to the "Log User In" action.
Handle successful login with the "Signed In" event.
Display user information using the exposed states.
Data Retrieval:
Once authenticated, use "Get Data" to retrieve specific information.
Display the retrieved data in your app using states like "String Output" or "Number Output".
Data Writing:
Create a form to collect user input.
Connect the form submission to the "Write Data" action.
Use the "Data Layer Updated" event to provide feedback.
Working Offline:
Implement "Make Data Offline" functionality for offline usage.
When connection is restored, use "Make Data Online" to sync.
Changelogs
Update 04.05.26 - Version 1.10.0
Bug fixes & stability improvements.
Update 03.07.25 - Version 1.9.0
Updated "Get Data" action to prevent trigger "Data Layer Updated" event when a collection is initialized.