Demo to preview the plugin:
Introduction
Bring the power of Twilio API for WhatsApp to your Bubble application with this no-code plugin by Zeroqode. It enables you to seamlessly send and receive WhatsApp messages globally.
With this plugin, you can build applications for alerts and notifications, customer support, user verification, and much more.

Prerequisites
You must have an account with Twilio to interact with the API. Create your development account at: https://console.twilio.com/
To start using the Twilio API for WhatsApp in production, you need to create a WhatsApp sender https://www.twilio.com/docs/whatsapp/self-sign-up
Pricing details can be seen here: https://www.twilio.com/en-us/whatsapp/pricing
Twilio Sandbox for Whatsapp
Twilio Sandbox for WhatsApp allows you to prototype with WhatsApp immediately, without waiting for your Twilio number to be approved for WhatsApp. It is pre-provisioned with a Twilio phone number that is shared across all sandbox users.
You can pick from a list of sandbox numbers to use when you activate the sandbox via the WhatsApp console here.
Note: You can use the Twilio sandbox during the development period until your number is approved for Whatsapp. You can find more details on setup here.
Installation Setup
- Install plugin Twilio for Whatsapp

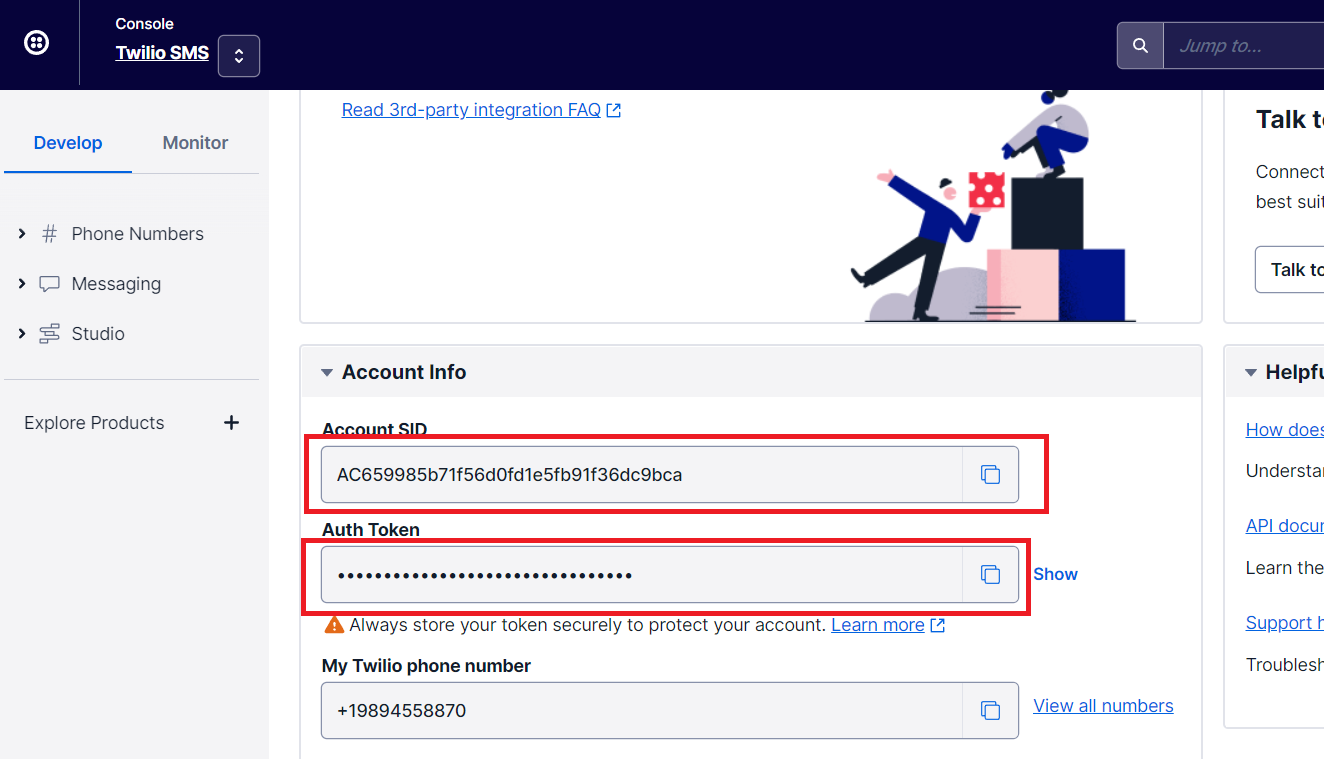
2. Enter your private key into the username and password fields in plugin settings.

3. After you've installed and set the plugin, create Webhook API for the plugin to receive messages to your application and status callback.
Don't forget to save them in the database so that they can be displayed in your application.
You can create API workflows/endpoints after checking the box 'This app exposes a Workflow API' in the API section in the Settings Tab.
These workflows are defined in the API Workflow page found in the Application Menu above the Palette. More info regarding the API: https://bubble.io/reference#API
3.1 Create an API Workflow:

3.2 From settings set option “Parameter definition” to “Detect request data”. Make sure that all three checkboxes are checked off: Expose as a public API workflow, This workflow can be run without authentication, Ignore privacy rules when running the workflow.
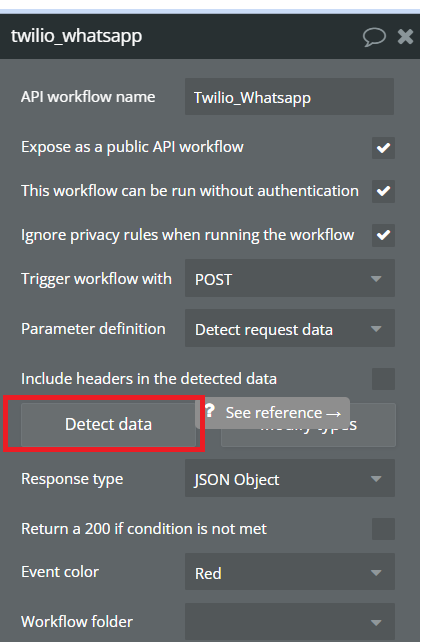
3.3 Press the “Detect data” button.
3.4 When the “Detecting Request Data” window pops up, copy the link provided by Bubble, and go to Twilio Dashboard.

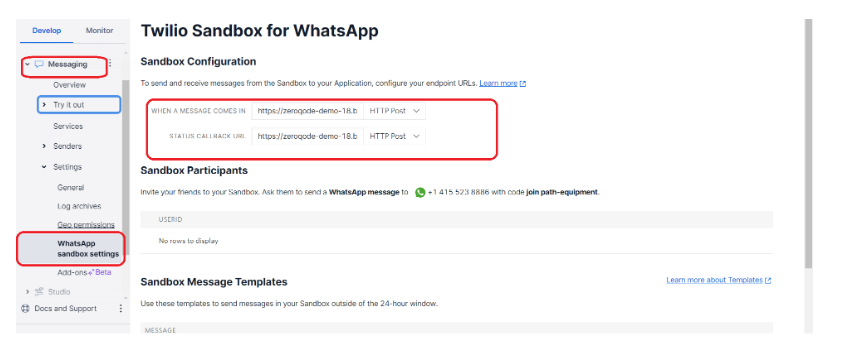
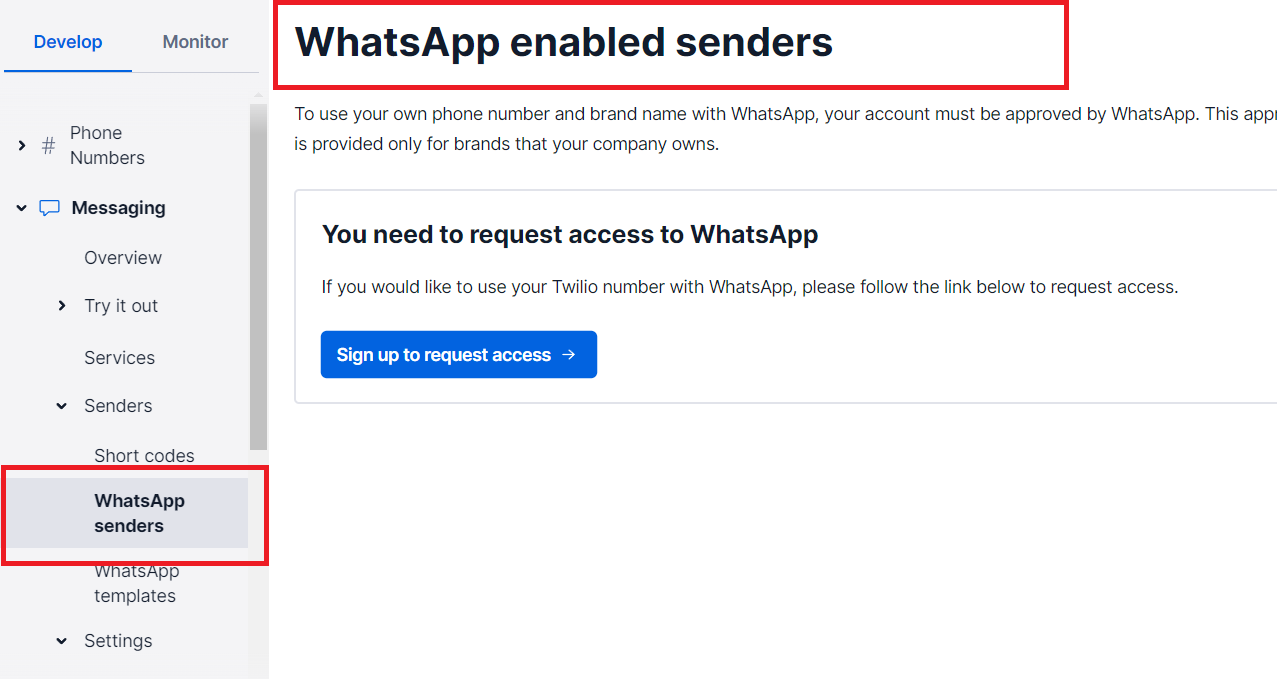
3.5 In Dashboard Twilio go to Messaging > Try it out > WhatsApp sandbox settings. Enter the links that lead to your endpoint in Bubble.
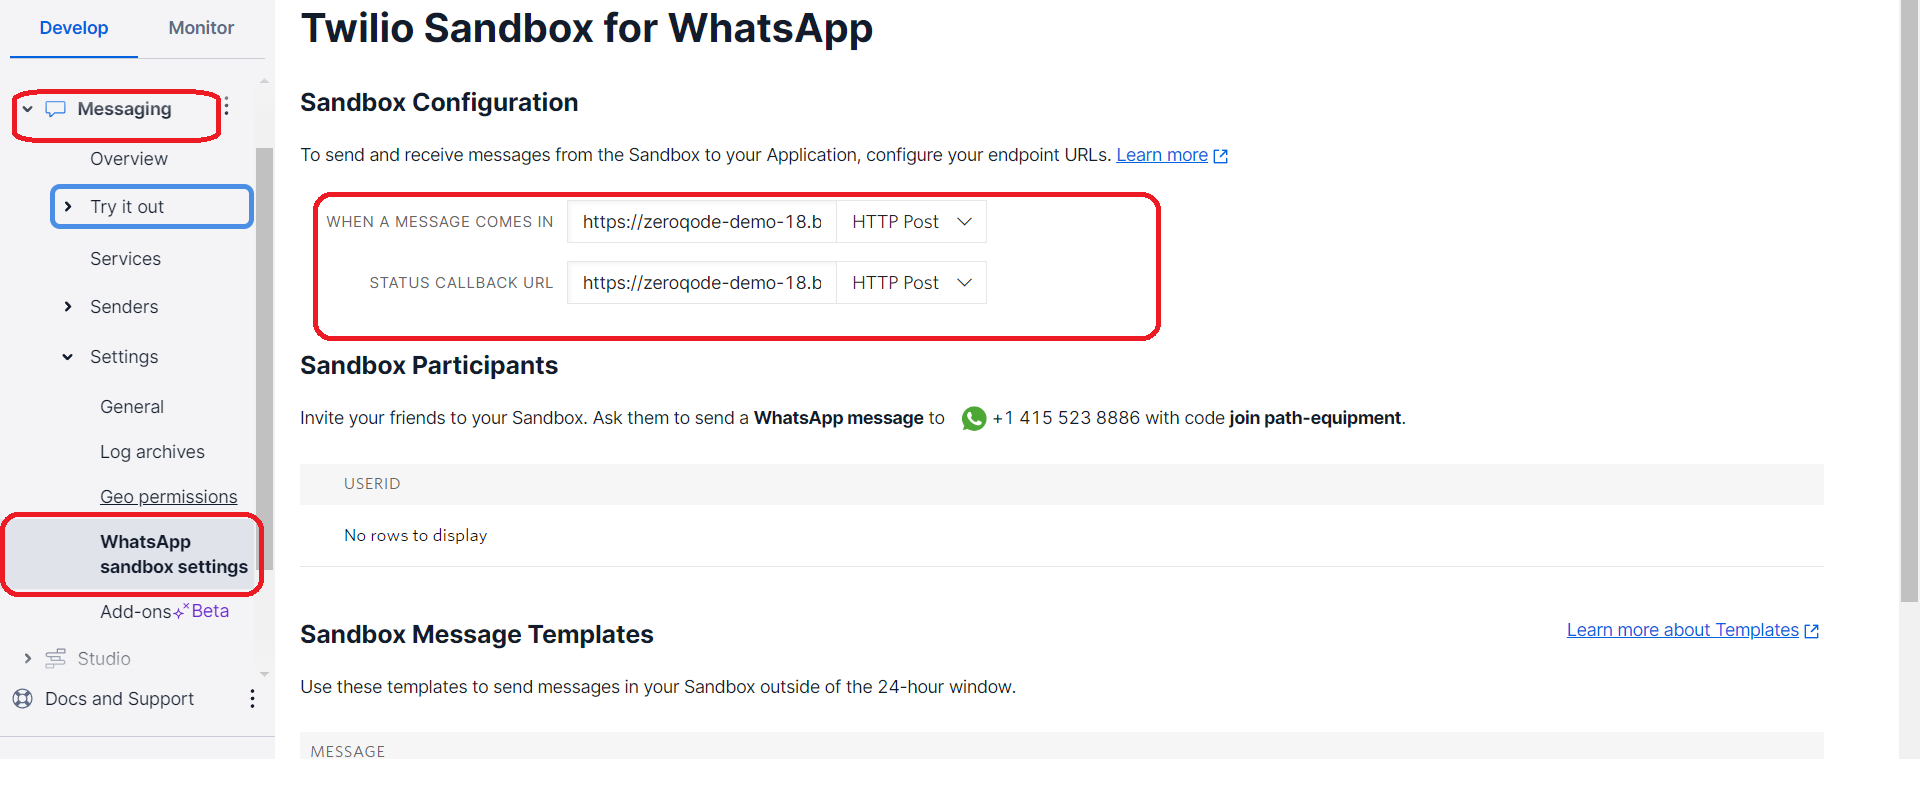
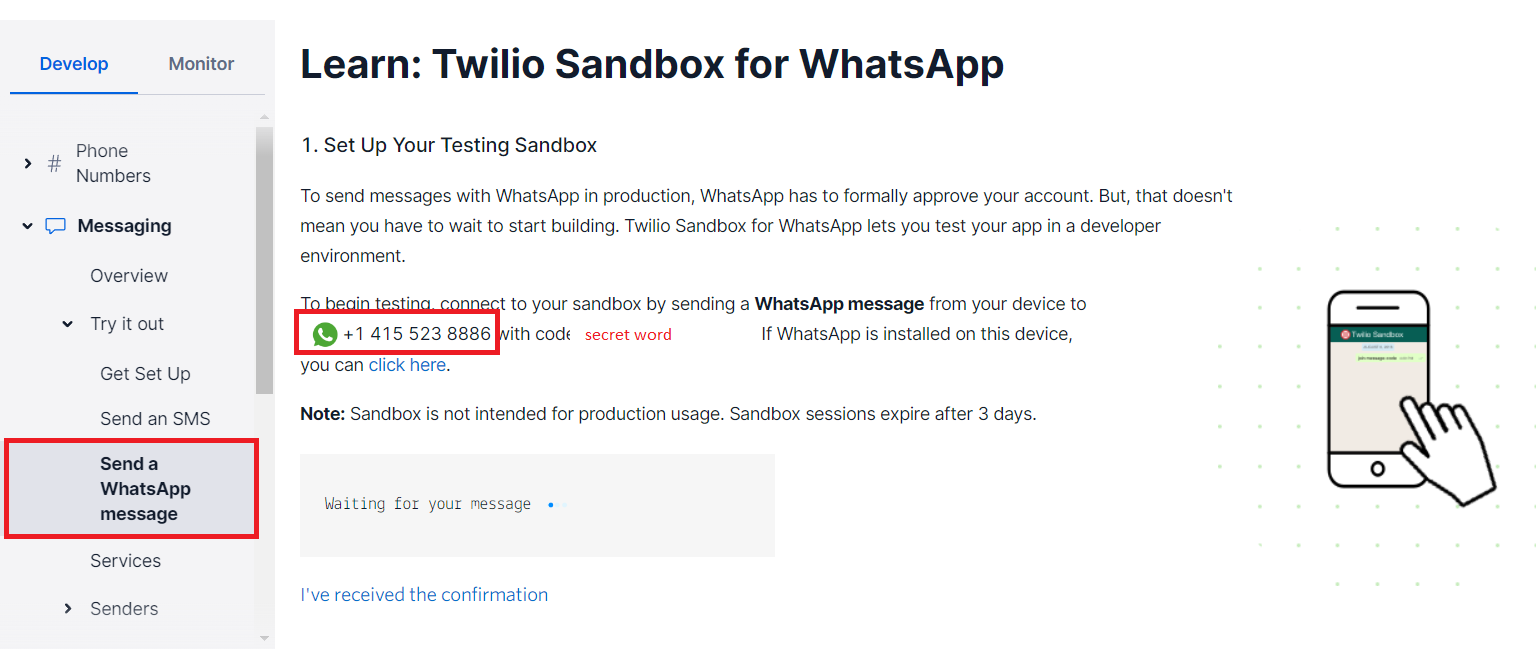
3.6 Go to Twilio Sandbox for WhatsApp. To begin testing connect to your sandbox by sending a WhatsApp message from your device to the sandbox number. Send the secret word from WhatsApp to the sandbox number you found on this page. Further, you will have to follow 4 steps.
3.7 After you have finished all 5 steps, go back to page "Twilio Sandbox for WhatsApp" and delete the word “initialize” from the endpoint link, save and go to your bubble backend, where your endpoint was initialized.


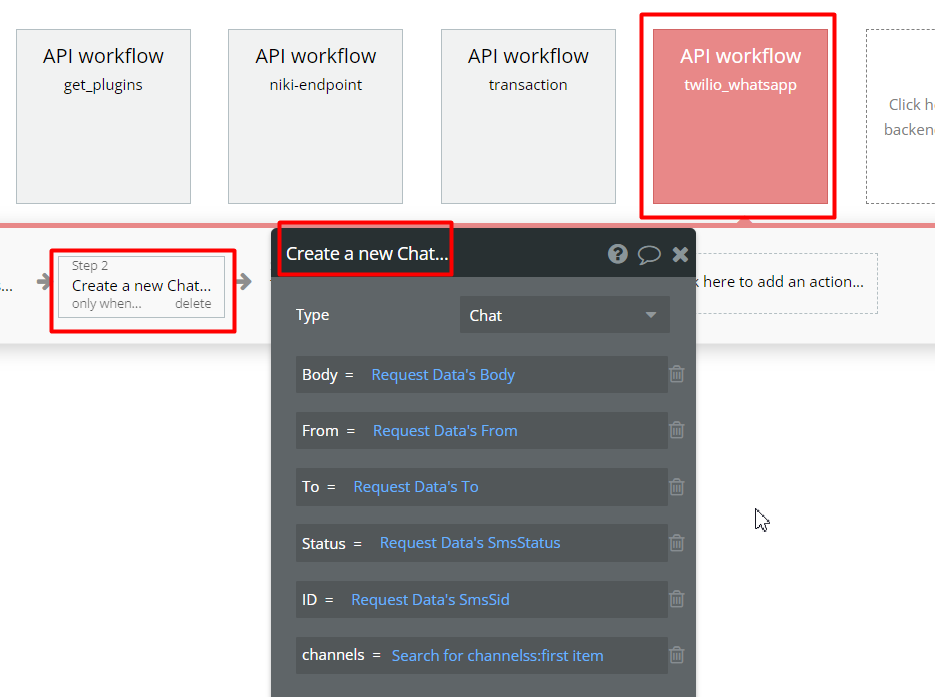
In order to save the response to the database, you need to extract the data from either the ”Request Data’s body” or “Request Data’s”.
In this case, add the action “Create a new thing” in the backend workflow.
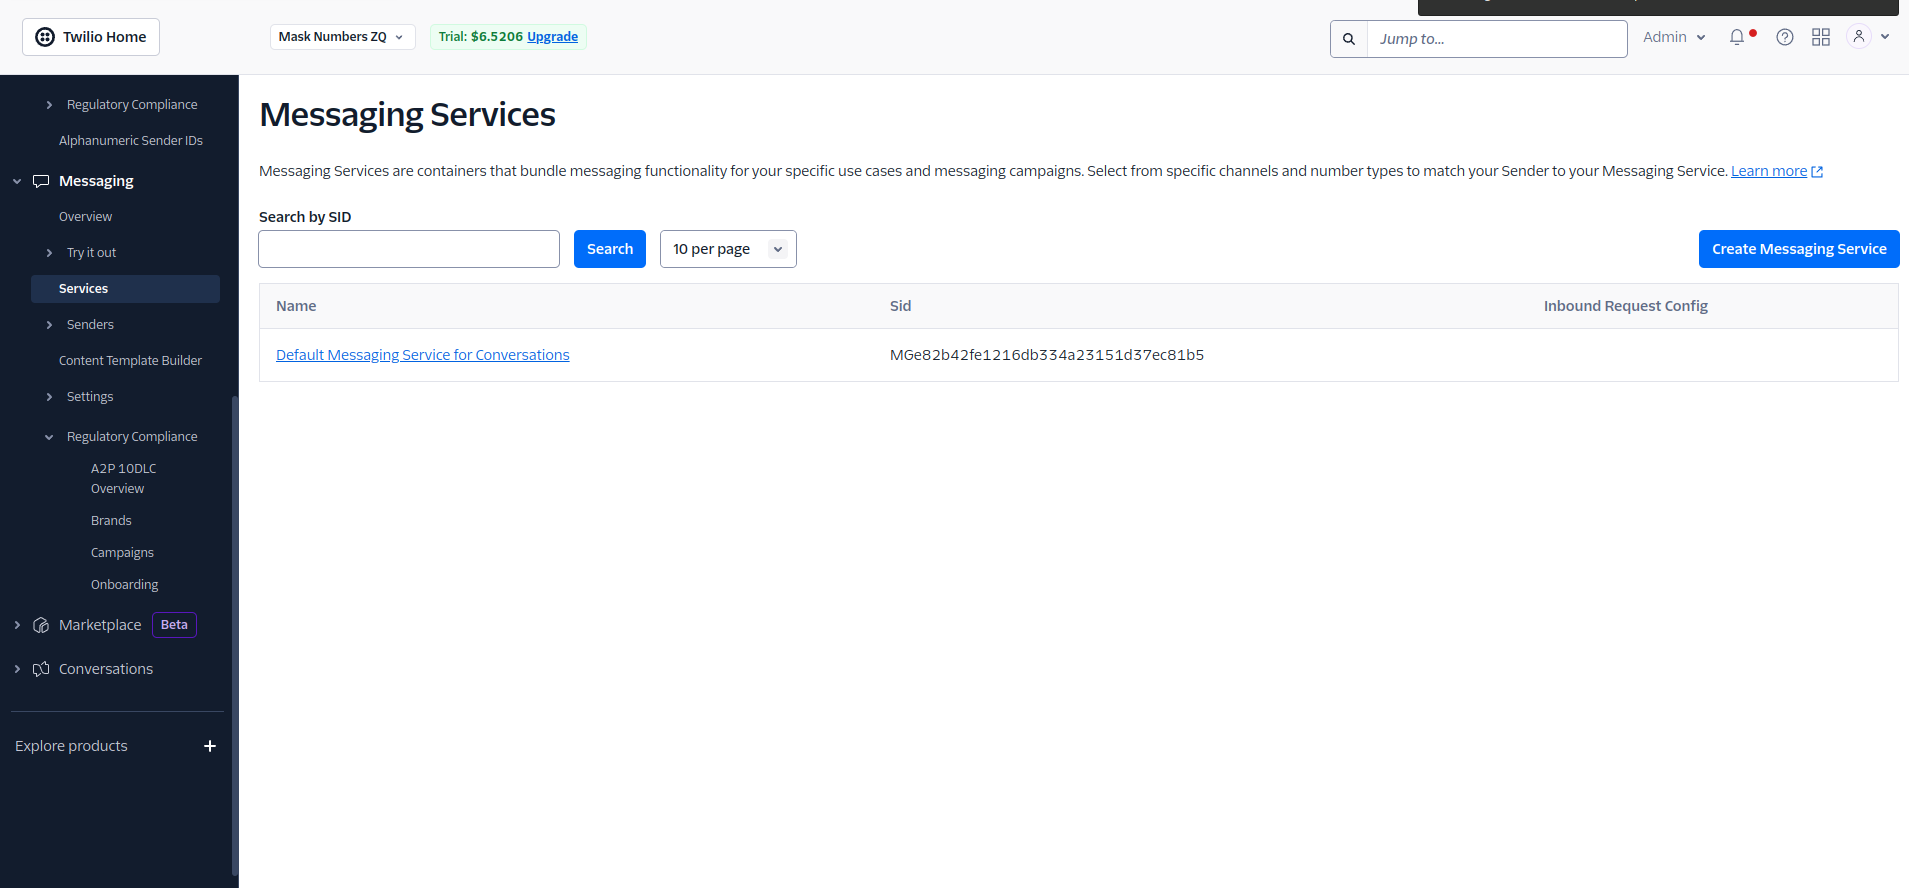
In case you want to send a message with template you will need to create a messaging service https://console.twilio.com/us1/develop/sms/services
and create a template using the Template Builder and send it for WhattsApp approval here https://console.twilio.com/us1/develop/sms/content-template-builder. More information can be found here https://www.twilio.com/docs/content/overview.
Plugin Actions
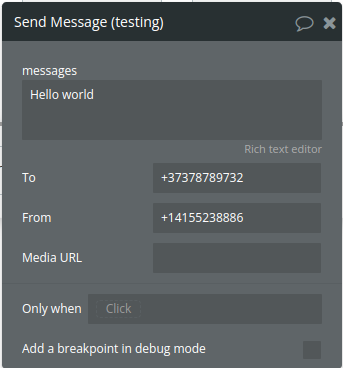
- Send Message - If you have a Twilio-approved WhatsApp sender, you can send WhatsApp messages by creating a new Message resource. (WhatsApp session limitations apply.)
Title | Description | Type |
Messages | Message content | Text |
To | A WhatsApp recipient address | Text |
From | Your approved WhatsApp sender address | Text |
Media URL | Media content of the message | Text (optional) |
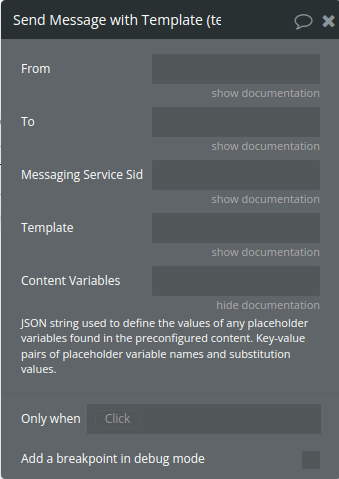
- Send Message with Template - To send messages from templates created using the Content Template Builder you will need to first configure a Messaging Service and create your content template.
Title | Description | Type |
Messaging Service Sid | The Messaging Service Sid, MGXXXXXXXX. | Text |
To | The identifier of the recipient you are sending the message to. Use e.164 format for phone numbers, | Text |
Template | String field used to identify the preconfigured content. Required to send templates created using the Content Template Builder. | Text |
Content Variables | JSON string used to define the values of any placeholder variables found in the preconfigured content. Key-value pairs of placeholder variable names and substitution values. Example: { “1”: "Name", “2": “Amount” } | Text (optional) |
From | The sender that is initiating the message. Use e.164 format for phone numbers | Text |
Migrating to a real number
- Once you are familiar with WhatsApp and Twilio's APIs, then you should continue by registering a phone number on WhatsApp, which Twilio calls a WhatsApp Sender. This will allow you to send and receive WhatsApp messages with your own branded profile and without having to use a "join" code every 72 hours. more information can be found here - https://www.twilio.com/docs/whatsapp/getting-started.
- Once you have an approved Whatsapp sender, you can enter the bubble endpoint URL without “initialize” in the Webhook URL for incoming messages.
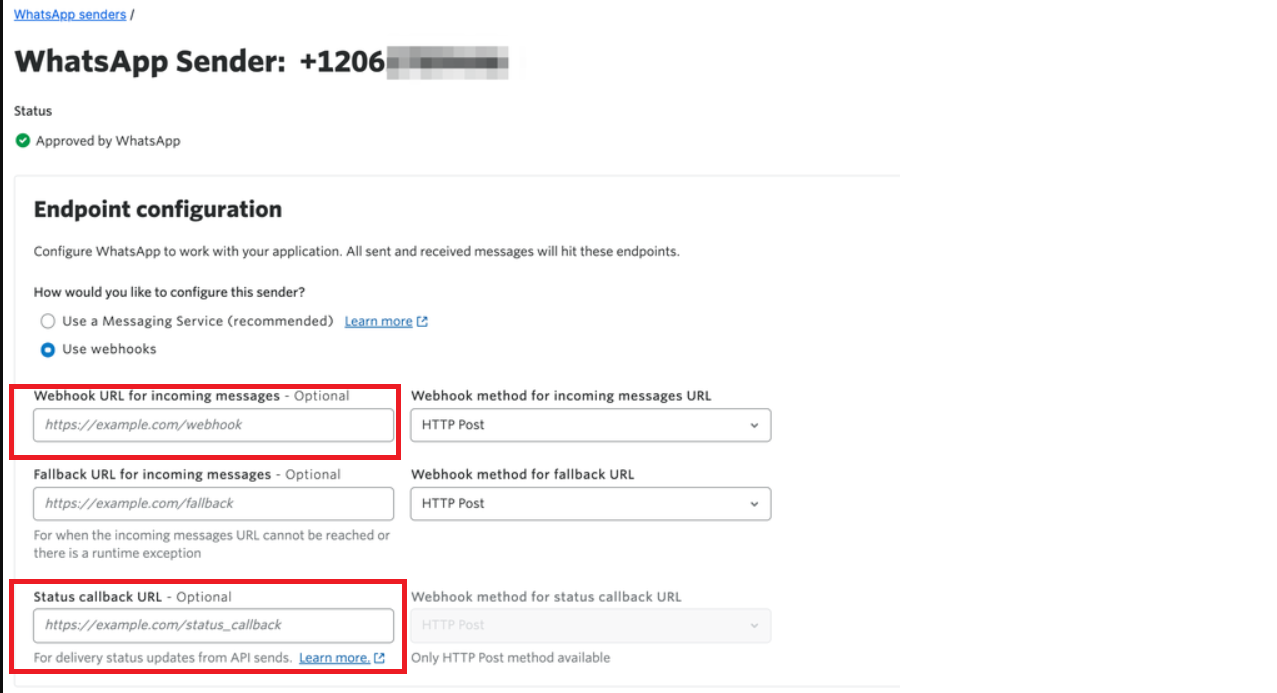
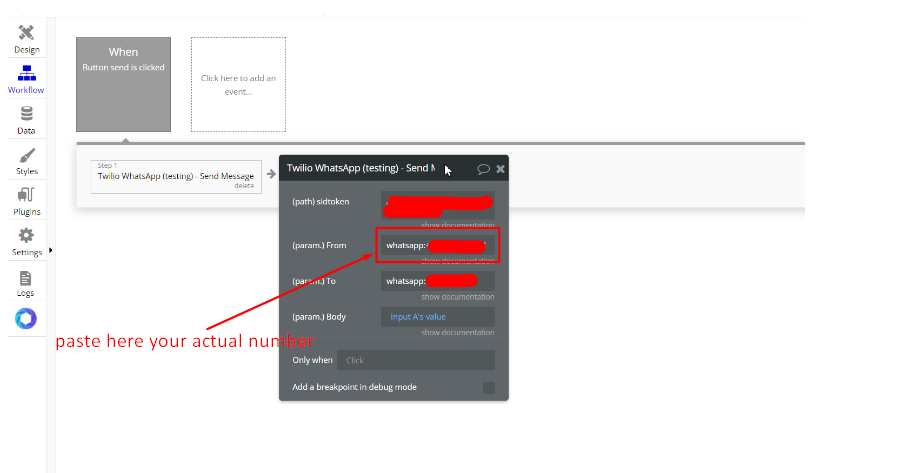
- Replace the sandbox number from the bubble workflow with your real number.
In order to be able to send messages, it is necessary for your user to give his consent, for this it is necessary for the user to send a message to your WhatsApp number.
Now the user will be able to receive messages for 24 hours.
We recommend you use message templates
Messages that initiate a conversation with a contact need to be sent in the form of a Message Template. Use WhatsApp Message Templates to initiate promotional and notification campaigns. Send proactive messages via Flows, LiveChat, and Broadcasts.
What's a Message Template
WhatsApp message templates are specific message formats that businesses use to reach contacts:
- You want to engage in communication outside the 24-hour messaging window.
- Who shared their phone number but never communicated previously with your business account via WhatsApp.
In both cases, make sure the contact gives their prior consent to receive your message in compliance with WhatsApp Business Policy.
Before sending a message, WhatsApp must first approve your Message Template, which can take several minutes. After your submission is approved, you can send messages with no limitations.
Message Templates categories include but are not limited to auto-replies, appointment reminders, shipping information, issue resolution, account and payment updates, etc. Read Creating Message Templates below for a complete list of categories.
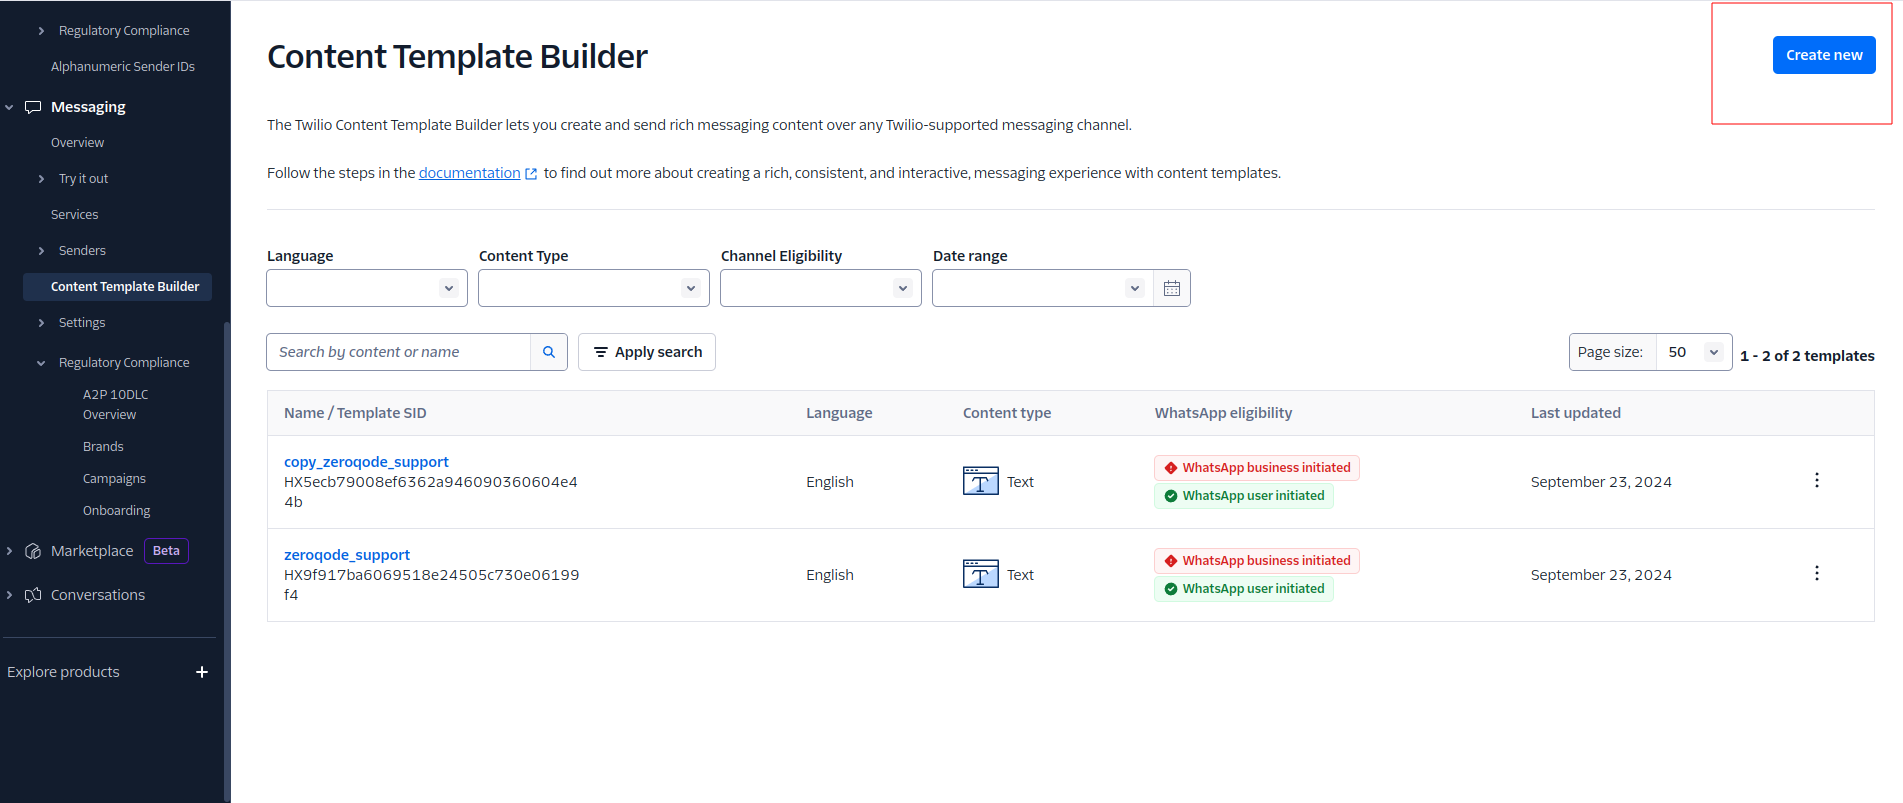
Creating a message template
To create a template, go to https://console.twilio.com/us1/develop/sms/content-template-builder Click on Create new:
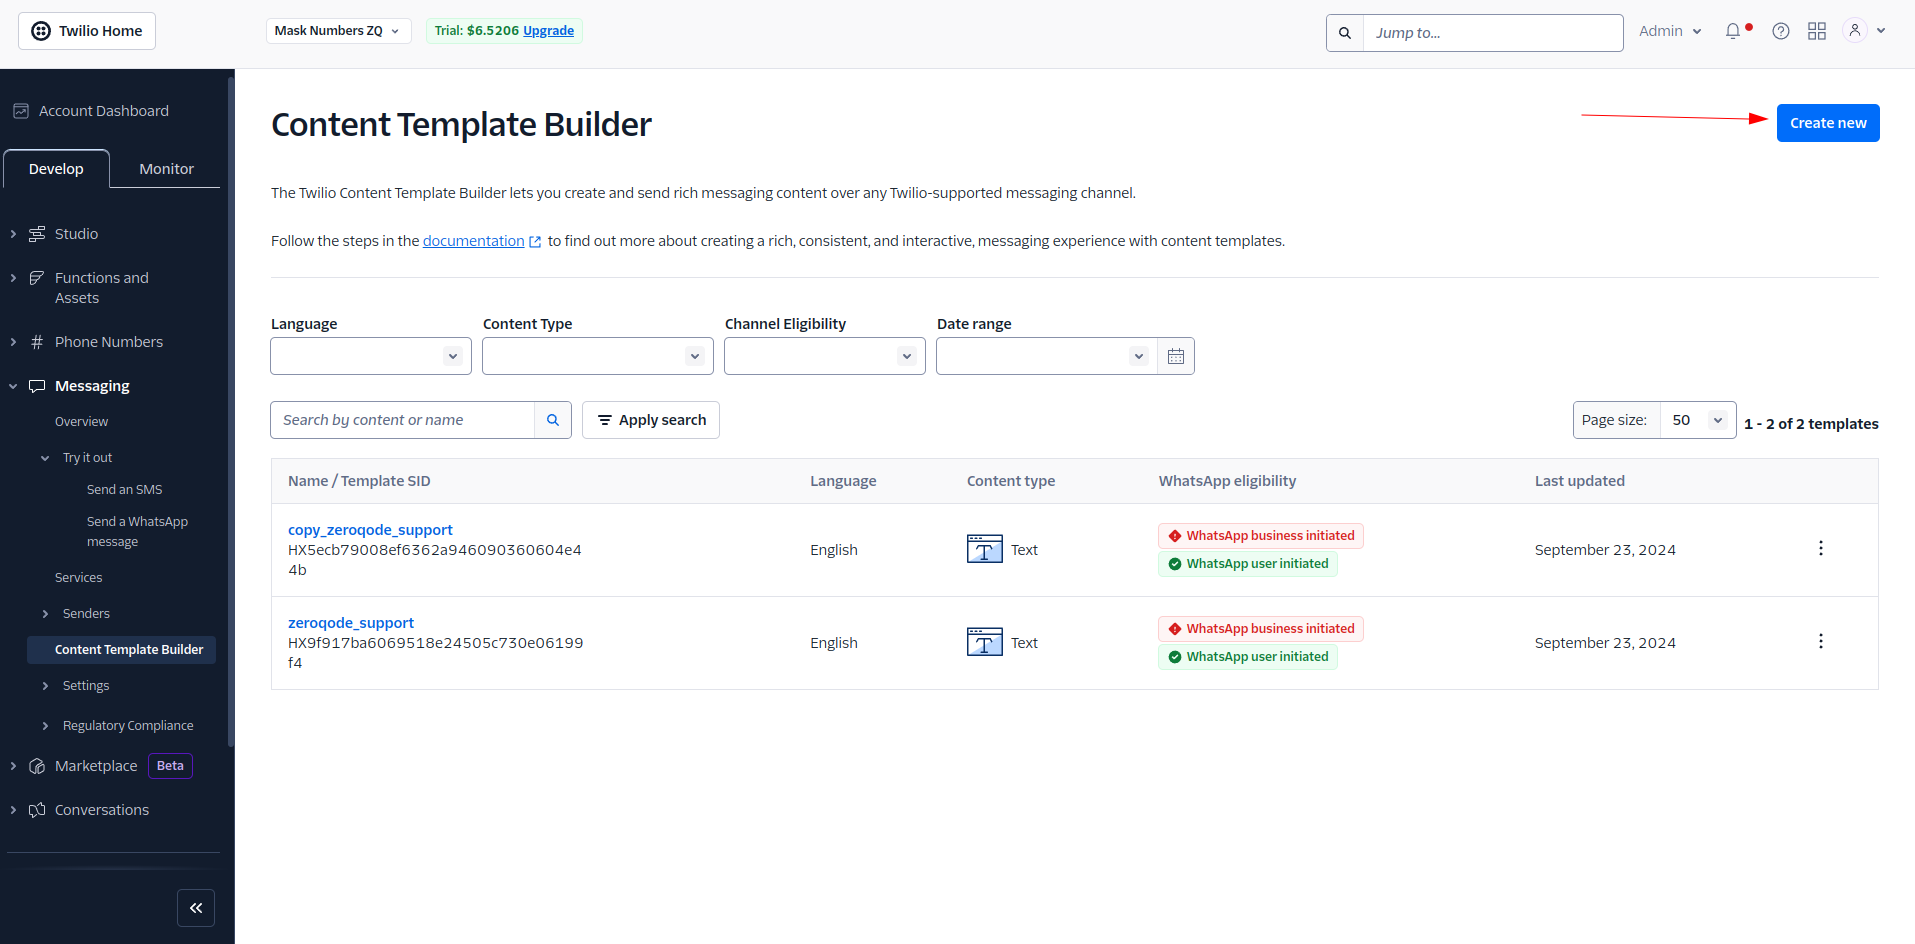
Follow the instructions and submit the template for WhatsApp approval.
All templates must be approved by WhatsApp before you can use them for messaging users.
Message template approval criteria
Please refer to this documentation page - https://www.twilio.com/docs/whatsapp/tutorial/message-template-approvals-statuses