Link to plugin page: https://zeroqode.com/plugin/qr--bar-code-reader-1530097456687x249120198975291400
Demo to preview the settings
Introduction
This plugin enables smooth and seamless QR and Bar code reading functionality in your Bubble app.
For better quality scanning, please make sure there is sufficient lighting in the room and QR/Barcodes are of good quality.

How to setup
Place the required elements on the page and fill in the fields. You can find a more detailed configuration on the plugin demo page.
Plugin Elements Properties
This plugin has 3 visual elements which can be used on the page: GenerateQR, Barcode/QR Live Scanner, and Barcode/QR Image Scanner.
GenerateQR
This is element is used to generate a QR-formatted image from inputted values. The width and height of the generated QR can be customized in action.
Element Actions
- Generate QR code - This action is used to generate a QR Code.
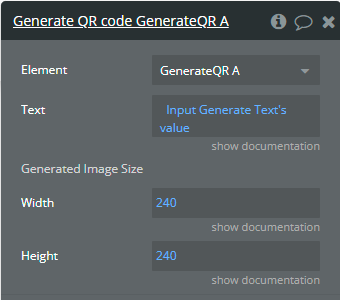
Fields:
Title | Description | Type |
Text | This is the value that you want to encode. | string |
Width | The value that represents the output width, in pixels, of the QR code image. | number |
Height | The value that represents the output height, in pixels, of the QR code image. | number |
Element States
Title | Description | Type |
Generated Image | The generated QR code is in base64 format. | string |
Barcode/QR Live Scanner
This is element is used to live scan Barcode by the camera. This element decodes 1D and 2D barcodes. It detects automatically the code and format of this.
Available format:
- Aztec
- Codabar
- Code 39
- Code 93
- Code 128
- Data Matrix
- EAN-8
- EAN-13
- ITF
- PDF 417
- QR Code
- UPC-A
Ensure sufficient lighting in the room and QR/Barcodes are of good quality.
Element Actions
- Start Scanning - This action will start the live scanning.
- Stop Scanning - This action will stop the live scanning.
- Set Camera - This action is used to change the camera which is used for scanning.
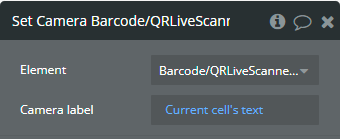
Fields:
Title | Description | Type |
Camera label | The camera label which you want to use for live scanning. Every camera device has an individual label. A list of camera labels is provided with element. See the Workflow Examples below. | string |
Element States
Title | Description | Type |
List of cameras | Every camera device has an individual label. This returns all available camera labels for scanning. You can use one of these in the Set Camera action. | list of string |
BarCode Result | This represents the value that was encoded in the barcode. | string |
BarCode Type | This represents the type of barcode. | string |
Barcode/QR Image Scanner
This is element is used to scan barcodes from images. This element decodes 1D and 2D barcodes. It detects automatically the encoded code.
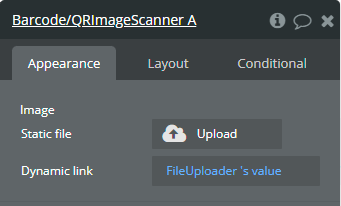
Use just the “.png”, “.jpeg”, “.jpg”, “.jpe”, “.jif” or “.jfif” file format for decoding when using this element.
Element Fields
Title | Description | Type |
Image | The image that should be scanned. This can be updated or inserted as a link. | file |
Element States
Title | Description | Type |
BarCode Result | This represents the value that was encoded in the barcode. | string |
Workflow example
Using GenerateQR
This workflow example represents how the GenerateQR element is used and its actions.
- On the page, it is placed the GenerateQR element. This element has no fields for completing.
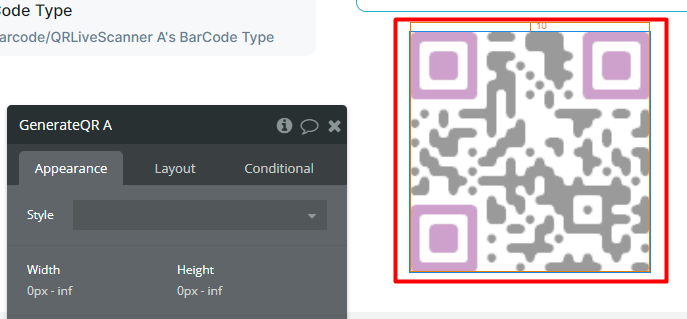
The element size is important because there will be displayed the QR code. the element size should be the same as the values in the actions, otherwise, the QR will be cropped.
- Also, on the page, it is placed the Input and Button elements. The Input element is used for the message that will be encoded. The Button element is used to start the GenerateQR element action, Generate QR code.
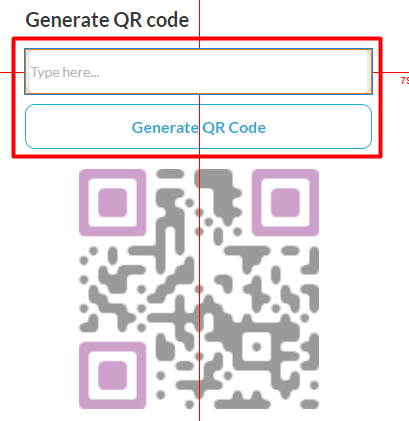
- In the workflow, when the Generate QR Code button is clicked then is called the Generate QR code action. After execution of this action, the Generated Image state will be available to use.
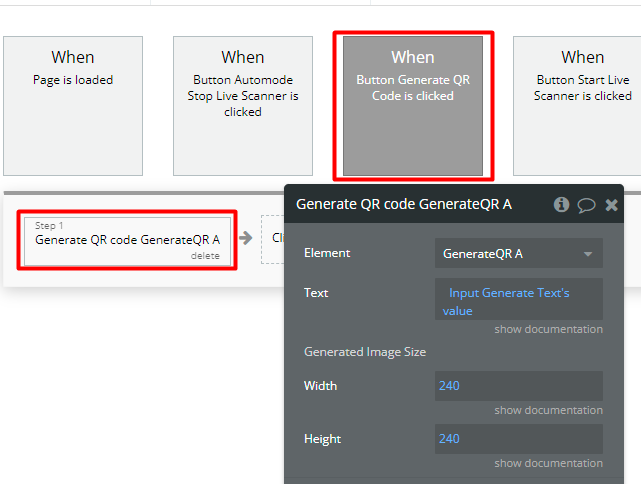
For Generate QR code action should provide the output size of the QR code image. If the size values will be bigger than the size of the GenerateQR element on the page then the QR code image will be cropped.
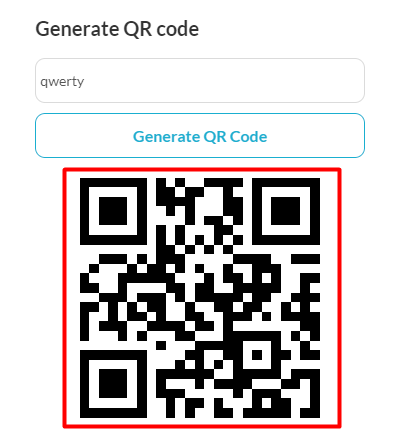
Also, on the page, will be displayed the QR code.
Using Barcode/QR Live Scanner
This workflow example represents how the Barcode/QR Live Scanner element is used and its actions.
- On the page, it is placed the Barcode/QR Live Scanner element. This element has no fields for completing.
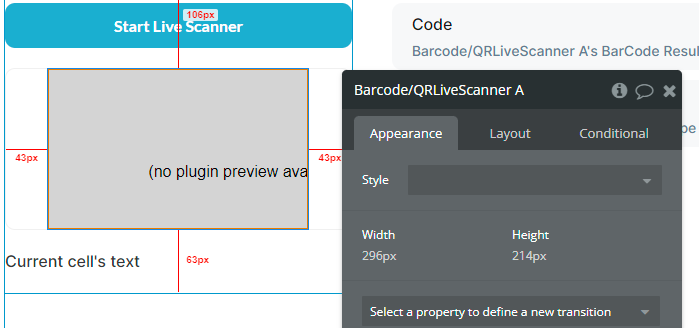
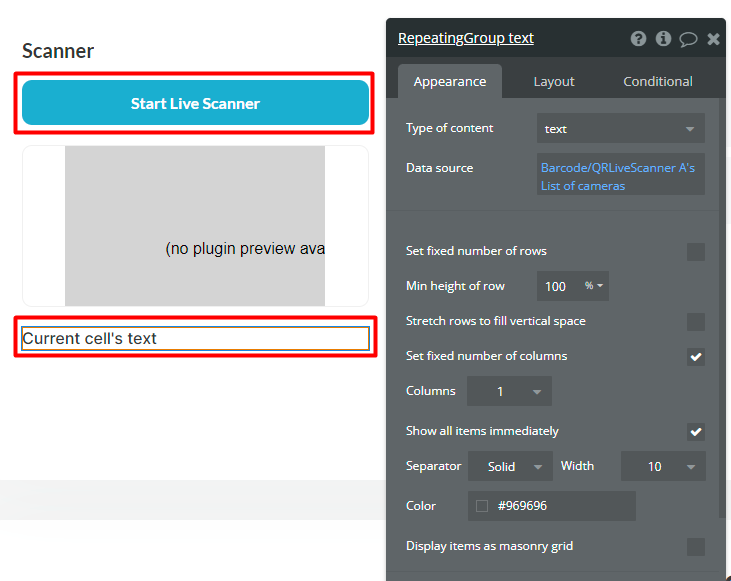
- Also, on the page, it is placed the Button and Repeating Group elements. The Button elements are used to start/stop the live scanning. The Repeating Group element is used to display all available camera labels.
- In the workflow, when the Start Live Scanner button is clicked then is called the Start Scanning action.
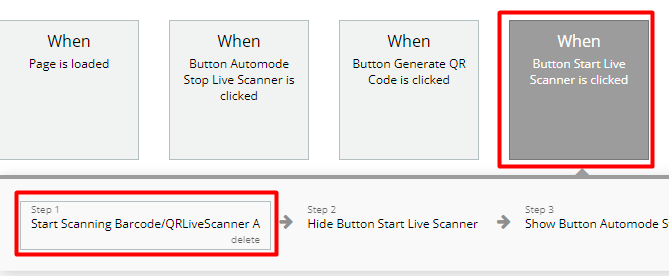
When the code is detected then the BarCode Result and BarCode Type will be available for use.
- When live scanning is in process, the Barcode/QR Live Scanner element will start streaming the camera.
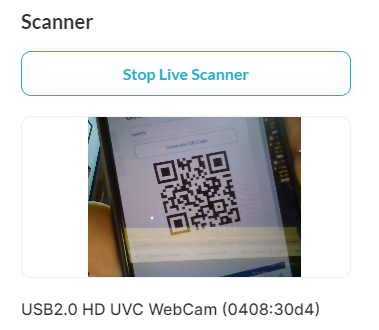
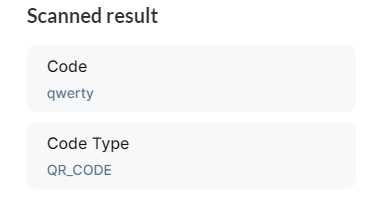
- When code is detected, the Text elements will display the results.
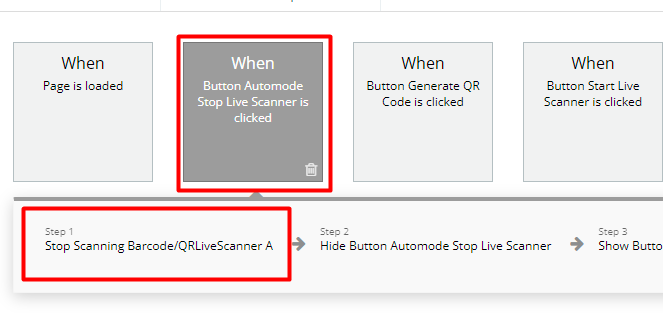
- In the workflow, when the Automode Stop Live Scanner button is clicked then is called the Stop Scanning action.
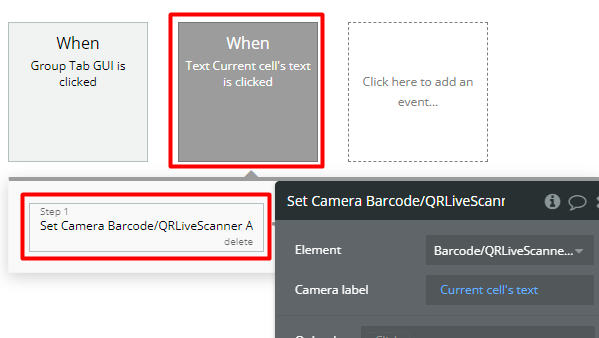
- In the workflow, when the Current cell’s text is clicked then is called the Set Camera action. This means when the camera label from Repeating Group is clicked then the clicked label will be send to Set Camera action like Camera label value. And, will be changed the camera for scanning.
Using Barcode/QR Image Scanner
This workflow example represents how the Barcode/QR Image Scanner element is used and its actions.
- On the page, it is placed the File Uploader element.
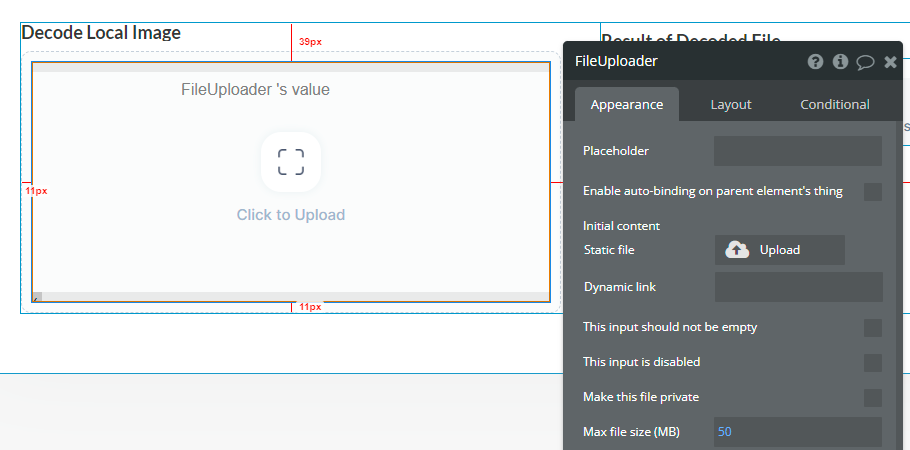
- Also, on the page, it is placed the Barcode/QR Image Scanner element. The Image field is completed with the value of File Uploader.
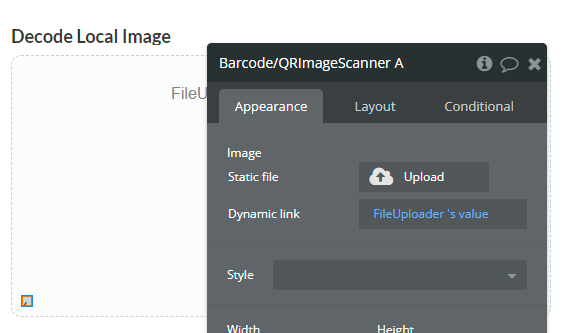
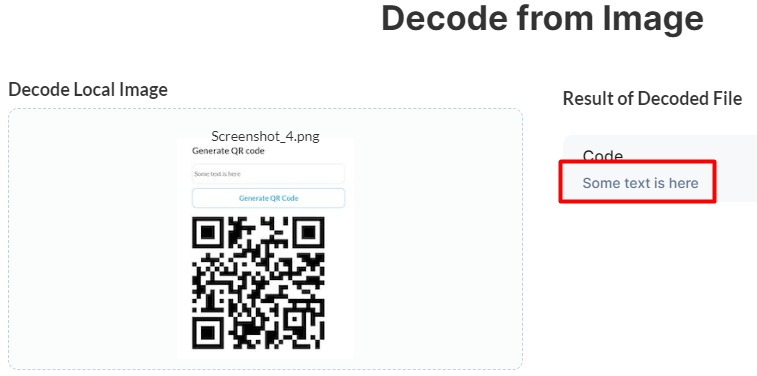
- When the file is uploaded in File Uploader element and the barcode is detected, the result will be displayed on the page.
