
✅
Demo to preview the plugin:
✅
Introduction
This plugin allows you to use PayPal for payments and includes actions such as creating a payment order, confirming an order using Paypal or a card, receiving payment data, etc. It also comes with a set of PayPal buttons that you can place on your page.
Prerequisites
You must have an account with PayPal Developer to interact with the API. Create your development account at: https://developer.paypal.com/developer/applications/create

How to setup
- Go to https://developer.paypal.com/developer/applications/create and create a new PayPal app using your PayPal Developer login.
Once you have created your app, change the environment to 'Live'.

For demo purposes, all screenshots below are from Sandbox, but in live this is the same.
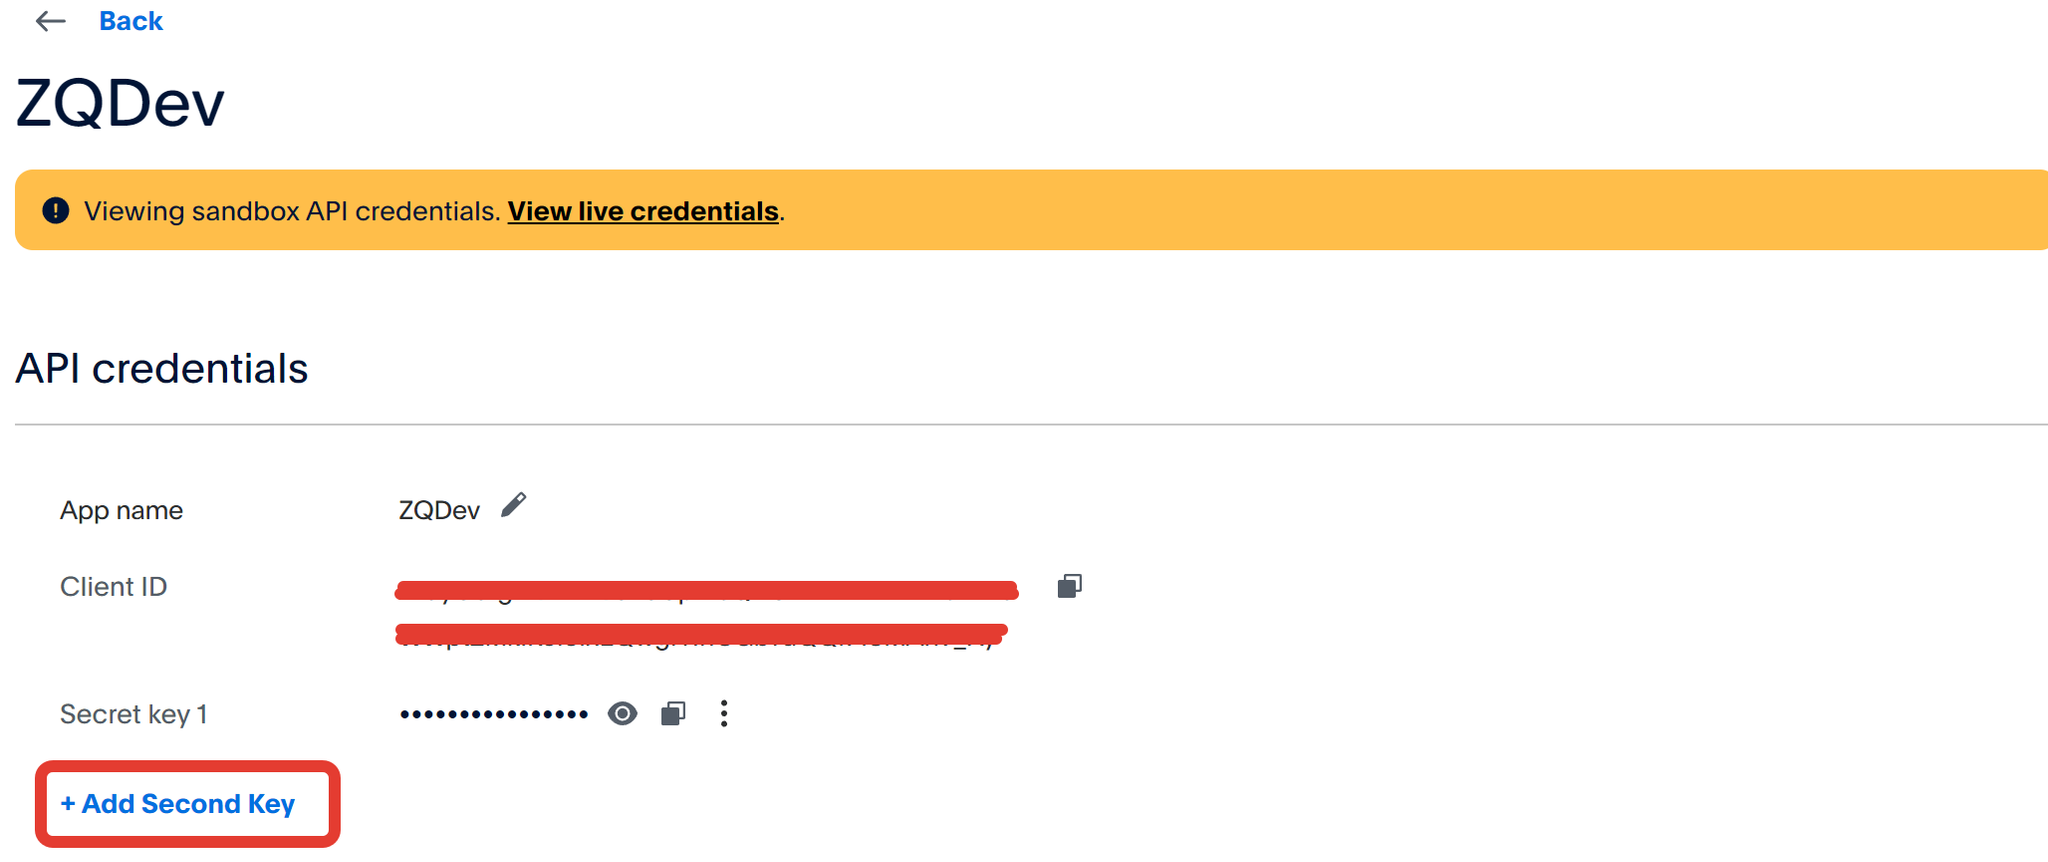
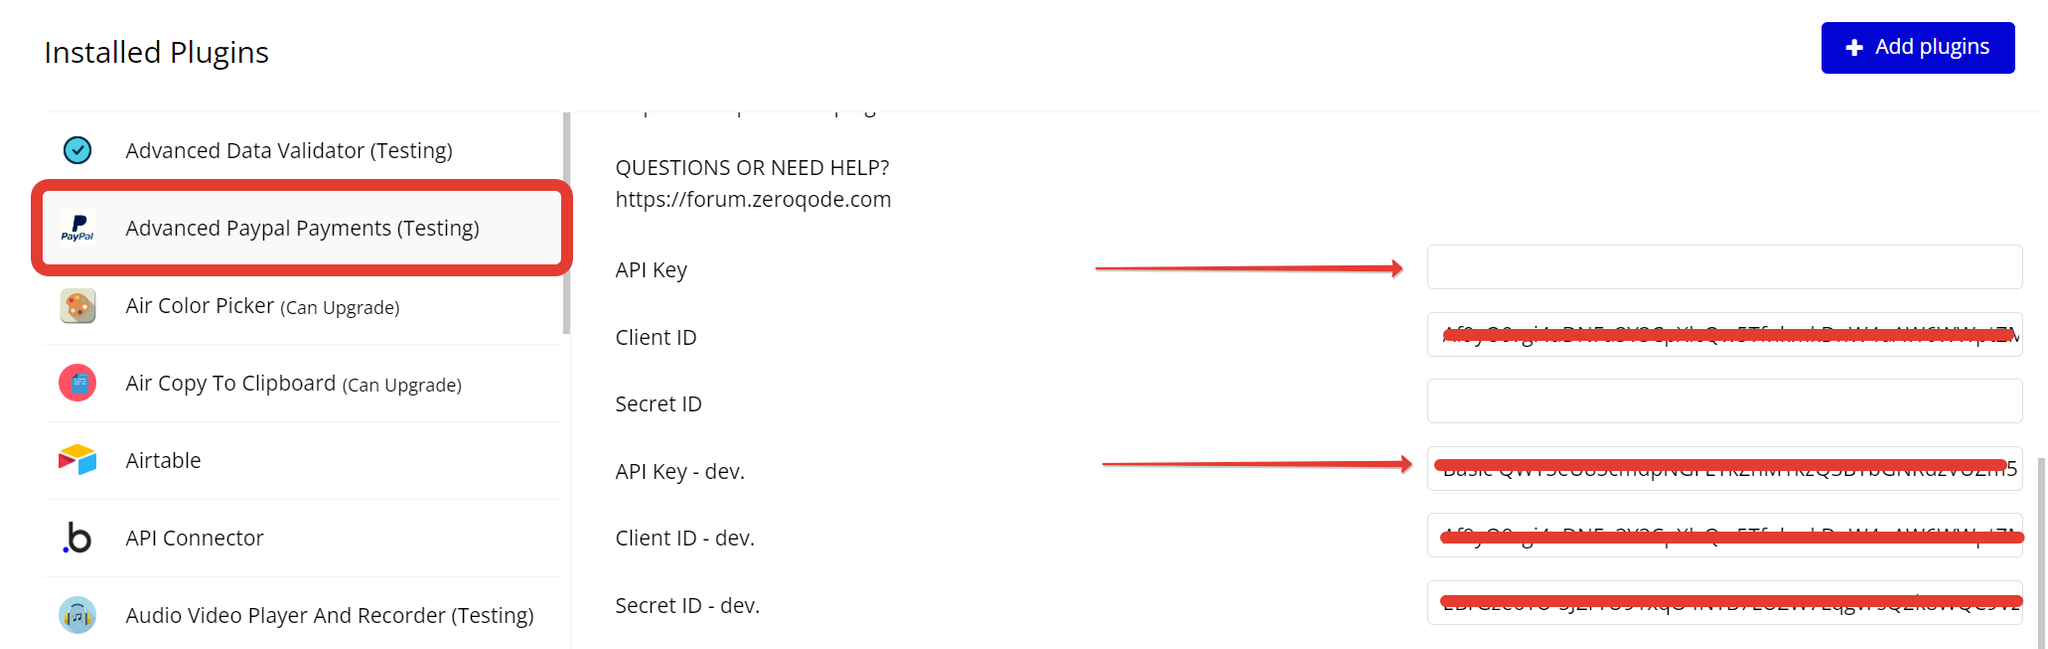
- Go to your app settings. Next copy Client ID and Secret key
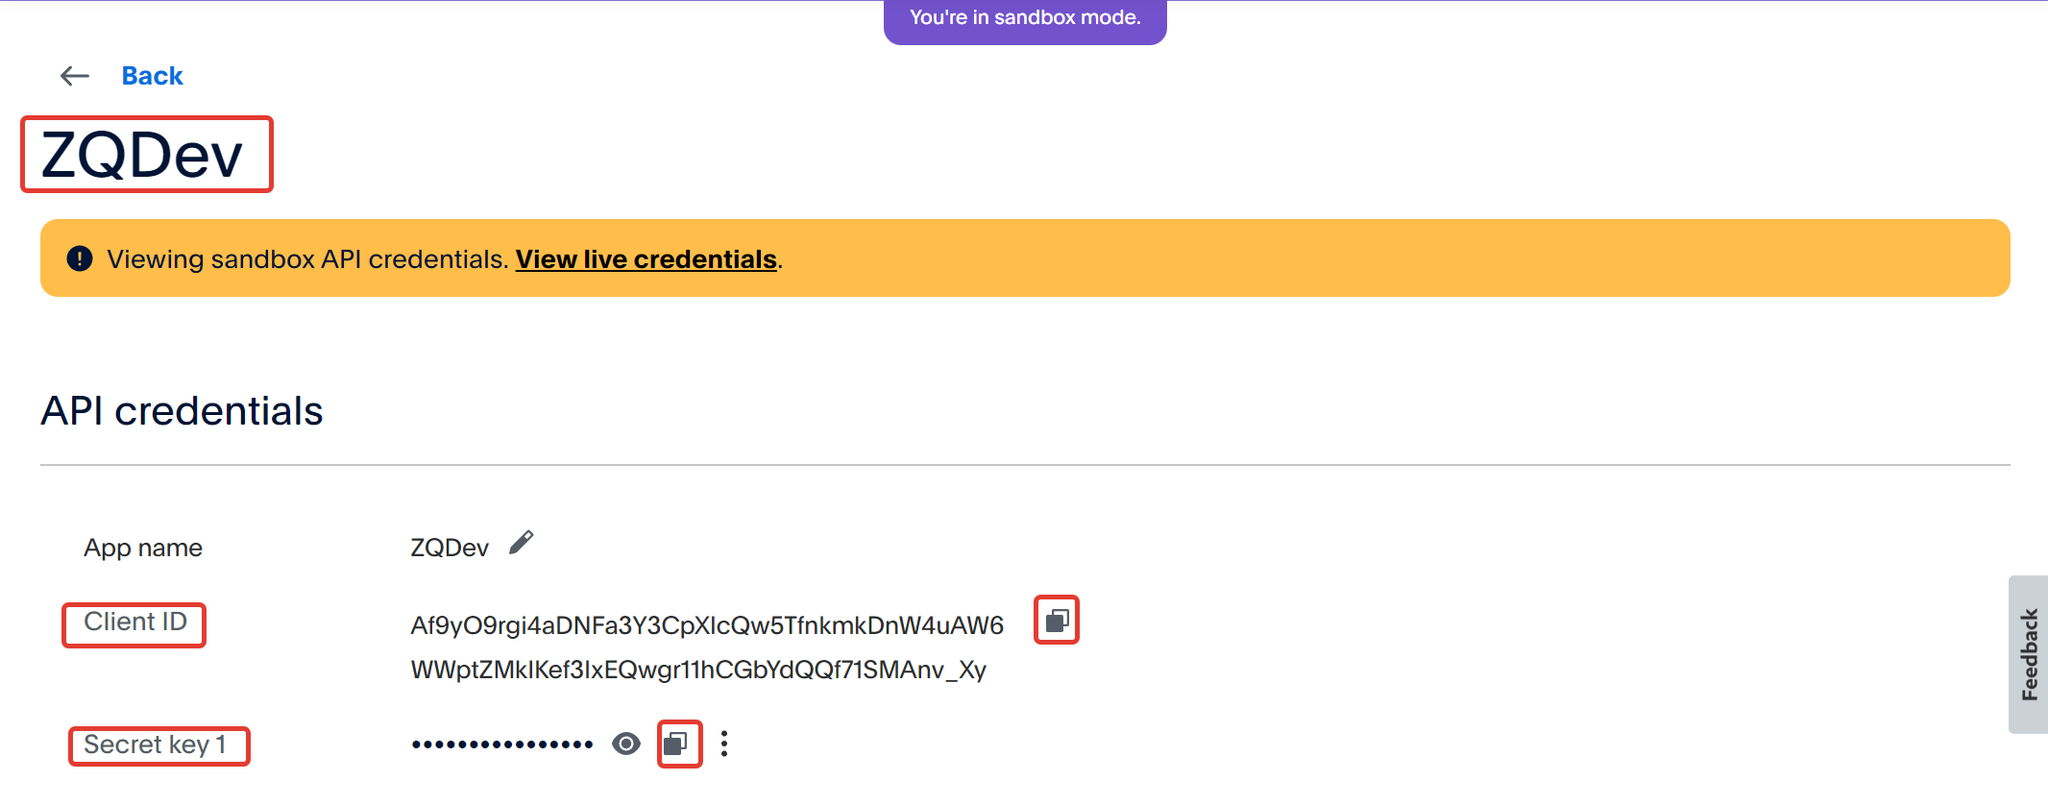
- You can generate a new key if you don’t have any.
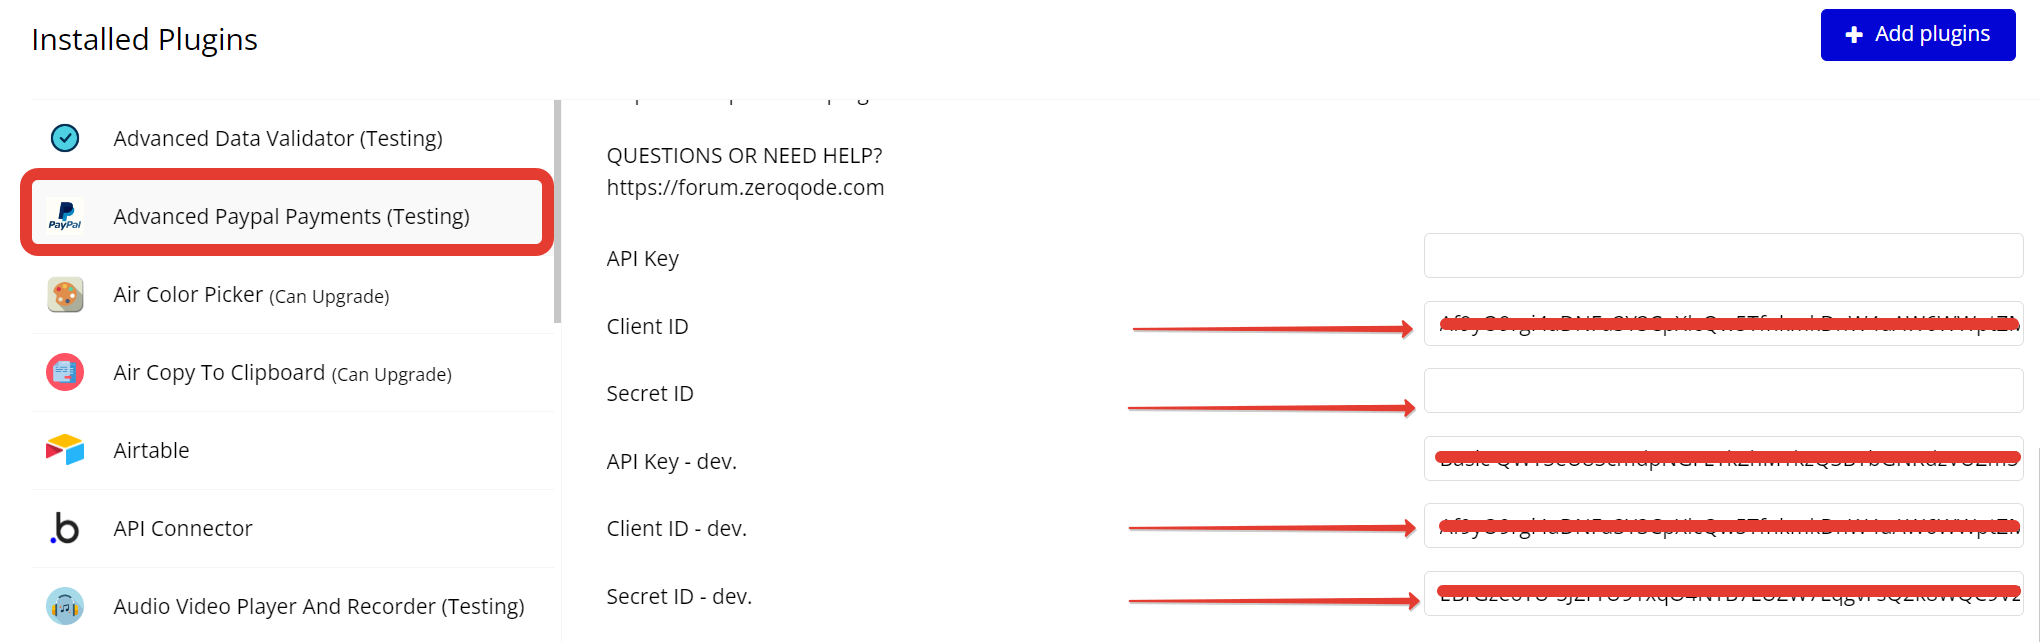
- Insert the Client ID and Secret key into your application in the appropriate fields in the plugin settings.
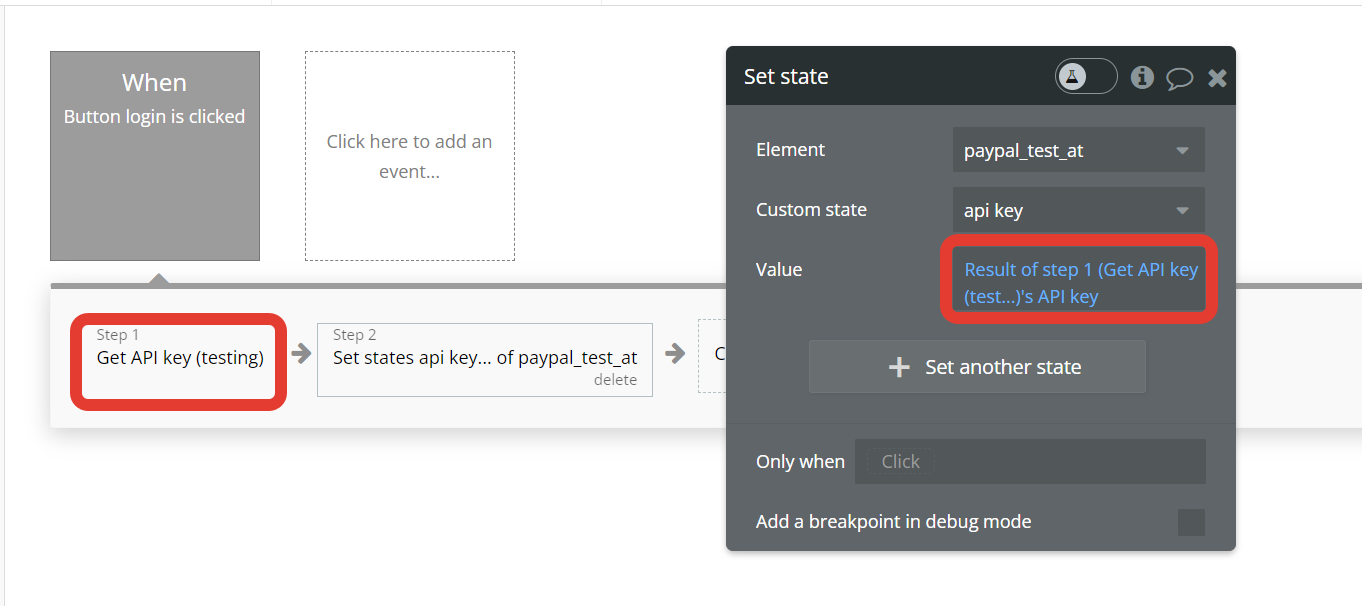
- Use the action "Get API key" to get the API key. The result of calling this action will be the API key, copy it together with the name “Basic”. This action will only be used once to obtain the Key. Since the demo page already has a retrieved API key, this functionality is not present in the demo. Below is an example of setting up a workflow to obtain an API key.

- Insert API key in Plugin settings.
There are a few things to understand to complete a recurring payment plan, the flow should follow these actions:
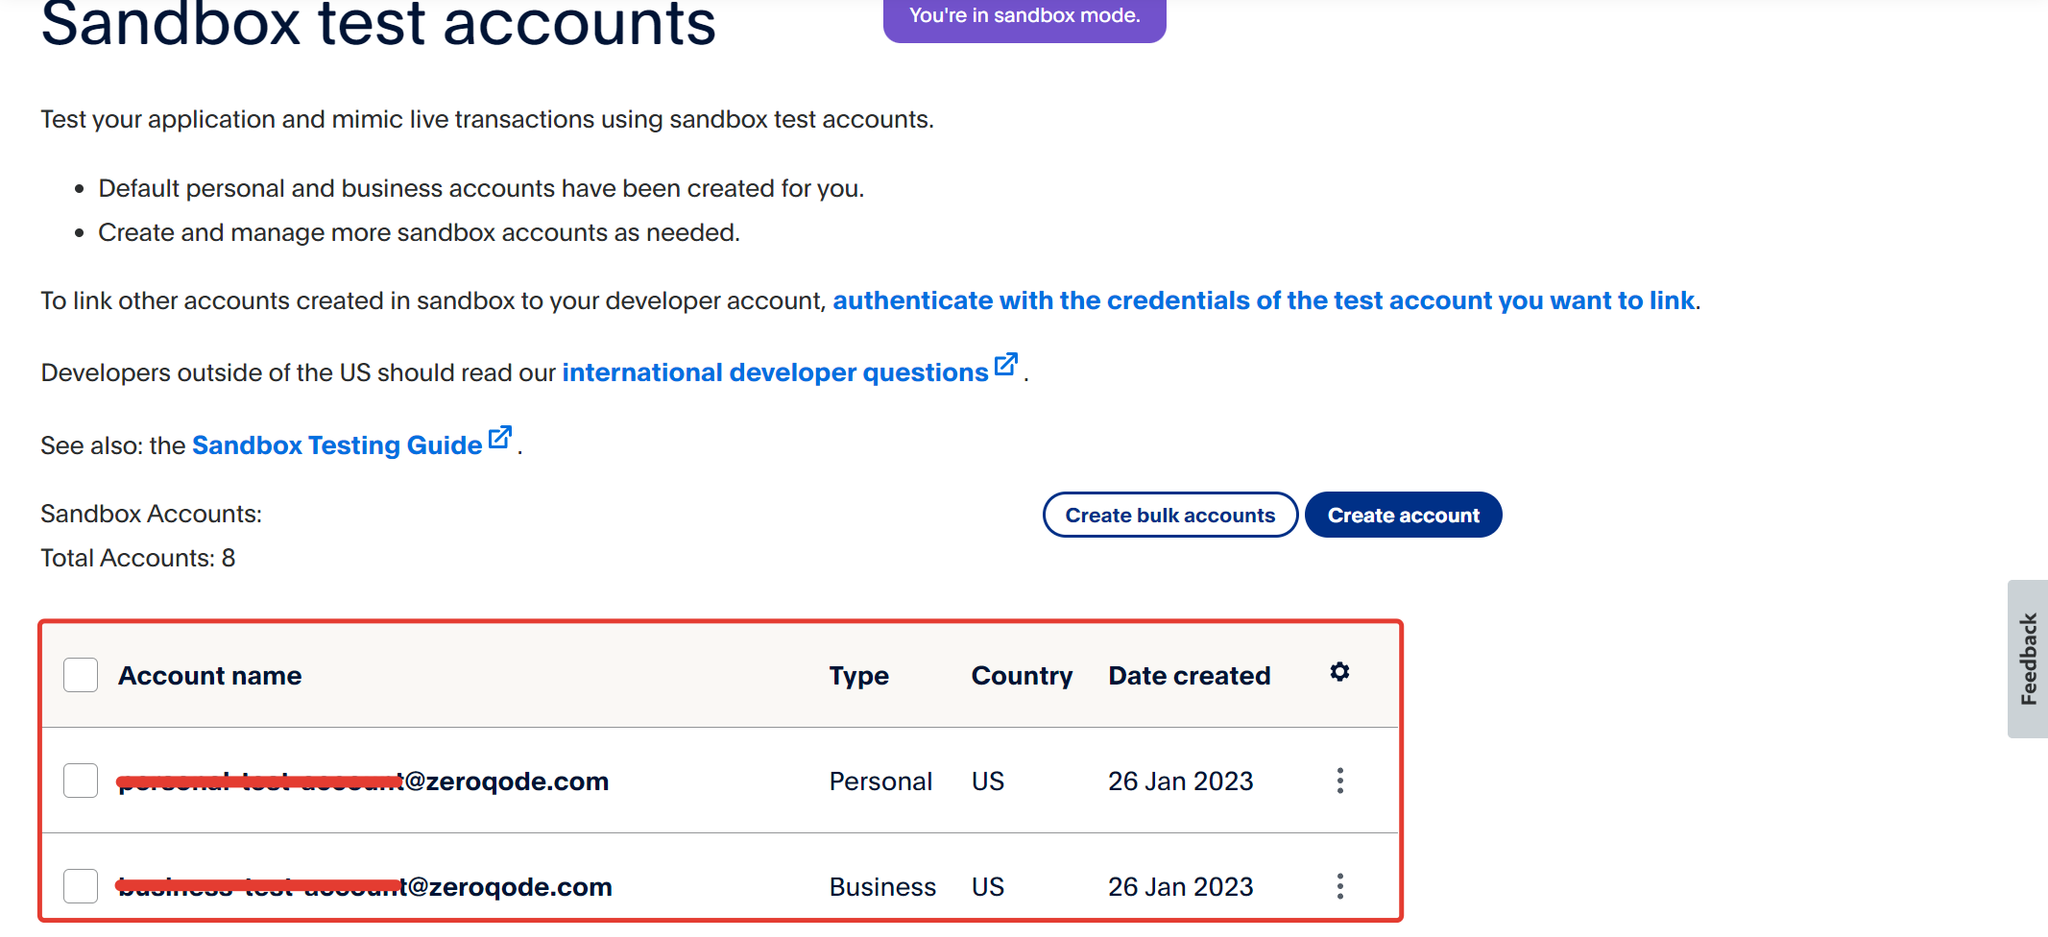
Sandbox Accounts
- Go to the "Testing Tools" tab.

Two accounts (Personal & Business) will be created automatically for the PayPal sandbox.
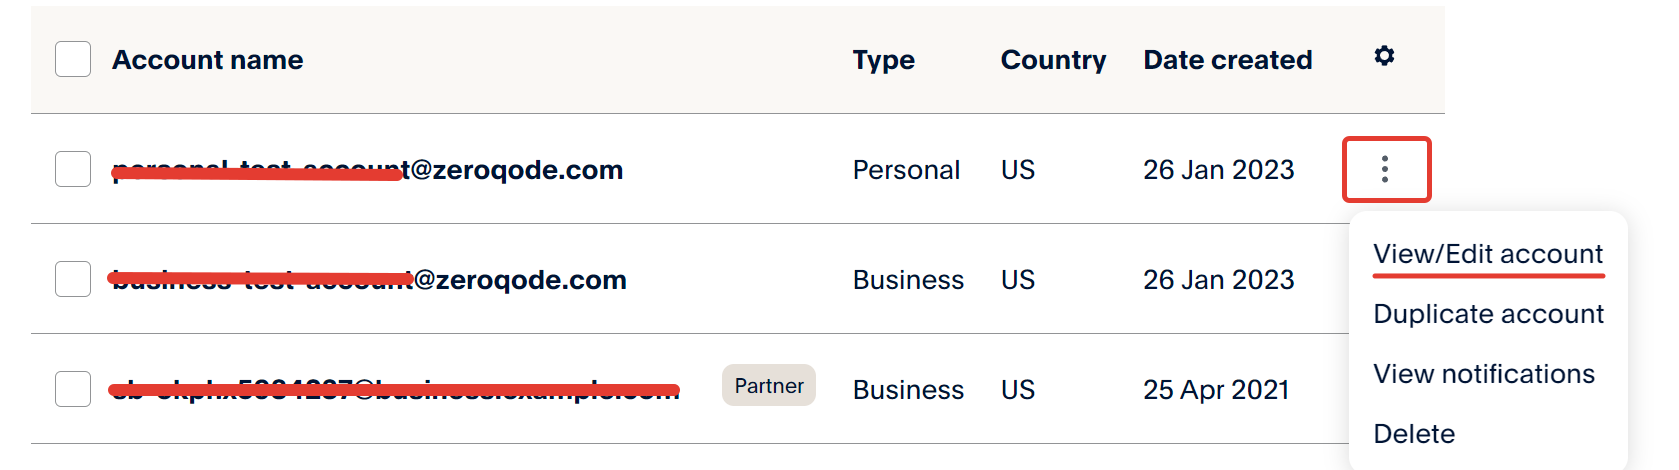
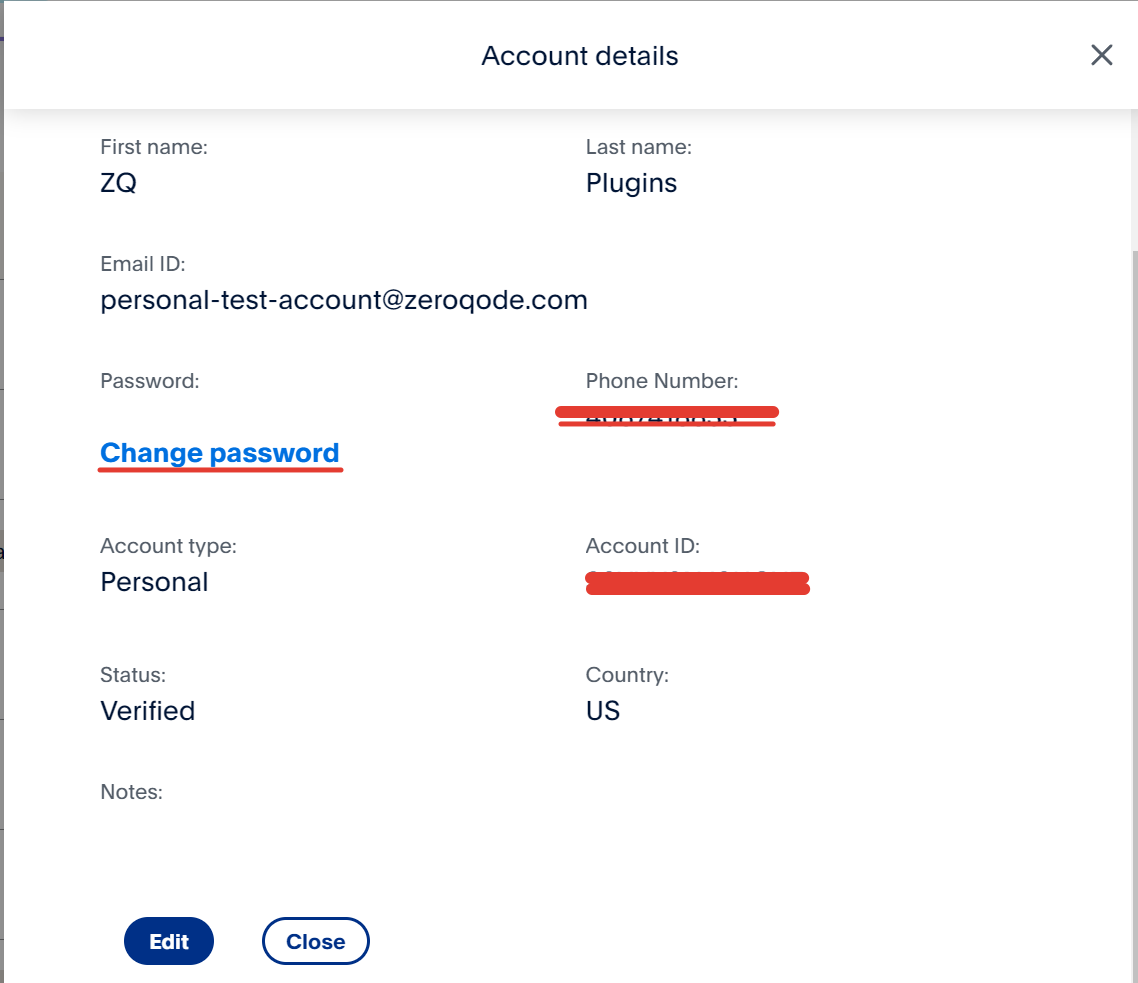
- The password for your PayPal sandbox accounts can be changed in the "View/Edit account" section.
Elements
Paypal Button
It allows you to add a PayPal button to your website or application, enabling users to make payments using their PayPal accounts. This button can be customized and placed on your page to provide a seamless payment experience for your customers.
Fields
Title | Description | Type |
Client ID | Client ID your application | text |
Locale | locale (en_US) | text |
Button Color | gold, blue, silver, white, black | text |
Button Shape | pill, rect | text |
Payment Amount | The value of the total order amount. | number |
Currency | The three-character ISO-4217 currency code that identifies the currency. | text |
Button Label | checkout, pay, buynow, paypal | text |
Show Icons | bolean |
Events
Name | Description |
Payment Success | Successful payment event |
Payment Canceled | Event if the payment is canceled |
Action
Get API key
This server-side action uses keys from the plugin settings and generates an API key in base64 format.
Returns value:
Title | Type | Description |
api_key | string | API key |
API Calls
Orders
An order represents a payment between two or more parties. Use the Orders Data & Action Calls to create, update, retrieve, authorize, and capture orders.
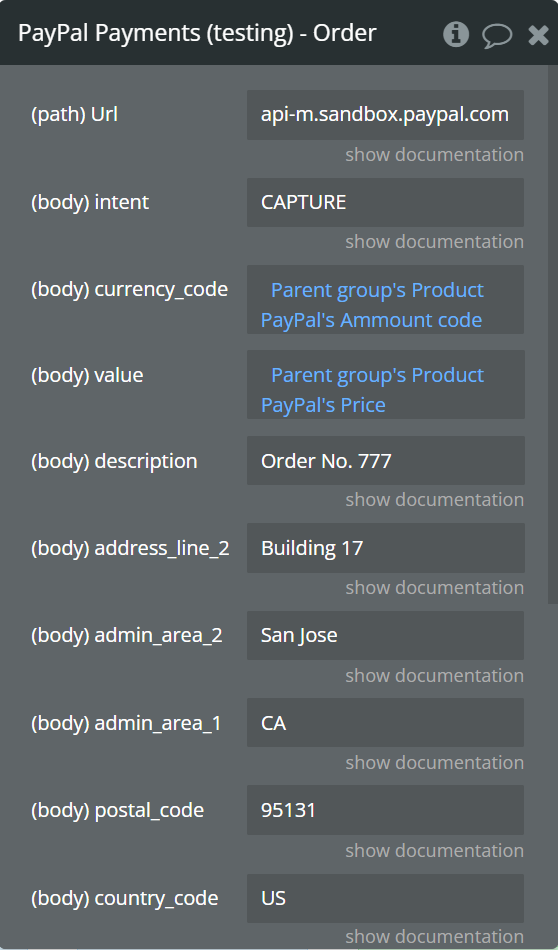
- Create order - creates an order.
Fields:
Title | Type | Description |
Url | string | The URL to the API service is either:
Sandbox: api-m.sandbox.paypal.com
Live: api-m.paypal.com |
intent | string | CAPTURE. The merchant intends to capture payment immediately after the customer makes a payment.
AUTHORIZE. The merchant intends to authorize a payment and place funds on hold after the customer makes a payment. |
currency_code | string | The three-character ISO-4217 currency code that identifies the currency. |
value | string | The value of the total order amount. |
description | string | The purchase description. |
address_line_1 | string | The first line of the address, such as number and street, for example, 173 Drury Lane. Needed for data entry, and Compliance and Risk checks. This field needs to pass the full address. |
address_line_2 | string | The second line of the address, for example, a suite or apartment number. |
admin_area_2 | string | A city, town, or village. |
admin_area_1 | string | The highest-level sub-division in a country, which is usually a province, state, or ISO-3166-2 subdivision. This data is formatted for postal delivery, for example, CA and not California. |
postal_code | string | The postal code, which is the ZIP code or equivalent. Typically required for countries with a postal code or an equivalent. See postal code. |
country_code | string | The 2-character ISO 3166-1 code that identifies the country or region. Entered in uppercase letters.
❗Note: The country code for Great Britain is GB and not UK as used in the top-level domain names for that country. Use the C2 country code for China worldwide for comparable uncontrolled price (CUP) method, bank card, and cross-border transactions. |
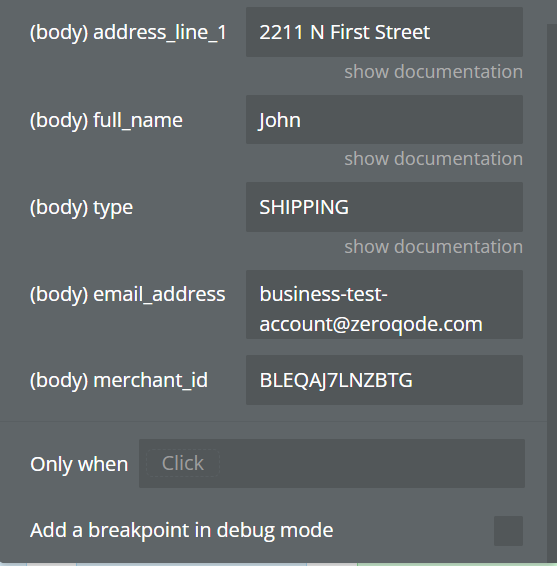
full_name | string | The name of the person to whom to ship the items. |
type | string | The method by which the payer wants to get their items from the payee e.g shipping, in-person pickup. Either type or options but not both may be present.
SHIPPING - The payer intends to receive the items at a specified address.
PICKUP_IN_PERSON - The payer intends to pick up the items from the payee in person. |
email_address | string | The email address of merchant. |
merchant_id | string | The encrypted PayPal account ID of the merchant. |
Returns:
Title | Type | Description |
id | string | The ID of the order. |
status | string | The order status. CREATED, SAVED, APPROVED, VOIDED, COMPLETED, PAYER_ACTION_REQUIRED |
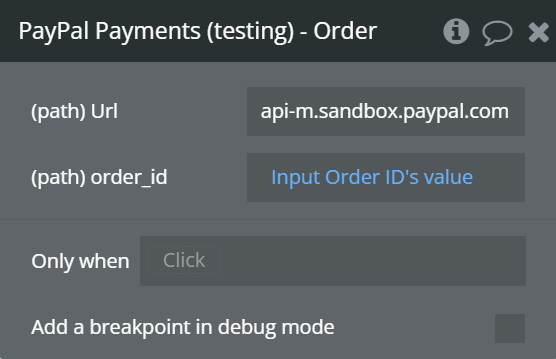
- Show order details - Shows details for an order, by ID.
Fields:
Title | Type | Description |
Url | string | The URL to the API service is either:
Sandbox: api-m.sandbox.paypal.com
Live: api-m.paypal.com |
order_id | string | The ID of the order. |
Returns:
Title | Type | Description |
id | string | The ID of the order.m |
intent | string | CAPTURE. The merchant intends to capture payment immediately after the customer makes a payment.
AUTHORIZE. The merchant intends to authorize a payment and place funds on hold after the customer makes a payment. |
status | string | The order status. CREATED, SAVED, APPROVED, VOIDED, COMPLETED, PAYER_ACTION_REQUIRED |
payment_source | object | The payment source used to fund the payment. Values: paypal or card which contains data about the payer (email_address, account_id, given_name, surname, address) |
purchase_units | Array of objects | An array of purchase units. Each purchase unit establishes a contract between a customer and a merchant. Each purchase unit represents either a full or partial order that the customer intends to purchase from the merchant. |
payer | object | The customer who approves and pays for the order. The customer is also known as the payer. |
- Update order - Updates an order with a CREATED or APPROVED status. You cannot update an order with the COMPLETED status.
Common fields:
Title | Type | Description |
Url | string | The URL to the API service is either:
Sandbox: api-m.sandbox.paypal.com
Live: api-m.paypal.com |
order_id | string | The ID of the order. |
You can update all previously created data in the order with actions calls:
Update intent order
Update address order
Update description order
Update shipping name order
Update shipping type order
Update amount order
Using the "operation" field, you can specify the action to update. The table below shows possible updates for the values:
Attribute | Operation | Notes |
intent | replace | |
payer | replace, add | Using replace op for payer will replace the whole payer object with the value sent in request. |
purchase_units | replace, add | |
purchase_units[].custom_id | replace, add, remove | |
purchase_units[].description | replace, add, remove | |
purchase_units[].payee.email | replace | |
purchase_units[].shipping.name | replace, add | |
purchase_units[].shipping.address | replace, add | |
purchase_units[].shipping.type | replace, add | |
purchase_units[].soft_descriptor | replace, remove | |
purchase_units[].amount | replace | |
purchase_units[].invoice_id | replace, add, remove | |
purchase_units[].payment_instruction | replace | |
purchase_units[].payment_instruction.disbursement_mode | replace | By default, disbursement_mode is INSTANT. |
purchase_units[].payment_instruction.platform_fees | replace, add, remove | |
purchase_units[].supplementary_data.card | replace, add, remove | |
application_context.client_configuration | replace, add |
- Confirm the Order Paypal - The payer confirms their intent to pay for the Order with the payment source Paypal.
Fields:
Title | Type | Description |
Url | string | The URL to the API service is either:
Sandbox: api-m.sandbox.paypal.com
Live: api-m.paypal.com |
order_id | string | The ID of the order. |
given_name | string | When the party is a person, the party's given, or first, name. |
surname | string | When the party is a person, the party's surname or family name. Also known as the last name. Required when the party is a person. Use also to store multiple surnames including the matronymic, or mother's, surname. |
email_address | string | The email address of the PayPal account holder. |
payment_method_preference | string | The merchant-preferred payment methods.
UNRESTRICTED Accepts any type of payment from the customer.
IMMEDIATE_PAYMENT_REQUIRED Accepts only immediate payment from the customer. For example, credit card, PayPal balance, or instant ACH. Ensures that at the time of capture, the payment does not have the pending status. |
brand_name | string | The label overrides the business name in the PayPal account on the PayPal site. The pattern is defined by an external party and supports Unicode. |
locale | string | The BCP 47-formatted locale of pages that the PayPal payment experience shows. PayPal supports a five-character code. For example, da-DK, he-IL, id-ID, ja-JP, no-NO, pt-BR, ru-RU, sv-SE, th-TH, zh-CN, zh-HK, or zh-TW. |
landing_page | string | The type of landing page to show on the PayPal site for customer checkout. Values:
LOGIN When the customer clicks PayPal Checkout, the customer is redirected to a page to log in to PayPal and approve the payment.
GUEST_CHECKOUT When the customer clicks PayPal Checkout, the customer is redirected to a page to enter credit or debit card and other relevant billing information required to complete the purchase. This option has previously been also called as 'BILLING'
NO_PREFERENCE When the customer clicks PayPal Checkout, the customer is redirected to either a page to log in to PayPal and approve the payment or to a page to enter credit or debit card and other relevant billing information required to complete the purchase, depending on their previous interaction with PayPal. |
shipping_preference | string | The location from which the shipping address is derived.
Values:
GET_FROM_FILE. Get the customer-provided shipping address on the PayPal site.
NO_SHIPPING. Redacts the shipping address from the PayPal site. Recommended for digital goods.
SET_PROVIDED_ADDRESS. Get the merchant-provided address. The customer cannot change this address on the PayPal site. |
user_action | string | Configures a CONTINUE or PAY_NOW checkout flow. |
return_url | string | The URL where the customer is redirected after the customer approves the payment. |
cancel_url | string | The URL where the customer is redirected after the customer cancels the payment. |
Returns:
Title | Type | Description |
id | string | The ID of the order.m |
status | string | The order status. CREATED, SAVED, APPROVED, VOIDED, COMPLETED, PAYER_ACTION_REQUIRED |
payment_source | object | The payment source used to fund the payment. Values: PayPal or card which contains data about the payer (email_address, account_id, given_name, surname, address) |
payer | object | The customer who approves and pays for the order. The customer is also known as the payer. |
links | Array of objects | An array of request-related HATEOAS links. To complete payer approval, use the approve link to redirect the payer. The API caller has 3 hours (default setting, this which can be changed by your account manager to 24/48/72 hours to accommodate your use case) from the time the order is created, to redirect your payer. Once redirected, the API caller has 3 hours for the payer to approve the order and either authorize or capture the order. If you are not using the PayPal JavaScript SDK to initiate PayPal Checkout (in context) ensure that you include application_context.return_url
is specified or you will get "We're sorry, Things don't appear to be working at the moment" after the payer approves the payment. |
- Confirm the Order Card - Payer confirms their intent to pay for the Order with the payment source Card.
The payment card to use to fund a payment. Can be a credit or debit card.
❗
Note: Passing card number, cvv and expiry directly via the API require PCI SAQ D compliance.
PayPal offers a mechanism by which you do not have to take on the PCI SAQ D burden by using hosted fields - refer to this Integration Guide.
To test card payment, use this guide.
Fields:
Title | Type | Description |
Url | string | The URL to the API service is either:
Sandbox: api-m.sandbox.paypal.com
Live: api-m.paypal.com |
order_id | string | The ID of the order. |
Number | string | The primary account number (PAN) for the payment card. |
Expiry | string | The card expiration year and month, in Internet date format. |
Name | string | The card holder's name as it appears on the card. |
security_code | string | The three- or four-digit security code of the card. Also known as the CVV, CVC, CVN, CVE, or CID. This parameter cannot be present in the request when payment_initiator=MERCHANT. |
address_line_1 | string | The first line of the address, such as number and street, for example, 173 Drury Lane. Needed for data entry, and Compliance and Risk checks. This field needs to pass the full address. |
address_line_2 | string | The second line of the address, for example, a suite or apartment number. |
admin_area_2 | string | A city, town, or village. |
admin_area_1 | string | The highest-level sub-division in a country, which is usually a province, state, or ISO-3166-2 subdivision. This data is formatted for postal delivery, for example, CA and not California. |
postal_code | string | The postal code, which is the ZIP code or equivalent. Typically required for countries with a postal code or an equivalent. See postal code. |
country_code | string | The 2-character ISO 3166-1 code that identifies the country or region. Entered in uppercase letters.
❗Note: The country code for Great Britain is GB and not UK as used in the top-level domain names for that country. Use the C2 country code for China worldwide for comparable uncontrolled price (CUP) method, bank card, and cross-border transactions. |
Returns:
Title | Type | Description |
id | string | The ID of the order.m |
status | string | The order status. CREATED, SAVED, APPROVED, VOIDED, COMPLETED, PAYER_ACTION_REQUIRED |
payment_source | object | The payment source used to fund the payment. Values: paypal or card which contain data about the payer (email_address, account_id, given_name, surname, address) |
- Authorize payment for order - Authorizes payment for an order. To successfully authorize payment for an order.
Fields:
Title | Type | Description |
Url | string | The URL to the API service is either:
Sandbox: api-m.sandbox.paypal.com
Live: api-m.paypal.com |
order_id | string | The ID of the order. |
Returns:
Title | Type | Description |
id | string | The ID of the order.m |
status | string | The order status. CREATED, SAVED, APPROVED, VOIDED, COMPLETED, PAYER_ACTION_REQUIRED |
payment_source | object | The payment source used to fund the payment. Values: paypal or card which contain data about the payer (email_address, account_id, given_name, surname, address) |
purchase_units | Array of objects | An array of purchase units. Each purchase unit establishes a contract between a customer and merchant. Each purchase unit represents either a full or partial order that the customer intends to purchase from the merchant. |
payer | object | The customer who approves and pays for the order. The customer is also known as the payer. |
- Capture payment for order - Captures payment for an order. To successfully capture payment for an order.
Fields:
Title | Type | Description |
Url | string | The URL to the API service is either:
Sandbox: api-m.sandbox.paypal.com
Live: api-m.paypal.com |
order_id | string | The ID of the order. |
Returns:
Title | Type | Description |
id | string | The ID of the order. |
status | string | The order status. CREATED, SAVED, APPROVED, VOIDED, COMPLETED, PAYER_ACTION_REQUIRED |
payment_source | object | The payment source used to fund the payment. Values: paypal or card which contain data about the payer (email_address, account_id, given_name, surname, address) |
purchase_units | Array of objects | An array of purchase units. Each purchase unit establishes a contract between a customer and merchant. Each purchase unit represents either a full or partial order that the customer intends to purchase from the merchant. |
payer | object | The customer who approves and pays for the order. The customer is also known as the payer. |
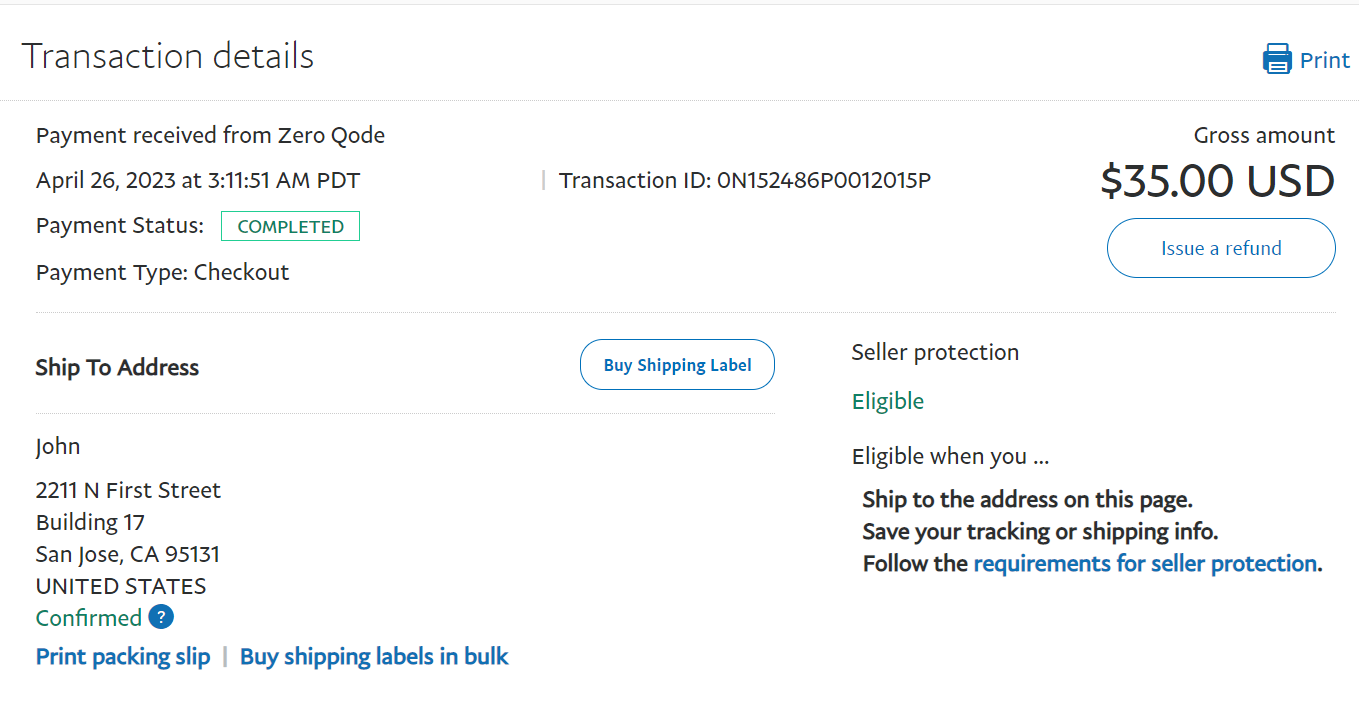
Payments
Call the Payments API to authorize payments, capture authorized payments, refund payments that have already been captured, and show payment information. Use the Payments API in conjunction with the Orders calls.
❗
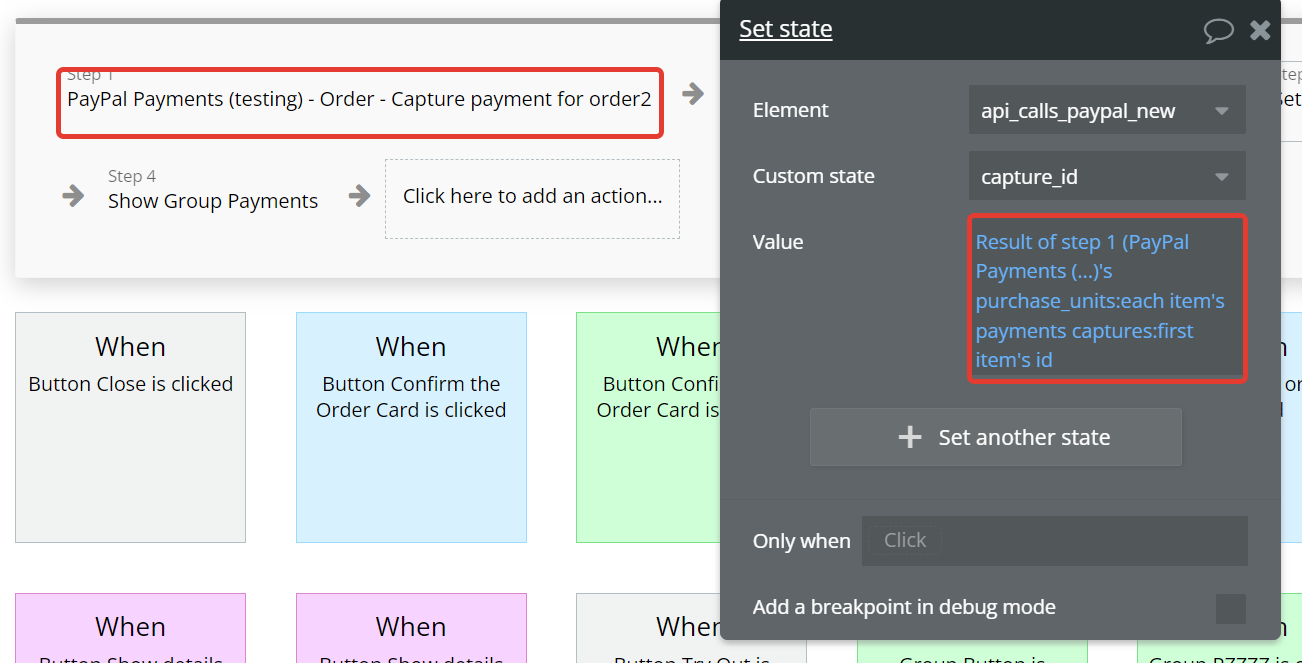
Note: The payment ID can be obtained from the returned object when calling "Authorize payment for order" and "Capture payment for order".
Authorize payment for order: purchase_units➡️payments➡️authorizations➡️id
Capture payment for order: purchase_units➡️payments➡️captures➡️id
- Show details for authorized payment - Shows details for an authorized payment, by ID.
Fields:
Title | Type | Description |
Url | string | The URL to the API service is either:
Sandbox: api-m.sandbox.paypal.com
Live: api-m.paypal.com |
payments _id | string | The ID of the authorized payment for which to show details. |
Returns:
Title | Type | Description |
id | string | The ID of the authorized payment for which to show details. |
status | string | The order status. CREATED, SAVED, APPROVED, VOIDED, COMPLETED, PAYER_ACTION_REQUIRED |
amount | object | The payment source used to fund the payment. Values: paypal or card which contains data about the payer (email_address, account_id, given_name, surname, address) |
seller_protection | object | An array of purchase units. Each purchase unit establishes a contract between a customer and merchant. Each purchase unit represents either a full or partial order that the customer intends to purchase from the merchant. |
supplementary_data | object | The customer who approves and pays for the order. The customer is also known as the payer. |
- Capture authorized payment - Captures an authorized payment, by ID.
Fields:
Title | Type | Description |
Url | string | The URL to the API service is either:
Sandbox: api-m.sandbox.paypal.com
Live: api-m.paypal.com |
payments _id | string | The ID of the authorized payment for which to show details. |
value | string | The amount to capture. To capture a portion of the full authorized amount, specify an amount. If amount is not specified, the full authorized amount is captured. The amount must be a positive number and in the same currency as the authorization against which the payment is being captured. |
currency_code | string | The three-character ISO-4217 currency code that identifies the currency. |
note_to_payer | string | An informational note about this settlement. Appears in both the payer's transaction history and the emails that the payer receives. |
soft_descriptor | string | The payment descriptor on the payer's account statement. |
final_capture | boolean | Indicates whether you can make additional captures against the authorized payment. Set to true if you do not intend to capture additional payments against the authorization. Set to false if you intend to capture additional payments against the authorization. |
invoice_id | string | The API caller-provided external invoice number for this order. Appears in both the payer's transaction history and the emails that the payer receives. |
Returns:
Title | Type | Description |
id | string | The ID of the order. |
status | string | The order status. CREATED, SAVED, APPROVED, VOIDED, COMPLETED, PAYER_ACTION_REQUIRED |
- Reauthorize authorized payment
Reauthorizes an authorized PayPal account payment, by ID. To ensure that funds are still available, reauthorize a payment after its initial three-day honor period expires. Within the 29-day authorization period, you can issue multiple re-authorizations after the honor period expires.
If 30 days have transpired since the date of the original authorization, you must create an authorized payment instead of reauthorizing the original authorized payment.
A reauthorized payment itself has a new honor period of three days.
You can reauthorize an authorized payment once for up to 115% of the original authorized amount, not to exceed an increase of $75 USD.
Supports only the amount request parameter.
Fields:
Title | Type | Description |
Url | string | The URL to the API service is either:
Sandbox: api-m.sandbox.paypal.com
Live: api-m.paypal.com |
payments _id | string | The PayPal-generated ID for the authorized payment to reauthorize. |
value | string | The amount to reauthorize for an authorized payment. |
currency_code | string | The three-character ISO-4217 currency code that identifies the currency. |
Returns:
Title | Type | Description |
id | string | The PayPal-generated ID for the authorized payment to reauthorize. |
status | string | The order status. CREATED, SAVED, APPROVED, VOIDED, COMPLETED, PAYER_ACTION_REQUIRED |
- Show captured payment details - Shows details for a captured payment, by ID.
Fields:
Title | Type | Description |
Url | string | The URL to the API service is either:
Sandbox: api-m.sandbox.paypal.com
Live: api-m.paypal.com |
capture_id | string | The PayPal-generated ID for the captured payment for which to show details. |
Returns:
Title | Type | Description |
id | string | The PayPal-generated ID for the captured payment for which to show details. |
status | string | The order status. CREATED, SAVED, APPROVED, VOIDED, COMPLETED, PAYER_ACTION_REQUIRED |
amount | object | The amount for this captured payment. |
final_capture | boolean | Default: false
Indicates whether you can make additional captures against the authorized payment. Set to true if you do not intend to capture additional payments against the authorization. Set to false if you intend to capture additional payments against the authorization. |
seller_protection | object | The level of protection offered as defined by PayPal Seller Protection for Merchants. |
disbursement_mode | string | The funds that are held on behalf of the merchant. |
seller_receivable_breakdown | object | The detailed breakdown of the capture activity. This is not available for transactions that are in pending state. |
Products
Merchants can use the Catalog Products API to create products, which are goods and services.
- Create New products
Fields:
Title | Type | Description |
Url | string | The URL to the API service is either:
Sandbox: api-m.sandbox.paypal.com
Live: api-m.paypal.com |
Name | string | The product name. |
Description | string | The product description. |
Type | string | The product type. Indicates whether the product is physical or digital goods, or a service. |
Category | string | The product category. |
Product_Image_URL | string | The image URL for the product. |
Product_Home_URL | string | The home page URL for the product. |
List of possible product categories
AC_REFRIGERATION_REPAIR |
ACADEMIC_SOFTWARE |
ACCESSORIES |
ACCOUNTING |
ADULT |
ADVERTISING |
AFFILIATED_AUTO_RENTAL |
AGENCIES |
AGGREGATORS |
AGRICULTURAL_COOPERATIVE_FOR_MAIL_ORDER |
AIR_CARRIERS_AIRLINES |
AIRLINES |
AIRPORTS_FLYING_FIELDS |
ALCOHOLIC_BEVERAGES |
AMUSEMENT_PARKS_CARNIVALS |
ANIMATION |
ANTIQUES |
APPLIANCES |
AQUARIAMS_SEAQUARIUMS_DOLPHINARIUMS |
ARCHITECTURAL_ENGINEERING_AND_SURVEYING_SERVICES |
ART_AND_CRAFT_SUPPLIES |
ART_DEALERS_AND_GALLERIES |
ARTIFACTS_GRAVE_RELATED_AND_NATIVE_AMERICAN_CRAFTS |
ARTS_AND_CRAFTS |
ARTS_CRAFTS_AND_COLLECTIBLES |
AUDIO_BOOKS |
AUTO_ASSOCIATIONS_CLUBS |
AUTO_DEALER_USED_ONLY |
AUTO_RENTALS |
AUTO_SERVICE |
AUTOMATED_FUEL_DISPENSERS |
AUTOMOBILE_ASSOCIATIONS |
AUTOMOTIVE |
AUTOMOTIVE_REPAIR_SHOPS_NON_DEALER |
AUTOMOTIVE_TOP_AND_BODY_SHOPS |
AVIATION |
BABIES_CLOTHING_AND_SUPPLIES |
BABY |
BANDS_ORCHESTRAS_ENTERTAINERS |
BARBIES |
BATH_AND_BODY |
BATTERIES |
BEAN_BABIES |
BEAUTY |
BEAUTY_AND_FRAGRANCES |
BED_AND_BATH |
BICYCLE_SHOPS_SALES_AND_SERVICE |
BICYCLES_AND_ACCESSORIES |
BILLIARD_POOL_ESTABLISHMENTS |
BOAT_DEALERS |
BOAT_RENTALS_AND_LEASING |
BOATING_SAILING_AND_ACCESSORIES |
BOOKS |
BOOKS_AND_MAGAZINES |
BOOKS_MANUSCRIPTS |
BOOKS_PERIODICALS_AND_NEWSPAPERS |
BOWLING_ALLEYS |
BULLETIN_BOARD |
BUS_LINE |
BUS_LINES_CHARTERS_TOUR_BUSES |
BUSINESS |
BUSINESS_AND_SECRETARIAL_SCHOOLS |
BUYING_AND_SHOPPING_SERVICES_AND_CLUBS |
CABLE_SATELLITE_AND_OTHER_PAY_TELEVISION_AND_RADIO_SERVICES |
CABLE_SATELLITE_AND_OTHER_PAY_TV_AND_RADIO |
CAMERA_AND_PHOTOGRAPHIC_SUPPLIES |
CAMERAS |
CAMERAS_AND_PHOTOGRAPHY |
CAMPER_RECREATIONAL_AND_UTILITY_TRAILER_DEALERS |
CAMPING_AND_OUTDOORS |
CAMPING_AND_SURVIVAL |
CAR_AND_TRUCK_DEALERS |
CAR_AND_TRUCK_DEALERS_USED_ONLY |
CAR_AUDIO_AND_ELECTRONICS |
CAR_RENTAL_AGENCY |
CATALOG_MERCHANT |
CATALOG_RETAIL_MERCHANT |
CATERING_SERVICES |
CHARITY |
CHECK_CASHIER |
CHILD_CARE_SERVICES |
CHILDREN_BOOKS |
CHIROPODISTS_PODIATRISTS |
CHIROPRACTORS |
CIGAR_STORES_AND_STANDS |
CIVIC_SOCIAL_FRATERNAL_ASSOCIATIONS |
CIVIL_SOCIAL_FRAT_ASSOCIATIONS |
CLOTHING |
CLOTHING_ACCESSORIES_AND_SHOES |
CLOTHING_RENTAL |
COFFEE_AND_TEA |
COIN_OPERATED_BANKS_AND_CASINOS |
COLLECTIBLES |
COLLECTION_AGENCY |
COLLEGES_AND_UNIVERSITIES |
COMMERCIAL_EQUIPMENT |
COMMERCIAL_FOOTWEAR |
COMMERCIAL_PHOTOGRAPHY |
COMMERCIAL_PHOTOGRAPHY_ART_AND_GRAPHICS |
COMMERCIAL_SPORTS_PROFESSIONA |
COMMODITIES_AND_FUTURES_EXCHANGE |
COMPUTER_AND_DATA_PROCESSING_SERVICES |
COMPUTER_HARDWARE_AND_SOFTWARE |
COMPUTER_MAINTENANCE_REPAIR_AND_SERVICES_NOT_ELSEWHERE_CLAS |
CONSTRUCTION |
CONSTRUCTION_MATERIALS_NOT_ELSEWHERE_CLASSIFIED |
CONSULTING_SERVICES |
CONSUMER_CREDIT_REPORTING_AGENCIES |
CONVALESCENT_HOMES |
COSMETIC_STORES |
COUNSELING_SERVICES_DEBT_MARRIAGE_PERSONAL |
COUNTERFEIT_CURRENCY_AND_STAMPS |
COUNTERFEIT_ITEMS |
COUNTRY_CLUBS |
COURIER_SERVICES |
COURIER_SERVICES_AIR_AND_GROUND_AND_FREIGHT_FORWARDERS |
COURT_COSTS_ALIMNY_CHILD_SUPT |
COURT_COSTS_INCLUDING_ALIMONY_AND_CHILD_SUPPORT_COURTS_OF_LAW |
CREDIT_CARDS |
CREDIT_UNION |
CULTURE_AND_RELIGION |
DAIRY_PRODUCTS_STORES |
DANCE_HALLS_STUDIOS_AND_SCHOOLS |
DECORATIVE |
DENTAL |
DENTISTS_AND_ORTHODONTISTS |
DEPARTMENT_STORES |
DESKTOP_PCS |
DEVICES |
DIECAST_TOYS_VEHICLES |
DIGITAL_GAMES |
DIGITAL_MEDIA_BOOKS_MOVIES_MUSIC |
DIRECT_MARKETING |
DIRECT_MARKETING_CATALOG_MERCHANT |
DIRECT_MARKETING_INBOUND_TELE |
DIRECT_MARKETING_OUTBOUND_TELE |
DIRECT_MARKETING_SUBSCRIPTION |
DISCOUNT_STORES |
DOOR_TO_DOOR_SALES |
DRAPERY_WINDOW_COVERING_AND_UPHOLSTERY |
DRINKING_PLACES |
DRUGSTORE |
DURABLE_GOODS |
ECOMMERCE_DEVELOPMENT |
ECOMMERCE_SERVICES |
EDUCATIONAL_AND_TEXTBOOKS |
ELECTRIC_RAZOR_STORES |
ELECTRICAL_AND_SMALL_APPLIANCE_REPAIR |
ELECTRICAL_CONTRACTORS |
ELECTRICAL_PARTS_AND_EQUIPMENT |
ELECTRONIC_CASH |
ELEMENTARY_AND_SECONDARY_SCHOOLS |
EMPLOYMENT |
ENTERTAINERS |
ENTERTAINMENT_AND_MEDIA |
EQUIP_TOOL_FURNITURE_AND_APPLIANCE_RENTAL_AND_LEASING |
ESCROW |
EVENT_AND_WEDDING_PLANNING |
EXERCISE_AND_FITNESS |
EXERCISE_EQUIPMENT |
EXTERMINATING_AND_DISINFECTING_SERVICES |
FABRICS_AND_SEWING |
FAMILY_CLOTHING_STORES |
FASHION_JEWELRY |
FAST_FOOD_RESTAURANTS |
FICTION_AND_NONFICTION |
FINANCE_COMPANY |
FINANCIAL_AND_INVESTMENT_ADVICE |
FINANCIAL_INSTITUTIONS_MERCHANDISE_AND_SERVICES |
FIREARM_ACCESSORIES |
FIREARMS_WEAPONS_AND_KNIVES |
FIREPLACE_AND_FIREPLACE_SCREENS |
FIREWORKS |
FISHING |
FLORISTS |
FLOWERS |
FOOD_DRINK_AND_NUTRITION |
FOOD_PRODUCTS |
FOOD_RETAIL_AND_SERVICE |
FRAGRANCES_AND_PERFUMES |
FREEZER_AND_LOCKER_MEAT_PROVISIONERS |
FUEL_DEALERS_FUEL_OIL_WOOD_AND_COAL |
FUEL_DEALERS_NON_AUTOMOTIVE |
FUNERAL_SERVICES_AND_CREMATORIES |
FURNISHING_AND_DECORATING |
FURNITURE |
FURRIERS_AND_FUR_SHOPS |
GADGETS_AND_OTHER_ELECTRONICS |
GAMBLING |
GAME_SOFTWARE |
GAMES |
GARDEN_SUPPLIES |
GENERAL |
GENERAL_CONTRACTORS |
GENERAL_GOVERNMENT |
GENERAL_SOFTWARE |
GENERAL_TELECOM |
GIFTS_AND_FLOWERS |
GLASS_PAINT_AND_WALLPAPER_STORES |
GLASSWARE_CRYSTAL_STORES |
GOVERNMENT |
GOVERNMENT_IDS_AND_LICENSES |
GOVERNMENT_LICENSED_ON_LINE_CASINOS_ON_LINE_GAMBLING |
GOVERNMENT_OWNED_LOTTERIES |
GOVERNMENT_SERVICES |
GRAPHIC_AND_COMMERCIAL_DESIGN |
GREETING_CARDS |
GROCERY_STORES_AND_SUPERMARKETS |
HARDWARE_AND_TOOLS |
HARDWARE_EQUIPMENT_AND_SUPPLIES |
HAZARDOUS_RESTRICTED_AND_PERISHABLE_ITEMS |
HEALTH_AND_BEAUTY_SPAS |
HEALTH_AND_NUTRITION |
HEALTH_AND_PERSONAL_CARE |
HEARING_AIDS_SALES_AND_SUPPLIES |
HEATING_PLUMBING_AC |
HIGH_RISK_MERCHANT |
HIRING_SERVICES |
HOBBIES_TOYS_AND_GAMES |
HOME_AND_GARDEN |
HOME_AUDIO |
HOME_DECOR |
HOME_ELECTRONICS |
HOSPITALS |
HOTELS_MOTELS_INNS_RESORTS |
HOUSEWARES |
HUMAN_PARTS_AND_REMAINS |
HUMOROUS_GIFTS_AND_NOVELTIES |
HUNTING |
IDS_LICENSES_AND_PASSPORTS |
ILLEGAL_DRUGS_AND_PARAPHERNALIA |
INDUSTRIAL |
INDUSTRIAL_AND_MANUFACTURING_SUPPLIES |
INSURANCE_AUTO_AND_HOME |
INSURANCE_DIRECT |
INSURANCE_LIFE_AND_ANNUITY |
INSURANCE_SALES_UNDERWRITING |
INSURANCE_UNDERWRITING_PREMIUMS |
INTERNET_AND_NETWORK_SERVICES |
INTRA_COMPANY_PURCHASES |
LABORATORIES_DENTAL_MEDICAL |
LANDSCAPING |
LANDSCAPING_AND_HORTICULTURAL_SERVICES |
LAUNDRY_CLEANING_SERVICES |
LEGAL |
LEGAL_SERVICES_AND_ATTORNEYS |
LOCAL_DELIVERY_SERVICE |
LOCKSMITH |
LODGING_AND_ACCOMMODATIONS |
LOTTERY_AND_CONTESTS |
LUGGAGE_AND_LEATHER_GOODS |
LUMBER_AND_BUILDING_MATERIALS |
MAGAZINES |
MAINTENANCE_AND_REPAIR_SERVICES |
MAKEUP_AND_COSMETICS |
MANUAL_CASH_DISBURSEMENTS |
MASSAGE_PARLORS |
MEDICAL |
MEDICAL_AND_PHARMACEUTICAL |
MEDICAL_CARE |
MEDICAL_EQUIPMENT_AND_SUPPLIES |
MEDICAL_SERVICES |
MEETING_PLANNERS |
MEMBERSHIP_CLUBS_AND_ORGANIZATIONS |
MEMBERSHIP_COUNTRY_CLUBS_GOLF |
MEMORABILIA |
MEN_AND_BOY_CLOTHING_AND_ACCESSORY_STORES |
MEN_CLOTHING |
MERCHANDISE |
METAPHYSICAL |
MILITARIA |
MILITARY_AND_CIVIL_SERVICE_UNIFORMS |
MISC._AUTOMOTIVE_AIRCRAFT_AND_FARM_EQUIPMENT_DEALERS |
MISC._GENERAL_MERCHANDISE |
MISCELLANEOUS_GENERAL_SERVICES |
MISCELLANEOUS_REPAIR_SHOPS_AND_RELATED_SERVICES |
MODEL_KITS |
MONEY_TRANSFER_MEMBER_FINANCIAL_INSTITUTION |
MONEY_TRANSFER_MERCHANT |
MOTION_PICTURE_THEATERS |
MOTOR_FREIGHT_CARRIERS_AND_TRUCKING |
MOTOR_HOME_AND_RECREATIONAL_VEHICLE_RENTAL |
MOTOR_HOMES_DEALERS |
MOTOR_VEHICLE_SUPPLIES_AND_NEW_PARTS |
MOTORCYCLE_DEALERS |
MOTORCYCLES |
MOVIE |
MOVIE_TICKETS |
MOVING_AND_STORAGE |
MULTI_LEVEL_MARKETING |
MUSIC_CDS_CASSETTES_AND_ALBUMS |
MUSIC_STORE_INSTRUMENTS_AND_SHEET_MUSIC |
NETWORKING |
NEW_AGE |
NEW_PARTS_AND_SUPPLIES_MOTOR_VEHICLE |
NEWS_DEALERS_AND_NEWSTANDS |
NON_DURABLE_GOODS |
NON_FICTION |
NON_PROFIT_POLITICAL_AND_RELIGION |
NONPROFIT |
NOVELTIES |
OEM_SOFTWARE |
OFFICE_SUPPLIES_AND_EQUIPMENT |
ONLINE_DATING |
ONLINE_GAMING |
ONLINE_GAMING_CURRENCY |
ONLINE_SERVICES |
OOUTBOUND_TELEMARKETING_MERCH |
OPHTHALMOLOGISTS_OPTOMETRIST |
OPTICIANS_AND_DISPENSING |
ORTHOPEDIC_GOODS_PROSTHETICS |
OSTEOPATHS |
OTHER |
PACKAGE_TOUR_OPERATORS |
PAINTBALL |
PAINTS_VARNISHES_AND_SUPPLIES |
PARKING_LOTS_AND_GARAGES |
PARTS_AND_ACCESSORIES |
PAWN_SHOPS |
PAYCHECK_LENDER_OR_CASH_ADVANCE |
PERIPHERALS |
PERSONALIZED_GIFTS |
PET_SHOPS_PET_FOOD_AND_SUPPLIES |
PETROLEUM_AND_PETROLEUM_PRODUCTS |
PETS_AND_ANIMALS |
PHOTOFINISHING_LABORATORIES_PHOTO_DEVELOPING |
PHOTOGRAPHIC_STUDIOS_PORTRAITS |
PHOTOGRAPHY |
PHYSICAL_GOOD |
PICTURE_VIDEO_PRODUCTION |
PIECE_GOODS_NOTIONS_AND_OTHER_DRY_GOODS |
PLANTS_AND_SEEDS |
PLUMBING_AND_HEATING_EQUIPMENTS_AND_SUPPLIES |
POLICE_RELATED_ITEMS |
POLITICAL_ORGANIZATIONS |
POSTAL_SERVICES_GOVERNMENT_ONLY |
POSTERS |
PREPAID_AND_STORED_VALUE_CARDS |
PRESCRIPTION_DRUGS |
PROMOTIONAL_ITEMS |
PUBLIC_WAREHOUSING_AND_STORAGE |
PUBLISHING_AND_PRINTING |
PUBLISHING_SERVICES |
RADAR_DECTORS |
RADIO_TELEVISION_AND_STEREO_REPAIR |
REAL_ESTATE |
REAL_ESTATE_AGENT |
REAL_ESTATE_AGENTS_AND_MANAGERS_RENTALS |
RELIGION_AND_SPIRITUALITY_FOR_PROFIT |
RELIGIOUS |
RELIGIOUS_ORGANIZATIONS |
REMITTANCE |
RENTAL_PROPERTY_MANAGEMENT |
RESIDENTIAL |
RETAIL |
RETAIL_FINE_JEWELRY_AND_WATCHES |
REUPHOLSTERY_AND_FURNITURE_REPAIR |
RINGS |
ROOFING_SIDING_SHEET_METAL |
RUGS_AND_CARPETS |
SCHOOLS_AND_COLLEGES |
SCIENCE_FICTION |
SCRAPBOOKING |
SCULPTURES |
SECURITIES_BROKERS_AND_DEALERS |
SECURITY_AND_SURVEILLANCE |
SECURITY_AND_SURVEILLANCE_EQUIPMENT |
SECURITY_BROKERS_AND_DEALERS |
SEMINARS |
SERVICE_STATIONS |
SERVICES |
SEWING_NEEDLEWORK_FABRIC_AND_PIECE_GOODS_STORES |
SHIPPING_AND_PACKING |
SHOE_REPAIR_HAT_CLEANING |
SHOE_STORES |
SHOES |
SNOWMOBILE_DEALERS |
SOFTWARE |
SPECIALTY_AND_MISC._FOOD_STORES |
SPECIALTY_CLEANING_POLISHING_AND_SANITATION_PREPARATIONS |
SPECIALTY_OR_RARE_PETS |
SPORT_GAMES_AND_TOYS |
SPORTING_AND_RECREATIONAL_CAMPS |
SPORTING_GOODS |
SPORTS_AND_OUTDOORS |
SPORTS_AND_RECREATION |
STAMP_AND_COIN |
STATIONARY_PRINTING_AND_WRITING_PAPER |
STENOGRAPHIC_AND_SECRETARIAL_SUPPORT_SERVICES |
STOCKS_BONDS_SECURITIES_AND_RELATED_CERTIFICATES |
STORED_VALUE_CARDS |
SUPPLIES |
SUPPLIES_AND_TOYS |
SURVEILLANCE_EQUIPMENT |
SWIMMING_POOLS_AND_SPAS |
SWIMMING_POOLS_SALES_SUPPLIES_SERVICES |
TAILORS_AND_ALTERATIONS |
TAX_PAYMENTS |
TAX_PAYMENTS_GOVERNMENT_AGENCIES |
TAXICABS_AND_LIMOUSINES |
TELECOMMUNICATION_SERVICES |
TELEPHONE_CARDS |
TELEPHONE_EQUIPMENT |
TELEPHONE_SERVICES |
THEATER |
TIRE_RETREADING_AND_REPAIR |
TOLL_OR_BRIDGE_FEES |
TOOLS_AND_EQUIPMENT |
TOURIST_ATTRACTIONS_AND_EXHIBITS |
TOWING_SERVICE |
TOYS_AND_GAMES |
TRADE_AND_VOCATIONAL_SCHOOLS |
TRADEMARK_INFRINGEMENT |
TRAILER_PARKS_AND_CAMPGROUNDS |
TRAINING_SERVICES |
TRANSPORTATION_SERVICES |
TRAVEL |
TRUCK_AND_UTILITY_TRAILER_RENTALS |
TRUCK_STOP |
TYPESETTING_PLATE_MAKING_AND_RELATED_SERVICES |
USED_MERCHANDISE_AND_SECONDHAND_STORES |
USED_PARTS_MOTOR_VEHICLE |
UTILITIES |
UTILITIES_ELECTRIC_GAS_WATER_SANITARY |
VARIETY_STORES |
VEHICLE_SALES |
VEHICLE_SERVICE_AND_ACCESSORIES |
VIDEO_EQUIPMENT |
VIDEO_GAME_ARCADES_ESTABLISH |
VIDEO_GAMES_AND_SYSTEMS |
VIDEO_TAPE_RENTAL_STORES |
VINTAGE_AND_COLLECTIBLE_VEHICLES |
VINTAGE_AND_COLLECTIBLES |
VITAMINS_AND_SUPPLEMENTS |
VOCATIONAL_AND_TRADE_SCHOOLS |
WATCH_CLOCK_AND_JEWELRY_REPAIR |
WEB_HOSTING_AND_DESIGN |
WELDING_REPAIR |
WHOLESALE_CLUBS |
WHOLESALE_FLORIST_SUPPLIERS |
WHOLESALE_PRESCRIPTION_DRUGS |
WILDLIFE_PRODUCTS |
WIRE_TRANSFER |
WIRE_TRANSFER_AND_MONEY_ORDER |
WOMEN_ACCESSORY_SPECIALITY |
WOMEN_CLOTHING |
Returns:
Title | Type | Description |
id | string | The ID of the product. |
name | string | The product name. |
description | string | The product description. |
type | string | The product type. Indicates whether the product is physical or digital goods, or a service. |
category | string | The product category. |
image_url | string | The image URL for the product. |
home_url | string | The home page URL for the product. |
links | list of objects | An array of request-related HATEOAS links. |
- List products.
Fields:
Title | Type | Description |
Url | string | The URL to the API service is either:
Sandbox: api-m.sandbox.paypal.com
Live: api-m.paypal.com |
page size | number | The number of items to return in the response. |
page | number | A non-zero integer which is the start index of the entire list of items that are returned in the response. So, the combination of page=1 and page_size=20 returns the first 20 items. The combination of page=2 and page_size=20 returns the next 20 items. |
total required | string | Indicates whether to show the total items and total pages in the response. |
Returns:
Title | Type | Description |
products | list | An list of products. |
total_items | number | The total number of items. |
total_pages | number | The total number of pages. |
links | list of objects | An array of request-related HATEOAS links. |
- Show product details - Shows details for a product, by ID.
Fields:
Title | Type | Description |
Url | string | The URL to the API service is either:
Sandbox: api-m.sandbox.paypal.com
Live: api-m.paypal.com |
product_id | string | The product ID. |
Returns:
Title | Type | Description |
id | string | The ID of the product. |
name | string | The product name. |
description | string | The product description. |
type | string | The product type. Indicates whether the product is physical or digital goods, or a service. |
category | string | The product category. |
image_url | string | The image URL for the product. |
home_url | string | The home page URL for the product. |
links | list of objects | An array of request-related HATEOAS links. |
- Update product - Updates a product, by ID. You can patch these attributes and objects:
Fields:
Title | Type | Description |
Url | string | The URL to the API service is either:
Sandbox: api-m.sandbox.paypal.com
Live: api-m.paypal.com |
product_id | string | The product ID. |
operation | string | The operation: add, replace, remove |
path | string | The JSON Pointer to the target document location at which to complete the operation. |
value | string | The value to apply. The remove operation does not require a value. |
Subscriptions
You can use billing plans and subscriptions to create subscriptions that process recurring PayPal payments for physical or digital goods, or services. A plan includes pricing and billing cycle information that defines the amount and frequency of charge for a subscription. You can also define a fixed plan, such as a $5 basic plan or a volume- or graduated-based plan with pricing tiers based on the quantity purchased. For more information, see Subscriptions Overview.
- Create New Plan - Creates a plan that defines pricing and billing cycle details for subscriptions.
Fields:
Title | Type | Description |
Url | string | The URL to the API service is either:
Sandbox: api-m.sandbox.paypal.com
Live: api-m.paypal.com |
product_id | string | The ID of the product associated with the plan. |
name | string | The name of the plan. |
status | string | The status of the plan. |
description | string | The description of the plan. |
billing_cycles | array of objects | An array of billing cycle definitions for the plan. |
payment_preferences | object | The payment preferences for the plan. |
taxes | object | The taxes for the plan. |
quantity_supported | boolean | Indicates whether the plan supports quantity. |
create_time | string | The time the plan was created. |
update_time | string | The time the plan was last updated. |
links | array of objects | An array of request-related https://developer.paypal.com/docs/api/overview/#hateoas-links for the plan. |
Returns:
Title | Type | Description |
product_id | string | The ID of the product associated with the plan. |
name | string | The name of the plan. |
status | string | The status of the plan. |
description | string | The description of the plan. |
billing_cycles | array of objects | An array of billing cycle definitions for the plan. |
payment_preferences | object | The payment preferences for the plan. |
taxes | object | The taxes for the plan. |
quantity_supported | boolean | Indicates whether the plan supports quantity. |
create_time | string | The time the plan was created. |
update_time | string | The time the plan was last updated. |
links | array of objects | An array of request-related HATEOAS links for the plan. |
- List plans - Lists billing plans.
Fields:
Title | Type | Description |
Url | string | The URL to the API service is either: |
Sandbox: api-m.sandbox.paypal.com | ||
Live: api-m.paypal.com | ||
page size | number | The number of items to return in the response. |
page | number | A non-zero integer which is the start index of the entire list of items that are returned in the response. So, the combination of page=1 and page_size=20 returns the first 20 items. The combination of page=2 and page_size=20 returns the next 20 items. |
total required | string | Indicates whether to show the total items and total pages in the response. |
Returns:
Title | Type | Description |
plans | list | An list of plans. |
total_items | number | integer [ 0 .. 500000000 ]The total number of items. |
total_pages | number | The total number of pages. |
links | list of objects | An array of request-related links for the plan. |
- Show plan details - Shows details for a plan, by ID.
Fields:
Title | Type | Description |
Url | string | The URL to the API service is either:
Sandbox: api-m.sandbox.paypal.com
Live: api-m.paypal.com |
plan_id | string | The ID of the plan. |
Returns:
Title | Type | Description |
id | string | The ID of the plan. |
product_id | string | The ID of the product associated with the plan. |
name | string | The name of the plan. |
status | string | The status of the plan. |
description | string | The description of the plan. |
billing_cycles | array of objects | An array of billing cycle definitions for the plan. |
payment_preferences | object | The payment preferences for the plan. |
taxes | object | The taxes for the plan. |
quantity_supported | boolean | Indicates whether the plan supports quantity. |
create_time | string | The time the plan was created. |
update_time | string | The time the plan was last updated. |
links | array of objects | An array of request-related links for the plan. |
- Activate plan - Activates a plan, by ID.
Fields:
Title | Type | Description |
Url | string | The URL to the API service is either:
Sandbox: api-m.sandbox.paypal.com
Live: api-m.paypal.com |
plan_id | string | The ID of the plan. |
- Deactivate plan - Deactivates a plan, by ID.
Fields:
Title | Type | Description |
Url | string | The URL to the API service is either:
Sandbox: api-m.sandbox.paypal.com
Live: api-m.paypal.com |
plan_id | string | The ID of the plan. |
- Create subscription
Fields:
Title | Type | Description |
Url | string | The URL to the API service is either:
Sandbox: api-m.sandbox.paypal.com
Live: api-m.paypal.com |
plan_id | string | The ID of the plan associated with the subscription. |
start_time | string | The start time of the subscription. This must be in the future. The format is yyyy-MM-ddTHH:mm:ssZ. |
quantity | number | The quantity of the product in the subscription. |
shipping_amount | object | The shipping amount for the subscription. |
subscriber | object | Information about the subscriber. |
application_context | object | Information about the context of the application. |
Returns:
Title | Type | Description |
id | string | The ID of the subscription. |
status | string | The status of the subscription. |
status_update_time | string | The time the subscription status was last updated. |
plan_id | string | The ID of the plan associated with the subscription. |
start_time | string | The start time of the subscription. |
quantity | string | The quantity of the product in the subscription. |
shipping_amount | object | The shipping amount for the subscription. |
subscriber | object | Information about the subscriber. |
create_time | string | The time the subscription was created. |
links | list of objects | An list of request-related links for the subscription. |
- Activate subscription - Activates the subscription.
Fields:
Title | Type | Description |
Url | string | The URL to the API service is either:
Sandbox: api-m.sandbox.paypal.com
Live: api-m.paypal.com |
subscriptions_id | string | The ID of the plan. |
reason | string | reason |
- Suspend subscription - Suspends the subscription.
Fields:
Title | Type | Description |
Url | string | The URL to the API service is either:
Sandbox: api-m.sandbox.paypal.com
Live: api-m.paypal.com |
subscriptions_id | string | The ID of the plan. |
reason | string | reason |
- Cancel subscription - Cancels the subscription.
Fields:
Title | Type | Description |
Url | string | The URL to the API service is either:
Sandbox: api-m.sandbox.paypal.com
Live: api-m.paypal.com |
subscriptions_id | string | The ID of the plan. |
reason | string | reason |
- List transactions for subscription
Fields:
Title | Type | Description |
Url | string | The URL to the API service is either:
Sandbox: api-m.sandbox.paypal.com
Live: api-m.paypal.com |
subscriptions_id | string | The ID of the plan. |
start_time | string | The start time of the range of transactions to list. |
end_time | string | The end time of the range of transactions to list. |
Returns:
Title | Type | Description |
transactions | list | An list of transactions. |
total_items | number | integer [ 0 .. 500000000 ]The total number of items. |
total_pages | number | The total number of pages. |
links | list of objects | An array of request-related links for the plan. |
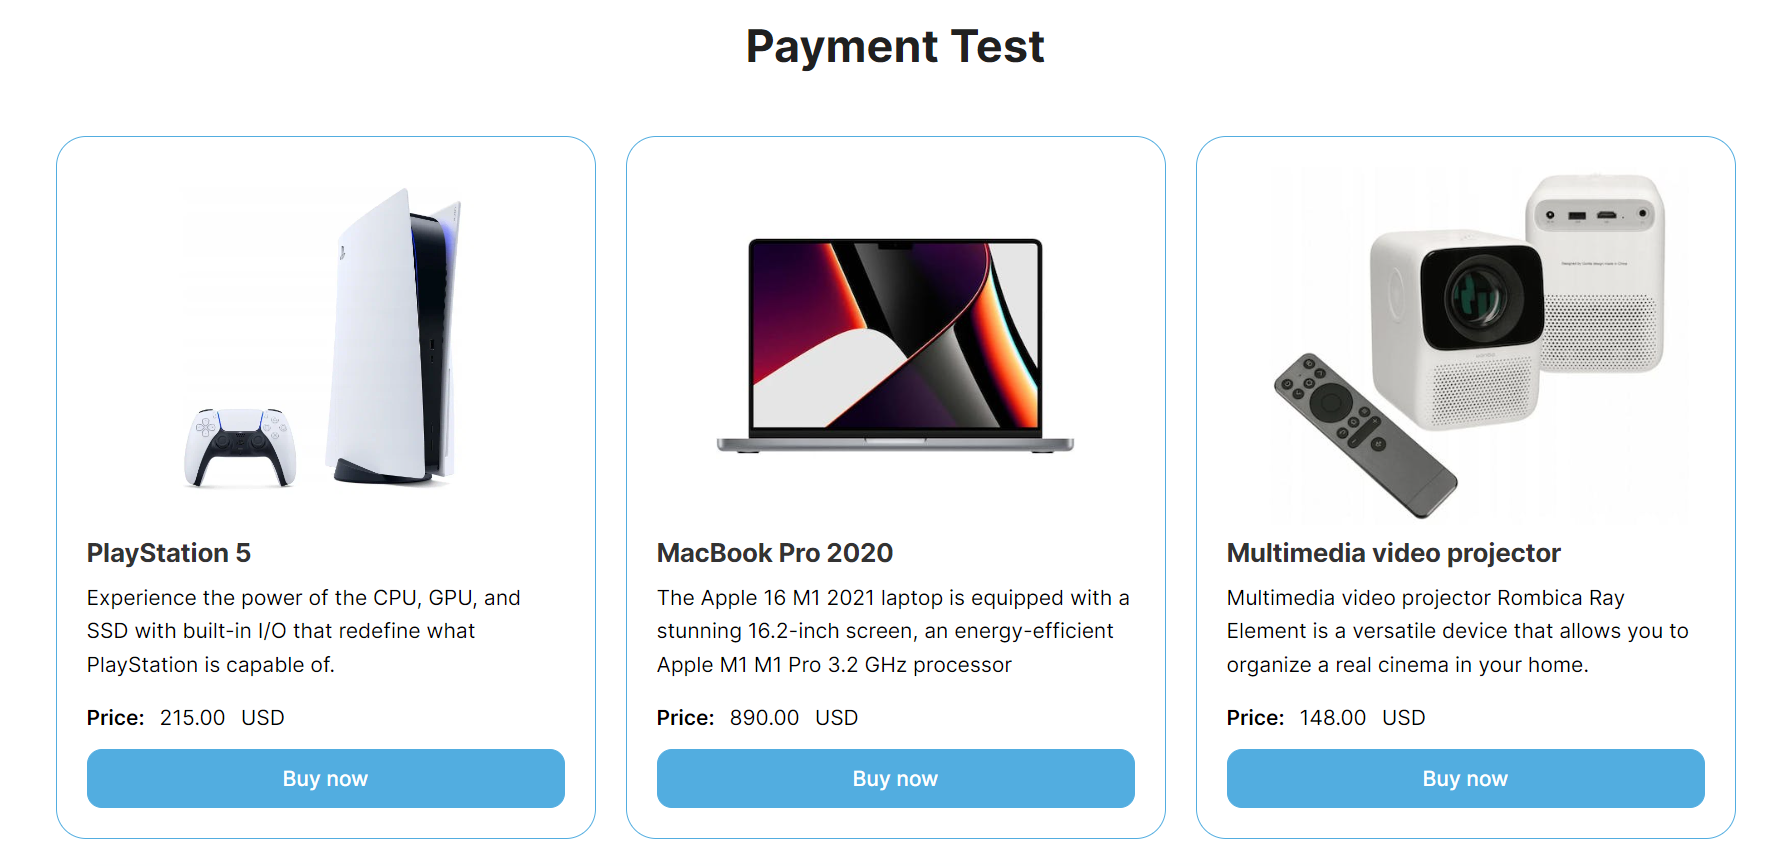
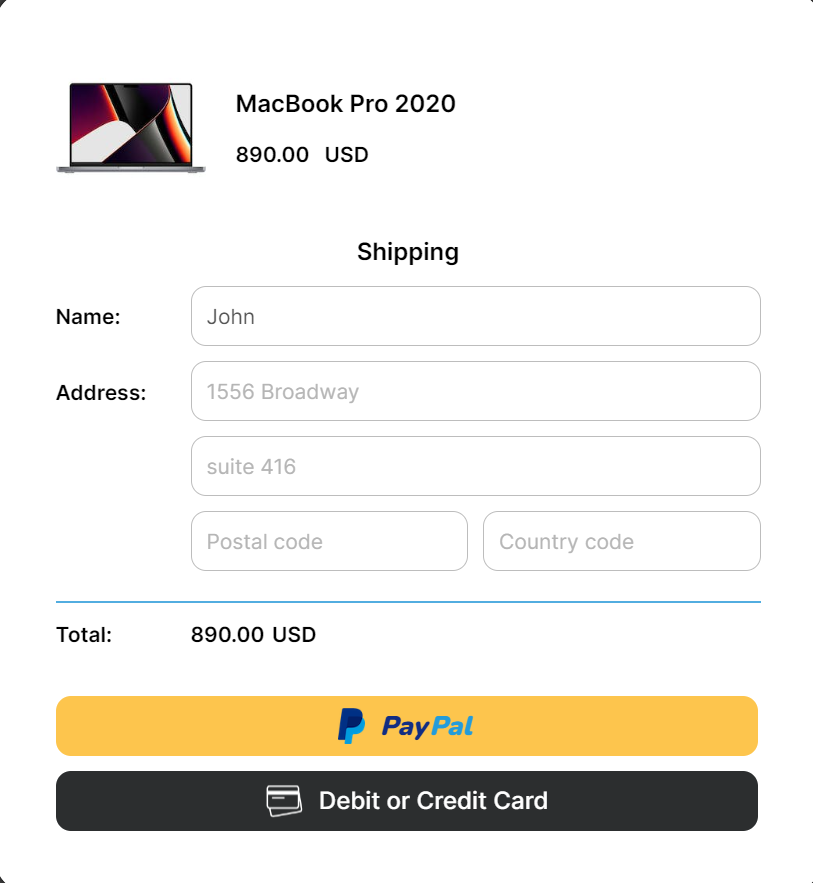
Payment Test workflow
This workflow demonstrates, using the example of buying a product in a store, how to set up API calls for creating a payment order, choosing a payment method, confirming payment and further processing the payment on the seller's side.
- When buying one or more products, you can set up the action "Order - Create order2" and transfer the necessary amount for payment and other necessary parameters according to the documentation of this action.
- After creating a payment order using order ID, you can get data about the payment order (ID, status, etc.) using the action "Order - Show order details2" or data call "Order - Show order details data". As long as the payment order is not paid and the payment is not captured by the seller, you can edit the payment order using actions: Update intent order, Update order address, Update order description, Update shipping name order, Update the shipping type order, Update amount order.
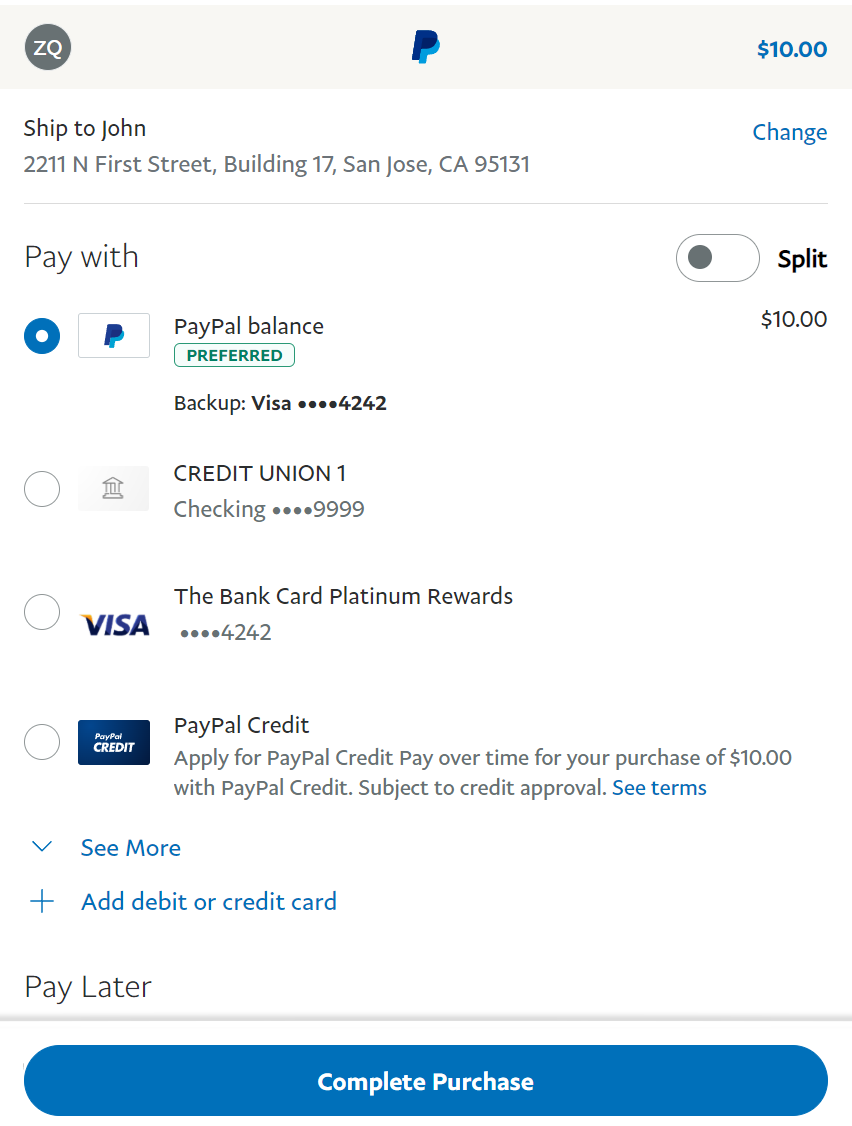
- For the created order, you can accept payment using Paypal or a Card. To do this, use the actions "Order - Confirm the Order Paypal" and "Order - Confirm the Order Card".
Action "Order - Confirm the Order Paypal" returns a link to go to the Paypal site for payment (links➡️href).
After successful payment, the status of the payment order will change to APPROVED.
- Depending on the selected value of the field "intent" action "Order - Create order2", it is necessary to select further actions.
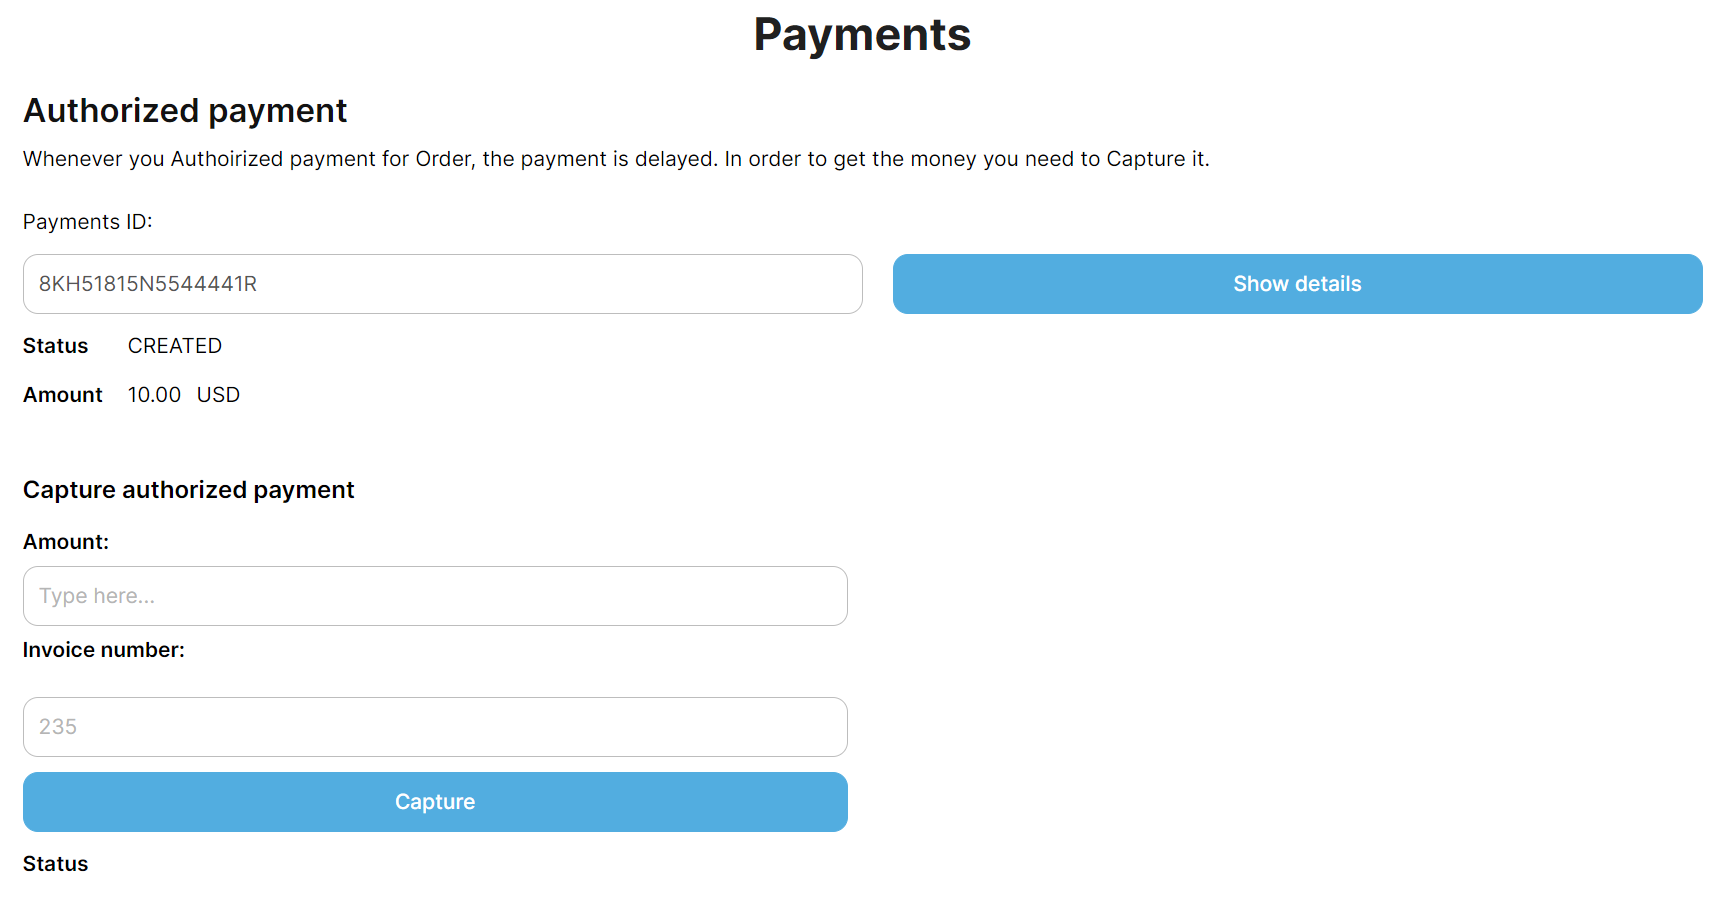
- If the value of the field is "intent" AUTHORIZE, then it is necessary to authorize the payment of the order using the action "Order - Authorize payment for order2". At the same time, the payment will be waiting for authorization in the buyer's personal account.
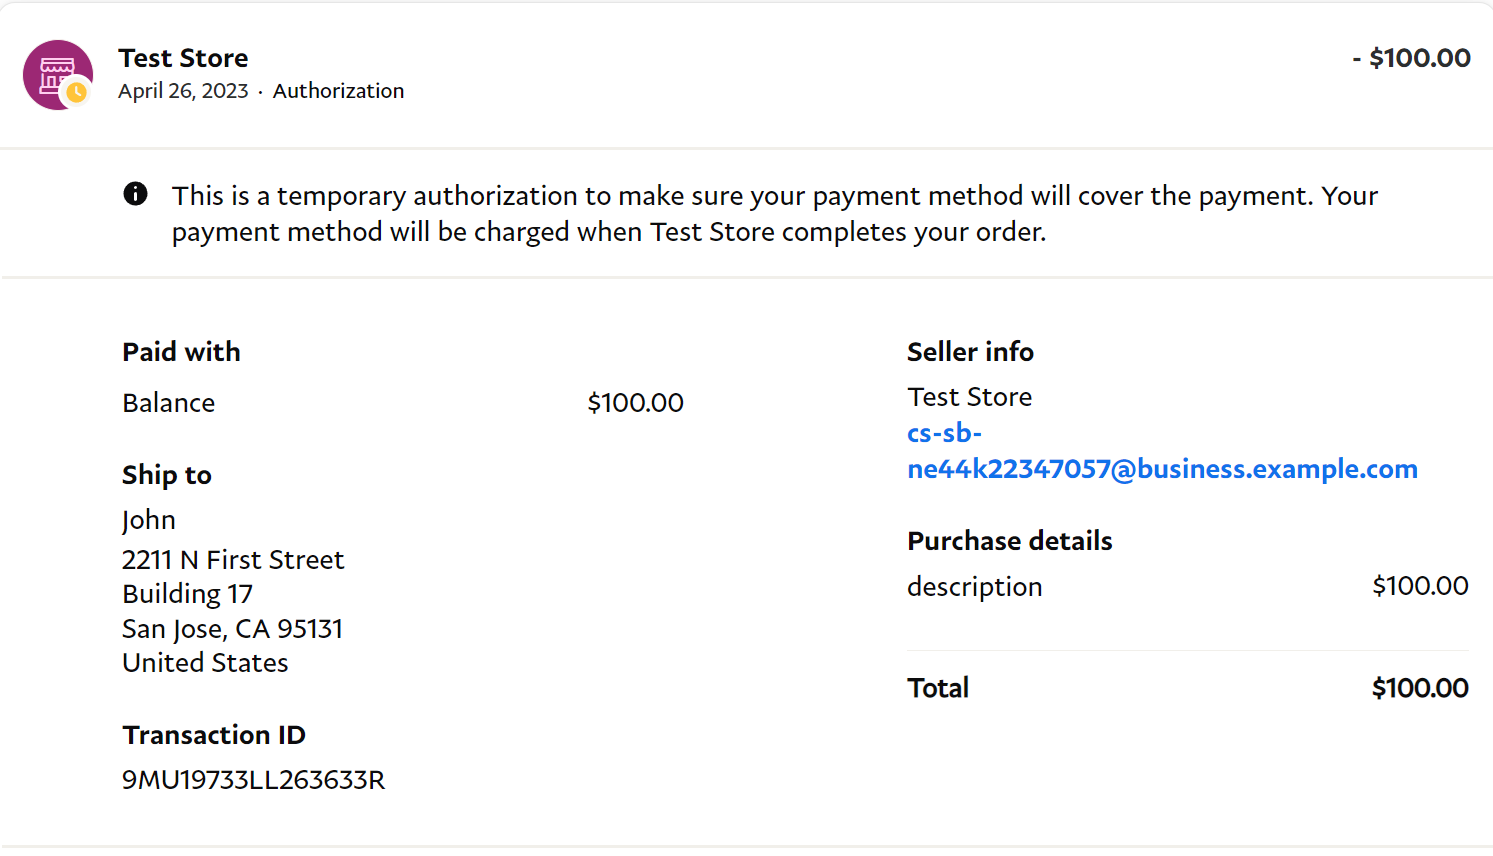
In the merchant's personal account, the payment will have the status "PENDING".
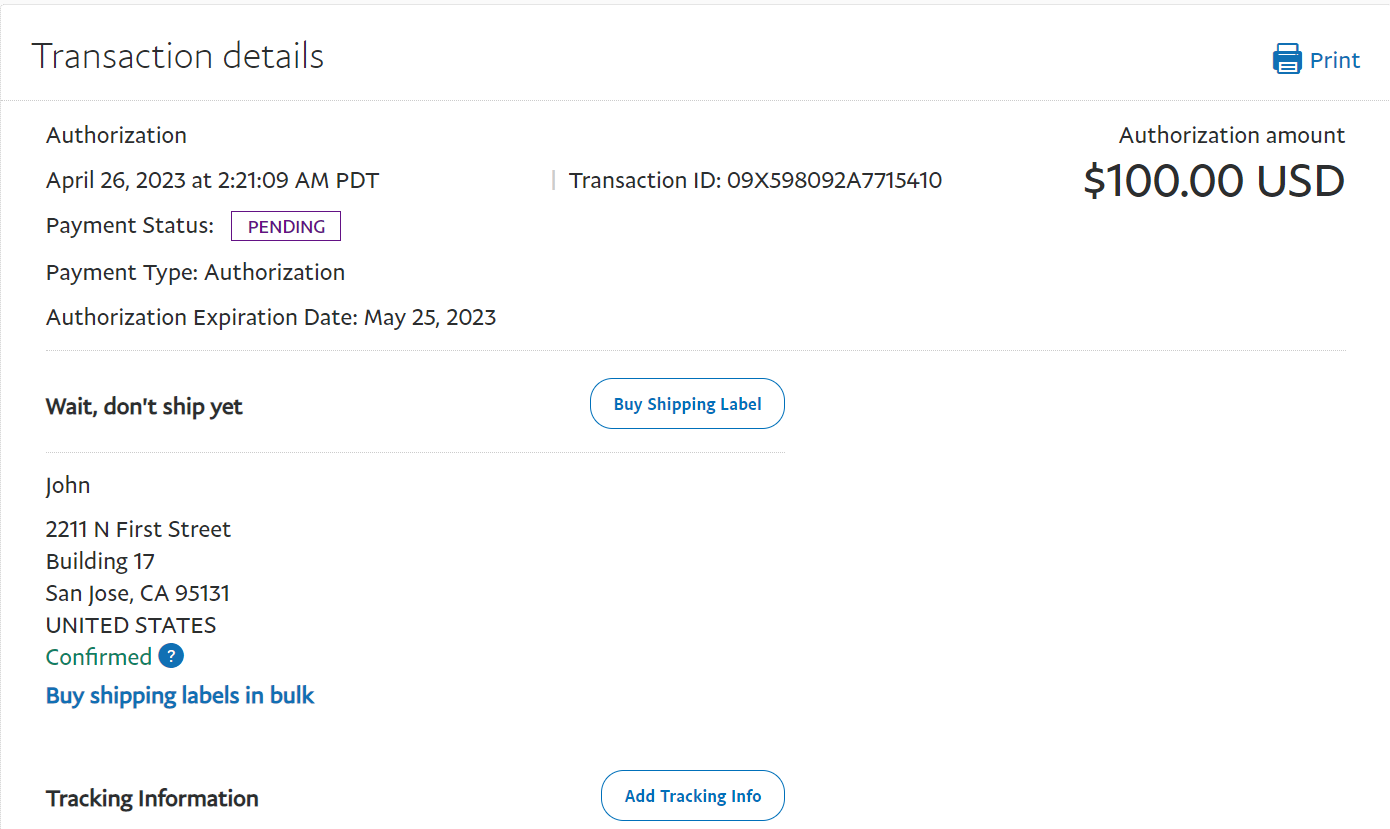
To further fix the authorized payment, use the action "Payments - Capture authorized payment".
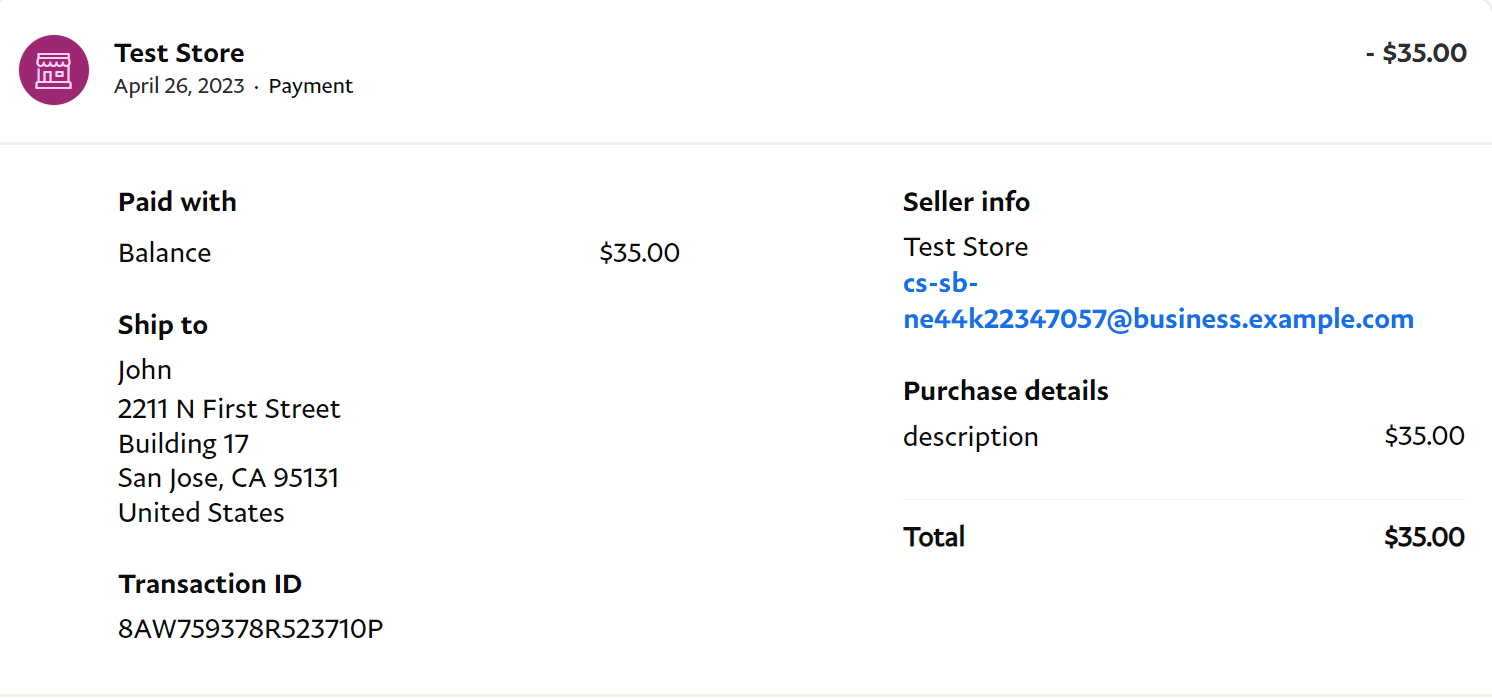
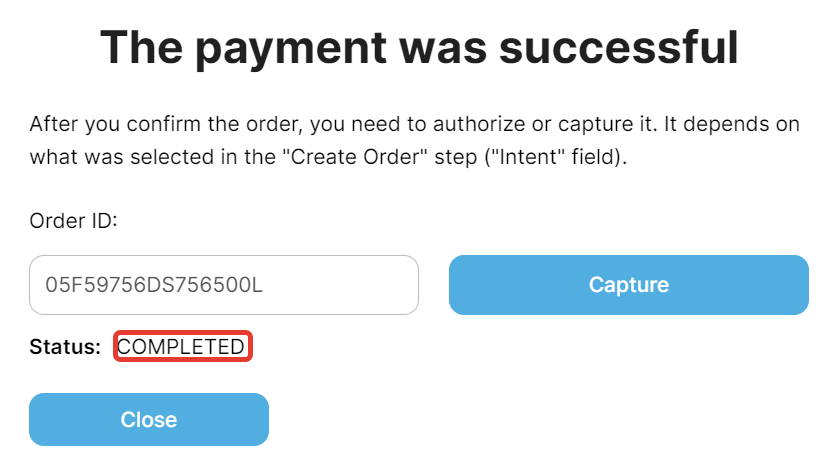
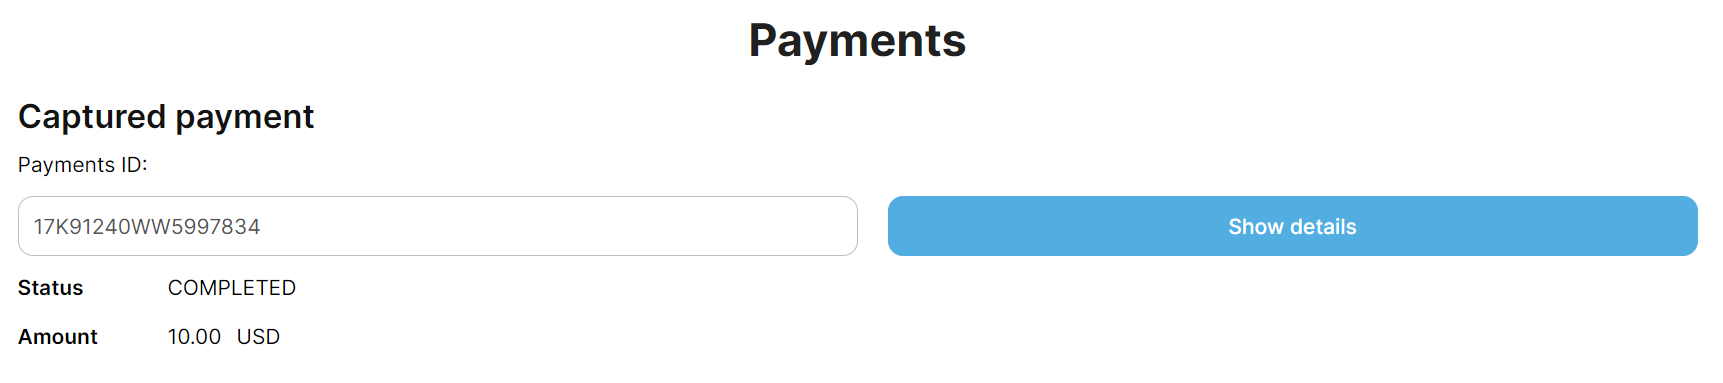
- If the value of the "intent" field is CAPTURE, then it is necessary to authorize the payment of the order using the "Order - Capture payment for order2" action. In this case, the payment will be recorded immediately after the buyer makes the payment.
Step-by-step configuration workflow
This workflow demonstrates the step-by-step process of the API from the moment the payment order is created to the moment the seller receives the money.
- Create a payment order by filling in the required fields.
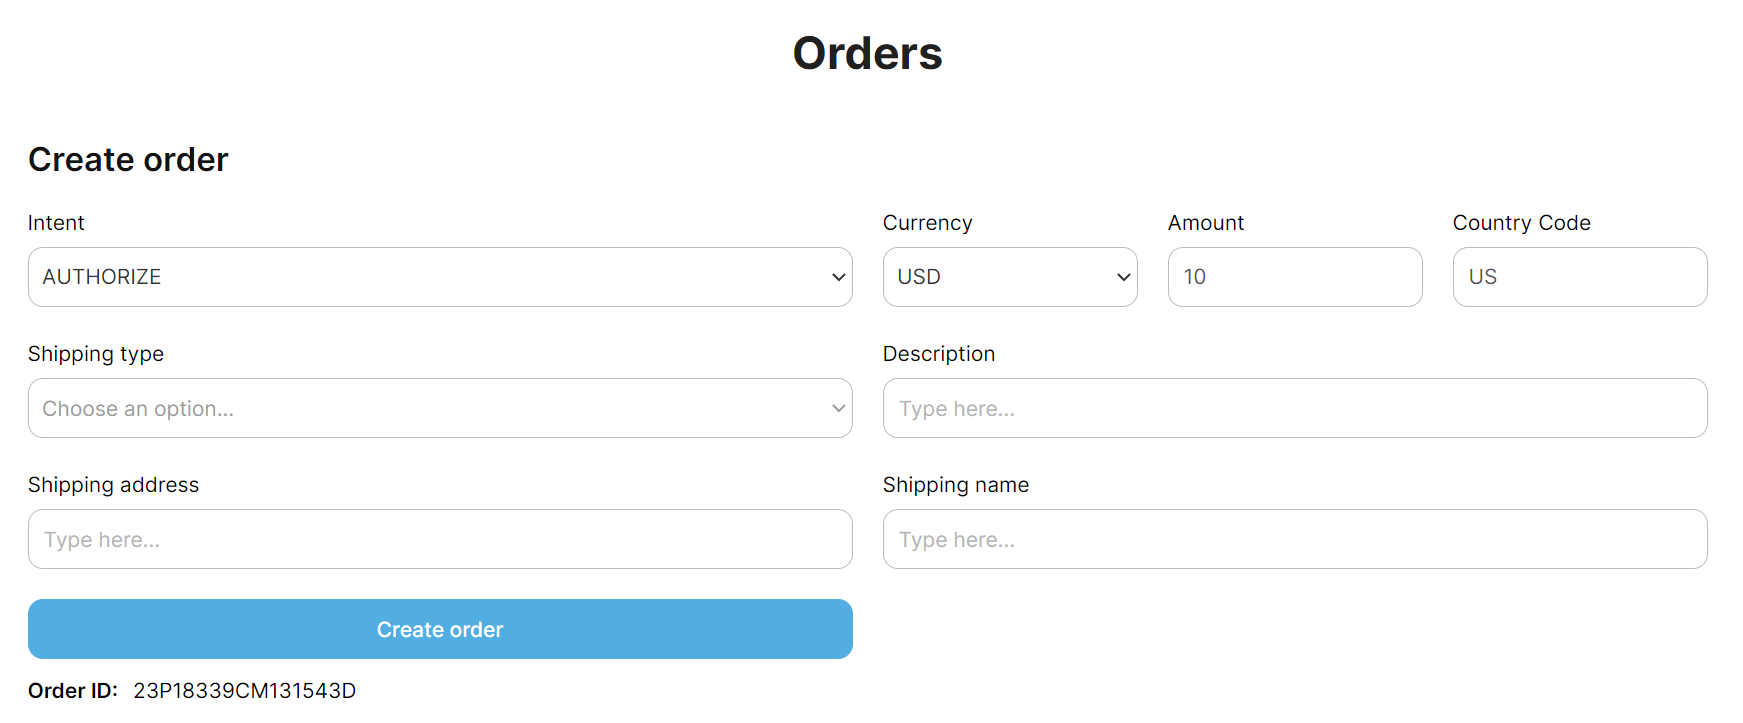
For further work with the payment order, you need to use the order_id received when using the Order - Create order2 action.
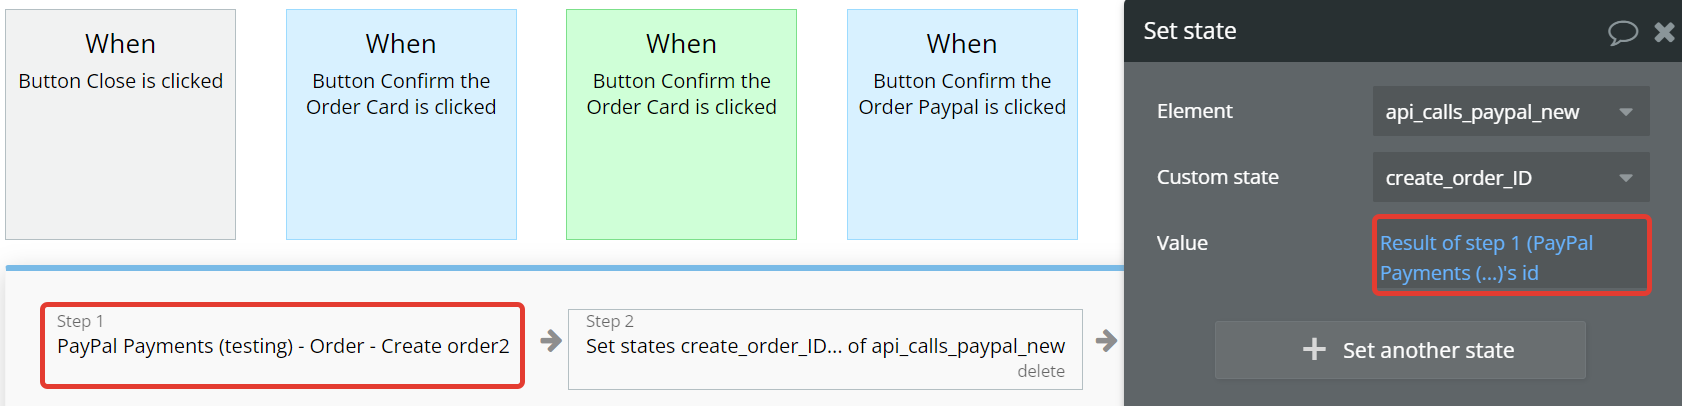
- Use the Order ID to further confirm the payment using the selected method:
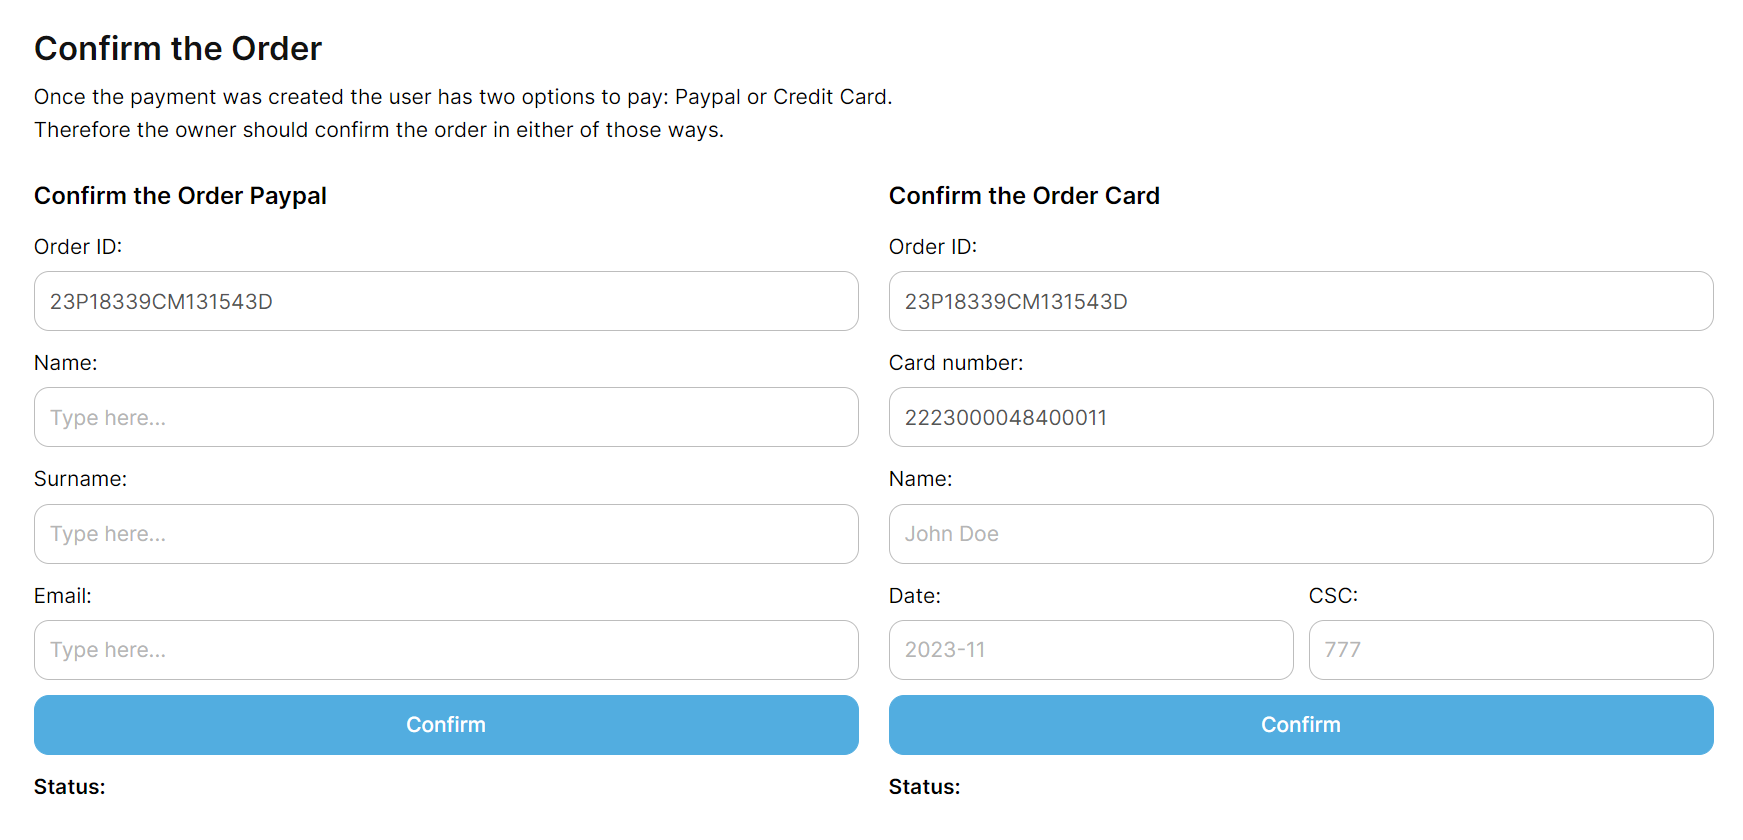
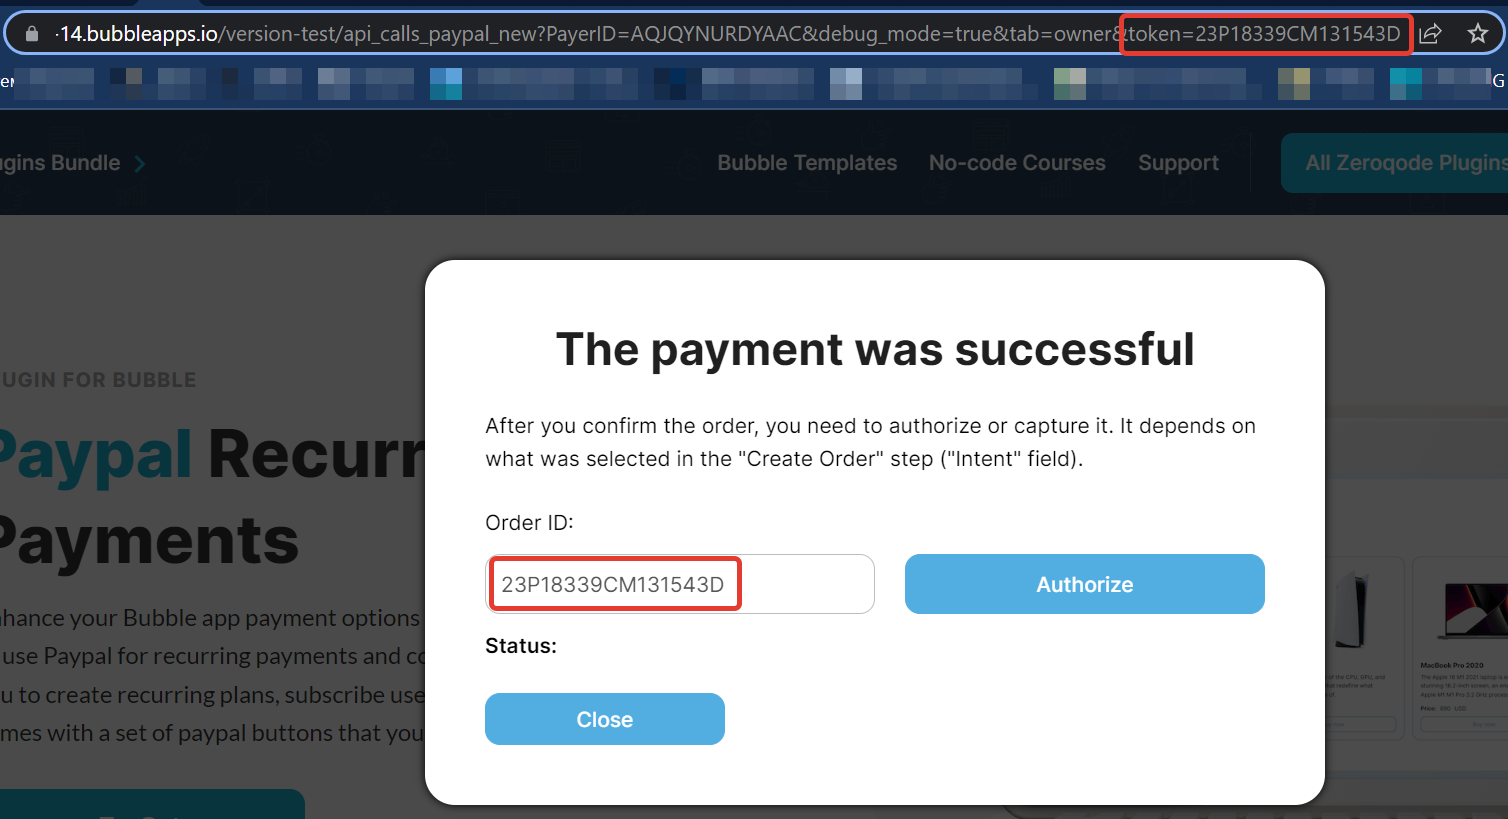
- when paying using Paypal, use the action "Order - Confirm the Order Paypal" by filling in the required fields. Using the action "Order - Confirm the Order Paypal" returns a link to go to the Paypal payment site, after a successful (unsuccessful) payment on the Paypal site, you can set up a redirect link (field return_url (cancel_url)).
After successful payment, you can use the Order ID from the URL, it is located in the "token" parameter.
- when paying with a credit/debit card, use the action "Order - Confirm the Order Card" by filling in the required fields. To test card payment, use Paypal documentation.
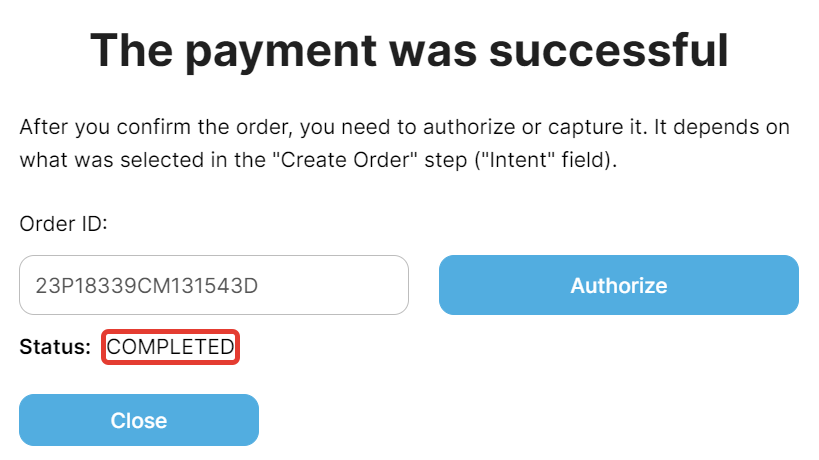
- If the payment was successful, then the payment order must be authorized or captured, depending on the selected "Intent" value when creating the payment order. To do this, use the actions "Order - Authorize payment for order2" and "Order - Capture payment for order2" by filling in all the necessary fields. After successful authorization or capture of the payment order, you will receive the payment ID.
- Using actions Payments - Show details for authorized payment, Payments - Show captured payment details you can get information about payments, as well as re-authorize an authorized payment using action Payments - Reauthorize authorized payment. Use the payment ID in these actions obtained in the previous step.

Changelogs
Update 19.07.24 - Version 1.10.0
- Minor update.
Update 17.07.24 - Version 1.9.0
- Minor update (Marketing update).
Update 06.06.24 - Version 1.8.0
- Minor update.
Update 31.05.24 - Version 1.7.0
- Updated demo/service links.
Update 30.01.24 - Version 1.6.0
- updated description.
Update 03.01.24 - Version 1.5.0
- updated description.
Update 27.12.23 - Version 1.4.0
- updated description.
Update 25.10.23 - Version 1.3.0
- updated description.
Update 18.10.23 - Version 1.2.0
- updated description.
Update 18.10.23 - Version 1.1.0
- updated description.
Update 17.10.23 - Version 1.0.0
- Initial Release.