The guide states the things to note, like Admin Access, Custom Code, Notes, APIs, etc.
Admin Rights
Most of the template content is directly pulled from the database. Please do not delete an entire Data Thing unless you are sure of what you are doing. However, feel free to delete any template content you prefer.
For security purposes, this template has limited rights for potential customers. Meaning, you will not be able to use the admin features at its fullest until you purchase the template and enable admin rights.
The restricted elements for clicking are:
- Button "Refund" (transactions)
- Button "Refund" (users)
- Button "Add playlist"
- FeatherIcon "edit category 1"
- FeatherIcon "edit category 2"
- FeatherIcon "edit category 3"
- FeatherIcon "edit category 4"
- Group "category 1"
- Group "category 2"
- Group "category 3"
- Group "category 4"
- Group "random" (for today)
- Group "edit" (for today)
- Group "random" (start now)
- Group "edit" (start now)
- Button "add new meditation"
- Group "edit meditation"
- Group "delete meditation"
To enable these buttons, it is required to grant the template access.
1. First of all, go to Data -> App data -> All Users tab. Select any user you want to grant admin rights to, and click to edit that database entry. Then change the admin field to yes:
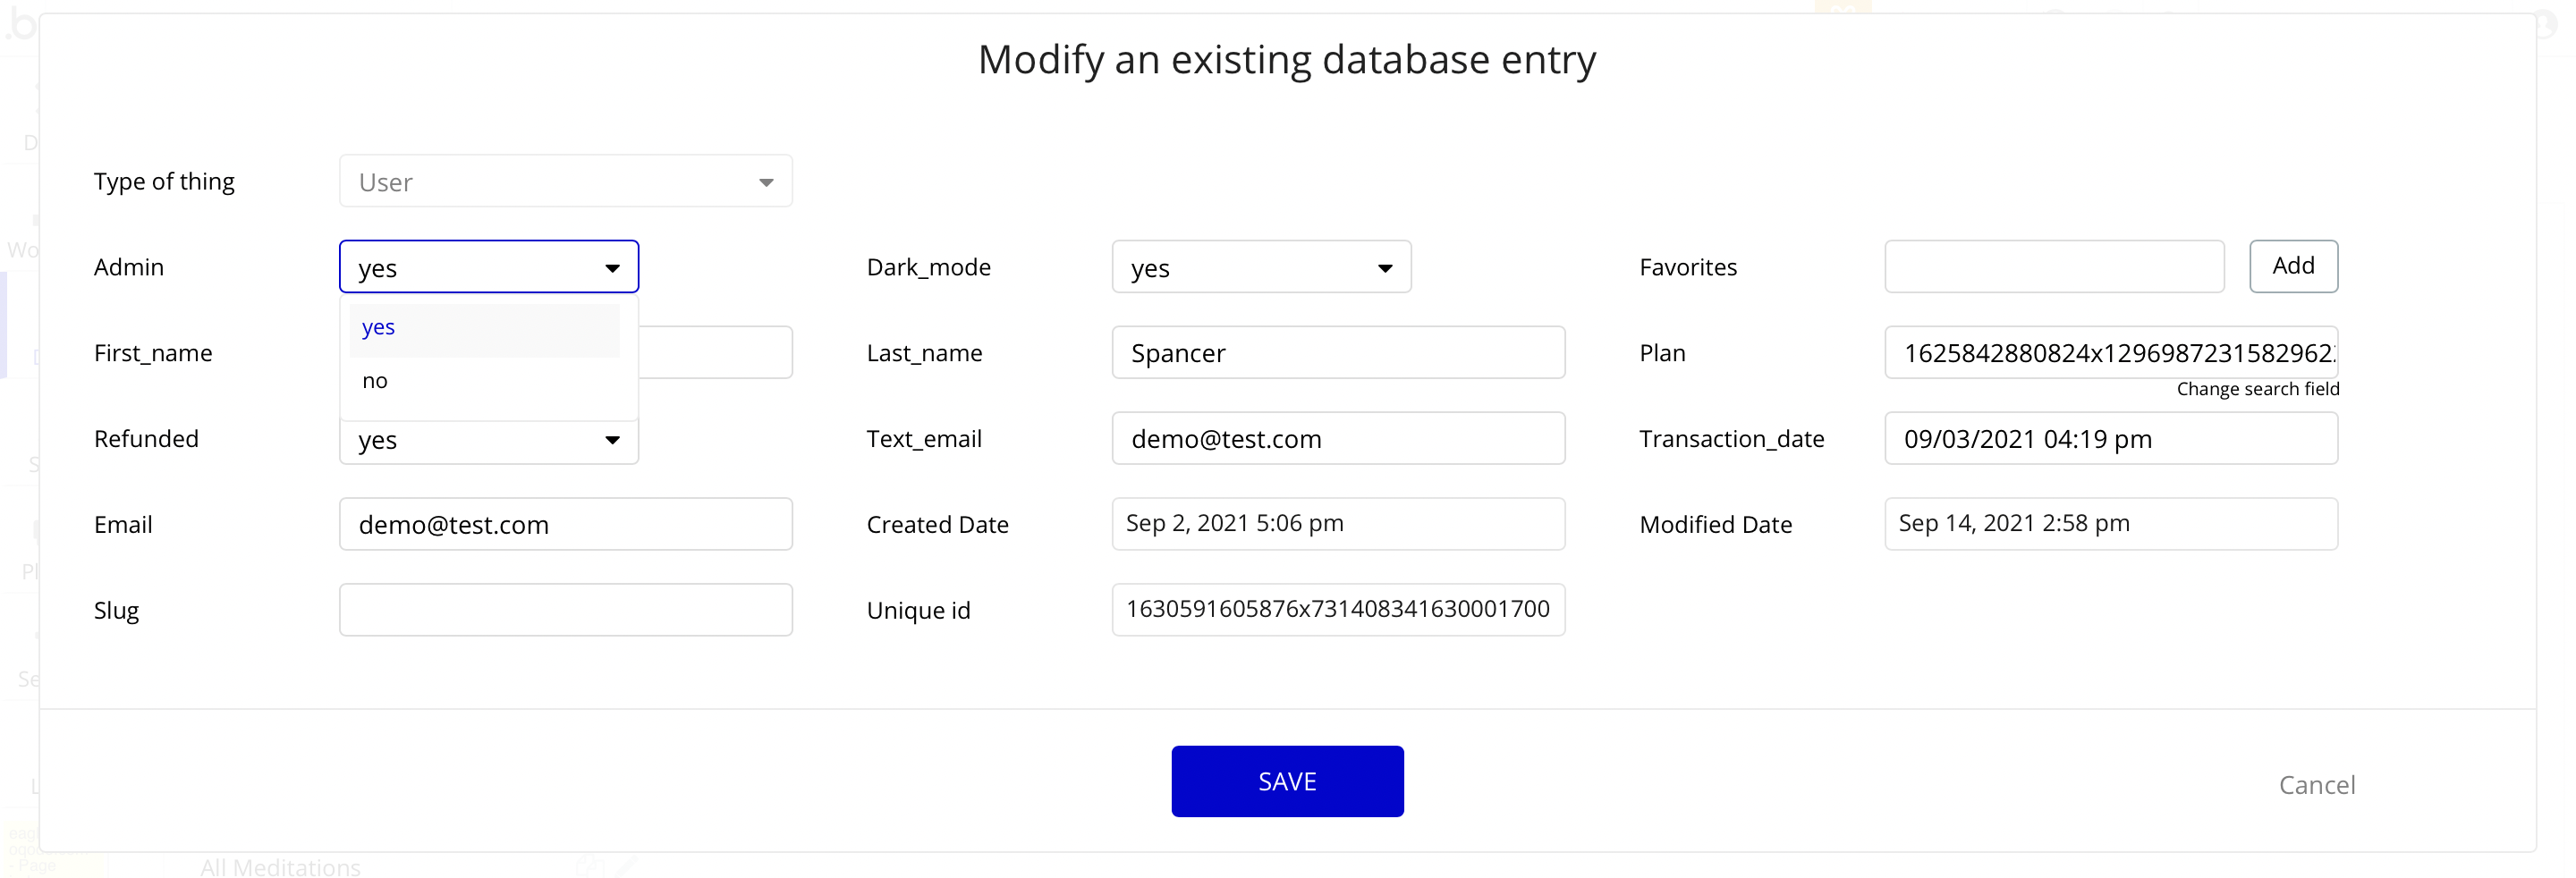
Note: Remember to hit the SAVE button.
Now, you will be able to access the admin page.
2. Go to Data -> App data -> All AccessTemplates tab. Click to modify the database entry, and change the access field value to yes:
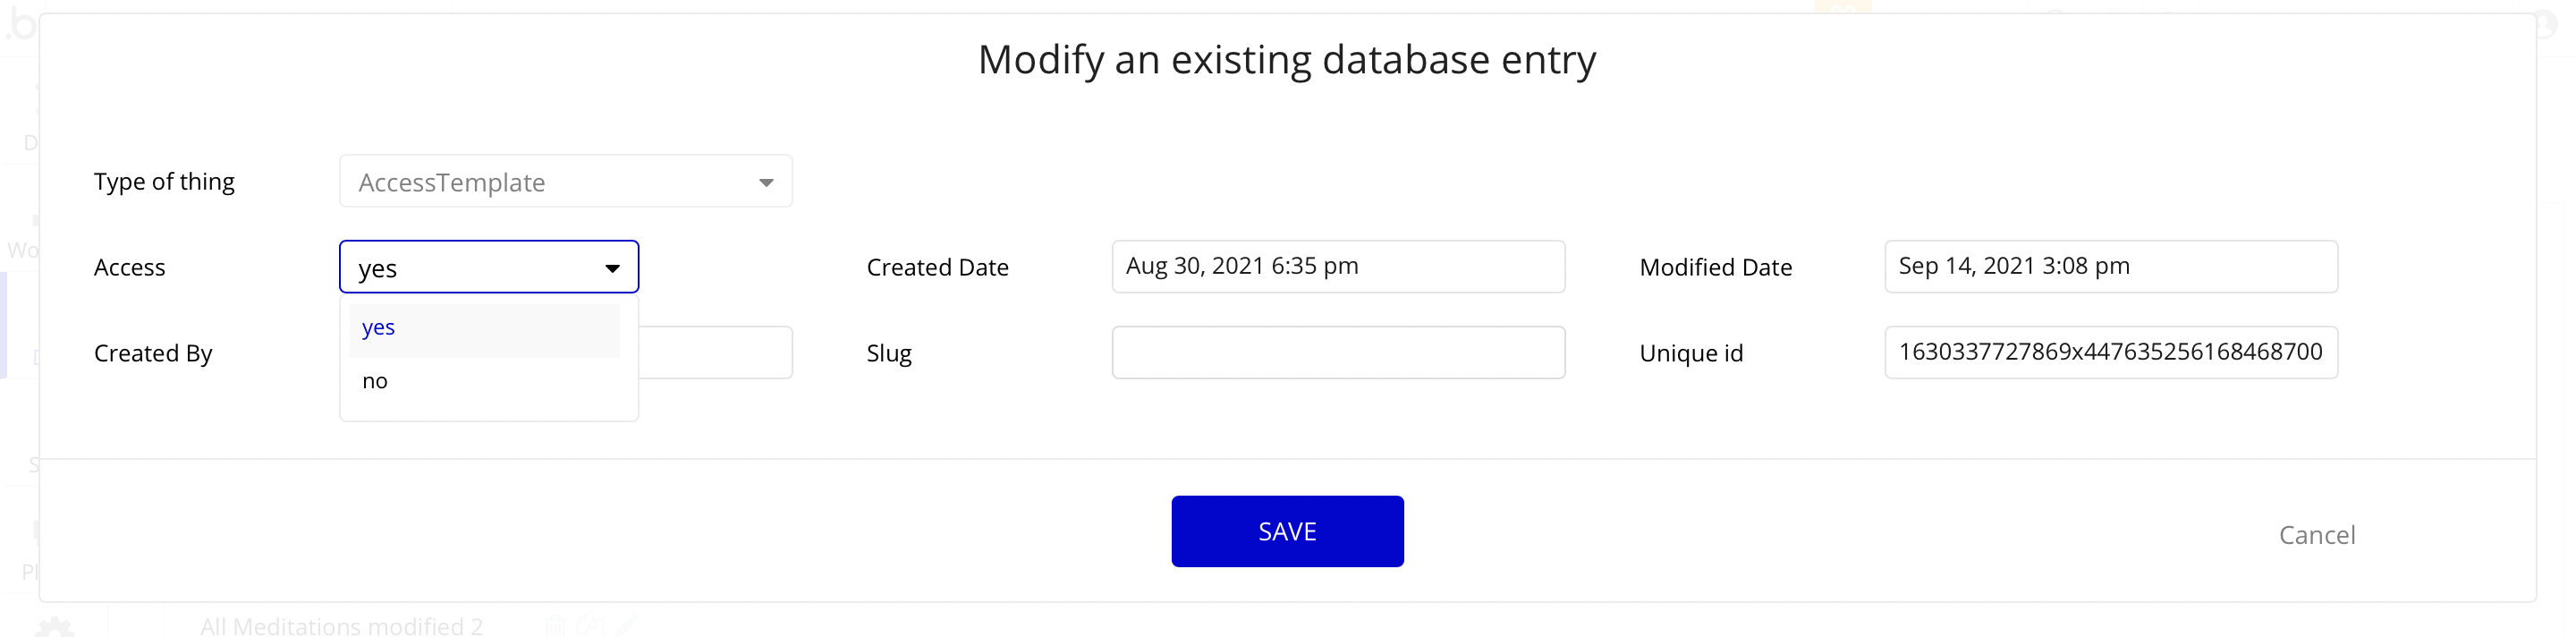
Note: Remember to hit the SAVE button.
Congrats! You have successfully granted admin rights. Now you can use all the admin page and its features as an admin user.
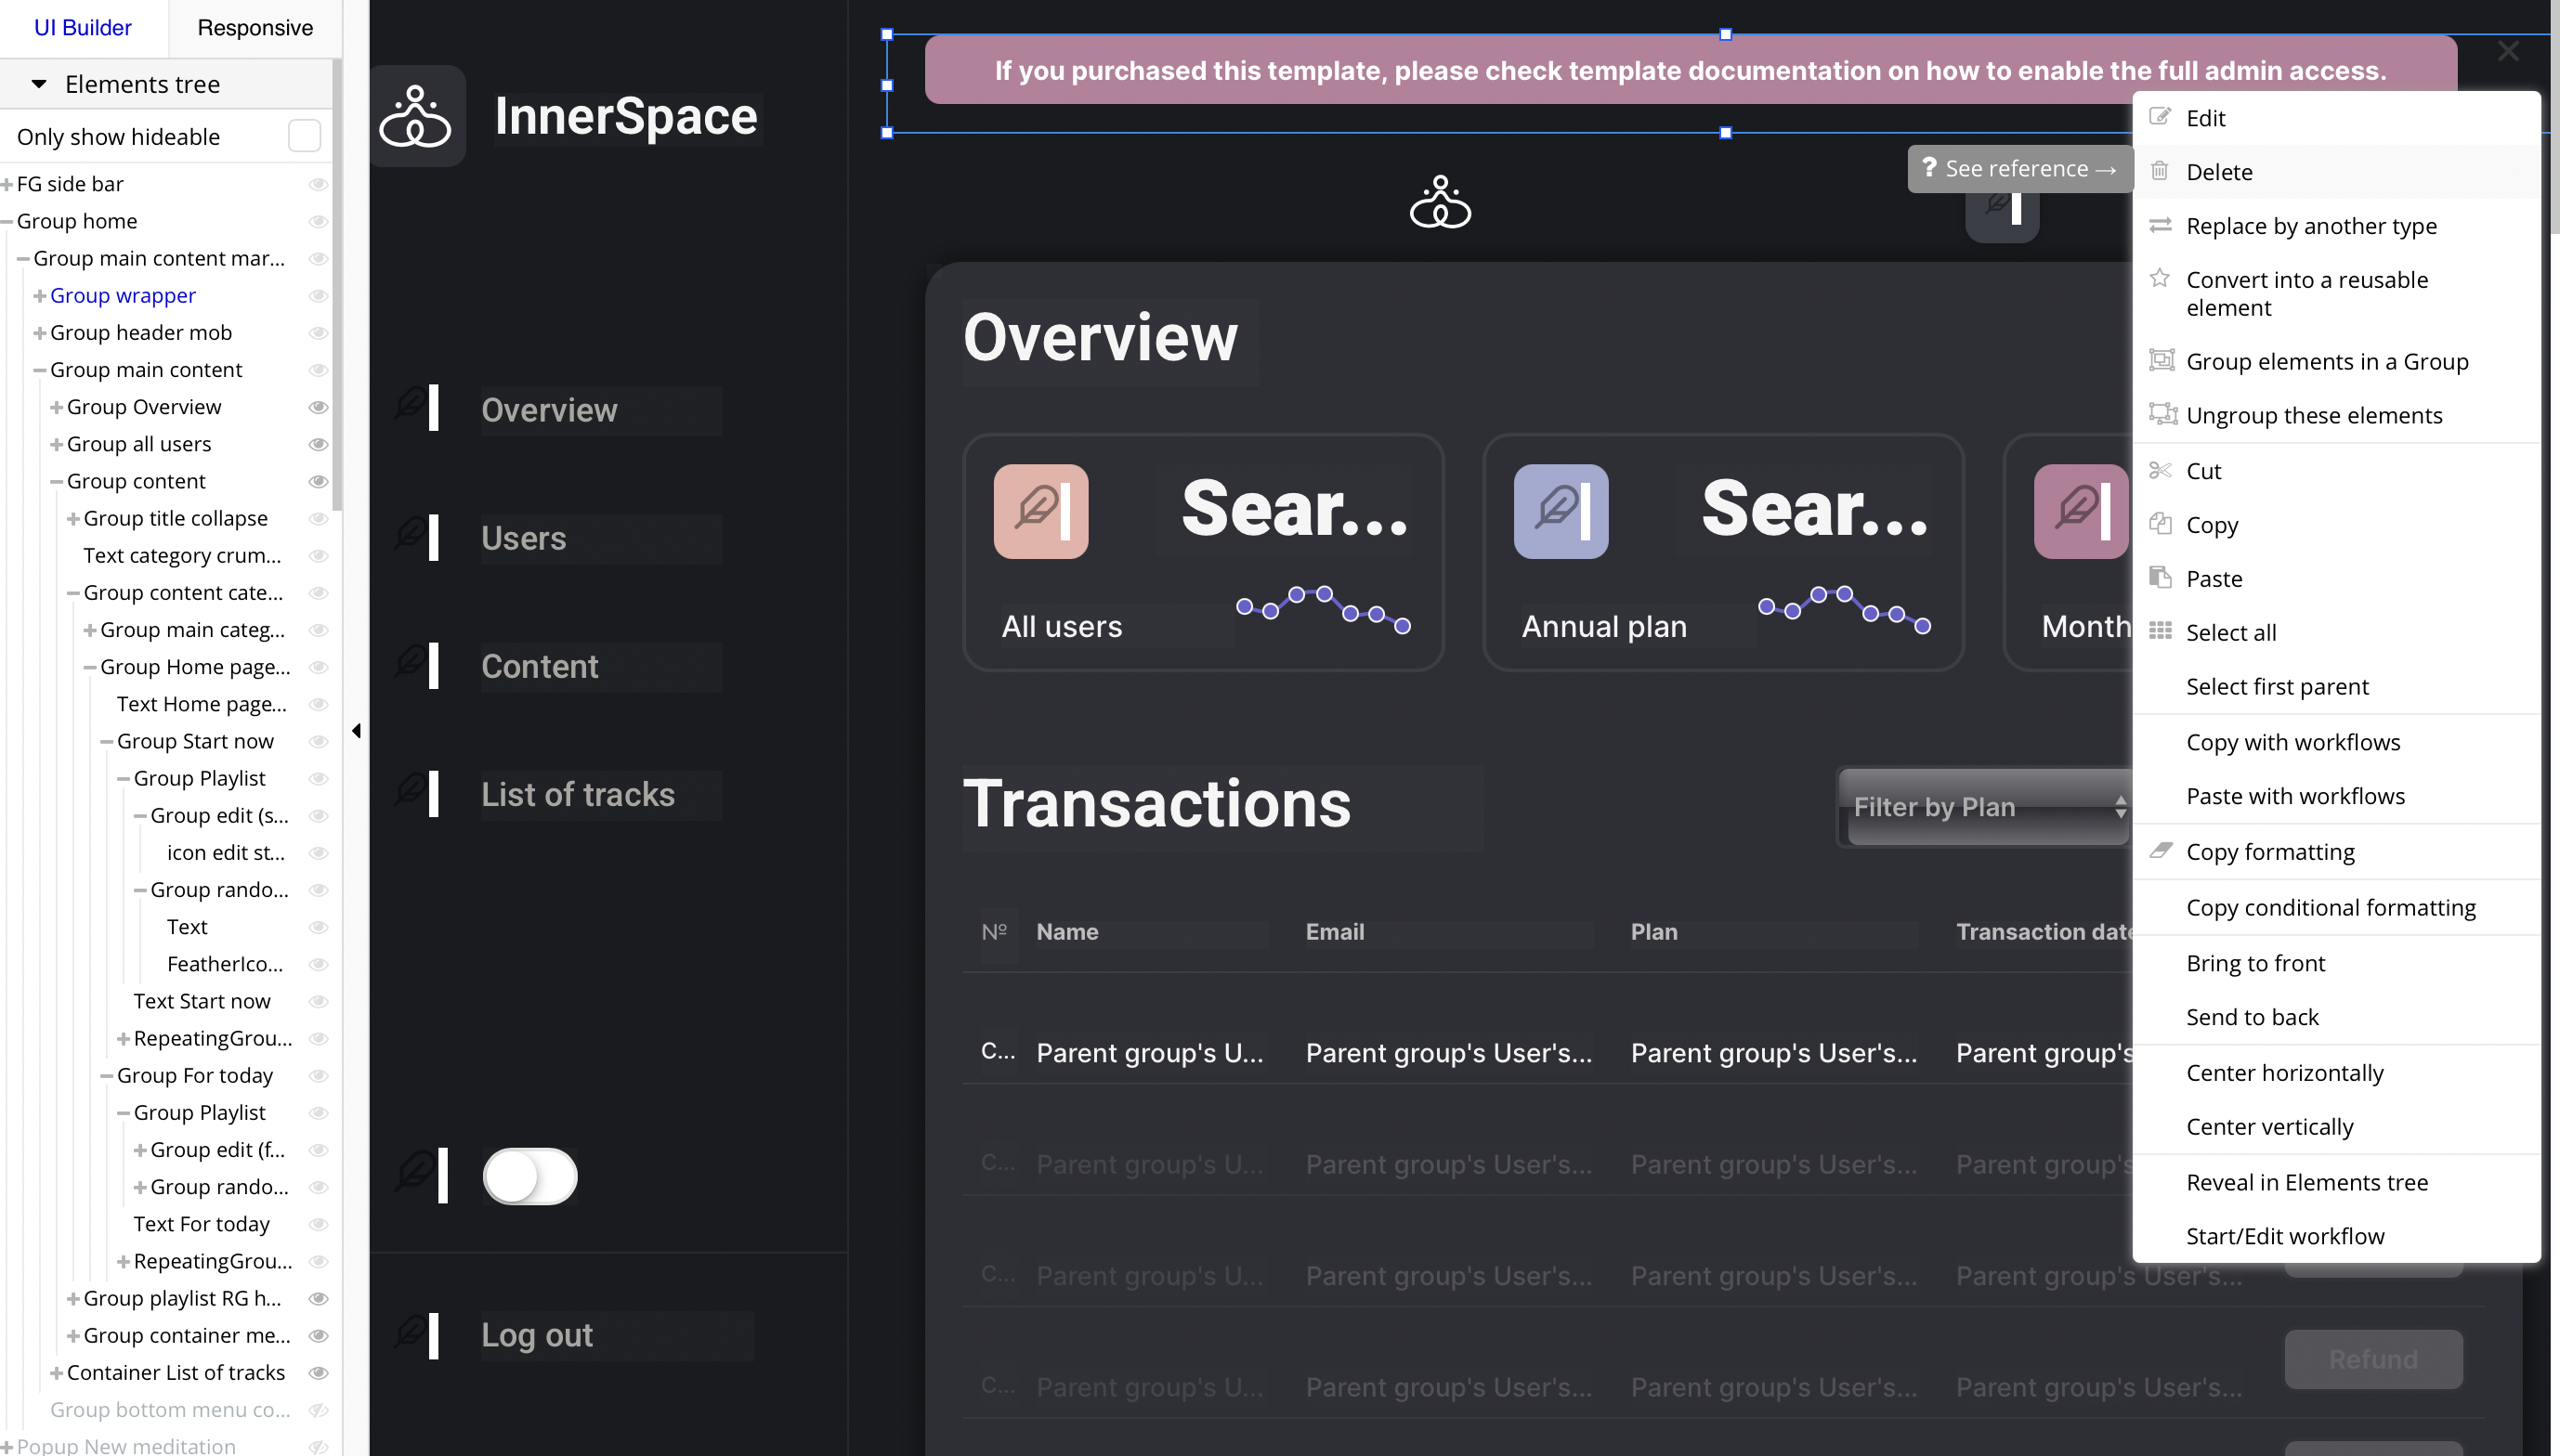
Also, locate the "Group wrapper" element, and simply delete it:

Stock Photos
This template is using lots of images that have been purchased at https://ui8.net.
Note: To use them, you should purchase them first, or you simply replace them with some other illustrations.
Custom Code
On certain pages, there are some HTML elements used for some solutions that are not available by default. You can find these codes on the following pages:
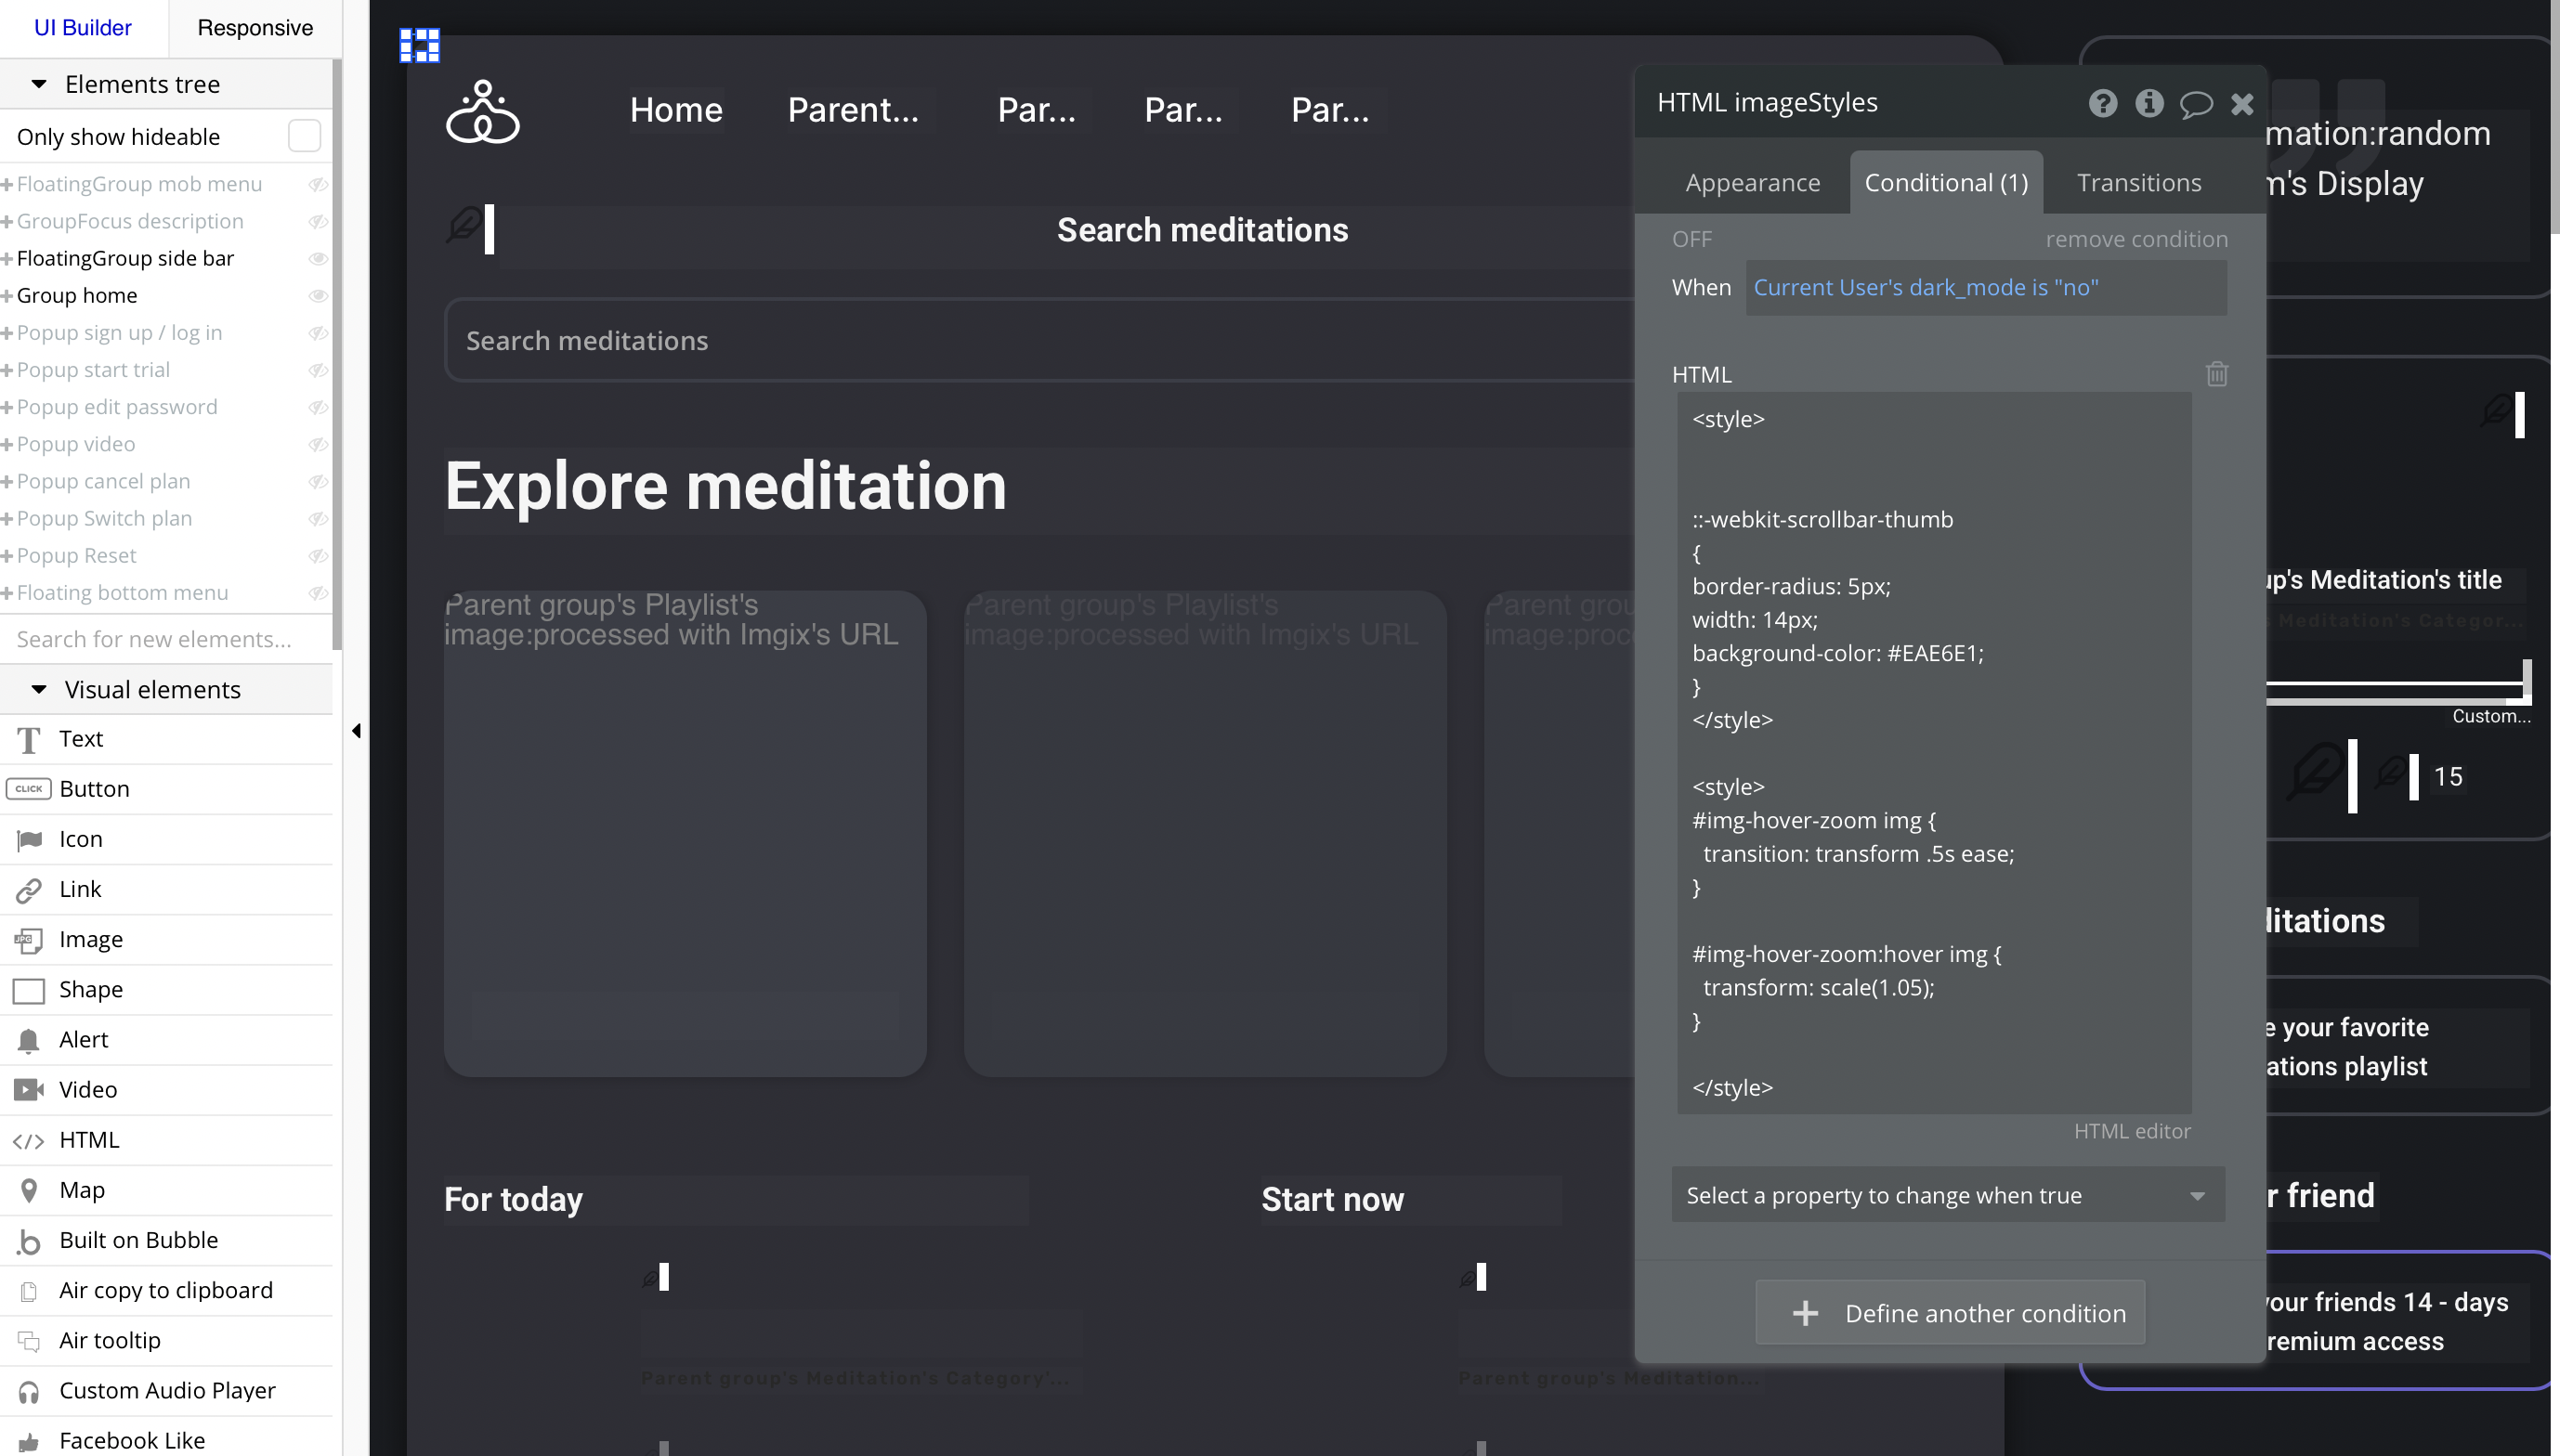
index page, HTML imageStyles - used to set styling for images on this page.
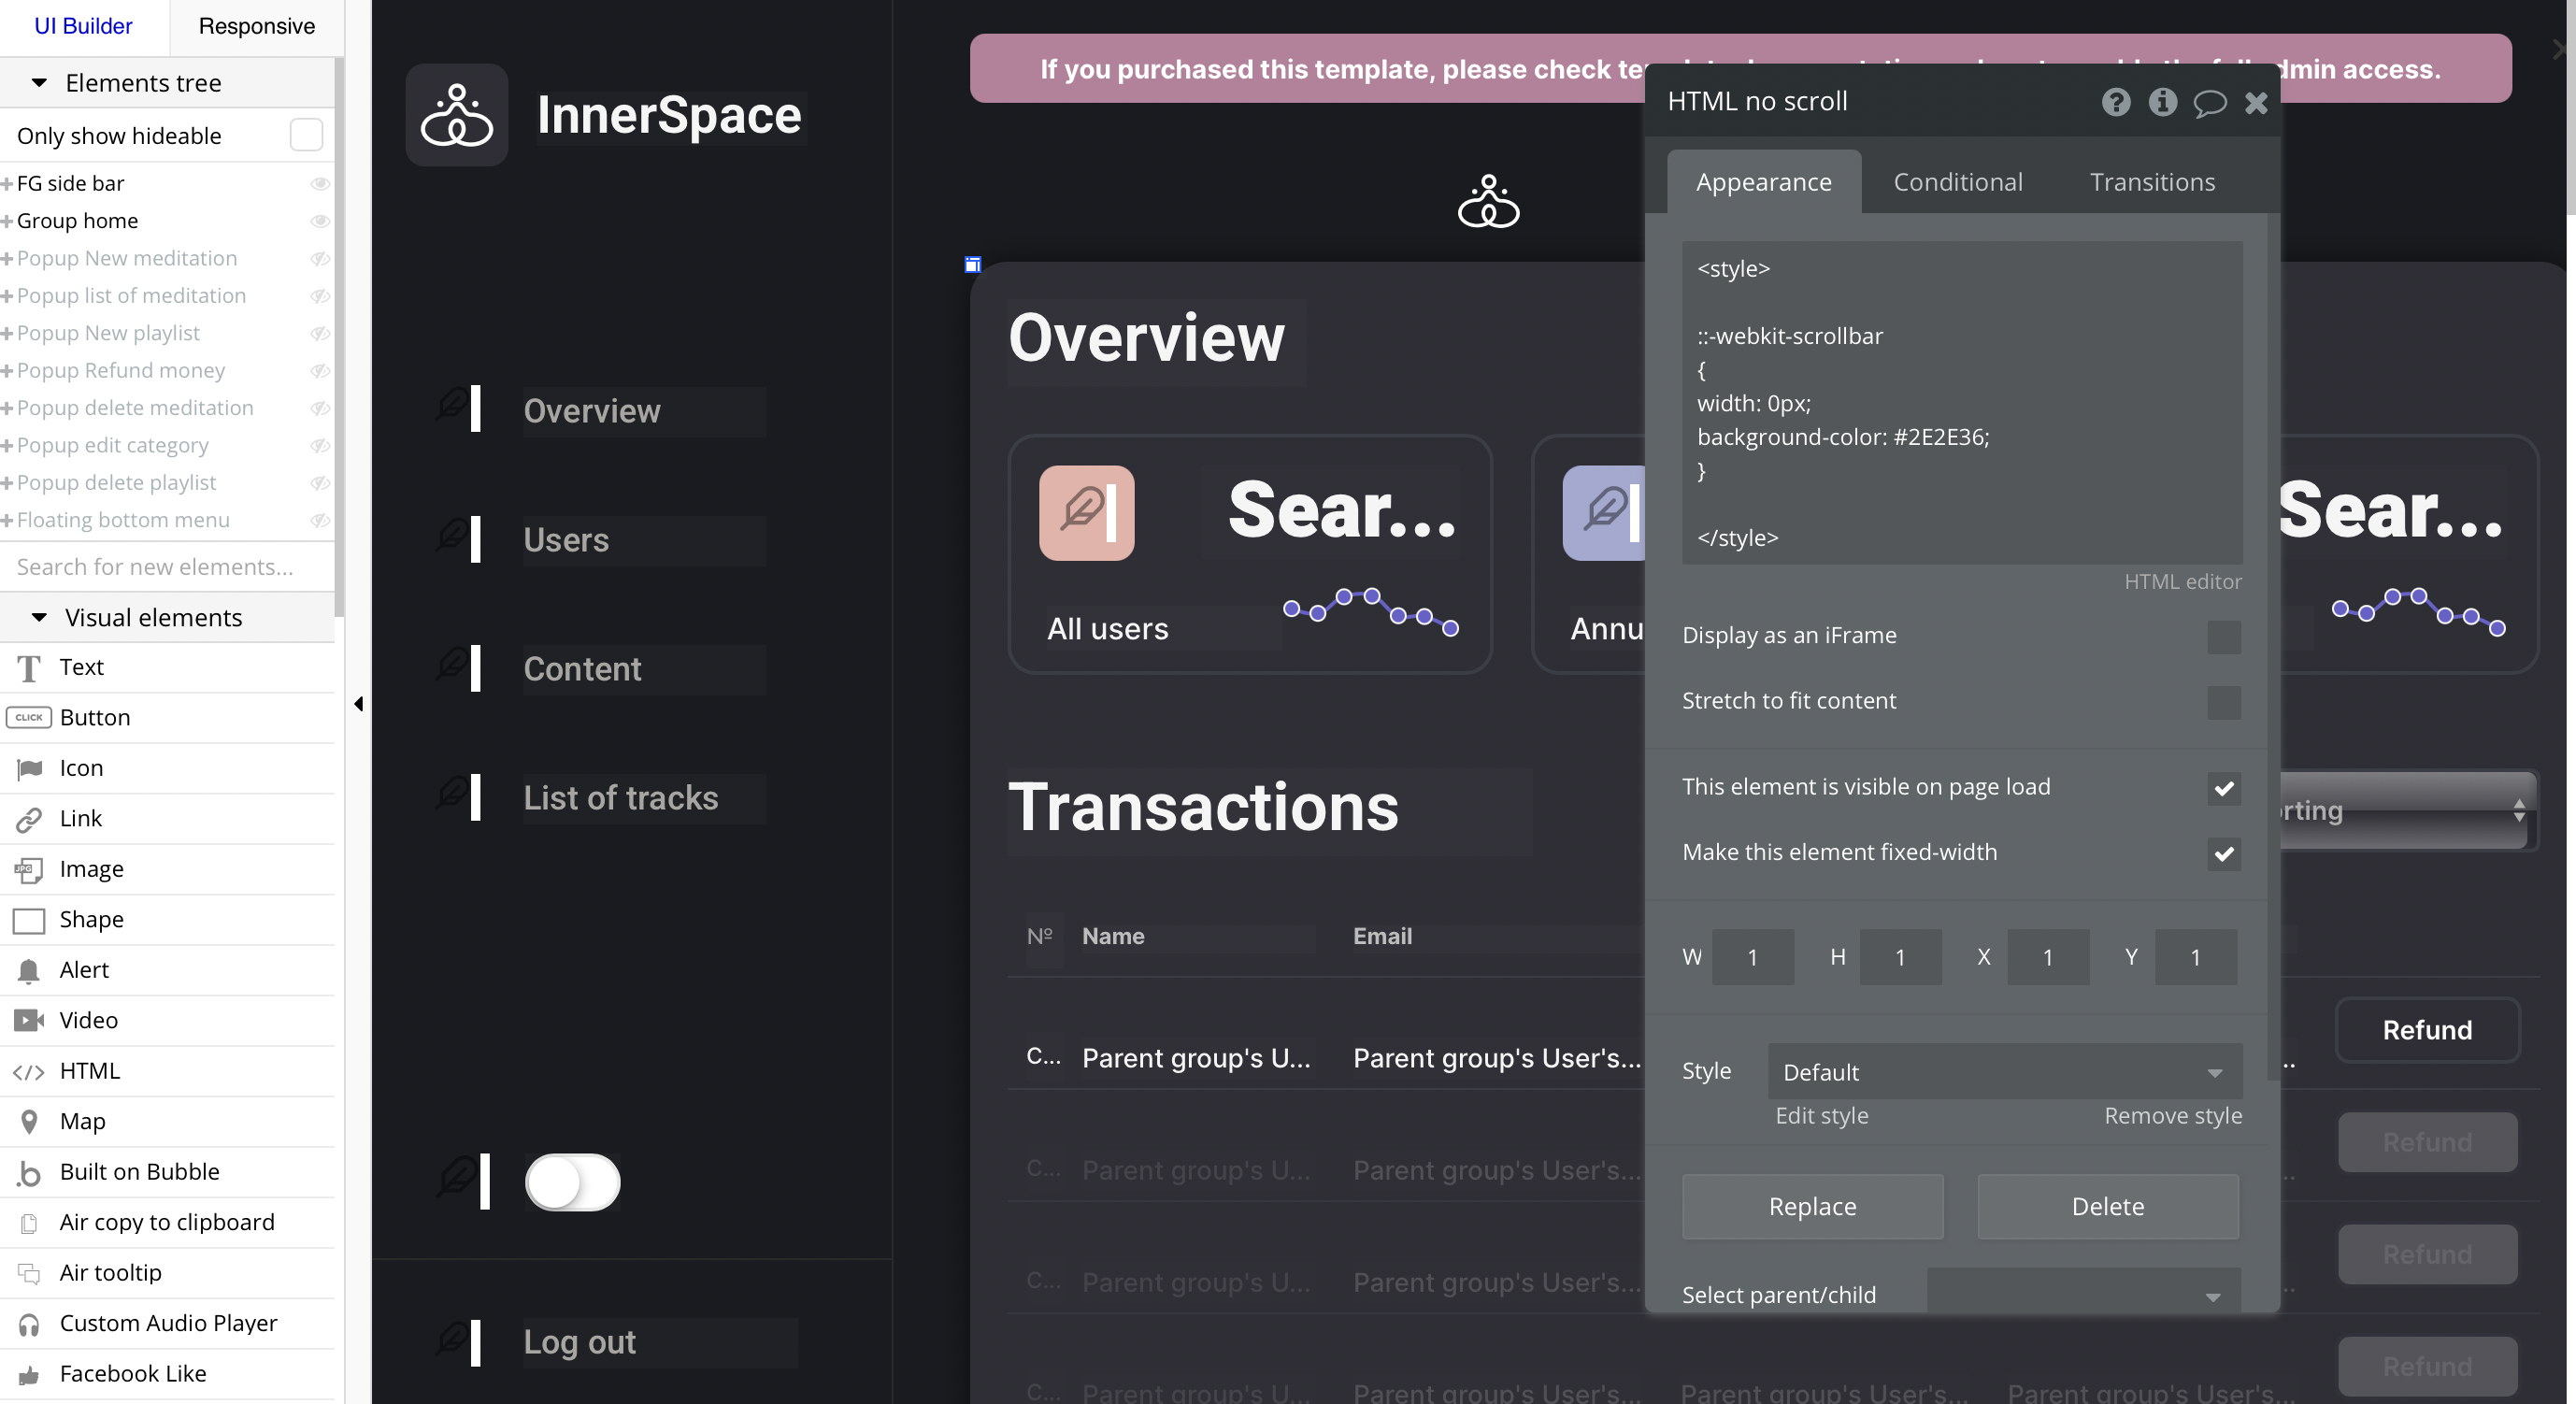
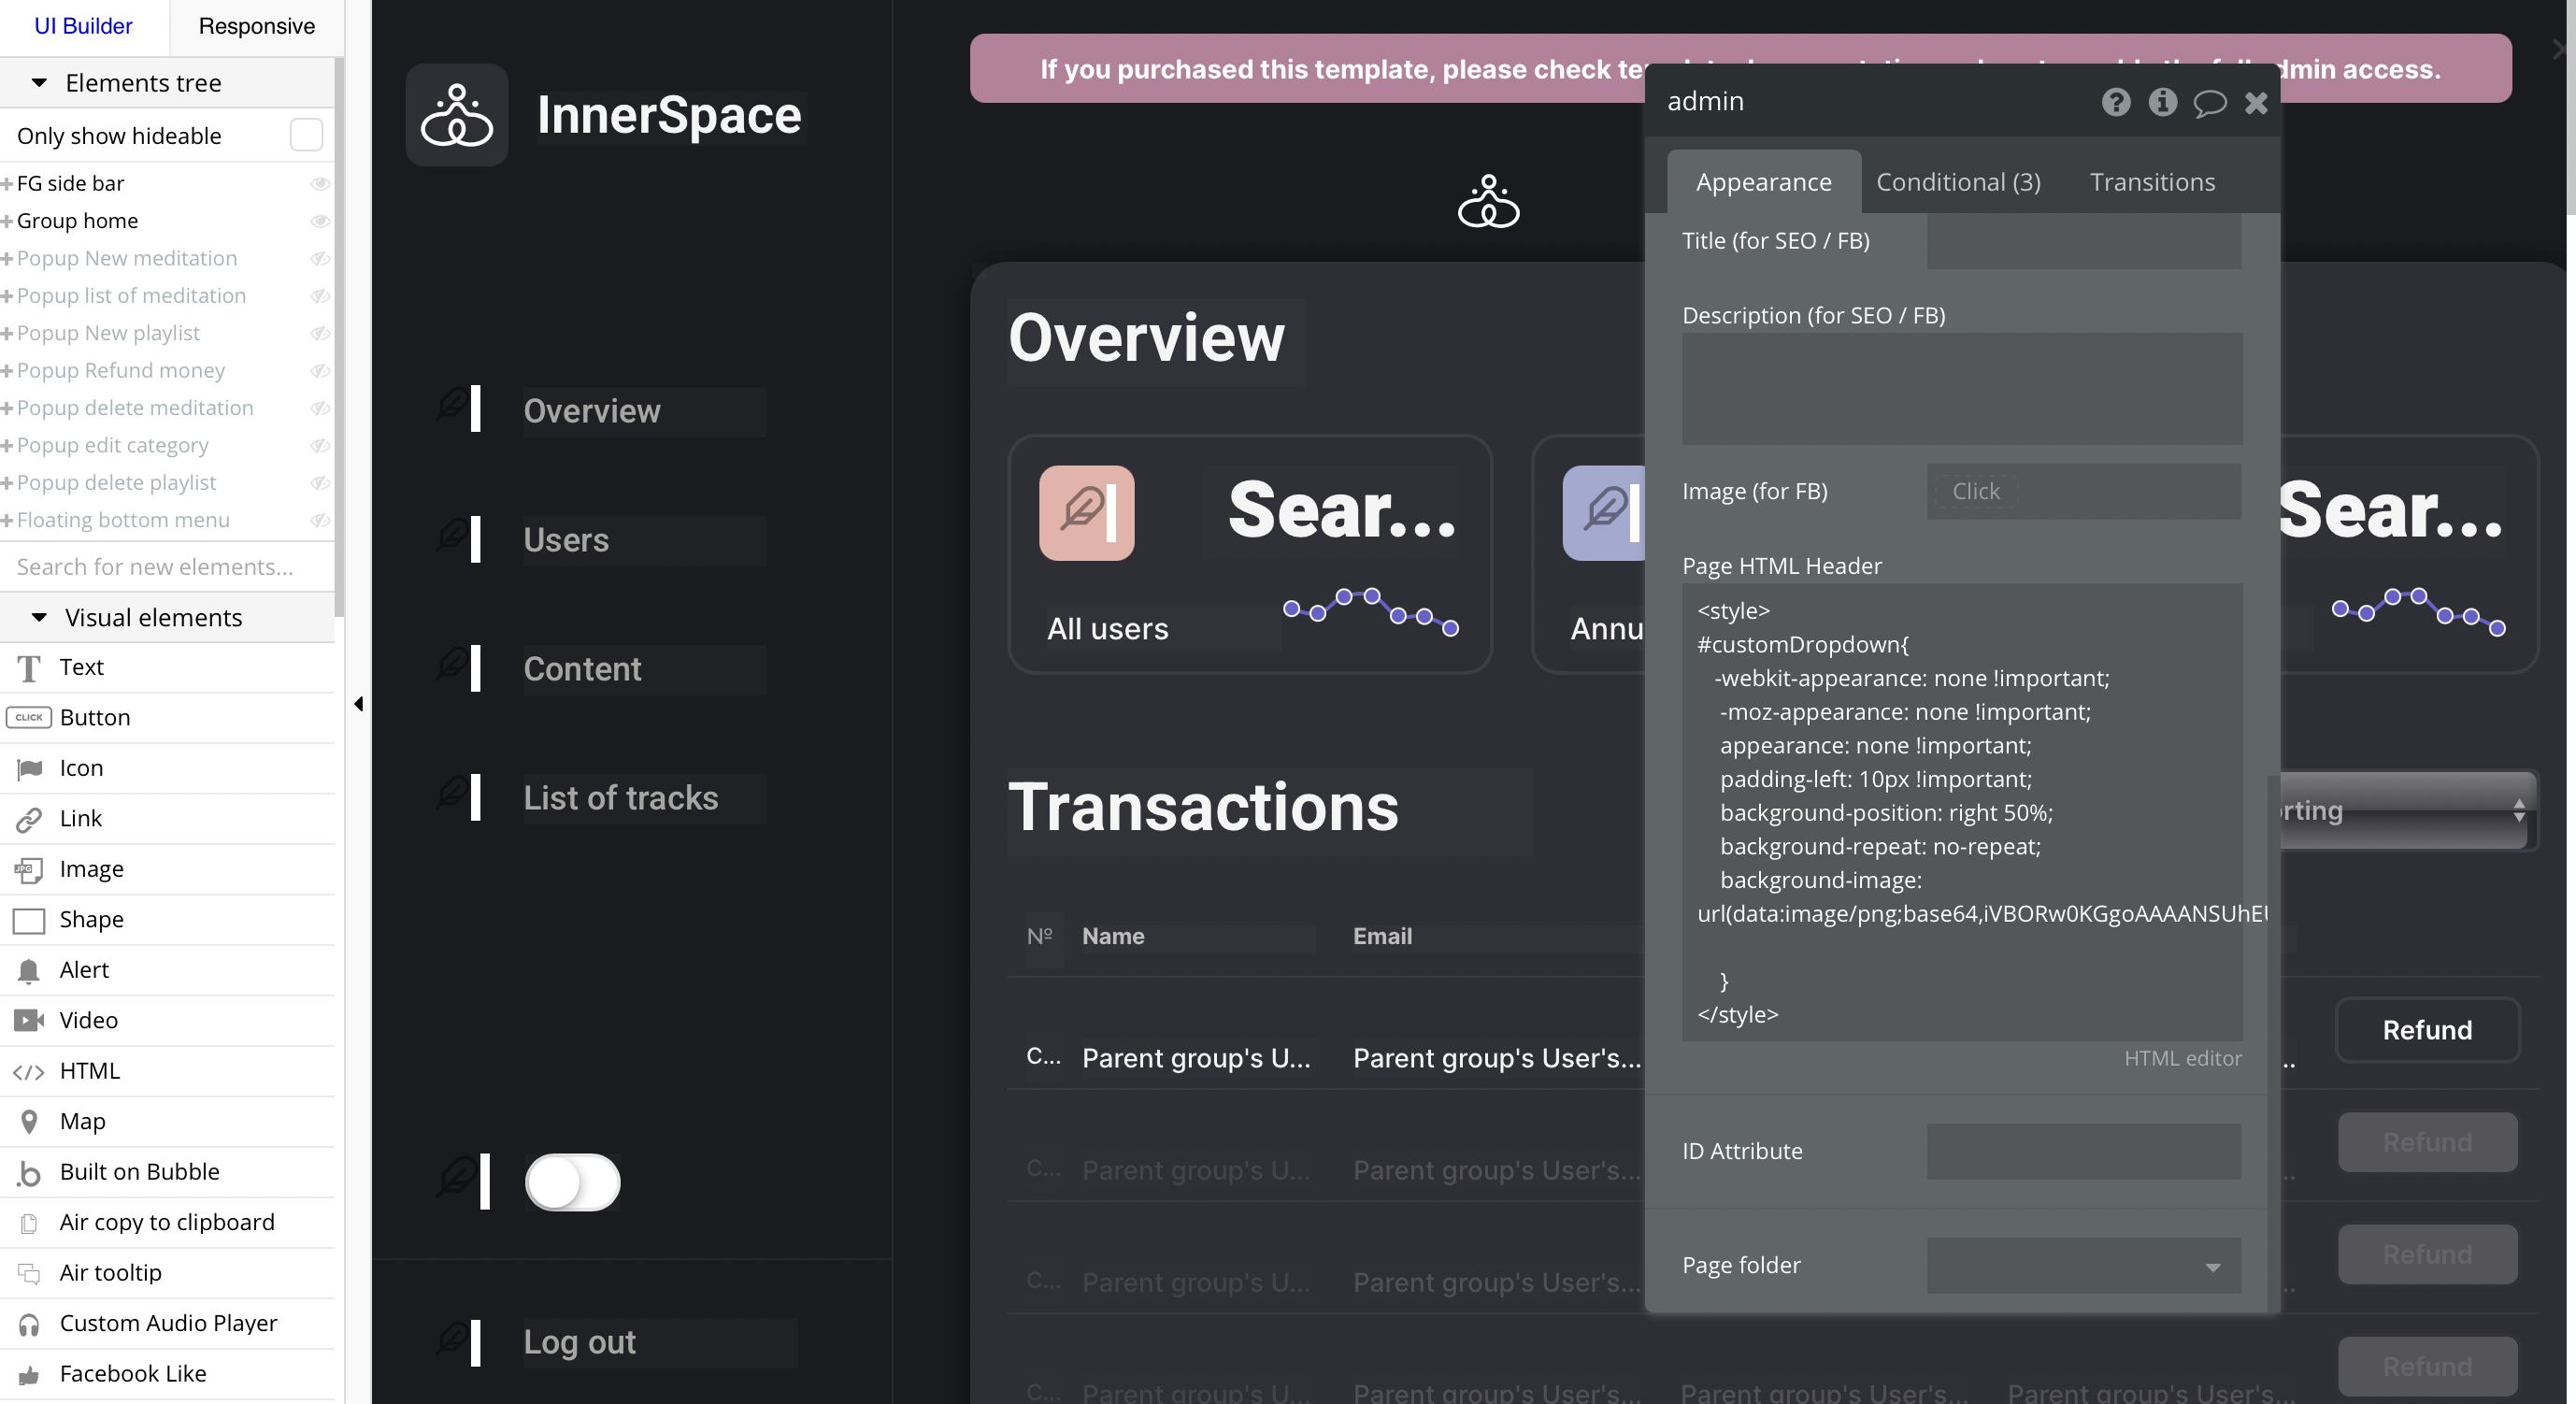
admin page:
- HTML no scroll - used to remove the page scroll bar.
- Page HTML Header - used to set the same dropdown styling across all browsers.
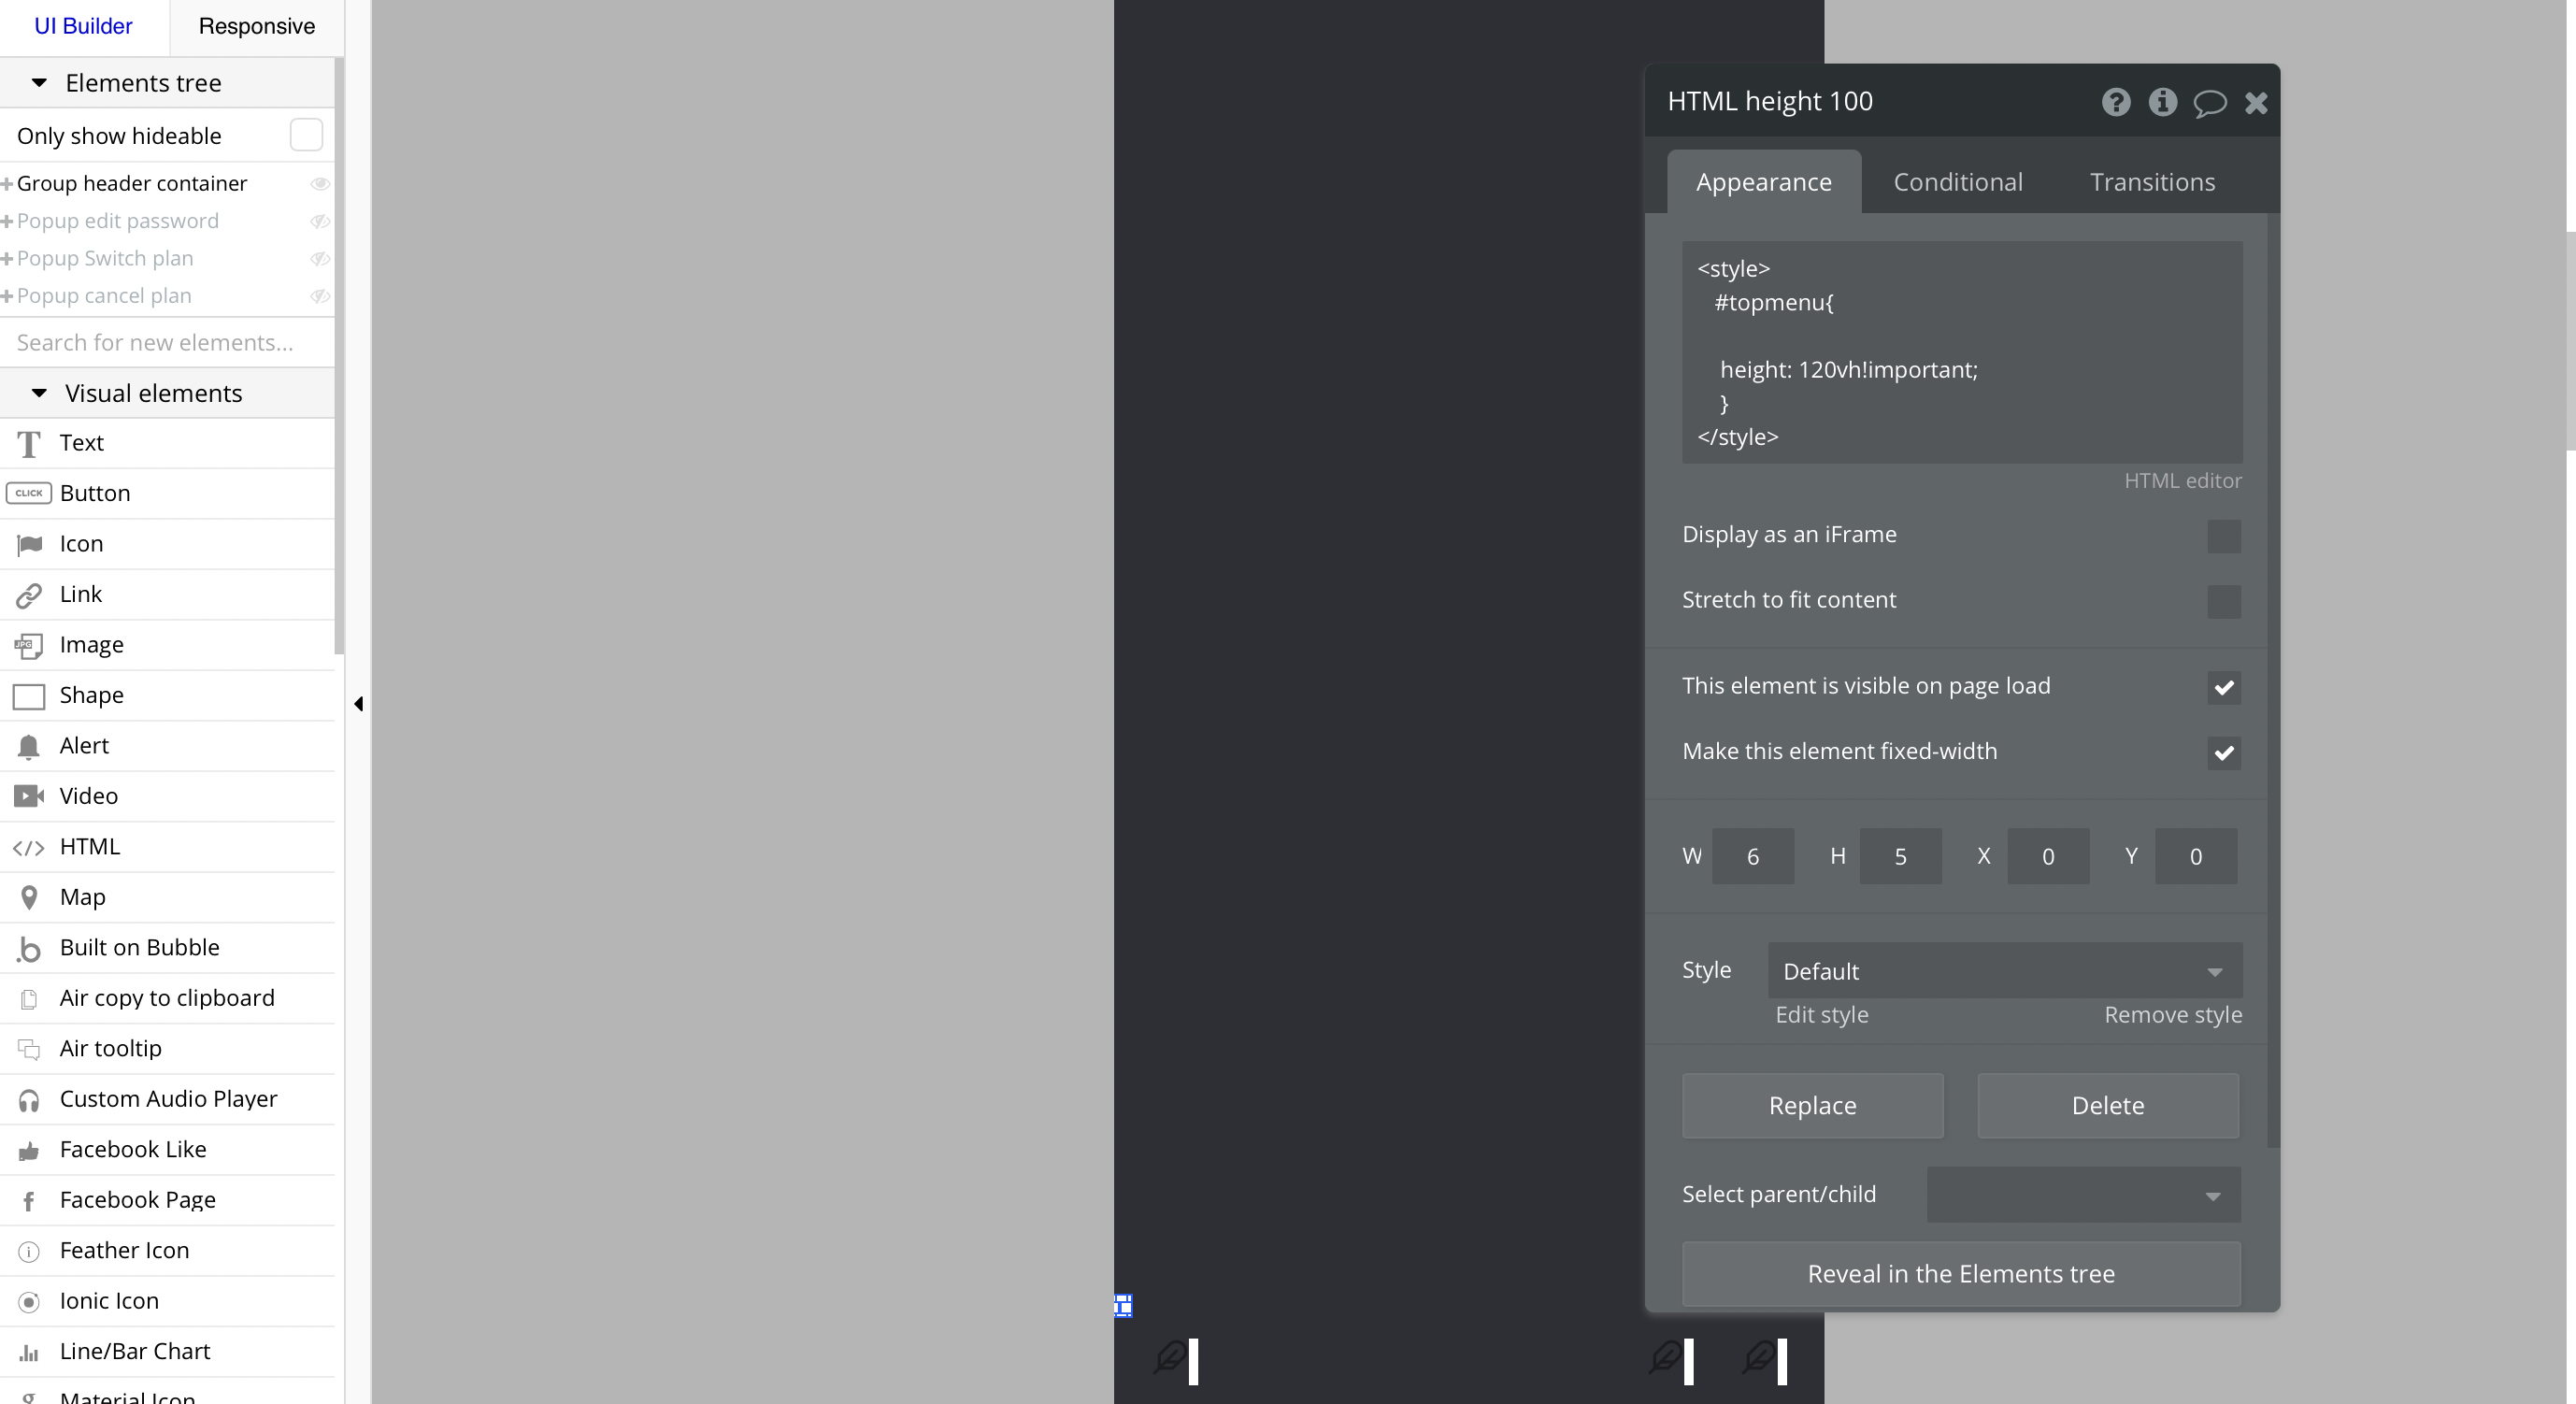
header reusable element, HTML height 100 - used to make the full height.
Feel free to customize the styles, but please note that changing the code may break the described functionality. Strong CSS/Javascript and Bubble skills recommended.
For all things Bubble check: https://manual.bubble.io/.
For CSS/Javascript check: https://www.w3schools.com/.
Plugins
In this section, we describe additional plugins used on templates pages for different purposes.
Zeroqode Air Native plugin
Note: This template has Zeroqode Air Native plugin installed. With the plugin you will be able to integrate all the native features into your Bubble app: Touch ID & Face ID, Push Notifications, Camera & Gallery Access, and many others.
To be able to use all the native features, the plugin needs to be purchased (one-time payment or a monthly subscription) via Bubble’s marketplace.
The Air Native plugin allows you to implement the native features within your Bubble editor, but in order to convert the Bubble app into native Android and iOS, it is required to use the Air Native service.
If you do not want to use it, simply remove the plugin from the template.
Zeroqode Air Bundle plugin
Note: This template has Zeroqode Air Bundle plugin installed. It contains ten most commonly used and complex plugins that will easily extend your application. To be able to use it, the plugin needs to be purchased (one-time payment or a monthly subscription) via Bubble’s marketplace.
If you do not want to use it, simply remove the plugin from the template.
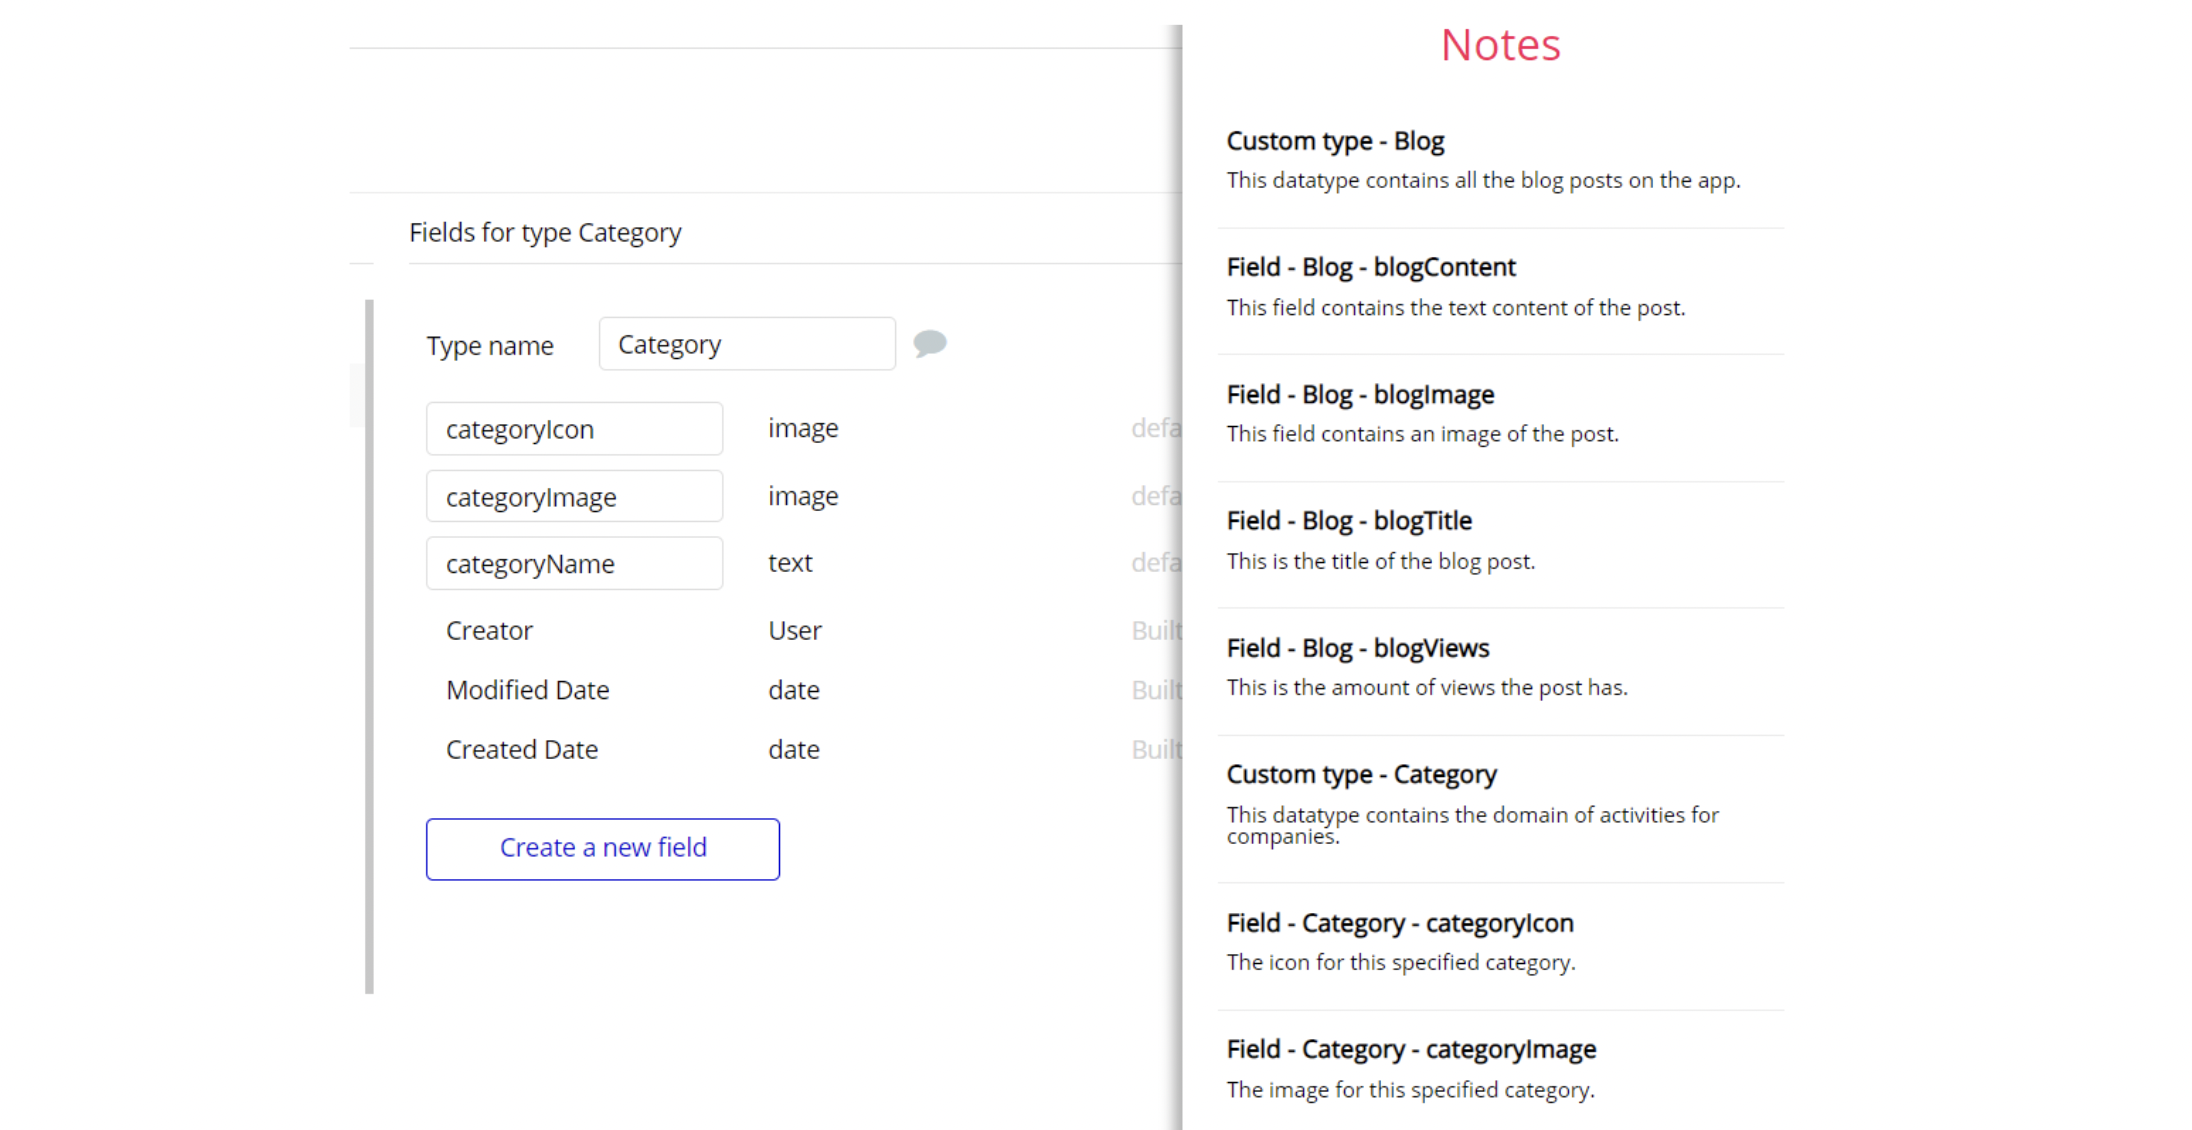
Embedded Notes in Bubble Editor
This template comes with explicit Notes for Database fields, Option sets and their fields, and Privacy rules, which will guide you with the modification process.
In order to preview a Note of any data type or field, click on the 💬 icon.